Articles
How To Remove Siding
Modified: October 28, 2024
Learn the best techniques and tips in our articles on how to remove siding. Get expert advice and step-by-step instructions for a successful project.
(Many of the links in this article redirect to a specific reviewed product. Your purchase of these products through affiliate links helps to generate commission for Storables.com, at no extra cost. Learn more)
Introduction
When it comes to home renovation and maintenance, there may come a time when you need to remove the siding from your house. Whether you’re preparing for a new siding installation, making repairs, or simply looking to update the exterior of your home, knowing how to remove siding properly is crucial. In this comprehensive guide, we will walk you through the steps of removing different types of siding and provide valuable tips to ensure a successful project.
Before diving into the specifics of each siding type, it’s important to emphasize the significance of proper preparation. Before you begin the job, take the time to inspect your siding for any signs of damage or wear. Make sure you have all the necessary tools and equipment ready, and familiarize yourself with the specific techniques required for each type of siding. This will help you work efficiently and minimize any potential damage to the underlying structure of your home.
In the following sections, we will discuss the step-by-step process for removing vinyl siding, aluminum siding, wood siding, and fiber cement siding. Each type will require slightly different techniques and tools, so be sure to read the corresponding section carefully before starting your project.
During the removal process, it’s important to handle nails and fasteners with caution. Properly removing and disposing of these materials will prevent injuries and ensure a clean workspace. Additionally, you will need to consider how to deal with trim and accessories that may be attached to the siding. We will provide useful tips and techniques for safely removing and preserving these elements.
Once the siding has been removed, you may encounter areas of the wall that require patching or repair. We will guide you through the steps of patching and repairing the wall, ensuring a seamless and professional finish.
Removing siding can be a rewarding DIY project, but it’s essential to approach it with knowledge and caution. By following the guidelines and techniques outlined in this article, you can successfully remove siding from your home while protecting its integrity and aesthetics. So let’s get started with the first type: vinyl siding removal.
Key Takeaways:
- Proper preparation, including inspecting the siding, gathering tools, and obtaining permits, is crucial before removing siding to ensure a smooth and efficient project.
- Carefully handling nails, fasteners, trim, and accessories during the siding removal process is essential to preserve the integrity of the home’s exterior and ensure a successful outcome.
Read more: How To Remove Hardie Board Siding
Preparing for Siding Removal
Before you can begin the process of removing siding from your house, it’s crucial to adequately prepare for the project. Taking the time to prepare will make the removal process smoother and help prevent any unnecessary damage to your home. Here are some important steps to follow:
- Inspect the siding: Start by thoroughly examining the condition of your siding. Look for any signs of damage or wear, such as cracks, warping, or missing pieces. Addressing these issues before starting the removal process will ensure a better overall outcome.
- Gather the necessary tools and equipment: Depending on the type of siding you have, you’ll need specific tools and equipment to remove it effectively. Some common tools include a pry bar, utility knife, hammer, circular saw, and a ladder. Be sure to have all the required tools on hand before starting the project.
- Protect yourself: Safety should always be a priority. Before beginning the removal process, make sure you’re wearing adequate personal protective equipment (PPE), such as safety goggles, work gloves, and sturdy footwear. This will help protect you from any potential injuries during the project.
- Clear the area: Clearing the area around your house is essential to create a safe working environment. Remove any furniture, plants, or other obstacles that may hinder your progress or pose a safety risk. Additionally, cover any delicate or vulnerable areas, such as windows or landscaping, to prevent accidental damage.
- Secure necessary permits: Depending on your location and the extent of the project, you may need to obtain permits or authorization from your local building department before starting the removal process. Check with your local authorities to ensure compliance with any regulations or guidelines.
- Plan for waste disposal: Siding removal will generate a significant amount of waste material. Make sure you have a plan for proper waste disposal in place before starting the project. You might need to rent a dumpster or arrange for a disposal service to ensure the proper and responsible handling of the debris.
By taking the time to prepare diligently, you set yourself up for success in the siding removal project. Proper inspection, acquiring the necessary tools, protecting yourself, clearing the area, obtaining permits (if required), and planning for waste disposal are all critical steps to ensure a smooth and efficient removal process.
Tools and Equipment Needed
Removing siding from your house requires specific tools and equipment to ensure a successful and efficient process. Having the right tools on hand will save you time and effort, and help minimize any potential damage to your home. Here are some essential tools and equipment you’ll need:
- Pry Bar: A pry bar is a versatile tool that will help you remove siding panels by lifting them away from the wall. Look for a pry bar with a flat, wide blade for maximum leverage and strength.
- Utility Knife: A utility knife with a sharp, retractable blade is essential for cutting through any caulking or sealants between the siding panels. It will also come in handy for trimming and making precise cuts as needed.
- Hammer: A hammer will be useful for removing any nails or fasteners that are holding the siding in place. Choose a claw hammer for easy nail extraction.
- Circular Saw: If you have wood or fiber cement siding, a circular saw will be necessary to make clean and accurate cuts. Make sure to use the appropriate blade for the type of material you are cutting.
- Ladder: Depending on the height of your house, you may need a ladder to access the higher sections of the siding. Choose a sturdy ladder that provides a safe and stable platform for you to work from.
- Safety Equipment: Personal protective equipment (PPE), such as safety goggles, work gloves, and sturdy footwear, is essential for your safety during the siding removal process. Protect yourself from potential injuries or accidents by wearing appropriate safety gear.
- Siding Removal Tools: Various tools, such as zip siding tools or a siding removal tool, can be specifically designed to facilitate the removal of certain types of siding, such as vinyl or aluminum. These tools can make the process easier and help prevent damage to the siding or the underlying structure.
- Storage Containers: It’s a good idea to have storage containers or bins available to collect any small parts, such as nails or trim pieces, during the removal process. This will help keep your work area organized and prevent any accidents caused by loose debris.
Having these tools and equipment readily available will ensure a smoother and more efficient siding removal process. Make sure to gather all the necessary items before you begin, and always follow safety protocols to protect yourself and your home during the project.
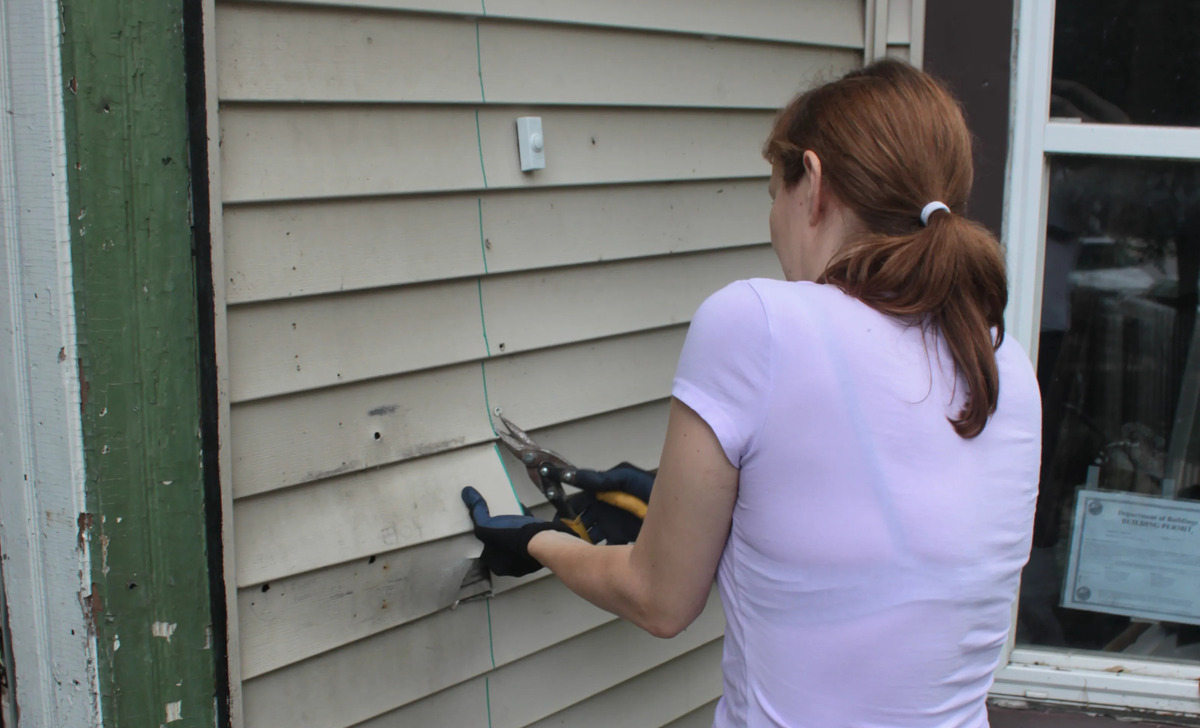
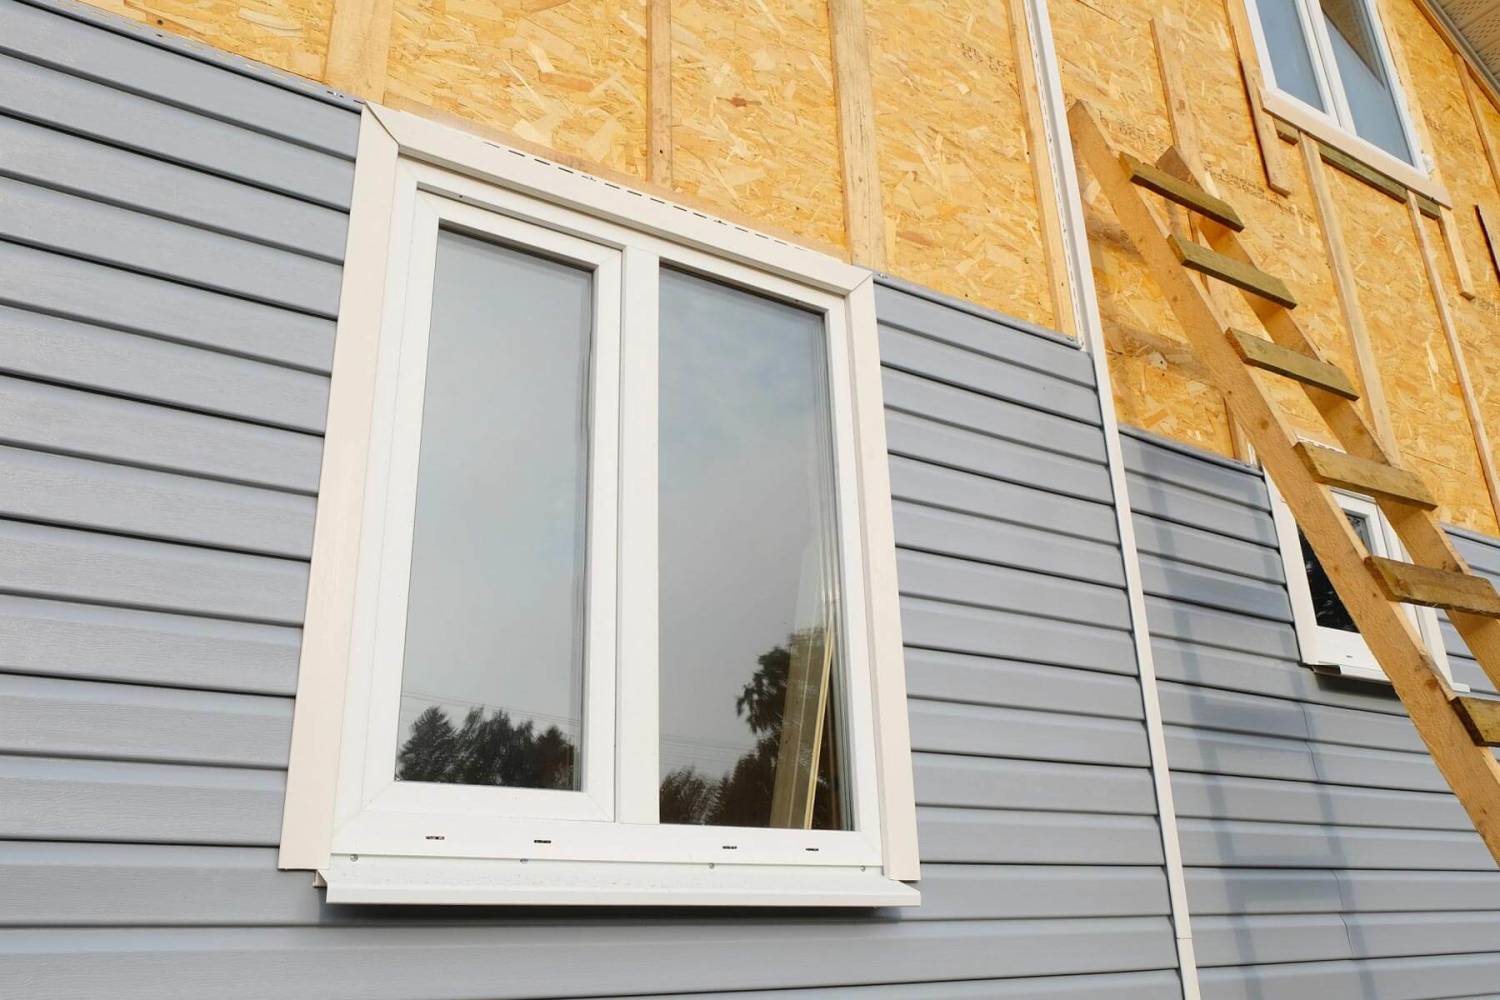
Removing Vinyl Siding
Vinyl siding is a popular choice for many homeowners due to its durability, affordability, and low maintenance. When it comes to removing vinyl siding, it’s essential to follow the correct steps to ensure a successful removal without causing any damage. Here’s a step-by-step guide on how to remove vinyl siding:
- Prepare the work area: Clear the area around the section of siding you want to remove. Remove any obstacles such as furniture, plants, or exterior decorations, that may interfere with the process.
- Inspect the area: Carefully examine the vinyl siding for any fasteners or accessories that need to be removed before starting. Look for nails, screws, or clips that may be securing the siding panels or any trim pieces.
- Start from the bottom: Vinyl siding is typically installed from bottom to top, so it’s best to start the removal process from the bottom of the wall. Locate the starting point by looking for an overlapping edge or a starter strip. Insert the pry bar behind the bottom edge of the panel and gently pry it away from the wall.
- Work your way up: Once the bottom panel is removed, continue working your way up. Insert the pry bar at the top of the panel above the one you just removed and lift it away from the wall. Repeat this process for each subsequent panel, gently prying them off one by one.
- Remove trim and accessories: As you remove the siding panels, you may encounter trim pieces or accessories that need to be removed separately. Use a utility knife or pry bar to carefully detach any trim pieces or accessories without damaging them.
- Handle obstacles: If you encounter obstacles such as electrical outlets, light fixtures, or vents, take extra care when removing the siding around them. Use a utility knife to cut around the obstacle, ensuring a clean and precise cut. Remove any fasteners or clips holding the siding in place, and carefully work around the obstacle.
- Dispose of the removed siding: Collect the removed vinyl siding panels and trim pieces in a bin or container for proper disposal. Be mindful of any recycling guidelines or regulations in your area.
It’s important to work carefully and methodically when removing vinyl siding to avoid any damage to the underlying structure or other components of your home’s exterior. Take your time and be patient throughout the process.
By following these steps, you can successfully remove vinyl siding from your home, whether you’re preparing for a new siding installation or making repairs. Remember to always prioritize safety and wear appropriate personal protective equipment (PPE) while working with tools or handling the siding material.
Removing Aluminum Siding
Aluminum siding is another popular choice for homeowners due to its durability and resistance to harsh weather conditions. If you’re looking to remove aluminum siding from your house, it’s important to approach the process with care to avoid any damage. Here’s a step-by-step guide on how to remove aluminum siding:
- Prepare the work area: Clear the area around the section of siding you plan to remove. Remove any obstacles such as furniture, plants, or exterior decorations that may be in the way.
- Inspect the area: Before starting, closely examine the aluminum siding for any fasteners or accessories that need to be removed first. Look for nails, screws, or clips that may be holding the siding panels or any trim pieces in place.
- Start from the bottom: Similar to vinyl siding, it’s best to begin the removal process from the bottom of the wall. Locate the starting point by identifying the overlapping edge or the starter strip. Use a pry bar to gently separate the bottom edge of the panel from the wall.
- Work your way up: Once the bottom panel is removed, continue working your way up. Insert the pry bar at the top of the panel above the one just removed and carefully pry it away from the wall. Repeat this step for each subsequent panel, gradually removing them one by one.
- Remove trim and accessories: As you remove the aluminum siding panels, you may encounter trim pieces or accessories that require separate removal. Use a utility knife or pry bar to carefully detach any trim pieces or accessories without causing any damage.
- Handle obstacles: If you come across obstacles such as electrical outlets, light fixtures, or vents, take extra care when removing the siding around them. Use a utility knife to cut around the obstacle, ensuring a clean and precise cut. Remove any fasteners or clips holding the siding in place, and carefully work around the obstacle.
- Dispose of the removed siding: Collect the removed aluminum siding panels and trim pieces in a bin or container for proper disposal. Check local recycling guidelines or waste management regulations for the appropriate disposal method.
Removing aluminum siding requires attention to detail and a steady approach. Properly handling the panels and trim pieces during removal will help preserve their integrity for potential reuse or resale. Take your time and be mindful of any potential obstacles or unique features of your home’s exterior.
By following these steps, you can successfully remove aluminum siding from your home, whether you’re preparing for a new siding installation or making repairs. Remember to prioritize safety and wear appropriate personal protective equipment (PPE) when working with tools or handling the siding material.
Read more: How To Use A Siding Removal Tool
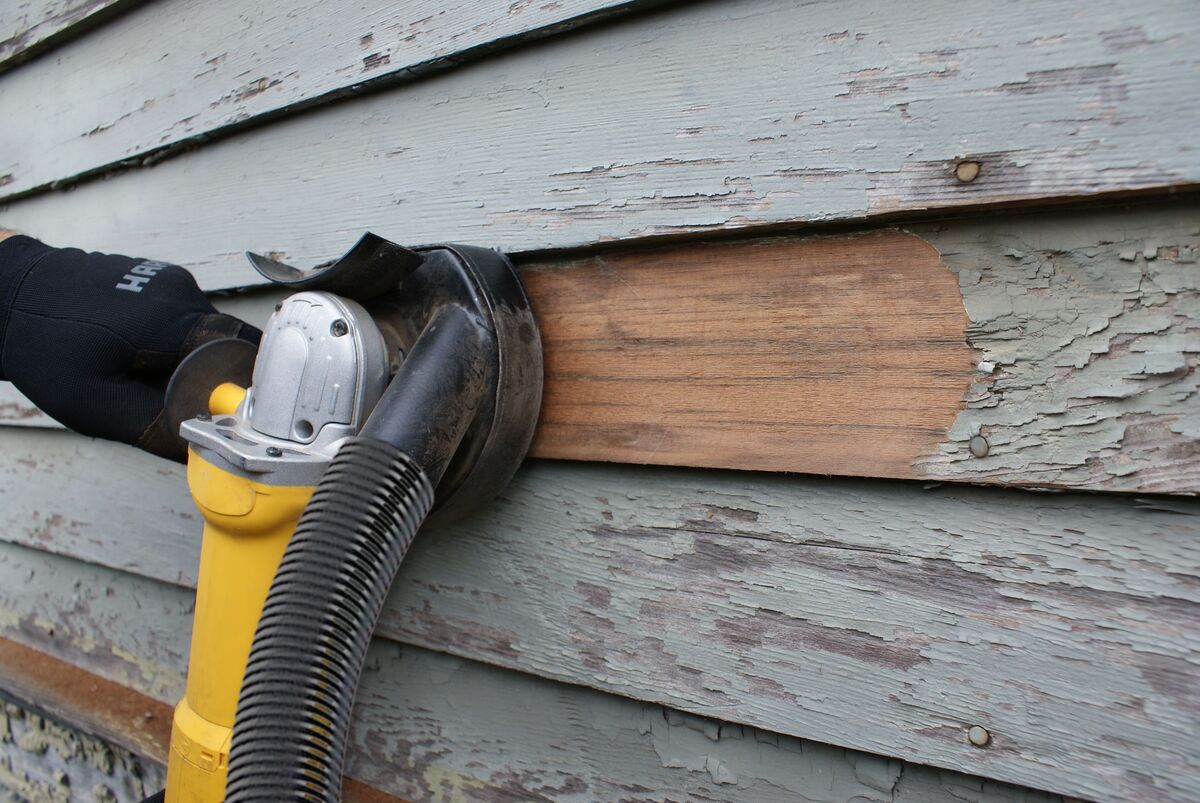
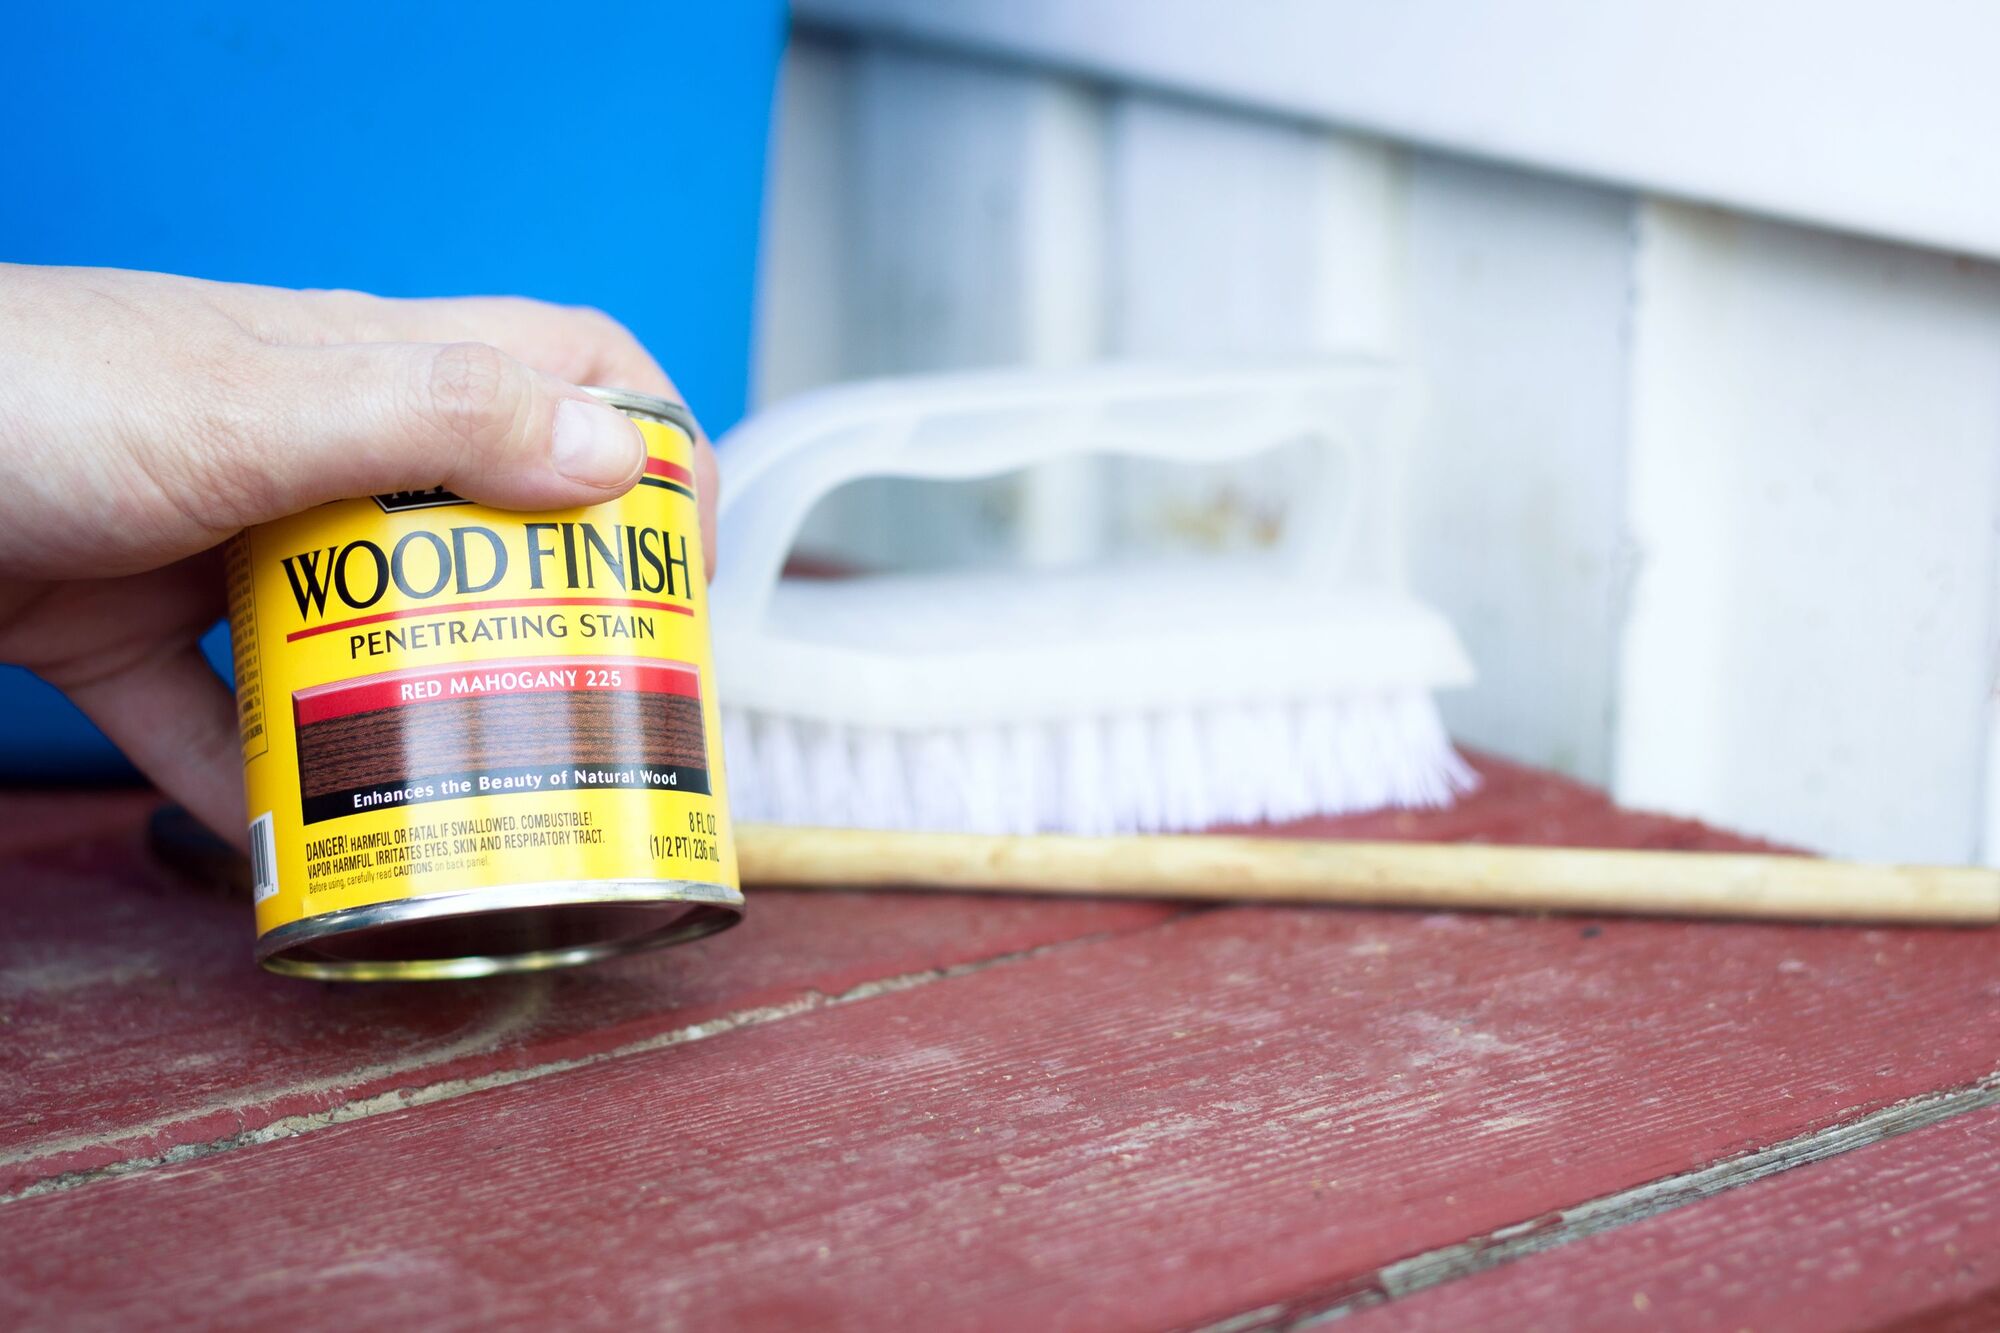
Removing Wood Siding
Wood siding adds a timeless and natural beauty to a home’s exterior. However, there may come a time when you need to remove the wood siding, whether for repairs or to install a new siding material. Here’s a step-by-step guide on how to remove wood siding:
- Prepare the work area: Before starting, clear the area around the section of siding you want to remove. Remove any obstacles such as furniture, plants, or exterior decorations that may be in the way.
- Inspect the area: Thoroughly examine the wood siding for any fasteners, such as nails or screws, holding it in place. Look for any trim pieces, corner boards, or other accessories that need to be removed first.
- Start from the bottom: Begin the removal process from the bottom of the wall. Locate the starting point by identifying the overlapping edge or the first piece of siding that was installed. Insert a pry bar or a claw hammer underneath the bottom edge of the siding and gently pry it away from the wall.
- Work your way up: Once the bottom section is removed, continue working your way up. Use the pry bar or hammer to lift the next piece of siding above the one just removed and carefully detach it from the wall. Repeat this step for each subsequent piece of siding, gradually removing them in a bottom-up fashion.
- Remove trim and accessories: As you remove the wood siding panels, you may encounter trim pieces or accessories that need separate removal. Use a pry bar or utility knife to carefully detach any trim pieces, corner boards, or other accessories without causing damage.
- Handle obstacles: If you come across obstacles such as electrical outlets, light fixtures, or vents, take extra care when removing the siding around them. Use a utility knife to cut around the obstacle, ensuring a clean and precise cut. Remove any nails or screws holding the siding in place and carefully work around the obstacle.
- Dispose of the removed siding: Collect the removed wood siding panels and trim pieces in a bin or container for proper disposal. Consider repurposing any salvageable pieces of wood or donating them if they are still in good condition.
Removing wood siding requires attention to detail and caution to avoid any damage to the underlying structure or the siding itself. Take your time and be mindful of any potential obstacles or delicate components of your home’s exterior.
By following these steps, you can successfully remove wood siding from your home, whether you’re preparing for a new siding installation or making repairs. Remember to prioritize safety and wear appropriate personal protective equipment (PPE) when working with tools or handling the siding material.
When removing siding, start at the top and work your way down to avoid damaging the underlying structure. Use a siding removal tool to carefully pry the siding away from the wall.
Removing Fiber Cement Siding
Fiber cement siding has gained popularity for its durability, low maintenance, and resistance to various weather conditions. Whether you’re replacing damaged fiber cement siding or looking to update your home’s exterior, here’s a step-by-step guide on how to remove fiber cement siding:
- Prepare the work area: Clear the area surrounding the section of siding you want to remove. Remove any objects, such as outdoor furniture or plants, that may obstruct your workspace.
- Inspect the area: Carefully examine the fiber cement siding for any fasteners, such as nails or screws, that need to be removed. Identify any trim pieces or accessories that may require separate removal.
- Start from the bottom: Begin the removal process from the bottom of the wall. Locate the starting point by identifying the overlap or the first piece of siding installed. Insert a pry bar or a specialized fiber cement siding removal tool under the bottom edge of the siding and gently pry it away from the wall.
- Work your way up: Once the bottom section is removed, continue working your way up. Insert the pry bar or removal tool at the top of the next piece of siding above the one just removed and carefully detach it from the wall. Repeat this step for each subsequent piece, gradually working your way up.
- Remove trim and accessories: As you remove the fiber cement siding panels, you may encounter trim pieces or accessories that need separate removal. Use a pry bar or utility knife to carefully detach these components without causing damage.
- Handle obstacles: Take special care when removing siding around obstacles such as electrical outlets, light fixtures, or vents. Use a utility knife to cut around the obstacle, ensuring a clean and precise cut. Remove any fasteners or clips holding the siding in place and safely work around the obstacle.
- Dispose of the removed siding: Collect the removed fiber cement siding panels and any associated trim pieces in a container for proper disposal. Check local waste management guidelines or recycling centers for the appropriate disposal method.
Removing fiber cement siding requires attention to detail and proper handling to prevent breakage or damage to the siding or the underlying structure. Take your time, work carefully, and ensure you have the necessary tools and safety equipment on hand.
By following these steps, you can successfully remove fiber cement siding from your home, whether you’re preparing for a new installation or making repairs. Remember to prioritize safety, wear appropriate personal protective equipment (PPE), and dispose of the removed materials responsibly.
Dealing with Nails and Fasteners
When removing siding from your house, one of the key challenges you will encounter is dealing with nails and fasteners. Properly handling these components is crucial to prevent injuries and ensure a smooth removal process. Here are some tips for effectively dealing with nails and fasteners:
- Identify and locate the nails or fasteners: Before starting the siding removal process, carefully inspect and identify the location of any nails or fasteners securing the siding. Look for visible nail heads, screws, or clips that may be holding the siding panels in place.
- Use the appropriate tools: Depending on the type of fasteners used, you may need specific tools to remove them. A pry bar, claw hammer, screwdriver, or a specialized siding removal tool can help you loosen and extract the nails or fasteners.
- Work from bottom to top: Start removing the siding from the bottom and work your way up. As you remove each siding panel, pay attention to any nails or fasteners that may be exposed or partially hidden behind the panel.
- Remove nails or fasteners carefully: Use a pry bar or claw hammer to gently pry out nails or screws. Be cautious not to damage the underlying structure or the surrounding siding as you remove them. If the nails are stubborn, use a block of wood against the siding panel to leverage the force without causing damage.
- Dispose of nails and fasteners safely: Collect the removed nails or fasteners in a container or bag to prevent accidents or injuries. Dispose of them responsibly by following local waste management regulations. Consider recycling metal fasteners if facilities are available in your area.
- Inspect and repair the wall: After removing the nails or fasteners, inspect the wall for any damage, such as holes or indentations. Fill any holes with wood filler or patching compound and sand the area smooth before proceeding with any necessary repairs or new siding installation.
Dealing with nails and fasteners requires patience and attention to detail. Take your time to ensure the proper removal of these components without causing any damage to the siding or underlying structure of your home.
By following these tips, you can effectively handle nails and fasteners during the siding removal process. Remember to prioritize safety, wear appropriate personal protective equipment (PPE), and dispose of the removed nails and fasteners responsibly.
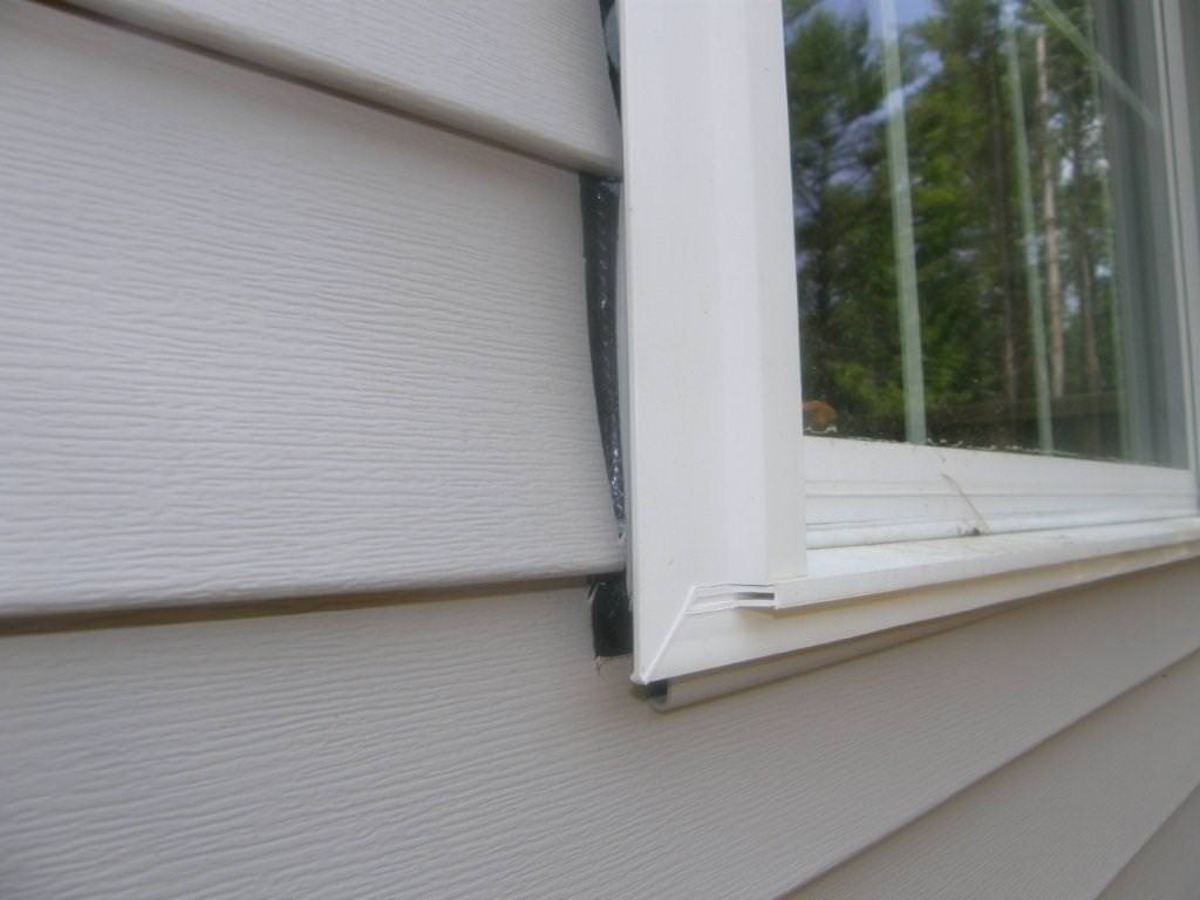
Handling Trim and Accessories
When removing siding from your house, you may encounter various trim pieces and accessories that need to be dealt with separately. These elements, such as corner boards, fascia, or decorative accents, require special attention to ensure their preservation and proper removal. Here are some tips for handling trim and accessories during the siding removal process:
- Inspect and identify the trim and accessories: Before starting the siding removal, carefully examine the area and identify any trim pieces or accessories that may need to be removed. These could include corner boards, window trim, door trim, or any other decorative elements attached to the siding.
- Remove trim before the siding: In most cases, it’s best to remove the trim pieces before removing the siding itself. This allows for easier access and reduces the risk of damaging the trim during the siding removal process. Use a pry bar or a utility knife to carefully detach the trim from the wall, taking care not to cause any damage.
- Set aside and label removed trim: As you remove the trim pieces, be sure to carefully set them aside and label them. This will help you keep track of the trim pieces and ensure their proper reinstallation later. Consider using a marker or labeling tape to identify each piece for easier reference.
- Protect delicate or intricate trim: If you encounter trim pieces that are fragile, intricate, or easily damaged, take extra precautions. Wrap them in bubble wrap or cloth to protect them during the siding removal process. Store them in a safe place to avoid any accidental damage or loss.
- Handle trim removal gently: Use a pry bar, utility knife, or a specialized trim removal tool to gently remove the trim pieces. Apply even pressure and work carefully to avoid any splintering or breaking of the trim. Take your time and be patient throughout the process.
- Preserve and restore trim if needed: Once the siding removal is complete, assess the condition of the trim pieces. If any repairs or restoration are required, address them before reinstalling the trim. This may involve sanding, filling holes, or applying fresh paint or stain as necessary.
Handling trim and accessories during the siding removal process requires attention to detail and careful preservation. Take your time, work gently, and ensure that all trim pieces are properly labeled and protected for future reinstallation.
By following these tips, you can effectively handle trim and accessories, ensuring their preservation during the siding removal process. Remember to prioritize safety, wear appropriate personal protective equipment (PPE), and store the removed trim pieces in a secure and labeled manner.
Patching and Repairing the Wall
After removing the siding from your house, you may encounter areas of the wall that require patching or repair. It’s important to address these issues before installing new siding to ensure a smooth and seamless finish. Here are the steps you can follow to patch and repair the wall:
- Assess the condition of the wall: Thoroughly inspect the wall to identify any holes, cracks, or other damages that need to be repaired. Pay attention to areas where the siding was attached, as well as any existing imperfections or deteriorating sections.
- Clean the wall: Before patching, ensure that the wall is clean and free from any debris, dust, or loose material. Use a brush or vacuum to remove any loose particles and create a clean surface for the patching material to adhere to.
- Fill holes and cracks: For small holes or cracks, apply a patching compound or spackling paste using a putty knife. Smooth the compound over the damaged area and feather out the edges to blend it with the rest of the wall. Allow sufficient drying time, and sand the patched area lightly for a smooth finish.
- Repair larger damaged areas: If you encounter larger damages, such as rot or extensive deterioration, you may need to replace the affected sections of the wall. Cut out the damaged portion and replace it with a new piece of wallboard, ensuring a snug fit. Secure the new piece in place with screws or nails and use joint compound to smooth and blend the edges.
- Inspect the repaired areas: After patching and repairing the wall, closely inspect the repaired areas to ensure they are seamless and free from any visible imperfections. Sand any rough spots or uneven surfaces, and touch up with paint or primer to match the surrounding wall.
- Consider a professional: If you’re unsure about your ability to patch or repair the wall, or if the damages are extensive, it may be wise to consult a professional contractor. They can assess the condition of the wall and provide expert guidance and assistance, ensuring a high-quality repair.
Patching and repairing the wall is a crucial step in the siding replacement process. Taking the time to properly address any damages will result in a clean and stable foundation for your new siding installation.
By following these steps, you can effectively patch and repair the wall after removing the siding from your house. Remember to prioritize safety, wear appropriate personal protective equipment (PPE), and consult a professional if needed.
Conclusion
Removing siding from your house can be a challenging yet rewarding endeavor. Whether you’re preparing for a new siding installation, making repairs, or giving your home a fresh look, understanding the proper techniques and following the necessary steps is crucial for a successful project.
In this comprehensive guide, we’ve covered the essential aspects of removing different types of siding, including vinyl, aluminum, wood, and fiber cement. Additionally, we’ve discussed how to handle nails, fasteners, trim, and accessories, as well as how to patch and repair the wall after the siding removal process.
Throughout the entire process, it is important to prioritize safety by wearing appropriate personal protective equipment (PPE) and using the correct tools. Take your time and work diligently, paying close attention to detail to avoid any unnecessary damage or hazards.
Remember to inspect your siding before beginning the removal process, gather the necessary tools and equipment, and prepare the work area for a smooth and efficient project. Dispose of the removed materials responsibly, following local waste management guidelines and regulations.
If you’re unsure about any step or encounter extensive damages, it’s always wise to consult a professional contractor who can provide guidance and expertise to ensure a successful outcome.
By following the guidelines provided in this guide, you can confidently remove siding from your house while protecting the integrity and aesthetics of your home. Whether you’re a DIY enthusiast or a homeowner looking to make improvements, removing siding is a task that can be tackled with the right knowledge and preparation.
So, are you ready to embark on your siding removal project? With careful planning, proper tools, and a methodical approach, you can achieve a beautiful and refreshed exterior for your home.
Frequently Asked Questions about How To Remove Siding
Was this page helpful?
At Storables.com, we guarantee accurate and reliable information. Our content, validated by Expert Board Contributors, is crafted following stringent Editorial Policies. We're committed to providing you with well-researched, expert-backed insights for all your informational needs.


0 thoughts on “How To Remove Siding”