
Articles
Why Does My Ryobi Trimmer Keep Stopping
Modified: October 20, 2024
Discover helpful articles on why your Ryobi trimmer keeps stopping and learn how to troubleshoot and fix the issue efficiently. Find expert advice and solutions now.
(Many of the links in this article redirect to a specific reviewed product. Your purchase of these products through affiliate links helps to generate commission for Storables.com, at no extra cost. Learn more)
Introduction
Having a well-maintained and reliable trimmer is essential for keeping your lawn and garden looking neat and tidy. But what do you do when your trusted Ryobi trimmer keeps stopping unexpectedly? This can be frustrating and hinder your progress in completing your yard work.
There can be several reasons why your Ryobi trimmer keeps stopping, ranging from simple issues to more complex ones. In this article, we will explore some common causes and provide practical solutions to help you troubleshoot and fix the problem. By following these steps, you can get your trimmer back up and running smoothly, allowing you to resume your landscaping tasks with ease.
So, let’s dive in and discover the possible culprits behind your Ryobi trimmer stopping, as well as the steps you can take to resolve these issues. Whether you’re a seasoned gardener or a novice trimmer user, this article aims to empower you with the knowledge and skills to keep your trimmer working efficiently.
Key Takeaways:
- Keep your Ryobi trimmer running smoothly by regularly checking and maintaining the fuel system, spark plug, air filter, trimmer line, lubrication, and other components. Proper maintenance ensures efficient operation and prevents unexpected stalling.
- Troubleshoot and fix your Ryobi trimmer by adjusting the carburetor settings, examining the ignition coil, and following the manufacturer’s guidelines for specific maintenance tailored to your trimmer model. Diligent maintenance promotes longevity and reliability.
Read more: Why Does My Ryobi Lawn Mower Keep Stopping
Common Causes for Ryobi Trimmer Stopping
When your Ryobi trimmer keeps stopping, it’s important to identify the underlying cause before attempting any repairs. Here are some common culprits that could be responsible for the interruptions in your trimmer’s operation:
1. Fuel Issues: One of the primary reasons for a trimmer to stop is a problem with the fuel supply. Check that you have fresh fuel in the tank and that the fuel filter is clean. Stale or contaminated fuel can clog the carburetor or cause engine misfires, resulting in a trimmer that stops unexpectedly.
2. Spark Plug Problems: A faulty or worn-out spark plug can lead to frequent stalling of your Ryobi trimmer. Inspect the spark plug for signs of corrosion, damage, or carbon buildup. If necessary, replace it with a new one to ensure a strong spark and consistent operation.
3. Air Filter Clogs: A dirty or clogged air filter restricts air flow to the engine, causing it to run poorly or even stall. Regularly check and clean the air filter, or replace it if it’s too dirty. This simple maintenance task can go a long way in preventing sudden trimmer shutdowns.
4. Trimmer Line Tangles: Excessive tangling or binding of the trimmer line can put strain on the trimmer’s engine, causing it to stop abruptly. Inspect the trimmer line spool and make sure it’s properly wound. Consider using high-quality trimmer line that is less prone to tangling.
5. Lack of Lubrication: Insufficient lubrication in the trimmer’s engine or cutting mechanism can lead to increased friction and overheating, resulting in frequent stops. Regularly lubricate the trimmer’s moving parts with oil or grease as recommended by the manufacturer.
6. Overheating: Continuous use of the trimmer without giving it sufficient rest can cause it to overheat, leading to engine shutdowns. Avoid pushing the trimmer beyond its recommended usage time and allow it to cool down periodically during long trimming sessions.
7. Carburetor Adjustment: If the carburetor settings are not properly adjusted, it can affect the fuel-air mixture and cause the trimmer to stall. Consult your Ryobi trimmer’s manual or seek professional assistance to ensure the correct carburetor settings for optimal performance.
8. Ignition Coil Malfunction: A faulty ignition coil can disrupt the spark and ignition process, resulting in an unreliable trimmer that frequently stops. Test the ignition coil with a spark tester, and if it is defective, replace it to restore proper spark and consistent operation.
By understanding and addressing these common causes, you can troubleshoot and resolve the issues that are causing your Ryobi trimmer to stop unexpectedly. Remember to follow the manufacturer’s guidelines and safety precautions when attempting any repairs or maintenance tasks. Now, let’s move on to the specific steps to check and fix these potential problems to get your trimmer back in action.
Check the Fuel System
When your Ryobi trimmer keeps stopping, one of the first areas to examine is the fuel system. Issues with the fuel supply can cause the engine to starve for fuel or experience inconsistent fuel delivery, leading to frequent stalling. Here’s a step-by-step guide to checking the fuel system:
1. Check the Fuel Level: Ensure that the trimmer has enough fuel in the tank. If the fuel level is low, refill it with fresh, unleaded gasoline. Avoid using old or stale fuel, as it can lead to poor engine performance and interruptions in operation.
2. Inspect the Fuel Lines: Examine the fuel lines for any signs of cracks, leaks, or clogs. A cracked or damaged fuel line can cause fuel to leak or restrict its flow, resulting in inadequate fuel supply to the engine. Replace any damaged or deteriorated fuel lines with new ones.
3. Clean or Replace the Fuel Filter: The fuel filter prevents dirt, debris, and impurities from entering the carburetor and clogging the fuel system. Over time, the filter may become clogged, obstructing the fuel flow and causing the trimmer to stop. Clean or replace the fuel filter as needed, following the manufacturer’s instructions.
4. Inspect the Carburetor: The carburetor is responsible for mixing fuel with air to create the combustible mixture required for engine operation. A dirty or clogged carburetor can disrupt this process and lead to stalling. Remove the carburetor and clean it thoroughly with carburetor cleaner, paying attention to the small openings and jets.
5. Adjust the Carburetor: If cleaning the carburetor does not solve the problem, it may require adjustment. Consult your Ryobi trimmer’s manual for the correct carburetor adjustment procedure and follow it carefully. Adjusting the carburetor settings can help optimize fuel delivery and ensure smooth operation.
6. Drain and Refill the Fuel Tank: If you suspect that the fuel in the tank is contaminated or stale, it’s recommended to drain the tank completely. Dispose of the old fuel properly and refill the tank with fresh, clean gasoline. Be sure to check that the fuel is within the recommended octane rating for your trimmer.
By thoroughly inspecting and maintaining the fuel system, you can eliminate fuel-related issues that may be causing your Ryobi trimmer to stop unexpectedly. Regularly check the fuel level, clean or replace the fuel filter, and keep the carburetor in good condition. Taking these steps will help ensure a steady fuel supply to the engine, contributing to a smoother and uninterrupted trimming experience.
Inspect the Spark Plug
A faulty spark plug can be a common culprit behind a Ryobi trimmer that keeps stopping. The spark plug is responsible for igniting the fuel-air mixture in the engine, and if it’s worn out or damaged, it can lead to engine misfires and frequent stalls. Here’s how to inspect the spark plug:
1. Locate the Spark Plug: The spark plug is typically located at the top of the engine cylinder, connected to a wire. Refer to your Ryobi trimmer’s manual for the exact location of the spark plug.
2. Clean the Spark Plug: Use a spark plug cleaner tool or a soft bristle brush to remove any dirt, oil, or carbon deposits from the spark plug. Make sure to clean around the electrode and the insulator tip. Avoid using any abrasive materials or excessive force, as it can damage the spark plug.
3. Inspect for Damage: Examine the spark plug for any signs of damage such as cracks, chips, or a worn-out electrode. If any damage is detected, it’s best to replace the spark plug with a new one to ensure proper combustion and reliable operation.
4. Check the Spark Gap: The spark gap is the distance between the center and side electrodes of the spark plug. Use a spark plug gap tool to measure the gap, ensuring it matches the manufacturer’s specifications. Adjust the gap if necessary by carefully bending the side electrode.
5. Check for Proper Spark: To check the spark, disconnect the spark plug wire and remove the spark plug from the engine. Reconnect the spark plug wire to the spark plug and ground the metal body of the plug against the engine block. Pull the starter rope or engage the starter to observe a spark across the spark plug gap. If no spark is visible, the spark plug may need to be replaced.
6. Replace the Spark Plug: If the spark plug is damaged, worn out, or failing the spark test, it’s time to replace it. Purchase a compatible spark plug for your Ryobi trimmer model and install it following the manufacturer’s guidelines. Ensure the spark plug is properly tightened to the recommended torque.
By inspecting and maintaining the spark plug, you can ensure proper ignition and combustion, preventing frequent stalls in your Ryobi trimmer. Regularly cleaning and inspecting the spark plug can help identify any issues early on and allow for timely replacements when necessary. Remember to always use the recommended spark plug type and maintain the correct spark gap for optimal performance.
Clean or Replace the Air Filter
A dirty or clogged air filter can restrict the airflow to the engine, leading to poor combustion and frequent stalling of your Ryobi trimmer. Therefore, it’s crucial to regularly clean or replace the air filter to maintain optimal performance. Here’s how to clean or replace the air filter:
1. Locate the Air Filter: The air filter is usually located near the carburetor or the air intake of the engine. Refer to your Ryobi trimmer’s manual for the exact location and instructions on accessing the air filter.
2. Inspect the Air Filter: Remove the air filter from its housing and inspect it for any visible dirt, dust, or debris. If the filter appears clogged, discolored, or damaged, it’s recommended to replace it with a new one. Some air filters are washable, while others are disposable, so check the specifications and follow the manufacturer’s guidelines.
3. Cleaning a Washable Air Filter: If you have a washable air filter, gently tap it against a surface or use compressed air to remove loose debris. Then, rinse the filter in warm, soapy water. Avoid using harsh chemicals or excessive force during the cleaning process. After washing, thoroughly rinse the filter with clean water and allow it to air dry completely before reinstalling it.
4. Replacing a Disposable Air Filter: If your Ryobi trimmer is equipped with a disposable air filter, simply remove the old filter and replace it with a new one of the same type and size. Make sure the filter fits securely in the housing.
5. Check the Air Filter Housing: While the air filter is removed, take a moment to inspect the air filter housing for any dirt or debris. Clean out any accumulated debris with a soft brush or cloth to prevent it from entering the engine when you reinstall the filter.
6. Reinstall the Air Filter: Carefully place the cleaned or new air filter back into its housing, ensuring it is properly seated and secured. Double-check that there are no gaps or loose connections that may allow unfiltered air to enter the engine.
By regularly cleaning or replacing the air filter, you ensure proper airflow to the engine of your Ryobi trimmer, preventing debris from entering and causing disruptions in performance. Remember to follow the manufacturer’s instructions and recommendations regarding the air filter maintenance schedule and type of filter to use. This simple maintenance task goes a long way in preventing stalling and maintaining the longevity of your trimmer.
Read more: Why Does My Washer Keep Stopping
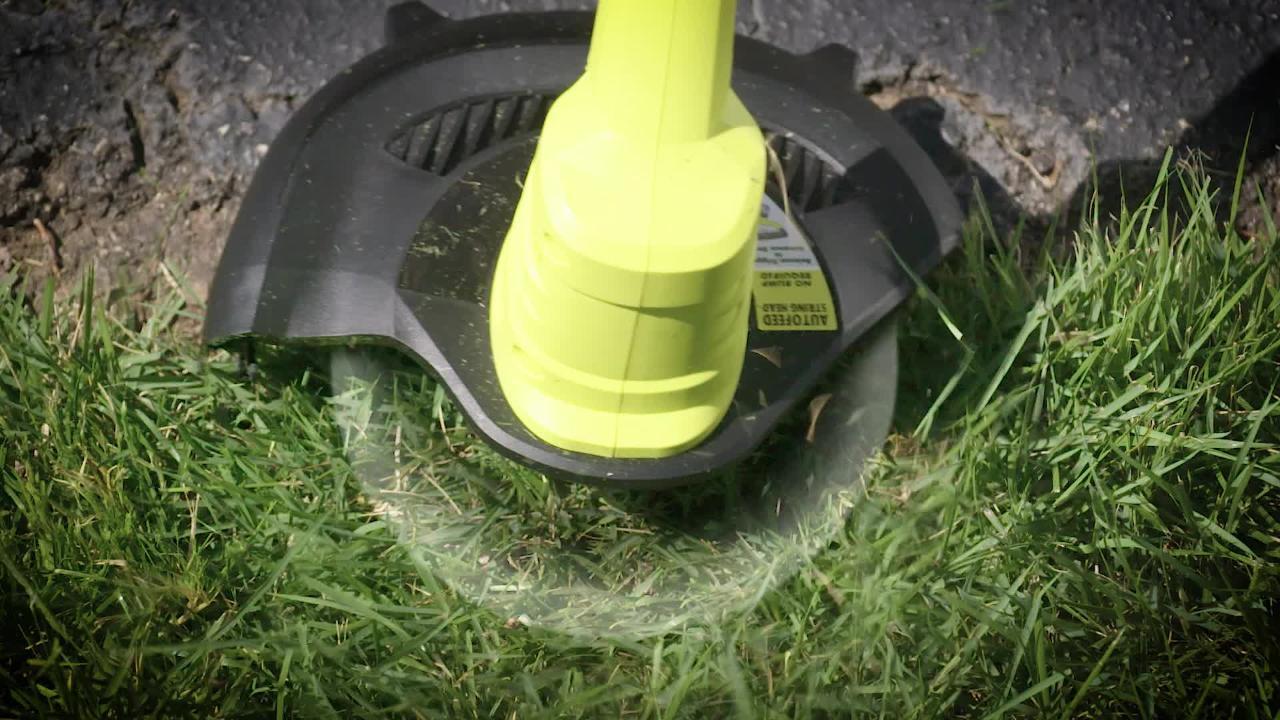
Examine the Trimmer Line
The trimmer line on your Ryobi trimmer is responsible for cutting grass and weeds. However, if the trimmer line is worn out, tangled, or improperly installed, it can lead to interruptions in operation. Here’s how to examine the trimmer line and ensure it’s in good condition:
1. Inspect the Length: Check the length of the trimmer line. If it’s too short, it may not effectively reach and cut the vegetation. Replace the trimmer line with a longer one, following the manufacturer’s guidelines for the recommended length.
2. Examine for Wear and Tear: Look closely at the trimmer line for signs of wear, such as fraying, splitting, or excessive abrasion. If the line is damaged, it’s best to replace it with a new one. Operating the trimmer with a worn-out line can result in poor cutting performance and frequent stops.
3. Untangle any Tangles: If the trimmer line is tangled or twisted, it can cause strain on the motor and interrupt the trimmer’s operation. Carefully unravel any tangles or twists in the line to ensure smooth rotation during use.
4. Proper Line Installation: Check that the trimmer line is properly installed according to the manufacturer’s instructions. Ensure it is securely attached and properly wound around the spool. Improperly installed trimmer line can cause feeding issues, leading to stops and interruptions.
5. Use High-Quality Trimmer Line: Consider using high-quality trimmer line that is less prone to tangling and breaking. Investing in a durable and reliable trimmer line can result in smoother operation and reduced downtime.
6. Replace the Trimmer Line: If the trimmer line is too worn or damaged beyond repair, it’s time to replace it. Follow the manufacturer’s recommendations for the correct trimmer line size and type. Install the new trimmer line according to the instructions for your specific Ryobi trimmer model.
Regularly inspecting the trimmer line and ensuring it’s in good condition will help prevent unexpected stops and maintain efficient cutting performance. Keep a close eye on the length, wear and tear, and tangles in the line. By properly installing and using high-quality trimmer line, you can enjoy smooth and uninterrupted operation during your trimming tasks.
Check the fuel and air filters for clogs, and make sure the spark plug is clean and properly gapped. Also, ensure the trimmer head isn’t clogged with debris.
Ensure Proper Lubrication
Proper lubrication is crucial for maintaining the smooth operation and longevity of your Ryobi trimmer. Adequate lubrication reduces friction and heat build-up, preventing damage to the engine and other moving parts. Here’s how to ensure proper lubrication:
1. Check the Oil Level: Refer to your Ryobi trimmer’s manual to locate the oil reservoir. Check the oil level by removing the oil dipstick or using an oil level indicator. If the oil level is low, add the recommended oil type specified in the manual. Avoid overfilling the oil reservoir.
2. Inspect the Oil Quality: Check the oil for signs of contamination or discoloration. If the oil appears dirty, milky, or contains particles, it may be time for an oil change. Impurities in the oil can lead to poor lubrication and cause the trimmer to stop unexpectedly. Drain the old oil and replace it with fresh, clean oil according to the manufacturer’s instructions.
3. Lubricate Moving Parts: Your Ryobi trimmer has various moving parts that require lubrication to reduce friction. Use a lubricating spray or oil to lubricate the cutting blades, trimmer head, and other moving components as recommended in the manual. Be cautious not to over-apply lubricant, as excessive oil or grease can attract dirt and debris, leading to clogs or malfunctions.
4. Follow Maintenance Schedule: Consult the maintenance schedule provided by Ryobi for recommended lubrication intervals. Regularly lubricate the trimmer’s moving parts to ensure optimal performance and prevent unnecessary wear and tear that can lead to frequent stops.
5. Store the Trimmer Properly: When not in use, store your Ryobi trimmer in a dry and secure location. Protect it from extreme temperatures, humidity, and direct sunlight. Proper storage helps maintain the lubrication and overall condition of the trimmer, reducing the likelihood of unexpected stops.
By ensuring proper lubrication, you extend the life of your Ryobi trimmer and minimize the chances of it stalling during use. Regularly check and maintain the oil level and quality, lubricate the necessary parts, and store the trimmer correctly. Following these steps will greatly contribute to the smooth operation and reliability of your trimmer.
Check for Overheating
Overheating can be a common cause for a Ryobi trimmer to keep stopping. Excessive heat buildup can lead to engine malfunctions and shutdowns. To prevent overheating and ensure the smooth operation of your trimmer, follow these steps:
1. Inspect the Cooling System: Check the air vents and cooling fins on the engine for any obstructions or buildup of dirt, debris, or grass clippings. Clean them using a soft brush or compressed air to ensure proper airflow and cooling.
2. Avoid Excessive Continuous Use: Using the trimmer for extended periods without giving it a chance to cool down can cause overheating. Take breaks during long trimming sessions to allow the engine to cool down. This practice will prevent the trimmer from getting too hot and reduce the risk of frequent stops.
3. Proper Technique and Speed: Ensure that you’re using the trimmer at the appropriate speed for the task at hand. Operating the trimmer at excessively high speeds or applying excessive force can strain the engine and cause it to overheat. Use a steady and controlled cutting motion while maintaining a moderate speed.
4. Check for Air Leaks: Inspect the trimmer’s engine housing for any cracks, loose fittings, or air leaks that may affect proper cooling. Air leaks can disrupt the cooling airflow and result in overheating. If any air leaks are detected, consult a professional for repairs or service.
5. Maintain Sharp Cutting Blades: Dull trimmer blades can cause the engine to work harder, generating more heat. Regularly inspect and sharpen the cutting blades as needed. Sharp blades ensure efficient cutting and reduce strain on the trimmer’s motor, minimizing the risk of overheating.
6. Keep the Engine Clean: Regularly clean the engine and remove any grass clippings, dirt, or debris that may accumulate during use. A clean engine allows for better heat dissipation and reduces the chances of overheating.
7. Operate in Ideal Conditions: Avoid using the trimmer in extreme heat or direct sunlight whenever possible. High temperatures combined with direct sunlight can increase the risk of overheating. If you must use the trimmer under such conditions, take extra precautions, like providing shade for the engine or trimming during cooler parts of the day.
By checking for overheating and taking the necessary preventative measures, you can keep your Ryobi trimmer running smoothly and minimize unexpected stops. Remember to regularly inspect and clean the cooling system, use the trimmer with proper technique and speed, and maintain sharp cutting blades. By following these steps, you will help ensure that your trimmer operates efficiently and reliably, even during demanding tasks.
Adjust the Carburetor Settings
Improper carburetor settings can cause fuel and air imbalances, leading to a Ryobi trimmer that keeps stopping. The carburetor is responsible for mixing the right amount of fuel and air for combustion. If these settings are off, it can result in stalling and inconsistent performance. Here’s how to adjust the carburetor settings:
1. Refer to the Manual: Consult your Ryobi trimmer’s manual for specific instructions on carburetor adjustment. The manual will provide details on the location of the adjustment screws and the recommended settings for your particular trimmer model.
2. Identify the Adjusting Screws: Typically, carburetors have two adjustment screws – the “H” (high-speed) screw and the “L” (low-speed) screw. The “H” screw controls the fuel mixture at high engine speeds, while the “L” screw controls it at idle or low speeds.
3. Initial Adjustment: Start by turning both screws (H and L) clockwise until they are lightly seated. Be careful not to overtighten or force them.
4. Start the Engine: With the trimmer on a stable surface and in a well-ventilated area, start the engine and let it warm up for a few minutes.
5. Adjust the Low-Speed Screw (L): With the engine idling, slowly turn the “L” screw counterclockwise until the engine runs smoothly and idles consistently. Avoid excessively rich or lean mixtures, which can cause stalling or damage to the engine.
6. Adjust the High-Speed Screw (H): Increase the throttle to the highest possible setting (full throttle) and carefully turn the “H” screw counterclockwise until the engine runs smoothly without any hesitation or sputtering at high speeds. Aim for optimal power and performance.
7. Fine-Tuning: Once you have initially adjusted both screws, fine-tune the carburetor by making slight adjustments to achieve the best performance. Listen to the engine’s sound and observe the trimmer’s operation to determine if any further adjustments are required. Make small, incremental changes to the screws until you achieve optimal performance.
8. Perform a Final Check: After making adjustments, let the engine run for a few minutes and test the trimmer’s performance. Ensure that it starts easily, idles smoothly, and operates consistently at various speeds. Make any necessary additional adjustments until you achieve the desired results.
Note: Carburetor adjustment can be a delicate process. If you’re unsure or uncomfortable performing adjustments yourself, it’s recommended to seek the assistance of a qualified professional who can ensure the carburetor settings are properly adjusted for your specific trimmer model.
By adjusting the carburetor settings, you can optimize the fuel-air mixture and prevent the trimmer from stalling. Proper carburetor adjustments contribute to consistent performance and reliable operation, allowing you to complete your trimming tasks with ease and efficiency.
Read more: Why Does My Ryobi Mower Keep Shutting Off
Examine the Ignition Coil
The ignition coil plays a crucial role in the ignition process of your Ryobi trimmer’s engine. A faulty or malfunctioning ignition coil can result in inconsistent spark and engine misfires, leading to frequent stalling. Here’s how to examine the ignition coil:
1. Locate the Ignition Coil: Refer to your Ryobi trimmer’s manual to find the location of the ignition coil. It is often situated near the spark plug or within the engine assembly.
2. Inspect for Physical Damage: Check the ignition coil for any visible signs of physical damage, such as cracks, corrosion, or loose connections. A damaged ignition coil can disrupt the electrical flow and cause issues with the spark generation. If any damage is detected, it’s essential to replace the ignition coil.
3. Test the Ignition Coil: To test the ignition coil, you will need a spark tester. Remove the spark plug wire from the spark plug and connect it to the spark tester. Ground the spark tester to the engine using an appropriate ground connection. Pull the starter rope or engage the trimmer’s starter to observe the spark tester. A strong, consistent spark indicates a functioning ignition coil. If no spark is present or the spark is weak and inconsistent, the ignition coil may need to be replaced.
4. Check the Wiring Connections: Ensure that all wiring connections to the ignition coil are secure and properly connected. Loose or faulty connections can cause electrical issues and result in engine misfires or stalling. Firmly reconnect any loose connections and clean any corrosion from the terminals.
5. Replace the Ignition Coil: If the ignition coil is damaged, faulty, or fails the spark test, it’s necessary to replace it. Check your Ryobi trimmer’s manual for the specific ignition coil recommended for your model. Follow the manufacturer’s instructions for proper installation, ensuring that all connections are secure and the ignition coil is correctly positioned.
Examining and maintaining the ignition coil is essential for consistent spark generation and reliable engine operation. Regularly check for any physical damage, test the ignition coil’s functionality, and ensure all wiring connections are secure. Taking these steps will help identify any issues with the ignition coil and allow for timely repairs or replacements, reducing the occurrence of stalling and ensuring smooth functioning of your Ryobi trimmer.
Conclusion
A Ryobi trimmer that keeps stopping can be frustrating and disrupt your yard work progress. However, by understanding the common causes and implementing the appropriate solutions, you can get your trimmer back up and running smoothly. Throughout this article, we’ve explored various troubleshooting steps to address the issues behind trimmer stalling.
We started by checking the fuel system, ensuring that there is enough fuel, examining the fuel lines and filter, and cleaning the carburetor. Next, we focused on other crucial components such as the spark plug, air filter, trimmer line, lubrication, overheating, carburetor settings, and ignition coil. By inspecting and maintaining these elements, you can prevent frequent stalling and promote the efficient operation of your Ryobi trimmer.
Remember to consult your Ryobi trimmer’s manual for specific instructions and recommendations tailored to your particular model. Following the manufacturer’s guidelines and performing regular maintenance will contribute to the longevity and reliability of your trimmer.
Additionally, it’s important to operate the trimmer with care, using proper technique and speed. Taking breaks during long trimming sessions and avoiding excessive strain on the engine can help prevent overheating and improve overall performance.
In conclusion, troubleshooting and fixing a Ryobi trimmer that keeps stopping requires a systematic approach to identify and resolve the underlying issues. By diligently inspecting and maintaining the fuel system, spark plug, air filter, trimmer line, lubrication, and other components, you can mitigate stalling and ensure a smooth trimming experience.
Investing time and effort in proper maintenance will pay off in the long run, as it not only improves the performance of your Ryobi trimmer but also extends its lifespan. So, take the necessary steps to keep your trimmer in optimal condition, and enjoy hassle-free lawn and garden maintenance for years to come.
Frequently Asked Questions about Why Does My Ryobi Trimmer Keep Stopping
Was this page helpful?
At Storables.com, we guarantee accurate and reliable information. Our content, validated by Expert Board Contributors, is crafted following stringent Editorial Policies. We're committed to providing you with well-researched, expert-backed insights for all your informational needs.


0 thoughts on “Why Does My Ryobi Trimmer Keep Stopping”