Articles
Why Is My Bread So Dense In My Bread Machine
Modified: May 6, 2024
Discover why your homemade bread turns out dense in your bread machine with our helpful articles. Learn how to achieve light and fluffy loaves every time.
(Many of the links in this article redirect to a specific reviewed product. Your purchase of these products through affiliate links helps to generate commission for Storables.com, at no extra cost. Learn more)
Introduction
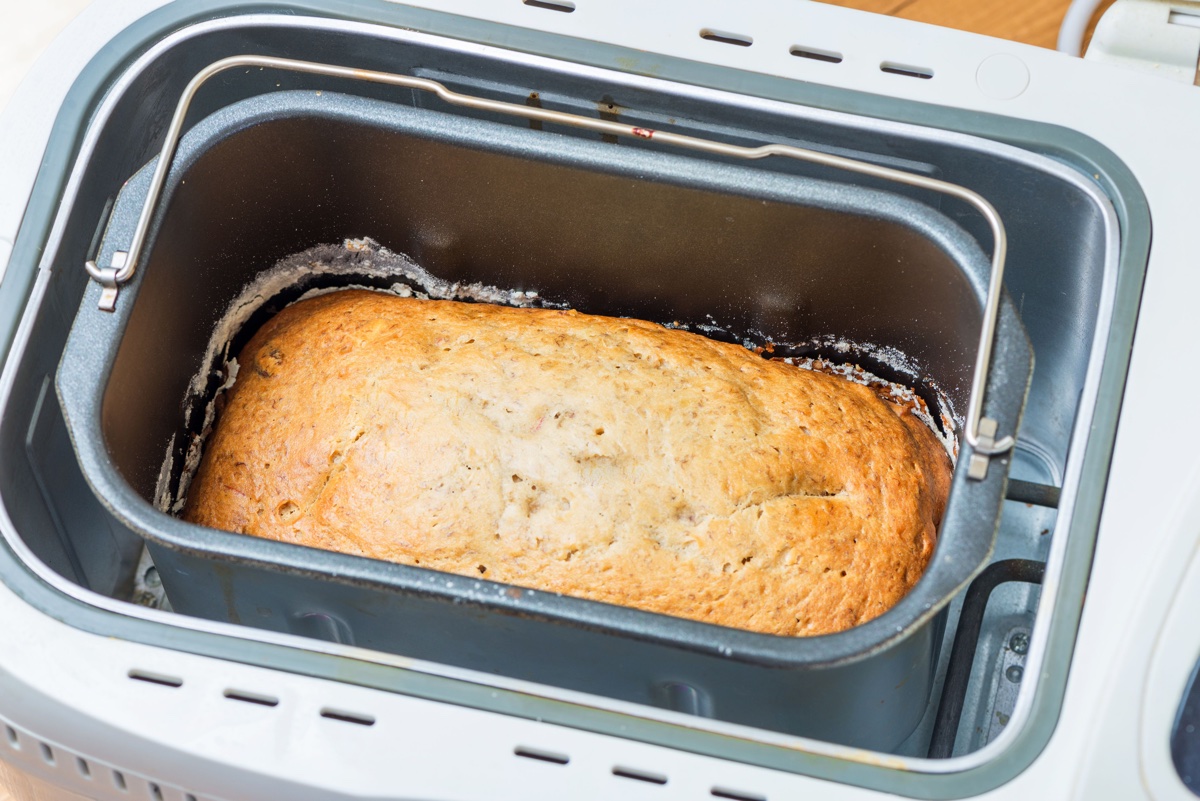
There’s nothing quite like the aroma of freshly baked bread filling your kitchen, but what happens when your bread comes out of the bread machine looking and feeling more like a brick than a fluffy loaf? If you’ve ever wondered why your bread is turning out dense and heavy in your bread machine, you’re not alone. This common issue can be frustrating, especially when you’re expecting light and airy slices to enjoy.
Several factors can contribute to dense bread in bread machines, ranging from yeast-related issues to improper mixing or proofing. Understanding these causes and how to troubleshoot them will help you create delicious and perfectly textured loaves every time.
In this article, we will explore some of the common causes for dense bread in bread machines and provide troubleshooting tips to help you achieve the light and fluffy bread you desire. So, let’s dive in and discover how to turn your dense loaves into soft and airy masterpieces!
Key Takeaways:
- Insufficient yeast, incorrect activation, and using the wrong flour can lead to dense bread in your machine. Pay attention to these factors and make adjustments to achieve light and fluffy loaves.
- Proper mixing, proofing, and using the correct machine size are crucial for airy bread. Troubleshoot these areas to transform your dense loaves into delightful, fluffy creations.
Read more: How To Make Bread Machine Bread Less Dense
Common Causes for Dense Bread in Bread Machines
When it comes to making bread in a bread machine, achieving the ideal texture can sometimes be a challenge. Here are some common causes for dense bread and why they may be affecting your loaves:
- Insufficient Yeast: Yeast plays a crucial role in the rising process of bread. If you’re not using enough yeast, the dough may not have enough gas production, resulting in a dense loaf.
- Incorrect Yeast Activation: Activating the yeast properly is essential to ensure its effectiveness. If the yeast isn’t activated correctly or if the water used is too hot or too cold, it can lead to poor rising, resulting in a dense loaf.
- Using the Wrong Flour: Different types of flour have varying protein contents, which directly affect the gluten formation. Using low-protein flours, such as cake flour or pastry flour, can result in less gluten development and, consequently, a denser bread.
- Old or Expired Ingredients: Just like any other ingredient, yeast and other leavening agents have a shelf life. Using expired yeast or ingredients can result in less effective rising, leading to denser bread.
- Incorrect Bread Machine Settings: Different bread machines have various settings and programs. Using the wrong setting for the type of bread you’re making can affect the rise and texture. Make sure to follow the instructions provided with your bread machine.
These are just a few of the common causes for dense bread in bread machines. However, don’t worry if you’ve experienced any of these issues. There are several troubleshooting tips you can try to improve the texture of your bread. Let’s explore them in the next section.
Insufficient Yeast
One of the primary causes of dense bread in bread machines is insufficient yeast. Yeast is responsible for the fermentation process that creates carbon dioxide, causing the dough to rise. If you don’t use enough yeast, there won’t be enough gas production to create the desired airy texture.
To achieve a light and fluffy loaf, it’s crucial to follow the recipe instructions and measure the yeast accurately. Generally, a standard loaf of bread requires about 2 to 3 teaspoons of yeast, but this may vary depending on the recipe and the size of your bread machine.
It’s important to note that using too much yeast can be just as detrimental as using too little. If you exceed the recommended amount, the yeast can overferment the dough, resulting in a collapsed or gummy texture. So, it’s essential to strike the right balance.
If you find that your bread is consistently dense due to insufficient yeast, consider increasing the amount slightly in your next batch. However, be cautious and make incremental adjustments. Start by adding an additional ½ teaspoon of yeast and observe the results. Keep experimenting until you achieve the desired lightness without compromising the taste.
Additionally, always ensure that your yeast is fresh and active. Check the expiration date on the package and store it properly in a cool, dry place. If your yeast is expired or inactive, it won’t be able to produce enough carbon dioxide, resulting in a denser bread.
By using the right amount of fresh yeast and ensuring its quality, you can significantly improve the texture of your bread and say goodbye to dense loaves.
Incorrect Yeast Activation
Another common cause for dense bread in a bread machine is incorrect yeast activation. Activating the yeast is a crucial step in bread making as it allows the yeast to become active and start the fermentation process. If the yeast is not properly activated, it may not be able to produce enough carbon dioxide, resulting in a dense loaf.
Proper yeast activation involves dissolving the yeast in warm water or milk with a small amount of sugar. The sugar acts as food for the yeast, helping it to ferment and produce carbon dioxide. It’s important to use water or milk at the right temperature, typically between 105°F to 110°F (40°C to 43°C).
If the liquid is too hot, it can kill the yeast, leading to ineffective fermentation. On the other hand, if the liquid is too cold, the yeast will not activate properly, resulting in poor rising and, ultimately, dense bread.
To ensure correct yeast activation, follow these steps:
- Measure the liquid temperature: Use a kitchen thermometer to measure the temperature of the liquid. It should be within the recommended range – not too hot or too cold.
- Add the yeast and sugar: Dissolve the yeast and a small amount of sugar in the warm liquid. The sugar provides nourishment for the yeast and aids in fermentation.
- Let it sit: Allow the yeast mixture to sit for about 5 to 10 minutes. During this time, the yeast will become foamy and start to release bubbles, indicating that it is active and ready to be used.
- Add the yeast mixture to the bread machine: Once the yeast is activated, add it to the bread machine along with the rest of the ingredients. Follow the recipe instructions for the order of ingredient addition.
By ensuring proper yeast activation, you can kickstart the fermentation process and promote adequate carbon dioxide production, resulting in a well-risen and lighter loaf of bread.
Using the Wrong Flour
The type of flour you use can greatly impact the texture and structure of your bread. Using the wrong flour can result in a denser loaf, so it’s essential to choose the appropriate flour for your bread machine recipes.
One key factor to consider is the protein content in the flour. Protein is what forms gluten when mixed with water. Gluten gives bread its structure and helps it to rise. Flours with higher protein content, such as bread flour or high-gluten flour, are ideal for making bread because they promote strong gluten development and result in a lighter and airier texture.
On the other hand, using low-protein flours like cake flour or pastry flour can lead to a lack of gluten formation, resulting in a denser, more compact bread. These flours are milled finer and contain less protein, making them better suited for delicate baked goods like cakes and pastries that require a tender crumb.
When selecting flour for your bread recipes, it’s important to read the labels carefully. Look for flour that specifically states “bread flour” or “high-gluten flour” for optimal results. These flours typically have a protein content of around 12-14%, which is ideal for bread making.
If you find that your bread is consistently turning out dense, and you suspect that the flour is the culprit, try swapping it out for a higher-protein option. Experiment with different brands or types of bread flour until you find one that works best for your bread machine recipes.
Remember, it’s not just the type of flour that matters but also its freshness. Just like any other ingredient, flour can go bad over time. Old or expired flour may not perform as well, as the yeast may not be able to effectively interact with it. Always check the expiration date on the flour packaging and store it in a cool, dry place for optimum quality.
By using the appropriate flour with the right protein content and ensuring its freshness, you’ll be on your way to achieving lighter and less dense bread in your bread machine.
Read more: Why Is My Bread Machine Bread Dry
Old or Expired Ingredients
When it comes to baking, using fresh and high-quality ingredients is key to achieving the best results. Using old or expired ingredients, including yeast, flour, and other leavening agents, can contribute to dense bread in your bread machine.
Yeast, in particular, has a limited shelf life. Over time, the viability of yeast decreases, and it becomes less effective at fermenting and creating carbon dioxide. If you’re using expired yeast, it may not be able to produce enough gas to properly leaven the bread dough, resulting in a dense texture.
Similarly, using stale or expired flour can affect the overall quality of your bread. As flour ages, it can become rancid and lose its ability to provide necessary structure and rise to the dough. Always check the expiration dates on your ingredients and discard any that have passed their prime.
In addition to yeast and flour, other leavening agents like baking powder and baking soda can also lose their potency over time. These agents are responsible for creating additional carbon dioxide gas in the dough, which helps with the rising process. If they are old or expired, they may not produce enough gas, resulting in a denser bread.
To ensure you’re using fresh ingredients, it’s a good practice to regularly check the expiration dates of all the ingredients you use in your bread recipes. Store them properly in a cool and dry pantry or refrigerator to maximize their freshness and shelf life.
By using fresh and high-quality ingredients, you’ll have a better chance of achieving light and fluffy loaves of bread in your bread machine. So, before you start your next baking session, double-check those expiration dates and stock up on fresh ingredients.
Incorrect Bread Machine Settings
Your bread machine comes equipped with different settings and programs designed to accommodate various types of bread recipes. Using the wrong setting can negatively impact the texture and outcome of your bread, often resulting in a denser loaf.
Each bread machine model may have slightly different settings, but the most common ones include basic, white, whole wheat, and rapid or quick bread options. It’s crucial to select the appropriate setting that matches the type of bread you’re making.
If you’re making a basic white bread, choose the “basic” or “white” setting, as this setting usually allows for the necessary rise and baking time required for this type of bread. On the other hand, if you’re making a whole wheat bread, opt for the “whole wheat” setting, which typically has a longer kneading and rising time to accommodate the heavier flour.
Using the wrong setting can lead to inadequate or excessive kneading, rising, or baking time, resulting in a dense loaf. It’s also important to note that the size of your bread machine can impact the final texture. If you’re using a smaller bread machine, be cautious not to overload it with too much dough, as this can also lead to a denser result.
Always refer to the instruction manual that comes with your bread machine to understand the settings and their recommended use. If you’re unsure which setting to choose for a particular recipe, it’s best to consult the manual or a reliable bread machine recipe book for guidance.
By selecting the appropriate bread machine setting and ensuring it aligns with the type of bread you’re making, you’ll have a better chance of achieving a lighter and fluffier texture in your loaves.
Remember, the settings on your bread machine are there to provide optimal results, so take advantage of them and enjoy perfectly baked bread every time!
Make sure you are using the correct type of flour for your recipe. Bread flour has a higher protein content, which helps create a lighter, less dense texture in your bread.
Overmixing or Undermixing the Dough
The process of mixing the dough in your bread machine plays a significant role in the final texture and structure of the bread. Both overmixing and undermixing can result in a denser loaf.
Overmixing the dough, especially in bread machines with powerful motors, can lead to excess gluten development. Gluten is a protein in flour that, when overworked, becomes tough and can create a dense and chewy texture. The excessive mixing may also cause the dough to lose its elasticity and ability to trap air, resulting in a compact loaf.
To avoid overmixing, it’s crucial to follow the recommended mixing times specified in your bread machine’s instruction manual or recipe. Typically, this involves mixing the ingredients until the dough just comes together and forms a smooth and slightly tacky ball. Avoid the temptation to let the bread machine continue kneading beyond this point, as it can lead to overmixing.
On the other hand, undermixing the dough can result in poor gluten development and insufficient air incorporation. When the dough is undermixed, it may not have enough strength to hold the gas produced during fermentation, resulting in a denser texture.
Ensure that you allow enough mixing time for the ingredients to combine thoroughly and for the gluten to develop. Pay close attention to the visual cues of the dough, such as its smoothness and elasticity, to determine if it has been mixed adequately.
If you find that your bread is consistently turning out dense, try adjusting the mixing times slightly. Keep in mind that the optimal mixing time can vary depending on the bread machine model, recipe, and desired bread texture. Experiment with different mixing times and observe the results to find the right balance for your preferences.
By avoiding both overmixing and undermixing, you can achieve a well-developed gluten structure and create a lighter and more airy loaf of bread in your bread machine.
Improper Proofing or Rising
The process of proofing or rising is a crucial step in bread making that allows the dough to ferment and develop flavor, texture, and volume. Improper proofing or rising can contribute to denser bread in your bread machine.
Proofing involves allowing the dough to rise after it has been mixed and before it’s baked. During this time, the yeast ferments the sugars in the dough, producing carbon dioxide gas that causes the dough to expand and become lighter.
One common mistake is not giving the dough sufficient time to rise. Insufficient proofing time can result in a dense texture because the dough hasn’t had enough time for the gas bubbles to develop and expand fully. It’s important to follow the recommended proofing times specified in your recipe or bread machine’s instruction manual.
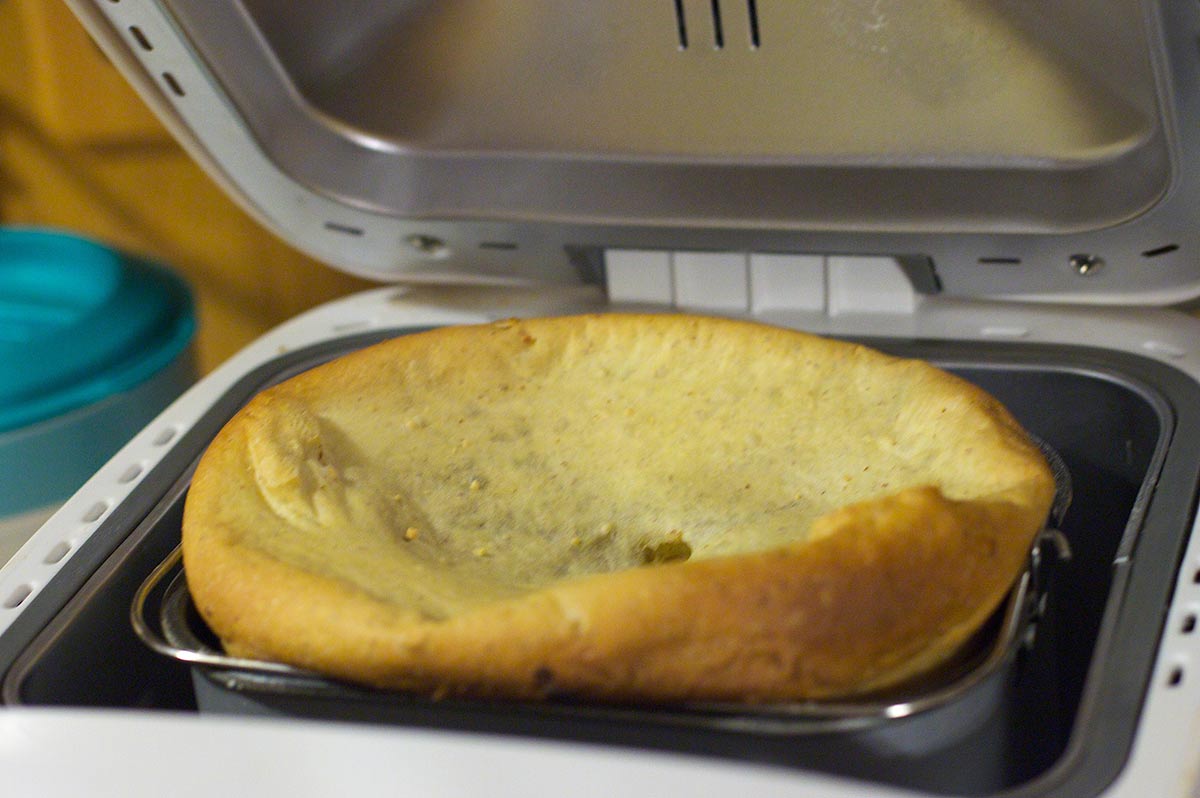
On the other hand, overproofing can also lead to dense bread. When the dough is allowed to rise for too long, the gluten structure becomes weak, and the gas bubbles may collapse, resulting in a flattened and denser loaf.
To achieve optimal proofing, it’s essential to create the ideal environment for fermentation. Here are some tips to consider:
- Temperature: Find a warm and draft-free area for the dough to rise. Yeast is more active in warmer temperatures, typically between 75°F to 85°F (24°C to 29°C).
- Time: Follow the recommended proofing times provided in your recipe. This can vary depending on the amount of yeast and desired flavor development.
- Visual Cues: Observe the dough during the proofing process. It should approximately double in size and have a visibly puffy and airy appearance.
Find the right balance and timing for proofing your bread. Experiment with different proofing times and temperature conditions until you achieve the desired texture and flavor.
By properly proofing your dough, you’ll allow the yeast to work its magic, creating a light and airy loaf with an open crumb structure.
Read more: Why Is My Basement So Hot
Incorrect Bread Machine Size
The size of your bread machine can impact the final outcome and texture of your bread. Using the incorrect bread machine size can result in a denser loaf.
Bread machines come in different sizes, typically measured by loaf capacity, such as 1-pound, 2-pound, or even larger sizes. The size refers to the weight of the dough the machine can handle, and it’s important to choose a machine that aligns with your recipe requirements.
If you’re using a bread machine that is too small for the amount of dough you’re making, it can lead to overcrowding and insufficient rising. The dough needs room to expand and rise during the baking process. If it’s packed too tightly, it may not have enough space to rise properly, resulting in a denser texture. This is especially true for doughs that contain a higher amount of yeast or ingredients that promote significant rising.
Conversely, using a large bread machine for smaller-sized recipes can also lead to denser bread. The dough may not fill the entire space of the bread pan, which can result in uneven rising and baking. The excess space in the pan can cause the dough to spread out too much instead of rising upwards, resulting in a flat and dense loaf.
To ensure proper rising and texture, it’s important to select a bread machine size that matches the amount of dough you’re making. If you frequently make different-sized loaves, consider investing in a bread machine with adjustable loaf-size options.
Follow the recommended amounts and measurements provided in your recipe. If your bread machine pan is too small, consider adjusting the recipe accordingly to make a smaller-sized loaf. On the other hand, if your machine is too large for your recipe, you may need to make a larger batch of dough to fill the pan adequately.
By using the correct-sized bread machine for your recipes, you’ll provide the dough with the ideal conditions for rising, resulting in a lighter and more evenly textured loaf of bread.
Problems with the Bread Machine Itself
While many instances of dense bread in a bread machine can be attributed to user errors or ingredient issues, it’s important to consider that problems with the bread machine itself can also contribute to a less-than-ideal outcome.
If you consistently experience dense bread despite following all the proper steps and using fresh ingredients, it might be worth checking if your bread machine is functioning correctly. Here are some potential issues to consider:
- Temperature inconsistency: Bread machines rely on precise temperature control during the proofing and baking process. If the bread machine’s thermostat is not calibrated correctly or if there’s a malfunction, it can lead to uneven heating and insufficient rise. Consider using an oven thermometer to monitor the internal temperature of the machine and compare it to the setting it’s turned to.
- Lack of kneading power: Proper kneading is crucial for gluten development, which in turn contributes to light and airy bread. If your bread machine lacks sufficient kneading power or if the paddles are not properly working, the dough may not be adequately kneaded, resulting in a denser texture. Check the paddles for damage or wear, and if necessary, consult the manufacturer for repairs or replacement parts.
- Malfunctioning yeast dispenser: Some bread machines have a yeast dispenser that automatically adds yeast at the appropriate time during the mixing process. If this dispenser is not functioning correctly or is clogged, it can affect yeast activation, resulting in poor rising and denser bread. Clean the dispenser, ensure it is working properly, or consider adding the yeast manually at the appropriate time.
- Poor insulation or ventilation: Bread machines require proper insulation and ventilation to maintain a consistent temperature during the baking process. If your machine has poor insulation or inadequate ventilation, it can lead to uneven heating and improper rising. Ensure that the machine is placed in a well-ventilated area and that there are no obstructions around it.
If you suspect that your bread machine is the source of the dense bread, consult the machine’s instruction manual or contact the manufacturer for troubleshooting steps or potential repairs. If necessary, considering investing in a new bread machine with reliable reviews and features that fit your baking needs.
Remember, while user errors are common causes of dense bread, it’s important to rule out any potential issues with the bread machine itself to achieve the light and fluffy loaves you desire.
Troubleshooting Tips for Dense Bread
If you find yourself consistently facing the issue of dense bread in your bread machine, don’t fret! There are several troubleshooting tips you can try to improve the texture of your bread. Here are some helpful suggestions:
- Adjust the yeast: Check the amount of yeast you’re using in your recipe. Ensure that you are using the recommended quantity and that it is fresh and active. Experiment with slightly increasing or decreasing the yeast amount to find the right balance for your desired texture.
- Double-check the flour: Ensure that you are using the correct type of flour with an appropriate protein content for bread making, such as bread flour or high-gluten flour. Using the wrong flour can lead to a denser texture. Also, make sure your flour is fresh and not expired.
- Activate the yeast properly: Pay attention to the temperature of the liquid used to activate the yeast. Use a kitchen thermometer to ensure it falls within the recommended range of 105°F to 110°F (40°C to 43°C). Properly activated yeast will contribute to better rising and a lighter texture.
- Follow the recommended bread machine settings: Consult your bread machine’s instruction manual for the recommended settings for the type of bread you’re making. Using the appropriate setting ensures proper kneading, rising, and baking, which can make a significant difference in the texture of your bread.
- Check proofing time and temperature: Allow the dough sufficient time to proof and rise according to the recipe. Make sure the proofing environment is warm and draft-free, and be cautious of overproofing, which can lead to a collapsed and denser loaf.
- Ensure proper mixing: Avoid overmixing or undermixing the dough. Follow the recipe instructions for mixing times and observe visual cues, like a smooth and slightly tacky dough, to determine the right consistency.
- Use the right bread machine size: Ensure that you are using the appropriate-sized bread machine for the amount of dough you’re making. Overcrowding or using a too-large pan can result in uneven rising and a denser texture.
Try implementing these troubleshooting tips one at a time, making slight adjustments as needed, until you achieve the desired texture in your bread. It may take some trial and error to find the perfect combination for your specific bread machine, recipe, and personal preferences.
Remember, baking is an art and a science, and it often requires practice and experimentation. Don’t be discouraged by a few dense loaves. With time and practice, you’ll master the art of creating light and fluffy bread in your bread machine.
Conclusion
Dense bread in a bread machine can be a frustrating outcome, but with proper understanding of the common causes and effective troubleshooting, you can transform your baking experience and achieve lighter and more enjoyable loaves of bread.
We learned that using insufficient yeast, incorrect yeast activation, using the wrong flour, and using old or expired ingredients can all contribute to dense bread. Additionally, incorrect bread machine settings, overmixing or undermixing the dough, improper proofing or rising, and using the incorrect bread machine size can also impact the texture of the bread.
Fortunately, by following some key tips, you can troubleshoot and overcome these challenges. Adjusting the yeast quantity, using appropriate flour, properly activating the yeast, following recommended bread machine settings, ensuring proper mixing and proofing, and using the right machine size can make a significant difference in achieving the desired lightness and fluffiness.
Remember that baking is both a science and an art, and it often requires patience, practice, and a willingness to experiment. It’s important to understand that not every loaf will turn out perfectly, but the joy of the process lies in the opportunity to improve and learn from each attempt.
So don’t get discouraged by a few dense loaves. Keep refining your techniques, taking note of the adjustments that work best for your specific bread machine, recipe, and personal taste preferences. With each batch, you’ll develop the skills needed to create delightful, light, and airy bread that will fill your kitchen with delicious aromas and bring joy to everyone who takes a bite.
Now, armed with the knowledge and troubleshooting tips shared in this article, it’s time to head back to your bread machine and embark on a bread-making journey filled with fluffy, delectable loaves that will have everyone coming back for more!
Curious about what else your bread machine can whip up besides your daily loaf? Don't stop at bread; there's a whole world of culinary delights waiting for you to discover. From sweet treats to savory dishes, your bread machine has untapped potential. Check out our article on versatile bread machine recipes and start transforming your meal prep today!
Frequently Asked Questions about Why Is My Bread So Dense In My Bread Machine
Was this page helpful?
At Storables.com, we guarantee accurate and reliable information. Our content, validated by Expert Board Contributors, is crafted following stringent Editorial Policies. We're committed to providing you with well-researched, expert-backed insights for all your informational needs.


0 thoughts on “Why Is My Bread So Dense In My Bread Machine”