Articles
How To Make Bread Machine Bread Less Dense
Modified: September 1, 2024
Looking for articles on how to make bread machine bread less dense? Read our expert tips and tricks to create lighter, fluffier loaves every time!
(Many of the links in this article redirect to a specific reviewed product. Your purchase of these products through affiliate links helps to generate commission for Storables.com, at no extra cost. Learn more)
Introduction
Welcome to the wonderful world of bread making! If you’ve recently purchased a bread machine or have been using one for a while, you may have encountered the common issue of dense bread. There’s nothing more disappointing than eagerly anticipating the delicious aroma of freshly baked bread, only to slice into a dense and heavy loaf.
But fret not! In this article, we will explore the various factors that can contribute to bread machine bread turning out dense, as well as provide you with helpful tips and techniques to make your bread lighter and fluffier.
Understanding the inner workings of your bread machine is essential in troubleshooting and achieving the desired texture. Bread machines are programmed to handle all the steps involved in bread making, from kneading the dough to proofing and baking. By following a few simple guidelines, you can ensure that your bread machine produces perfectly baked, airy loaves of bread.
In the next sections, we will cover important aspects such as choosing the right ingredients, measuring ingredients properly, selecting the correct bread machine setting, using the dough cycle, incorporating vital wheat gluten, adjusting the moisture level, experimenting with different flour types, and adding nut and seed mix-ins.
So, whether you are a beginner or seasoned bread maker, get ready to uncover the secrets to making bread machine bread less dense. Let’s dive in!
Key Takeaways:
- Master the art of making light and fluffy bread machine bread by choosing the right ingredients, measuring accurately, and utilizing the dough cycle to achieve the perfect texture.
- Overcome challenges of dense bread with troubleshooting tips, experimenting with different flour types, and adding nut and seed mix-ins for enhanced flavor and texture. Happy baking!
Read more: Why Is My Bread So Dense In My Bread Machine
Understanding the Bread Machine
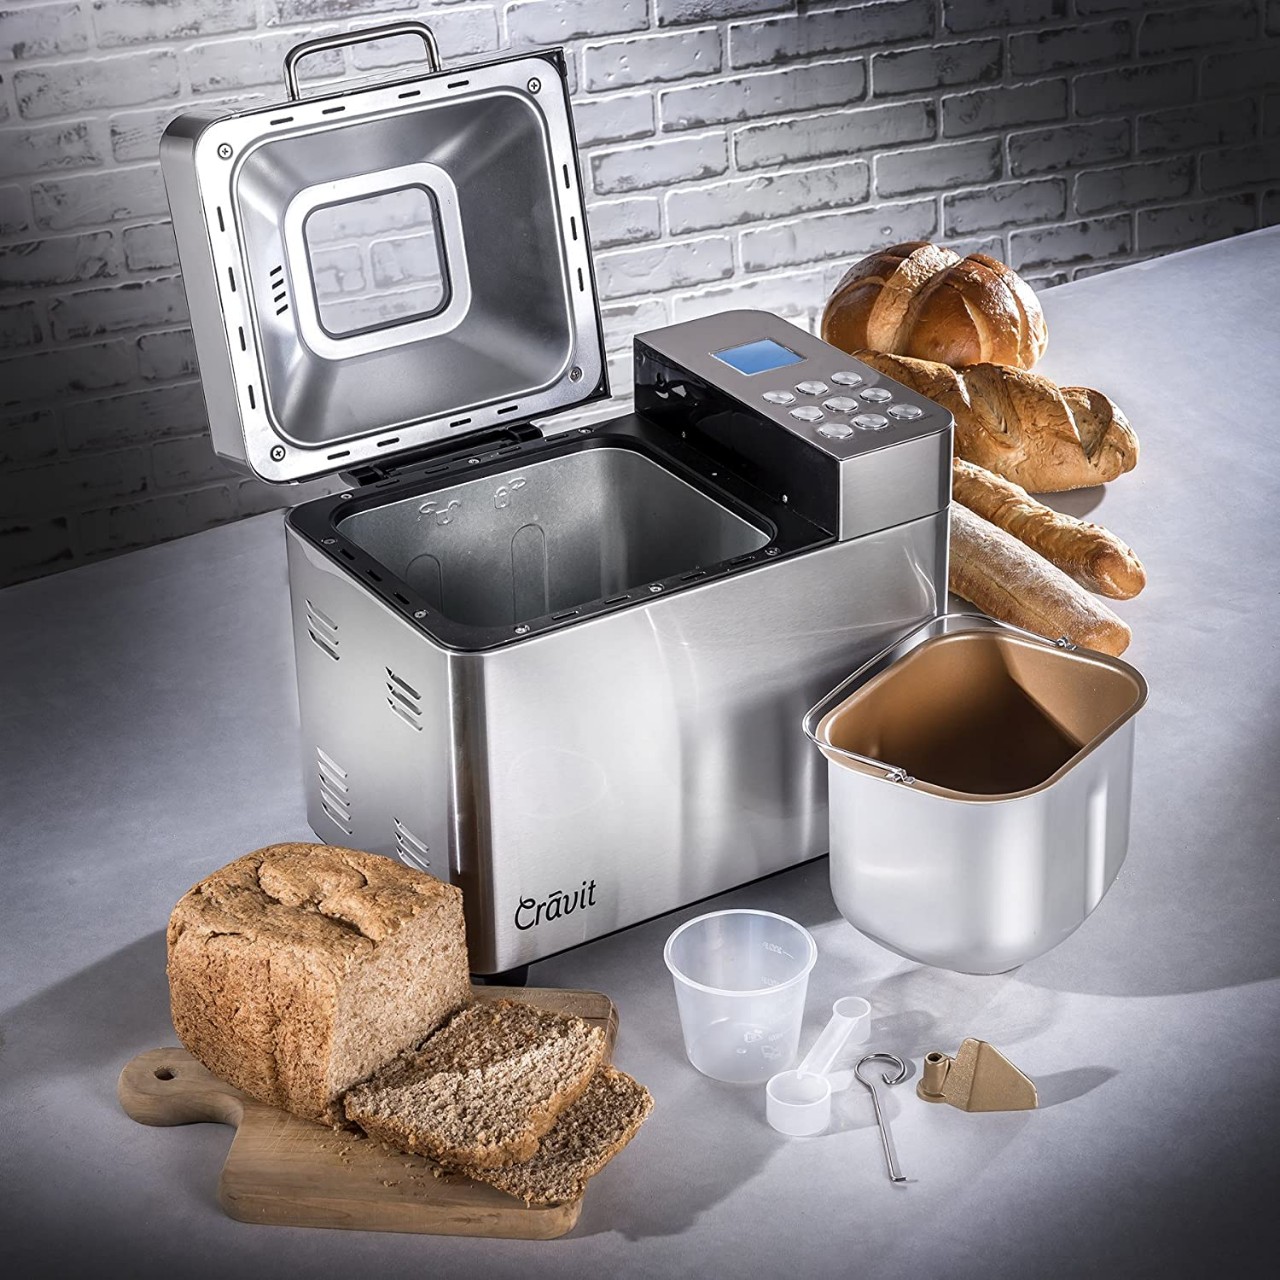
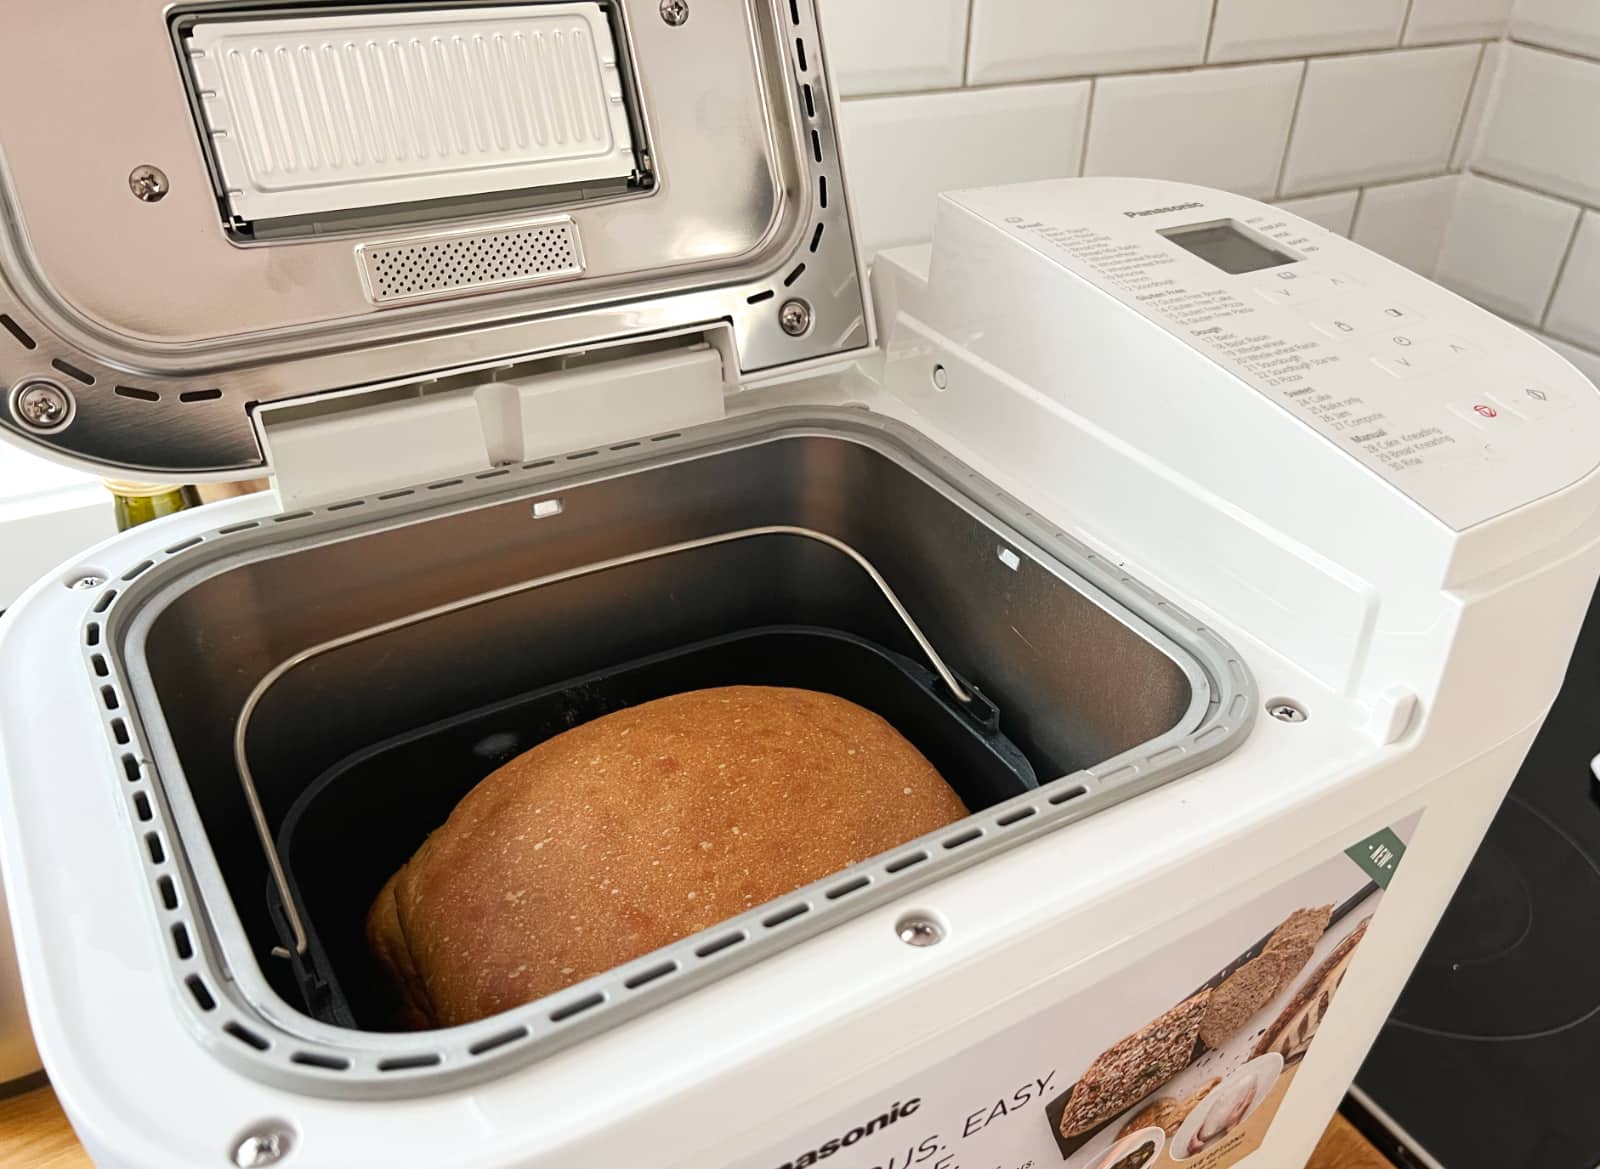
Before we delve into troubleshooting techniques, let’s take a moment to understand how a bread machine works. A bread machine is a compact kitchen appliance designed to automate the bread-making process. It has a built-in electric oven and motor that controls the various stages of bread production.
The bread machine typically consists of a bread pan, a kneading paddle, and a control panel with different settings. The paddle is responsible for kneading the dough, ensuring that the ingredients are thoroughly mixed and developed. The control panel allows you to select the type of bread, crust color, and sometimes additional functions such as delay start or keep warm.
Understanding the different settings on your bread machine is vital for achieving the desired bread texture. Most machines have options for basic white bread, whole wheat bread, gluten-free bread, and various specialty breads. Each setting is designed to adjust the time, temperature, and kneading cycle to suit the specific characteristics of the chosen type of bread.
It’s important to note that not all bread machines are created equal. The quality and performance may vary among different brands and models. Some machines may have more powerful motors, better heat distribution, or additional features for improved bread baking. Familiarize yourself with the specific features and limitations of your bread machine to make the most of your bread making experience.
Additionally, be aware that altitude and ambient temperature can also affect the performance of your bread machine. Higher altitudes may require adjustments to the recipe or baking time, while extreme temperatures may impact the rising and baking process. Consider these factors when troubleshooting and making adjustments to your bread machine recipes.
Now that we have a basic understanding of how a bread machine works, let’s move on to the next step: choosing the right ingredients.
Choosing the Right Ingredients
When it comes to making bread machine bread less dense, using high-quality ingredients is crucial. The right combination of flour, yeast, liquids, and other additives can significantly impact the texture and rise of your bread.
1. Flour: Choosing the right flour is essential for achieving a light and fluffy loaf. Opt for bread flour, which has a higher protein content compared to all-purpose flour. The protein in bread flour helps create gluten, a protein network that gives bread its structure and helps it rise. If you prefer whole wheat bread, look for whole wheat bread flour or mix whole wheat flour with bread flour to improve the rise and texture.
2. Yeast: Fresh and active yeast is necessary for proper fermentation and rising of the dough. Check the expiration date on the yeast package to ensure it is fresh. If using active dry yeast, activate it in warm water before adding it to the bread machine. Instant yeast can be added directly to the dry ingredients.
3. Liquids: The liquid component of the bread, such as water or milk, can also affect the texture. Measure the liquids accurately and use them at the recommended temperature as stated in the bread recipe. Using cold liquids can slow down the yeast activity, resulting in a dense loaf.
4. Sugar and Salt: Sugar provides food for the yeast, helping it activate and produce carbon dioxide for the bread to rise. Salt, on the other hand, regulates the fermentation process and adds flavor. Be mindful of the quantities and follow the recipe guidelines for the perfect balance.
5. Fats: Adding fats such as butter, oil, or margarine to the recipe can enhance the texture and flavor of the bread. Fats help tenderize the crumb and keep the bread moist. Experiment with different types of fats to find the perfect balance for your taste preferences.
6. Additives: Consider incorporating additional additives like vital wheat gluten or bread improvers to improve the rise and structure of your bread. These additives can help counteract the dense texture and create a lighter loaf.
By carefully selecting high-quality ingredients and ensuring proper measurements, you will set the foundation for a less dense bread. In the next section, we will discuss the importance of measuring ingredients properly to achieve consistent results.
Measuring Ingredients Properly
Precision in measuring ingredients is key to achieving consistent and well-textured bread machine bread. Even slight variations in measurements can affect the rise, structure, and overall density of the loaf. Here are some tips for measuring ingredients accurately:
1. Use measuring cups and spoons: Invest in a set of good-quality measuring cups and spoons specifically designed for dry and liquid ingredients. Avoid using regular cups and tablespoons, as they may not provide accurate measurements.
2. Spoon and level the flour: When measuring flour, use a spoon to scoop the flour into the measuring cup and level off the excess with a flat edge, such as a butter knife. Avoid tapping or packing the flour into the cup, as this can lead to compacted and heavy measurements.
3. Measure liquids at eye level: Pour the liquid ingredients into a clear measuring cup and check the level at eye level. This ensures accuracy in measuring exactly the required amount.
4. Use a kitchen scale: For even more precise measurements, consider using a kitchen scale. It allows you to measure ingredients by weight, which can eliminate any inconsistencies caused by the volume measurements.
5. Follow the recipe: Stick to the recipe measurements and ratios to achieve the intended texture and flavor of the bread. Small deviations can alter the balance of ingredients and impact the final result.
6. Take into account environmental factors: Be mindful of factors like humidity and altitude, as they can affect the moisture content of the flour and the overall dough consistency. Adjustments may be necessary to achieve optimal results in different climates.
Remember, precise measurements play a crucial role in achieving consistent and airy bread machine bread. By following these tips, you’ll be on your way to baking loaves with a perfect texture.
Next, let’s explore the importance of selecting the correct bread machine setting to ensure your bread rises to its fullest potential.
Selecting the Correct Bread Machine Setting
The selection of the right bread machine setting is crucial in producing bread with the desired texture and consistency. Different types of bread require specific settings to achieve optimal results. Here are some tips for selecting the correct setting:
1. Basic/White Bread: The basic or white bread setting is ideal for classic bread recipes that use all-purpose or bread flour. This setting typically involves a longer kneading and rising time, allowing the gluten to develop fully and giving the bread a lighter texture.
2. Whole Wheat Bread: If you’re making whole wheat bread, make sure to choose the whole wheat or whole grain setting on your bread machine. This setting adjusts the kneading and rising times to accommodate the heavier texture of whole wheat flour.
3. Gluten-Free Bread: For those with gluten intolerance or following a gluten-free diet, using the gluten-free setting is essential. This setting has a shorter rise time and different temperature settings, accommodating the unique needs of gluten-free flours and ingredients.
4. Rapid/Quick Bread: If you’re short on time and need a loaf of bread in a hurry, the rapid or quick bread setting is the way to go. This setting reduces the overall baking time but may result in a slightly denser texture compared to the regular settings.
5. Sweet Bread: When making breads that contain a higher amount of sugar, honey, or other sweeteners, choose the sweet bread setting. This setting typically has a longer rise time and may include additional pauses or stages to enhance the flavor and rise of sweetened bread dough.
6. Dough Cycle: In some cases, you may prefer to use the dough cycle on your bread machine to knead and rise the dough, and then shape and bake the bread separately. This allows you to experiment with different shapes and styles of bread while still benefiting from the efficiency of a bread machine for the initial stages of the bread-making process.
Consult your bread machine’s manual for specific settings and their corresponding times and temperatures. Remember, selecting the right setting ensures that the bread machine kneads and bakes the dough for an appropriate duration, resulting in a well-risen and properly textured loaf of bread.
In the next section, we’ll explore the option of using the dough cycle to create lighter and fluffier bread.
Read more: How To Make Dough In Bread Machine
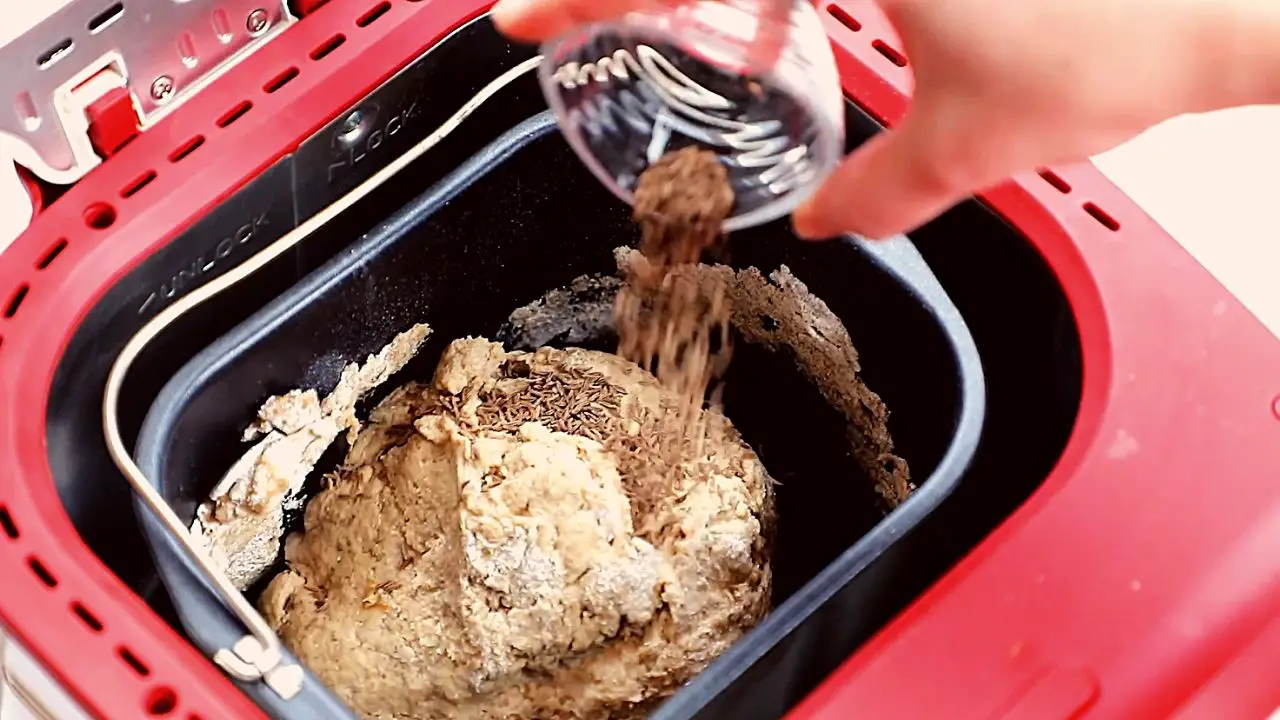
Using the Dough Cycle
The dough cycle on your bread machine can be a valuable tool in improving the texture and rise of your bread. It allows you to take advantage of the machine’s efficient kneading and rising capabilities while giving you the flexibility to shape and bake the bread separately. Here are some tips for utilizing the dough cycle:
1. Kneading and First Rise: Start by selecting the dough cycle on your bread machine. This setting typically involves the initial mixing and kneading of the dough, followed by a period of rising. Allow the machine to complete these stages as per the programmed timing.
2. Check the Dough Consistency: After the initial cycle is complete, check the dough consistency. The dough should be slightly tacky but not overly sticky. If it’s too sticky, add a tablespoon of flour at a time until it reaches the desired consistency. If it’s too dry, add a tablespoon of water at a time until it becomes slightly tacky.
3. Shaping the Dough: Once the dough is ready, transfer it onto a lightly floured surface. Gently deflate the dough and shape it into the desired form, such as a loaf, rolls, or buns. Let the shaped dough rest for a few minutes to allow it to relax and recover its elasticity.
4. Final Rise: Place the shaped dough in a greased pan or on a baking sheet, cover it lightly with a clean towel, and let it rise until doubled in size. This final rise can be done at room temperature or in a slightly warm environment to enhance the yeast’s activity.
5. Preheat and Bake: While the dough is on its final rise, preheat your oven to the appropriate temperature as specified in your recipe. Once the dough has doubled in size, gently brush the surface with an egg wash or water for a shiny crust. Place the bread in the preheated oven and bake it according to the recipe instructions.
Using the dough cycle offers several advantages. It allows you to customize the shape and style of your bread in addition to providing a lighter and more tender texture. Additionally, shaping and baking the dough separately can result in a more consistent rise and a more evenly baked loaf.
Keep in mind that every bread recipe and bread machine may have slightly different timing and instructions for using the dough cycle. It’s always a good idea to refer to the specific instructions in your bread machine’s manual and adapt them to your recipe’s requirements.
In the following section, we’ll explore the option of incorporating vital wheat gluten to improve the structure and rise of your bread.
To make bread machine bread less dense, try using bread flour instead of all-purpose flour. Bread flour has a higher protein content, which helps create a lighter, fluffier texture in the bread.
Incorporating Vital Wheat Gluten
If you’re struggling with dense bread machine bread, incorporating vital wheat gluten into your recipe can help improve the structure and rise of the loaf. Vital wheat gluten is a natural protein derived from wheat that helps promote gluten development and enhances the elasticity of the dough. Here’s how you can use it:
1. Understand the Purpose: Vital wheat gluten is particularly beneficial when using low-gluten flours or whole wheat flours, which tend to produce denser bread. By adding vital wheat gluten, you can boost the gluten content and improve the dough’s elasticity, resulting in a lighter and fluffier texture.
2. Measure Accurately: It’s important to measure the vital wheat gluten accurately, as too much or too little can affect the outcome. Follow the recommended amount specified in your recipe or use about 1 tablespoon of vital wheat gluten per cup of flour if you’re experimenting with your own recipe.
3. Incorporate Properly: To incorporate vital wheat gluten into your recipe, add it when you’re adding the flour. Simply whisk the vital wheat gluten into the flour before adding it to the bread machine. This will ensure even distribution throughout the dough.
4. Adjust Other Ingredients: Adding vital wheat gluten may slightly impact the texture and moisture absorption of the dough. Keep an eye on the dough consistency during the mixing and kneading process. If the dough appears too dry, add a tablespoon of water at a time until it reaches the right consistency. Conversely, if the dough is too sticky, add a tablespoon of flour at a time until it becomes slightly tacky.
5. Follow the Recipe: While adding vital wheat gluten can improve the rise and structure of your bread, it’s important to remember that it’s not a magical fix for all bread-related issues. Follow the recipe guidelines, including the amounts and ratios of other ingredients, to achieve the best results.
By incorporating vital wheat gluten into your bread machine recipes, you can enhance the gluten development and achieve a lighter and more airy bread. Be sure to experiment and adjust the amount of vital wheat gluten based on your individual preferences and the specific recipe you’re using.
In the next section, we’ll explore the importance of adjusting the moisture level in your bread machine bread to achieve the perfect texture.
Adjusting the Moisture Level
The moisture level plays a critical role in the texture and overall density of bread machine bread. If the dough has too little moisture, it can result in a dense and dry loaf. Conversely, if the dough is too moist, it may not rise properly and result in a heavy texture. Here are some tips for adjusting the moisture level:
1. Follow the Recipe Guidelines: Start by following the recipe guidelines for the recommended amount of water or other liquids. These guidelines have been carefully tested to achieve the optimal moisture level for the specific bread recipe.
2. Adjust Gradually: If the dough appears too dry, gradually add small amounts of water or other liquids, such as milk or buttermilk, to the dough during the mixing and kneading process. Add a tablespoon at a time until the dough reaches the desired consistency. This will ensure that you don’t add too much liquid, which can result in a sticky and hard-to-handle dough.
3. Check the Dough Texture: Throughout the mixing and kneading process, keep a close eye on the dough’s texture. It should be slightly tacky but not overly sticky. Properly hydrated dough will be pliable and easy to work with. Adjust the moisture level as necessary to achieve this ideal consistency.
4. Consider Environmental Factors: Environmental factors such as humidity and altitude can affect the moisture content of the flour and the overall dough consistency. If you live in a dry climate, you may need to add slightly more moisture to the dough to compensate. On the other hand, in a humid environment, you may need to reduce the amount of liquid slightly.
5. Be Mindful of Hydration Levels: Different types of flour absorb moisture differently. For example, whole wheat flour typically requires more liquid than all-purpose flour. Pay attention to the hydration levels of the flours you’re using and make adjustments accordingly.
6. Use a Spray Bottle: If you find it challenging to measure small amounts of liquid accurately, consider using a spray bottle filled with water. Lightly mist the dough as needed to adjust the moisture level. This method allows for better control over the amount of liquid added.
By adjusting the moisture level in your bread machine bread, you can achieve a lighter and more tender loaf. Remember to make gradual adjustments and observe the dough’s texture throughout the process. With practice, you’ll develop a better understanding of how to achieve the perfect moisture level for your desired bread texture.
Next, in the following section, we’ll explore the option of experimenting with different flour types to improve the overall texture of your bread machine bread.
Experimenting with Different Flour Types
If you’re looking to improve the texture and density of your bread machine bread, experimenting with different flour types can make a significant difference. Various flours have different protein content, texture, and flavor profiles, which can result in lighter and more flavorful loaves. Here are some flour types you can consider:
1. Bread Flour: Bread flour is higher in protein content compared to all-purpose flour. It has a higher gluten-forming capability, which promotes better structure and a lighter texture in bread. Substitute bread flour for all-purpose flour in your recipe to achieve a more open crumb and increased rise in your bread.
2. Whole Wheat Flour: Whole wheat flour contains the entire wheat kernel, including the bran, germ, and endosperm. It has a higher fiber content and imparts a nutty flavor to the bread. While whole wheat flour can produce denser bread, using a combination of bread flour and whole wheat flour can result in a lighter texture while still enjoying the benefits of whole grains.
3. Rye Flour: Rye flour is made from ground rye grains and offers a distinct flavor and denser texture to bread. Incorporating rye flour into your bread machine bread can add depth of flavor and a chewy crumb. Start with smaller proportions of rye flour and gradually increase them to find the perfect balance for your taste preferences.
4. Spelt Flour: Spelt flour is an ancient grain that is lower in gluten but higher in protein compared to wheat flour. It has a milder flavor and can lend a light and tender texture to your bread. Combine spelt flour with other flours like bread flour or all-purpose flour for a well-rounded flavor and improved structure.
5. Gluten-Free Flour Blends: If you’re avoiding gluten, gluten-free flour blends made from a combination of alternative flours like rice flour, tapioca flour, and potato starch can be used in your bread machine. Look for gluten-free recipes specifically designed for bread machines to achieve the best results.
6. Ancient Grains: Ancient grains like quinoa, amaranth, and kamut offer different flavors and textures to bread. Experiment with incorporating these grains into your flour blend to create unique and nutritious bread with improved texture and taste.
When experimenting with different flour types, it’s important to note that the properties of flours can vary. They absorb liquid differently and may require adjustments in the moisture level and kneading time. Start by substituting small portions of your regular flour with these alternative flours and observe the results before making larger adjustments.
By exploring different flour options, you can unleash your creativity and discover new flavors, textures, and nutritional benefits in your bread machine bread.
In the following section, we’ll discuss the option of adding nut and seed mix-ins to enhance the flavor and texture of your bread.
Read more: How To Make Sourdough In Bread Machine
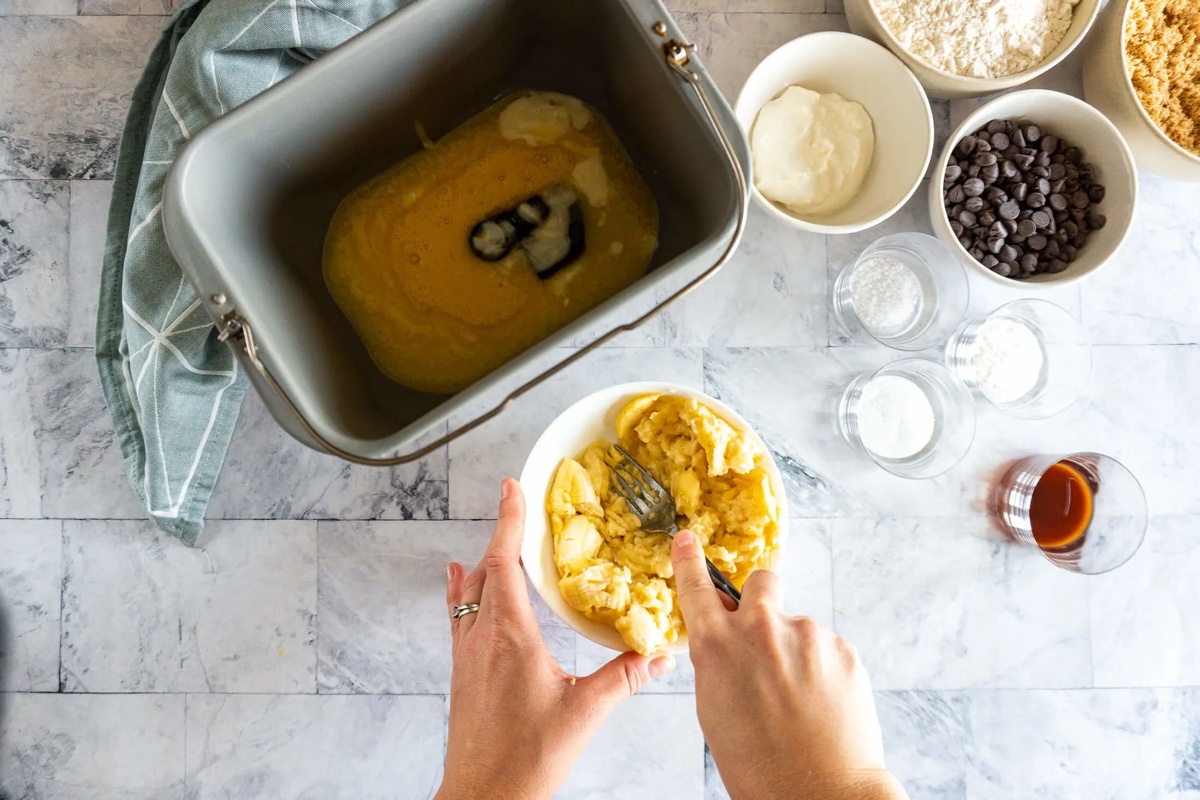
Adding Nut and Seed Mix-Ins
Adding nut and seed mix-ins to your bread machine bread not only enhances the flavor but also contributes to a more interesting texture. Nuts and seeds add crunch, richness, and nutritional value to your loaf. Here’s how you can incorporate them into your bread machine bread:
1. Select the Nuts and Seeds: Choose your favorite nuts and seeds to add to your bread. Options include walnuts, almonds, pecans, sunflower seeds, pumpkin seeds, flaxseeds, and sesame seeds. You can use a single type of nut or create a combination for a more varied flavor profile.
2. Toast the Nuts and Seeds: For added depth of flavor, consider toasting the nuts and seeds before adding them to your bread. Simply spread them out on a baking sheet and toast in the oven at a low temperature (around 325°F or 160°C) for about 10-15 minutes until they become fragrant and slightly golden. Allow them to cool before incorporating them into your dough.
3. Measure and Add: Measure the desired amount of nuts and seeds according to your recipe or personal preference. You can add them at the beginning with the rest of your ingredients, or if your bread machine has a designated ingredient dispenser, you can add them during the kneading process. This allows the nuts and seeds to be evenly distributed throughout the dough.
4. Adjust Moisture Levels: When adding nuts and seeds to your bread dough, they can absorb some moisture during baking, so it’s important to consider this when adjusting the overall hydration of the dough. If the dough appears too dry after adding the mix-ins, you may need to increase the liquid slightly to maintain the desired consistency.
5. Experiment with Size and Texture: Depending on your preference, you can chop the nuts into smaller pieces or leave them whole for a more substantial bite. For a smoother texture, you can also grind the nuts before adding them to the dough. Similarly, you can use whole seeds or opt to grind them for a smoother texture throughout the bread.
6. Distribute Evenly: Ensure that the nuts and seeds are evenly distributed throughout the dough. This can be achieved by gently kneading the dough or incorporating the nuts and seeds during the dough cycle, allowing the machine to distribute them evenly for you.
Adding nut and seed mix-ins to your bread machine bread not only enhances the flavor but also adds nutritional value and a delightful crunch. Experiment with different combinations to discover your favorite combinations.
In the next section, we’ll provide some troubleshooting tips to help you overcome challenges and achieve the perfect texture for your bread.
Troubleshooting Tips for Dense Bread
Despite your best efforts, sometimes bread machine bread can still turn out dense. Don’t worry, as there are several troubleshooting tips you can employ to overcome this issue and achieve a lighter texture. Here are some common problems and their solutions:
1. Insufficient Kneading: Proper kneading is crucial for developing gluten and creating an airy texture. If you find that your bread is consistently dense, try increasing the kneading time in your bread machine. You can also try adding vital wheat gluten to help improve the gluten development.
2. Inactive Yeast: In order for the bread to rise properly, the yeast needs to be active. Check the expiration date on your yeast package and make sure it hasn’t expired. If you’re using active dry yeast, proof it in warm water before adding it to the bread machine. Instant yeast can be added directly to the dry ingredients.
3. Incorrect Liquid Measurement: If the dough is too dry, it may result in a dense loaf. Double-check the liquid measurements in your recipe and ensure they are accurate. Adjust the moisture level if needed by adding small amounts of water or other liquids until the desired consistency is achieved.
4. Improper Rising Conditions: Yeast needs a warm and consistent environment to rise properly. Ensure that your bread machine is placed in a draft-free area with a stable temperature. If needed, use the rapid rise setting or consider preheating your bread machine before adding the ingredients to create a warmer environment for the yeast to thrive.
5. Overproofing: Allowing the dough to rise for too long can cause it to become overproofed and result in a dense texture. Follow the recommended rising times in your recipe and avoid leaving the dough to rise for an extended period. If your bread machine has a delay start feature, use it judiciously to avoid overproofing the dough.
6. Incorrect Flour Type or Measurement: Ensure that you are using the right type of flour specified in your recipe. Different flours have different protein content and absorb liquids differently, which can affect the texture of the bread. Measure the flour accurately, spooning it into the measuring cup and leveling it off, to prevent using too much flour, which can result in a dense loaf.
7. Machine Malfunction: If you’ve tried various troubleshooting techniques and still encounter consistent issues with dense bread, it’s possible that there may be a malfunction with your bread machine. Contact the manufacturer or refer to the user manual for assistance or consider getting your machine checked by a professional.
Remember, troubleshooting bread machine bread may involve some trial and error. Experiment with different techniques and adjustments to find what works best for you. Don’t be discouraged by a few failed attempts — it’s all part of the learning process!
Now, armed with these troubleshooting tips, you can overcome the challenges of dense bread and create light and fluffy loaves that will delight your taste buds.
Finally, let’s conclude our article on making bread machine bread less dense.
Conclusion
Congratulations! You’ve now learned valuable tips and techniques to make your bread machine bread less dense and achieve a lighter, fluffier texture. By understanding the inner workings of your bread machine, choosing the right ingredients, measuring accurately, selecting the correct setting, utilizing the dough cycle, incorporating vital wheat gluten, adjusting the moisture level, experimenting with different flour types, and adding nut and seed mix-ins, you have the tools to create amazing bread right in the comfort of your own kitchen.
Bread making is a delightful and rewarding process that allows you to unleash your creativity and enjoy the irresistible aroma of freshly baked bread. While there may be occasional challenges along the way, remember that practice makes perfect. Don’t be afraid to experiment with different techniques, flavors, and combinations to find what works best for you.
As you continue on your bread making journey, be sure to consult your bread machine’s manual, follow recipe guidelines, and adapt and adjust as necessary. Pay attention to the dough consistency, rise times, and baking temperatures to achieve the best results every time.
With patience, perseverance, and a bit of experimentation, you’ll soon master the art of making bread machine bread with a light, airy texture that will impress friends and family alike.
So, go ahead and let your creativity soar. Enjoy the process of crafting delicious loaves of bread, and savor the joy of biting into a perfect slice of homemade goodness. Happy baking!
Frequently Asked Questions about How To Make Bread Machine Bread Less Dense
Was this page helpful?
At Storables.com, we guarantee accurate and reliable information. Our content, validated by Expert Board Contributors, is crafted following stringent Editorial Policies. We're committed to providing you with well-researched, expert-backed insights for all your informational needs.


0 thoughts on “How To Make Bread Machine Bread Less Dense”