Articles
Why Is My Coffee Machine Leaking
Modified: February 26, 2024
Discover the reasons why your coffee machine may be leaking and how to fix it with our informative articles.
(Many of the links in this article redirect to a specific reviewed product. Your purchase of these products through affiliate links helps to generate commission for Storables.com, at no extra cost. Learn more)
Introduction
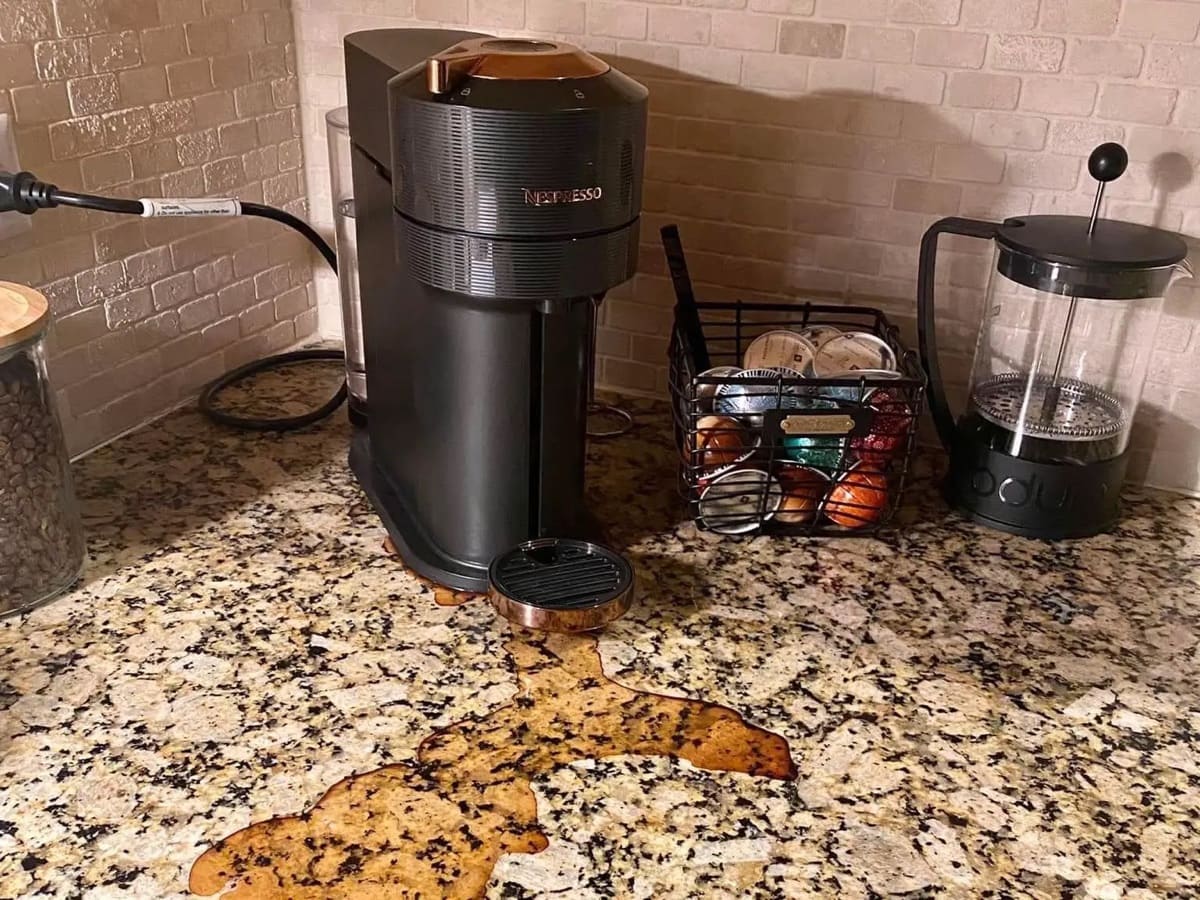
There’s nothing quite like starting your day with a fresh cup of coffee. It’s a ritual that provides a jolt of energy and a moment of indulgence. But what happens when you wake up, excited for your morning brew, only to find that your coffee machine is leaking? It can be frustrating and perplexing, especially when you’re not sure why it’s happening.
A leaking coffee machine is a common problem that many coffee lovers encounter. It can be caused by various factors, ranging from minor issues to more significant malfunctions. Understanding the reason behind the leak is crucial to finding a solution and getting your coffee machine back to full functionality.
In this article, we will explore the common causes of coffee machine leaks and provide practical tips on how to diagnose and prevent them. So, grab a fresh cup of joe, and let’s dive in.
Key Takeaways:
- Proper maintenance, including checking water tank placement, inspecting seals, and clearing water lines, can prevent coffee machine leaks and ensure uninterrupted brewing for coffee lovers.
- Regular cleaning, using filtered water, and following manufacturer’s guidelines for maintenance are essential in preventing leaks and maintaining the optimal performance of coffee machines.
Read more: Why Is My Espresso Machine Leaking Water?
Common Causes of Coffee Machine Leaks
A coffee machine is a complex appliance with several components working together to brew your favorite cup of coffee. When any of these components malfunction or deteriorate, it can result in a leak. Here are some common causes of coffee machine leaks:
1. Improper Water Tank Placement: One of the major causes of leaks is improper placement of the water tank. If it’s not securely positioned or if the seal is compromised, water can leak out during the brewing process.
2. Damaged Seals or Gaskets: Seals and gaskets are essential for maintaining a watertight seal in a coffee machine. Over time, these rubber components can become worn or damaged, causing leaks around the water reservoir, portafilter, or steam wand.
3. Clogged or Blocked Water Lines: Coffee machines have intricate water lines that transport water from the reservoir to the brewing mechanism. If these lines become clogged or blocked with mineral deposits or coffee residue, it can disrupt the water flow and lead to leakage.
4. Excessive Water Pressure: High water pressure can put stress on the internal components of a coffee machine. This increased pressure can cause leaks in various areas, such as the brewing head, portafilter, or steam wand.
5. Wear and Tear of Internal Components: Like any other appliance, coffee machines experience wear and tear over time. Whether it’s a cracked valve, a damaged O-ring, or a faulty pressure release valve, these internal components can result in leaks if they are not functioning properly.
Identifying the cause of the leak is key to resolving the issue. In the next section, we will discuss how to diagnose a coffee machine leak.
Improper Water Tank Placement
One of the common causes of coffee machine leaks is improper water tank placement. The water tank is a crucial component that stores water for the brewing process. If it is not properly positioned or the seal is compromised, water can leak out during operation.
To ensure proper water tank placement, follow these steps:
- Make sure the water tank is firmly seated in its designated spot. It should fit snugly and securely without any wobbling or movement.
- Check for any debris or foreign objects around the tank that could prevent it from forming a proper seal. Clear away any obstructions to ensure a tight fit.
- Inspect the tank’s gasket or O-ring, which forms the seal between the tank and the rest of the machine. If the gasket is worn, cracked, or damaged, it may need to be replaced. Consult your coffee machine’s user manual or contact the manufacturer for guidance on obtaining a replacement gasket.
- Ensure that the tank is filled with water to the appropriate level indicated by the machine. Overfilling the tank can cause water to overflow and leak out during brewing.
- If you have recently cleaned or descaled your coffee machine, make sure that all cleaning agents are thoroughly rinsed away. Residual cleaning agents can interfere with the tank’s seal and cause leaks.
By properly placing and securing the water tank, you can minimize the chances of a leak occurring due to this specific issue. However, if you continue to experience leaks, it may be necessary to explore other potential causes and troubleshooting steps.
Damaged Seals or Gaskets
Damaged seals or gaskets are a common culprit for coffee machine leaks. Seals and gaskets are essential components that create a watertight seal, preventing water from escaping during the brewing process. Over time, these rubber components can become worn, cracked, or damaged, compromising their ability to maintain a proper seal.
Here are some steps to diagnose and address issues related to damaged seals or gaskets:
- Inspect the seals or gaskets around the water reservoir, portafilter, and steam wand. Look for any visible signs of wear, cracking, or deterioration.
- If you notice any damage, consult your coffee machine’s user manual or contact the manufacturer to inquire about purchasing replacement seals or gaskets. It’s important to use genuine replacement parts to ensure proper fit and functionality.
- Carefully remove the damaged seal or gasket and replace it with the new one. Follow the manufacturer’s instructions or refer to online tutorials for guidance on how to properly install the replacement.
- After replacing the seal or gasket, run a test brew to ensure that the leak has been resolved. Monitor the machine during the brewing process to confirm that water is not escaping from the previously affected areas.
Regularly inspecting and replacing damaged seals or gaskets is key to preventing leaks and maintaining the optimal performance of your coffee machine. If the issue persists after replacing the seals or gaskets, it may be necessary to explore other potential causes or seek professional assistance.
Clogged or Blocked Water Lines
Clogged or blocked water lines can also lead to leaks in your coffee machine. Over time, mineral deposits from hard water or residue from coffee grounds can accumulate and obstruct the water flow, causing pressure to build up and water to escape from unintended areas.
To diagnose and address clogged or blocked water lines, follow these steps:
- Check the user manual or manufacturer’s guidelines to identify the water lines in your coffee machine.
- Disconnect the machine from the power source and allow it to cool down.
- Locate the water lines and inspect them for any visible signs of blockage or debris. Look for any mineral buildup or coffee residue that could hinder the flow of water.
- Use a small brush or pipe cleaner to gently remove any obstructions from the water lines. Be cautious not to use abrasive tools that could damage the lines.
- Flush the water lines by running water through them. You can do this by following the manufacturer’s instructions or by simply filling the water reservoir and allowing water to flow through the system without brewing coffee.
- If the blockage is severe and cannot be cleared manually, it may be necessary to use a descaling solution specifically designed for coffee machines. This solution can dissolve mineral deposits and help restore the water flow. Again, follow the manufacturer’s instructions and safety precautions when using a descaler.
- Once the water lines are clear, reassemble the machine and run a test brew to ensure that the leak has been resolved.
Regularly cleaning and maintaining the water lines of your coffee machine can help prevent clogs and blockages, reducing the likelihood of leaks and ensuring optimal performance.
Excessive Water Pressure
Excessive water pressure can be another cause of leaks in coffee machines. If the water pressure is too high, it can put strain on the internal components and cause water to escape from unintended areas.
To address issues related to excessive water pressure, consider the following steps:
- Consult the user manual or manufacturer’s guidelines to determine the recommended water pressure for your specific coffee machine model.
- If your machine has adjustable water pressure settings, ensure that it is set within the recommended range. Make any necessary adjustments accordingly.
- If you don’t have a pressure adjustment option or if the issue persists after adjusting it, you may need to install a water pressure regulator. This device can help regulate and reduce the incoming water pressure to a safe level for your coffee machine.
- Consult a professional plumber or an authorized service center if you’re unsure about installing a water pressure regulator or if you need assistance in adjusting the pressure settings.
- Monitor the machine during the brewing process after making the necessary adjustments. Ensure that no water is leaking from areas other than the intended outlets.
By maintaining the appropriate water pressure in your coffee machine, you can prevent undue stress on the internal components and minimize the risk of leaks. It’s important to note that excessive water pressure can also be a symptom of an underlying issue, such as a malfunctioning pressure release valve or a faulty pump. If adjusting the pressure does not resolve the problem, it may be necessary to seek professional assistance for further diagnosis and repair.
Wear and Tear of Internal Components
Over time, the internal components of a coffee machine can experience wear and tear, which can lead to leaks. Components such as valves, O-rings, pressure release valves, and other seals can deteriorate, compromising their ability to maintain a watertight seal.
Here are some steps to diagnose and address issues related to the wear and tear of internal components:
- Consult the user manual or manufacturer’s guidelines to identify the location of the internal components that may be causing the leak.
- Inspect the components for any signs of damage, wear, or deterioration. Look for cracks, tears, or visible degradation.
- If you notice any damaged components, contact the manufacturer or an authorized service center to inquire about replacement parts. It is crucial to use genuine replacement parts to ensure proper fit and functionality.
- Follow the manufacturer’s instructions or refer to online tutorials to replace the damaged components. Take necessary precautions and ensure the machine is disconnected from the power source before performing any repairs.
- After replacing the parts, run a test brew to ensure that the leak has been resolved. Monitor the machine during the brewing process to prevent any water from escaping from previously affected areas.
Regular maintenance and prompt replacement of worn or damaged internal components are essential for the performance and longevity of your coffee machine. By addressing these issues in a timely manner, you can prevent leaks and enjoy a hassle-free brewing experience.
How to Diagnose a Coffee Machine Leak
Diagnosing the cause of a coffee machine leak is the first step in finding a solution. By identifying the source of the leak, you can address the specific issue and prevent further water damage. Here are some steps to help you diagnose a coffee machine leak:
- Start by examining the external areas of the machine. Check for any visible signs of water pooling, dripping, or moisture around the water reservoir, portafilter, steam wand, or any other relevant areas. This can give you a clue as to where the leak is originating.
- If you’re unable to detect the source of the leak externally, carefully remove the machine’s panels or access points to inspect the internal components. Take caution and follow the manufacturer’s instructions for disassembly.
- Inspect the water lines, seals, gaskets, valves, and other internal components for any signs of damage, wear, or blockage. Look for cracks, tears, corrosion, or mineral buildup that may be causing the leak.
- Use a flashlight or magnifying glass to thoroughly examine the components for any subtle leaks or areas of water seepage. Sometimes, the source of the leak can be hidden or not immediately noticeable.
- If necessary, run a test brew while closely monitoring the machine. This can help you identify the exact moment and location of the leak.
- Take note of any unusual sounds, smells, or other indications that may accompany the leak. This information can be helpful in diagnosing potential underlying issues that need attention.
By thoroughly assessing the external and internal components of your coffee machine, you can pinpoint the source of the leak. This information will guide you in taking the appropriate steps to resolve the issue and restore your machine to its optimal functioning.
Check the water reservoir and ensure it is properly seated. If it is not in place, it can cause leaks. Also, check the seals and gaskets for any wear or damage.
Check the Water Tank Placement
One of the first steps in diagnosing a coffee machine leak is to check the placement of the water tank. A poorly positioned water tank can lead to water leaks during the brewing process. Here’s how you can check and ensure proper water tank placement:
- Remove the water tank from your coffee machine.
- Inspect the water tank and the area where it is supposed to be placed. Look for any debris, dirt, or foreign objects that could hinder a proper seal.
- Clean the tank and the designated area on the machine thoroughly. Use a damp cloth to wipe away any residue and ensure a clean surface.
- Place the water tank back onto the machine, making sure it fits securely and snugly into its designated spot.
- Check for any gaps or misalignment between the tank and the machine. If there are any uneven or loose areas, adjust the tank until it sits flush with the machine.
- Make sure that the tank is properly inserted and securely positioned. It should not wobble or shift during operation.
- If your machine has a locking mechanism for the water tank, ensure that it is engaged and holding the tank in place.
Proper water tank placement is crucial for maintaining a tight seal and preventing leaks. A loose or improperly positioned water tank can result in water escaping from the machine during the brewing process. By checking and adjusting the water tank placement, you can eliminate this possible cause of the leak and potentially resolve the issue.
Inspect Seals and Gaskets
Another step in diagnosing a coffee machine leak is to inspect the seals and gaskets. These rubber components are essential for creating a watertight seal in various areas of the machine, such as the water reservoir, portafilter, and steam wand. Here’s how you can inspect the seals and gaskets:
- Identify the locations of the seals and gaskets in your coffee machine. Refer to the user manual or manufacturer’s guidelines for assistance, if needed.
- Closely examine each seal and gasket for any visible signs of wear, cracks, tears, or deterioration. Look for any areas where the seal may be compromised.
- If you notice any damage, consider replacing the affected seals or gaskets. Contact the manufacturer or consult an authorized service center to obtain genuine replacement parts.
- Remove the damaged seals or gaskets, following the manufacturer’s instructions or using online tutorials as guidance.
- Install the new seals or gaskets, ensuring a proper fit. Pay attention to any specific instructions provided by the manufacturer.
- Once the new seals or gaskets are in place, run a test brew to check for any signs of leakage. Monitor the machine closely during the brewing process to ensure that water is not escaping from the previously affected areas.
Seals and gaskets play a crucial role in preventing leaks in a coffee machine. Over time, these components can deteriorate, leading to water leaks. By inspecting and replacing damaged seals or gaskets, you can restore the integrity of the sealing mechanism and minimize the risk of future leaks.
Clear Water Lines
Clearing the water lines is another important step in diagnosing and resolving a coffee machine leak. Over time, mineral deposits from hard water or residue from coffee grounds can accumulate and block the water lines, resulting in leaks. Here’s how you can clear the water lines:
- Turn off and unplug your coffee machine to ensure safety.
- Refer to the user manual or manufacturer’s guidelines to identify the water lines in your specific coffee machine model.
- Inspect the water lines for any visible signs of blockage, such as mineral buildup or coffee residue.
- If the blockage is mild, use a small brush or pipe cleaner to gently remove the debris. Be careful not to use abrasive tools that may damage the lines.
- Run water through the machine to flush out any remaining debris. You can do this by filling the water reservoir and allowing water to flow through the system without brewing coffee.
- If the blockage is severe or the lines are heavily clogged, you may need to use a descaling solution specifically designed for coffee machines. Follow the manufacturer’s instructions on how to use the descaling solution properly and rinse your machine thoroughly afterward.
- Once the water lines are clear, reassemble the machine and run a test brew. Monitor the machine closely during the brewing process to ensure that water is not leaking from the previously affected areas.
Regularly clearing the water lines of your coffee machine is essential for preventing clogs and blockages that can lead to leaks. It’s important to follow the manufacturer’s guidelines and use appropriate cleaning solutions to maintain the optimal performance of your machine.
Adjust Water Pressure
Adjusting the water pressure is another step you can take when diagnosing a coffee machine leak. High water pressure can put undue stress on the internal components, leading to leaks in various areas of the machine. Here’s how you can adjust the water pressure:
- Refer to the user manual or manufacturer’s guidelines to determine the recommended water pressure for your specific coffee machine model.
- If your coffee machine has adjustable water pressure settings, locate the pressure adjustment mechanism. This can typically be found near the water inlet or on the control panel.
- Depending on your machine, you may need to use a screwdriver or a knob to adjust the water pressure. Turn the adjustment mechanism clockwise to increase the pressure or counterclockwise to decrease the pressure.
- If your machine does not have adjustable water pressure settings, you may need to install a water pressure regulator. Consult a professional plumber or the manufacturer for guidance on choosing and installing the appropriate regulator.
- After making the necessary adjustments, run a test brew to see if the leak has been resolved. Monitor the machine closely during the brewing process to ensure that water is not escaping from unintended areas.
- If the leak persists or the water pressure adjustment does not seem to have an effect, it is recommended to consult a professional technician or the manufacturer for further assistance.
Adjusting the water pressure can help alleviate the strain on internal components and minimize the risk of leaks. It is important to follow the manufacturer’s guidelines and make gradual adjustments to avoid sudden changes in pressure that may cause other issues with your coffee machine.
Examine Internal Components
Examining the internal components of your coffee machine is a crucial step in diagnosing and resolving a leak. Over time, wear and tear can affect various internal parts, leading to water leaks. Here’s how you can examine the internal components:
- Turn off and unplug your coffee machine to ensure your safety.
- Refer to the user manual or manufacturer’s guidelines to locate the internal components that may be causing the leak. These can include valves, O-rings, pressure release valves, and other seals.
- Carefully inspect each component for any signs of damage, wear, or deterioration. Look for cracks, tears, corrosion, or mineral buildup.
- If you notice any damaged components, consider replacing them. Contact the manufacturer or an authorized service center to inquire about replacement parts.
- Follow the manufacturer’s instructions or consult online tutorials to properly remove and replace the damaged components. Take necessary precautions and ensure the machine is disconnected from the power source before performing any repairs.
- After replacing the necessary parts, reassemble the machine and run a test brew. Monitor the machine closely during the brewing process to ensure that water is not leaking from the previously affected areas.
- If the leak persists or you are unsure about examining or replacing internal components, it is recommended to seek professional assistance from a certified technician or the manufacturer’s service center.
Examining the internal components allows you to identify and address any issues that may be causing the leak. By replacing damaged or worn-out parts, you can restore the integrity of your coffee machine and prevent future leaks.
Tips for Preventing Coffee Machine Leaks
Preventing coffee machine leaks is essential for maintaining the functionality and longevity of your appliance. Here are some tips to help you prevent leaks and keep your coffee machine in optimal condition:
- Regularly clean and descale your coffee machine. Follow the manufacturer’s guidelines for cleaning and descaling frequency. This helps prevent mineral buildup and clogs that can lead to leaks.
- Use filtered water or a water softening system to reduce mineral deposits. Hard water can contribute to the accumulation of scale, which can block water lines and cause leaks.
- Ensure that the water tank is properly positioned and securely attached to the machine. A loose or misaligned water tank can result in leaks during brewing.
- Check the seals and gaskets regularly for signs of wear or damage. Replace them as needed to maintain a watertight seal.
- Avoid using excessive force when closing or locking the coffee machine components. Tightening them too much can damage seals and gaskets, leading to leaks.
- Do not overfill the water tank. Follow the recommended water level indicated by the machine to prevent overflowing and leaks.
- Be mindful of the brewing process. Avoid interrupting the brewing cycle or removing components while the machine is in operation, as this can cause water to escape from unintended areas.
- Keep the brewing area clean and free from coffee grounds or debris. This prevents blockages and ensures the smooth flow of water through the machine.
- Regularly inspect the external and internal components for any signs of wear, cracks, or leaks. Address any issues promptly to prevent them from worsening.
- Follow proper maintenance practices outlined in the user manual or manufacturer’s guidelines. This includes regular cleaning, descaling, and professional servicing as recommended.
By following these tips and incorporating them into your coffee machine care routine, you can minimize the risk of leaks and enjoy uninterrupted brewing for years to come. Remember, proper maintenance and attentiveness are key to preventing issues and maintaining the performance of your coffee machine.
Conclusion
A coffee machine leak can be a frustrating and troublesome issue for coffee lovers. However, by understanding the common causes and taking the necessary steps for diagnosis and prevention, you can effectively address and minimize the likelihood of leaks.
We explored several common causes of coffee machine leaks, including improper water tank placement, damaged seals or gaskets, clogged or blocked water lines, excessive water pressure, and wear and tear of internal components. Each of these factors can contribute to the occurrence of leaks, but with proper attention and maintenance, you can effectively resolve and prevent them.
When diagnosing a coffee machine leak, it is important to check the water tank placement, inspect seals and gaskets, clear water lines, adjust water pressure, and examine internal components. These steps will help you identify the source of the leak and take the necessary actions to rectify the issue.
Furthermore, by implementing preventive measures such as regular cleaning, using filtered water, maintaining proper water tank placement, and staying vigilant in inspecting and maintaining your coffee machine’s components, you can greatly reduce the likelihood of leaks in the future.
In conclusion, addressing coffee machine leaks requires a combination of troubleshooting, maintenance, and preventive measures. By following the tips outlined in this article and staying proactive in caring for your coffee machine, you can enjoy leak-free brewing and continue to savor your favorite cup of coffee day after day.
Frequently Asked Questions about Why Is My Coffee Machine Leaking
Was this page helpful?
At Storables.com, we guarantee accurate and reliable information. Our content, validated by Expert Board Contributors, is crafted following stringent Editorial Policies. We're committed to providing you with well-researched, expert-backed insights for all your informational needs.
0 thoughts on “Why Is My Coffee Machine Leaking”