Articles
Why Is My HVAC Leaking
Modified: August 16, 2024
Read our informative articles to find out why your HVAC system may be leaking and how to fix the issue. Don't let a small leak turn into a big problem!
(Many of the links in this article redirect to a specific reviewed product. Your purchase of these products through affiliate links helps to generate commission for Storables.com, at no extra cost. Learn more)
Introduction
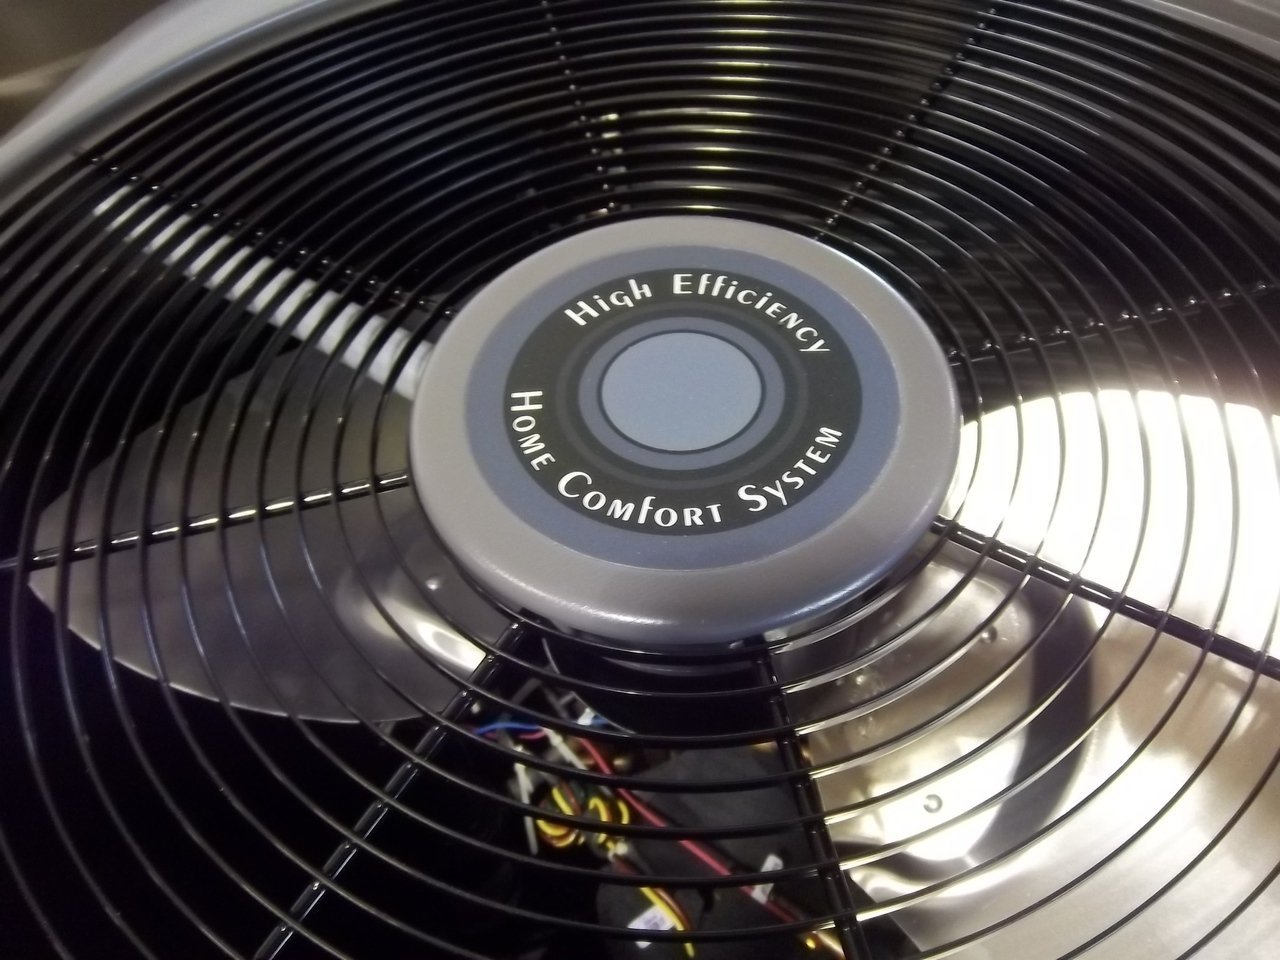
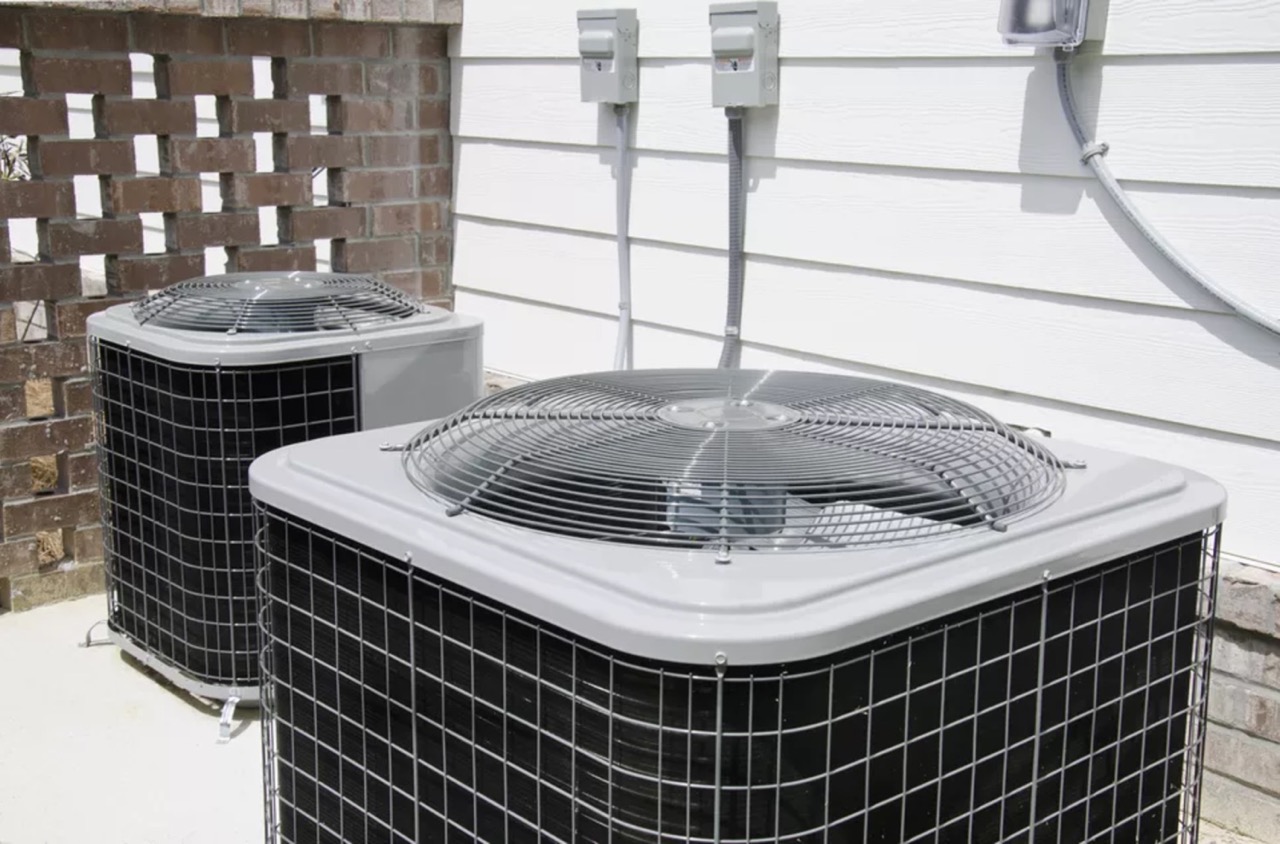
When it comes to keeping your home comfortable, your HVAC (Heating, Ventilation, and Air Conditioning) system plays a vital role. It helps regulate the temperature, improve indoor air quality, and create a comfortable living environment. However, there are times when your HVAC system may experience issues, such as leaking.
HVAC leaks can be a cause for concern, and it’s essential to understand the common causes and signs of leaks and how to address them. Addressing HVAC leaks promptly can help prevent further damage to your system and avoid potential health hazards like mold growth and water damage.
In this article, we will explore the common causes of HVAC leaks, signs that indicate a leaky system, and steps you can take to fix these issues.
Key Takeaways:
- Regular maintenance, including cleaning components, checking refrigerant levels, and ensuring proper airflow, can help prevent HVAC leaks and maintain system efficiency, ultimately saving you from potential water damage and costly repairs.
- Consulting a professional HVAC technician for proper installation, repairs, and maintenance is crucial to accurately diagnose and address HVAC leaks, ensuring a reliable, efficient, and leak-free system.
Read more: Why Is My Humidifier Leaking
Common Causes of HVAC Leaks
HVAC leaks can be caused by various factors. It’s important to identify the root cause of the leaks to fix the issue effectively. Here are some of the common causes of HVAC leaks:
- Clogged Drain Line: The drain line is responsible for carrying condensation away from the system. Over time, the drain line can become clogged with dirt, debris, or algae growth, causing water backup and leakage.
- Damaged or Clogged Condensate Pump: The condensate pump helps remove the excess condensation collected by the HVAC system. If the pump is damaged or clogged, it can result in water overflow and leaks.
- Frozen Evaporator Coil: If the airflow to the evaporator coil is restricted or the refrigerant levels are imbalanced, the evaporator coil may freeze. When the ice melts, it can lead to water leakage from the HVAC unit.
- Dirty Air Filters: When air filters are not regularly cleaned or replaced, dust and debris can accumulate. This buildup can obstruct airflow and cause the evaporator coil to freeze, resulting in leaks.
- Improper Installation or Maintenance: HVAC systems require proper installation and regular maintenance to function effectively. Poor installation or insufficient maintenance can lead to issues such as loose connections, worn-out components, or inadequate drainage, causing leaks.
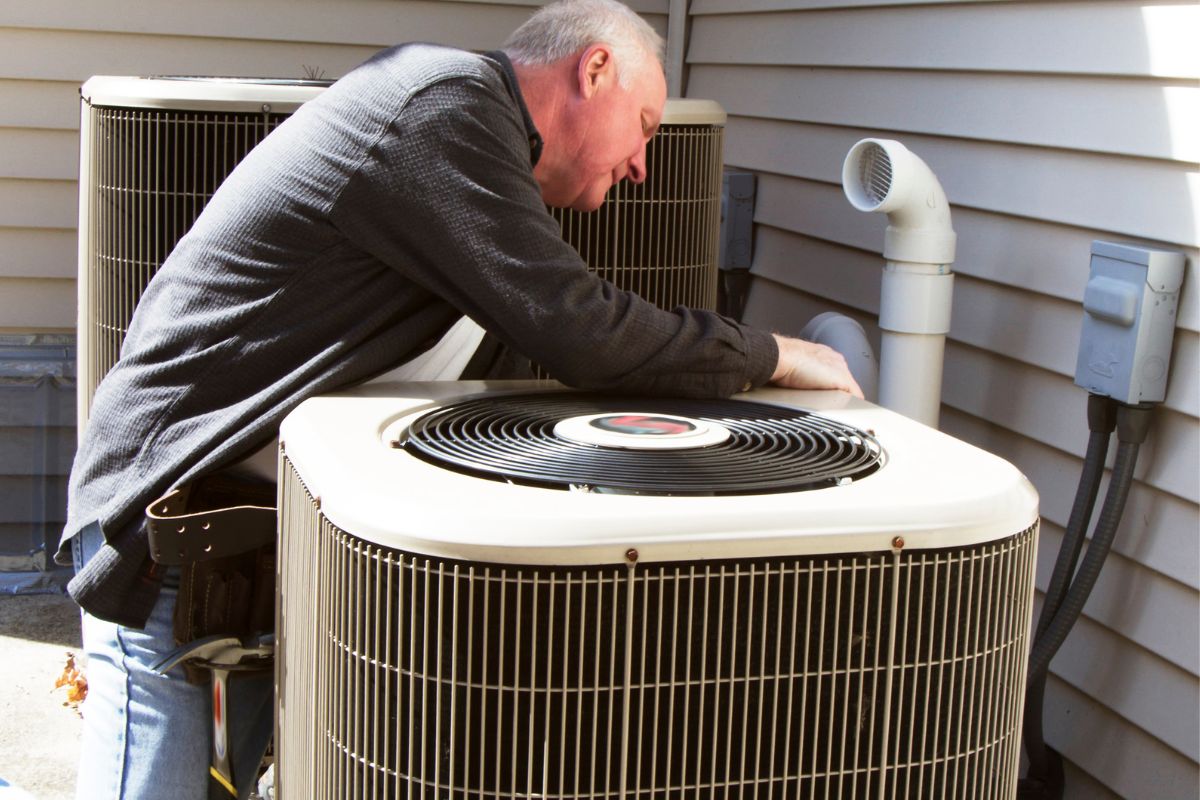
Identifying the specific cause of the HVAC leak is crucial for successful repairs. If you are unsure about the cause or unable to fix the issue on your own, it’s best to consult a professional HVAC technician.
Clogged Drain Line
A clogged drain line is one of the most common causes of HVAC leaks. The drain line is responsible for carrying condensation away from the HVAC system. Over time, dirt, debris, mold, and algae can accumulate in the drain line, causing a blockage and preventing water from flowing out.
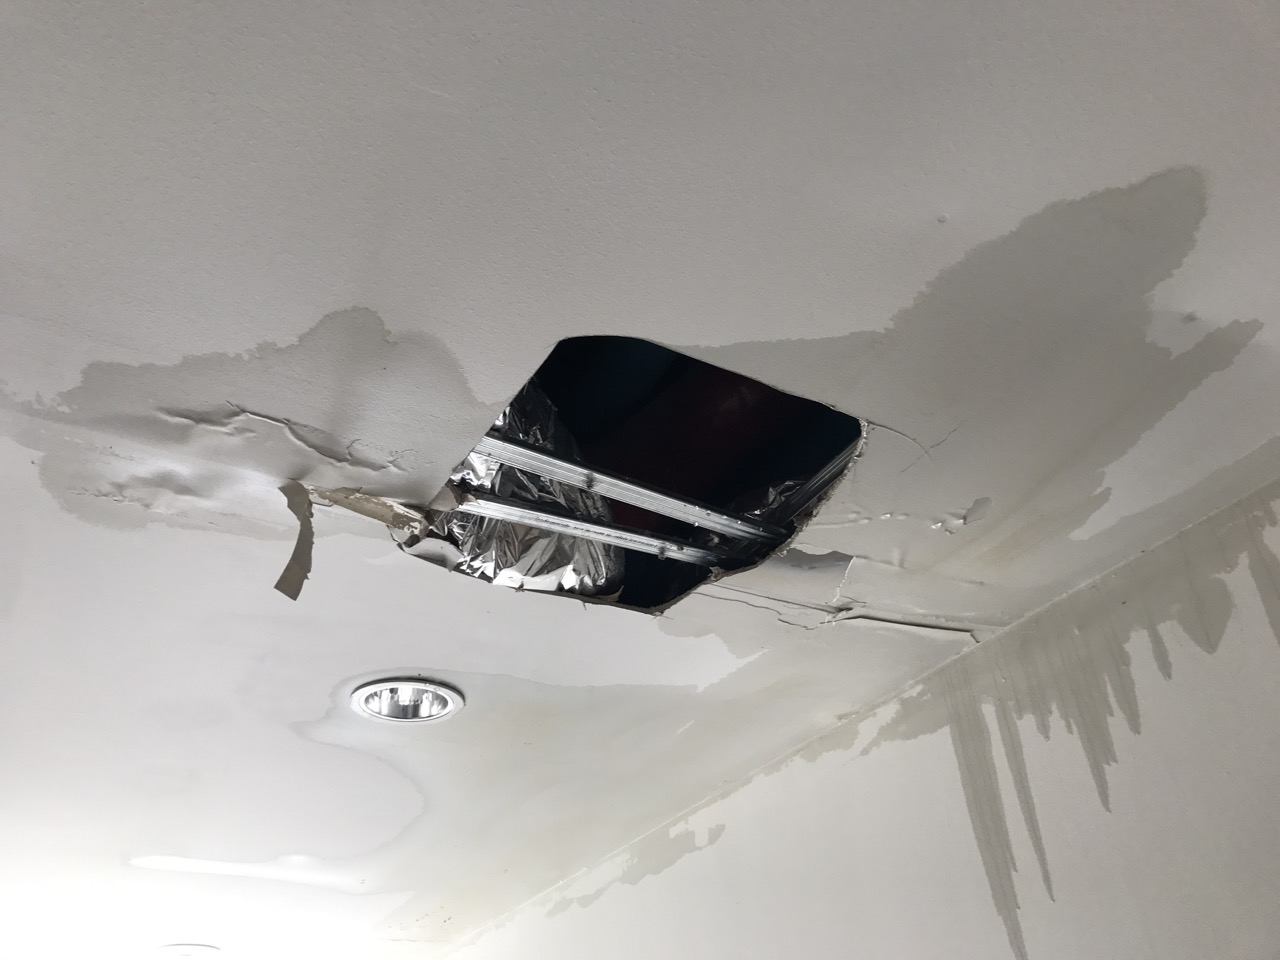
When the drain line is clogged, water can back up and overflow, leading to leaks around the HVAC unit. This can result in water damage to the surrounding area and potential mold growth if left unaddressed.
To fix a clogged drain line, you can follow these steps:
- Turn off the HVAC system: Before attempting any repairs, it’s important to turn off the power to the HVAC system to ensure your safety.
- Locate the drain line: The drain line is typically located near the indoor air handler unit or the furnace. It is a PVC pipe that extends from the HVAC system to the outside of your home.
- Remove the clog: You can use a wet/dry vacuum or a long, flexible brush to remove the debris or buildup from the drain line. It’s important to be gentle to avoid causing any damage to the pipe.
- Flush the drain line: After removing the clog, you can flush the drain line with a mixture of bleach and water to kill any mold or algae that may be present. This will help prevent future clogs and keep the drain line clean.
- Test the drain line: Once you’ve cleared the clog and flushed the drain line, you can turn the power back on and run the HVAC system to ensure that the water is flowing freely through the drain line and there are no more leaks.
If you are unsure about how to unclog the drain line or if the issue persists even after following these steps, it’s recommended to seek the assistance of a professional HVAC technician. They have the necessary tools and expertise to diagnose and resolve the problem effectively.
Damaged or Clogged Condensate Pump
A condensate pump is an important component of an HVAC system that helps remove excess condensation. It is commonly used in systems with basement or low-lying air handlers where gravity drainage is not possible. If the condensate pump is damaged or clogged, it can lead to water backup and subsequent leaks.
Here’s a step-by-step guide to fix a damaged or clogged condensate pump:
- Turn off the HVAC system: Always switch off the power supply to the HVAC system before attempting any repairs to ensure your safety.
- Locate the condensate pump: The condensate pump is typically located near the air handler unit. It is a small, box-like device connected to a drain line and an electrical power source.
- Inspect for damage: Check the condensate pump for any visible signs of damage, such as cracks, leaks, or loose connections. If any parts appear damaged, they may need to be replaced.
- Clean the pump: Remove and clean the condensate pump thoroughly. Check for any debris or buildup that may be causing a clog. You can use a soft brush or cloth to clean the pump and ensure it is free of obstructions.
- Test the pump: Once the pump is cleaned, reconnect it and turn on the power to the HVAC system. Verify that the condensate pump is working by pouring a small amount of water into the pump’s reservoir. The pump should activate and expel the water properly.
- Regular maintenance: To prevent future issues with your condensate pump, make it a habit to clean and inspect it regularly. This will help maintain its efficiency and prevent clogging or damage.
If you find that the condensate pump is severely damaged or you are unable to fix the issue on your own, it’s advisable to seek the assistance of a professional HVAC technician. They will have the expertise and knowledge to repair or replace the condensate pump as needed.
Frozen Evaporator Coil
The evaporator coil is an important component of the HVAC system that is responsible for cooling the air. When the airflow to the evaporator coil is restricted or when there is an imbalance in refrigerant levels, the coil can freeze. As the ice on the coil melts, it can result in water leakage from the HVAC unit.
If you notice that your HVAC system is leaking due to a frozen evaporator coil, here’s what you can do to address the issue:
- Turn off the HVAC system: To prevent further damage and ensure your safety, it’s crucial to turn off the power to the HVAC system.
- Allow the coil to thaw: Simply allowing the coil to thaw naturally can sometimes resolve the issue. This can take several hours, so it’s important to be patient. Place towels or a pan beneath the coil to catch any water that drips.
- Check airflow: Inspect the air filters, vents, and ductwork for any blockages or restrictions that may be hindering proper airflow. Clean or replace the air filters if necessary.
- Check for refrigerant leaks: Low refrigerant levels can contribute to the freezing of the evaporator coil. If you suspect a refrigerant leak, it is best to contact a professional HVAC technician for proper diagnosis and repair.
- Schedule maintenance: Regular maintenance is essential to ensure proper airflow and refrigerant charge. A professional HVAC technician can inspect and clean the evaporator coil, check refrigerant levels, and address any other issues that may be causing the coil to freeze.
If the issue persists even after following these steps, it’s recommended to contact a qualified HVAC technician. They can provide a more accurate diagnosis and perform any necessary repairs to prevent the evaporator coil from freezing in the future.
Read more: Why Is My Bathtub Leaking Underneath
Dirty Air Filters
Dirty air filters can contribute to HVAC leaks and other performance issues. The air filters in your HVAC system are responsible for capturing dust, debris, and other particles to prevent them from entering the system and circulating in the air. Over time, these filters can become dirty and clogged, restricting airflow and causing the evaporator coil to freeze or the condensate pan to overflow.
To address HVAC leaks caused by dirty air filters, follow these steps:
- Turn off the HVAC system: Before attempting any repairs, it’s crucial to turn off the power supply to your HVAC system.
- Locate the air filters: The filters are usually located near the air handler unit or in the return air vents. Refer to the HVAC system manual for specific instructions on accessing and removing the filters.
- Inspect and clean or replace the filters: Inspect the filters for dirt, dust, and debris buildup. If the filters are reusable, remove them and clean them according to the manufacturer’s instructions. If the filters are disposable and heavily soiled, it’s best to replace them completely with new ones.
- Reinstall the filters and turn on the HVAC system: Once the filters are clean or replaced, carefully reinstall them back into the HVAC system. Make sure they are properly secured. Then, turn on the power to the HVAC system and observe if the leaks have stopped.
- Maintain regular filter maintenance: To prevent future leaks and ensure optimal HVAC performance, make it a habit to clean or replace the air filters on a regular basis. The frequency of filter maintenance depend on factors such as filter type, household pets, and indoor air quality.
Keeping the air filters clean and maintaining regular filter maintenance can significantly improve the performance and efficiency of your HVAC system while minimizing the risk of leaks. If you have difficulty accessing or cleaning the filters, or if the HVAC leaks persist even after filter maintenance, it’s recommended to consult a qualified HVAC technician for further assistance.
Improper Installation or Maintenance
Improper installation or maintenance of an HVAC system can lead to various issues, including leaks. It’s crucial to ensure that your HVAC system is installed correctly and undergoes regular maintenance to prevent leaks and other problems from occurring.
Here are some steps to address HVAC leaks caused by improper installation or maintenance:
- Consult a professional: If you suspect that your HVAC system was improperly installed or maintained, it’s best to consult a professional HVAC technician. They can assess the system and identify any installation or maintenance issues that may be contributing to the leaks.
- Verify proper installation: A professional technician can inspect the HVAC system for any installation errors, such as loose connections, improper drainage, or incorrect placement of components. They will ensure that the system is installed to industry standards and manufacturer specifications.
- Schedule regular maintenance: Regular HVAC maintenance is essential to maintain the system’s performance and prevent leaks. A professional technician can perform routine maintenance tasks such as cleaning coils, checking refrigerant levels, lubricating moving parts, and ensuring proper airflow.
- Replace worn-out components: If any components of your HVAC system are worn-out or damaged, it’s important to have them replaced. This can include faulty valves, worn-out gaskets, or damaged drainage pipes. Replacing these components will help prevent leaks and ensure the system functions properly.
- Follow manufacturer guidelines: Adhere to the manufacturer’s guidelines for maintenance and operation of your HVAC system. This includes using the recommended filters, cleaning the system as advised, and scheduling professional maintenance at regular intervals.
By addressing any installation or maintenance issues and following proper procedures, you can minimize the risk of leaks and ensure that your HVAC system operates efficiently and effectively.
If you suspect that improper installation or maintenance is causing your HVAC leaks, it’s strongly recommended to seek the assistance of a professional HVAC technician. They have the expertise and knowledge to diagnose the issue accurately and provide the necessary solutions.
Signs of HVAC Leaks
Identifying the signs of HVAC leaks early can help prevent further damage and potentially costly repairs. Here are some common signs that indicate your HVAC system may be leaking:
- Water stains or puddles around the unit: If you notice water stains or puddles around your HVAC unit, it is a strong indicator of a leak. These stains or puddles may be present near the air handler, condenser, or the drain line.
- Strange odors or musty smells: A musty or unpleasant odor emanating from your HVAC system or the surrounding area can indicate mold or mildew growth, which often occurs as a result of water leakage. These odors can impact your indoor air quality and should be addressed promptly.
- Decreased cooling or heating efficiency: Leaks in the HVAC system can cause a decrease in cooling or heating efficiency. If you notice that your HVAC system is taking longer to cool or heat your home, or if there are noticeable temperature variations, it may be due to leaks affecting the system’s performance.
- Unusual noises: Leaks in the HVAC system can result in unusual sounds, such as dripping or gurgling noises. If you hear these sounds coming from the HVAC unit, it’s likely there’s a leak that requires attention.
- Increase in water bills: A sudden increase in your water bills without any other explanation may be a result of a hidden HVAC leak. Leaks in the system can waste water and lead to higher water consumption.
If you notice any of these signs, it’s important to investigate and address the issue promptly to prevent further damage to your HVAC system or your property.
Keep in mind that while these signs are indicative of HVAC leaks, a professional inspection is always recommended to determine the precise cause and location of the leaks. A qualified HVAC technician will be able to assess your system and provide the necessary repairs or maintenance to resolve the leaks effectively.
Water Stains or Puddles Around the Unit
One of the most obvious signs of an HVAC leak is the presence of water stains or puddles around the unit. If you notice water accumulating near your HVAC system, it is a strong indication that there is a leak that needs to be addressed.
Here’s what you can do if you observe water stains or puddles around your HVAC unit:
- Inspect the drain line: The first step is to check the drain line, which is responsible for carrying condensation away from the system. A clogged or damaged drain line can cause water to back up and result in leaks. If you notice any blockages or obstructions in the drain line, clear them out carefully to restore proper drainage.
- Check the condensate pan: The condensate pan is located beneath the evaporator coil, and it collects the excess moisture that is removed from the air. If the pan is damaged, rusted, or overflowing, it can lead to water leaks. Inspect the pan for any signs of damage and clean it if necessary. In some cases, the pan may need to be replaced.
- Examine the connections: Leaks can also occur due to loose or damaged connections in the HVAC system. Inspect all the connections and fittings around the unit, including the pipes, hoses, and valves. Tighten any loose connections or replace damaged parts to ensure a secure and watertight seal.
- Look for ice buildup: In some cases, a frozen evaporator coil can cause water leaks when it melts. If you notice excessive ice buildup on the evaporator coil, it indicates a problem with airflow or refrigerant levels. Thawing the coil and addressing the underlying issue can help prevent further leaks.
- Consult a professional technician: If you are unable to identify the source of the leak or if the issue persists after attempting these basic troubleshooting steps, it’s best to consult a professional HVAC technician. They have the knowledge and expertise to diagnose and repair the leak accurately.
Water stains or puddles around your HVAC unit should never be ignored, as they can lead to water damage, mold growth, and further complications if left unresolved. It’s important to address the issue promptly to protect your HVAC system and maintain a safe and comfortable indoor environment.
Regularly check and clean the condensate drain line to prevent clogs and potential leaks in your HVAC system. This simple maintenance task can help avoid water damage and costly repairs.
Read more: Why Is My Water Pump Leaking
Strange Odors or Musty Smells
Strange odors or musty smells emanating from your HVAC system or the surrounding area can indicate the presence of water leaks. These odors are often caused by mold or mildew growth, which thrive in moist environments.
If you notice unusual odors coming from your HVAC system, here are some steps you can take to address the issue:
- Inspect for visible signs of mold or mildew: Check the visible areas around your HVAC system, such as the air handler, ductwork, and vents for any signs of mold or mildew growth. This can include black or green patches, a fuzzy or slimy texture, or a musty odor in those areas.
- Check for water leaks: Water leaks can contribute to mold and mildew growth. Inspect the areas around your HVAC unit for any signs of water stains, puddles, or dampness. If you find any, it indicates a potential leak that needs to be addressed.
- Clean the affected area: If you discover mold or mildew growth, clean the affected area immediately. Use a mixture of bleach and water or a commercial mold and mildew cleaner to kill the spores and remove any visible mold or mildew. Wear protective gloves and a mask to prevent exposure to allergens and harmful substances.
- Improve ventilation: Proper ventilation plays a crucial role in reducing moisture levels and preventing the growth of mold or mildew. Ensure that your HVAC system is providing adequate ventilation throughout your home or office. Consider using exhaust fans in bathrooms and kitchens to expel excess moisture.
- Address the underlying issue: Mold and mildew growth is often a result of excess moisture caused by water leaks. Identify and fix the source of the leak to prevent further mold growth. This may involve unclogging or repairing the drain lines, fixing damaged components, or improving the system’s drainage system.
- Consult a professional: If you are unable to locate the source of the odor or if the mold growth persists, it’s advisable to consult a professional HVAC technician. They can perform a thorough inspection, identify the underlying issues, and provide appropriate solutions to address the odor problem effectively.
Strange odors or musty smells should not be ignored, as they can indicate potential water leaks and mold growth. Taking prompt action to resolve the issue will help maintain a healthy and comfortable indoor environment.
Decreased Cooling or Heating Efficiency
If you notice a decrease in the cooling or heating efficiency of your HVAC system, it could be a sign of water leaks affecting its performance. Leaks can disrupt the proper functioning of the system, resulting in reduced efficiency and compromised comfort levels in your home or office.
If you suspect that water leaks are causing the decreased efficiency of your HVAC system, here’s what you can do:
- Check for visible signs of leaks: Inspect the area around your HVAC unit for any signs of water stains, puddles, or dampness. Leaks can occur from the air handler, condenser, or other components of the system, leading to reduced efficiency.
- Examine the air filters: Dirty or clogged air filters can restrict airflow to the HVAC system, causing it to work harder and reducing its overall efficiency. Check the filters and clean or replace them if necessary. This simple maintenance task can improve the performance of your HVAC system.
- Inspect the evaporator coil: The evaporator coil plays a critical role in the cooling process of your HVAC system. A frozen or dirty evaporator coil can hinder its efficiency. Check for any signs of ice buildup or dirt accumulation on the coil and clean it if necessary. If the coil appears damaged, it may need professional attention.
- Address any refrigerant leaks: Refrigerant leaks can cause a decrease in cooling or heating efficiency. If you suspect a refrigerant leak, it’s important to contact a professional HVAC technician. They have the expertise to diagnose and repair refrigerant leaks, ensuring optimal performance of your system.
- Consider professional maintenance: Regular professional maintenance is essential to maintain the efficiency of your HVAC system. A technician can inspect and clean the system, check refrigerant levels, clean the evaporator coil, and identify any potential leaks or issues that may be affecting the efficiency of your system.
- Consult a professional: If you have exhausted the basic troubleshooting steps and the decreased efficiency of your HVAC system persists, it’s best to consult a professional HVAC technician. They can perform a thorough inspection, identify the underlying causes, and provide the necessary solutions to restore the efficiency of your system.
Decreased cooling or heating efficiency can impact the comfort of your indoor space and lead to increased energy consumption. By addressing water leaks and conducting regular maintenance, you can improve the performance and efficiency of your HVAC system while enjoying optimal comfort.
Steps to Fix HVAC Leaks
If you discover leaks in your HVAC system, it’s essential to take immediate action to prevent further damage and ensure the efficient operation of your system. Here are steps you can follow to fix HVAC leaks:
- Turn off the HVAC system: Before attempting any repairs, shut off the power to the HVAC system. This ensures your safety while you work on the system.
- Identify the source of the leak: Carefully inspect the HVAC unit to determine the source of the leak. Common areas where leaks occur include the air handler, condenser, ductwork, drain lines, or components like the condensate pump or evaporator coil.
- Check and clean the drain line: Clogged drain lines are a common cause of HVAC leaks. Locate the drain line and remove any blockages or debris that may be obstructing the flow of water. Use a wet/dry vacuum or a long brush to clear the line. Flush the drain line with a mixture of bleach and water to remove any mold or algae buildup.
- Inspect and clean the condensate pump: If your HVAC system has a condensate pump, check it for damage or signs of clogs. Clean the pump and ensure it is functioning properly. Replace any damaged or dysfunctional parts, if necessary.
- Thaw a frozen evaporator coil: If the evaporator coil is frozen, turn off the HVAC system and allow the coil to thaw naturally. Use fans or gentle heat to expedite the thawing process. Once thawed, check for any underlying issues that may have caused the freezing, such as low refrigerant levels or airflow restrictions.
- Replace dirty air filters: Dirty air filters can contribute to HVAC leaks and reduced efficiency. Remove and replace dirty air filters regularly to ensure proper airflow and prevent debris from entering the system.
- Consult a professional for proper installation or maintenance: If the leaks persist or you’re unsure about the cause of the leaks, it’s best to consult a professional HVAC technician. They have the expertise and knowledge to diagnose and repair the issue effectively. They can also provide guidance on proper installation or regular maintenance to prevent future leaks.
Remember, HVAC repairs can be complex, and it is crucial to exercise caution when working with electrical components or dealing with refrigerant. If you are unsure or uncomfortable performing any of these steps, it is always recommended to seek the assistance of a qualified HVAC technician to ensure the safety of yourself and your system.
By following these steps and addressing HVAC leaks promptly, you can restore the functionality and efficiency of your HVAC system, prevent further damage, and maintain a comfortable indoor environment.
Check and Clean the Drain Line
A clogged drain line is a common cause of HVAC leaks. The drain line is responsible for carrying condensation away from the HVAC system. Over time, the drain line can become clogged with dirt, debris, or algae growth, causing water backup and leakage.
Here are the steps to check and clean the drain line of your HVAC system:
- Turn off the HVAC system: Before starting any maintenance work, it’s important to turn off the power supply to the HVAC system. This will ensure your safety while working on the drain line.
- Locate the drain line: The drain line is typically a PVC pipe that extends from the HVAC unit to the outside of your home. It is usually located near the indoor air handler or furnace.
- Inspect the drain line: Check the drain line for any visible signs of clogs or blockages. Look for areas where there might be dirt buildup or algae growth. A clogged or obstructed drain line will prevent water from flowing properly and can lead to leaks.
- Remove the clog: If you notice a clog in the drain line, there are several ways to clear it. You can use a wet/dry vacuum to suck out the clog from the line. Alternatively, you can use a long, flexible brush to dislodge the clog and push it out of the line.
- Flush the drain line: Once the clog is removed, it’s important to flush the drain line to ensure it is clear of any remaining debris. Mix a solution of equal parts bleach and water and pour it into the drain line. This will help kill any remaining bacteria or algae and keep the line clean.
- Test the drain line: After cleaning, turn on the power to the HVAC system and run it for a few minutes. Observe the drain line for any signs of water flowing freely. Check if there are any leaks or water pooling around the HVAC unit. If the drain line is clear, the water should flow smoothly and not back up into the system.
Regularly checking and cleaning the drain line of your HVAC system is essential to prevent leaks and ensure proper functionality. By following these steps, you can maintain a clear and efficient drain line, reducing the risk of water damage and maintaining the performance of your HVAC system.
Read more: Why Is My Basement Ceiling Leaking
Inspect and Clean the Condensate Pump
The condensate pump is an important component of an HVAC system that helps remove excess condensation. It is commonly used in systems with basements or low-lying air handlers where gravity drainage is not possible. If the condensate pump is damaged or clogged, it can lead to water backup and subsequent leaks.
To inspect and clean the condensate pump, follow these steps:
- Turn off the HVAC system: Before beginning any maintenance work, it’s important to turn off the power supply to the HVAC system. This ensures your safety while inspecting and cleaning the condensate pump.
- Locate the condensate pump: The condensate pump is typically located near the air handler unit. It is a small, box-like device connected to a drain line and an electrical power source.
- Inspect the pump for damage: Carefully examine the condensate pump for any signs of damage, such as cracks, leaks, or loose connections. Check the power cord to ensure it is securely connected. If any parts appear damaged, they may need to be replaced.
- Clean the pump: Remove the condensate pump from its location and clean it thoroughly. Use a soft brush or cloth to remove any dirt, dust, or debris that may have accumulated on the pump. Pay attention to the intake and discharge areas, as these are common areas for clogs.
- Check the drain line: While inspecting the condensate pump, also check the drain line connected to it. Clear any debris or obstructions in the drain line to ensure proper water flow. A clogged drain line can cause the condensate pump to malfunction.
- Test the pump: After cleaning, reinstall the condensate pump and reconnect it to the power source. Pour a small amount of water into the condensate pump’s reservoir to test its functionality. The pump should activate and expel the water properly. If the pump doesn’t work or there are still issues, it may need to be repaired or replaced.
Cleaning and inspecting the condensate pump regularly is crucial to ensure it functions properly and prevents water backup and leaks. By following these steps, you can maintain the performance and reliability of your HVAC system and minimize the risk of leaks caused by a damaged or clogged condensate pump.
Thaw a Frozen Evaporator Coil
A frozen evaporator coil can cause water leaks and reduce the efficiency of your HVAC system. When the airflow to the evaporator coil is restricted or the refrigerant levels are imbalanced, ice can form on the coil. Thawing the coil is crucial to prevent further damage and restore the proper function of the system.
To thaw a frozen evaporator coil, follow these steps:
- Turn off the HVAC system: Shut off the power to the HVAC system to ensure your safety while working on the frozen evaporator coil.
- Allow the coil to thaw naturally: Simply turning off the system and letting the coil thaw naturally is often enough to resolve the issue. This process can take several hours, so be patient and wait for all the ice to melt. Place towels or a pan beneath the coil to catch any water that drips.
- Improve airflow: Once the coil is thawed, check for any obstructions that may have contributed to the freezing. Inspect the air filters, vents, and ductwork for any blockages or restrictions. Clean or replace dirty air filters and ensure proper airflow throughout the system.
- Check refrigerant levels: Low refrigerant levels can also cause the evaporator coil to freeze. If you suspect a refrigerant leak, it’s best to contact a professional HVAC technician. They have the tools and expertise to diagnose and repair any leaks.
- Schedule regular maintenance: Regular maintenance is essential for the optimal performance of your HVAC system. A professional technician can clean the evaporator coil, check refrigerant levels, and inspect the system for any issues that may lead to future freeze-ups.
- Monitor the system: Once the evaporator coil is thawed and the system is running again, keep an eye on it to ensure there are no further freezing issues. If the problem persists or recurs frequently, it’s important to consult a professional technician for a thorough inspection and proper diagnosis.
Thawing a frozen evaporator coil is essential to restore the efficiency and functionality of your HVAC system. By following these steps and addressing any underlying issues, you can prevent future freeze-ups and ensure a reliable, leak-free operation of your HVAC system.
Replace Dirty Air Filters
Dirty air filters can contribute to HVAC leaks and reduce the efficiency of your system. Air filters are responsible for capturing dust, debris, and other particles to prevent them from entering the HVAC system. Over time, these filters can become clogged and dirty, hindering proper airflow and leading to various issues, including water leaks.
To replace dirty air filters, follow these steps:
- Turn off the HVAC system: Before replacing the air filters, it’s important to turn off the power supply to the HVAC system. This will ensure your safety during the replacement process.
- Locate the air filters: The air filters are usually located near the air handler unit or in the return air vents. Refer to the HVAC system manual or consult a professional technician if you are unsure about their exact location.
- Inspect the air filters: Remove the air filters from the system and inspect them for dirt, dust, and debris buildup. If the filters are visibly dirty or clogged, it’s time to replace them. Additionally, pay attention to any signs of damage, such as tears or holes, which may indicate the need for immediate replacement.
- Find the right replacements: Determine the correct type and size of air filters for your HVAC system. Air filters come in various sizes and efficiencies, so it’s important to choose the right ones that are compatible with your system. Consult the HVAC system manual or seek professional advice if you are unsure about the appropriate filters to use.
- Install the new filters: Carefully insert the new air filters into their designated slots, ensuring they are properly aligned and securely placed. Follow the arrows or markings on the filters to ensure they are facing the correct direction for airflow.
- Dispose of the old filters: Properly dispose of the old air filters. If the filters are reusable and in relatively good condition, you may consider cleaning them according to the manufacturer’s instructions for future use. However, filters that are heavily soiled or damaged should be discarded and replaced.
- Regularly replace air filters: To maintain optimal performance and prevent HVAC leaks, it’s important to establish a regular schedule for replacing your air filters. The frequency of replacement depends on several factors, such as filter type, household pets, and indoor air quality. Consult the manufacturer’s guidelines or a professional technician for recommendations specific to your system.
Regularly replacing dirty air filters will improve the indoor air quality, enhance the efficiency of your HVAC system, and reduce the risk of leaks. By following these steps, you can ensure proper airflow and maintain a clean and healthy indoor environment.
Consult a Professional for Proper Installation or Maintenance
Proper installation and maintenance are critical for the optimal performance and longevity of your HVAC system. If you are experiencing HVAC leaks or suspect issues with your system, it’s essential to consult a professional HVAC technician for expert assistance. They have the knowledge, experience, and specialized tools to address installation or maintenance problems effectively.
Here are a few reasons why consulting a professional is important:
HVAC leaks can have various underlying causes, and it can be challenging to pinpoint the exact issue without proper expertise. A professional technician can conduct a thorough inspection, identify the source of the leaks, and provide an accurate diagnosis. HVAC systems are complex, and attempting repairs or adjustments without adequate knowledge can worsen the problem or lead to additional issues. A qualified technician will have the skills and tools necessary to make the correct repairs or adjustments, ensuring that your system operates efficiently and leak-free. Regular maintenance is crucial for preventing HVAC leaks and ensuring that your system functions optimally. A professional technician will have a comprehensive understanding of the maintenance tasks required for your specific system. They can perform tasks such as cleaning components, lubricating moving parts, checking and adjusting refrigerant levels, and inspecting electrical connections with precision. HVAC systems must comply with local building codes and industry standards. A professional technician will have up-to-date knowledge of these codes and standards, ensuring that your system is installed and maintained in accordance with the regulations for safety and performance. If your HVAC system is still under warranty, attempting DIY repairs or maintenance without professional guidance could void the warranty. Consulting a professional technician ensures that any work performed on your HVAC system is within the terms of the warranty, protecting your investment. While hiring a professional technician may involve upfront costs, it can save you money in the long run. They can identify and resolve HVAC leaks and other issues promptly, preventing further damage and potential costly repairs down the line. A well-maintained HVAC system also operates more efficiently, leading to energy savings over time.
When it comes to HVAC leaks, it’s advisable to consult a professional technician for proper installation, repairs, and maintenance. They have the expertise and experience to address issues effectively, providing you with a reliable, efficient, and leak-free HVAC system.
Read more: Why Is My Coffee Machine Leaking
Conclusion
HVAC leaks can be a cause for concern as they can lead to water damage, mold growth, and compromised system performance. However, by understanding the common causes of HVAC leaks and taking appropriate steps to address them, you can prevent further damage and maintain the functionality of your system.
In this article, we explored common causes of HVAC leaks, including clogged drain lines, damaged or clogged condensate pumps, frozen evaporator coils, dirty air filters, and improper installation or maintenance. We also discussed the signs that indicate HVAC leaks, such as water stains, strange odors, decreased cooling or heating efficiency, and increased water bills.
To fix HVAC leaks, it’s important to follow proper steps. These steps include checking and cleaning the drain line, inspecting and cleaning the condensate pump, thawing a frozen evaporator coil, replacing dirty air filters, and consulting a professional for proper installation or maintenance.
Remember, addressing HVAC leaks promptly is crucial to prevent further damage to your system and avoid potential health and financial implications. Regular maintenance, including cleaning components, checking refrigerant levels, and ensuring proper airflow, can help prevent leaks and keep your system running efficiently.
If you are unsure about how to address HVAC leaks or if the issue persists after attempting some troubleshooting steps, it’s best to consult a professional HVAC technician. They have the expertise and knowledge to diagnose and repair the issue effectively.
By being proactive in maintaining your HVAC system and addressing leaks promptly, you can ensure a comfortable and healthy indoor environment while maximizing the lifespan and efficiency of your HVAC system.
Frequently Asked Questions about Why Is My HVAC Leaking
Was this page helpful?
At Storables.com, we guarantee accurate and reliable information. Our content, validated by Expert Board Contributors, is crafted following stringent Editorial Policies. We're committed to providing you with well-researched, expert-backed insights for all your informational needs.

0 thoughts on “Why Is My HVAC Leaking”