Articles
Why Is My Humidifier Leaking
Modified: October 20, 2024
Get answers to your questions about why your humidifier might be leaking. Read informative articles to troubleshoot and fix the issue.
(Many of the links in this article redirect to a specific reviewed product. Your purchase of these products through affiliate links helps to generate commission for Storables.com, at no extra cost. Learn more)
Introduction
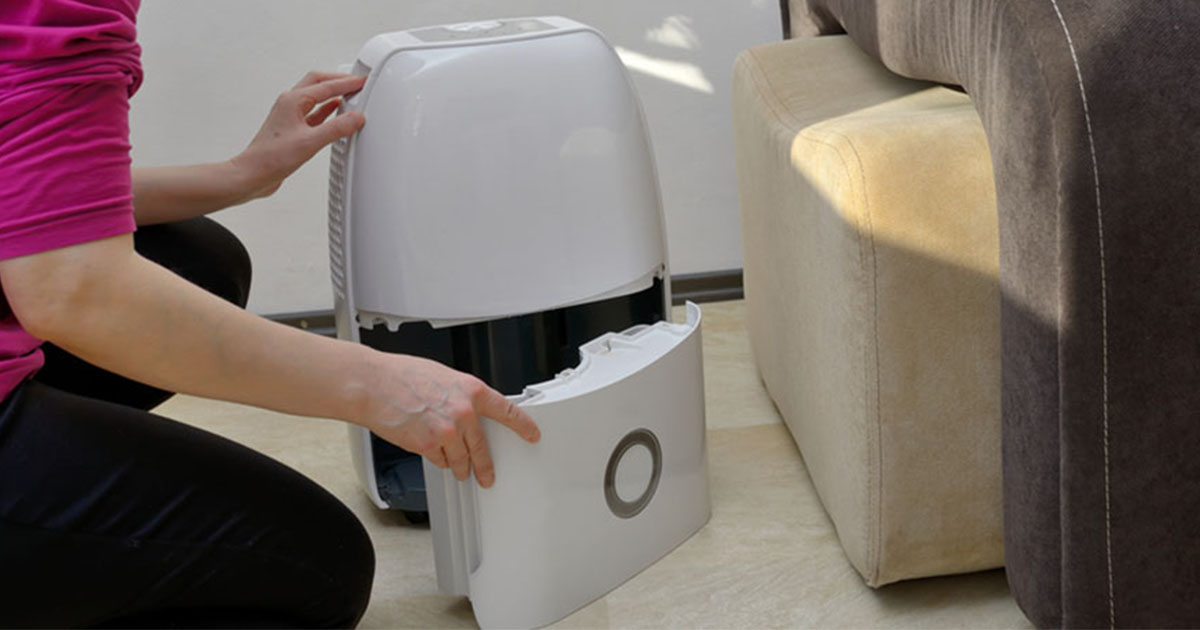
Humidifiers are essential appliances that help improve the air quality in our homes and provide a range of health benefits. They add moisture to the air, which can help alleviate dry skin, soothe respiratory issues, and reduce allergy symptoms. However, there are instances when a humidifier may start leaking, causing frustration and potentially damaging your surroundings.
In this article, we will explore the common causes of humidifier leaks and provide troubleshooting steps to help you address the issue. By understanding the reasons behind the leaks and how to fix them, you can ensure that your humidifier remains efficient and reliable.
Before we delve into the causes and solutions, let’s briefly understand how a humidifier functions to create the desired humidity levels in your home.
Key Takeaways:
- Troubleshooting common causes of humidifier leaks, such as adjusting water levels and inspecting components, can help maintain a leak-free and efficient humidifier, ensuring optimal air quality and health benefits.
- Regular maintenance, proper assembly, and timely repairs of humidifiers can prevent leaks, prolong the appliance’s lifespan, and contribute to a comfortable and healthy living environment.
Read more: Why Is My Humidifier Not Working
Understanding the Humidifier’s Function
A humidifier is a device that increases moisture levels in the air by dispersing water vapor. It consists of a water reservoir, a mechanism to create water vapor, and a fan or blower to distribute the moisture into the surrounding environment. There are various types of humidifiers available, including cool mist humidifiers, warm mist humidifiers, and ultrasonic humidifiers.
Cool mist humidifiers work by using a fan to blow air over a wick or filter soaked in water, creating a fine mist that is released into the air. Warm mist humidifiers, on the other hand, use a heating element to boil the water and release warm steam. Ultrasonic humidifiers produce moisture through ultrasonic vibrations that break water particles into a fine mist. Regardless of the type, all humidifiers operate with the same goal of increasing humidity levels in a controlled manner.
Humidifiers have various settings to adjust the moisture output, allowing you to customize the humidity levels to your comfort. However, it is crucial to maintain the proper humidity balance in your home to avoid excessive moisture, which can lead to mold growth or damage to furniture and other materials.
Now that we understand the basic function of a humidifier, let’s explore the common causes of leaks and how to troubleshoot them effectively.
Common Causes of Humidifier Leaks
Humidifier leaks can occur due to various reasons. It’s important to identify the cause of the leak to effectively address the issue. Here are the most common causes of humidifier leaks:
- Improper Water Level: One of the main causes of humidifier leaks is an improper water level. If the water level is too high, it can overflow and cause the humidifier to leak. Conversely, if the water level is too low, it can result in air escaping and causing leaks. Maintaining the recommended water level is crucial to prevent leaks.
- Damaged Water Tank: A cracked or damaged water tank can lead to leaks. Over time, the water tank may wear out and develop cracks or other forms of damage. Inspect the water tank regularly for any signs of damage and replace it if necessary.
- Clogged Drainage Tube: The drainage tube is responsible for removing excess water from the humidifier. If the drainage tube becomes clogged with mineral deposits or debris, the water can back up and cause leaks. Regularly cleaning and clearing the drainage tube can prevent this issue.
- Faulty Water Valve: The water valve controls the flow of water into the humidifier. If the valve is faulty or worn out, it can lead to leaks. Inspect the water valve for any signs of damage or malfunction and replace it if needed.
- Broken Humidifier Seal: The humidifier seal ensures that there is a tight seal between the water tank and the base of the humidifier. If the seal is broken or damaged, it can result in leaks. Check the seal and replace it if necessary.
- Incorrect Assembly: If the humidifier is not assembled correctly, it can lead to leaks. Make sure that all components, such as the water tank and base, are properly aligned and securely fastened. Improper assembly can cause gaps or loose connections that result in leaks.
By understanding these common causes of humidifier leaks, you can now move on to troubleshooting steps to address the issue effectively. Let’s explore the steps to take in the next section.
Improper Water Level
One of the most common causes of humidifier leaks is an improper water level. If the water level is too high, it can overflow and cause the humidifier to leak. On the other hand, if the water level is too low, it can result in air escaping and causing leaks.
To fix this issue, follow these troubleshooting steps:
- Check the water level: Begin by shutting off the humidifier and unplugging it from the power source. Carefully remove the water tank and check the water level. It should be at or slightly below the maximum fill line indicated on the tank.
- Adjust the water level: If the water level is too high, carefully pour out excess water until it reaches the appropriate level. If the water level is too low, add water to bring it up to the correct level. Ensure that you are using clean, distilled water to prevent mineral buildup and other issues.
- Replace any damaged parts: Inspect the water tank and other components for any cracks or damage. If you notice any issues, replace the damaged parts to ensure proper functioning and avoid further leaks.
- Regularly monitor water level: To prevent future leaks, it’s important to regularly monitor the water level in your humidifier. Check it daily and adjust as needed to maintain the right level and prevent overflow or air leakage.
By adjusting the water level and monitoring it regularly, you can ensure that your humidifier operates efficiently without any leaks caused by improper water levels.
Damaged Water Tank
A damaged water tank is another common cause of humidifier leaks. Over time, the water tank may develop cracks or other forms of damage, resulting in water leakage. It’s essential to address this issue to prevent further damage and maintain the performance of your humidifier.
Here are the steps to troubleshoot and fix a damaged water tank:
- Inspect the water tank: Start by turning off the humidifier and disconnecting it from the power source. Carefully remove the water tank and inspect it for any visible cracks, chips, or other damage. Pay attention to the corners and edges, as these areas are more prone to damage.
- Repair or replace the water tank: If you notice any damage to the water tank, determine whether it can be repaired or if it needs to be replaced. Minor cracks or chips can sometimes be repaired using waterproof sealants or adhesives specifically designed for plastic. However, if the damage is significant, it’s best to replace the water tank altogether to ensure proper functioning and prevent leaks.
- Follow manufacturer’s instructions: When repairing or replacing the water tank, refer to the manufacturer’s instructions for guidance. They may provide specific steps or recommendations based on the model of your humidifier. Make sure to use the appropriate tools and materials.
- Ensure proper installation: When installing the repaired or new water tank, ensure it is properly aligned and securely fastened to the base of the humidifier. An improper installation can lead to leaks, even with a repaired or replaced water tank.
- Monitor for leaks: After repairing or replacing the water tank, monitor the humidifier for any signs of leaks. Run the humidifier for a short period, and check if water is properly contained within the tank without any leakage. If you notice any leaks, double-check the installation or consider seeking professional assistance.
By inspecting and addressing any damage to the water tank, you can effectively resolve leaks and ensure the proper functioning of your humidifier.
Read more: Why Is My HVAC Leaking
Clogged Drainage Tube
A clogged drainage tube is a common issue that can lead to humidifier leaks. The drainage tube is responsible for removing excess water from the humidifier. If it becomes clogged with mineral deposits or debris, the water can back up and cause leaks.
To troubleshoot and resolve a clogged drainage tube, follow these steps:
- Turn off the humidifier: Start by turning off the humidifier and unplugging it from the power source. This will ensure your safety while troubleshooting and prevent any further leaks.
- Locate the drainage tube: Identify where the drainage tube is located in your humidifier. It is usually connected to the base of the unit and leads to a drain or collection tray.
- Disconnect and clean the drainage tube: Carefully disconnect the drainage tube from the base of the humidifier. Check for any visible blockages or buildup inside the tube. If you notice any debris or mineral deposits, gently clean the tube using a mixture of water and vinegar or a mild cleaning solution. Use a soft brush or cloth to remove the clogs or deposits.
- Flush the tube: After cleaning, flush the drainage tube with clean water to ensure all the debris or cleaning solution is rinsed out thoroughly.
- Reconnect the drainage tube: Once the drainage tube is clean and clear, reconnect it securely to the base of the humidifier. Ensure that it is properly aligned and tightly fastened.
- Test for leaks: Turn on the humidifier and let it run for a while. Monitor the drainage tube and check for any signs of leaks. If there are no leaks, the clog was likely the cause of the issue, and your humidifier should now work smoothly.
Regularly cleaning and maintaining the drainage tube can help prevent clogs and subsequent leaks. It is recommended to clean the tube every few months or more frequently if you notice any decrease in the performance of your humidifier.
Faulty Water Valve
A faulty water valve is another common cause of humidifier leaks. The water valve controls the flow of water into the humidifier, and if it is malfunctioning or worn out, it can lead to leaks. Addressing this issue is essential to ensure the proper operation of your humidifier and prevent any water damage.
Here are the steps to troubleshoot and fix a faulty water valve:
- Turn off the humidifier: Before attempting any repairs, turn off the humidifier and unplug it from the power source. This will ensure your safety and prevent any further leaks.
- Locate the water valve: Identify the location of the water valve in your humidifier. It is typically connected to the water supply line or located somewhere near the water tank.
- Inspect the water valve: Examine the water valve for any signs of damage, such as cracks, leaks, or mineral buildup. Pay attention to the valve body, connections, and any movable parts. If you notice any issues, it’s likely that the water valve is faulty.
- Repair or replace the water valve: Depending on the extent of the damage, you may be able to repair the water valve by replacing certain components. Refer to the manufacturer’s instructions for guidance on repairing or replacing the valve. If the valve is severely damaged or the repairs seem complex, it is recommended to replace the entire water valve.
- Install the new water valve: If you are replacing the water valve, carefully install the new valve according to the manufacturer’s instructions. Make sure all connections are secure and properly aligned.
- Test for leaks: After installing the new water valve or making necessary repairs, test the humidifier for any signs of leaks. Turn it on and let it run for a while, monitoring the area around the valve for any water leakage. If there are no leaks, the issue with the water valve has been resolved.
Remember to follow the manufacturer’s instructions and guidelines when addressing issues with the water valve. Regular maintenance and inspection of the valve can also help prevent future leaks and ensure the smooth operation of your humidifier.
Broken Humidifier Seal
A broken humidifier seal is another potential cause of leaks in your humidifier. The seal is responsible for maintaining a tight connection and preventing water from escaping between the water tank and the base of the humidifier. If the seal becomes damaged or worn out, it can result in leaks.
To troubleshoot and fix a broken humidifier seal, follow these steps:
- Turn off the humidifier: Begin by turning off the humidifier and disconnecting it from the power source. This will ensure your safety during the troubleshooting process.
- Inspect the seal: Carefully examine the seal where the water tank connects to the base of the humidifier. Look for any visible damage, such as cracks, tears, or gaps in the seal. Even small imperfections can cause leaks.
- Replace the seal: If you notice any damage or wear on the seal, it’s best to replace it. Check with the manufacturer or the humidifier’s manual for the specific seal required for your model. You can usually find replacement seals online or at local appliance stores.
- Remove the old seal: Gently remove the old seal from the humidifier. Use a soft cloth to clean any residue or debris from the area where the seal was attached.
- Install the new seal: Take the new seal and carefully position it in the place where the old seal was. Ensure that it is aligned properly and evenly applied to create a watertight seal between the water tank and the base of the humidifier.
- Press firmly and test for leaks: Once the new seal is in place, press firmly to ensure proper adhesion. Then, turn on the humidifier and run it for a while, monitoring for any signs of leaks. If there are no leaks, the broken humidifier seal has been successfully fixed.
Regularly inspecting and replacing the humidifier seal as needed is crucial in maintaining a leak-free humidifier. By taking these steps, you can ensure that your humidifier operates efficiently and effectively without any water leakage.
Incorrect Assembly
Incorrect assembly is another potential cause of leaks in your humidifier. If the components of the humidifier are not properly aligned or securely fastened, it can result in gaps or loose connections, leading to leaks. It’s essential to ensure correct assembly to prevent any water leakage issues.
To troubleshoot and fix incorrect assembly of your humidifier, follow these steps:
- Turn off the humidifier: Start by turning off the humidifier and disconnecting it from the power source. This will ensure your safety while addressing the assembly issue.
- Identify the components: Familiarize yourself with the various components of your humidifier, such as the water tank, base, filters, and any other removable parts. Refer to the user manual or manufacturer’s instructions if needed.
- Disassemble the humidifier: Carefully disassemble the humidifier by removing all the components according to the instructions provided. Pay close attention to the order in which the components were originally installed.
- Inspect for misalignment or loose connections: Examine each component for misalignment, gaps, or loose connections. Ensure that all the parts fit together correctly and tightly. If you notice any issues, readjust or tighten the connections as needed.
- Clean and reassemble: Clean any dust, debris, or mineral deposits from the components before reassembling the humidifier. Follow the specific instructions in the user manual or provided by the manufacturer to correctly reassemble the humidifier.
- Test for leaks: After reassembling the humidifier, turn it on and let it run for some time. Monitor closely for any signs of leaks. If there are no leaks, the issue was likely due to incorrect assembly, and your humidifier should now operate without any water leakage.
It’s important to carefully follow the manufacturer’s instructions and guidelines during the assembly process. Taking the time to ensure correct and secure assembly will prevent leaks and promote the efficient functioning of your humidifier.
Check the water tank and its seal for any cracks or damage. Make sure the tank is properly seated in the base. Clean the humidifier regularly to prevent clogs and leaks.
Read more: Why Is My Bathtub Leaking Underneath
Troubleshooting Steps for Leaking Humidifiers
If you’re dealing with a leaking humidifier, there are several troubleshooting steps you can take to address the issue before seeking professional assistance. By following these steps, you can potentially identify and resolve the problem, restoring your humidifier to efficient and leak-free operation.
- Check and Adjust Water Level: Examine the water level in the humidifier’s tank. Ensure it is at the recommended level indicated by the manufacturer. Adjust the water level as necessary to prevent overflow or air leakage.
- Inspect and Repair Water Tank: Thoroughly examine the water tank for any cracks, damages, or wear. If you notice any issues, repair or replace the water tank to prevent leaks.
- Clean or Replace Drainage Tube: Check the drainage tube for any clogs or blockages caused by mineral deposits or debris. Clean it thoroughly or replace it if necessary to ensure the proper flow of water and prevent leaks.
- Repair or Replace Water Valve: Evaluate the water valve for any malfunctions or damages that could lead to leaks. Repair or replace the water valve as needed to maintain proper water flow and prevent leaks.
- Fix Humidifier Seal: Inspect the humidifier seal between the water tank and the base. If it is broken or damaged, replace it to create a watertight seal and prevent leaks.
- Disassemble and Reassemble Correctly: Ensure that all the components of the humidifier are correctly assembled. Check for misalignments, loose connections, or gaps. Take the necessary steps to properly align and secure the components together.
By following these troubleshooting steps, you can potentially identify and fix the cause of the leaks in your humidifier. However, if the issue persists or you are unsure about any repairs, it’s always recommended to consult with a professional or contact the manufacturer for assistance.
Remember to regularly clean and maintain your humidifier to prevent future leaks. Proper maintenance, including regular inspection of components, cleaning, and following manufacturer guidelines, will help ensure the longevity and reliable performance of your humidifier.
Check and Adjust Water Level
One of the first troubleshooting steps for a leaking humidifier is to check and adjust the water level. An improper water level can lead to either overflow or air leakage, both of which can cause leaks. By ensuring that the water level is at the correct level, you can prevent these issues and potentially resolve the leak.
Here’s how to check and adjust the water level in your humidifier:
- Turn off and unplug the humidifier: Before checking the water level, make sure to turn off the humidifier and unplug it from the power source. This ensures your safety during the troubleshooting process.
- Remove the water tank: Carefully remove the water tank from the humidifier. Check if the water level is too high or too low. The ideal water level is usually indicated by a maximum fill line on the tank.
- Adjust the water level: If the water level is too high, pour out some water until it reaches the appropriate level. If the water level is too low, add clean, distilled water to bring it up to the recommended level. Avoid overfilling, as it can cause overflow and leaks.
- Check for obstructions: While inspecting the water level, also check for any obstructions or debris that may prevent the water from flowing properly. Clear any blockages to ensure smooth operation.
- Clean the tank: If you notice any mineral deposits or residue in the water tank, it’s a good idea to clean it before reassembling. Follow the manufacturer’s instructions for the proper cleaning process or use a mixture of water and vinegar to remove any buildup.
- Reassemble and test: Once you have adjusted the water level and cleaned the tank, reassemble the humidifier and make sure all the connections are secure. Turn on the humidifier and let it run for a while, monitoring for any signs of leaks.
Regularly checking and adjusting the water level in your humidifier can prevent overflow or air leakage, which can lead to leaks. It’s important to follow the manufacturer’s guidelines and recommendations for the proper water level to ensure the efficient and leak-free operation of your humidifier.
Inspect and Repair Water Tank
Another troubleshooting step for a leaking humidifier is to inspect and repair the water tank. The water tank is a crucial component that holds the water before it is released into the humidifier for evaporation. If the water tank is damaged or has any cracks or wear, it can lead to leaks. By addressing any issues with the water tank, you can prevent further leakage and ensure the proper functioning of your humidifier.
Here’s how to inspect and repair the water tank:
- Turn off and unplug the humidifier: Before inspecting the water tank, always ensure that the humidifier is turned off and unplugged from the power source. Safety is paramount during the troubleshooting process.
- Remove the water tank: Carefully detach the water tank from the humidifier. Pay attention to any water that may have accumulated in the tank and empty it if necessary.
- Inspect the water tank: Thoroughly examine the water tank for any visible cracks, damages, or signs of wear. Check the corners, edges, and the entire surface of the tank. If you detect any issues, it’s likely that the tank is the source of the leak.
- Repair or replace the water tank: Depending on the extent of the damage, you can either repair or replace the water tank. Minor cracks or chips can sometimes be repaired using a waterproof sealant or adhesive designed for plastic. Follow the manufacturer’s recommendations or consult with a professional for the best repair method. However, if the damage is significant or the repairs seem complex, it’s advisable to replace the water tank entirely to ensure a reliable and leak-free humidifier.
- Clean the water tank: Before reinstalling the water tank, it’s a good practice to clean it thoroughly. Rinse it with clean water to remove any dust, debris, or mineral deposits that may have accumulated. This step helps to maintain the overall cleanliness and efficiency of the humidifier.
- Reassemble and test: Once you have repaired or replaced the water tank and cleaned it, reassemble the humidifier and ensure all connections are secure. Turn on the humidifier and let it run for a while, keeping an eye out for any signs of leakage. If there are no leaks, the issue with the water tank has been resolved.
Regularly inspecting and maintaining the water tank of your humidifier is vital for preventing leaks. By addressing any damage and ensuring the proper functioning of the water tank, you can enjoy a reliable and efficient humidifier that maintains optimal humidity levels without any leakage.
Clean or Replace Drainage Tube
A clogged or blocked drainage tube can be a common cause of leaks in a humidifier. The drainage tube is responsible for removing excess water from the unit, and if it becomes clogged with mineral deposits or debris, it can hinder the proper flow of water and cause leaks. To troubleshoot and resolve this issue, you can clean or replace the drainage tube.
Here’s how to clean or replace the drainage tube:
- Turn off and unplug the humidifier: Before working on the drainage tube, ensure that the humidifier is turned off and unplugged from the power source. Safety is crucial during the troubleshooting process.
- Locate the drainage tube: Identify the location of the drainage tube in your humidifier. It is generally connected to the base of the unit and leads to a drain or collection tray.
- Disconnect the drainage tube: Carefully disconnect the drainage tube from the base of the humidifier. Depending on the design of your unit, you may need to unscrew or release a clip to detach the tube.
- Inspect the tube: Examine the drainage tube for any visible clogs or blockages caused by mineral deposits, mold, or other debris. If you notice any buildup, it’s likely causing the leakage.
- Clean the tube: Use a mixture of water and vinegar or a mild cleaning solution to clean the drainage tube. You can soak the tube in the solution or use a brush or cloth to scrub away any deposits. Make sure to clear any debris, mold, or mineral buildup that may have accumulated.
- Rinse and dry the tube: After cleaning, rinse the drainage tube with clean water to remove any remaining cleaning solution. Ensure that the tube is thoroughly dry before reattaching it to the humidifier to prevent mold growth or further blockages.
- Reattach the drainage tube: Once the drainage tube is clean and dry, reattach it securely to the base of the humidifier. Ensure that it is properly aligned and tightly fastened.
- Test for leaks: Turn on the humidifier and let it run for a while. Monitor the drainage tube area for any signs of leaks. If there are no leaks, the cleaning process should have resolved the issue. However, if leaks persist, you may need to consider replacing the drainage tube.
- Replace the drainage tube (if necessary): If cleaning the drainage tube did not resolve the leak issue, it may be necessary to replace the tube. Consult the manufacturer or refer to the humidifier’s manual for the specific replacement tube required. You can usually find replacement tubes online or at local appliance stores.
Regularly cleaning or replacing the drainage tube can prevent clogs and blockages that lead to leaks in your humidifier. By ensuring proper water flow and drainage, you can maintain the efficiency and functionality of your humidifier without any leakage troubles.
Read more: Why Is My Water Pump Leaking
Repair or Replace Water Valve
A faulty water valve can be a common cause of leaks in a humidifier. The water valve controls the flow of water into the humidifier, and if it is malfunctioning or worn out, it can lead to leaks. Repairing or replacing the water valve can help rectify this issue and restore the proper operation of your humidifier.
Here’s how you can troubleshoot and repair or replace the water valve:
- Turn off and unplug the humidifier: Before working on the water valve, ensure the humidifier is turned off and unplugged from the power source. Safety should always be prioritized during the troubleshooting process.
- Locate the water valve: Identify the location of the water valve in your humidifier. It is typically connected to the water supply line or located near the water tank.
- Inspect the water valve: Examine the water valve for any visible damage, such as cracks, leaks, or signs of wear. Make sure to check the valve body, connections, and any movable parts.
- Repair the water valve: If the water valve appears to have minor damage or malfunctions, you may be able to repair it. Refer to the manufacturer’s instructions or consult a professional for guidance. In some cases, replacing specific components of the valve or cleaning and lubricating certain parts can resolve the issue.
- Replace the water valve: If the water valve is severely damaged or the repairs seem complex, it’s advisable to replace the entire water valve. Consult the manufacturer or refer to the humidifier’s manual for the specific replacement valve required. You can usually find replacement valves online or at local appliance stores.
- Disconnect and replace the water valve: Turn off the water supply and disconnect the old water valve from the humidifier. Install the new water valve, following the instructions provided by the manufacturer. Ensure that all connections are secure and properly aligned.
- Test for leaks: After replacing the water valve, turn on the humidifier and allow it to run for some time. Monitor closely for any signs of leaks around the water valve area. If there are no leaks, the repair or replacement has been successful.
It is important to consult the manufacturer’s instructions and guidelines when attempting to repair or replace the water valve. If you are unsure or uncomfortable with performing the repair yourself, it is always recommended to seek professional assistance to ensure the safety and effectiveness of the repair.
By addressing any issues with the water valve, you can prevent leaks and maintain the proper flow of water in your humidifier, ensuring its efficient and leak-free operation.
Fix Humidifier Seal
A broken or damaged humidifier seal can often be a cause of leaks. The seal is responsible for creating a tight and secure connection between the water tank and the base of the humidifier. If the seal is compromised, it can result in water leakage. Fixing or replacing the humidifier seal is essential to prevent leaks and maintain the proper functioning of the humidifier.
Here’s how to fix a humidifier seal:
- Turn off and unplug the humidifier: Before working on the humidifier seal, turn off the unit and unplug it from the power source. This ensures your safety while conducting the troubleshooting process.
- Locate the humidifier seal: Identify the placement of the seal between the water tank and the base of the humidifier. Carefully examine the seal for any visible signs of damage, such as cracks, tears, or gaps.
- Remove the old seal: Gently remove the old seal from the humidifier. Clean any residue or debris from the area where the seal was attached using a soft cloth.
- Prepare the new seal: Acquire a replacement seal suitable for your specific humidifier model. Ensure that it matches the dimensions and specifications provided by the manufacturer.
- Attach the new seal: Carefully align the new seal in the spot where the old seal was positioned. Press firmly to create a tight seal, ensuring that there are no gaps or loose sections.
- Test for leaks: After attaching the new seal, reassemble the humidifier and turn it on. Allow it to run for a while, monitoring closely for any signs of leaks near the seal. If there are no leaks, the new seal has resolved the issue.
If fixing the humidifier seal does not resolve the leak problem, the seal may not be the primary cause. In such cases, it is advisable to consult the manufacturer’s instructions or contact a professional for further assistance.
Regularly inspecting and maintaining the humidifier seal is crucial for preventing leaks. By ensuring a proper seal between the water tank and the base of the humidifier, you can enjoy a leak-free and efficiently functioning humidifier.
Disassemble and Reassemble Correctly
Incorrect assembly of a humidifier can often lead to leaks. If the components are not properly aligned or securely fastened, it can result in gaps or loose connections, causing water to leak out. Disassembling and reassembling the humidifier correctly is essential to prevent leaks and ensure its efficient operation.
Here’s how to disassemble and reassemble your humidifier correctly:
- Turn off and unplug the humidifier: Before disassembling the humidifier, ensure that it is turned off and safely unplugged from the power source. This precautionary step is necessary to prevent any electrical or safety hazards.
- Refer to the user manual: Consult the user manual or manufacturer’s instructions specific to your humidifier model. Understand the proper disassembly and reassembly process, paying attention to the recommended order of components.
- Take pictures or notes: Before disassembling, consider taking pictures or making notes about the position and orientation of the components. This will help you remember the correct arrangement during reassembly.
- Begin disassembling: Carefully detach each component of the humidifier according to the instructions. Take caution not to force anything and avoid using excessive pressure that could cause damage.
- Inspect for misalignments or loose connections: As you disassemble, closely inspect each component for any misalignments, gaps, or loose connections. Identify any areas that may be causing leaks when improperly assembled.
- Clean the components: This is an excellent opportunity to clean the individual components of the humidifier. Use a mild cleaning solution or follow the manufacturer’s recommendations to remove any dust, debris, or mineral deposits.
- Reassemble the humidifier: Assemble the humidifier following the reverse order of disassembly. Ensure that each component is aligned properly and securely fastened. Pay attention to matching the markings or indicators provided by the manufacturer.
- Test for leaks: After reassembling the humidifier, turn it on and let it run for a while. Monitor closely for any signs of leaks. If there are no leaks, you have successfully disassembled and reassembled the unit correctly.
Proper assembly is crucial for the efficient and leak-free operation of your humidifier. If you encounter difficulties during the process or continue to experience leaks after reassembly, it is recommended to consult the manufacturer’s instructions or seek professional help for further assistance.
By disassembling and reassembling your humidifier correctly, you can ensure that all components are aligned, tightly connected, and working together to provide optimal performance without any water leakage.
Conclusion
A leaking humidifier can be frustrating and potentially damaging to your surroundings. However, by understanding the common causes of leaks and following the troubleshooting steps provided in this article, you can effectively address and resolve the issue.
Throughout the troubleshooting process, it’s important to check and adjust the water level, inspect and repair or replace the water tank, clean or replace the drainage tube, repair or replace the water valve, fix the humidifier seal, and ensure correct disassembly and reassembly. These steps will help you identify the root cause of the leak and implement the necessary repairs or replacements to fix the issue.
Remember to refer to the manufacturer’s instructions and guidelines specific to your humidifier model. Prioritize your safety by turning off and unplugging the humidifier before conducting any troubleshooting or repair work. If you are unsure about any repairs or encounter persistent leaks, don’t hesitate to seek professional assistance.
By regularly maintaining your humidifier and addressing any leaks promptly, you can ensure its efficient operation and prolong its lifespan. Maintaining the proper functioning of your humidifier will help improve air quality, alleviate dryness, and create a comfortable living environment.
With a leak-free humidifier, you can enjoy the benefits of optimal humidity levels in your home, including healthier skin, easier breathing, and relief from respiratory ailments and allergies.
Remember, a well-maintained and functioning humidifier can greatly contribute to your overall well-being and comfort. So, take the necessary steps to troubleshoot and fix any leaks, and enjoy the benefits of a properly working humidifier for years to come.
Frequently Asked Questions about Why Is My Humidifier Leaking
Was this page helpful?
At Storables.com, we guarantee accurate and reliable information. Our content, validated by Expert Board Contributors, is crafted following stringent Editorial Policies. We're committed to providing you with well-researched, expert-backed insights for all your informational needs.

0 thoughts on “Why Is My Humidifier Leaking”