Articles
Why Is My Water Pump Leaking
Modified: August 27, 2024
Learn why water pumps leak and how to fix them with our informative articles. Expert advice and tips to resolve this common plumbing issue.
(Many of the links in this article redirect to a specific reviewed product. Your purchase of these products through affiliate links helps to generate commission for Storables.com, at no extra cost. Learn more)
Introduction
Water pumps play a crucial role in the proper functioning of various systems and appliances, including vehicles, homes, and industrial machinery. They are responsible for circulating and regulating the flow of fluids, such as coolant in engines or water in plumbing systems. However, like any mechanical component, water pumps are susceptible to wear and tear, which can result in leaks.
Water pump leaks are a common problem that can occur in different situations and environments. They can lead to various issues, including reduced performance, engine overheating, and water damage to surrounding areas. Understanding the causes and signs of water pump leaks is essential for timely detection and repair.
In this article, we will explore the common causes of water pump leaks, provide tips on how to identify them, and outline the necessary steps to fix the problem. By gaining a deeper understanding of water pump leaks and their origins, you will be better equipped to maintain the longevity and efficiency of your systems and appliances.
Let’s dive into the common causes of water pump leaks and how they can impact different systems.
Key Takeaways:
- Proper maintenance and timely repair of water pump leaks are essential for preventing reduced performance, engine overheating, and potential damage to surrounding components in various systems and appliances.
- Identifying the source of the leak, preparing for repair, and thorough testing for leaks are crucial steps in effectively resolving water pump leaks and ensuring the longevity and efficiency of systems and appliances.
Read more: Why Is My Freezer Leaking Water
Common Causes of Water Pump Leaks
Water pump leaks can occur due to a variety of reasons. Understanding these common causes is essential for diagnosing and resolving the issue effectively. Here are some of the primary culprits behind water pump leaks:
1. Damaged or Worn Out Seals: Seals are critical components of water pumps that prevent fluid leakage. Over time, these seals can become damaged or worn out, leading to leaks. Common causes of seal damage include age, excessive heat, and improper installation.
2. Cracked or Broken Pump Housing: The housing of a water pump can develop cracks or breaks due to various reasons, such as impact from debris or excessive pressure. A damaged housing can cause leaks as it fails to contain the fluid properly.
3. Loose or Faulty Hose Connections: Water pumps are connected to hoses or pipes to facilitate the flow of fluid. If the connections are loose or faulty, it can result in leaks. It is important to ensure that the hoses are properly secured and free from damages.
4. Faulty Gaskets: Gaskets provide a seal between different components of the water pump. If the gasket becomes worn out or damaged, it can lead to leaks. Gasket failure can occur due to age, heat exposure, or inadequate maintenance.
5. Corrosion and Rust: Over time, water pumps can be exposed to moisture and corrosive substances, leading to corrosion and rust. These issues can weaken the integrity of the pump, eventually causing leaks.
6. Overheating and Excessive Pressure: Excessive heat and pressure can put strain on water pumps, leading to leaks. This can occur when the cooling system in a vehicle is not functioning properly or if the pump is operated under extreme conditions.
7. Mechanical Failure of Bearings or Shafts: The bearings and shafts in a water pump are responsible for its smooth operation. If these components experience mechanical failure or become worn out, it can result in leaks.
By being aware of these common causes, you can take proactive measures to prevent water pump leaks. Regular maintenance, proper installation, and prompt repairs are key to avoiding these issues and ensuring the efficient operation of your systems and appliances. In the next section, we will discuss how to identify if your water pump is leaking.
Damaged or Worn Out Seals
One of the primary causes of water pump leaks is damaged or worn out seals. Seals are crucial components that create a tight barrier between different parts of the water pump, preventing the escape of fluids. However, over time, these seals can deteriorate, leading to leaks.
There are several factors that can contribute to the damage or wear of seals:
1. Age and Usage: Like any mechanical component, seals have a limited lifespan. As a water pump ages and is used frequently, the seals can start to deteriorate. The continuous exposure to heat, pressure, and friction eventually weakens the seals, causing them to fail and allow fluid to escape.
2. Excessive Heat: Water pumps are often exposed to high temperatures due to the nature of their operation. Continuous exposure to heat can lead to the degradation of the seals over time. This is particularly common in vehicles, where the engine’s heat can affect the performance and lifespan of the water pump seals.
3. Improper Installation: If the seals were not installed correctly during the initial assembly of the water pump, it can lead to premature failure. Inadequate sealing or improper alignment can create gaps and weak points, making it easier for leaks to occur.
4. Contaminants and Exposure: The presence of contaminants, such as dirt, debris, chemicals, or corrosive substances, can accelerate the deterioration of the seals. These contaminants can cause erosion, corrosion, or physical damage to the seals, compromising their integrity and leading to leaks.
Identifying a water pump leak caused by damaged or worn out seals can be challenging, as the leak may not be visible externally. However, there are some signs that can help you identify this issue:
– Coolant puddles or stains under the vehicle or near the water pump
– A drop in coolant level without any visible external leaks
– Engine overheating
– Whining or grinding noise coming from the water pump area
– Sweet or burnt smell in the engine compartment
If you suspect a water pump leak caused by damaged or worn out seals, it is crucial to address the issue promptly to prevent further damage. Replacing the seals or the entire water pump assembly may be necessary depending on the severity of the damage.
In the next section, we will explore another common cause of water pump leaks: cracked or broken pump housing.
Cracked or Broken Pump Housing
Another common cause of water pump leaks is a cracked or broken pump housing. The housing of a water pump serves as the outer shell that encloses and supports the internal components. It plays a vital role in maintaining the integrity of the pump and preventing fluid leaks. However, various factors can contribute to the development of cracks or breaks in the pump housing.
Here are some of the common reasons behind a cracked or broken pump housing:
1. Impact or Physical Damage: Water pumps can be subjected to impacts from debris, road hazards, or accidents. A significant impact force can cause the pump housing to crack or break, resulting in leaks. This is particularly common in vehicles, where the water pump is exposed to potential damage from rocks, stones, or other objects on the road.
2. Excessive Pressure: Water pumps are designed to withstand a certain level of pressure. However, if the pressure exceeds the pump’s capacity, it can lead to stress and cause the housing to crack. This can occur due to a malfunction in the cooling system or a blockage in the water lines, causing pressure to build up.
3. Age and Wear: Over time, the materials used in the construction of the pump housing can weaken and deteriorate. Continuous exposure to high temperatures, engine vibrations, and other environmental factors can contribute to the wear and tear of the housing, making it more susceptible to cracks or breaks.
Identifying a water pump leak caused by a cracked or broken pump housing is relatively straightforward. Here are some signs to look out for:
– Visible cracks or breaks in the pump housing
– Coolant leaking from the housing
– Engine overheating
– Coolant puddles under the vehicle or near the water pump
If you suspect a water pump leak due to a cracked or broken pump housing, it is crucial to address the issue promptly. In most cases, the damaged housing will need to be replaced to prevent further leaks and ensure the proper functioning of the water pump.
In the next section, we will discuss another common cause of water pump leaks: loose or faulty hose connections.
Loose or Faulty Hose Connections
Loose or faulty hose connections are another common cause of water pump leaks. Water pumps are typically connected to hoses or pipes that facilitate the flow of fluid to and from the pump. If these connections are not properly secured or if the hoses themselves are damaged or worn out, it can result in leaks.
There are several reasons why hose connections can become loose or faulty:
1. Improper Installation: During the initial installation of the water pump or when replacing hoses, improper installation can lead to loose connections. If the hoses are not securely clamped or if the fittings are not tightened correctly, it can cause leaks.
2. Age and Wear: Hoses, like any other component, have a limited lifespan. Over time, they can become worn out, brittle, or develop cracks. As the hoses deteriorate, they may not create a tight seal with the water pump, leading to leaks.
3. Excessive Pressure or Vibration: High-pressure systems or continuous vibrations, such as those experienced in vehicles, can put strain on the hose connections. This can cause them to loosen over time, resulting in leaks.
4. Chemical Degradation: The presence of chemicals, contaminants, or incompatible fluids in the system can cause the hoses to degrade and become damaged. This can weaken the connections and lead to leaks.
Identifying a water pump leak caused by loose or faulty hose connections is relatively straightforward. Here are some signs to look out for:
– Visible signs of coolant leaking from the hose connections
– Coolant puddles or stains under the vehicle or near the water pump
– A drop in coolant level without any apparent external leaks
– Engine overheating
If you suspect a water pump leak due to loose or faulty hose connections, it is important to address the issue promptly. Tightening or replacing the connections, along with inspecting and replacing damaged hoses, may be necessary to resolve the leak and ensure the proper functioning of the water pump.
In the next section, we will explore another common cause of water pump leaks: faulty gaskets.
Read more: Why Is My Kettle Leaking Water
Faulty Gaskets
Faulty gaskets are a common cause of water pump leaks. Gaskets are crucial components that provide a tight seal between different parts of the water pump, preventing fluid leakage. However, over time, gaskets can wear out, become damaged, or develop imperfections, resulting in leaks.
Here are some of the common reasons behind faulty gaskets:
1. Age and Wear: Gaskets, like any mechanical component, have a limited lifespan. As they age, they can become brittle, lose their elasticity, or develop cracks. This can compromise their ability to create a tight seal and lead to leaks.
2. Heat and Pressure: Water pumps operate in high-temperature and high-pressure environments. Continuous exposure to heat and pressure can cause gaskets to deteriorate over time. The components in the water pump expand and contract due to thermal cycles, which can put strain on the gaskets, leading to failure and leaks.
3. Chemical Exposure: Water pumps come into contact with various fluids and chemicals. Certain chemicals, such as corrosion inhibitors or cleaning agents, can cause degradation of the gaskets. Exposure to these substances can result in the deterioration of the gasket material, compromising its ability to create an effective seal.
4. Improper Installation or Maintenance: If gaskets are not installed correctly or are not maintained properly, it can lead to leaks. Incorrect alignment, inadequate sealing, or failure to replace gaskets during maintenance can result in compromised seals and fluid leakage.
Identifying a water pump leak caused by faulty gaskets can be challenging as the leak may not be visible externally. However, there are some signs that can indicate a gasket-related issue:
– Coolant puddles or stains under the vehicle or near the water pump
– A drop in coolant level without any visible external leaks
– Overheating of the engine
– Steam or coolant odor coming from the engine compartment
If you suspect a water pump leak due to faulty gaskets, it is crucial to address the issue promptly. This typically involves replacing the faulty gasket(s) to restore the integrity of the water pump seal. It is important to choose gaskets made from high-quality materials and to follow proper installation procedures to ensure a reliable seal and prevent future leaks.
In the next section, we will discuss another common cause of water pump leaks: corrosion and rust.
Corrosion and Rust
Corrosion and rust are common causes of water pump leaks. Water pumps, especially those used in vehicles, are exposed to various environmental conditions that can lead to the formation of corrosion and rust. Over time, these issues can weaken the pump’s structure, compromising its integrity and causing leaks.
There are several factors that can contribute to corrosion and rust in water pumps:
1. Moisture and Humidity: Water pumps are constantly exposed to moisture, which can promote the formation of rust and corrosion. High humidity levels in the surrounding environment can accelerate this process, especially if the water pump is not adequately protected.
2. Chemical Reactions: Water pumps can come into contact with different fluids and chemicals, such as coolant, water, and cleaning agents. Some of these substances can react with the materials used in the pump, leading to corrosion or the breakdown of protective coatings.
3. Electrolysis: Electrolysis is a chemical reaction that occurs when dissimilar metals come into contact with an electrolyte, such as coolant or water. This can cause an electrical current to flow between the metals, leading to accelerated corrosion. Electrolysis is particularly common in older vehicles where dissimilar metals are used in the cooling system.
4. Road Salt and Debris: If you live in an area where road salt is used during winter months, the salt can come into contact with the water pump through splashing or spray. The corrosive nature of road salt combined with moisture can lead to accelerated rust and corrosion.
Detecting water pump leaks caused by corrosion and rust can be challenging, as the damage may not be immediately visible. However, there are some signs to look out for:
– Coolant leakage from the water pump or surrounding areas
– Visible rust or corrosion on the water pump housing or components
– Coolant contamination with rust particles or discoloration
If you suspect a water pump leak due to corrosion and rust, it is important to address the issue promptly. Depending on the severity of the corrosion, you may need to replace the affected components or even consider replacing the entire water pump. Regular maintenance and protecting the water pump from moisture and corrosive substances can help prevent future corrosion-related leaks.
In the next section, we will explore another common cause of water pump leaks: overheating and excessive pressure.
Overheating and Excessive Pressure
Overheating and excessive pressure can contribute to water pump leaks. Water pumps are designed to operate within specific temperature and pressure ranges. However, when these limits are exceeded, it can put strain on the pump, leading to leaks and other issues.
Here are some of the common causes of water pump leaks related to overheating and excessive pressure:
1. Cooling System Malfunction: The cooling system in vehicles plays a crucial role in maintaining optimal engine temperature. If there is a malfunction in the cooling system, such as a faulty thermostat, a clogged radiator, or a malfunctioning fan, it can cause the engine to overheat. The increased temperature can put strain on the water pump, potentially leading to leaks.
2. Low Coolant Levels: If the coolant level in the cooling system is low, it can result in inadequate cooling and overheating. As the engine temperature rises, the heat transferred to the water pump increases, potentially causing damage to seals, gaskets, or other components.
3. Extreme Operating Conditions: Operating a vehicle or machinery in extreme conditions, such as high ambient temperatures or heavy loads, can cause the engine to overheat. This increased heat can put extra stress on the water pump, potentially leading to leaks.
4. Excessive Pressure Buildup: If there is a blockage or restriction in the cooling system, it can lead to a buildup of pressure. The increased pressure can strain the water pump, potentially causing it to leak.
Identifying a water pump leak caused by overheating and excessive pressure can be done by paying attention to the following signs:
– Engine overheating
– Coolant leaking from the water pump or surrounding areas
– Increased temperature gauge reading
– Steam or coolant odor coming from the engine compartment
If you suspect a water pump leak due to overheating and excessive pressure, it is important to address the issue promptly. This may involve diagnosing and resolving any underlying cooling system malfunctions, ensuring proper coolant levels, and checking for any blockages in the system. Resolving these issues can help alleviate the strain on the water pump and prevent further leaks.
In the next section, we will discuss another common cause of water pump leaks: mechanical failure of bearings or shafts.
Mechanical Failure of Bearings or Shafts
A mechanical failure of bearings or shafts is another common cause of water pump leaks. Bearings and shafts play a crucial role in the smooth operation of a water pump. However, over time, these components can experience wear and tear, leading to failure and potential leaks.
Here are some of the common reasons for mechanical failure of bearings or shafts:
1. Age and Wear: As water pumps age, the bearings and shafts can undergo gradual wear and tear. Continuous use, exposure to high temperatures, and vibration can contribute to the degradation of these components over time. This can weaken their structural integrity and potentially result in leaks.
2. Lack of Lubrication: Adequate lubrication is essential for the proper functioning and longevity of bearings and shafts. Insufficient lubrication can cause increased friction, wear, and premature failure. This can be due to insufficient oil or grease, or a malfunction in the lubrication system.
3. Contaminants and Debris: Foreign particles, contaminants, or debris that find their way into the water pump can cause damage to the bearings and shafts. These substances can cause abrasive wear on the components, leading to mechanical failure and potential leaks.
4. Improper Installation or Maintenance: Incorrect installation or improper maintenance practices can contribute to the mechanical failure of bearings and shafts. This can include improper alignment, over-tightening, or inadequate replacement intervals.
Identifying a water pump leak caused by a mechanical failure of bearings or shafts can be challenging, as the issue may not be immediately visible. However, there are some signs to look out for:
– Grinding or whining noise coming from the water pump area
– Excessive vibration from the pump
– Coolant leakage from the water pump or surrounding areas
– Increased temperature gauge reading
If you suspect a water pump leak due to a mechanical failure of bearings or shafts, it is important to address the issue promptly. This typically involves replacing the damaged components and ensuring proper lubrication. Regular maintenance and proper installation practices can help prevent premature failure and potential leaks in the future.
In the next section, we will discuss how to identify if your water pump is leaking.
Read more: Why Is My Portable AC Leaking Water
How to Identify a Water Pump Leak
Identifying a water pump leak is crucial for prompt detection and resolution. If left untreated, a water pump leak can lead to various issues, such as reduced performance, engine overheating, and potential damage to surrounding components. Here are some key steps to help you identify a water pump leak:
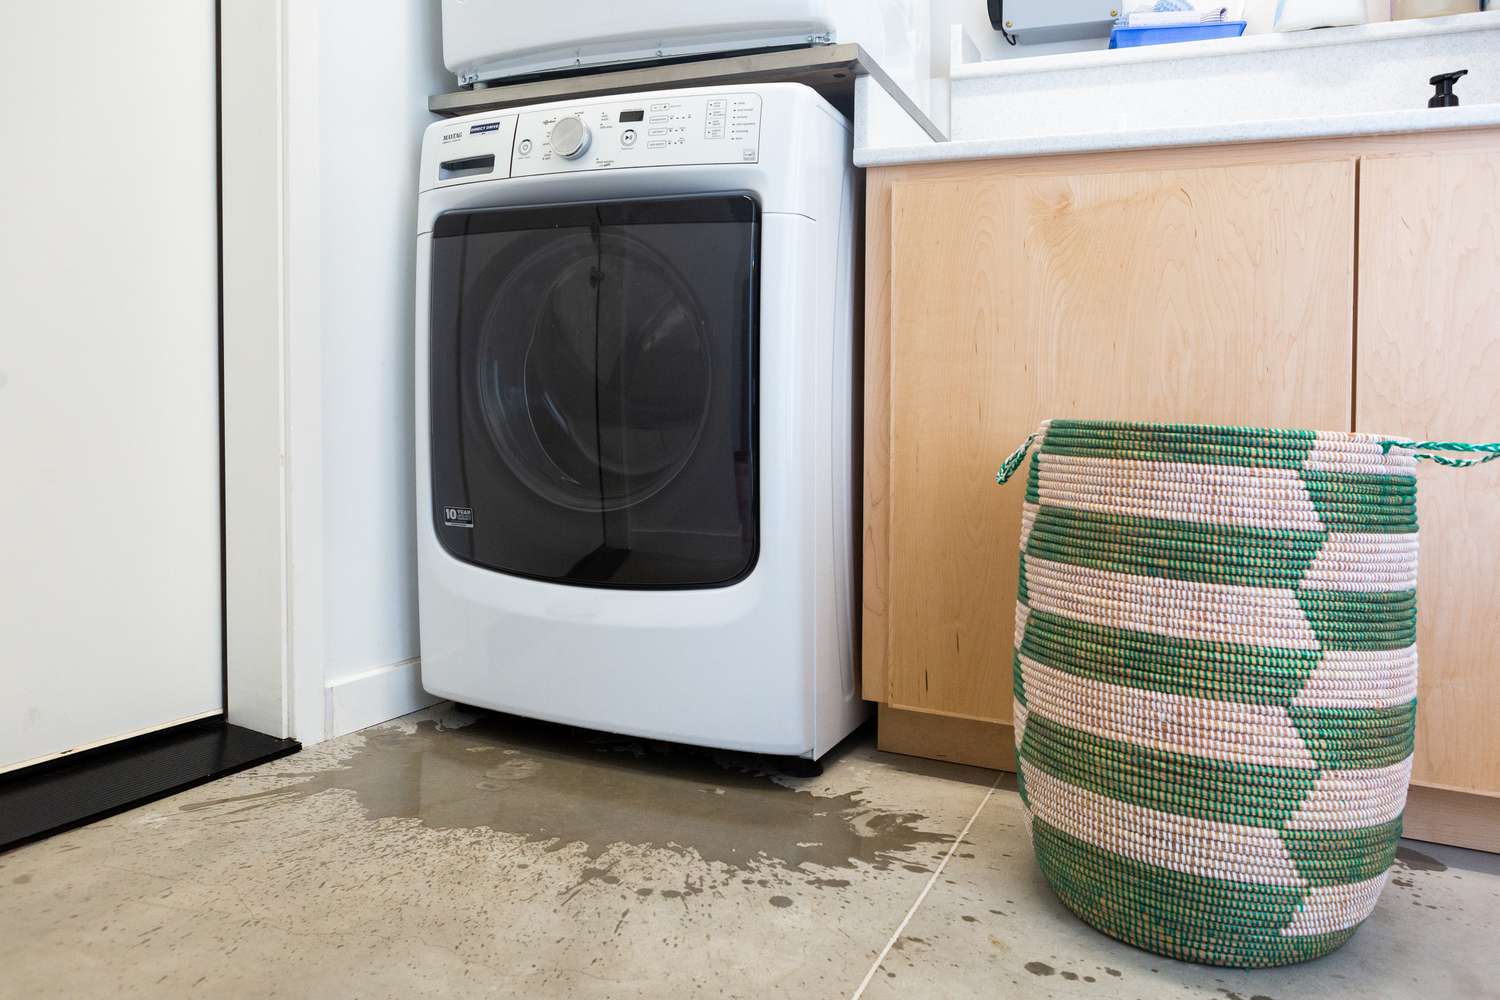
1. Checking for Visible Leaks: Start by inspecting the water pump and surrounding areas for any visible signs of coolant leakage. Look for coolant puddles or stains under the vehicle or near the water pump. Also, check for any signs of wetness or dampness around the pump.
2. Monitoring Coolant Levels: Keep an eye on the coolant level in the reservoir or radiator. If you notice a consistent drop in coolant levels without any apparent external leaks, it could be an indication of a water pump leak.
3. Paying Attention to Overheating Issues: Engine overheating can be a sign of a water pump leak. If your engine consistently runs hotter than usual or if it frequently overheats, it’s important to investigate the cause, which may include a potential water pump leak.
4. Inspecting for Unusual Noises or Vibrations: Listen for any unusual noises coming from the water pump area. Grinding, whining, or squealing noises could be an indication of a failing water pump. Additionally, excessive vibration from the pump may also indicate a problem.
5. Observing Coolant Contamination: Examine the coolant for any signs of contamination. If you notice rust particles, oil traces, or an unusual color or smell in the coolant, it may indicate a water pump leak contaminating the coolant.
By following these steps, you can effectively identify a water pump leak and take the necessary actions to address the issue. Prompt detection and resolution of a water pump leak can help prevent further damage and ensure the proper functioning of your systems and appliances.
In the next section, we will discuss the steps to fix a water pump leak.
Checking for Visible Leaks
One of the first steps in identifying a water pump leak is to check for any visible signs of leakage. This involves inspecting the water pump and its surroundings for any dampness, coolant puddles, or stains. Here’s how to perform a visual check for visible leaks:
1. Preparation: Before you begin, make sure the engine is cool to avoid any burns. If necessary, wait for the engine to cool down before proceeding.
2. Locate the Water Pump: Locate the water pump in your vehicle or appliance. In most cases, the water pump is located near the engine, connected to the cooling system.
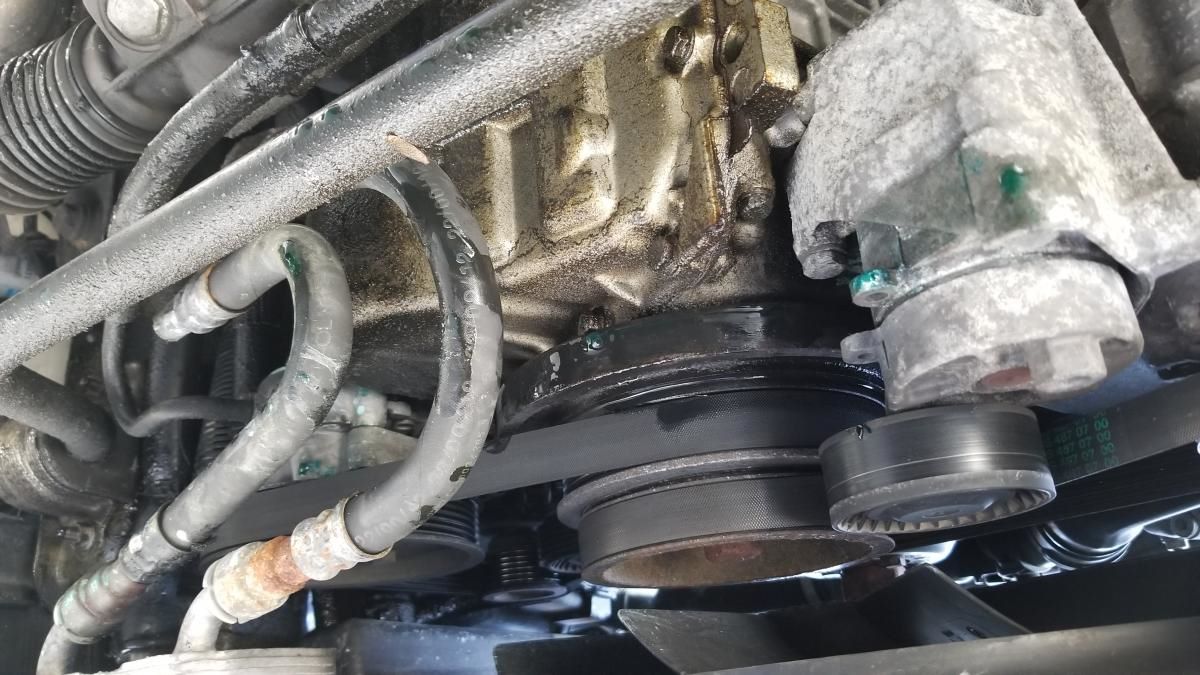
3. Visual Inspection: Carefully examine the water pump and its surrounding areas. Look for any signs of coolant leakage, such as wet spots, dripping coolant, or pools of coolant on the ground underneath the vehicle. Pay attention to the area around the water pump housing, gaskets, seals, and hose connections.
4. Check for Stains or Residue: Look for any stains, residue, or discoloration around the water pump or on nearby components. Coolant stains are often green, yellow, or orange in color, depending on the type of coolant used. Stains or residue can indicate a past or ongoing leak.
5. Use a Flashlight: If necessary, use a flashlight to get a better view of hard-to-reach areas or to examine the water pump more closely. Shine the light onto the water pump and its connections, focusing on any potential leak points.
6. Document Findings: Take note of any visible leaks or signs of leakage. If possible, take pictures to document the location and severity of the leaks. This information will be helpful for further diagnosis and repair.
Checking for visible leaks is an essential first step in identifying a water pump leak. However, it’s important to note that not all water pump leaks are immediately visible. Some leaks may occur internally or in hard-to-reach areas. If you suspect a water pump leak based on other signs or symptoms, it’s necessary to proceed with further diagnostic steps to confirm the presence of a leak and pinpoint its source.
In the next section, we will discuss how to monitor coolant levels as part of identifying a water pump leak.
Monitoring Coolant Levels
Monitoring coolant levels is an important step in identifying a water pump leak. A sudden or consistent drop in coolant levels without any apparent external leaks can indicate a potential water pump leak. Here’s how to monitor coolant levels effectively:
1. Park on Level Ground: Park your vehicle or appliance on a level surface to ensure accurate measurements of the coolant level. This will help you get a more precise reading.
2. Cool Engine: Make sure the engine is cool before checking the coolant level. Opening the coolant reservoir or radiator cap when the engine is hot can lead to pressurized coolant spewing out and potentially causing burns.
3. Locate the Coolant Reservoir or Radiator: Depending on the design of your system, locate the coolant reservoir or the radiator. The coolant reservoir is typically a translucent plastic container located near the engine compartment. The radiator may have a separate cap that allows direct access to the coolant.
4. Check the Current Coolant Level: Carefully remove the coolant reservoir cap or radiator cap (if the engine is cool). Observe the coolant level inside. It should be within the recommended minimum and maximum markings on the reservoir or the radiator.
5. Record the Initial Coolant Level: Take note of the initial coolant level by visually inspecting the amount of coolant in the reservoir or the radiator. Use a dipstick or coolant level indicator, if available, to get a more precise measurement.
6. Monitor Coolant Level Over Time: Keep an eye on the coolant level over a period of time. Check the level regularly, especially after driving or using the appliance. If you notice a significant drop in the coolant level without any visible external leaks, it may indicate a water pump leak.
7. Document Changes in Coolant Level: Note any changes in the coolant level and record the date and time. If the coolant level consistently decreases, it suggests that there may be a leak in the cooling system, including the water pump.
Monitoring coolant levels can help you identify a water pump leak by tracking any unexplained losses of coolant. If you observe a significant and consistent decrease in coolant levels, it is advisable to proceed with further inspection and diagnosis to confirm the presence of a water pump leak and locate its source.
In the next section, we will discuss paying attention to overheating issues as an essential step in identifying a water pump leak.
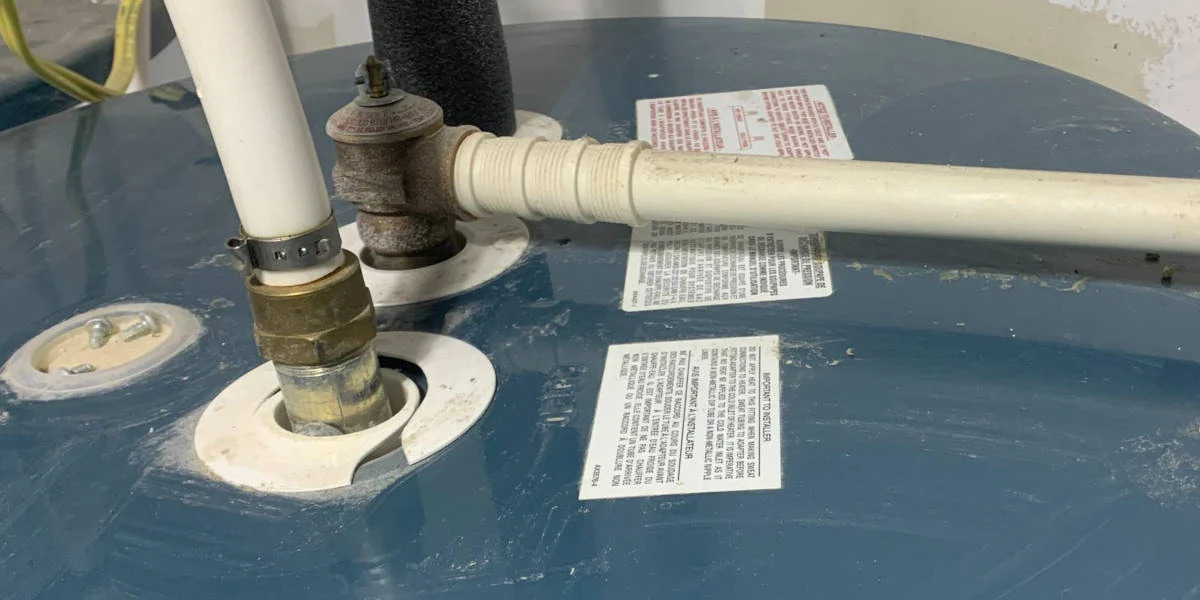
Check the gaskets and seals for wear and tear, as they can be a common source of water pump leaks. Replace any damaged components to prevent further leakage.
Paying Attention to Overheating Issues
Paying attention to overheating issues is a crucial step in identifying a water pump leak. A malfunctioning water pump can disrupt the proper circulation of coolant, leading to engine overheating. Here’s how to pay attention to overheating issues:
1. Temperature Gauge: Keep an eye on the temperature gauge or temperature indicator on your vehicle’s dashboard or appliance’s control panel. The gauge typically shows the operating temperature of the engine. If you notice the temperature gauge consistently running hotter than normal or reaching the red zone, it may indicate an overheating problem, potentially caused by a water pump leak.
2. Warning Lights or Alarms: Some vehicles or appliances may have warning lights or alarms that alert you to engine overheating. If you see a warning light illuminated or hear an alarm, it’s crucial to investigate the cause, including the possibility of a water pump leak.
3. Steam or Smoke: If you observe steam or smoke coming from the engine compartment, it is a clear sign of overheating. This can be caused by a water pump leak, preventing proper cooling and leading to excessive heat buildup.
4. Loss of Performance: Engine performance may be affected when the engine starts to overheat. If you notice a decrease in power, sluggish acceleration, or poor engine performance, it may be due to a water pump leak affecting the cooling system’s efficiency.
5. Strange Smells: Take note of any unusual smells emanating from the engine compartment. A sweet or burnt odor can indicate coolant leaking or being burnt due to an overheating issue caused by a water pump leak.
Paying attention to overheating issues is crucial as it can help you catch a potential water pump leak early on. If you consistently experience overheating problems, it is recommended to stop driving or using the appliance and seek professional assistance to diagnose and resolve the issue.
In the next section, we will discuss inspecting for unusual noises or vibrations as a step in identifying a water pump leak.
Read more: Why Is My Espresso Machine Leaking Water?
Inspecting for Unusual Noises or Vibrations
Inspecting for unusual noises or vibrations is an important step in identifying a water pump leak. Mechanical issues in the water pump can cause abnormal sounds and vibrations. Here’s how to conduct this inspection:
1. Park in a Quiet Location: Start by parking your vehicle or appliance in a quiet location where you can carefully listen for any unusual sounds. Turn off the radio and other sources of noise to enhance your ability to detect abnormal sounds.
2. Start the Engine: Start the engine and let it idle. Pay attention to any sounds coming from the engine compartment, particularly near the water pump area.
3. Listen for Grinding or Whining Noises: A failing water pump may produce grinding, whining, or squealing noises. These noises usually indicate bearing or shaft problems. Listen for any unusual sounds that differ from the normal engine sounds.
4. Observe Any Vibrations: Alongside listening for noises, pay attention to any unusual vibrations coming from the water pump area. Excessive vibration could signify internal damage or misalignment, potentially leading to a water pump leak.
5. Note the Location of Sounds and Vibrations: If you observe any unusual noises or vibrations, try to pinpoint their location. This can help you narrow down the potential source of the issue, such as a water pump leak.
It’s important to note that there can be other causes of unusual noises and vibrations in the engine compartment unrelated to a water pump leak. However, if you determine that the sounds or vibrations are originating from the water pump area, it’s recommended to further investigate the possibility of a water pump leak.
Document any abnormal sounds or vibrations you notice, including information about their frequency, intensity, and whether they occur consistently or intermittently. Providing this information to a professional mechanic or appliance technician can help in diagnosing and resolving the issue.
In the next section, we will discuss observing coolant contamination as a step in identifying a water pump leak.
Observing Coolant Contamination
Observing coolant contamination is an important step in identifying a water pump leak. A water pump leak can introduce foreign substances into the coolant, leading to contamination. Here’s how to observe coolant contamination:
1. Check Coolant Color and Consistency: Take a close look at the color and consistency of the coolant in the reservoir or radiator. Coolant is typically brightly colored, such as green, yellow, red, or orange, depending on the type used. If you notice a significant change in color, such as a milky or muddy appearance, it could indicate coolant contamination.
2. Inspect for Rust Particles: Rust particles present in the coolant can indicate the presence of corrosion in the cooling system. Check the coolant for any visible rust particles or sediment. This could suggest a water pump leak, as rust can enter the coolant due to a damaged or corroded water pump component.
3. Smell and Texture: Pay attention to any unusual smells or textures in the coolant. Coolant that smells burnt or exhibits a strange odor could be an indication of contamination. Additionally, if the coolant feels slimy, gritty, or has an unusual texture, it may warrant further investigation for possible contamination.
4. Coolant Loss without Visible Leaks: If you notice a significant loss of coolant without any apparent visible leaks, it could suggest a water pump leak. The loss of coolant could be due to a leak from the water pump that is not immediately visible to the naked eye.
Observing coolant contamination can provide valuable insights into the condition of your cooling system and help identify a potential water pump leak. If you detect coolant contamination or suspect a water pump leak based on the appearance, smell, or texture of the coolant, it is advisable to seek further inspection and diagnosis from a qualified professional.
Document any observations of coolant contamination, including changes in color, the presence of rust particles, and any unusual smells or textures. This information can assist a technician in pinpointing the source of the water pump leak and determining the necessary repairs or replacements.
In the next section, we will discuss the essential steps to fix a water pump leak once it has been identified.
Steps to Fix a Water Pump Leak
Fixing a water pump leak is crucial to ensure the proper functioning of your systems and appliances. Here are the essential steps to fix a water pump leak:
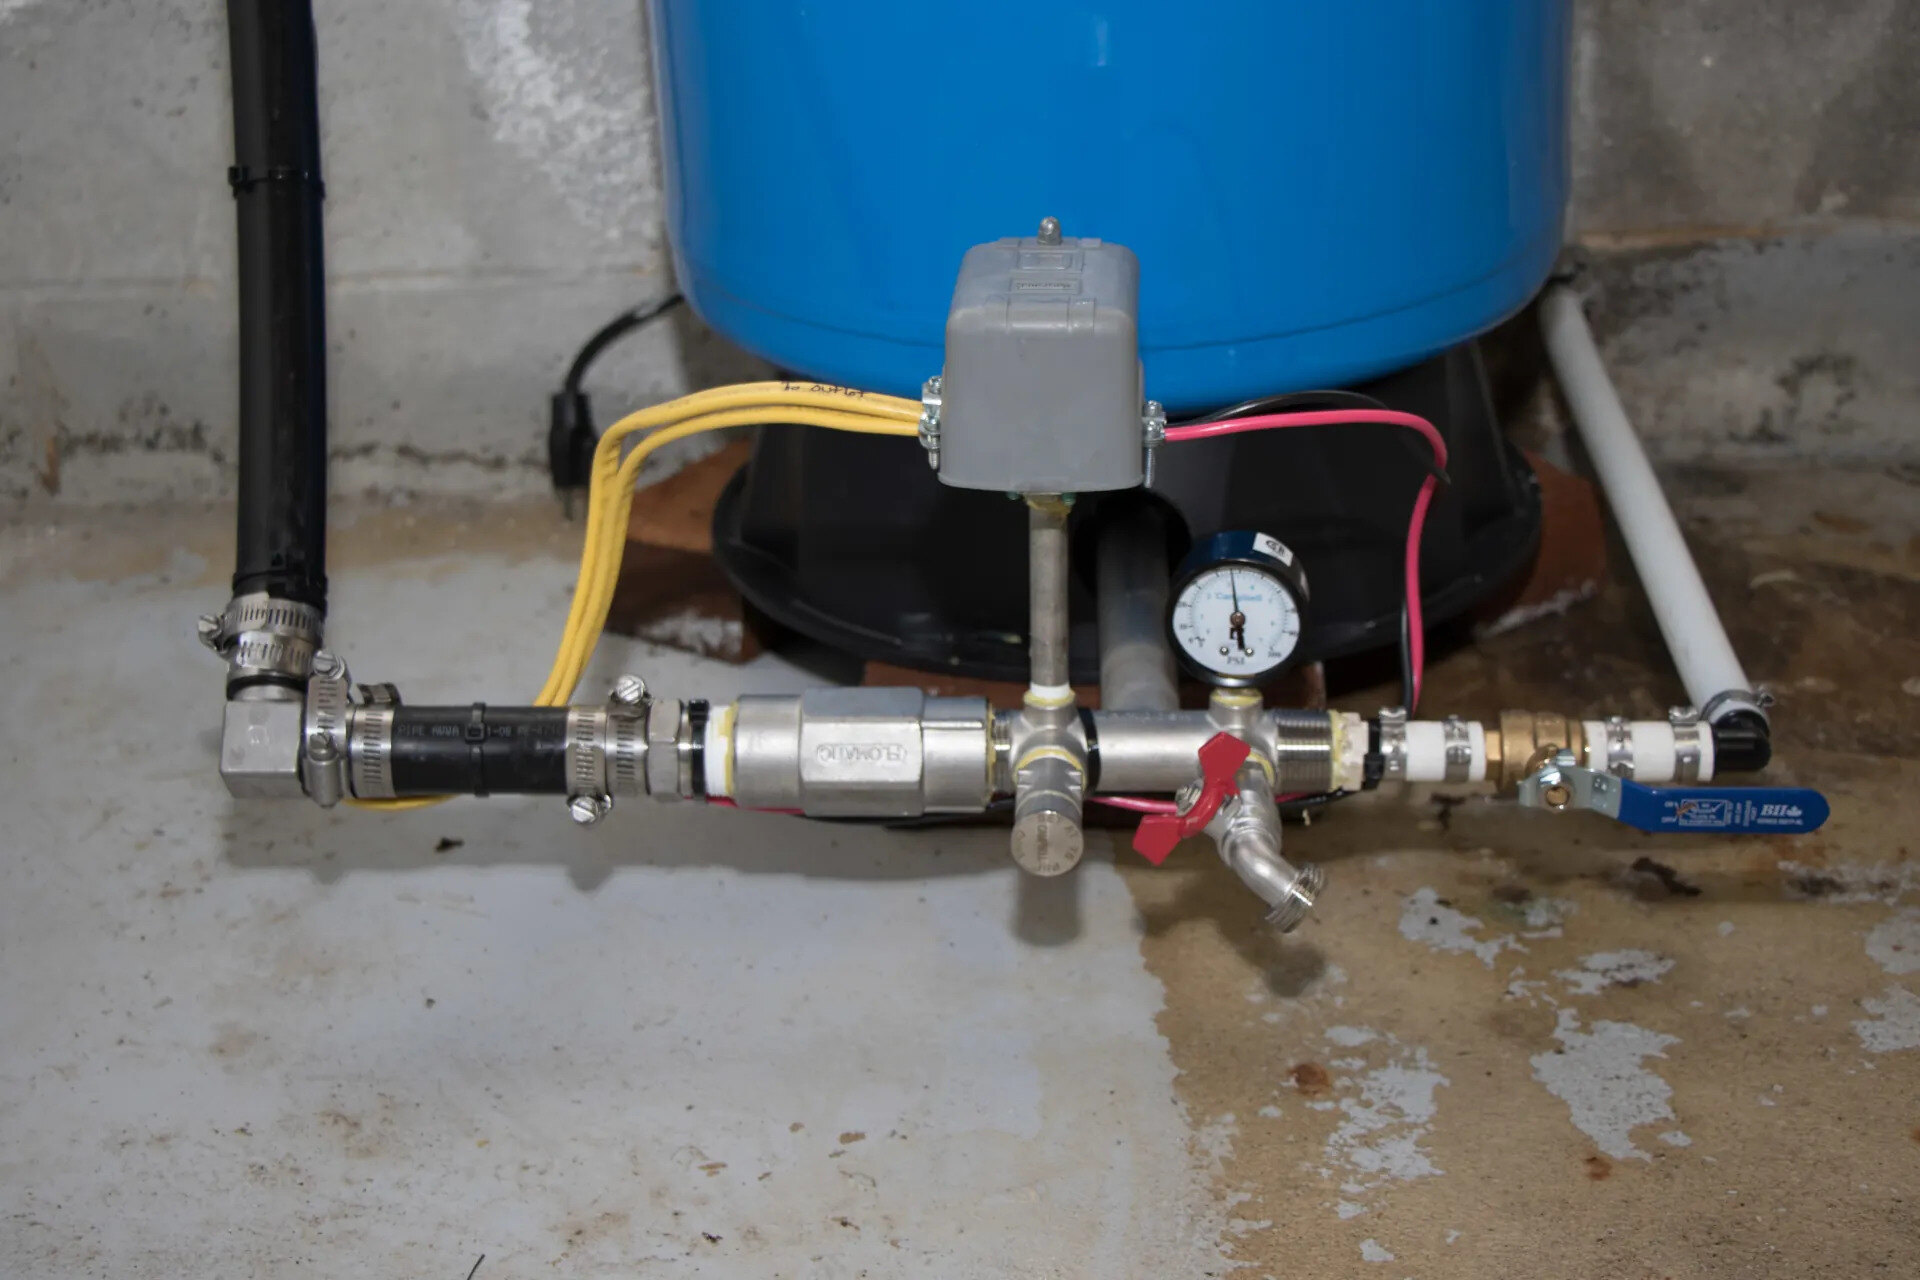
1. Determine the Source of the Leak: Before starting any repairs, correctly identifying the source of the water pump leak is vital. Inspect the water pump, gaskets, seals, and hose connections to pinpoint the exact location of the leak. This will help you determine the appropriate course of action.
2. Prepare for Repair: Once you have identified the source of the leak, gather the necessary tools and materials for the repair. This may include a replacement water pump, gaskets, seals, coolant, and any additional components needed.
3. Remove the Old Water Pump: Begin by draining the coolant from the system to prevent spills and contamination. Follow the manufacturer’s instructions or consult a service manual for your specific vehicle or appliance to safely remove the old water pump. Disconnect any hoses, belts, and electrical connections associated with the water pump. Take note of their position and route for reassembly.
4. Install a New Water Pump: Clean the mounting surface of the engine block to ensure a proper seal. Install the new water pump, making sure to align it correctly and secure it in place according to the manufacturer’s instructions. Use new gaskets and seals to ensure a reliable and leak-free connection.
5. Reassemble the Cooling System: Reconnect any hoses, belts, and electrical connections that were disconnected during the removal process. Replace the coolant with a clean and appropriate mixture of coolant and water, following the recommended ratios and specifications for your system.
6. Test for Leaks: Once the water pump and cooling system are reassembled, start the engine and let it run for a few minutes. Monitor the area around the water pump for any signs of leaks. Pay attention to coolant levels, engine temperature, and any unusual noises or vibrations. If there are no leaks and the system performs as expected, you have successfully fixed the water pump leak.
It is worth noting that repairing a water pump leak can be a complex process, especially for vehicles or appliances with intricate cooling systems. If you are not confident in your ability to perform the repair, it is recommended to seek assistance from a qualified mechanic or appliance technician.
Remember to follow the manufacturer’s instructions and safety guidelines throughout the repair process. Regular maintenance and preventive measures, such as monitoring coolant levels and addressing any cooling system issues promptly, can help prevent future water pump leaks and ensure the longevity and efficiency of your systems and appliances.
In the next section, we will conclude our discussion on water pump leaks and their resolution.
Determine the Source of the Leak
When faced with a water pump leak, the first step in resolving the issue is to determine the source of the leak. Identifying the exact location of the leak is crucial for effectively repairing or replacing the damaged components. Here’s how to determine the source of the water pump leak:
1. Visual Inspection: Start by visually inspecting the water pump and its surrounding areas. Look for any visible signs of coolant leakage, such as wet spots, dripping coolant, or coolant stains. Pay close attention to the water pump housing, gaskets, seals, hose connections, and any other components associated with the water pump.
2. Clean and Dry the Area: If the area around the water pump is dirty or covered in coolant, clean and dry it using a suitable cleaning agent and a lint-free cloth. This will help in identifying new leaks or existing leaks that may have been concealed by coolant residue.
3. Pressure Testing: Pressure testing is a reliable method to determine if the water pump is the source of the leak. Using a pressure tester, apply pressure to the cooling system to simulate operating conditions. Observe the water pump area for any signs of coolant leakage under pressure. If you notice leakage, it indicates a problem with the water pump.
4. Thermography or Dye Testing: In some cases, thermography or dye testing can be helpful in identifying the source of a water pump leak. Thermographic imaging uses infrared technology to detect temperature variations, while dye testing involves introducing a fluorescent dye into the cooling system and using UV light to trace the path of the leak.
5. Professional Inspection: If you are unsure about the source of the leak or unable to identify it, seeking professional assistance is recommended. An experienced mechanic or appliance technician can conduct a thorough inspection using specialized tools and techniques to diagnose the water pump leak accurately.
By determining the source of the water pump leak, you can focus your efforts on repairing or replacing the specific components that are causing the issue. This will lead to a more efficient and effective resolution of the problem, ensuring the proper functioning of your systems and appliances.
In the next section, we will discuss the importance of proper maintenance and preventive measures to avoid water pump leaks.
Read more: Why Is My Smoke Detector Leaking Water
Prepare for Repair
Once you have determined the source of the water pump leak, it is essential to properly prepare for the repair process. Adequate preparation will ensure that you have all the necessary tools, materials, and knowledge to successfully fix the leak. Here are the steps to prepare for repairing the water pump:
1. Gather the Required Tools: Make a list of the tools needed for the repair based on the make and model of your vehicle or appliance. Common tools may include wrenches, sockets, screwdrivers, pliers, hose clamp tools, and a torque wrench. Ensure that you have the appropriate tools in the correct sizes to avoid any difficulties during the repair.
2. Acquire the Replacement Parts: Depending on the extent of the water pump leak and the manufacturer’s recommendations, you may need to replace various components. This may include a new water pump, gaskets, seals, O-rings, coolant, or any other parts that are damaged or prone to wear. Purchase high-quality replacement parts that are suitable for your specific system to ensure a reliable and long-lasting repair.
3. Obtain Service Manuals or Repair Guides: Consult service manuals, repair guides, or online resources specific to your vehicle or appliance. These resources provide step-by-step instructions and diagrams that can guide you through the repair process. Familiarize yourself with the repair procedure outlined in these resources to ensure you have a clear understanding of the required steps.
4. Ensure a Safe Working Environment: Before starting the repair, ensure you are working in a safe environment. Park your vehicle or appliance on a level surface and engage the parking brake. If working under a vehicle, use jack stands to secure it properly. If working with hot components, ensure they have cooled down before handling. Always wear appropriate personal protective equipment, such as gloves and safety glasses, to protect yourself during the repair process.
5. Prepare a Clean Work Area: Clear the work area of any unnecessary clutter or debris to create a clean and organized space. This will make it easier to access the components and perform the repair. Lay down a clean mat or cloth to prevent any small parts from getting lost during the process.
Taking the time to properly prepare for the repair ensures a smoother and more efficient process. It minimizes the risk of missing or incorrect tools, provides a good understanding of the repair procedure, and creates a safe and organized work environment. By being well-prepared, you can approach the repair with confidence and increase the likelihood of a successful repair outcome.
In the next section, we will discuss the steps to remove the old water pump as part of the repair process.
Remove the Old Water Pump
Once you have prepared for the repair, the next step is to remove the old water pump. Removing the old water pump is necessary to gain access to the damaged or leaking components and replace them with new ones. Here are the steps to remove the old water pump:
1. Drain the Coolant: Before starting the removal process, drain the coolant from the cooling system to prevent any spills or contamination. Follow the manufacturer’s instructions or consult a service manual for your specific vehicle or appliance to safely drain the coolant. Use a drain pan to collect the coolant for proper disposal or recycling.
2. Disconnect Hoses and Electrical Connections: Locate the hoses connected to the water pump and carefully remove the hose clamps. Gently twist and pull the hoses off the water pump, being cautious of any coolant spills. If there are any electrical connections, such as sensors or switches, disconnect them from the water pump.
3. Remove Belts or Pulleys: If necessary, remove any belts or pulleys that may obstruct access to the water pump. Loosen the tensioner or adjust the tension to relieve pressure on the belts. Remove the belts or pulleys as per the manufacturer’s instructions or service manual.
4. Unbolt and Remove the Water Pump: Identify the mounting bolts that secure the water pump to the engine or mounting bracket. Using the appropriate tools, carefully remove the bolts, ensuring not to strip or damage them. Once the bolts are removed, gently pry or tap the old water pump to separate it from the engine or mounting bracket. Be cautious not to damage any nearby components during this process.
5. Clean the Mounting Surface: Once the old water pump is removed, clean the mounting surface on the engine or mounting bracket. Use a suitable cleaning agent and a lint-free cloth to remove any debris, gasket material, or coolant residue. A clean surface is essential for a proper seal when installing the new water pump.
During the removal process, it is essential to handle the old water pump and associated components with care. Avoid dropping or damaging these parts, as they may need to be returned or exchanged if they are eligible for warranty coverage or core return.
Following these steps will allow you to successfully remove the old water pump and prepare for the installation of the new one. Remember to organize and keep track of any removed parts for proper reassembly later. In the next section, we will discuss the process of installing a new water pump.
Install a New Water Pump
Once you have removed the old water pump, the next step is to install a new water pump. Installing a new water pump is crucial to ensure a proper seal and prevent future leaks. Here are the steps to follow:
1. Preparation: Before installing the new water pump, ensure that the mounting surface on the engine or mounting bracket is clean and free from debris. Inspect the new water pump and its components to ensure they are in good condition and match the specifications of your vehicle or appliance.
2. Apply Gasket Sealant: If instructed by the manufacturer or service manual, apply a thin layer of gasket sealant to the water pump housing or gasket mating surface. This will help create a reliable and leak-free seal between the water pump and the engine or mounting bracket.
3. Position the New Water Pump: Align the new water pump with the mounting holes on the engine or mounting bracket. Gently position the water pump in place, taking care not to damage the gasket or any surrounding components.
4. Install Mounting Bolts: Insert and hand-tighten the mounting bolts into their respective holes. Ensure that the water pump is sitting flush against the mounting surface.
5. Torque the Bolts: Gradually and evenly tighten the mounting bolts using a torque wrench, following the manufacturer’s specified torque values. Tighten the bolts in a crisscross pattern to ensure even pressure distribution. Avoid over-tightening, as it can damage the water pump or the mounting surface.
6. Reconnect Hoses and Electrical Connections: Reattach the hoses that were disconnected earlier, ensuring a secure and tight fit. Replace any hose clamps that were removed and ensure they are tightened properly. Reconnect any electrical connections, such as sensors or switches.
7. Install Belts or Pulleys: If any belts or pulleys were removed, reinstall them according to the manufacturer’s instructions or service manual. Adjust the tension of the belts, making sure they have the correct tension for proper operation.
8. Double-check Connections: Before proceeding, double-check all connections, including hoses, electrical connections, belts, and pulleys. Ensure they are properly secured and in their correct positions.
Once the new water pump is installed, you can proceed to the next step of reassembling the cooling system and testing for leaks. Proper installation of the water pump is crucial to ensure its optimal performance and prevent future leaks. If you are unsure about any step of the installation process, it is recommended to consult a service manual or seek assistance from a qualified mechanic or appliance technician.
In the next section, we will discuss the steps to reassemble the cooling system after installing the new water pump.
Reassemble the Cooling System
After installing the new water pump, the next step is to reassemble the cooling system. Proper reassembly ensures the smooth operation of the system and helps maintain the integrity of the water pump installation. Here are the steps to reassemble the cooling system:
1. Reconnect Hoses: Begin by reconnecting the hoses that were disconnected during the removal process. Ensure that the hoses are securely attached and tightened using appropriate hose clamps. Double-check the routing of the hoses to ensure they are correctly positioned.
2. Install the Thermostat (if applicable): If the thermostat was removed during the repair process, reinstall it according to the manufacturer’s instructions. Ensure that the thermostat is properly seated and the gasket is correctly positioned for a proper seal.
3. Reinstall Belts and Pulleys: If any belts or pulleys were removed, reinstall them as per the manufacturer’s instructions. Follow proper belt routing and ensure the belts are properly tensioned. Adjust the tensioner if necessary.
4. Fill the Cooling System with Coolant: Refill the cooling system with the appropriate type and mixture of coolant as recommended by the manufacturer. Follow proper coolant filling procedures, such as bleeding air from the system, to ensure proper circulation and prevent any airlocks.
5. Check for Leaks: Before starting the engine, carefully inspect all connections, including hoses, seals, and fittings, for any signs of leaks. This includes visually examining the water pump area for any coolant drips or pooling. Address any leaks immediately to prevent further issues.
6. Reinstall any Removed Components: If any components, such as covers or panels, were removed during the repair process, reinstall them according to the manufacturer’s instructions. Ensure that all fasteners are properly tightened and all electrical connections are securely reconnected.
7. Test the Cooling System: Start the engine and let it idle, allowing the cooling system to reach operating temperature. Monitor the temperature gauge and look for any abnormal fluctuations or overheating. Check for any signs of coolant leakage while the engine is running.
By following these steps to reassemble the cooling system, you can ensure that all connections are properly secured, coolant levels are replenished, and the system is ready for operation. Proper reassembly is crucial to prevent any issues that may arise due to loose components or improper cooling system functioning.
In the next section, we will discuss how to test for leaks to ensure the effectiveness of the repair and the successful resolution of the water pump leak.
Read more: Why Is My Rv Water Pump Not Working
Test for Leaks
Testing for leaks is a crucial step in the water pump repair process to ensure the effectiveness of the repair and the prevention of future issues. Proper testing helps verify that the water pump is functioning correctly and that all connections are secure. Here are the steps to test for leaks:
1. Visual Inspection: Begin by visually inspecting the water pump, hoses, gaskets, and surrounding areas for any signs of coolant leakage. Look for any coolant drips, stains, or pools around the water pump or any connection points. Pay close attention to areas where the old leak was identified or other potential weak spots.
2. Pressure Test: Using a cooling system pressure tester, pressurize the cooling system to the manufacturer’s recommended pressure or specifications. The pressure tester typically attaches to the radiator or coolant reservoir. Apply pressure and closely monitor the water pump and surrounding connections for any signs of leakage.
3. Observe Coolant Levels: Monitor the coolant levels in the reservoir or radiator as the pressure test is being conducted. A sudden drop in coolant levels can indicate an active leak. Additionally, if there is a consistent decrease in coolant levels over time without any signs of external leakage, it may suggest an internal leak in the water pump or another component.
4. Inspect for Visual Fluid Movement: While the pressure test is underway, carefully observe the water pump, hoses, and gaskets for any visual fluid movement. Look for any indications of coolant seeping, spraying, or spurting from the water pump or any connections. These signs can indicate a leak that may require further investigation or tightening of connections.
5. Check Cooling System Performance: During the pressure test, closely monitor the overall performance of the cooling system. Keep an eye on the temperature gauge to ensure that the engine does not overheat. If the engine temperature rises unexpectedly or the cooling system shows signs of inefficiency, it may indicate a hidden leak or other issues that require further troubleshooting.
6. Reinspect Connections: After the pressure test, visually reinspect all connections, including the water pump, hoses, gaskets, and seals. Look for any signs of coolant residue or wetness. Tighten any connections, if necessary, to ensure a snug fit and prevent potential leaks.
By performing a thorough leak test, you can identify and address any remaining or newly discovered leaks in the water pump or cooling system. Detecting and resolving leaks promptly will help prevent further damage, ensure optimal performance, and extend the longevity of the water pump.
In the next section, we will conclude our discussion on repairing water pump leaks and highlight the importance of preventative maintenance to avoid future issues.
Conclusion
Water pump leaks can be a common and concerning issue in various systems and appliances. However, by understanding the common causes, identifying the signs, and following the necessary steps to repair the water pump, you can effectively address and resolve these leaks.
Throughout the repair process, it is crucial to determine the source of the leak, prepare for the repair with the necessary tools and replacement parts, remove the old water pump, install a new one, and reassemble the cooling system. Additionally, testing for leaks ensures that the repair has been effective and that the water pump is functioning properly.
Preventative maintenance plays a vital role in avoiding future water pump leaks. Regularly inspecting the water pump, hoses, gaskets, and connections, as well as maintaining proper coolant levels and cleanliness, can help identify potential issues early on. Additionally, following manufacturer recommendations for coolant replacement intervals and using high-quality replacement parts can help prevent premature wear and leakage.
Remember to consult the appropriate service manuals, repair guides, and online resources specific to your vehicle or appliance during the repair process. If you are unsure or uncomfortable with any aspect of the repair, it is recommended to seek professional assistance from a qualified mechanic or appliance technician.
Resolving water pump leaks promptly not only prevents further damage but also ensures the proper functioning of your systems and appliances. By taking the necessary steps to fix water pump leaks and practicing preventative maintenance, you can maintain the longevity, efficiency, and reliability of your systems and appliances.
Armed with the knowledge and understanding of water pump leaks, you can confidently tackle any issues that may arise, ensuring smooth operation and peace of mind.
Frequently Asked Questions about Why Is My Water Pump Leaking
Was this page helpful?
At Storables.com, we guarantee accurate and reliable information. Our content, validated by Expert Board Contributors, is crafted following stringent Editorial Policies. We're committed to providing you with well-researched, expert-backed insights for all your informational needs.

0 thoughts on “Why Is My Water Pump Leaking”