Home>Construction & Tools>Building Materials>How To Build A Brick Pathway
Building Materials
How To Build A Brick Pathway
Modified: March 24, 2024
Learn how to build a durable brick pathway using high-quality building materials. Follow our step-by-step guide for a long-lasting and attractive walkway.
(Many of the links in this article redirect to a specific reviewed product. Your purchase of these products through affiliate links helps to generate commission for Storables.com, at no extra cost. Learn more)
Introduction
Welcome to the world of DIY pathways! If you’re looking to add charm, functionality, and a touch of timeless elegance to your outdoor space, building a brick pathway is an excellent choice. Whether it’s a winding trail through your garden or a straight path leading to your front door, a well-crafted brick pathway can significantly enhance the visual appeal of your property while providing a durable and low-maintenance walking surface.
Not only does a brick pathway offer practical benefits such as preventing soil erosion and minimizing wear and tear on your lawn, but it also serves as a defining feature that can elevate the overall aesthetic of your landscape. The process of creating a brick pathway is a rewarding endeavor that allows you to unleash your creativity and craftsmanship, resulting in a beautiful addition to your outdoor environment.
In this comprehensive guide, we’ll walk you through the step-by-step process of building a brick pathway, from planning and designing to the finishing touches. Whether you’re a seasoned DIY enthusiast or a novice looking to embark on your first outdoor project, this guide will equip you with the knowledge and confidence to tackle this rewarding endeavor. So, roll up your sleeves, gather your tools, and let’s get started on creating a stunning brick pathway that will be admired for years to come.
Key Takeaways:
- Planning and Designing
Careful planning and design are crucial for a successful brick pathway. Consider location, brick style, pattern, and landscaping elements to create a visually appealing and functional outdoor feature. - Finishing Touches
Completing a brick pathway involves securing edges, filling gaps, compacting the surface, and considering optional sealant and landscaping elements. Regular maintenance ensures the pathway’s long-term beauty and functionality.
Planning and Designing Your Pathway
Before you start digging into the ground, it’s essential to carefully plan and design your brick pathway. This initial phase sets the foundation for a successful and visually appealing outcome. Here are the key steps to consider:
- Choose the Right Location: Assess your outdoor space and determine where you want the pathway to lead. Consider factors such as foot traffic patterns, landscaping features, and practical access points. The pathway should seamlessly integrate with the overall design of your yard.
- Measure and Mark the Pathway: Use stakes and string to outline the intended pathway. This visual representation will help you visualize the final layout and make any necessary adjustments before moving forward.
- Select the Brick Style: Explore different brick options, such as traditional red bricks, reclaimed bricks for a weathered look, or interlocking pavers for a modern touch. Consider the architectural style of your home and the surrounding landscape when choosing the most suitable brick style.
- Design the Pattern: Decide on the pattern in which the bricks will be laid. Popular options include herringbone, running bond, and basket weave patterns. The chosen pattern can significantly impact the visual appeal of the pathway.
- Consider Landscaping Elements: Take into account existing landscaping elements such as flower beds, trees, and shrubs. Ensure that the pathway design harmonizes with these features, creating a cohesive and aesthetically pleasing outdoor environment.
By investing time in the planning and design phase, you’ll set the stage for a successful brick pathway project. This thoughtful approach will help you avoid potential pitfalls and ensure that the end result aligns with your vision for a beautiful and functional outdoor pathway.
Gathering Materials and Tools
With the pathway design in place, it’s time to gather the necessary materials and tools to bring your vision to life. Here’s a rundown of what you’ll need:
- Bricks: Purchase enough bricks to cover the pathway area, factoring in a few extras for cuts and replacements. Choose high-quality bricks that are durable and suitable for outdoor use.
- Gravel and Sand: These materials will form the foundation and base for the pathway. Gravel provides stability and drainage, while sand allows for leveling and setting the bricks securely.
- Shovel and Rake: Essential for excavating the pathway area and leveling the gravel and sand base. A sturdy shovel and rake will help you achieve a smooth and even foundation.
- Wheelbarrow: Ideal for transporting gravel, sand, and other heavy materials to the pathway site. It will save you time and effort during the preparation phase.
- String and Stakes: These simple yet crucial tools will help you outline the pathway and maintain straight lines and consistent widths during construction.
- Masonry Saw or Hammer and Chisel: Depending on the complexity of your design, you may need to make precise cuts to the bricks. A masonry saw or a hammer and chisel will allow you to customize the bricks to fit the layout.
- Level and Trowel: These tools are essential for ensuring that the bricks are laid evenly and securely. A level will help you maintain a consistent slope and prevent tripping hazards, while a trowel is useful for spreading and smoothing the sand base.
- Protective Gear: Don’t forget to prioritize safety. Wear gloves, safety glasses, and sturdy footwear to protect yourself during the construction process.
By assembling the right materials and tools, you’ll be well-prepared to tackle the physical aspects of building your brick pathway. Having everything on hand will streamline the construction process and contribute to a professional-looking end result.
Preparing the Area
Before the first brick is laid, thorough preparation of the pathway area is essential to ensure a stable and long-lasting foundation. Follow these steps to prepare the site for your brick pathway:
- Clear the Pathway: Remove any existing vegetation, rocks, or debris from the designated pathway area. This step provides a clean canvas for the construction process.
- Excavate the Soil: Use a shovel to dig out the soil to a depth that accommodates the gravel and sand base, as well as the thickness of the bricks. The depth will depend on the specific requirements of your pathway design and the type of bricks being used.
- Compact the Soil: After excavation, use a tamper or compactor to firmly pack down the soil. This step creates a stable base and minimizes the risk of settling over time.
- Layer Gravel and Sand: Pour a layer of gravel into the excavated area and spread it evenly. Compact the gravel to create a solid and permeable base. Next, add a layer of sand and use a rake to level it, ensuring a smooth and uniform surface for the bricks.
- Establish the Slope: If your pathway needs to accommodate water runoff, ensure that the base has a slight slope to facilitate drainage. This is particularly important for pathways in areas prone to heavy rainfall.
- Compact the Base: Once the gravel and sand layers are in place, use a compactor to firmly compact the base. This step is crucial for creating a sturdy foundation that will support the weight of foot traffic and maintain the integrity of the pathway.
Thoroughly preparing the pathway area sets the stage for a successful brick installation. Taking the time to complete these foundational steps will contribute to the longevity and stability of your pathway, ensuring that it remains a functional and visually appealing feature in your outdoor space.
When building a brick pathway, make sure to properly prepare the base by digging a trench, adding a layer of gravel, and compacting it. This will ensure a stable and durable pathway.
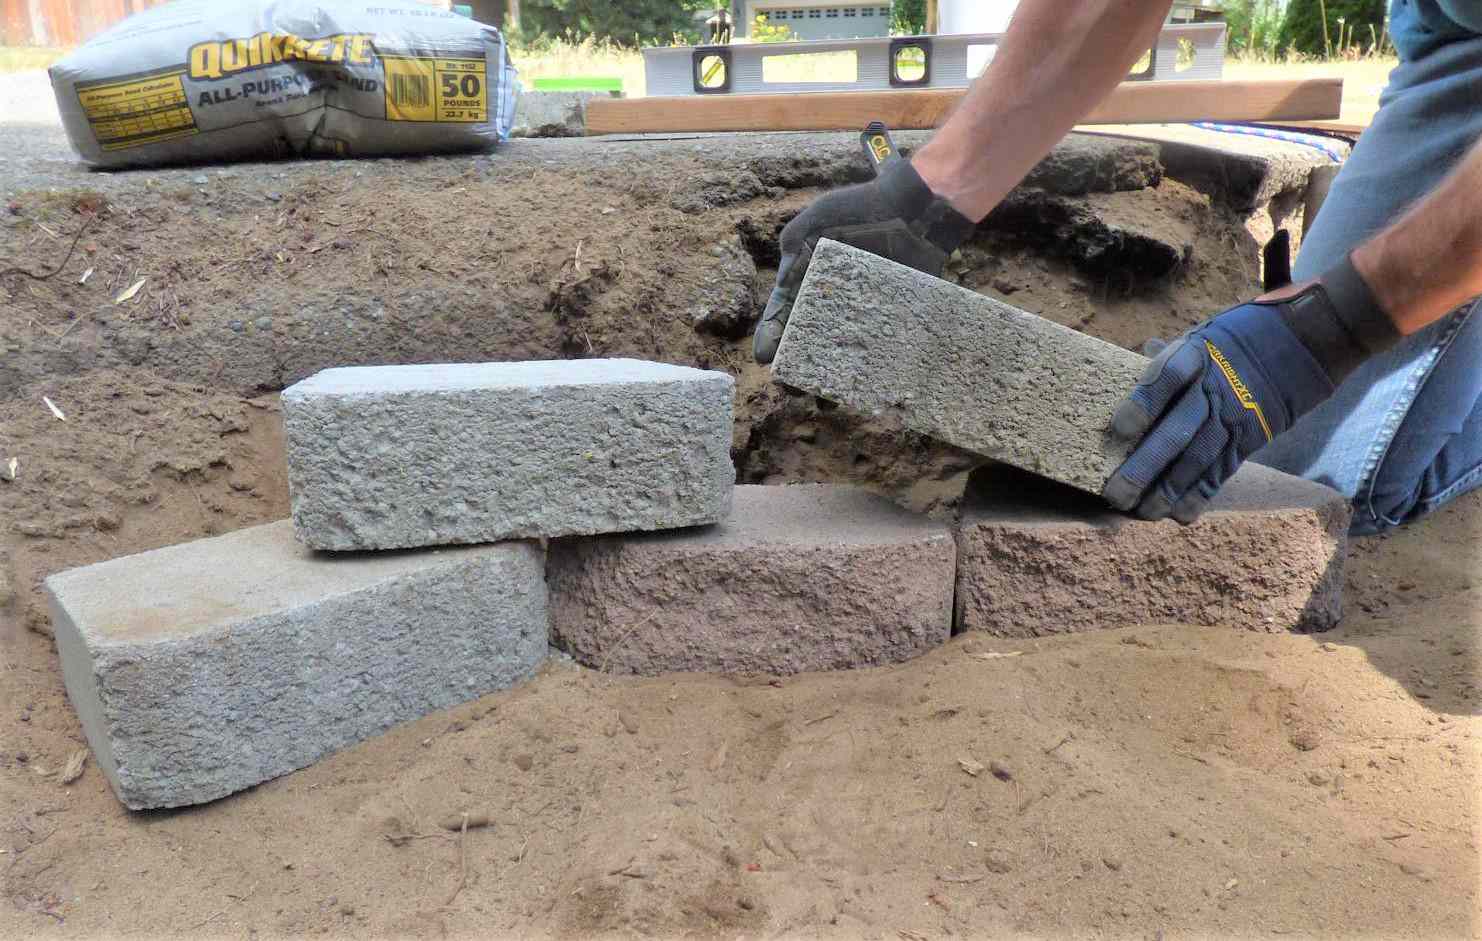
Laying the Foundation
With the pathway area meticulously prepared, it’s time to lay the foundation for your brick pathway. This phase involves setting the bricks in place, creating a sturdy and level surface. Here’s how to proceed:
- Begin at the Starting Point: Identify the starting point of your pathway, typically near an existing structure or at the entrance point from a patio or driveway. This ensures a seamless transition between the pathway and the surrounding area.
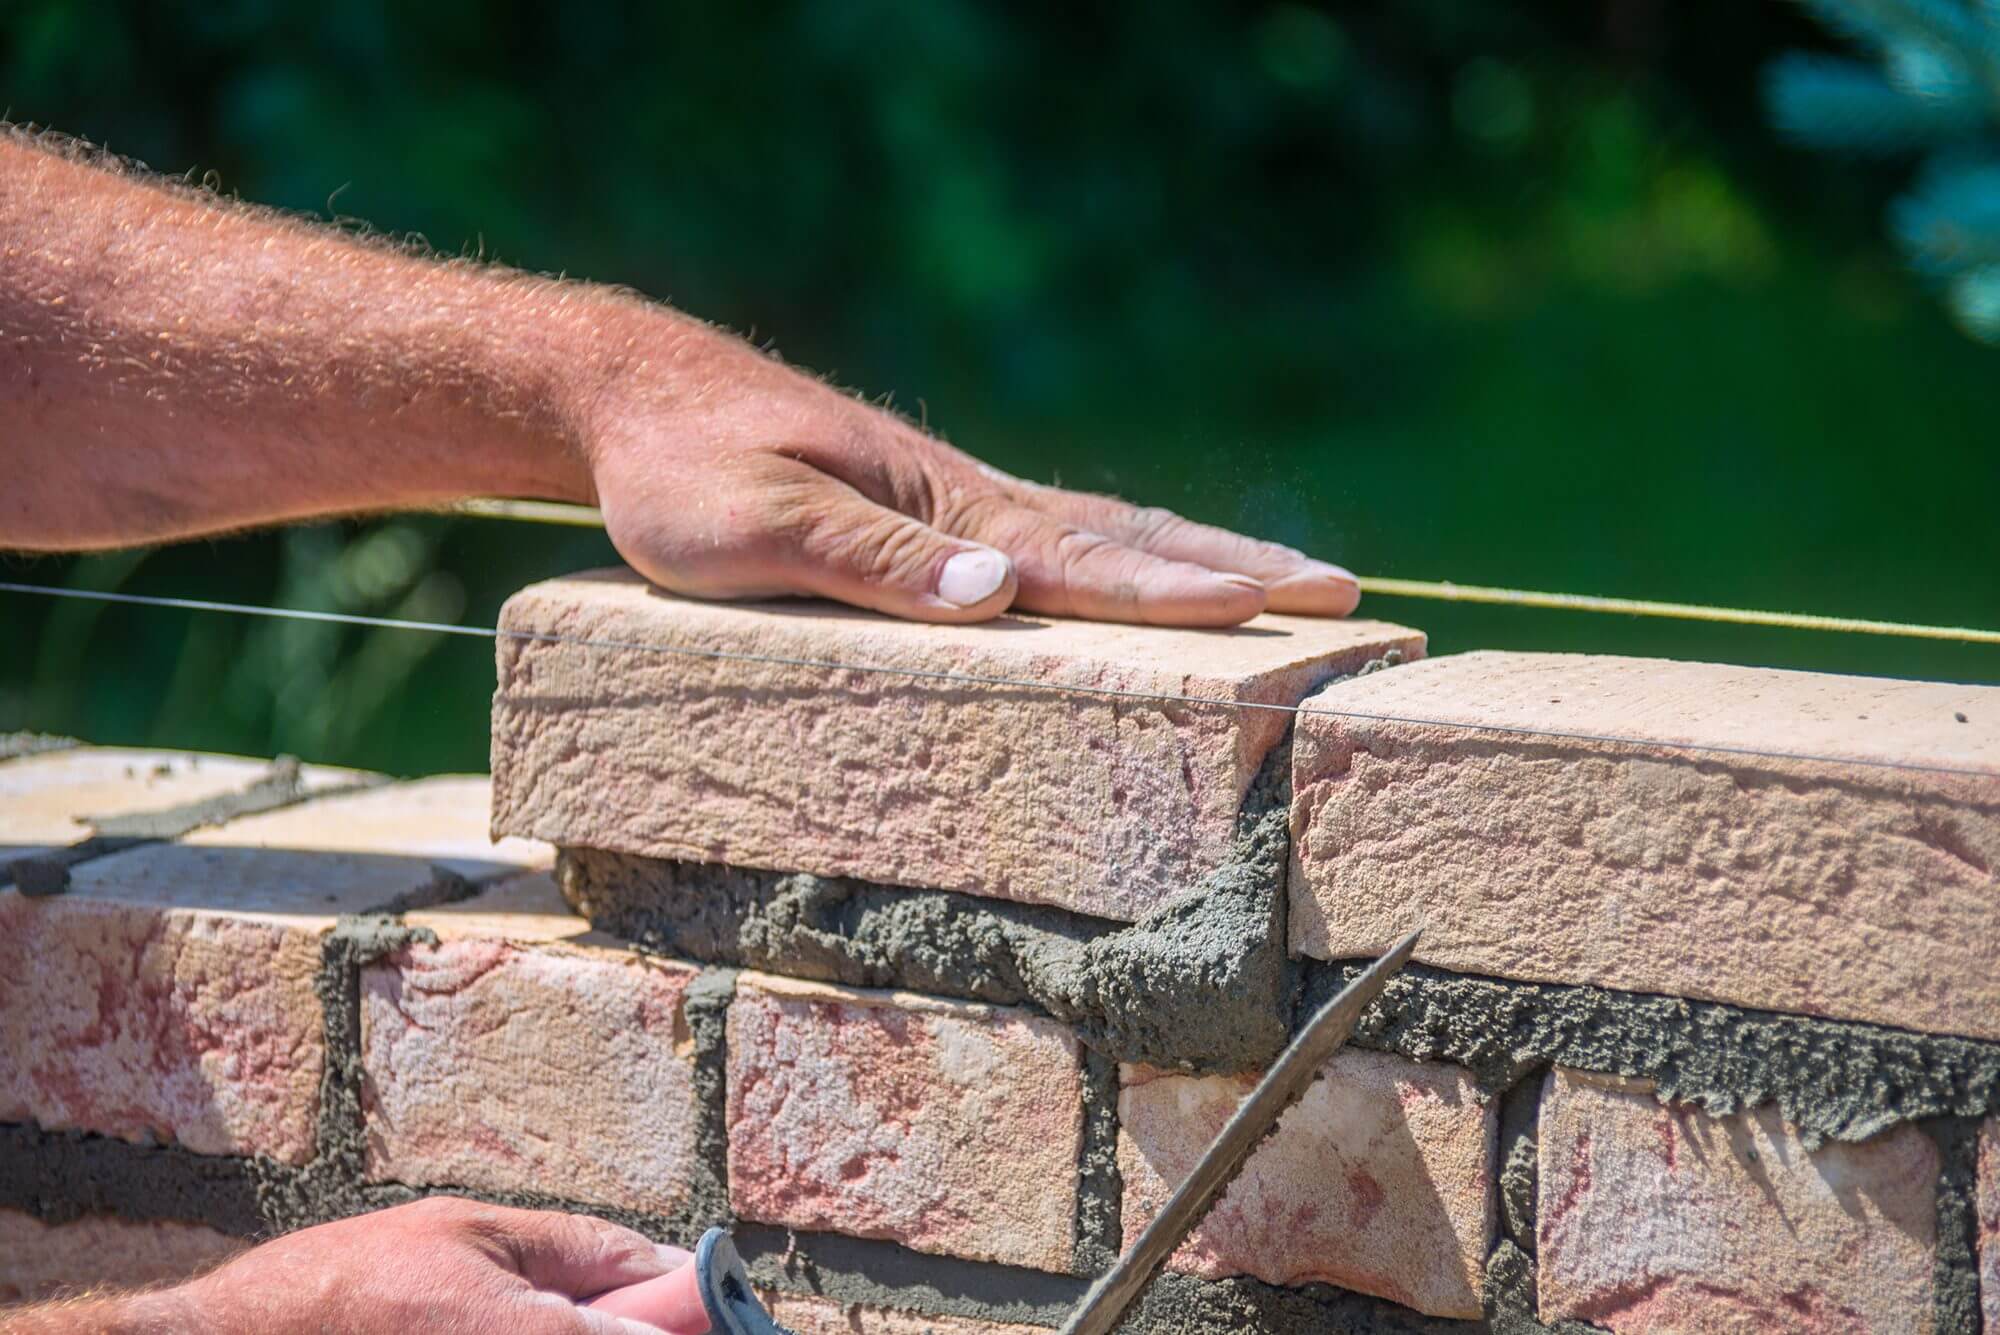
- Place the First Bricks: Carefully position the first row of bricks according to your predetermined design and pattern. Use a level to ensure that the bricks are even and aligned, making any necessary adjustments to maintain straight lines and consistent spacing.
- Create Edge Restraints: Install edge restraints along the sides of the pathway to secure the bricks in place and prevent shifting over time. This can be achieved using plastic or metal paver restraints, which are anchored into the ground along the pathway edges.
- Fill the Gaps: As you lay the bricks, fill the gaps between them with sand. This process, known as “sweeping in,” helps lock the bricks in position and provides stability. Once the gaps are filled, compact the bricks with a plate compactor to ensure a solid and level surface.
- Check for Consistency: Regularly use a level to verify that the bricks are consistently flat and even. Pay attention to maintaining a slight slope if necessary to facilitate water drainage. This step is crucial for preventing tripping hazards and ensuring a professional finish.
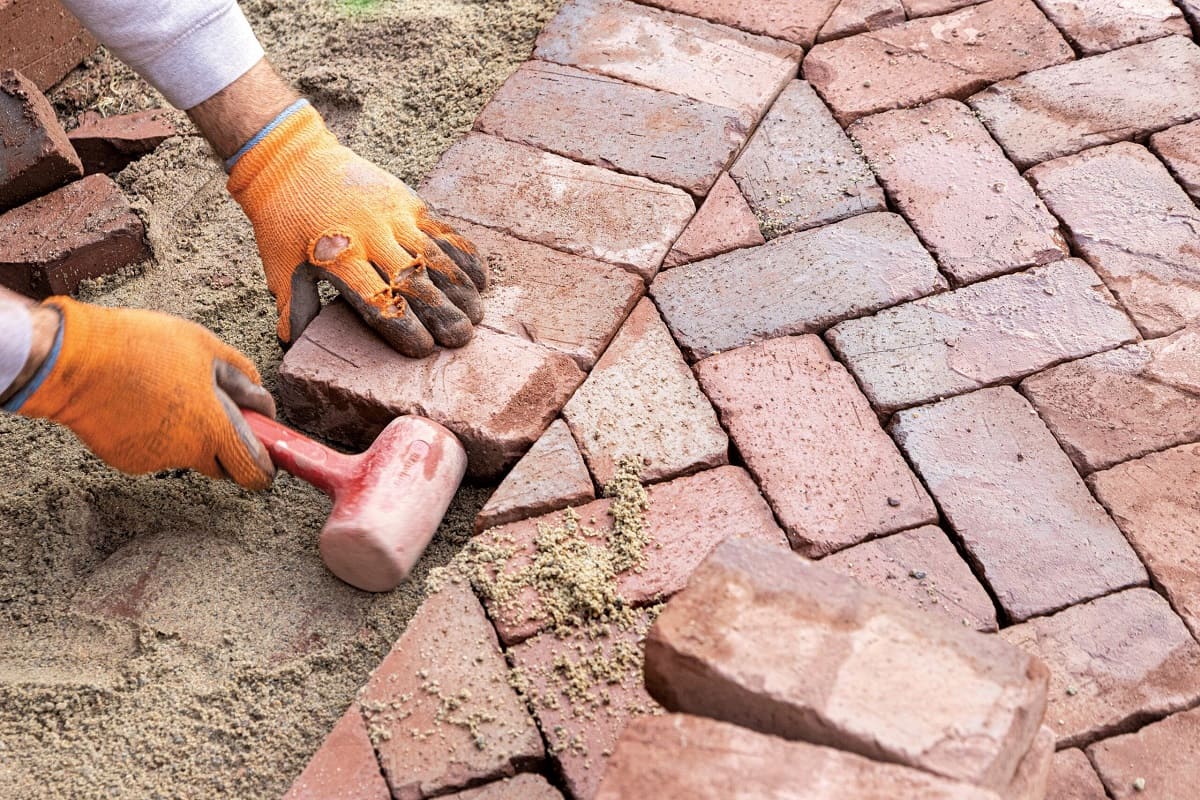
- Cut and Trim Bricks: As you approach the edges or encounter obstructions, you may need to cut or trim the bricks to fit the layout. Use a masonry saw or a hammer and chisel to make precise cuts, ensuring a seamless and tailored fit for the pathway.
By meticulously laying the foundation for your brick pathway, you’ll establish a durable and visually appealing surface that enhances the functionality and aesthetics of your outdoor space. Attention to detail during this phase will contribute to a polished and professional outcome that you can admire for years to come.
Read more: How To Build A Brick Mailbox
Placing the Bricks
With the foundation in place, it’s time to proceed with the exciting phase of placing the bricks to create the visual impact of your pathway. This step involves carefully arranging the bricks according to your chosen pattern, ensuring precision and attention to detail. Here’s how to proceed:
- Follow the Design Pattern: Refer to your predetermined design pattern, whether it’s a classic herringbone layout, a timeless running bond pattern, or a sophisticated basket weave design. Consistently following the pattern will result in a cohesive and visually appealing pathway.
- Work in Sections: Divide the pathway into manageable sections to maintain focus and consistency. This approach allows you to concentrate on one area at a time, ensuring that each section is meticulously executed before moving on to the next.
- Use Spacers: Insert plastic spacers between the bricks to maintain uniform spacing and facilitate the sweeping-in process. Spacers ensure that the gaps between the bricks are consistent, contributing to a professional and polished appearance.
- Verify Alignment and Leveling: Regularly check the alignment and levelness of the bricks as you progress. A slight adjustment during this phase can prevent significant issues later on, so take the time to ensure that each brick is precisely positioned.
- Consider Curves and Turns: If your pathway includes curves or turns, pay special attention to the placement of the bricks in these areas. Flexibility and precision are key to achieving smooth and visually appealing curves, enhancing the overall flow of the pathway.
- Secure the Bricks: Once the bricks are in place, use a plate compactor to firmly press them into the sand base. This step ensures that the bricks are securely set and minimizes the risk of shifting or unevenness over time.
By methodically placing the bricks according to your chosen pattern and design, you’ll bring your vision to life, creating a captivating and functional pathway that adds character and charm to your outdoor space. This phase marks a significant step toward the completion of your brick pathway project, showcasing your dedication to craftsmanship and attention to detail.
Finishing Touches
As you near the completion of your brick pathway, it’s time to add the finishing touches that will elevate its visual appeal and ensure long-term durability. These final steps contribute to a polished and professional outcome, showcasing your dedication to creating a stunning outdoor feature. Here’s how to add the finishing touches to your brick pathway:
- Secure the Edges: Install edge restraints along the sides of the pathway to provide structural support and prevent the bricks from shifting over time. Secure the restraints firmly to maintain the integrity of the pathway’s edges.
- Fill Gaps and Joints: Carefully sweep fine sand or polymeric sand into the joints between the bricks. This process stabilizes the bricks, minimizes weed growth, and enhances the overall appearance of the pathway.
- Compact the Surface: Use a plate compactor to gently compact the entire pathway surface. This final step ensures that the bricks are firmly set and the sand joints are well-established, creating a stable and even walking surface.
- Apply a Sealant (Optional): Consider applying a sealant to the brick pathway to enhance its color, protect against staining, and provide additional structural support. Choose a sealant specifically designed for outdoor brick surfaces and follow the manufacturer’s instructions for application.
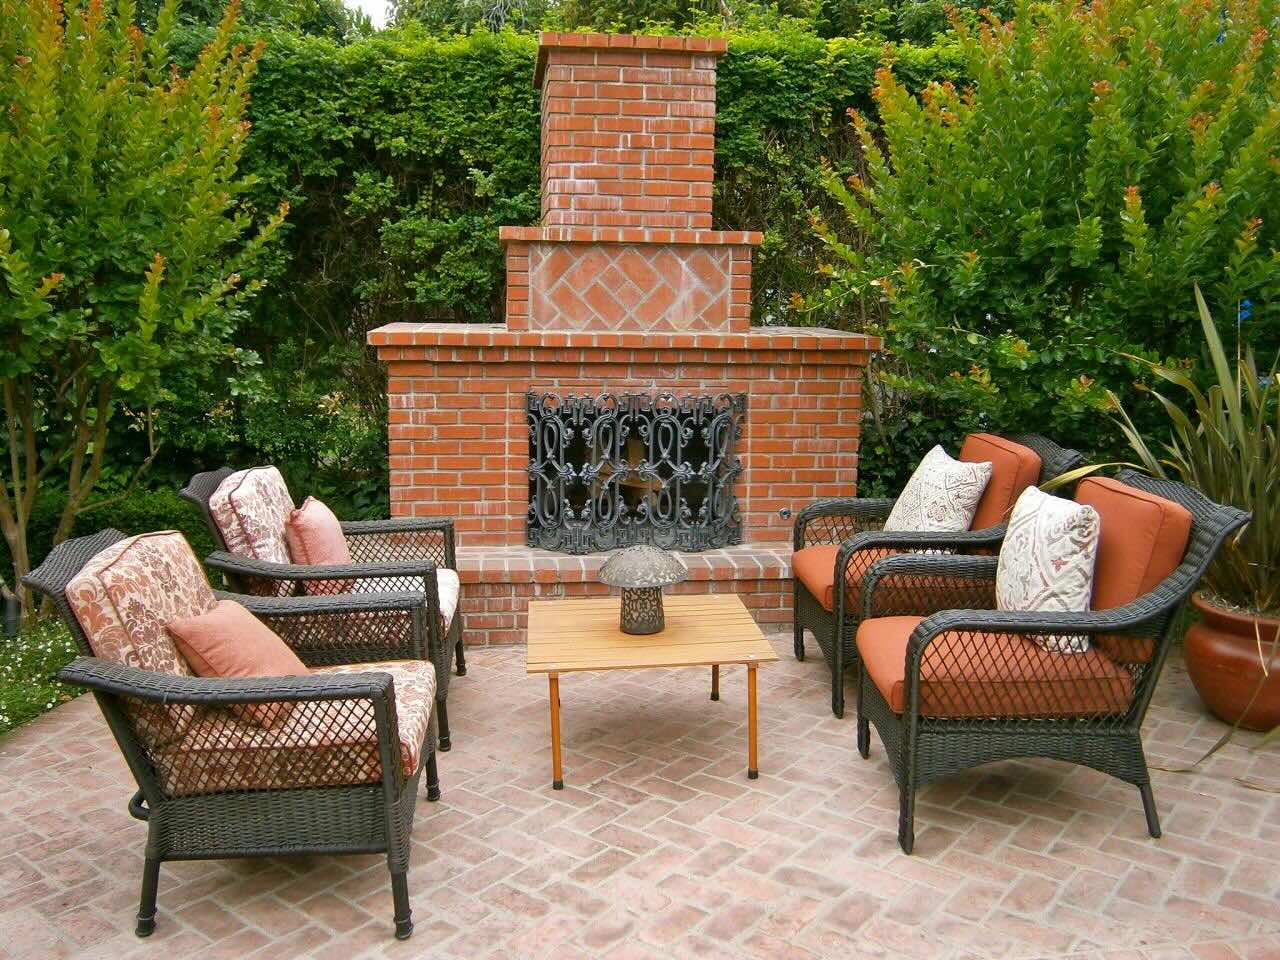
- Add Landscaping Elements: Enhance the visual impact of the pathway by incorporating landscaping elements such as low-maintenance plants, decorative lighting, or strategically placed outdoor furniture. These additions complement the pathway and contribute to a welcoming outdoor environment.
- Maintain Regularly: Once your brick pathway is complete, establish a maintenance routine to preserve its beauty and functionality. Regularly remove debris, inspect for any signs of shifting or damage, and address any minor repairs promptly to prolong the lifespan of the pathway.
By attending to these finishing touches, you’ll complete your brick pathway project with finesse and attention to detail. The result will be a visually striking and durable pathway that enhances the overall appeal and functionality of your outdoor space, providing a timeless feature to be enjoyed for years to come.
Conclusion
Congratulations on successfully completing your brick pathway project! By embarking on this endeavor, you’ve not only added a charming and functional feature to your outdoor space but also demonstrated your creativity and craftsmanship. As you admire the finished pathway, take pride in the dedication and attention to detail that have brought your vision to life.
A well-constructed brick pathway offers a multitude of benefits, serving as a durable and visually appealing element that enhances the overall landscape. It provides a designated walking surface, minimizes soil erosion, and contributes to the cohesive design of your outdoor environment. Additionally, the timeless elegance of a brick pathway adds a touch of warmth and character to your property, creating a welcoming atmosphere for residents and visitors alike.
As you enjoy the fruits of your labor, take the time to appreciate the transformation that has taken place in your outdoor space. The pathway you’ve created is a testament to your ability to blend practicality with aesthetic appeal, resulting in a feature that seamlessly integrates with the natural beauty of your surroundings.
Furthermore, the skills and knowledge you’ve gained throughout this project can be applied to future endeavors, empowering you to continue enhancing your outdoor living spaces with confidence and creativity. Whether it’s a garden expansion, a patio renovation, or other landscaping projects, the experience gained from building a brick pathway will serve as a valuable foundation for future DIY ventures.
Remember that maintenance plays a key role in preserving the beauty and functionality of your brick pathway. By implementing a regular maintenance routine and addressing any issues promptly, you can ensure that your pathway remains a source of pride and enjoyment for years to come.
Thank you for allowing us to guide you through the process of creating a brick pathway. We hope this experience has not only enriched your outdoor space but also inspired you to continue exploring the possibilities of DIY landscaping and outdoor projects. Your newly constructed pathway stands as a testament to your creativity, dedication, and the transformative power of DIY craftsmanship.
Frequently Asked Questions about How To Build A Brick Pathway
Was this page helpful?
At Storables.com, we guarantee accurate and reliable information. Our content, validated by Expert Board Contributors, is crafted following stringent Editorial Policies. We're committed to providing you with well-researched, expert-backed insights for all your informational needs.


0 thoughts on “How To Build A Brick Pathway”