Home>Dining>Tableware>How To Fold A Napkin With A Pocket For Silverware
Tableware
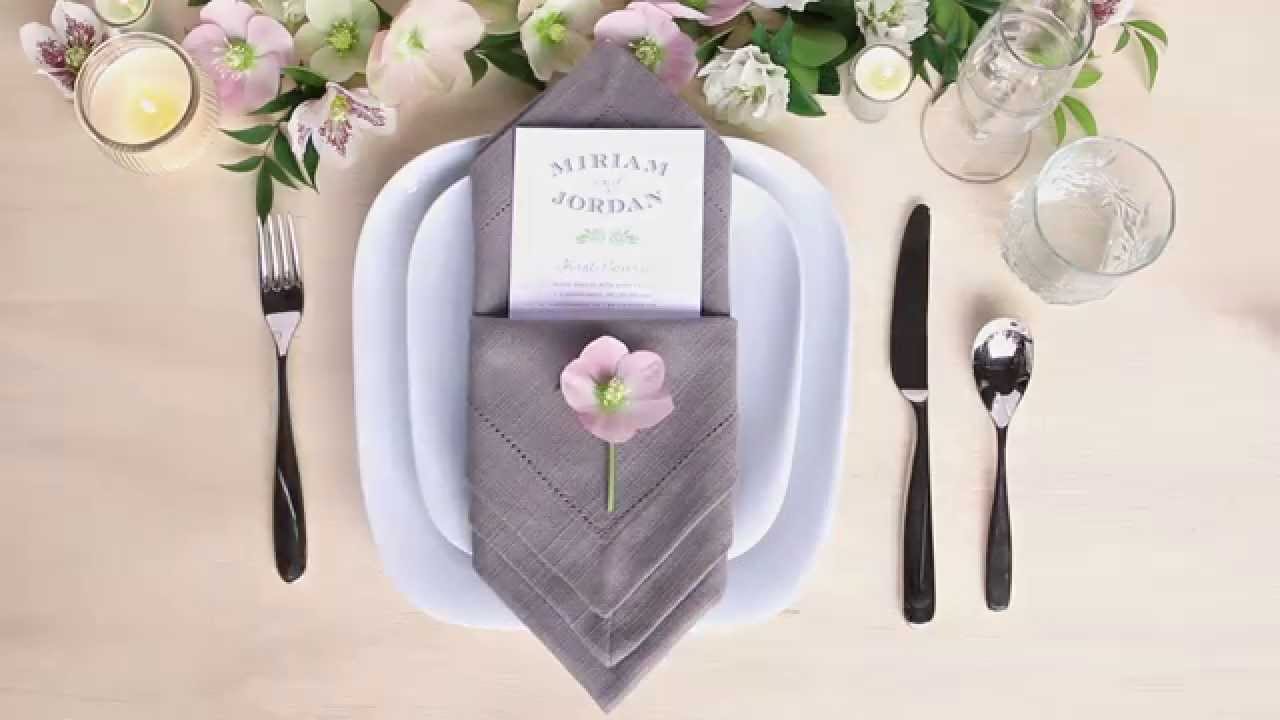
How To Fold A Napkin With A Pocket For Silverware
Modified: January 3, 2024
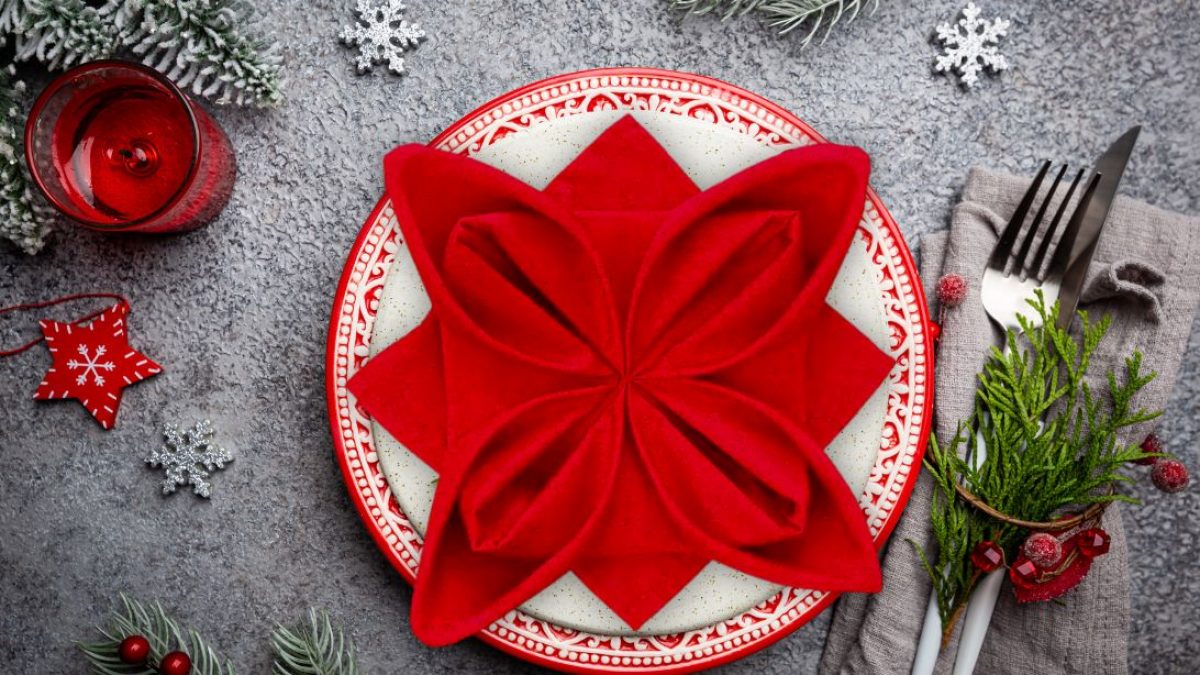
Learn how to fold a napkin with a pocket for silverware and elevate your tableware presentation. Impress your guests with this elegant table setting technique.
(Many of the links in this article redirect to a specific reviewed product. Your purchase of these products through affiliate links helps to generate commission for Storables.com, at no extra cost. Learn more)
Introduction
Welcome to this guide on how to fold a napkin with a pocket for silverware. Whether you are hosting a formal dinner party or simply want to add an elegant touch to your table setting, knowing how to fold a napkin in this unique way will surely impress your guests. Not only does it provide a decorative element, but it also serves a practical purpose by neatly holding your silverware.
With just a few simple steps and some practice, you can master the art of folding a napkin with a pocket. In this guide, I will take you through the process, providing detailed instructions and helpful tips along the way. So let’s get started!
Key Takeaways:
- Impress your guests and elevate your table setting by mastering the art of folding a napkin with a pocket for silverware. This elegant and functional detail adds a touch of sophistication to any dining occasion.
- With just a few simple steps and some practice, you can create a professional-looking napkin fold that is sure to make a statement. Choose a cloth napkin that complements your table setting and showcase your newfound napkin-folding skills!
Read more: How To Fold A Napkin To Hold Silverware
Materials Needed
Before we begin, let’s gather the materials you’ll need to fold a napkin with a pocket for silverware:
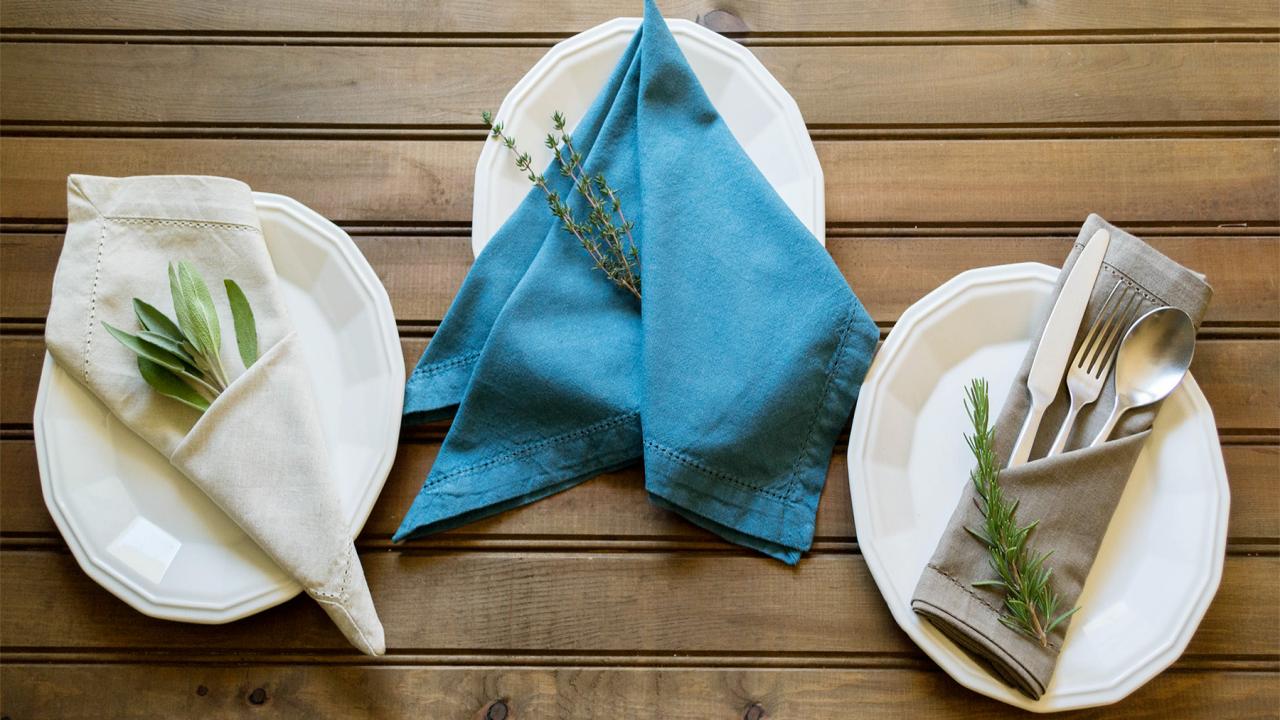
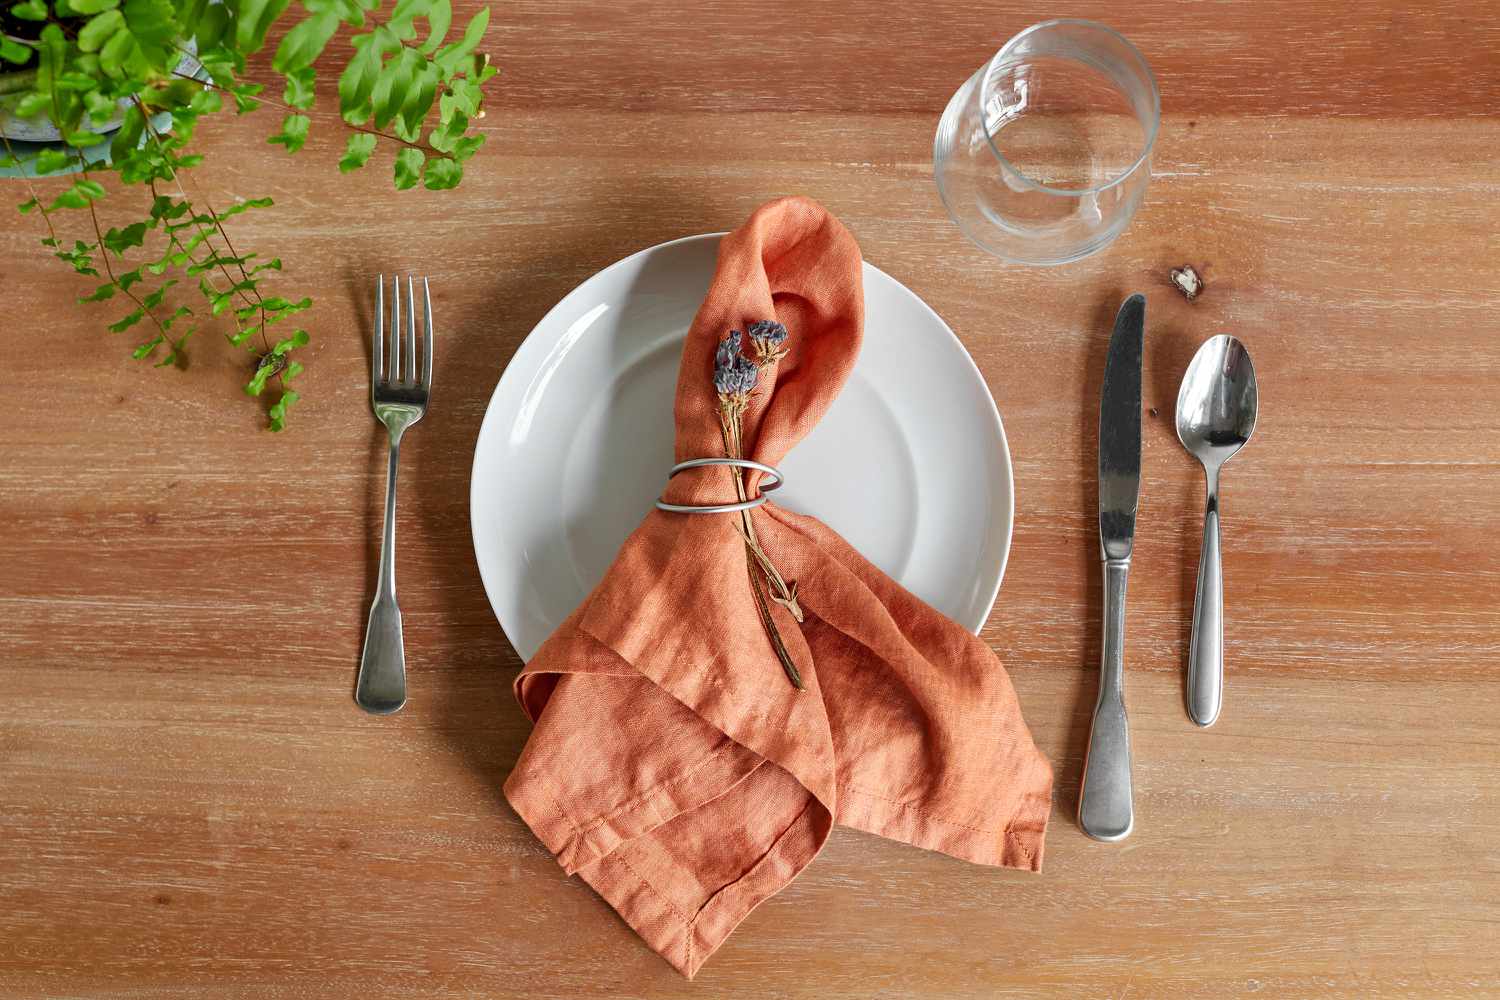
- A cloth napkin: Choose a napkin in a fabric and color that matches your table setting. The standard size for a cloth napkin is around 20×20 inches, but you can adjust the size based on your preference.
- Silverware: Select the cutlery you want to place in the napkin pocket. This can include a fork, knife, and spoon, or any other silverware you deem necessary for the meal.
- Iron: To ensure crisp folds and a polished look, it’s helpful to have an iron on hand to press the napkin before folding.
Make sure to have these materials ready before starting the folding process. Now that you are prepared, let’s move on to the step-by-step instructions for folding the napkin with a pocket for silverware.
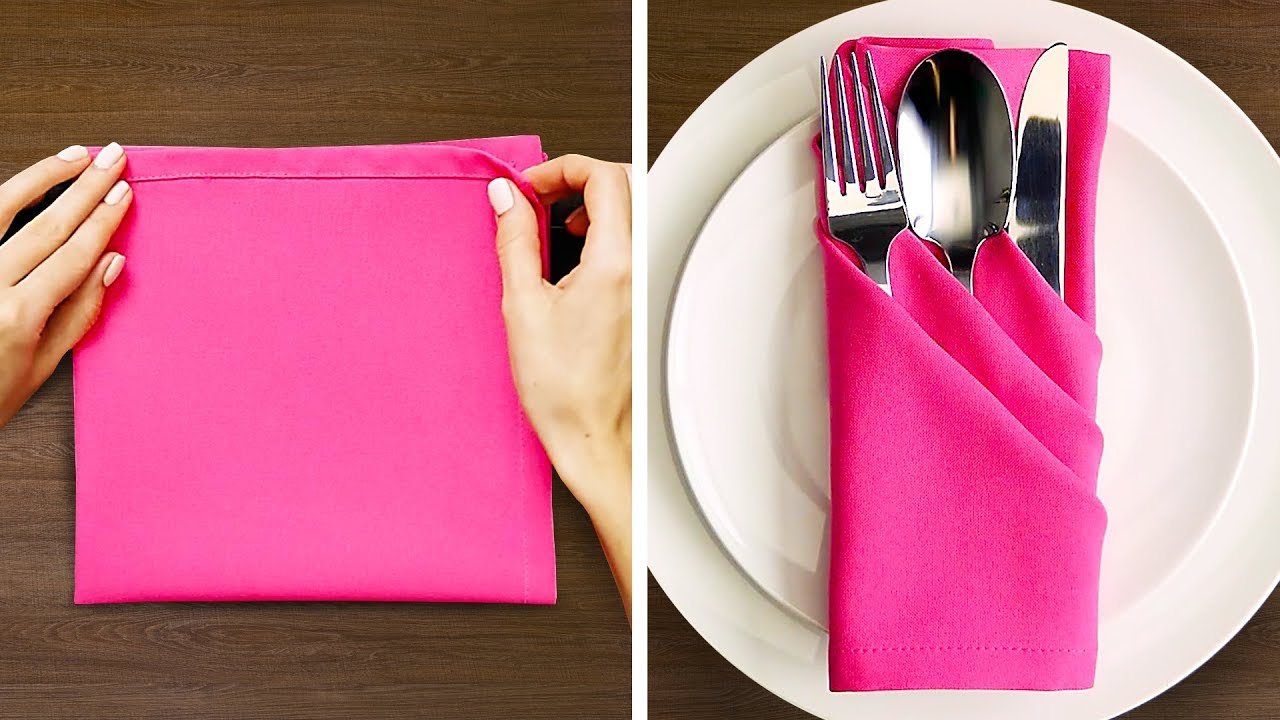
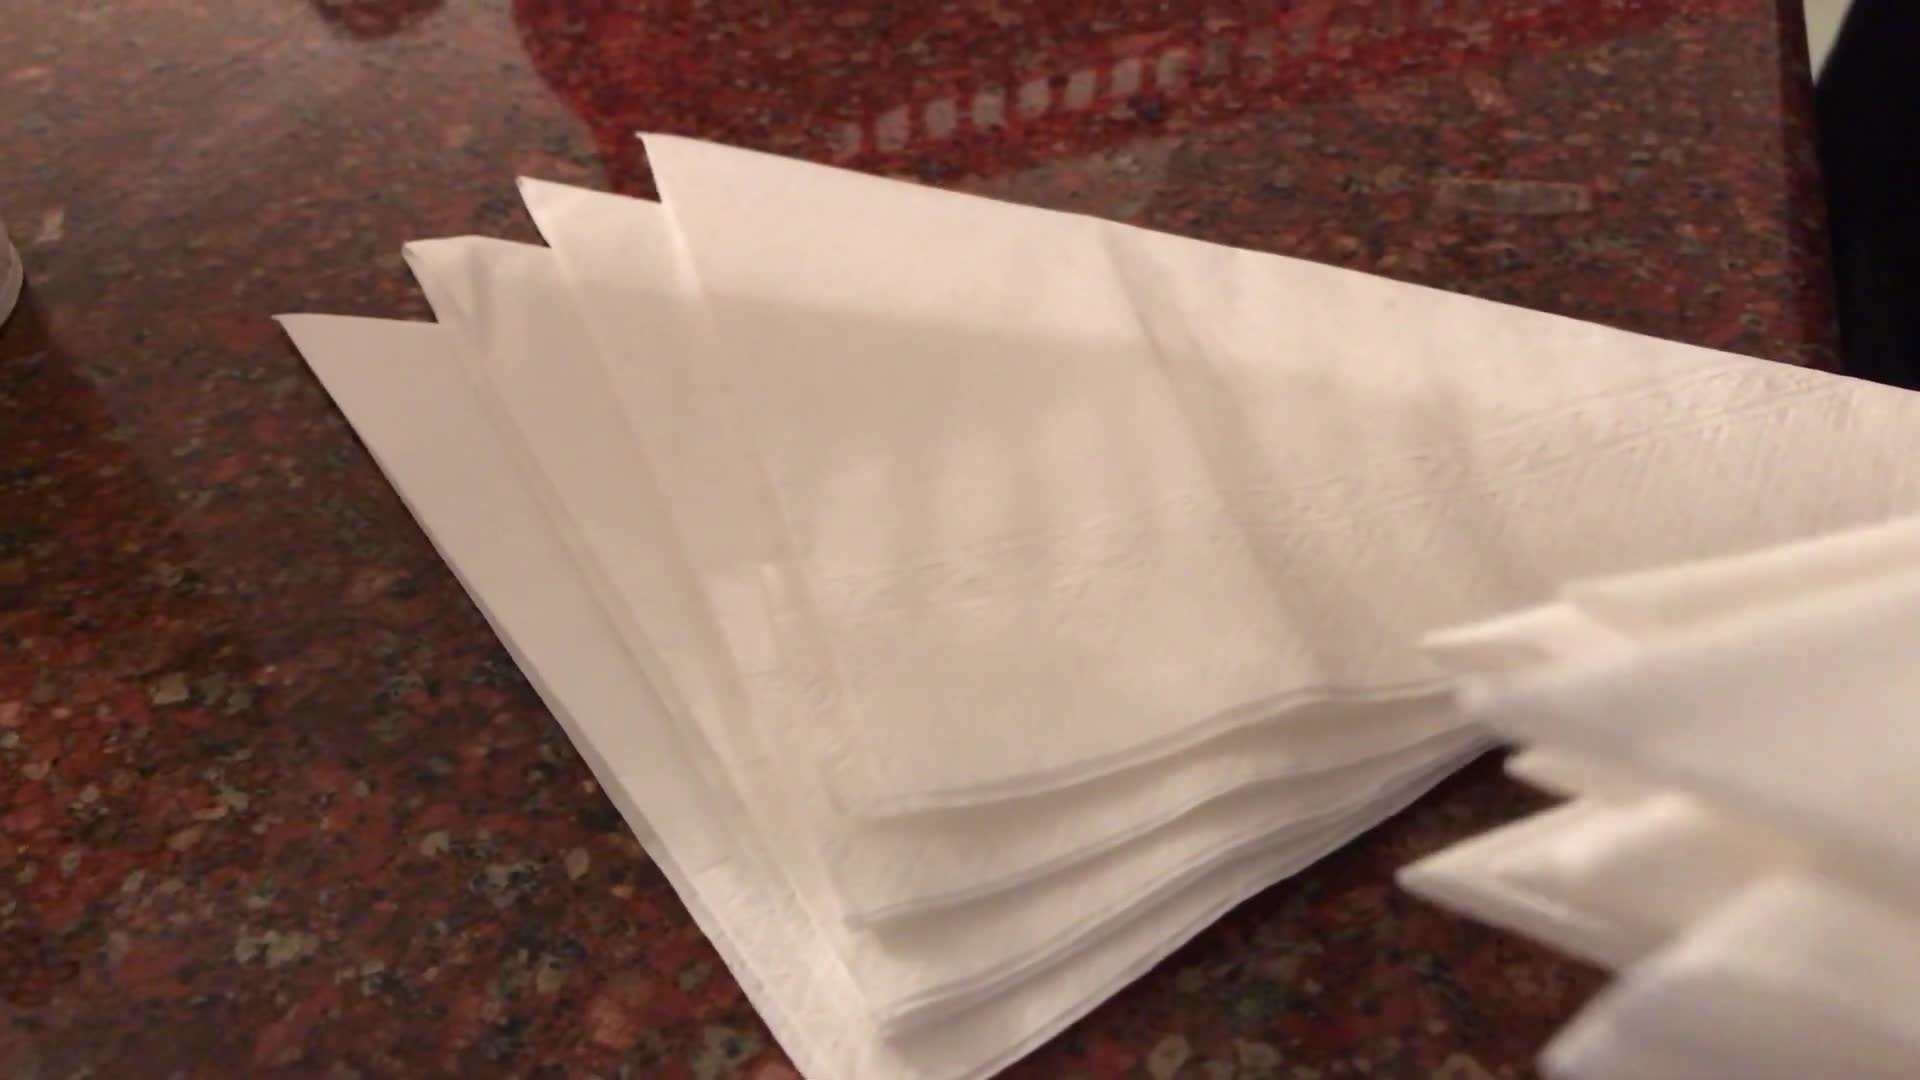
Step 1: Folding the Napkin in Half
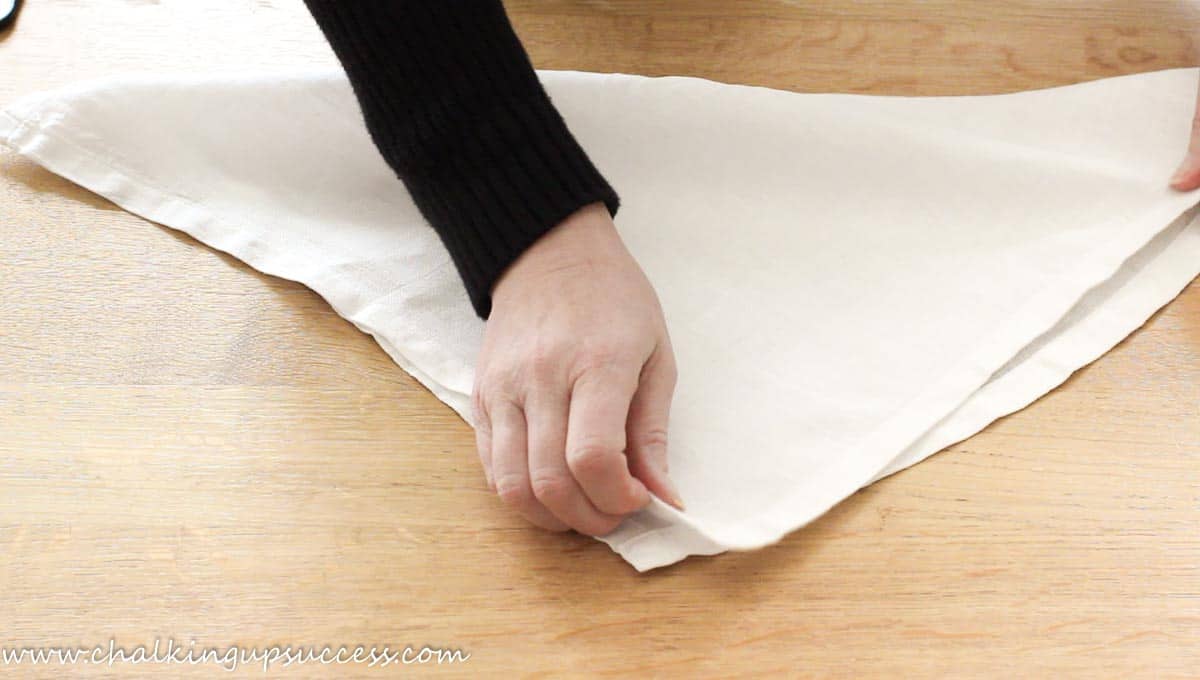
The first step in folding a napkin with a pocket for silverware is to start with a square cloth napkin. Lay the napkin on a flat surface in front of you, ensuring that it is positioned in a diamond shape, with one corner pointing towards you.
Take the bottom corner of the napkin and fold it upwards, aligning it with the top corner. You should now have a triangle shape with the folded edge facing away from you.
Now, carefully lift the left corner of the triangle and fold it towards the right corner. The result should be a smaller triangle with the folded edge facing downwards.
Smooth out any wrinkles and creases by gently pressing the folded napkin with your hands. If necessary, you can also use an iron on a low heat setting to achieve a crisp and neat fold.
Once you have successfully folded the napkin in half, proceed to the next step to create the pocket for your silverware.
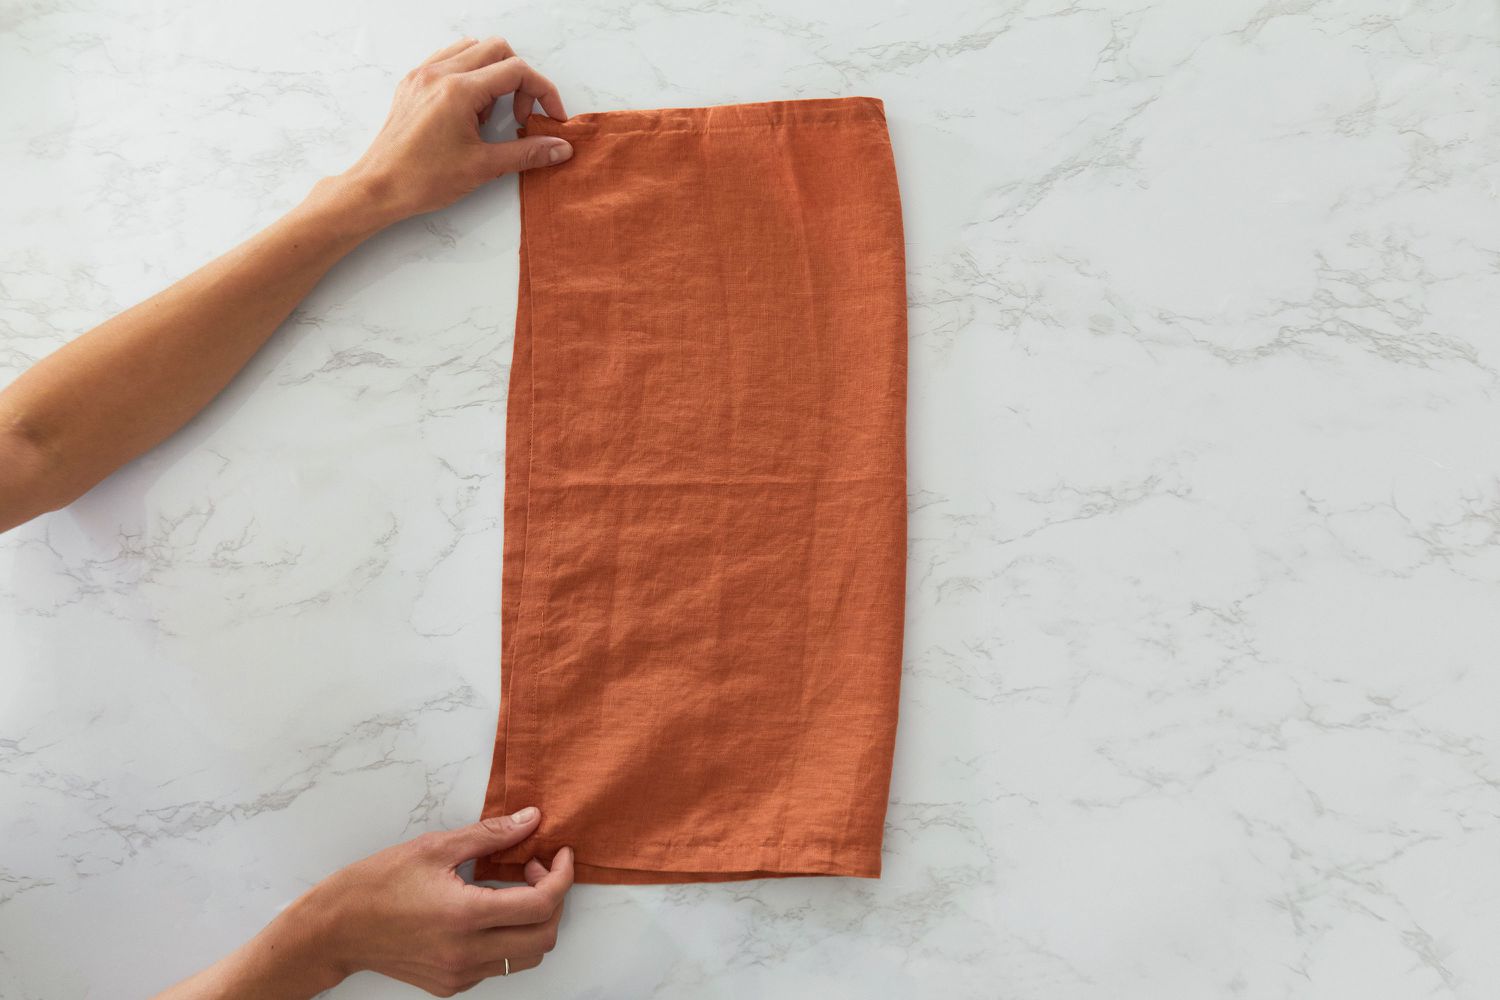
Step 2: Folding in the Sides
After folding the napkin in half, it’s time to create the sides of the pocket that will hold the silverware. Place the folded napkin in front of you with the folded edge facing down.
Take the right corner of the napkin and fold it towards the center, about one-third of the way. Repeat the same step with the left corner, folding it towards the center and overlapping the right corner. Make sure to align the edges neatly so that the sides of the pocket are symmetrical.
At this point, you should see a distinct pocket shape starting to form in the center of the napkin. Smooth out any wrinkles and adjust the folds if needed to create a clean and polished look.
Once you have folded in the sides and formed the pocket, proceed to the next step to continue shaping the napkin.
When folding a napkin with a pocket for silverware, make sure to use a large, square napkin for easier folding and a more spacious pocket. This will make it easier to insert the silverware and create a more visually appealing presentation.
Step 3: Folding the Bottom Edge Upwards
Now that you have folded in the sides of the napkin to create the pocket, it’s time to fold up the bottom edge to further define the shape of the pocket.
Take the bottom edge of the napkin and fold it upwards, aligning it with the top edge of the pocket. The size of the fold will depend on the length of the silverware you plan to place inside the pocket. It should be folded up high enough to securely hold the silverware, but not too high that it overwhelms the overall appearance of the folded napkin.
Smooth out any creases and ensure that the bottom edge is neatly tucked under the folded sides of the napkin. This will help maintain the structure of the pocket and keep the silverware snugly in place.
Take a moment to admire your progress so far. The napkin should now resemble a triangular shape with a defined pocket at the center. With the bottom edge folded upwards, you’re one step closer to completing the folding process.
Continue to the next step to add the finishing touches to the napkin fold.
Read more: How To Fold A Napkin With A Napkin Ring
Step 4: Folding the Corners In
In this step, we will fold the corners of the napkin to add a decorative touch and secure the pocket in place. Take hold of the right corner of the napkin and fold it towards the center of the pocket.
Next, grab the left corner and fold it towards the center as well, overlapping the right corner. Ensure that the corners are neatly aligned and the folds are crisp, creating a symmetrical appearance.
By folding the corners in, you are adding stability to the pocket and securing it in place. This will prevent the silverware from slipping out or the napkin from unfolding during use.
Take a moment to adjust the folds and smooth out any creases. If desired, you can use your fingers or a small utensil to gently tuck the folded corners into the pocket for a snug fit.
Now that you have successfully folded the corners in, the napkin is nearly complete. Proceed to the final step to add the silverware into the pocket, giving your folded napkin its ultimate purpose.
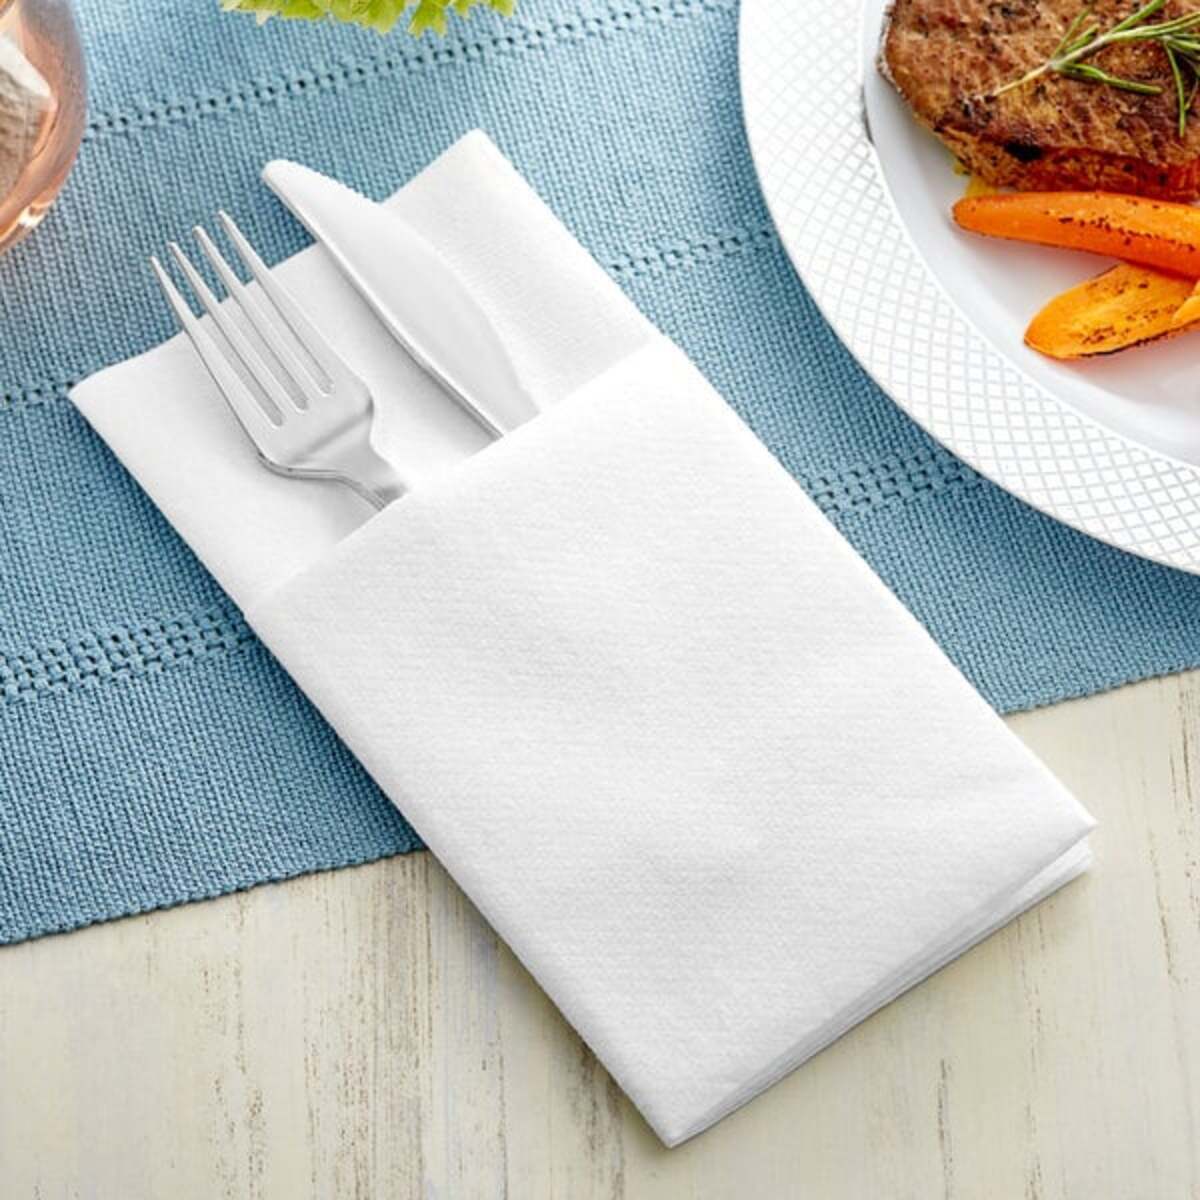
Step 5: Tucking the Silverware into the Pocket
The final step in folding a napkin with a pocket for silverware is to carefully tuck the silverware into the pocket you have created. This step not only adds functionality but also adds a stylish and polished touch to your table setting.
First, gather the silverware you plan to place in the napkin pocket. This can include a fork, knife, and spoon, or any other utensils required for the meal. Make sure they are clean and ready to be placed in the napkin.
With the folded napkin in front of you, gently insert the silverware into the pocket, one utensil at a time. Start with the fork, placing it handle-side down into the pocket. Next, add the knife, followed by the spoon. Ensure that the utensils are secured in the pocket and are not sticking out the sides.
Alternatively, if you are using just a single utensil, such as a fork or a spoon, you can place it directly into the pocket without worrying about the knife. Adjust the position of the silverware as needed to achieve the desired aesthetic.
Take a step back and assess the overall look of the folded napkin with the silverware in place. Make any necessary adjustments to ensure that the silverware is centered and the pocket is securely holding them.
Congratulations! You have successfully folded a napkin with a pocket for silverware. Your table setting now boasts an elegant and functional detail that is sure to impress your guests.
Remember, practice makes perfect, so don’t be discouraged if your first attempt isn’t flawless. With time and experience, you will become more skilled at folding napkins with pockets.
Now, it’s time to showcase your newfound napkin-folding skills and enjoy a beautiful and well-dressed table setting!
Conclusion
Folding a napkin with a pocket for silverware is a simple yet impressive way to elevate your table setting. By following the step-by-step instructions provided in this guide, you can create a stylish and functional napkin fold that will impress your guests and add a touch of elegance to any dining occasion.
Remember to choose a cloth napkin in a fabric and color that complements your table setting. By folding the napkin in half, folding in the sides, folding the bottom edge upwards, folding the corners in, and tucking the silverware into the pocket, you can achieve a professional-looking napkin fold that is sure to make a statement.
Practice makes perfect, so don’t be discouraged if your first few attempts are not perfect. With time and patience, you will master the art of folding a napkin with a pocket, and it will become second nature to you.
Whether you are hosting a formal dinner party, a holiday gathering, or an intimate meal with loved ones, taking the time to fold a napkin with a pocket for silverware shows attention to detail and enhances the overall ambiance of your table.
So go ahead, give it a try! Impress your guests and add a touch of sophistication to your dining experience with this elegant napkin fold.
Thank you for reading and happy napkin folding!
Frequently Asked Questions about How To Fold A Napkin With A Pocket For Silverware
Was this page helpful?
At Storables.com, we guarantee accurate and reliable information. Our content, validated by Expert Board Contributors, is crafted following stringent Editorial Policies. We're committed to providing you with well-researched, expert-backed insights for all your informational needs.


0 thoughts on “How To Fold A Napkin With A Pocket For Silverware”