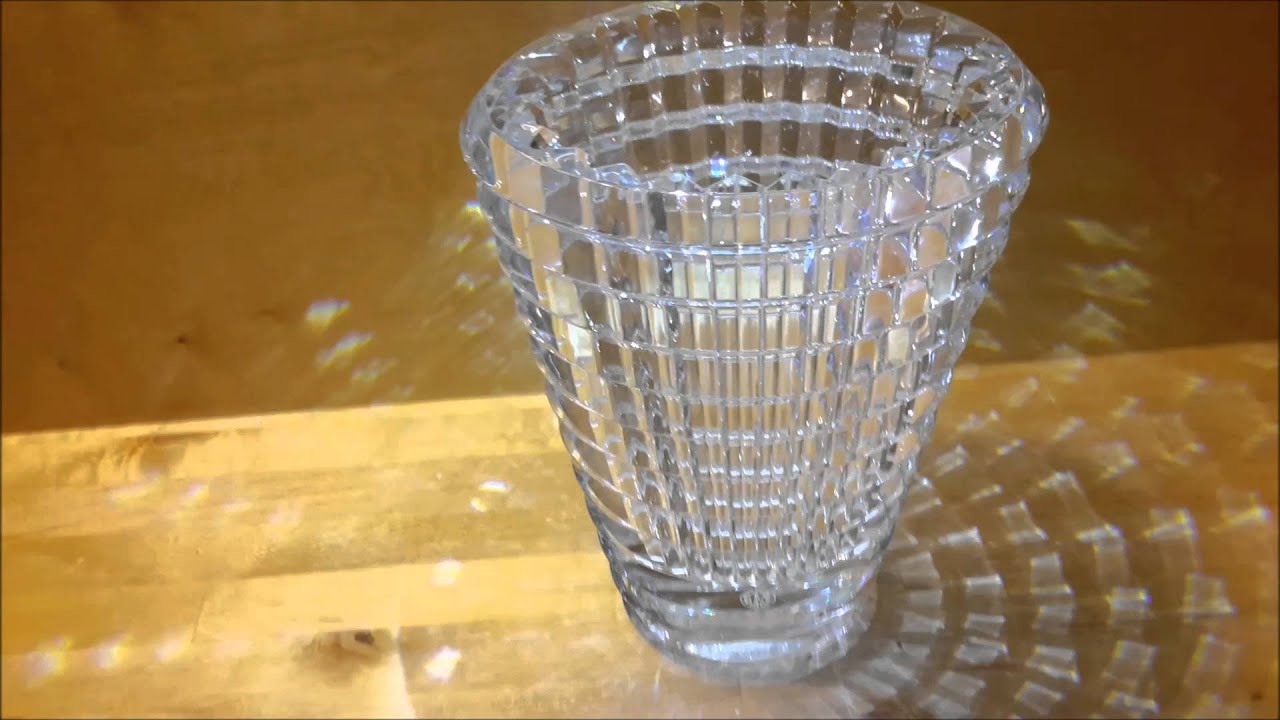
Tableware
How To Drill Through Crystal Glass
Modified: October 19, 2024
Learn how to drill through crystal glass with our step-by-step guide. Create stunning tableware with our expert tips and techniques.
(Many of the links in this article redirect to a specific reviewed product. Your purchase of these products through affiliate links helps to generate commission for Storables.com, at no extra cost. Learn more)
Introduction
Drilling through crystal glass may seem like a daunting task, but with the right technique and tools, it can be accomplished successfully. Whether you want to create a hole for a decorative project or need to drill through crystal glass for practical purposes, this article will guide you through the process step-by-step. By following these instructions, you will be able to achieve a clean and precise hole without damaging the delicate glass.
Crystal glass, known for its transparency, brilliance, and delicate nature, requires a careful approach to drilling. Unlike drilling through other materials, such as wood or metal, drilling through crystal glass requires special attention to prevent cracking or shattering. By implementing the proper techniques and taking necessary safety precautions, you can successfully drill through crystal glass and accomplish your desired outcome.
Before we dive into the details of how to drill through crystal glass, it is important to gather the necessary materials and equipment. Having the right tools and safety gear will ensure a smooth and safe drilling experience.
Key Takeaways:
- Master the art of drilling through crystal glass with the right tools, techniques, and safety measures to achieve clean and precise holes without compromising the glass’s integrity.
- Prioritize safety, patience, and attention to detail when drilling through crystal glass to ensure successful outcomes and prolong the lifespan of the drilled glass.
Read more: How To Drill Through Glass
Materials Needed
Before you embark on drilling through crystal glass, it is crucial to gather the necessary materials. Make sure you have the following items before you begin:
- Diamond-coated drill bit: Unlike regular drill bits, diamond-coated ones are specifically designed to cut through hard materials like glass. Ensure you have the appropriate size for your desired hole.
- Power drill: You will need a power drill with variable speed settings to have better control over the drilling process. Opt for a drill with a low RPM (revolutions per minute) to avoid overheating the glass.
- Safety goggles: Protect your eyes from any potential shards or debris by wearing safety goggles throughout the drilling process.
- Masking tape: This will be used to mark the spot where you want to drill and help prevent slipping or scratching of the glass surface.
- Lubricant: Using a lubricant, such as water or a specialized glass-cutting coolant, will help reduce friction and heat during the drilling process.
- Clamp or vise: Securing the glass with a clamp or vise will provide stability and prevent it from moving while you drill.
- Water container or spray bottle: Keeping the drill bit and glass cool is essential. A water container or spray bottle filled with water will help you frequently cool the drill bit to prevent overheating.
- Clean cloth: Having a clean cloth on hand will allow you to wipe away any moisture and keep your work area neat.
Once you have gathered all the necessary materials, you are ready to proceed with the drilling process. Make sure to read and understand the instructions thoroughly before starting. Remember to handle the glass with care throughout the entire process to avoid any mishaps.
Step 1: Gather Safety Equipment
Before you begin drilling through crystal glass, it is crucial to prioritize safety. Gathering the appropriate safety equipment will ensure that you can complete the task without any accidents or injuries. Here are the necessary safety measures you should take:
- Safety goggles: Protect your eyes from any potential shards or debris by wearing safety goggles throughout the drilling process. Choose goggles that provide a tight seal around your eyes to prevent any small particles from entering.
- Gloves: Consider wearing protective gloves to protect your hands from sharp edges or accidents. Choose gloves that offer a good grip but still allow for dexterity so you can control the drill effectively.
- Dust mask: Crystal glass can produce fine particles when drilled. To protect yourself from inhaling any dust or particles, wear a dust mask that is rated for fine particles. This will help prevent any respiratory issues that may arise from the drilling process.
- Protective clothing: Although not mandatory, wearing long sleeves and pants can provide an extra layer of protection against any glass fragments that may potentially fly off during drilling. Opt for clothing made of non-flammable materials for added safety.
- Ventilation: Ensure that you are working in a well-ventilated area to prevent any buildup of dust or fumes. If possible, open windows or use a fan to improve airflow and remove any dust or fumes from the drilling process.
By taking these safety precautions, you can reduce the risk of accidents and injuries while drilling through crystal glass. Remember, safety should always be the top priority. Now that you have gathered the necessary safety equipment, you are ready to move on to marking the desired drilling spot.
Step 2: Mark the Desired Drilling Spot
Marking the desired drilling spot on the crystal glass is crucial to ensure accuracy and precision during the drilling process. By taking the time to mark the spot correctly, you can avoid any unnecessary mistakes or damage to the glass. Follow these steps to mark the desired drilling spot:
- Choose the location: Determine where you want to drill the hole on the crystal glass. Ensure that it is a suitable spot that won’t compromise the overall integrity or appearance of the glass.
- Measure and mark: Use a ruler or measuring tape to accurately measure and mark the exact spot where you want to drill. Double-check your measurements to avoid any errors.
- Secure the glass: Place the crystal glass on a stable and secure surface, such as a workbench or table. Make sure it is positioned in a way that allows you to access the marked spot easily.
- Apply masking tape: Take a strip of masking tape and carefully place it over the marked spot. Press it down firmly to ensure it sticks well to the glass surface. The masking tape serves as a protective barrier and also helps in preventing the drill bit from slipping.
- Double-check: Before proceeding to the next step, visually inspect the marked spot and ensure it is exactly where you want your hole to be. If needed, make any necessary adjustments or re-mark the spot.
By following these steps and taking the time to mark the desired drilling spot accurately, you will set yourself up for a successful drilling process. The masking tape provides an extra layer of protection and stability during drilling, reducing the chances of the drill bit slipping on the glass surface. Now that you have marked the spot, it’s time to move on to the next step: creating a pilot hole.
Step 3: Create a Pilot Hole
Creating a pilot hole is an essential step when drilling through crystal glass. A pilot hole serves as a guide for the drill bit, allowing for better precision and control during the drilling process. Follow these steps to create a pilot hole:
- Select the appropriate drill bit size: Choose a small-sized diamond-coated drill bit that is specifically designed for drilling through glass. The size of the drill bit should be slightly smaller than the final hole size you desire.
- Secure the glass: Make sure the crystal glass is firmly secured on a stable surface to prevent any movement or slipping during the drilling process. If necessary, use a clamp or vise to hold the glass in place.
- Position the drill bit: Place the drill bit precisely over the marked spot on the masking tape. Ensure that the drill bit is perpendicular to the glass surface to maintain a straight pilot hole.
- Apply gentle pressure: Start the drilling process by applying minimal and steady pressure. Press the drill bit firmly against the glass surface to create the pilot hole. Avoid using excessive force, as it can lead to cracking or shattering of the glass.
- Monitor the drilling speed: Keep an eye on the speed of the drill and adjust it to a low RPM setting. The goal is to maintain a slow and controlled drilling speed to prevent overheating of the glass.
- Drill with patience: Continue drilling with a steady and gentle motion until you penetrate the glass surface and create a small indentation. This indentation will serve as your pilot hole for the next step.
Creating a pilot hole is a crucial step in the drilling process. It provides guidance for the larger drill bit and helps prevent the glass from cracking or chipping during the process. By following these steps and drilling with patience and control, you are ready to move on to the next step: positioning the drill bit.
Read more: How To Drill Through Stucco
Step 4: Position the Drill Bit
Once you have created a pilot hole in the crystal glass, it’s time to position the drill bit for the actual drilling process. Proper positioning of the drill bit is essential to ensure accuracy and prevent any damage to the glass. Follow these steps to position the drill bit correctly:
- Select the appropriate drill bit size: Choose a diamond-coated drill bit that matches the desired final hole size. Make sure the drill bit is slightly larger than the pilot hole you created in the previous step.
- Secure the glass: Double-check that the crystal glass is still securely held in place on the stable surface. Confirm that the masking tape is still intact and covering the marked spot.
- Position the drill bit: Carefully align the drill bit with the pilot hole you created. The pilot hole will serve as a guide for the drill bit, ensuring it remains centered and avoids any unnecessary movement during drilling.
- Hold the drill perpendicularly: Ensure that the drill is positioned perpendicular to the glass surface. This will enable the drill bit to enter the glass straight and minimize the risk of the glass cracking or chipping.
- Apply gentle pressure: Start the drilling process by gently pressing the drill bit against the glass. Use a slow and controlled motion to avoid damage to the glass. Let the drill bit do the work and avoid applying excessive force.
- Monitor the drilling speed and pressure: Keep a close eye on the drilling speed and the amount of pressure you apply. Adjust the speed to a low setting, and if needed, decrease the pressure to ensure a smooth and controlled drilling process.
- Continue drilling: Maintain a steady and consistent motion as you drill through the glass. Be patient and avoid rushing the process. Take breaks if needed to cool down the drill bit and prevent the glass from overheating.
By following these steps and positioning the drill bit accurately, you are ready to proceed to the next step: beginning the drilling process. Take your time, be mindful of the speed and pressure you apply, and remember to exercise caution to achieve the desired results without any damage to the crystal glass.
When drilling through crystal glass, use a diamond-tipped drill bit to prevent chipping or cracking. Keep the glass and drill bit lubricated with water to reduce heat and friction.
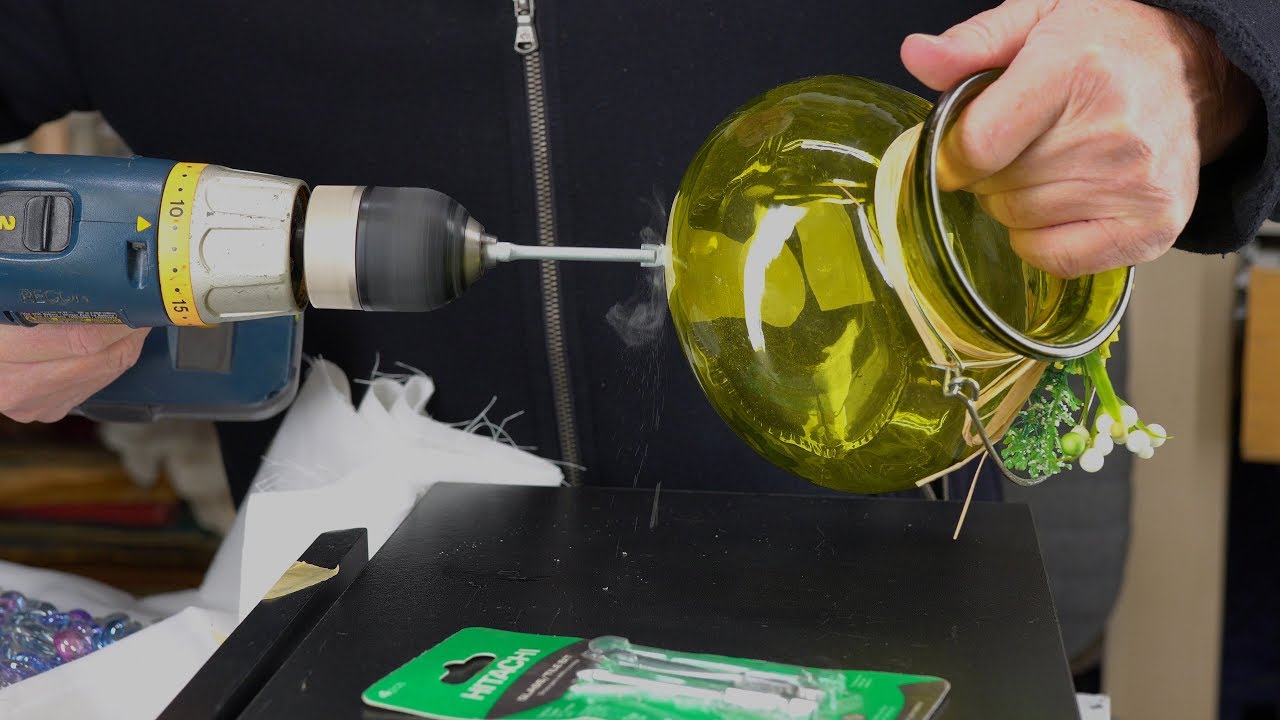
Step 5: Begin Drilling
Now that the drill bit is correctly positioned, it’s time to start the drilling process. This step requires careful precision and control to ensure a clean and successful drill through the crystal glass. Follow these steps to begin drilling:
- Double-check your setup: Before you begin, make sure the crystal glass is securely held in place, the drill bit is aligned with the pilot hole, and you have taken all necessary safety precautions.
- Start the drill at a low speed: Begin drilling at a low rotational speed to maintain control and prevent overheating of both the drill bit and the glass. It’s always better to start slow and gradually increase the speed if necessary.
- Apply gentle and even pressure: Hold the drill with a steady grip and apply consistent pressure as you press the drill bit against the glass. Avoid putting too much force, as this can cause the glass to crack or shatter.
- Keep the drill bit perpendicular: Ensure that you maintain the drill bit’s perpendicular position throughout the drilling process. This helps prevent any unwanted angled drillings and ensures a clean and straight hole.
- Use a pecking motion: Instead of continuously drilling in one go, use a pecking motion by briefly lifting the drill bit away from the glass surface every few seconds. This allows the glass to cool down and prevents overheating.
- Monitor the drill bit and the glass: Keep a close eye on the drill bit and the glass as you drill. Check for signs of overheating, such as excessive heat or smoke. If you notice any, stop drilling, let the drill bit and glass cool down, and continue once they are safe to proceed.
- Take breaks if needed: If the drilling process is taking longer, or if you notice the drill bit or glass becoming too hot, take short breaks to allow them to cool down. This will help prevent any damage to the glass and maintain the quality of the hole being drilled.
Remember, patience and control are key during the drilling process. By following these steps and being mindful of the speed and pressure applied, you can ensure a successful and smooth drilling experience. Once you have drilled through the crystal glass, move on to the next step: controlling the speed and pressure.
Step 6: Control the Speed and Pressure
Controlling the speed and pressure during the drilling process is crucial to prevent damage to the crystal glass. By maintaining a steady and controlled approach, you can achieve a clean and precise hole without risking fractures or breakage. Follow these steps to effectively control the speed and pressure:
- Monitor the drill speed: Keep an eye on the speed of the drill throughout the drilling process. Ensure that you are using a low RPM (revolutions per minute) setting to avoid overheating the drill bit and the glass.
- Adjust the pressure: Maintain a gentle and even pressure as you continue drilling. Avoid pushing or forcing the drill bit into the glass, as this can lead to cracks or chips. Let the drill bit do the work while you maintain control.
- Release pressure at the end: As you near the completion of the drilling process and the drill bit is about to come through the opposite side of the glass, release pressure gradually. This will help prevent any sudden impact or damage as the drill bit exits the glass.
- Use a consistent tempo: Maintain a steady and consistent drilling tempo. Avoid rushing or applying sudden bursts of pressure, as this can easily lead to accidents or damage. Focus on maintaining a smooth and controlled drilling motion.
- Pause for cooling: If you notice the drill bit or the glass becoming too hot during the drilling process, pause intermittently to allow them to cool down. Use a water spray bottle or dip the drill bit in a water container to cool the surface and prevent overheating.
- Take breaks if necessary: If the drilling process is more extensive or if you sense the drill bit or the glass is overheating too quickly, take breaks to cool them down. This will ensure the integrity of the glass and the quality of the hole being drilled.
By following these steps and maintaining control over the drilling speed and pressure, you can minimize the risk of cracks, chips, or shattering of the crystal glass. Remember, working with patience and care is essential to achieve a successful drilling outcome. Once you have completed the drilling process, proceed to the next step: using lubrication.
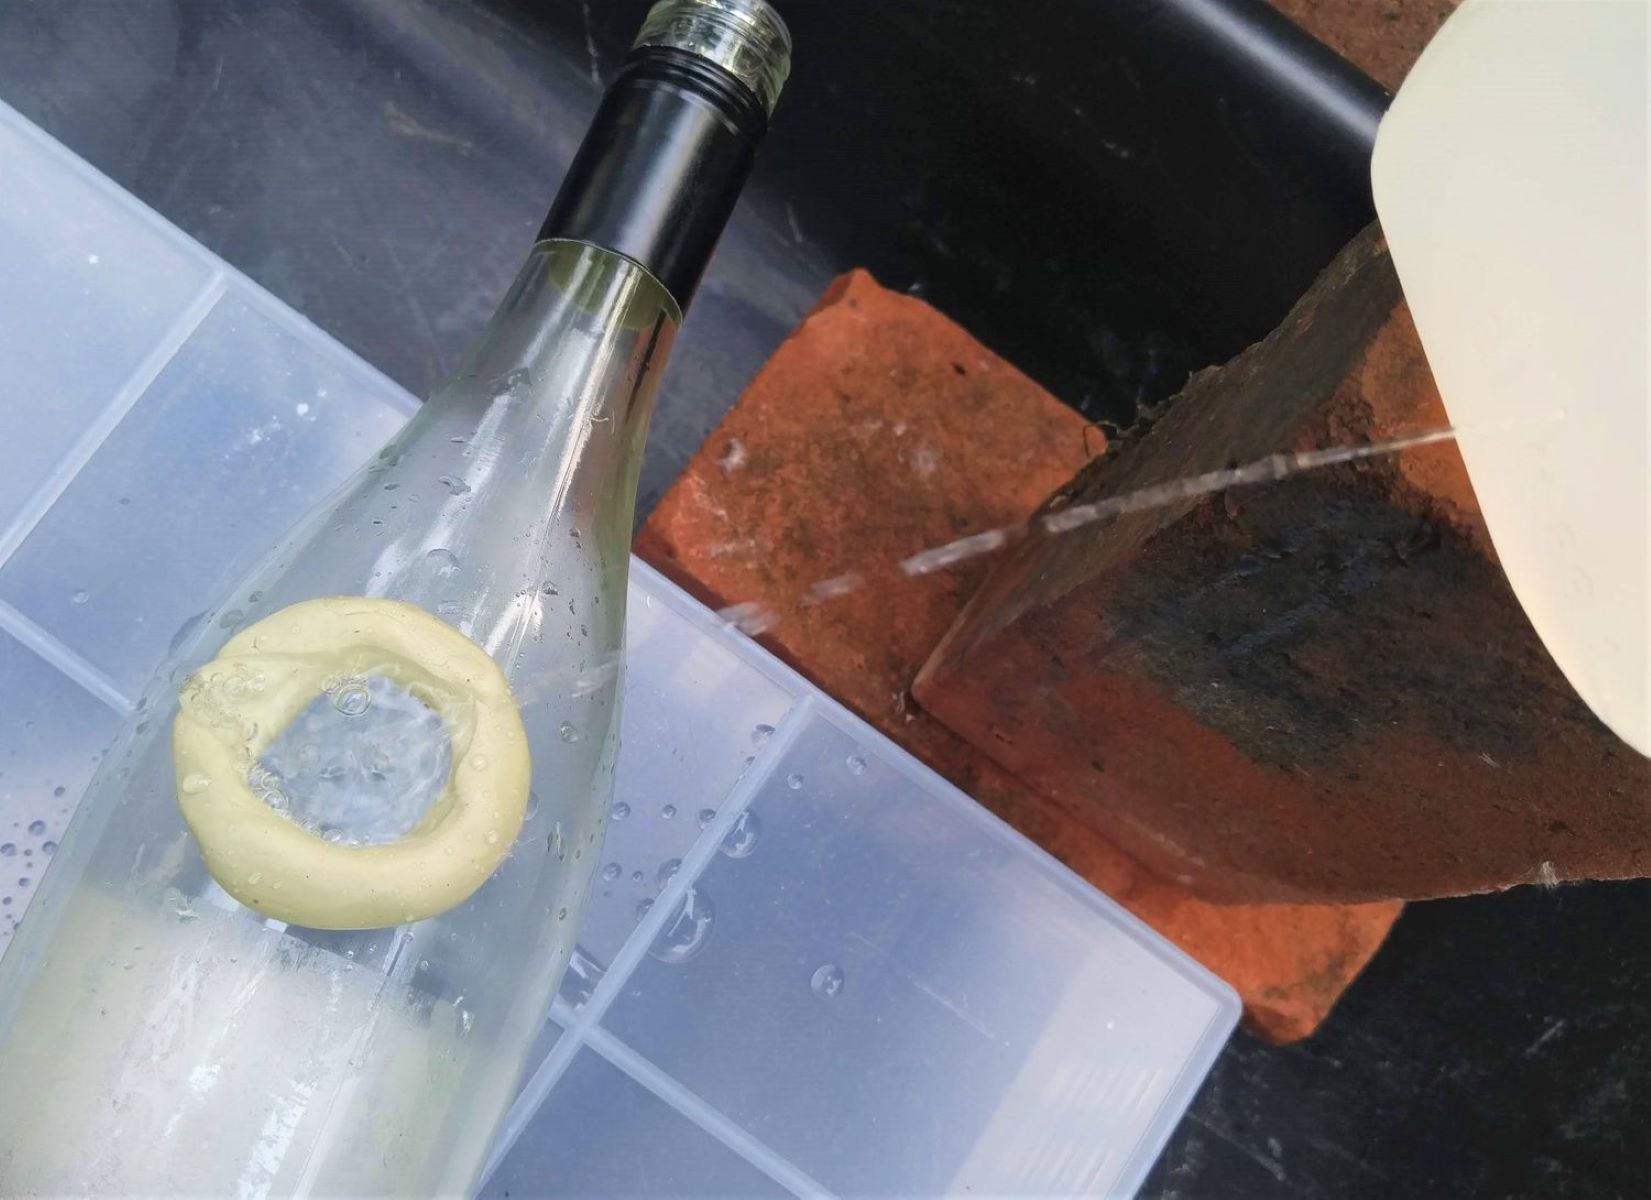
Step 7: Use Lubrication
Using lubrication during the drilling process is essential for drilling through crystal glass. Lubrication helps reduce friction and heat build-up, ensuring a smoother drilling experience and minimizing the risk of damaging the glass. Follow these steps to effectively use lubrication while drilling:
- Select the appropriate lubricant: Choose a lubricant specifically designed for glass drilling, such as a specialized glass-cutting coolant or water. These lubricants help keep the drill bit cool and prevent the glass from overheating.
- Apply lubrication to the drill bit: Before starting the drilling process, apply a small amount of lubricant to the drill bit. This can be done by dipping the bit into a shallow container of lubricant or using a spray bottle to mist it with water. Ensure the drill bit is coated evenly.
- Apply lubrication to the drilling area: To provide additional lubrication and cooling, apply a small amount of lubricant to the area where you are drilling. This can be done by spraying a fine mist of water on the surface or using a brush to apply the specialized glass-cutting coolant.
- Monitor and reapply lubrication: As you continue drilling, periodically check the drill bit and the drilling area for any signs of heat or friction. If you notice excessive heat or smoking, stop the drilling process and reapply lubricant to cool down the drill bit and glass surface.
- Keep the drilling area wet: Maintain a wet drilling area by periodically spraying water or applying lubricant throughout the process. This helps dissipate heat and prevents the glass from overheating, reducing the chances of cracks or damage.
- Handle lubrication with care: Follow the manufacturer”s instructions and safety guidelines while working with lubricants. Avoid contact with your skin, eyes, or clothing, and dispose of any used lubricants properly.
By using lubrication effectively, you can enhance the performance of the drill bit, keep the glass cool, and minimize the risk of damage to the crystal glass. Remember to monitor the drilling area and reapply lubrication as needed. Once you have completed the drilling process, move on to the next step: cleaning the glass.
Read more: How Is Crystal Glass Made?
Step 8: Clean the Glass
After drilling through the crystal glass, it’s important to properly clean it to remove any debris, lubricant residue, or other impurities. Cleaning the glass will not only enhance its appearance but also ensure that it is free from any contaminants that may affect its integrity. Follow these steps to effectively clean the glass:
- Remove the masking tape: Start by carefully peeling off the masking tape that was placed over the drilling spot. Lift it slowly and steadily to avoid any damage to the glass surface.
- Rinse the glass: Hold the glass under running water or gently rinse it with a mild soap and water solution to remove any loose debris or lubricant residue. Use your fingers or a soft brush to lightly scrub the area around the hole.
- Dry the glass: After rinsing, pat the glass dry with a clean, lint-free cloth or allow it to air dry. Take care to completely dry the surface to prevent any water spots or streaks from forming.
- Inspect for any debris: Once the glass is dry, carefully examine the drilled hole and the surrounding area for any remaining debris or particles. If you notice any, use a soft cloth or brush to gently remove them.
- Buff and polish (optional): If desired, you can use a glass polishing solution or a microfiber cloth to buff and polish the surface of the glass around the drilled hole. This will help restore its shine and clarity.
- Store or use the glass safely: Once the glass is clean and dry, handle it with care. Avoid placing any undue stress or pressure on the drilled hole, as it may be more fragile compared to the rest of the glass. Store or use the glass in a safe location where it is protected from potential damage.
By following these steps, you can ensure that your crystal glass is clean and free from any debris after drilling. Properly cleaning the glass also allows you to evaluate the quality of the drilled hole and ensures the glass is ready for its intended purpose. Now that the glass is clean and pristine, proceed to the final step: finishing touches and safety measures.
Step 9: Finishing Touches and Safety Measures
After drilling through the crystal glass and cleaning it, there are some final touches and safety measures to consider. These steps will help ensure the longevity of the drilled hole and maintain the safety of both the glass and anyone handling it. Follow these guidelines for finishing touches and safety measures:
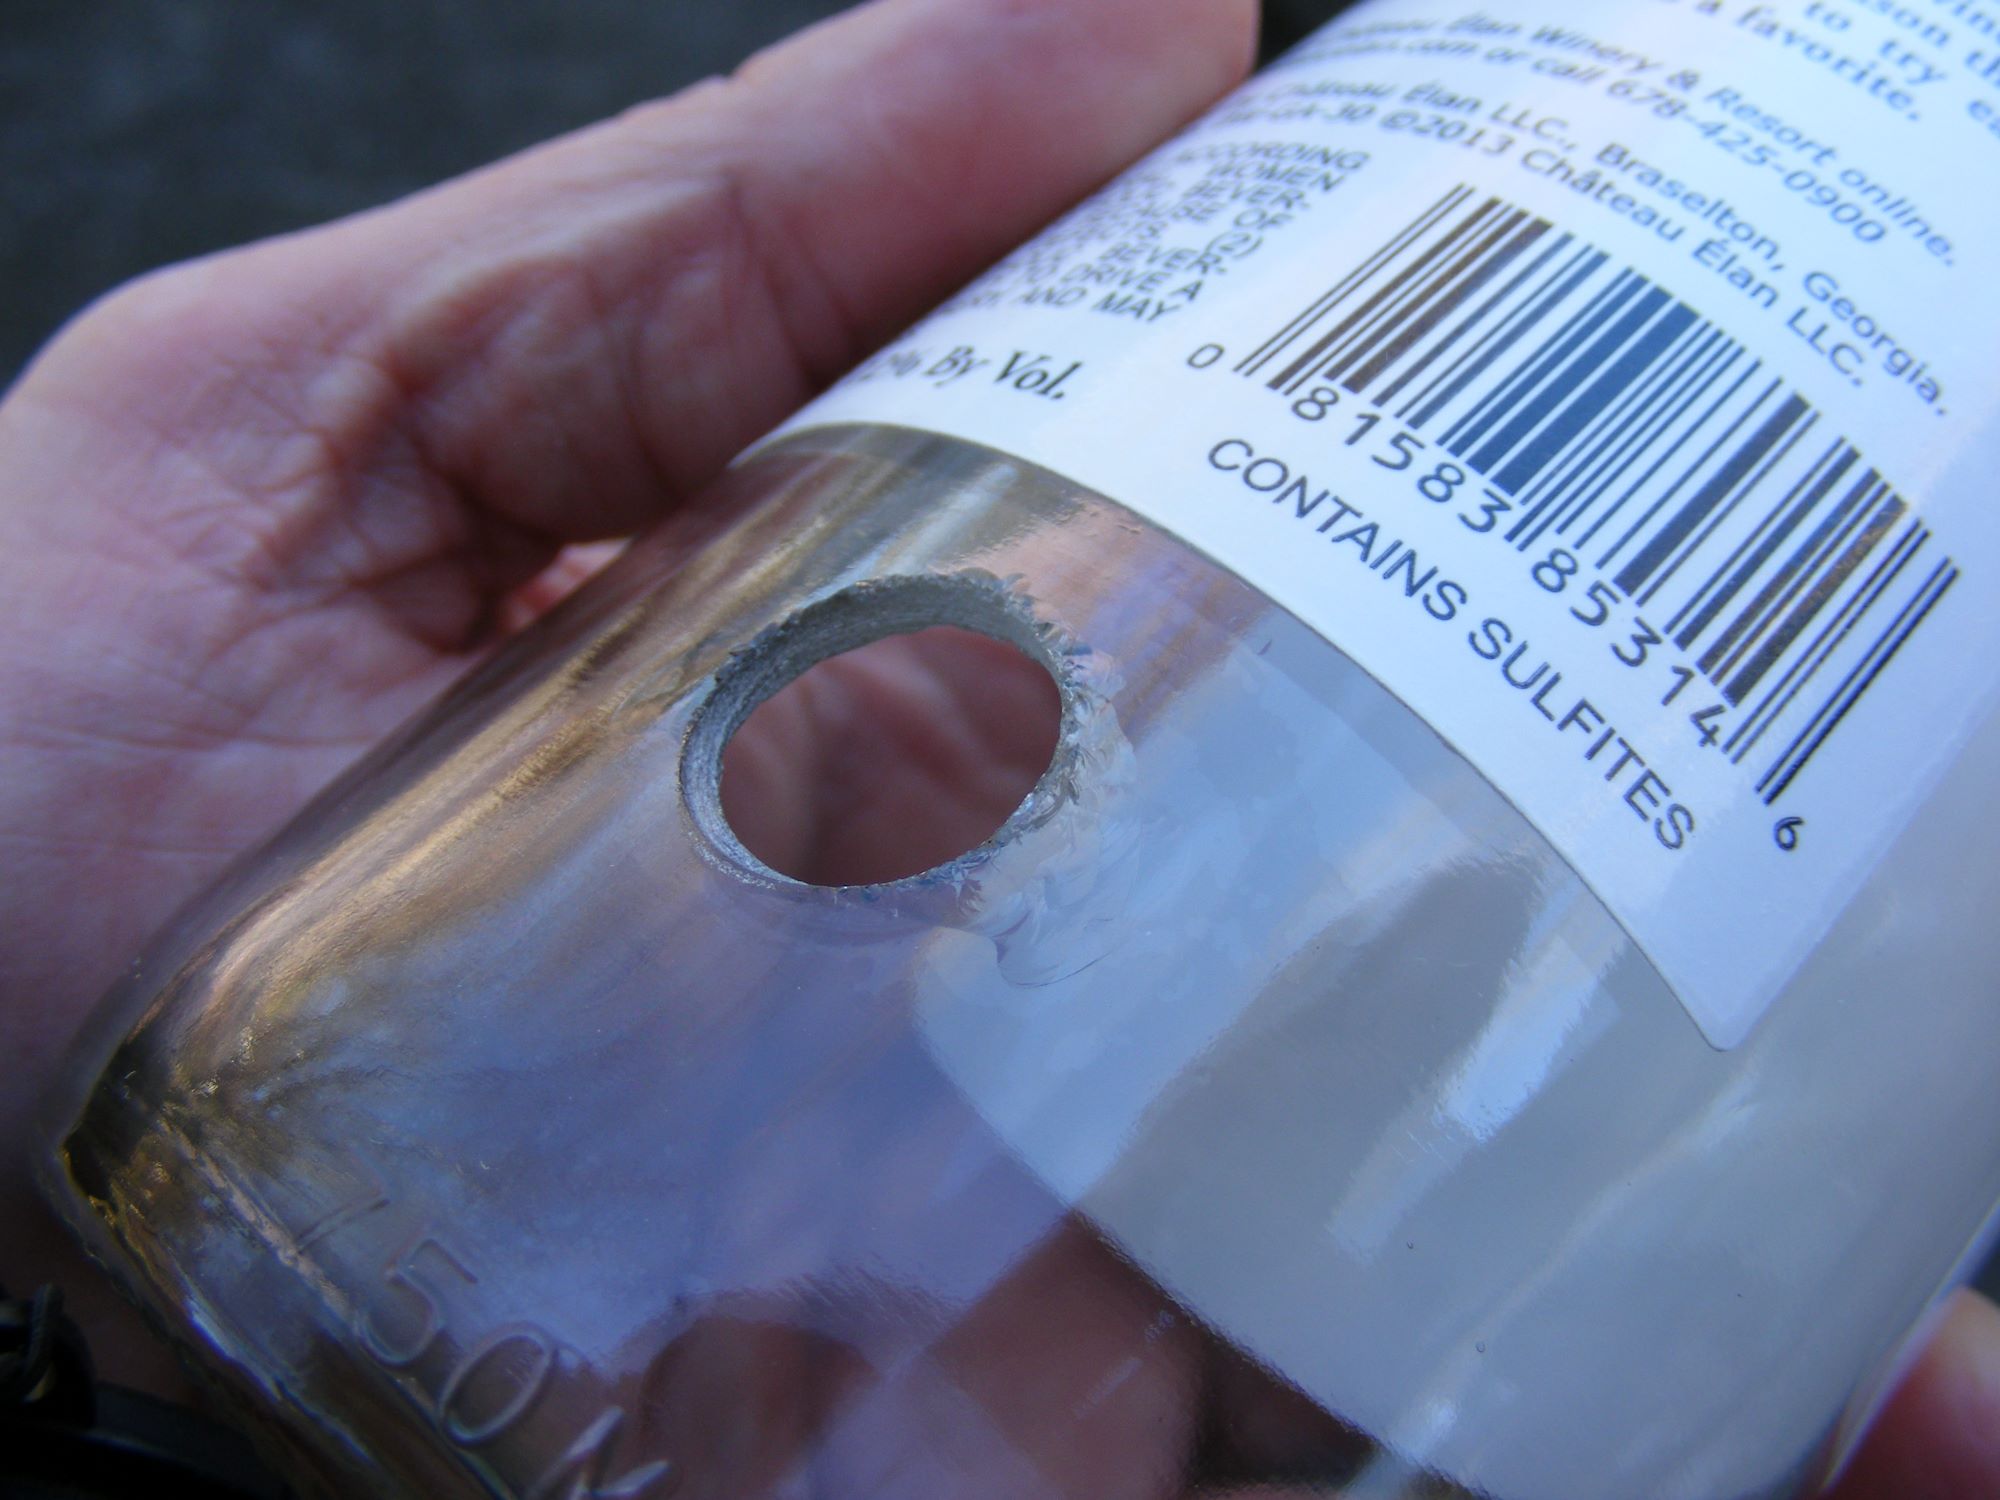
- Inspect the drilled hole: Take a closer look at the drilled hole to ensure it meets your expectations in terms of size, cleanliness, and overall appearance. If needed, use a chamfering tool to smooth out any rough edges around the hole.
- Smooth the edges: If desired, you can use a fine-grit sandpaper or a glass file to gently smooth the edges of the drilled hole. This helps prevent any potential snags or sharp edges that could cause injury or damage to other materials.
- Apply a sealant (optional): Depending on the purpose of the drilled hole, you may choose to apply a suitable sealant or adhesive around the edges of the hole. This provides added strength and security, particularly if you are using the glass for decorative or functional purposes.
- Handle the glass with care: Even though the drilling process is complete, it’s important to continue handling the glass with care. Avoid placing unnecessary stress or pressure on the drilled hole, as this could weaken the glass and jeopardize its integrity.
- Store or display the glass safely: If you are not using the glass immediately, store it in a secure and upright position to prevent any accidental damage. If you plan to display the glass, ensure it is kept away from areas where it may be bumped, knocked over, or exposed to extreme temperatures.
- Dispose of waste materials responsibly: Properly dispose of any waste materials, such as masking tape or lubricant containers, in accordance with local regulations. Take care not to leave any debris or sharp objects around that could pose a safety hazard.
- Keep safety equipment accessible: Store your safety goggles, gloves, and any other protective equipment in a readily accessible location. This ensures that you can easily retrieve them for future projects or when handling glass or other materials that require protection.
By following these finishing touches and safety measures, you can ensure the longevity and safety of the drilled glass. Remember to handle the glass with care at all times and exercise caution when using or displaying it. With these final steps completed, congratulations on successfully drilling through crystal glass and completing your project!
Conclusion
Drilling through crystal glass may initially seem like a challenging task, but with the right technique, tools, and precautions, it can be accomplished successfully. By following the step-by-step instructions outlined in this guide, you can confidently drill through crystal glass and achieve the desired results without compromising its integrity.
Throughout the drilling process, it is essential to prioritize safety by wearing appropriate protective gear such as safety goggles, gloves, and a dust mask. Additionally, maintaining control over the speed and pressure while using lubrication helps prevent damage to the glass and ensures a smooth drilling experience.
Properly marking the desired drilling spot, creating a pilot hole, positioning the drill bit accurately, and cleaning the glass afterwards are all crucial steps that contribute to the success of the drilling process. It is important to pay attention to detail and exercise patience, as rushing or applying excessive force can lead to damage or fractures in the glass.
By adhering to the finishing touches and safety measures, such as inspecting and smoothing the drilled hole, handling the glass with care, and storing it in a secure location, you can maintain the integrity of the drilled glass and prolong its lifespan.
Remember, practice and experience are key to mastering the art of drilling through crystal glass. Don’t be discouraged if your first attempt is not flawless – each project serves as a learning opportunity for improvement.
Now armed with the knowledge and skills necessary to drill through crystal glass, you can confidently embark on various projects, whether for decorative purposes or practical applications. Stay safe, adapt to different techniques as needed, and enjoy the process of creating beautiful and functional pieces with drilled crystal glass!
Frequently Asked Questions about How To Drill Through Crystal Glass
Was this page helpful?
At Storables.com, we guarantee accurate and reliable information. Our content, validated by Expert Board Contributors, is crafted following stringent Editorial Policies. We're committed to providing you with well-researched, expert-backed insights for all your informational needs.


0 thoughts on “How To Drill Through Crystal Glass”