Tableware
How To Extend A Dining Room Table
Modified: March 2, 2024
Learn how to extend your dining room table to accommodate more guests with these simple tips and tricks. Explore different tableware options to create the perfect table setting for any occasion.
(Many of the links in this article redirect to a specific reviewed product. Your purchase of these products through affiliate links helps to generate commission for Storables.com, at no extra cost. Learn more)
Introduction
Welcome to our comprehensive guide on how to extend a dining room table! A dining room table is undoubtedly the centerpiece of a dining area, where family and friends gather to share meals and create lasting memories. However, there may be times when you find yourself needing a little extra space for those special occasions or dinner parties. That’s where extending your dining room table comes in handy.
In this article, we will take you through a step-by-step process on how to extend your dining room table, allowing you to accommodate more guests and create a comfortable environment for everyone to enjoy. We will cover everything from assessing your current dining room table to choosing the right extension method, measuring and marking the table, attaching the extension pieces, stabilizing the extended table, and even refinishing and sealing the table for a polished finish. So, whether you have a small gathering or a grand feast in mind, with our expert guidance, you’ll have the perfect table for any occasion.
Before we dive into the practical steps, let’s briefly discuss some of the benefits of extending your dining room table:
- Flexibility: By extending your dining room table, you can easily adjust the size to accommodate different numbers of guests. This flexibility allows you to host gatherings of various sizes without investing in multiple table sizes.
- Cost-effective: Instead of purchasing a new, larger table, extending your current table can save you money. By using extension pieces or techniques, you can maximize the functionality of your existing table.
- Preserving sentimental value: Many dining room tables hold sentimental value, passed down through generations or acquired during special times in our lives. Extending the table allows you to preserve its memories while adapting it to your changing needs.
- Space-saving: Instead of having a large table that takes up significant space all the time, extending your table allows you to keep space efficient when not in use.
Now that we’ve highlighted the benefits, let’s move on to the practical steps of extending your dining room table. So roll up your sleeves and let’s get to work!
Key Takeaways:
- Extending a dining room table provides flexibility, cost-effectiveness, and space-saving benefits, allowing you to accommodate varying numbers of guests without investing in multiple table sizes.
- When extending your dining room table, carefully assess the current table, choose the right extension method, and prioritize stability, functionality, and aesthetics for a seamless and integrated extension.
Read more: How To Extend A Dining Table
Step 1: Assess your current dining room table
The first step in extending your dining room table is to carefully assess your current table. Take a close look at its design, structure, and overall condition. This assessment will help you determine the best extension method to use and ensure that the extended table remains sturdy and functional.
Here are a few key aspects to consider when assessing your dining room table:
- Table material: Identify the material your dining room table is made of. Common materials include wood, glass, metal, or a combination of these. The material will impact the type of extension method you can use and the tools required for the process.
- Table shape: Note the shape of your table. Is it rectangular, round, square, or oval? The shape will influence the extension method you choose, as some methods are better suited for certain shapes than others. For example, a drop-leaf extension works well for rectangular tables, while a pedestal extension suits round or oval tables.
- Table size: Measure the dimensions of your table, including its width, length, and height. This information will be helpful when selecting extension pieces or determining the dimensions of the extension you plan to create.
- Table legs and support: Examine the table’s legs, support beams, and any additional support structures. Ensure they are sturdy and in good condition. If there are any issues with the table’s stability, it may be necessary to address them before extending the table.
- Table style: Consider the overall style of your dining room table. Is it modern, traditional, rustic, or vintage? This will help you choose an extension method that complements the table’s aesthetic and maintains its visual appeal.
By thoroughly assessing your current dining room table, you will have a clear understanding of its strengths, limitations, and potential for extension. This knowledge will guide you in selecting the appropriate extension method and ensure that the final result is a seamless expansion of your table that meets your specific requirements.
Once you have assessed your dining room table, you can proceed to the next step: determining the desired extension method.
Step 2: Determine the desired extension method
After assessing your current dining room table, the next step in extending it is to determine the desired extension method. There are several options available, depending on your preferences, the table’s design, and your skill level in DIY projects. Each method has its own advantages and considerations, so it’s important to choose one that suits your needs and aligns with the table’s structure.
Here are some common extension methods to consider:
- Drop-leaf extensions: This method involves hinged panels that can be extended or folded down when not in use. Drop-leaf extensions are ideal for rectangular or square tables and provide a compact option for smaller spaces.
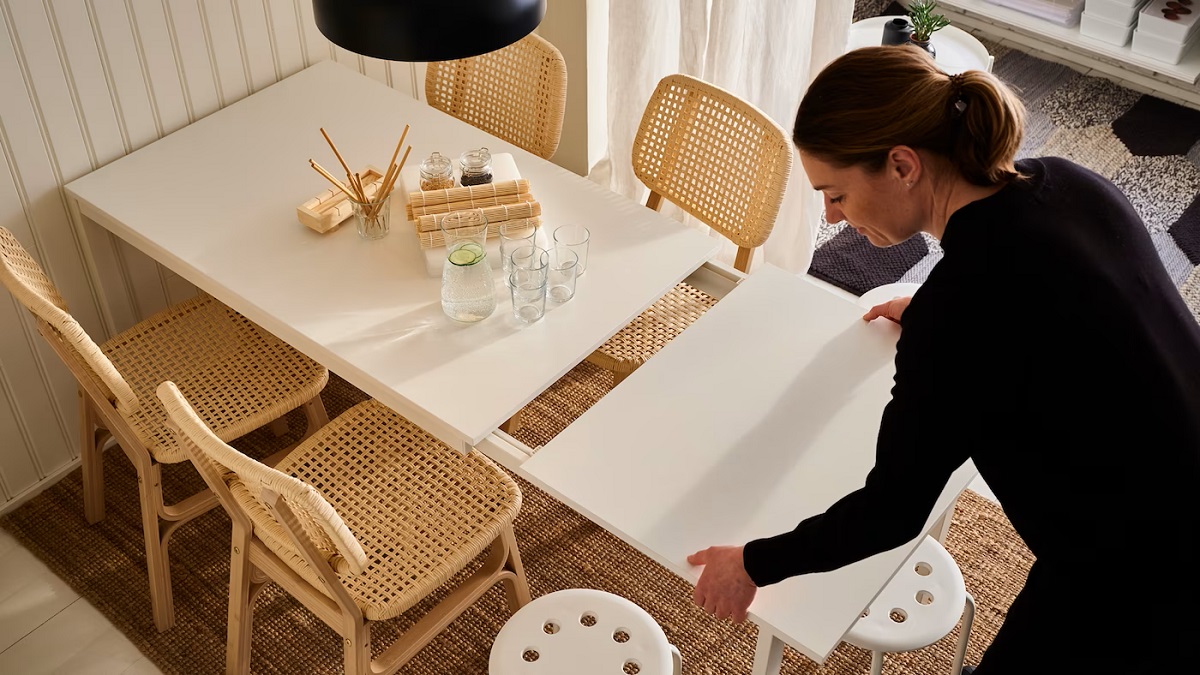
- Removable leaf extensions: With this method, additional table leaves are inserted in between the center of the table, allowing you to expand the length. Removable leaf extensions are versatile and can be added or removed based on the number of guests you wish to accommodate.
- Pedestal extensions: This method involves adding a removable circular or oval top to the existing table, creating extra seating capacity. Pedestal extensions are great for round or oval tables and provide a cohesive look, as the extension blends seamlessly with the original tabletop.
- Folding extensions: Folding extensions consist of sections that can be folded out from underneath the table, increasing its surface area. This method is practical for both rectangular and round tables and offers a convenient storage solution when the extension is not in use.
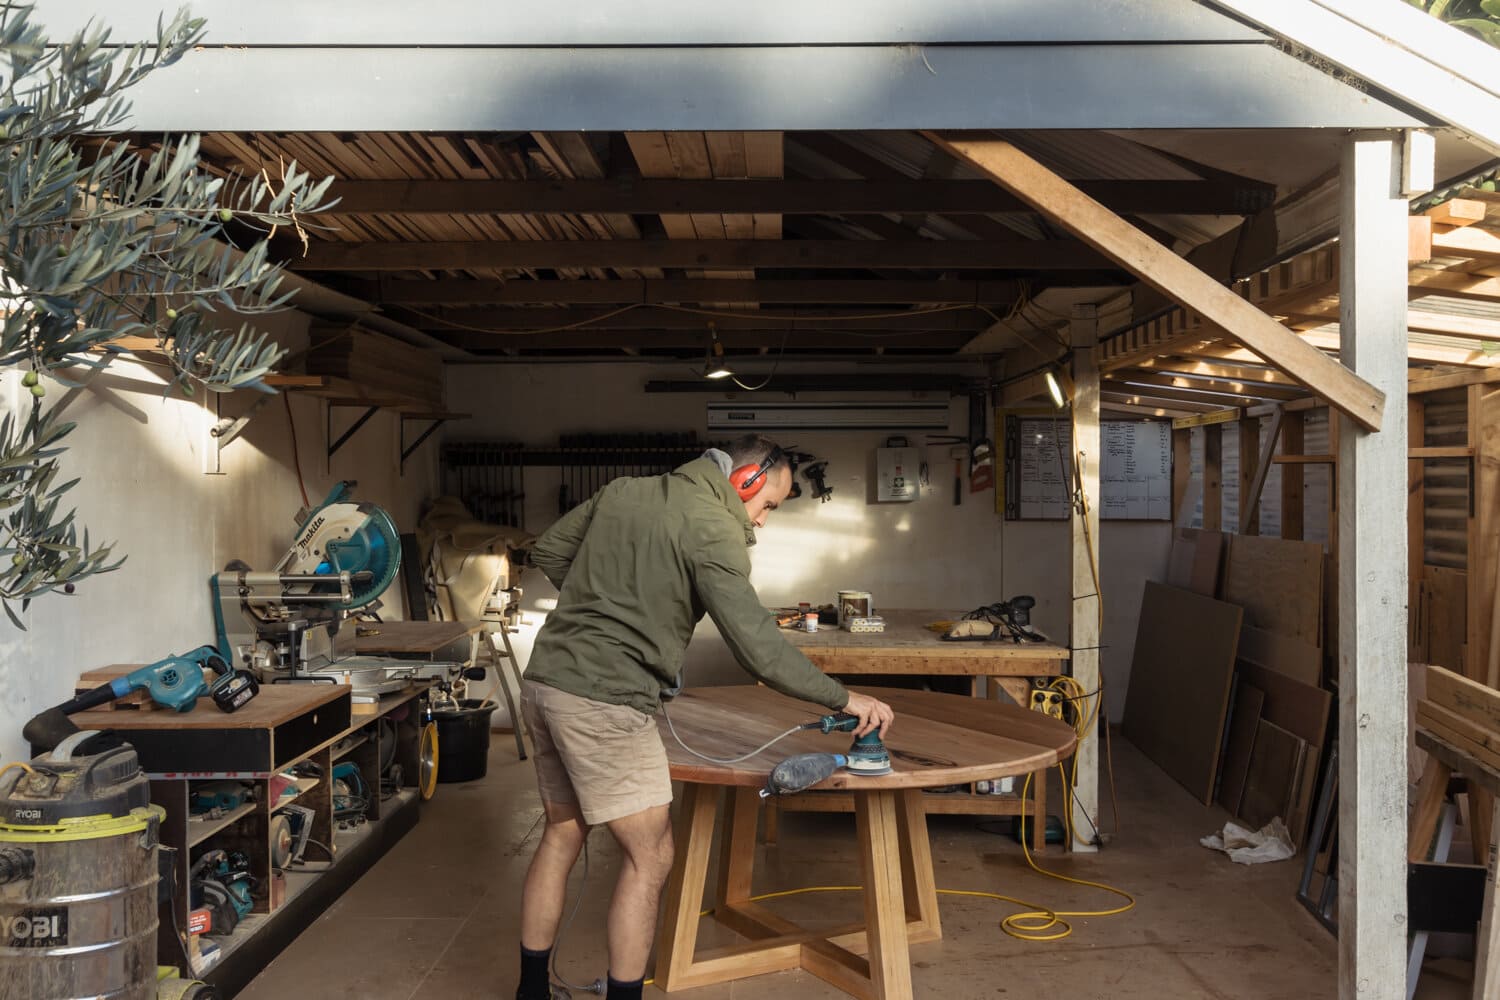
- Custom-built extensions: if you’re skilled in woodworking or have access to a professional carpenter, you can opt for custom-built extensions. This method allows you to create extensions that perfectly match the dimensions and style of your table, providing a seamless and cohesive look.
Consider the size of your dining area, the number of guests you typically host, and the aesthetic you want to achieve when deciding on the extension method. Additionally, take into account the level of complexity you are comfortable with and your budget for this project.
Once you have determined the desired extension method, you can move on to the next step: measuring and marking the table for extension.
Step 3: Measure and mark the table for extension
With your desired extension method in mind, it’s time to move on to measuring and marking your dining room table for the extension. Precise measurements are crucial to ensure a seamless and well-fitted extension that aligns with the existing table. By taking the time to measure and mark accurately, you can avoid any mishaps or uneven extensions.
Here’s what you need to do:
- Measure the table length: Use a measuring tape to determine the length of your table. Measure from one end of the table to the other, making sure to include any aprons or overhangs in your measurement.
- Determine the desired extension length: Decide how much additional length you want to add to your table. This can vary depending on your needs and the number of guests you plan to accommodate. Consider leaving enough space for everyone to sit comfortably and move around the table easily.
- Mark the extension placement: Based on the desired extension length, mark the appropriate spots on the table where the extension pieces or panels will be attached. Use a pencil or masking tape to make clear marks on the tabletop surface.
- Ensure even alignment: Double-check that the marked spots are evenly aligned with the sides and corners of the table. This will help maintain a balanced and symmetrical appearance once the extension is attached.
- Consider the thickness of the extension: Take into account the thickness of the extension pieces or panels when marking the table. This will ensure that the extended table surface remains level and comfortable for dining.
It’s important to note that if you are using removable leaf extensions, you’ll need to measure the width of the table and the length of the leaves to ensure a proper fit.
Remember, precise measurements and accurate markings are key to a successful table extension. Take your time during this step and carefully record the dimensions and placement of the extension. This will serve as a guide when it comes to attaching the extension pieces in the next step.
Once you have measured and marked the table for extension, you’re ready to move on to Step 4: purchasing or creating the extension pieces.
Step 4: Purchase or create extension pieces
Now that you have measured and marked your dining room table for extension, it’s time to acquire the necessary extension pieces. Depending on your chosen extension method, you may need to purchase pre-made extensions or create custom pieces to fit your table perfectly. Whichever route you choose, ensure that the extension pieces are of high quality and match the style of your table.
Here are some options for acquiring extension pieces:
- Ready-made extension leaves: If you are using removable leaf extensions, you can purchase them from furniture stores or online retailers. These leaves are typically designed to fit various table sizes and can easily be inserted or removed as needed.
- Extension panels: For methods like drop-leaf extensions or folding extensions, you can purchase pre-made panels that can be attached to the sides or underneath the table. These panels are available in different materials and finishes, allowing you to find one that complements your existing table.
- Custom-built extensions: If you prefer a more customized solution, you can choose to have extension pieces custom-built. This option is especially useful if you have unique table dimensions or a specific design in mind. Consult with a professional carpenter or furniture maker who can create extensions that seamlessly integrate with your table.
- Repurposing materials: If you’re feeling crafty and want to add a personal touch to your table extension, consider repurposing materials. For example, you could use reclaimed wood to create additional tabletop sections or repurpose old doors to serve as drop-leaf extensions. This option allows for creativity and can result in a unique and eco-friendly table extension.
When purchasing or creating extension pieces, ensure that they are made from durable and stable materials, as they will need to support the weight of dining essentials and guests. Also, consider the finish or stain of the extension pieces to match or complement the existing tabletop, creating a cohesive look.
Take precise measurements of the extension pieces to ensure they align perfectly with the markings on your table. This will ensure a seamless and secure fit when attaching the extensions in the next step.
With the extension pieces in hand, you are now ready to move on to Step 5: attaching the extension pieces to the table.
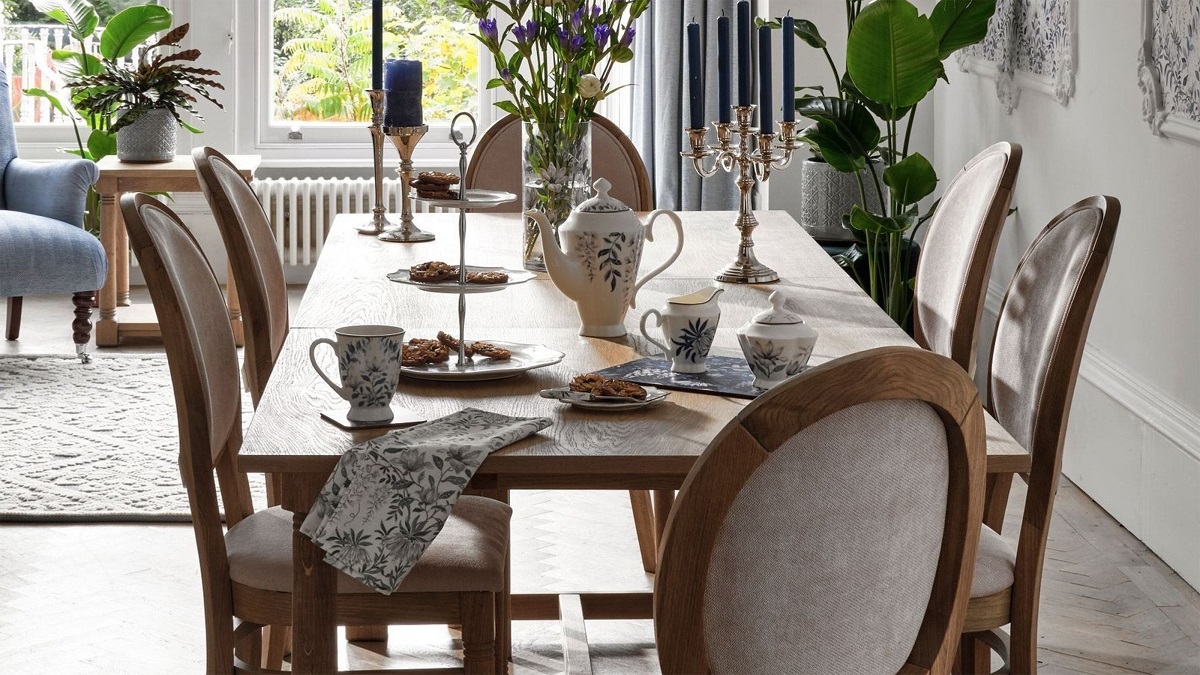
Consider adding table leaf extensions to increase the length of your dining room table. These can be easily inserted and removed as needed for extra seating.
Read more: How To Extend Your Dining Table For Guests
Step 5: Attach the extension pieces to the table
Now that you have acquired the extension pieces, it’s time to attach them to your dining room table. The method of attachment will depend on the type of extension pieces you have chosen and the design of your table. Follow these steps to ensure a secure and stable attachment:
- Clean and prepare the table: Before attaching the extension pieces, make sure the table surface is clean and free of any dust or debris. This will ensure a smooth and even attachment.
- Align the extension pieces: If you are using removable leaf extensions, carefully align the extension leaves with the marked spots on the table. Ensure that they are centered and level with the table surface. If you are attaching panel extensions, follow the manufacturer’s instructions for placement and alignment.
- Secure the attachments: Depending on the type of extension pieces, you may need to secure them using screws, bolts, or brackets. Make sure to use the appropriate hardware and tools for a secure attachment. Tighten the fittings firmly but avoid overtightening to prevent damage to the table or extension pieces.
- Test the stability: Once the extension pieces are attached, gently test the stability of the extended tabletop. Apply light pressure on the extended area to ensure the attachments are secure and there is no wobbling or movement. If you notice any instability, double-check the attachment points and tighten them if necessary.
- Smooth out the table surface: After attaching the extension pieces, check the table surface for any unevenness or gaps between the extension and the original tabletop. If needed, sand down any rough edges or use wood filler to fill in gaps. This will create a seamless surface for dining.
It’s important to note that if you have opted for custom-built extensions, you may need professional assistance to attach them securely. A skilled carpenter or furniture maker can ensure a strong and durable attachment that seamlessly integrates with your table.
By following these steps, you can successfully attach the extension pieces to your dining room table, creating a larger surface area for your guests to enjoy their meals.
With the table extensions securely attached, you can now proceed to Step 6: stabilizing the extended dining room table.
Step 6: Stabilize the extended dining room table
Once you have extended your dining room table by attaching the extension pieces, it’s important to ensure that it remains stable and secure. Stability is crucial for a safe and comfortable dining experience. Here are some tips to help you stabilize your extended dining room table:
- Check the levelness: Use a spirit level to check if the extended tabletop is level. Place the level on different areas of the table, including the extension pieces and the original tabletop. Adjust the attachment points if needed to ensure an even and stable surface.
- Reinforce the support structure: Examine the table legs and support beams to ensure they are sturdy and can adequately support the extended table. If you notice any signs of weakness or instability, reinforce the support structure by adding additional support braces or brackets.
- Consider table leg extensions: If the height of the extension pieces differs from the original table height, you might need to adjust the table legs to maintain stability. You can purchase table leg extensions or use felt pads or furniture risers to level the table and prevent wobbling.
- Secure loose joints: If you notice any loose joints or connections between the extension pieces and the original table, tighten them to improve stability. Use appropriate tools and hardware to ensure a secure fit.
- Use table stabilizers: To further enhance stability, you can consider using table stabilizers. These devices are specifically designed to prevent wobbling and provide support to extended dining room tables. They can be attached to the bottom of table legs or placed underneath the tabletop for added stability.
By taking these steps to stabilize your extended dining room table, you can ensure a secure and level surface for dining. A stable table not only improves safety but also enhances the overall dining experience by allowing your guests to dine comfortably without any concerns about the table’s stability.
With the extended table now stabilized, you can proceed to Step 7: refinishing and sealing the table (optional).
Step 7: Refinish and Seal the Table (Optional)
Step 7 involves refinishing and sealing the table, which is an optional but recommended step to ensure the longevity and visual appeal of your extended dining room table. Refinishing and sealing not only protect the table from stains, scratches, and moisture but also enhance its overall appearance. Here’s what you need to do:
- Sand the tabletop: Use sandpaper or a sanding block to gently sand the entire tabletop, including the extension pieces. This will remove any existing finish, stains, or imperfections and create a smooth surface for refinishing. Start with coarse-grit sandpaper and gradually move to finer grits for a polished finish.
- Choose the finish: Consider the desired look and style of your dining room table when selecting a finish. Common options include varnish, polyurethane, lacquer, or wax. Each finish has its own advantages and considerations, so research and choose the one that suits your preferences and maintenance requirements.
- Apply the finish: Follow the manufacturer’s instructions for applying the chosen finish. Use a brush, foam applicator, or cloth to apply an even coat of finish to the tabletop and extension pieces. Allow each coat to dry thoroughly before applying subsequent coats. Multiple coats may be necessary to achieve the desired level of protection and sheen.
- Smooth between coats: For a flawless finish, lightly sand the tabletop between each coat of finish. This step helps remove any imperfections or bubbles and ensures a smooth and uniform appearance. Use a fine-grit sandpaper and wipe away the sanding dust before applying the next coat.
- Seal the edges: Pay attention to the edges of the table and extension pieces, as they are more prone to moisture infiltration. Apply extra coats of finish to the edges and ensure they are sealed properly to protect against any potential damage.
- Cure and buff the finish: Allow the final coat of finish to cure according to the manufacturer’s instructions. Once fully cured, you can gently buff the surface with a soft cloth to enhance the shine and smoothness of the finish.
Refinishing and sealing your extended dining room table not only adds a protective layer but also brings out the natural beauty of the wood or enhances the chosen finish. It’s important to keep in mind that refinishing and sealing can be a time-consuming process, so allocate plenty of time for each coat to dry and cure properly.
Following these steps will ensure that your extended dining room table remains well-protected and visually appealing for years to come.
With the table refinishing and sealing complete, you have successfully extended, stabilized, and enhanced the overall finish of your dining room table. Now, you can proudly host gatherings and create lasting memories around your beautifully extended dining table.
Finally, we hope this comprehensive guide has been helpful in assisting you with extending your dining room table. Happy entertaining and enjoy your newly expanded dining space!
Conclusion
Congratulations! You have reached the end of our comprehensive guide on how to extend a dining room table. By following the step-by-step process outlined in this article, you have learned how to assess your current table, determine the desired extension method, measure and mark the table, acquire extension pieces, attach them securely, stabilize the extended table, and optionally refinish and seal the table. With these skills, you now have the knowledge and confidence to extend your dining room table and create a versatile space for hosting gatherings and accommodating more guests.
Extending a dining room table allows you to adapt to different social occasions and make the most of your available space. Whether you have a small apartment or a spacious dining area, the flexibility of an extended table ensures that you can comfortably dine with family and friends, fostering a warm and inviting atmosphere.
Remember, as you undertake this project, always prioritize stability, functionality, and aesthetics. Assess your table carefully, choose the right extension method for your needs, and ensure that the attachment is secure and stable. By paying attention to these details, you’ll create a seamless and integrated extension that enhances the overall look and functionality of your dining room.
Finally, consider adding some personal flair to your extended dining room table. Whether it’s through a custom-made extension, unique finishes, or decorative accents, infuse your own style and personality into the space. This will make your table extension even more special and reflective of your tastes and preferences.
We hope this guide has been a valuable resource for you. Now, it’s time to put your newfound knowledge to use and extend your dining room table to accommodate your next gathering. Enjoy the process, and may your extended table bring joy, laughter, and wonderful memories to all who gather around it!
Frequently Asked Questions about How To Extend A Dining Room Table
Was this page helpful?
At Storables.com, we guarantee accurate and reliable information. Our content, validated by Expert Board Contributors, is crafted following stringent Editorial Policies. We're committed to providing you with well-researched, expert-backed insights for all your informational needs.


0 thoughts on “How To Extend A Dining Room Table”