Tableware
How To Wrap Silverware In A Napkin
Modified: December 7, 2023
Learn how to elegantly wrap silverware in a napkin for your tableware arrangement. Impress your guests with this simple but classy dining touch.
(Many of the links in this article redirect to a specific reviewed product. Your purchase of these products through affiliate links helps to generate commission for Storables.com, at no extra cost. Learn more)
Introduction
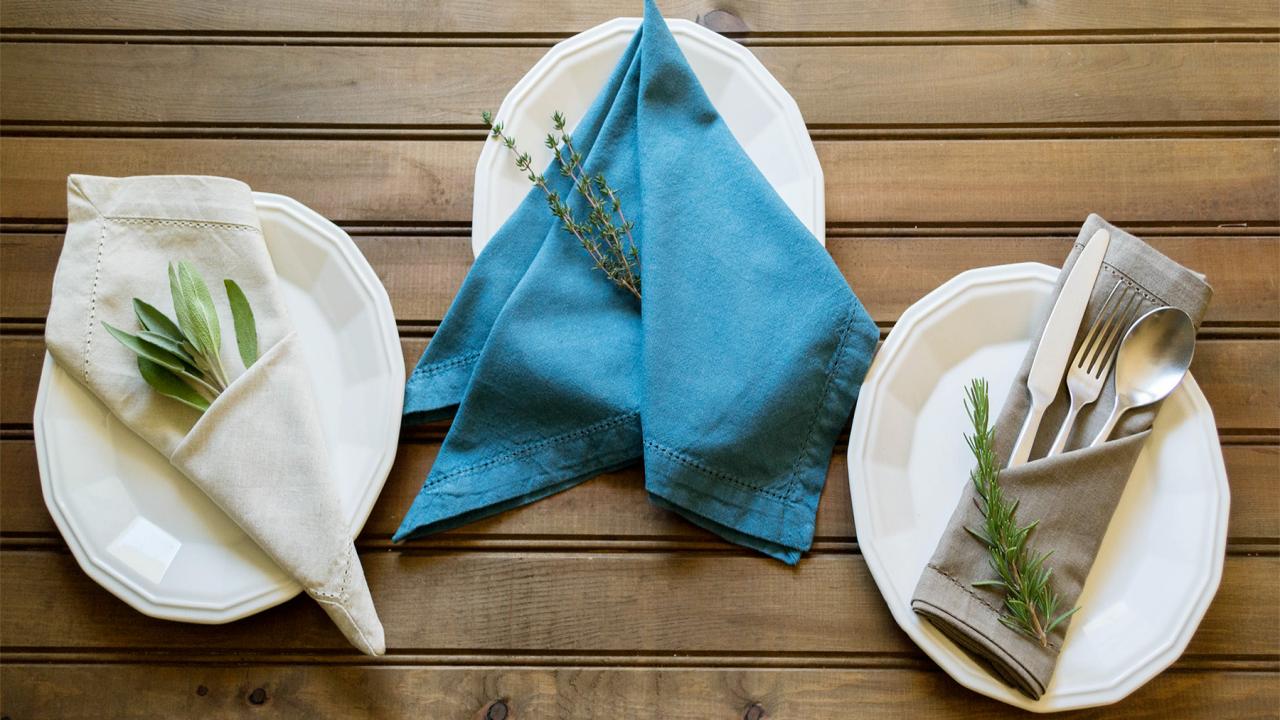
When it comes to setting a table, the presentation of tableware plays a crucial role in creating a visually appealing and inviting dining experience. One way to elevate the presentation of your table settings is by wrapping silverware in a napkin. This simple yet elegant touch not only adds a touch of sophistication to your table, but it also helps to keep the silverware clean and organized.
In this article, we will guide you through the process of wrapping silverware in a napkin, sharing helpful tips along the way. Whether you are hosting a dinner party, a family gathering, or simply want to impress your guests, this step-by-step guide will equip you with the knowledge and techniques to beautifully wrap your silverware in a napkin.
Before we dive into the precise steps, let’s first gather the materials needed and ensure we have everything readily available. With the right tools at your disposal, you’ll find the process much smoother and enjoyable. So, let’s get started on this creative and practical endeavor of perfecting the art of wrapping silverware in a napkin.
Key Takeaways:
- Elevate your table setting by wrapping silverware in a napkin, adding sophistication and practicality to any dining occasion. Impress your guests with beautifully arranged tableware that sets the tone for a delightful meal.
- Master the art of wrapping silverware in a napkin to create visually appealing and organized table settings. Add personal touches and attention to detail for a memorable dining experience.
Read more: How To Wrap Silverware In Paper Napkins
Materials Needed
Before you begin wrapping silverware in a napkin, it’s important to gather all the necessary materials. Having everything prepared will make the process seamless and efficient. Here are the materials you will need:
1. Napkins: Choose cloth napkins in a color or pattern that complements your table setting. The size of the napkin should be large enough to comfortably wrap the silverware.
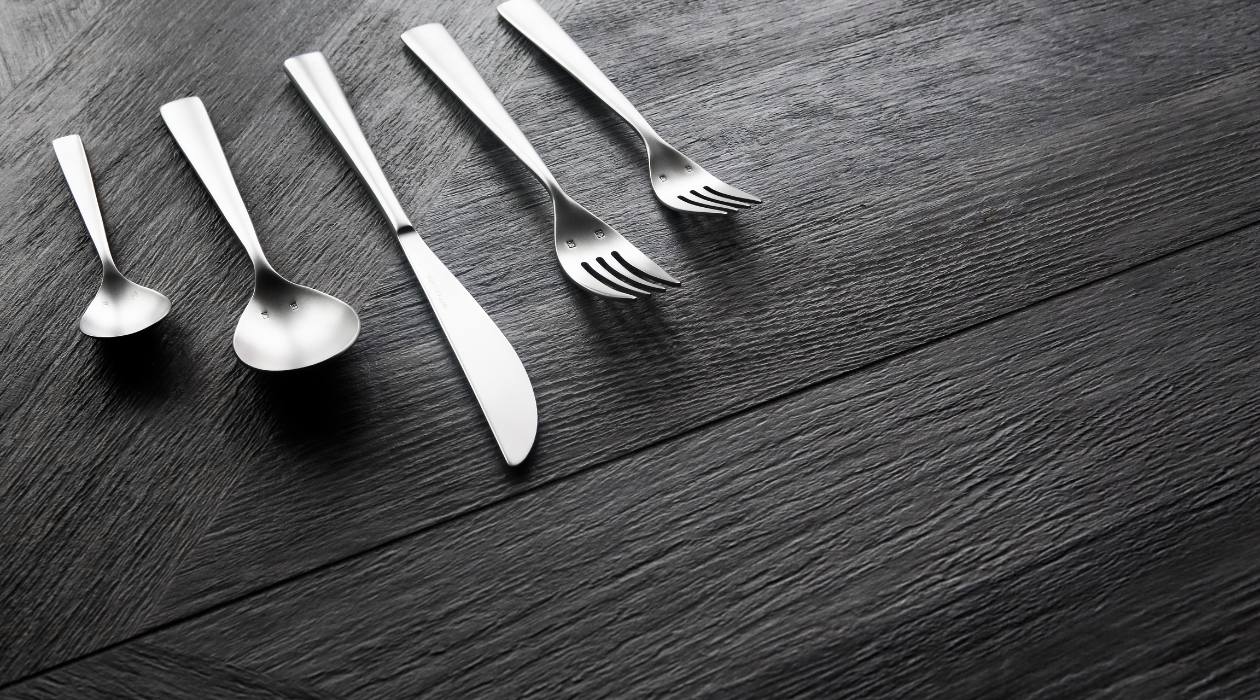
2. Silverware: Select the silverware you wish to wrap. This typically includes a dinner fork, knife, and spoon. You can also include additional utensils like salad forks or dessert spoons, depending on the occasion.
3. Ribbon or twine: To add an elegant finishing touch to your wrapped silverware, have some ribbon or twine on hand. Choose a color that complements the napkins or matches the theme of your event.
4. Optional embellishments: If you want to take your wrapped silverware to the next level, consider adding decorative elements such as personalized tags, fresh herbs, or small flowers. These little details can enhance the overall visual appeal of the table setting.
5. Iron: If your napkins are wrinkled, using an iron to smooth them out beforehand will give your wrap a polished and neat appearance.
Now that you have gathered all the necessary materials, you’re ready to dive into the step-by-step process of wrapping silverware in a napkin. Prepare yourself to impress your guests with a beautifully arranged table setting that will undoubtedly elevate any dining experience.
Step 1: Preparing the Napkin
The first step in wrapping silverware in a napkin is to prepare the napkin itself. This involves ensuring it is clean, pressed, and ready to be neatly folded. Here’s how to prepare the napkin:
1. Start with a clean napkin: Before you begin, make sure your napkin is freshly laundered and free of any stains or dirt. This will ensure that the silverware looks pristine when wrapped.
2. Press the napkin: If your napkin is wrinkled, take the time to iron it before proceeding. Smooth out any creases to achieve a crisp and polished look.
3. Lay the napkin flat: Find a clean, flat surface on which to work. Lay the napkin out in front of you, ensuring it is fully opened and spread evenly.
4. Positioning the napkin: Orient the napkin so that it appears like a diamond shape in front of you, with one corner pointing towards you.
By taking the time to prepare the napkin properly, you lay the foundation for a beautifully wrapped presentation. Pristine, pressed, and positioned correctly, the napkin becomes a canvas upon which the silverware will be tastefully arranged. With the napkin ready, we can now move on to the next step of placing the silverware.
Step 2: Placing the Silverware
Now that your napkin is prepared, it’s time to carefully place the silverware onto the napkin. This step requires attention to detail and precision to ensure that the silverware is positioned neatly and symmetrically. Follow these steps to expertly place your silverware:
1. Start with the largest utensil: Begin by placing the largest utensil, such as a dinner fork or dinner knife, at the center of the napkin. This will serve as the anchor for the rest of the silverware.
2. Add the other utensils: Place the remaining utensils next to the largest utensil, ensuring they are parallel and evenly spaced. If you’re wrapping a fork, place the tines facing upward. If you’re wrapping a knife, position the blade towards the center of the napkin, away from the edge.
3. Space between utensils: Leave a small gap between each utensil to maintain an organized and visually pleasing arrangement. This also allows the napkin to fold neatly around each piece of silverware.
4. Optional extras: If you are including additional utensils like salad forks or dessert spoons, place them to the side of the larger utensils, following the same spacing and alignment.
By taking the time to place the silverware thoughtfully and symmetrically, you create a visually appealing arrangement that showcases attention to detail and adds elegance to the table setting. Once you have positioned the silverware, it’s time to move on to the next step—folding the napkin.
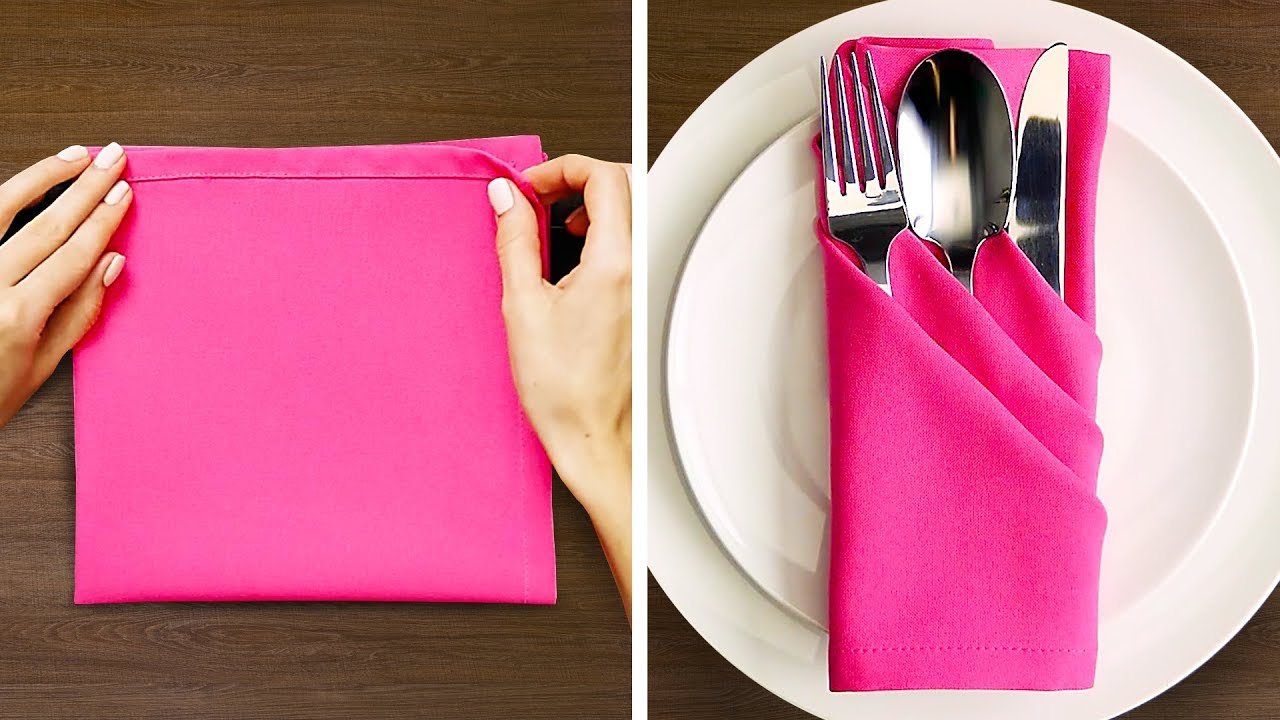
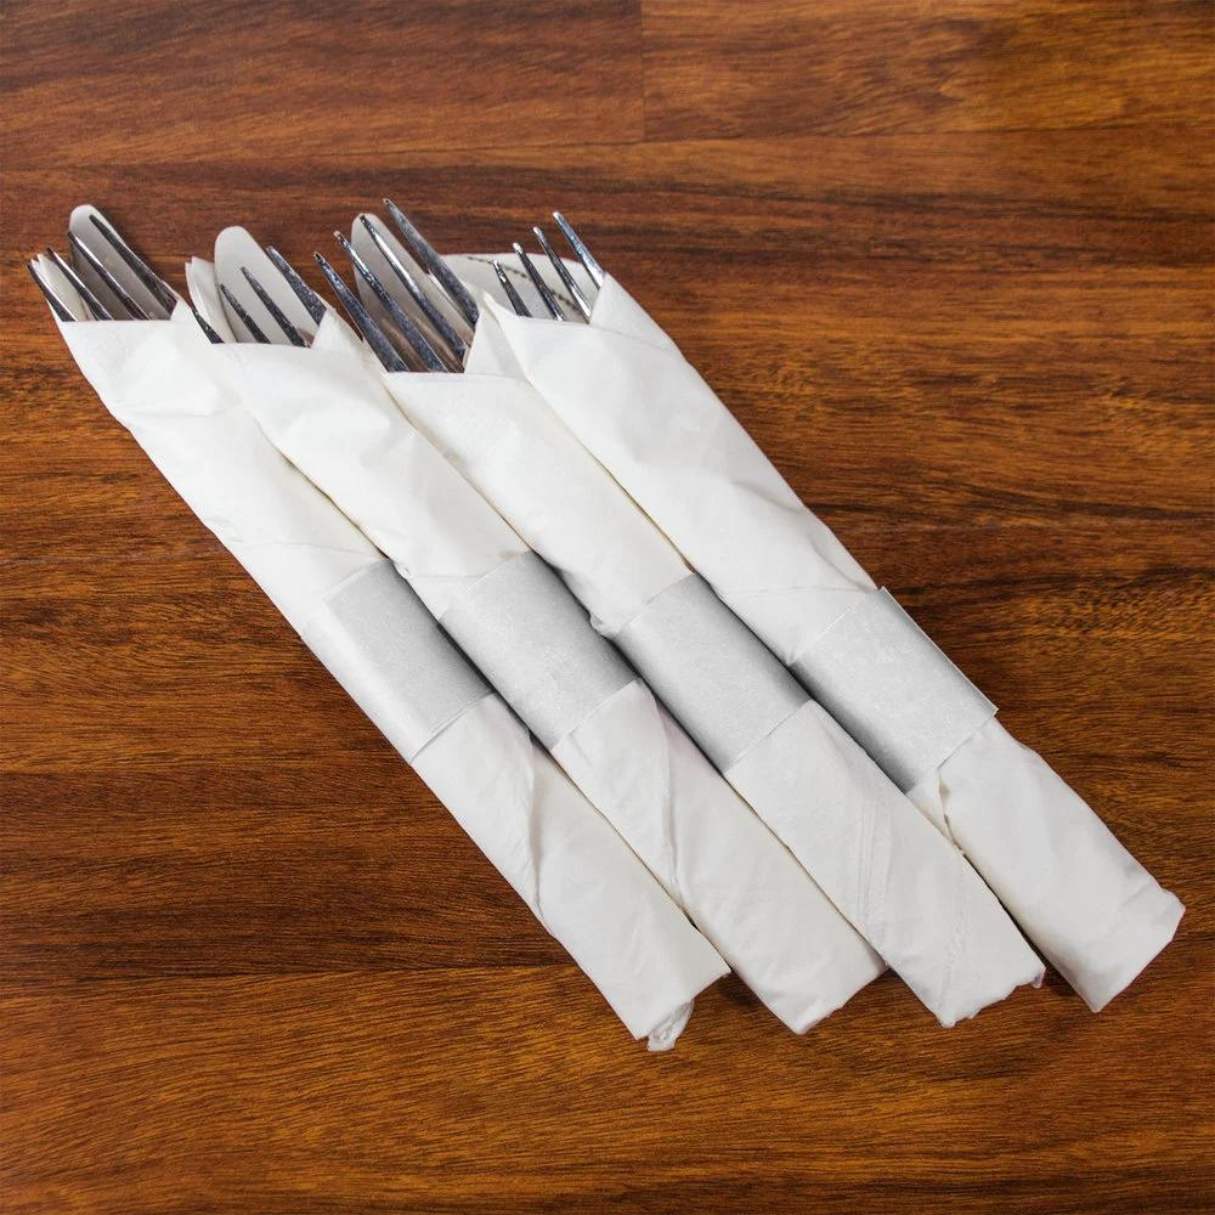
When wrapping silverware in a napkin, start by placing the silverware in the center of the napkin. Then, fold the bottom of the napkin over the silverware, followed by the sides, and finally the top. This will create a neat and secure package.
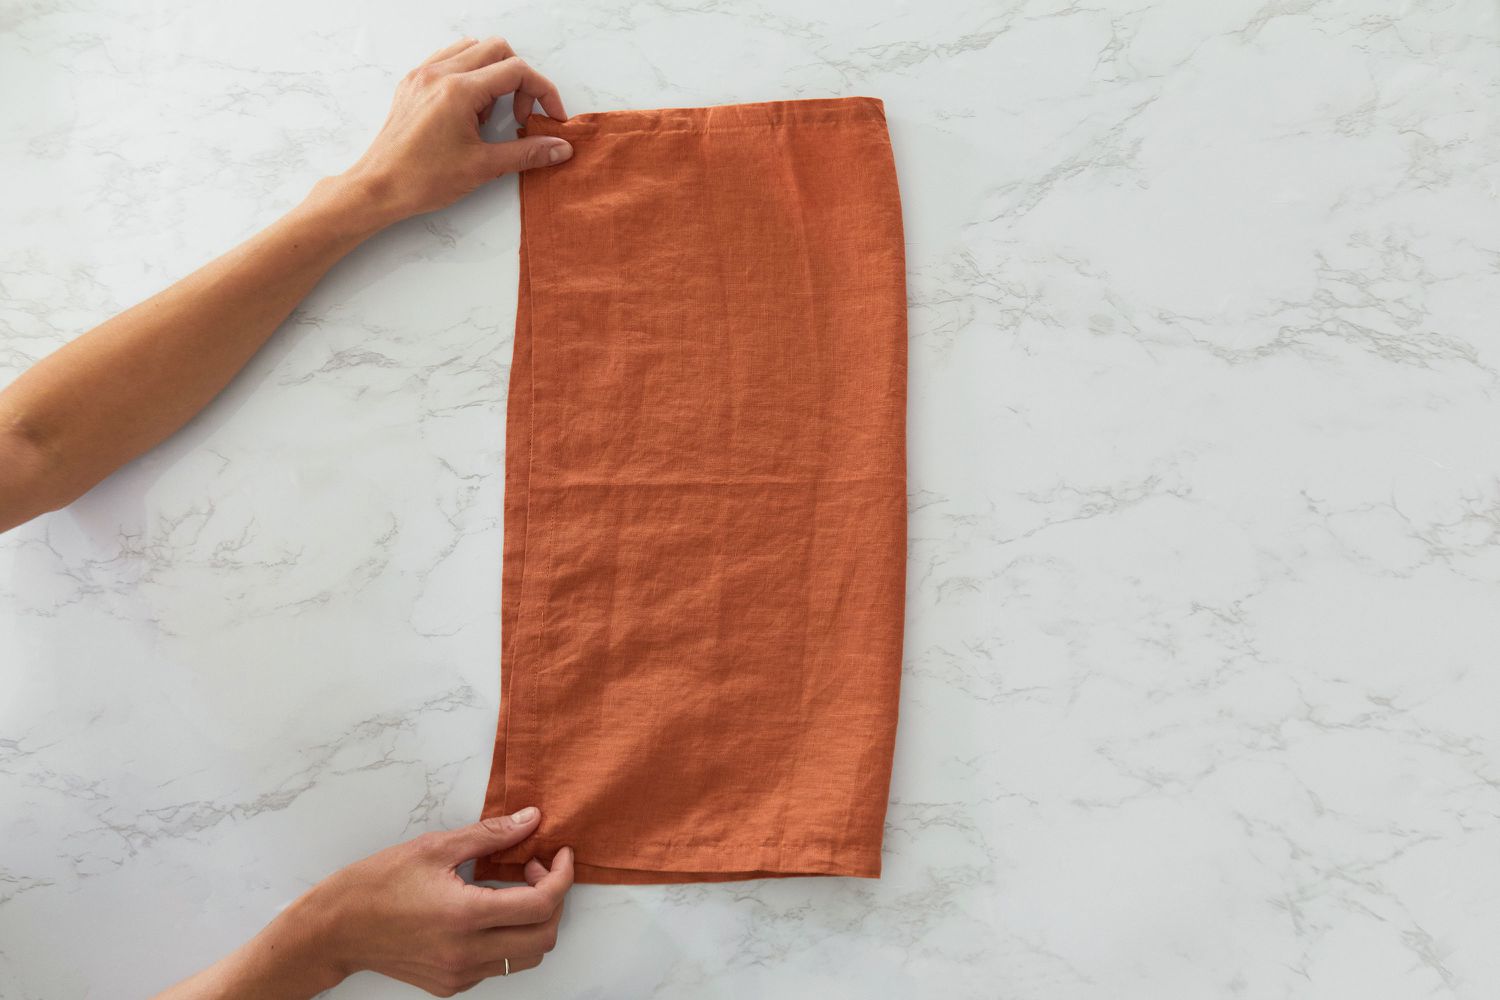
Step 3: Folding the Napkin
With the silverware expertly positioned, it’s time to fold the napkin around the utensils, creating an elegant wrap. Follow these steps to fold the napkin smoothly:
1. Take the bottom corner: Start by bringing the bottom corner of the napkin up towards the center, covering the silverware. Ensure that the fold aligns with the top edge of the silverware.
2. Fold the left corner: Next, fold the left corner of the napkin diagonally towards the center, overlapping the bottom corner fold. This creates a neat triangular shape on the left side of the silverware.
3. Fold the right corner: Repeat the same process with the right corner of the napkin, folding it diagonally towards the center and tucking it underneath the left corner fold. This creates a symmetrical triangular shape on both sides of the silverware.
4. Smooth out any creases: Gently smooth out any creases and adjust the folds if needed to ensure a clean and polished appearance.
By folding the napkin in this manner, you not only create a visually pleasing wrap but also keep the silverware securely in place. The triangular folds add a touch of sophistication to the presentation and make the wrapped silverware more enjoyable to handle when it’s time for your guests to sit down and indulge in a delicious meal. Now, let’s move on to the final step of securing the wrap.
Read more: How To Fold A Napkin To Hold Silverware
Step 4: Securing the Wrap
To complete the process of wrapping silverware in a napkin, it’s essential to secure the wrap to ensure it stays intact until it’s time to set the table. Follow these steps to secure the wrap:
1. Tie a ribbon or twine: Take a ribbon or twine and wrap it around the middle of the wrap where the folds meet. Tie it into a knot or a bow, depending on your desired look. Make sure the ribbon or twine is snug but not too tight, allowing for easy removal when it’s time for your guests to unwrap the silverware.
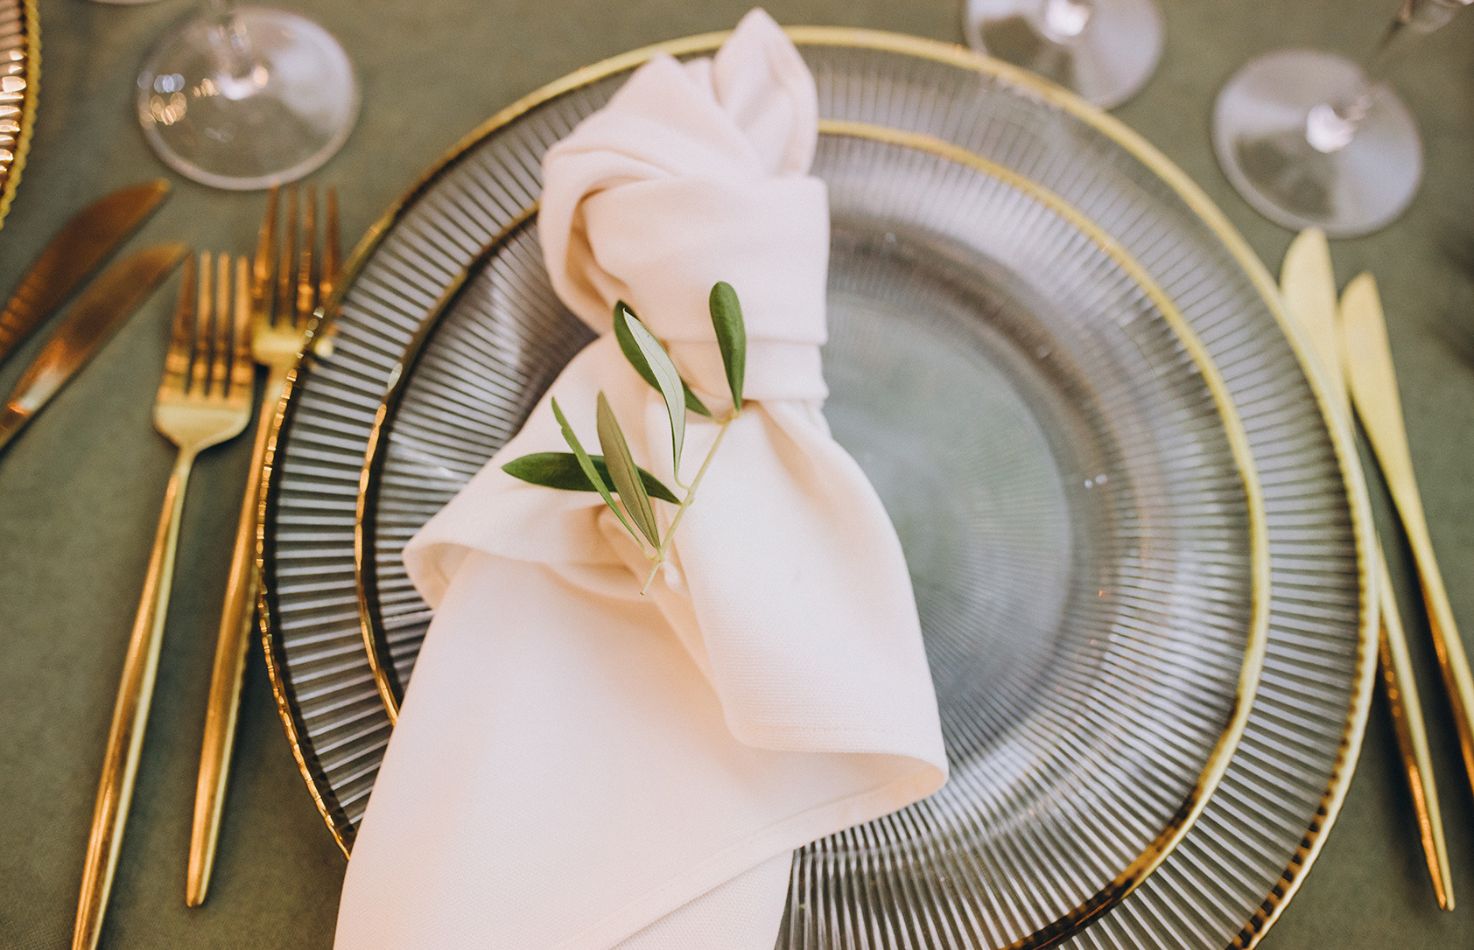
2. Optional embellishments: If you wish to add a personal touch or enhance the visual appeal, consider adding optional embellishments. Attach a personalized tag with your guests’ names, or tuck in a sprig of fresh herbs or a small flower. These extra touches can elevate the overall presentation and make your table setting even more memorable.
3. Adjust and straighten: Take a moment to adjust the silverware inside the wrap and ensure that everything is aligned and symmetrical. Straighten the ribbons or twine, and double-check that any optional embellishments are securely in place. This attention to detail will showcase your dedication to creating a beautiful table setting.
By securing the wrap with a ribbon or twine and adding optional embellishments, you add a finishing touch that makes the wrapped silverware look polished and inviting. Your guests will appreciate the care and effort you put into every aspect of the dining experience.
With the silverware securely wrapped, you have completed the process of wrapping silverware in a napkin. It’s time to set the table and showcase your beautifully presented tableware. The art of wrapping silverware in a napkin not only adds a touch of elegance to your dining occasions but also helps to keep the silverware organized and protected. Enjoy the compliments and the admiration as your guests are greeted with a stunning table setting that sets the tone for a delightful meal.
Conclusion
Wrapping silverware in a napkin is an art that adds a touch of sophistication and visual appeal to any table setting. By following the step-by-step guide outlined in this article, you can effortlessly create beautifully wrapped silverware that will impress your guests and elevate the overall dining experience.
From preparing the napkin to carefully placing the silverware, folding the napkin, and securing the wrap, each step contributes to creating a polished and tasteful presentation. Taking the time to gather the necessary materials, ensuring the napkin is clean and pressed, and positioning the silverware symmetrically all contribute to an aesthetically pleasing result.
The act of wrapping silverware in a napkin not only enhances the visual aspect of your table setting, but it also serves practical purposes. By neatly wrapping the silverware, you keep the utensils clean, organized, and easily accessible for your guests. It adds an element of elegance and anticipation as the napkin is unwrapped to reveal the gleaming silverware.
Remember, the beauty is in the details. Consider personalizing the wraps with decorative elements like ribbons, tags, or small embellishments that match the theme or ambiance of your event. These small touches can make a big impact and leave a lasting impression on your guests.
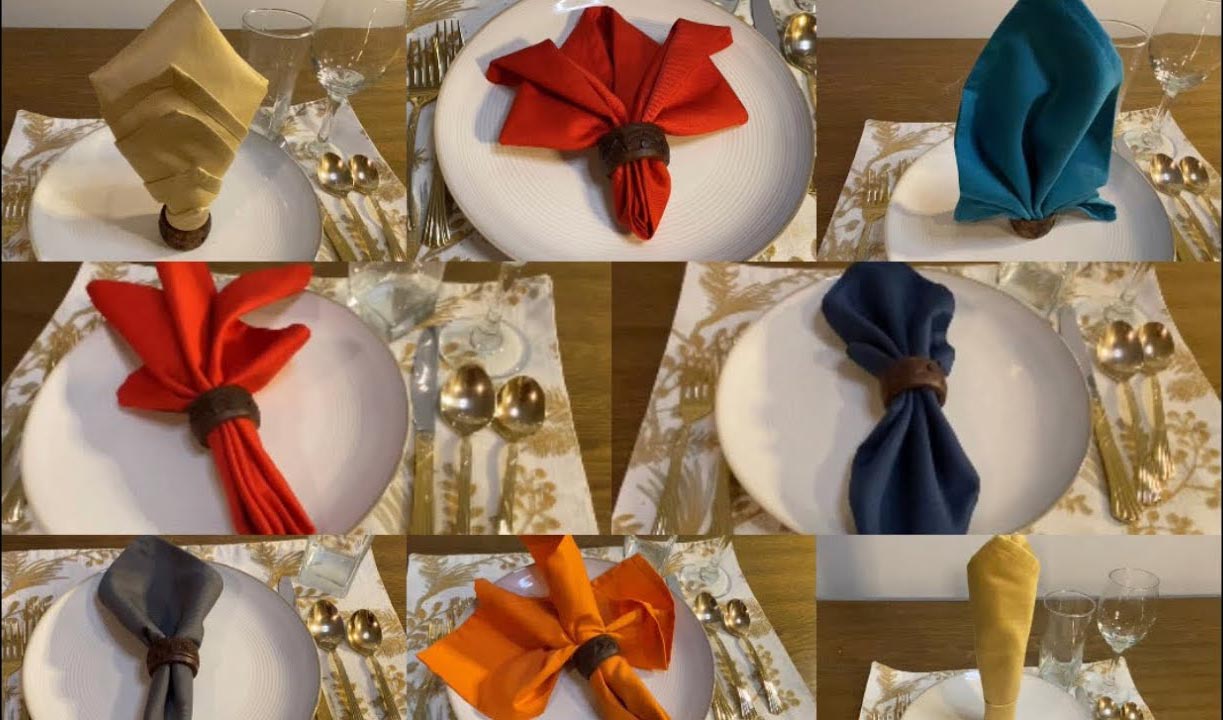
Mastering the art of wrapping silverware in a napkin requires practice and attention to detail. With time and experience, you will develop your own unique style and techniques. Experiment with different napkin folds, color combinations, and embellishments to create table settings that reflect your creativity and personal touch.
So, the next time you are hosting a dinner party, a family gathering, or any special occasion, take a moment to wrap your silverware in a napkin. Embrace the artistry and the elegance it brings to your table. Your guests will appreciate the thought and effort you put into every aspect of the dining experience, leaving them with lasting memories of a truly remarkable event.
Frequently Asked Questions about How To Wrap Silverware In A Napkin
Was this page helpful?
At Storables.com, we guarantee accurate and reliable information. Our content, validated by Expert Board Contributors, is crafted following stringent Editorial Policies. We're committed to providing you with well-researched, expert-backed insights for all your informational needs.


0 thoughts on “How To Wrap Silverware In A Napkin”