Home>diy>Architecture & Design>How To Design An Electrical Plan For A House
Architecture & Design
How To Design An Electrical Plan For A House
Modified: December 7, 2023
Learn how to design an electrical plan for your house with the help of expert architecture designers. Create a safe and efficient electrical layout for your dream home.
(Many of the links in this article redirect to a specific reviewed product. Your purchase of these products through affiliate links helps to generate commission for Storables.com, at no extra cost. Learn more)
Introduction
Designing the electrical plan for a house is a crucial step in the construction or renovation process. It involves carefully considering the electrical requirements, creating a layout, selecting appropriate components, allocating circuits, planning for safety measures, and thinking about future electrical needs. The electrical plan ensures that the house has a safe and efficient electrical system that meets the needs of the occupants.
Whether you are an architect, contractor, or a homeowner taking on a DIY project, designing an electrical plan requires a deep understanding of electrical systems and the architectural design of the house. It involves working closely with electricians and other professionals to ensure compliance with building codes and regulations.
In this article, we will guide you through the process of designing an electrical plan for a house. We will cover all the necessary steps and provide valuable tips to help you create a comprehensive and efficient electrical system.
Key Takeaways:
- Carefully determine the electrical requirements, create a comprehensive layout, select high-quality components, and allocate circuits to ensure a safe, efficient, and future-proof electrical plan for your house.
- Prioritize safety measures, consider future electrical needs, and consult professionals to finalize a well-documented electrical plan that integrates seamlessly with your house design, ensuring long-term functionality and safety.
Read more: How To Design Own House Plans
Step 1: Determine Electrical Requirements
The first step in designing an electrical plan for a house is to determine the electrical requirements. This involves considering the size of the house, the number of rooms, and the appliances and electronics that will be used. It’s important to calculate the expected load and estimate the amount of power needed to meet these requirements.
Working with an electrician or electrical engineer can be valuable during this stage, as they can provide expertise and ensure that the electrical system meets all safety standards and regulations. They will help you assess the maximum demand for the electrical system and determine the appropriate size of the main electrical panel.
Additionally, it’s important to consider any specialized electrical needs that may arise. For example, if the house includes a home office or a media room, you may need additional outlets and wiring to accommodate the equipment. If you are planning to install solar panels or an electric vehicle charger, these requirements should also be taken into account.
When determining the electrical requirements, it’s essential to plan for future needs as well. Anticipating potential electrical upgrades or additions can save you time and money in the long run. Consider any possible expansions, such as additional rooms or outdoor living spaces, and ensure that the electrical system can support these future changes.
Remember to take into consideration any local building codes and regulations that may affect the electrical requirements for your specific area. This will ensure that the electrical plan is compliant and meets all safety standards.
By carefully determining the electrical requirements, you will have a solid foundation for creating an effective and efficient electrical plan for your house.
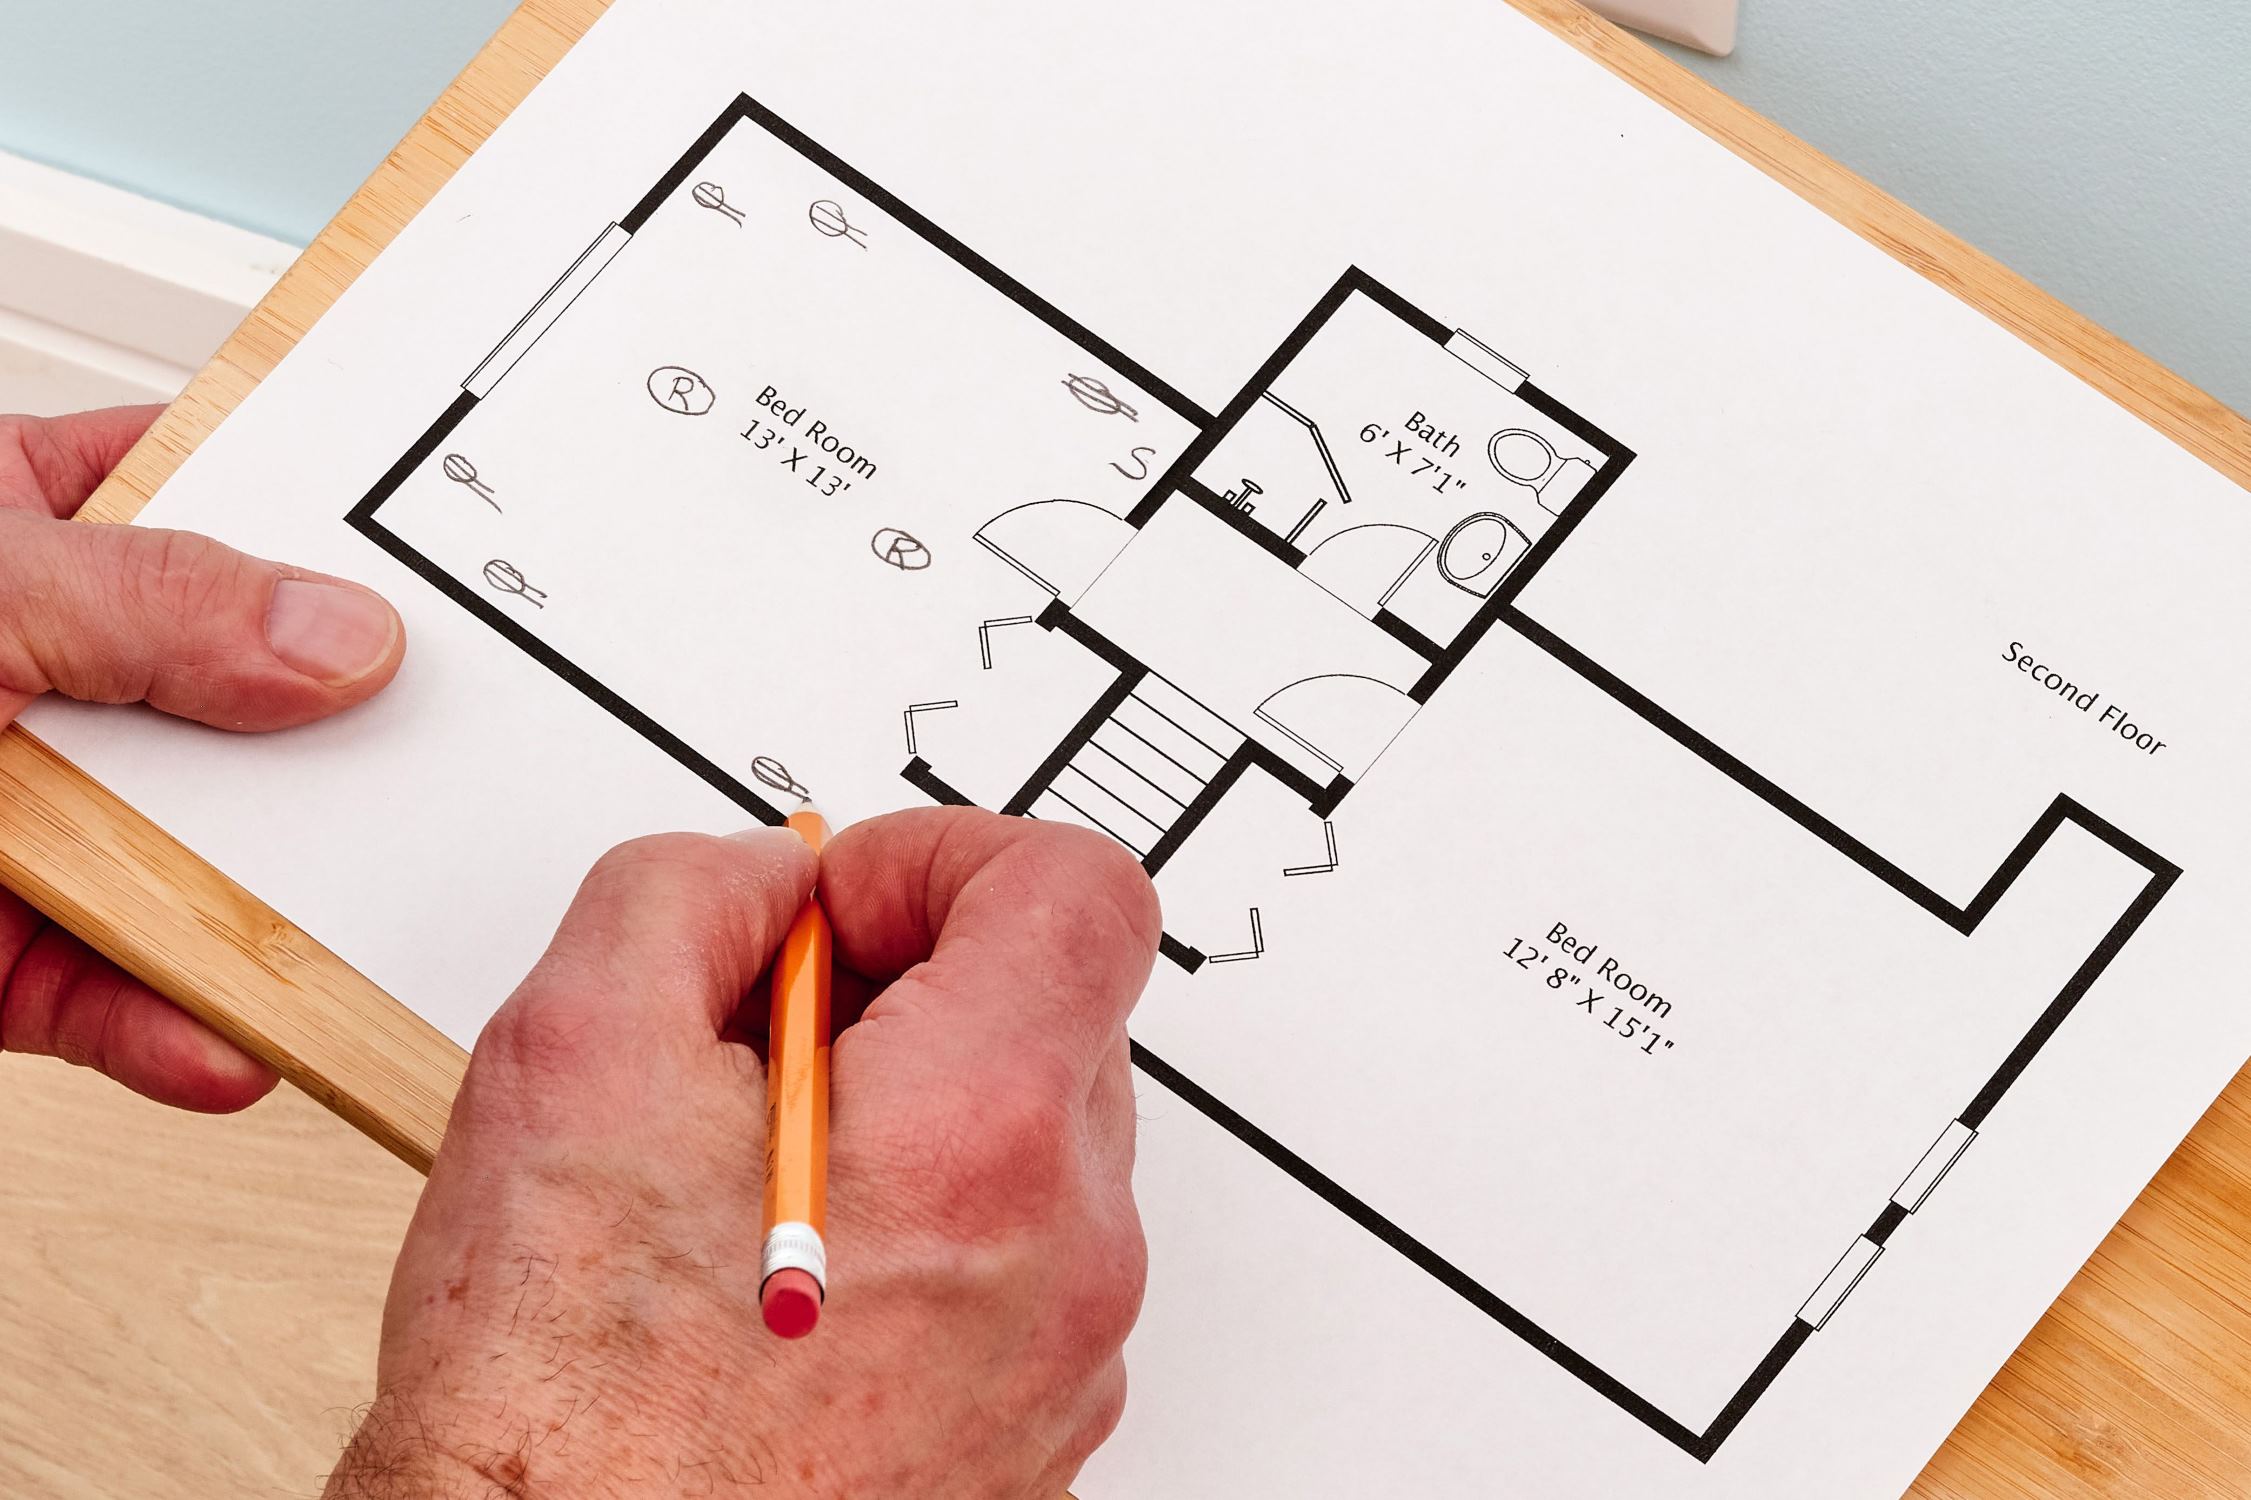
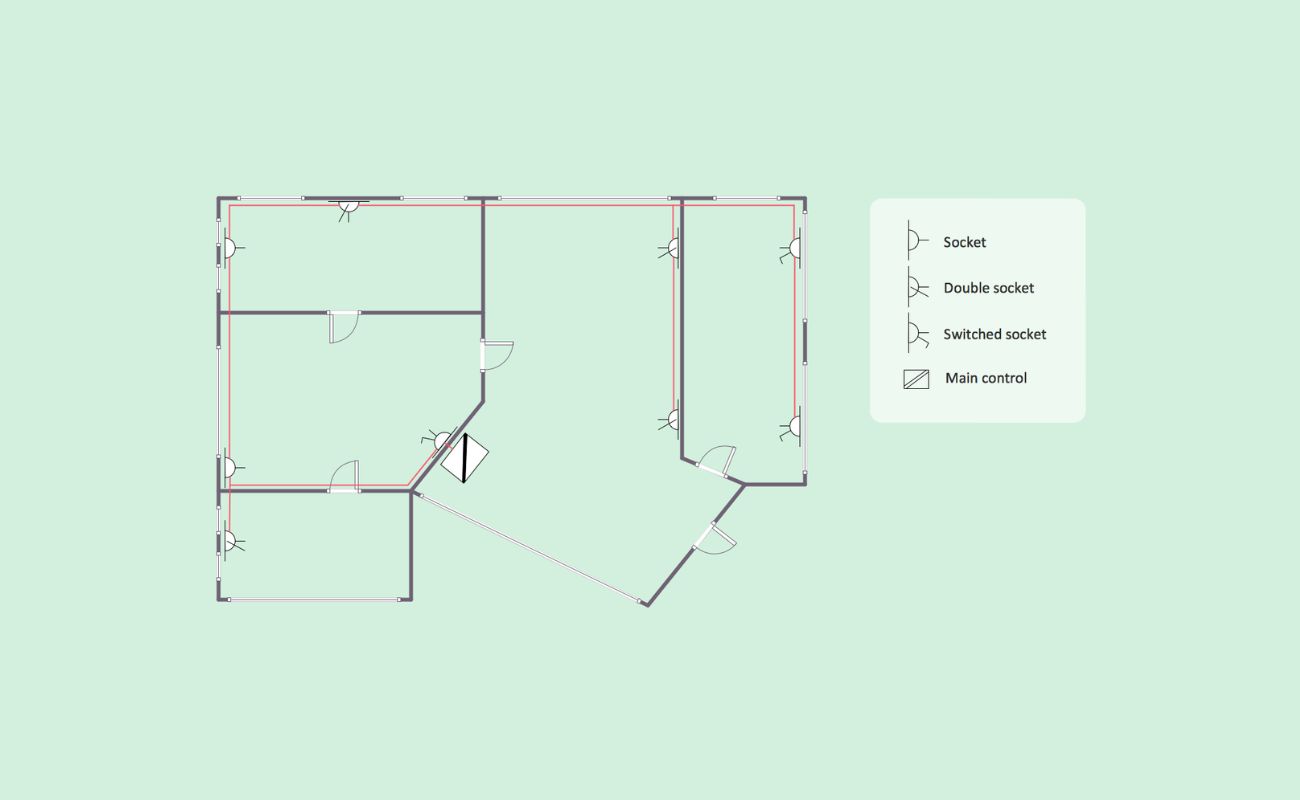
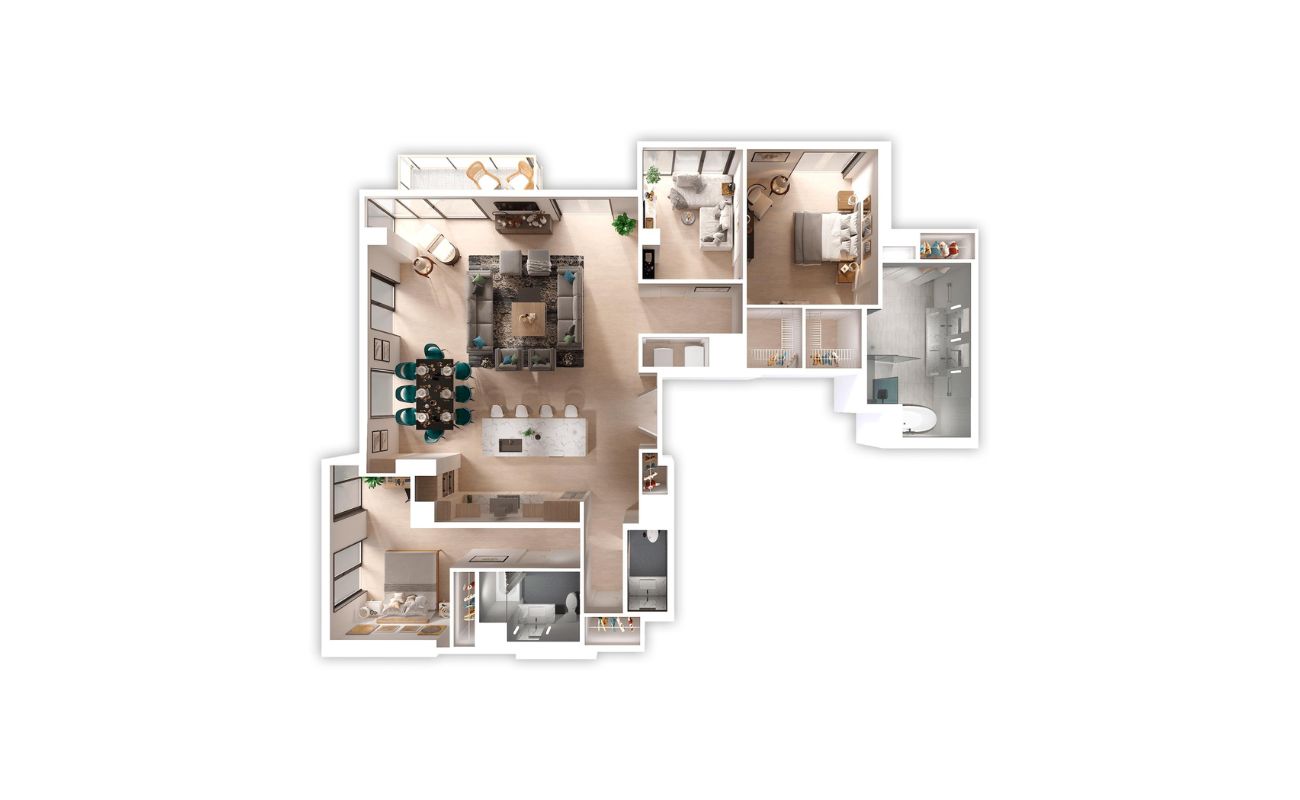
Step 2: Create an Electrical Layout
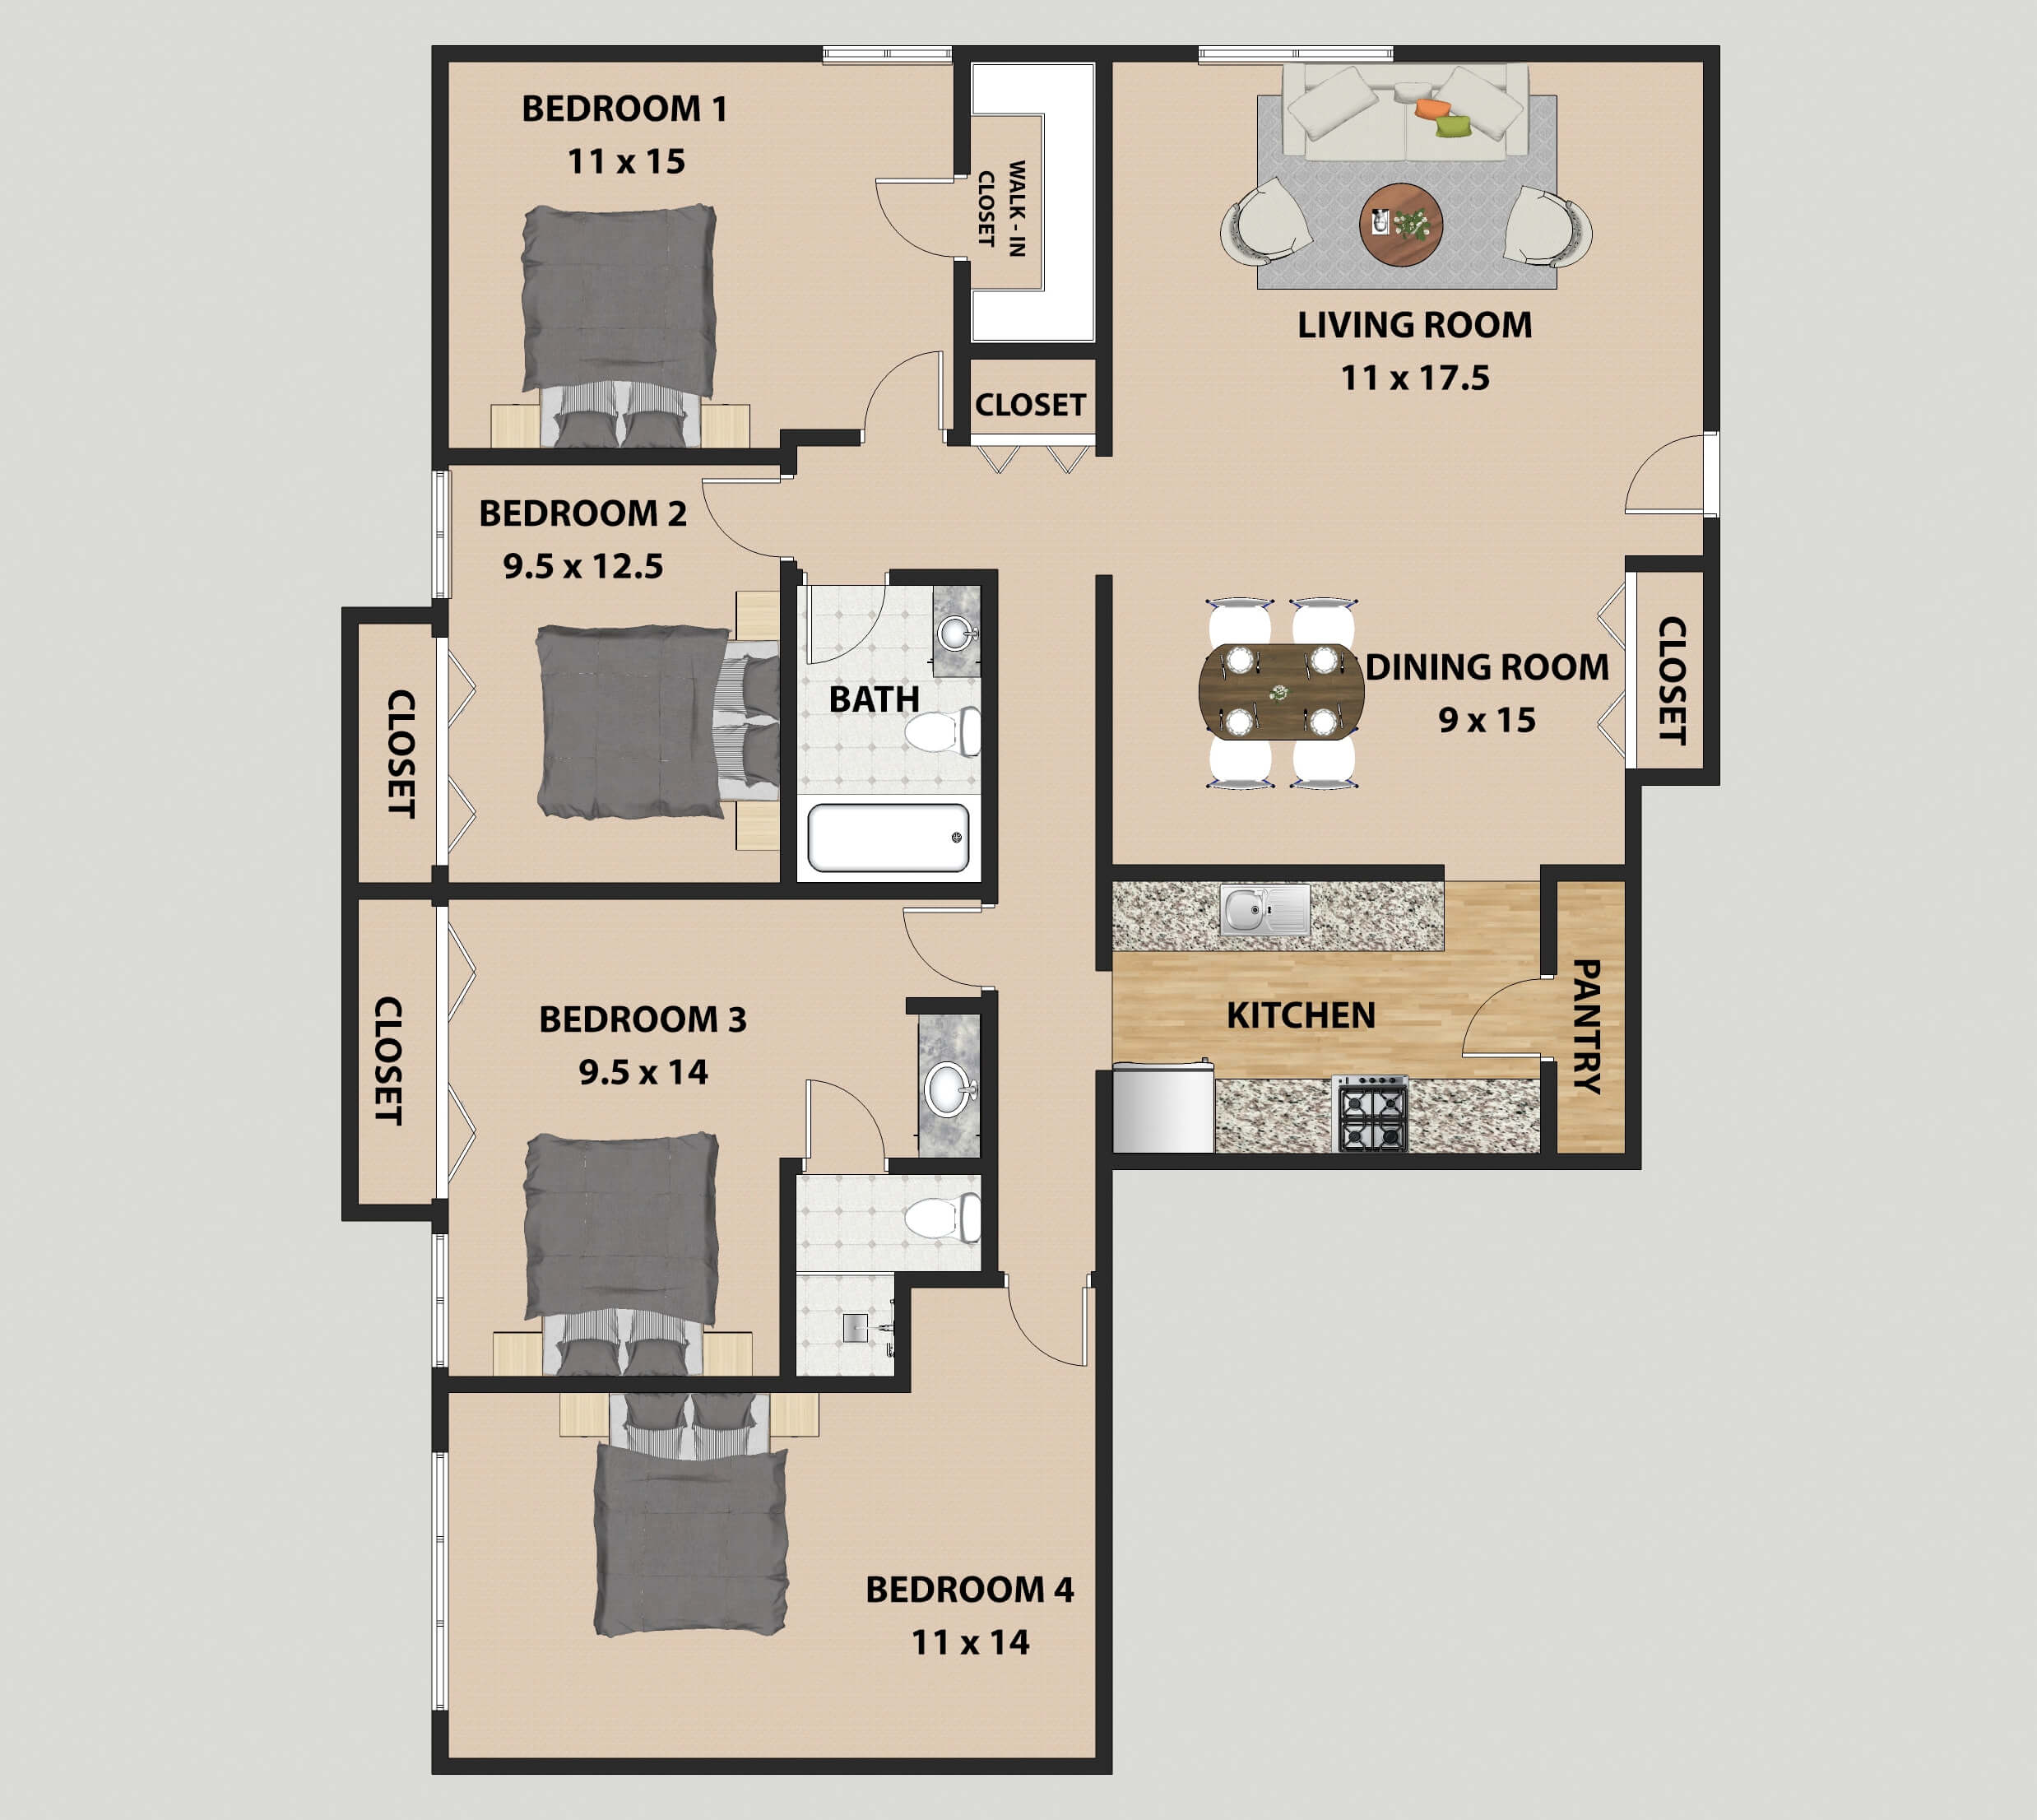
Once you have determined the electrical requirements for your house, the next step is to create an electrical layout. This involves mapping out the placement of electrical outlets, switches, lighting fixtures, and other electrical components throughout the house.
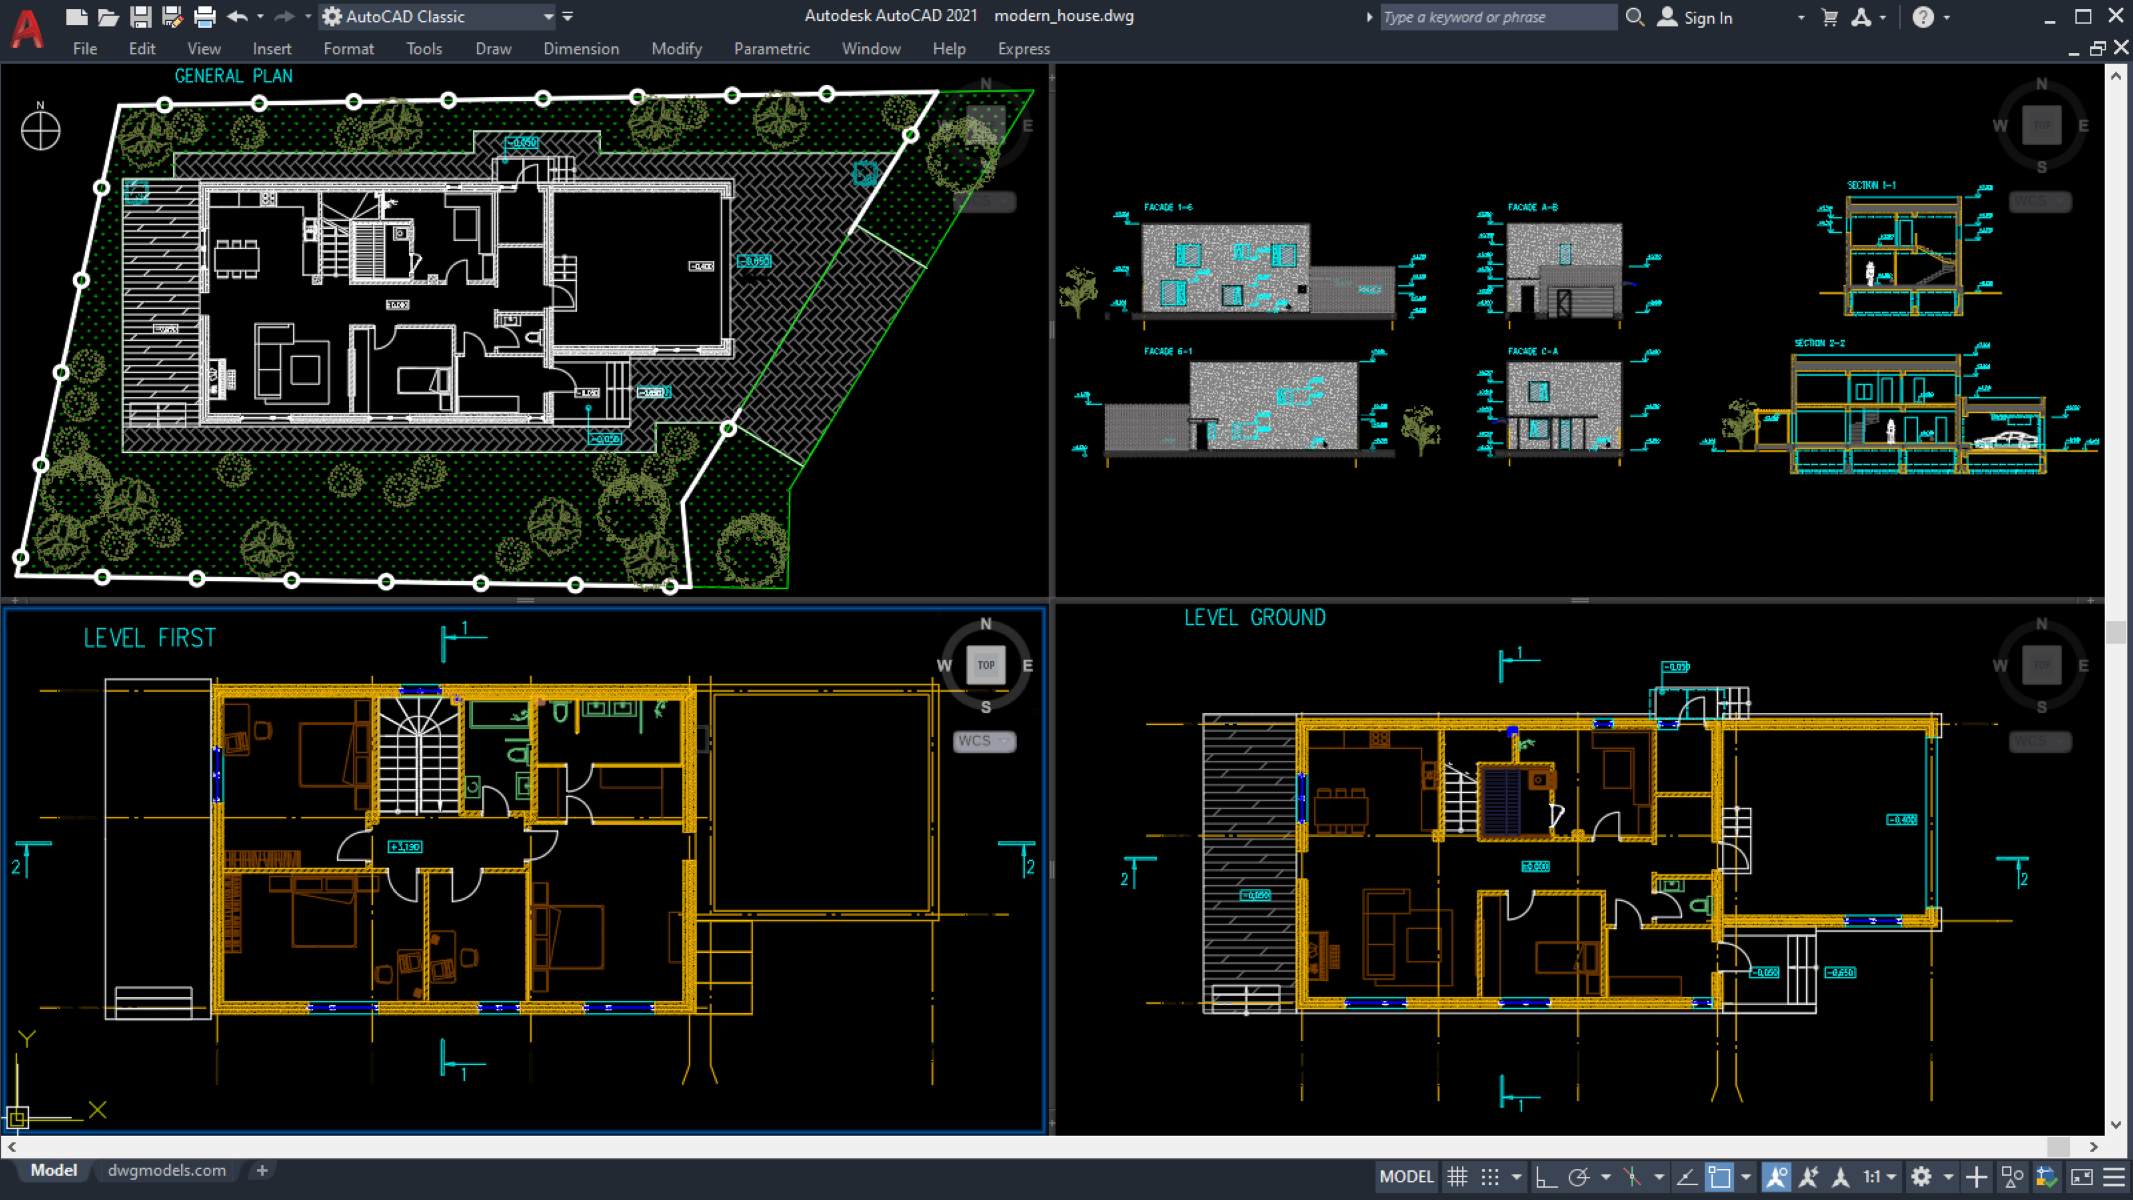
Start by obtaining the architectural floor plan of the house. This will provide you with a visual representation of the space and help you identify the different rooms and areas that require electrical components. Conduct a thorough walkthrough of each room to get a clear understanding of the layout and identify any specific electrical needs.
When creating the electrical layout, it’s important to consider functionality, aesthetics, and safety. Here are some key factors to keep in mind:
- Outlets: Determine the number and placement of electrical outlets in each room to accommodate the electrical devices and appliances that will be used. Place outlets at convenient locations, considering furniture placement and user accessibility.
- Switches: Map out the placement of switches for lighting fixtures, ceiling fans, and other electrical devices. Position switches at convenient entry points in each room for easy access.
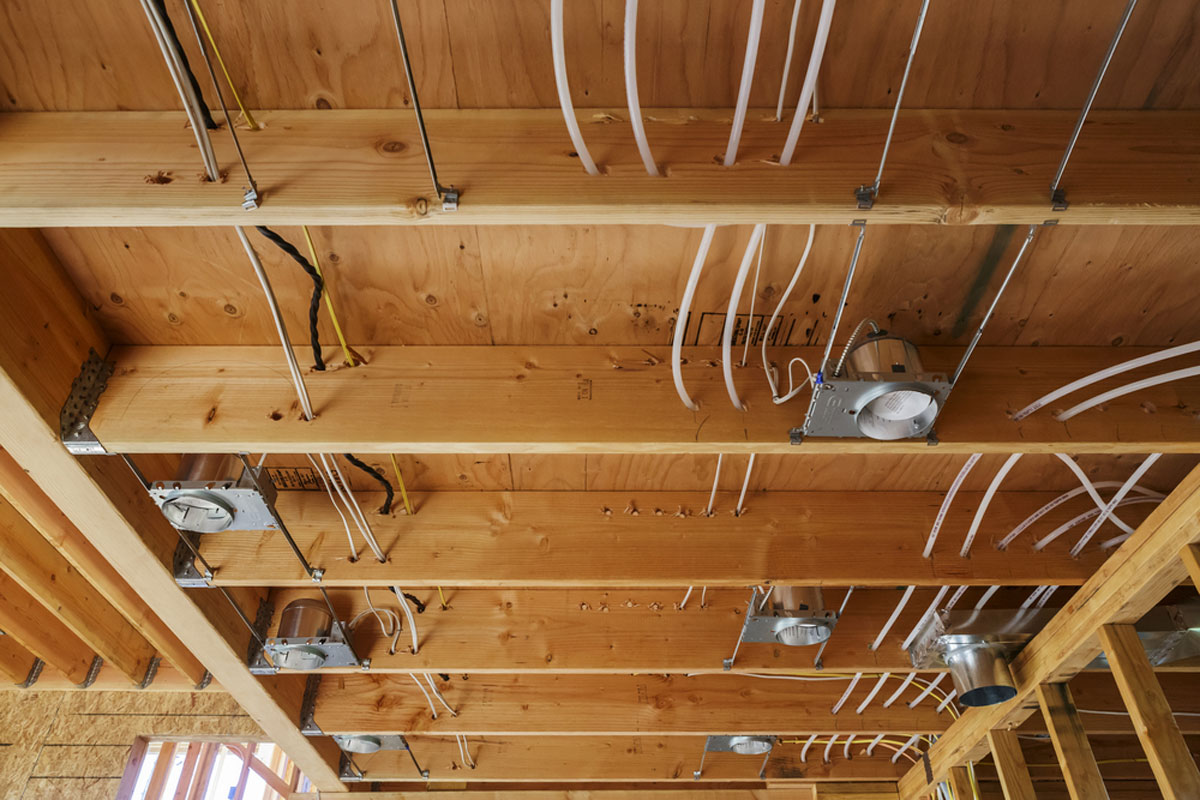
- Lighting: Plan the placement of lighting fixtures, including recessed lights, pendant lights, and sconces. Consider the desired ambiance and functionality of each room when determining the type and placement of lighting.
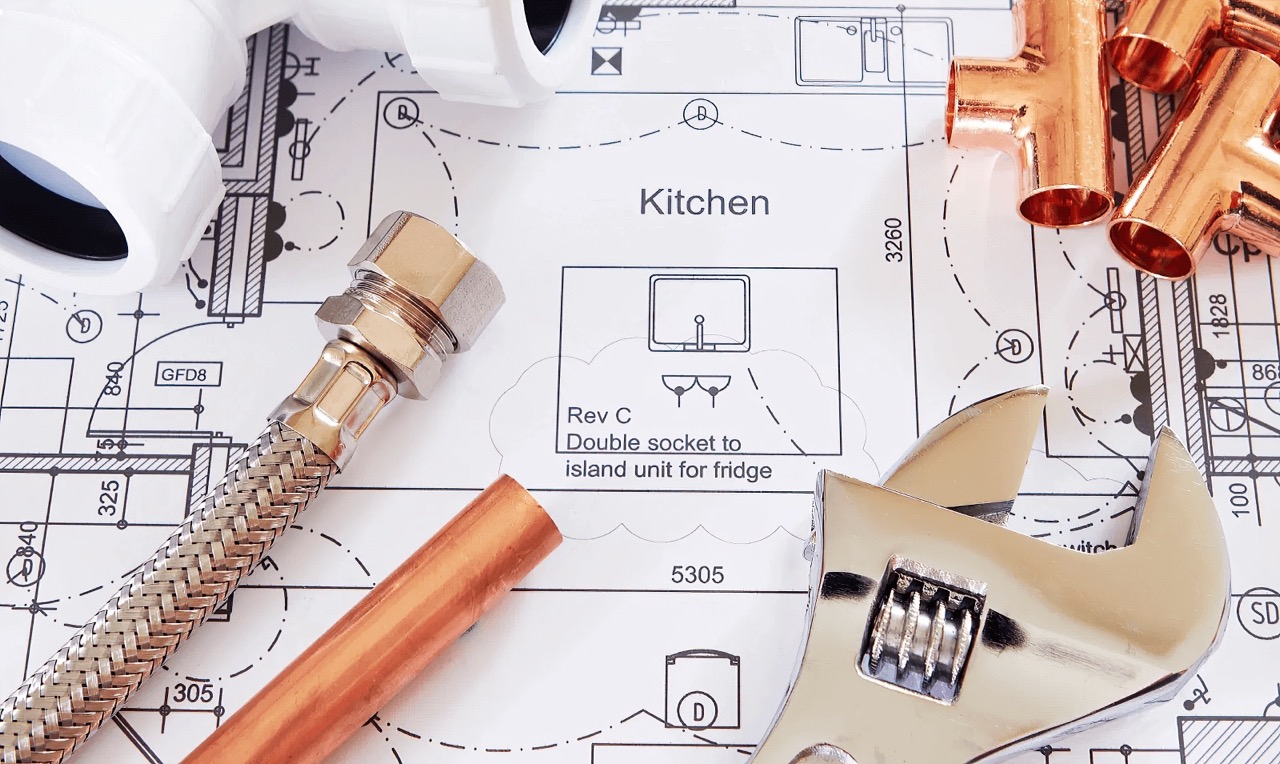
- Specialized areas: Take into account any specialized areas, such as the kitchen, bathroom, or garage, which may have specific electrical requirements. Allocate circuits for appliances, ventilation fans, and dedicated outlets for power tools or charging stations.
- Outdoor spaces: If you have outdoor areas, plan for outdoor lighting, outlets, and any other electrical needs. Consider the placement of the electrical components to ensure they are protected from the elements.
During the layout creation, it’s important to consult with an electrician to ensure that the design complies with electrical codes and safety regulations. They can provide valuable insights and guidance to optimize the placement of electrical components for efficiency and safety.
By creating a comprehensive electrical layout, you will have a clear plan for positioning outlets, switches, and lighting fixtures, ensuring a well-lit and functional home.
Step 3: Select the Appropriate Electrical Components
Once you have created the electrical layout for your house, the next step is to select the appropriate electrical components. This involves identifying the types of outlets, switches, lighting fixtures, and other electrical devices that will be needed to complete the electrical system.
When choosing electrical components, it’s crucial to prioritize quality, durability, and safety. Here are some key factors to consider:
- Outlets and Switches: Select outlets and switches that are compatible with the electrical wiring system in your house. Consider factors such as the number of outlets required, the type of wiring used (e.g., standard or GFCI for areas prone to moisture), and any special features needed (e.g., USB ports in outlets).
- Lighting Fixtures: Choose lighting fixtures that match the style and functionality of each room. Consider factors such as the type of bulb needed, the desired brightness, and energy efficiency. Also, ensure that the fixtures are suitable for the location (e.g., waterproof for outdoor lighting).
- Wiring and Cables: Use high-quality wiring and cables that meet electrical safety standards. Consider the type of wiring needed for different areas and devices (e.g., thicker gauge wiring for high-power appliances). Consulting with an electrician can help ensure that the wiring and cables are appropriate for your specific electrical needs.
- Panel and Breakers: Select a main electrical panel and circuit breakers that can handle the electrical load of your house. Consult an electrician to determine the appropriate panel size and the number and type of breakers needed to distribute power efficiently and safely.
- Other Electrical Devices: Consider any other specific electrical devices that may be needed, such as smoke detectors, carbon monoxide detectors, ventilation fans, or home automation systems. Choose reliable and certified devices that meet safety standards.
When selecting the electrical components, it’s important to consider your budget, energy efficiency, and any specific requirements of your local building codes. Research reputable brands and consult with professionals to ensure that the chosen components are reliable and suitable for your electrical plan.
By carefully selecting the appropriate electrical components, you can ensure the longevity, safety, and efficiency of your electrical system, making it a vital part of your house design.
Step 4: Allocate Circuits for Different Areas
Allocating circuits for different areas of your house is a crucial step in designing an efficient and safe electrical plan. This involves determining the electrical load for each area and assigning dedicated circuits to meet the power demands of specific appliances and devices.
Here are some key considerations for allocating circuits:
- Kitchen: The kitchen typically requires multiple circuits to power various appliances such as the refrigerator, stove, microwave, dishwasher, and small kitchen appliances. Allocating separate circuits for each major appliance helps prevent overload and ensures a stable and safe power supply.
- Bathrooms: Bathrooms typically require dedicated circuits for lighting, GFCI outlets, and ventilation fans. GFCI outlets are essential for safety in areas where water is present, such as near sinks and bathtubs. Having dedicated circuits for each bathroom minimizes the risk of tripping the breaker and ensures a reliable power source.
- Bedrooms and Living Areas: Bedrooms and living areas generally require circuits for lighting and outlets. Determine the number of outlets needed, taking into account the placement of furniture and potential electronics. It’s also advisable to allocate separate circuits for heavier power-consuming devices like computers, televisions, or sound systems.
- Outdoor Spaces: If you have outdoor areas, allocate circuits for outdoor lighting, outlets, and any specific equipment such as pool pumps or garden equipment. Using GFCI outlets in outdoor spaces is crucial to minimize the risk of electrical shock.
- Utility Rooms and Garages: Allocate circuits for utility rooms that house electrical panels, water heaters, or HVAC systems. Garages often require dedicated circuits for power tools, electric vehicle chargers, or workshop equipment.
Consulting with an electrician during the circuit allocation process is highly recommended. They have the expertise to properly assess the electrical load of each area and ensure that the circuits are correctly sized and meet safety requirements. They will also guide you in complying with local building codes and regulations.
Remember to label the electrical panel clearly, indicating which circuit corresponds to each area of the house. This makes it easier to locate and reset breakers in case of an electrical issue.
By allocating circuits appropriately, you optimize the electrical distribution throughout your house, preventing overloads, and ensuring a safe and reliable power supply to every area and device.
When designing an electrical plan for a house, make sure to consider the placement of outlets, switches, and lighting fixtures to ensure convenient and efficient access to power throughout the space.
Read more: How To Design Plans For A Metal House
Step 5: Plan for Safety Measures
When designing an electrical plan for your house, it is essential to prioritize safety. Planning for safety measures ensures the well-being of the occupants and protects against potential electrical hazards. Here are some key considerations:
- Ground Fault Circuit Interrupters (GFCIs): Install GFCI outlets in areas where water is present, such as kitchens, bathrooms, laundry rooms, and outdoor spaces. GFCIs detect imbalances in electrical currents and quickly shut off the power to prevent electric shock.
- Arc Fault Circuit Interrupters (AFCIs): Use AFCIs to detect dangerous electrical arcs, which can cause fires. AFCIs are particularly important in bedrooms, living areas, and other locations where electrical fires can occur due to electrical faults.
- Smoke Detectors: Place smoke detectors in every bedroom, outside sleeping areas, and on each level of the house. Interconnected smoke detectors provide early warning in case of a fire, allowing occupants to safely evacuate.
- Carbon Monoxide Detectors: Install carbon monoxide detectors near bedrooms and fuel-burning appliances, as carbon monoxide is a silent and potentially lethal gas. A carbon monoxide detector can alert you to unsafe levels of this odorless and colorless gas.
- Proper Wiring and Protection: Ensure that all wiring is installed correctly, and use protective measures such as conduit to shield wiring from damage. Use surge protectors for sensitive electronics to prevent damage caused by power surges.
- Proper Clearance: Keep electrical panels, outlets, and equipment clear of obstructions. Maintain appropriate clearance around appliances and ensure that electrical cords are not pinched, frayed, or damaged.
- Labeling and Documentation: Clearly label electrical panels, circuits, and outlets to easily identify and trace electrical connections. Keep documentation of the electrical plan, including circuit schedules and any modifications made over time.
- Regular Maintenance: Conduct regular inspections and maintenance to identify and address any potential issues. Schedule professional inspections and electrical system checks to ensure that everything is functioning properly.
Consulting with a licensed electrician is crucial to ensure that all safety measures are implemented correctly. They can guide you through the process and provide expert advice on additional safety features or local building code requirements.
By planning for safety measures, you create a secure environment and minimize the risk of electrical accidents or hazards in your house.
Step 6: Consider Future Electrical Needs
When designing the electrical plan for your house, it’s important to consider future electrical needs. Anticipating potential changes or expansions can save you time, money, and the inconvenience of making significant modifications later on. Here are some key points to keep in mind:
- Room Additions: If you anticipate adding more rooms to your house in the future, plan for additional circuits and outlets. Consult with an electrician to ensure that the electrical panel can accommodate the increased demand and that wiring paths allow for smooth expansion.
- Home Office or Theater: If you plan to have a dedicated home office, media room, or theater, ensure that the electrical plan includes sufficient outlets, wiring for audio/visual equipment, and internet connectivity. Consider future technologies that may require additional electrical or data connections.
- Electric Vehicle Charging: If you own or plan to purchase an electric vehicle, consider adding a dedicated circuit and electrical outlet for charging. This will allow for convenient and efficient vehicle charging at home.
- Smart Home Technology: With the rise of smart home technology, it’s important to plan for the integration of smart devices, such as thermostats, lighting systems, security systems, and voice-controlled assistants. Consider the wiring and infrastructure needed to support these technologies.
- Outdoor Living Spaces: If you have plans for outdoor living spaces like a patio or pool area, consider electrical needs for outdoor lighting, outlets, and entertainment systems. Ensure that the electrical plan accounts for these future additions.
- Solar Panel Installation: If you are considering installing solar panels in the future, consult with an electrician during the initial electrical design phase. They can advise on the appropriate wiring and electrical connections needed to support solar energy integration.
By factoring in future electrical needs, you can avoid the hassle of retrofitting and ensure that your electrical plan is flexible and adaptable to future technological advancements and lifestyle changes. It’s essential to consult with professionals, as they can offer guidance and expertise in designing an electrical system that can accommodate these future needs.
Step 7: Finalize the Electrical Plan
The final step in designing an electrical plan for your house is to review and finalize the plan. This involves assessing the layout, component selection, circuit allocation, safety measures, and consideration of future electrical needs to ensure that everything is in order.
During this stage, it is essential to:
- Double-check the Layout: Go through the electrical layout again to verify that all areas, rooms, and electrical components have been accurately identified. Ensure that the placement of outlets, switches, and lighting fixtures aligns with the functionality and aesthetics of each space.
- Verify Component Selection: Review the chosen electrical components, such as outlets, switches, lighting fixtures, and wiring, to ensure they meet safety standards and suit your needs. Confirm that the components are compatible with the electrical system and that they align with your design preferences.
- Confirm Circuit Allocation: Check the circuit allocation for each area, making sure that the circuits are appropriately sized and capable of handling the electrical load. Verify that dedicated circuits are assigned for high-power appliances, sensitive electronics, and areas requiring specific safety measures.
- Evaluate Safety Measures: Ensure that all necessary safety measures, such as GFCIs, AFCIs, smoke detectors, and carbon monoxide detectors, have been incorporated into the plan. Double-check that wiring, clearance, and labeling adhere to safety guidelines.
- Consider Future Needs: Revisit the plan to verify that future electrical needs have been adequately considered. Confirm that the electrical system can accommodate potential expansions, integration of smart home technology, installation of solar panels, or other anticipated changes.
- Consult with Professionals: If you have any doubts or concerns during the final review, seek guidance from an electrician or electrical engineer. They can provide expert advice, ensure compliance with codes and regulations, and help fine-tune the electrical plan.
Once you are satisfied with the electrical plan, document it thoroughly, including all details, specifications, circuit schedules, and safety measures. This documentation will be invaluable during construction, renovation, or future modifications.
Remember, an electrical plan is a crucial component of your overall house design, impacting not only functionality but also safety. Taking the time to carefully review and finalize the plan will ensure a smooth construction process and a reliable electrical system for years to come.
Conclusion
Designing an electrical plan for your house is a critical step that requires careful consideration and attention to detail. By following the steps outlined in this guide, you can create a comprehensive and efficient electrical system that meets your requirements and ensures the safety of your home and occupants.
Starting with determining the electrical requirements, you establish the foundation for the rest of the design process. Creating an electrical layout helps map out the placement of outlets, switches, and lighting fixtures, ensuring functionality and aesthetics. Selecting the appropriate electrical components guarantees the reliability and longevity of your system.
Carefully allocating circuits for different areas of the house prevents overloads and ensures a stable power supply. Planning for safety measures, such as GFCIs, AFCIs, smoke detectors, and good wiring practices, safeguards against electrical hazards. Considering future electrical needs allows for flexibility and accommodates potential expansions or technological advancements.
Finally, reviewing and finalizing the electrical plan ensures that everything is in order before beginning construction. This step is crucial in ensuring the accuracy of the layout, component selection, circuit allocation, safety measures, and future considerations.
Throughout the process, it is important to consult with licensed electricians or electrical engineers to ensure compliance with building codes and to benefit from their expertise. They can provide valuable insights and ensure that your electrical plan meets all safety standards.
By following these steps and taking the time to design a well-thought-out electrical plan, you can create a safe, efficient, and reliable electrical system that seamlessly integrates with your house design. The result is a home that not only looks stunning but also functions flawlessly to meet your electrical needs for years to come.
Frequently Asked Questions about How To Design An Electrical Plan For A House
Was this page helpful?
At Storables.com, we guarantee accurate and reliable information. Our content, validated by Expert Board Contributors, is crafted following stringent Editorial Policies. We're committed to providing you with well-researched, expert-backed insights for all your informational needs.


0 thoughts on “How To Design An Electrical Plan For A House”