Articles
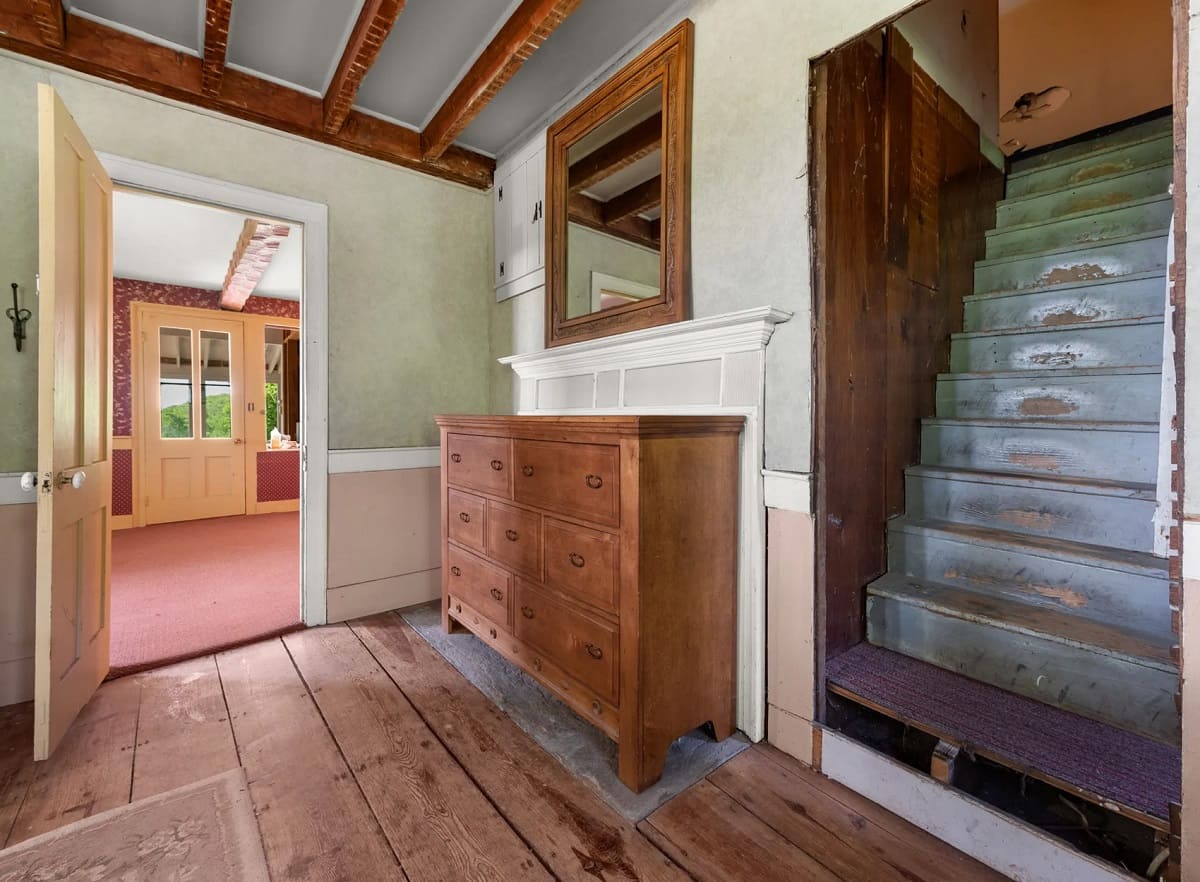
How To Fix Steep Stairs In Old House
Modified: October 22, 2024
Learn effective methods to fix steep stairs in your old house through our informative articles. Gain valuable insights and expert tips to ensure safety and improve accessibility.
(Many of the links in this article redirect to a specific reviewed product. Your purchase of these products through affiliate links helps to generate commission for Storables.com, at no extra cost. Learn more)
Introduction
Welcome to our guide on how to fix steep stairs in an old house. Steep stairs can be a safety hazard and cause discomfort for occupants, especially in older homes where the design may not meet current building codes. If you have noticed that the stairs in your old house are steeper than standard or if you simply want to improve the functionality and aesthetics of your staircase, this article is for you.
Steep stairs in old houses are a common issue that can be caused by various factors such as settling of the foundation, improper construction, or changes made over time. Regardless of the cause, it is important to address this problem to ensure the safety and convenience of everyone using the stairs.
In this comprehensive guide, we will walk you through the step-by-step process of fixing steep stairs in an old house. You will learn how to assess the problem, identify the causes of the steepness, and implement the necessary solutions. This guide is designed to provide you with a clear understanding of the methods involved, along with helpful tips and considerations.
Before we dive into the details, it is important to mention that tackling a project like this may require certain skills and tools. If you are not confident in your ability or if the problem seems beyond your capabilities, it may be best to consult with a professional contractor or carpenter who specializes in staircase renovations. However, for those who are handy and willing to take on the challenge, let’s begin the process of fixing steep stairs in your old house.
Disclaimer: This guide is for informational purposes only and should not replace professional advice. Always prioritize safety and consult with qualified experts when necessary.
Key Takeaways:
- Fixing steep stairs in an old house involves assessing the problem, identifying the causes, and implementing solutions. Proper planning, precision, and attention to detail are crucial for a successful renovation.
- The process of fixing steep stairs includes adjusting the stringers, installing new treads, and adding finishing touches. Prioritizing safety, stability, and aesthetics results in a transformed and improved staircase.
Read more: How Steep Can Stairs Be
Step 1: Assessing the Problem
The first step in fixing steep stairs in an old house is to assess and evaluate the extent of the problem. This involves carefully examining the current condition of the staircase and identifying the specific issues that contribute to the steepness.
Start by taking a close look at the angle of the stairs. Measure the rise (the vertical distance between each step) and the run (the horizontal distance). Compare these measurements to the recommended standards for staircases, which typically have a rise of around 6 to 8 inches and a run of around 9 to 11 inches. If your stairs deviate significantly from these standards, it is a clear indication of steepness.
Next, look for any signs of damage or wear on the stairs. This could include cracked or loose treads, wobbly or unstable handrails, or evidence of rot or decay in the wood. Pay attention to any areas where the stairs feel particularly steep or where you or others have expressed difficulty navigating them.
It is also important to consider the overall layout and design of the staircase. Are the stairs too narrow or lacking proper lighting? Are there any obstructions or obstacles that impede safe passage? These factors can contribute to the perceived steepness and should be taken into account.
Additionally, try to determine the cause of the steepness. Is it a result of poor initial construction, settling of the foundation, or modifications made over time? Understanding the root cause will help you develop an effective plan for fixing the problem.
During the assessment process, it can be helpful to consult with a professional contractor or carpenter for their expertise. They can provide valuable insights and identify any underlying issues that may not be immediately apparent to an untrained eye.
By thoroughly assessing the problem, you will have a clear understanding of the extent of the steepness and the underlying causes. This knowledge will be crucial when developing a plan to fix your steep stairs in an old house.
Step 2: Identifying the Causes of Steep Stairs
Once you have assessed the steepness of your stairs, the next step is to identify the causes behind it. Understanding the root causes will help you develop an effective strategy to rectify the problem and ensure long-lasting results.
There are several factors that can contribute to steep stairs in an old house. Here are a few common causes to consider:
- Original Construction: In some cases, the steepness may be a result of the original construction of the house. Older homes may have been built to different standards or with different design principles, resulting in steeper staircases. If this is the case, you will need to evaluate the structural integrity and make adjustments accordingly.
- Foundation Settling: Over time, the foundation of an old house may settle, causing the stairs to become uneven and steep. This can occur due to a variety of reasons, including soil conditions and structural changes to the property. If foundation settling is identified as the cause, you may need to address the underlying foundation issues before fixing the stairs.
- Modifications: In many cases, steep stairs in old houses are a result of modifications made over time. Homeowners may have altered the staircase without considering the impact on the overall design and safety. Common modifications include adding new flooring or carpeting, changing the height of the risers, or altering the position of the steps. Identifying these modifications will help guide your repair approach.
- Poor Design: Another cause of steep stairs can be poor design or inadequate planning during previous renovations or construction. Factors such as limited space, insufficient knowledge of stair design principles, or lack of attention to building codes can contribute to steepness. In such cases, you may need to make significant changes to the staircase structure to achieve the desired slope.
By identifying the causes of the steepness, you will be better equipped to address the problem effectively. This knowledge will guide your decision-making process and help you determine the most appropriate solutions for fixing your steep stairs in an old house. If you are unsure about the specific causes or need professional advice, consider consulting with a contractor or architect who specializes in staircase renovations.
Step 3: Proper Planning and Preparation
Once you have assessed the problem and identified the causes of the steep stairs in your old house, the next step is to engage in proper planning and preparation. This stage is crucial in ensuring a smooth and successful renovation process.
Here are some key considerations for planning and preparation:
- Set a Budget: Determine your budget for the project. This will help guide your decision-making process and ensure that you allocate funds appropriately for materials, tools, and professional assistance if needed.
- Research Building Codes: Familiarize yourself with the building codes and regulations in your area. Ensure that any modifications you make to the staircase comply with the relevant codes for safety and accessibility.
- Gather Necessary Tools and Materials: Make a list of the tools and materials you will need for the renovation. This may include a circular saw, drill, measuring tape, level, safety goggles, gloves, new stair treads, adhesive, and finishing materials.
- Create a Renovation Timeline: Develop a timeline that outlines the steps involved in the project and sets realistic goals for completion. This will help you stay organized and focused throughout the renovation process.
- Consider Professional Assistance: Assess your skills and the complexity of the project. If you are not confident in your abilities or if the renovation requires expertise beyond your scope, it may be wise to consult with a professional contractor or carpenter who specializes in staircase renovations.
- Protect and Prepare the Surrounding Area: Before starting the renovation, make sure to protect the surrounding area. Cover nearby walls and floors with drop cloths or protective sheets to prevent any damage during the construction process.
Proper planning and preparation are essential to ensure that the renovation of your steep stairs in an old house goes smoothly. Taking the time to plan and gather the necessary resources will help you stay organized and minimize any unexpected challenges along the way.
Remember to remain flexible and adaptable throughout the renovation process. Sometimes, unexpected obstacles may arise, and adjustments to your original plan may be necessary. By being prepared and open to adjustments, you will be better equipped to handle any challenges that come your way.
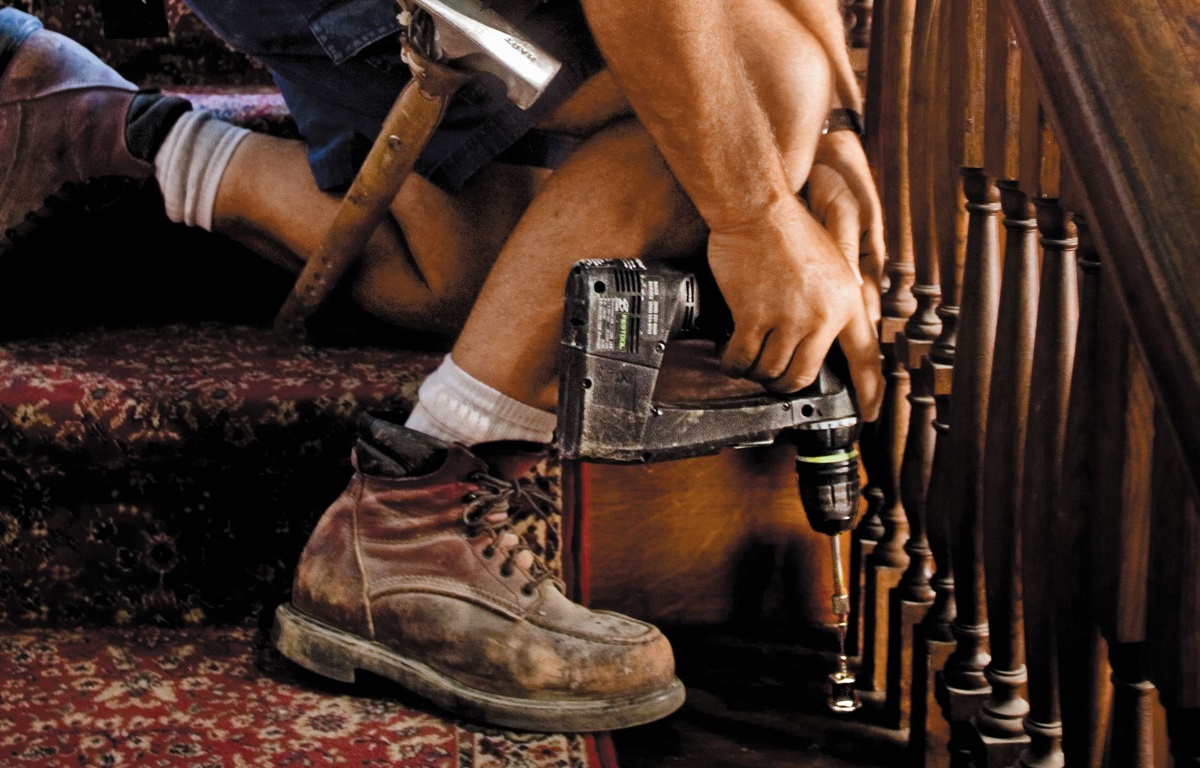
Step 4: Removing Existing Stair Treads
In this step, we will focus on removing the existing stair treads from your old staircase. This will allow you to start fresh and create a level surface for installing new treads that meet the desired slope.
Here’s a step-by-step guide on how to remove existing stair treads:
- Clear the Area: Begin by removing any obstacles or items from the stairs that may obstruct your work area. This includes rugs, carpeting, or any debris.
- Locate and Remove Nails or Screws: Check for nails or screws securing the treads to the stringers. Use a hammer or screwdriver to carefully remove these fasteners. Take note of any damaged or loose treads that may need to be replaced.
- Pry the Treads: Using a pry bar or claw hammer, gently pry up the old stair treads. Start at one end and work your way across, being cautious not to damage the surrounding stairs or the stringers. Apply even pressure to lift the treads from the supports.
- Remove any Residue: Once the treads are removed, you may find residual adhesives or nails sticking out from the stringers. Use a scraper or sandpaper to remove any residue, creating a smooth surface for the new treads to be installed.
- Inspect the Supporting Structure: Take this opportunity to inspect the condition of the stringers and supporting structure. Look for any signs of damage, rot, or loose connections. If necessary, reinforce or repair the stringers to ensure they are sturdy and able to support the new treads.
It is important to approach the removal process carefully to avoid causing damage to the stairs or injuring yourself. Take your time, use appropriate tools, and exercise caution throughout the process.
Once you have successfully removed the existing stair treads and prepared the stringers, you are ready to move on to the next step: adjusting the stair stringers to achieve the desired slope.
Consider installing a handrail for safety and support. Adding non-slip treads or carpeting can also help improve traction and reduce the risk of slipping. If possible, consider hiring a professional to assess and address any structural issues with the stairs.
Read more: How To Fix Steep Driveway
Step 5: Adjusting the Stair Stringers
Now that you have removed the existing stair treads, it’s time to focus on adjusting the stair stringers to achieve the desired slope. This step is crucial in correcting the steepness of your stairs and ensuring a safe and comfortable staircase.
Follow these steps to adjust the stair stringers:
- Measure and Calculate: Measure the new desired rise and run for your stairs based on industry standards or your preferred specifications. Calculate the number of risers needed and the height of each riser.
- Mark the Stringers: Using a pencil or marker, mark the position where each new riser will be installed on the stair stringers. Make sure the marks are evenly spaced and aligned.
- Cut the Stringers: Carefully cut along the marked lines on the stair stringers, ensuring that the cuts are precise and clean. A circular saw or handsaw can be used for this task.
- Adjust the Stringers: To achieve the desired slope, you may need to adjust the stringers. This can be done by cutting notches or wedges into the stringers, allowing for the necessary angle. Use a jigsaw or chisel to make these adjustments, ensuring that they are accurate and well-fitted.
- Secure the Stringers: Once the stringers are adjusted, reattach them to the structure using screws or nails. Make sure they are securely fastened, providing stability and support for the new stair treads.
While adjusting the stair stringers, it is important to maintain the proper dimensions and alignment to ensure a safe and functional staircase. Double-check your measurements and consult building codes if needed to ensure compliance with safety standards.
Remember, precision and accuracy are key to achieving a well-balanced and comfortable staircase. Take your time, carefully make adjustments to the stringers, and use the appropriate tools for each step.
Once the stair stringers are adjusted, you are ready to move on to the next step: installing the new stair treads.
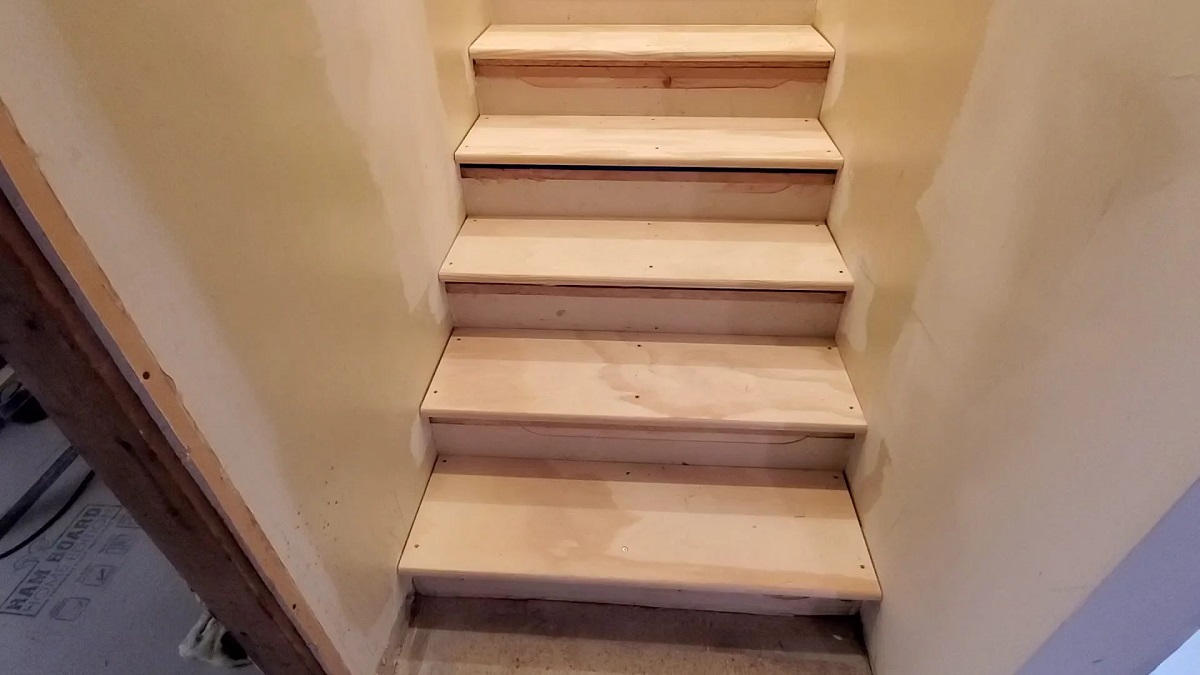
Step 6: Installing New Stair Treads
With the stair stringers properly adjusted, it’s time to move on to installing the new stair treads. This step will significantly impact the visual appeal and functionality of your staircase.
Follow these steps to install new stair treads:
- Prepare the Treads: Before installation, ensure that the new stair treads are the correct dimensions and properly finished. Sand any rough edges, and consider staining or varnishing the treads for added protection and aesthetics.
- Apply Adhesive: Apply construction adhesive to the backside of each tread. Be careful not to use too much adhesive to prevent an excessive mess or overflow.
- Position the Treads: Carefully position each tread on the stair stringers, starting from the bottom and working your way up. Ensure that the treads are aligned with the markings you made earlier and that they fit snugly against the stringers.
- Secure the Treads: To ensure a strong and durable connection, use screws or nails to secure the treads to the stringers. Place the fasteners evenly along the edges and into the underside of each tread. Make sure they are properly countersunk to create a smooth surface.
- Check for Level and Stability: After securing each tread, use a level to check for any potential unevenness. If needed, make slight adjustments by adding shims or adjusting the fasteners. Ensure that each tread is stable and securely attached.
- Repeat the Process: Continue installing the remaining treads, following the same steps as above. Take your time and be thorough to guarantee a consistent and safe staircase.
Throughout the installation process, it’s important to maintain accuracy and attention to detail. Ensure that the treads are properly aligned, level, and securely fastened to the stringers for a solid and long-lasting staircase.
Once all the new stair treads are installed, take a moment to inspect the overall appearance and functionality of your staircase. Make any necessary adjustments before moving on to the final step: securing the stairs and adding finishing touches.
Step 7: Securing the Stairs and Finishing Touches
Congratulations, you’re almost done with fixing the steep stairs in your old house! The final step is to secure the stairs and add finishing touches to complete the renovation process. This step will ensure that your staircase is safe, stable, and visually appealing.
Here are the key tasks to consider in this final step:
- Check Stability: Go through each step and ensure that they are secure and stable. Wiggle each tread to confirm they are properly attached to the stringers. Make any necessary adjustments and tighten any loose screws or nails.
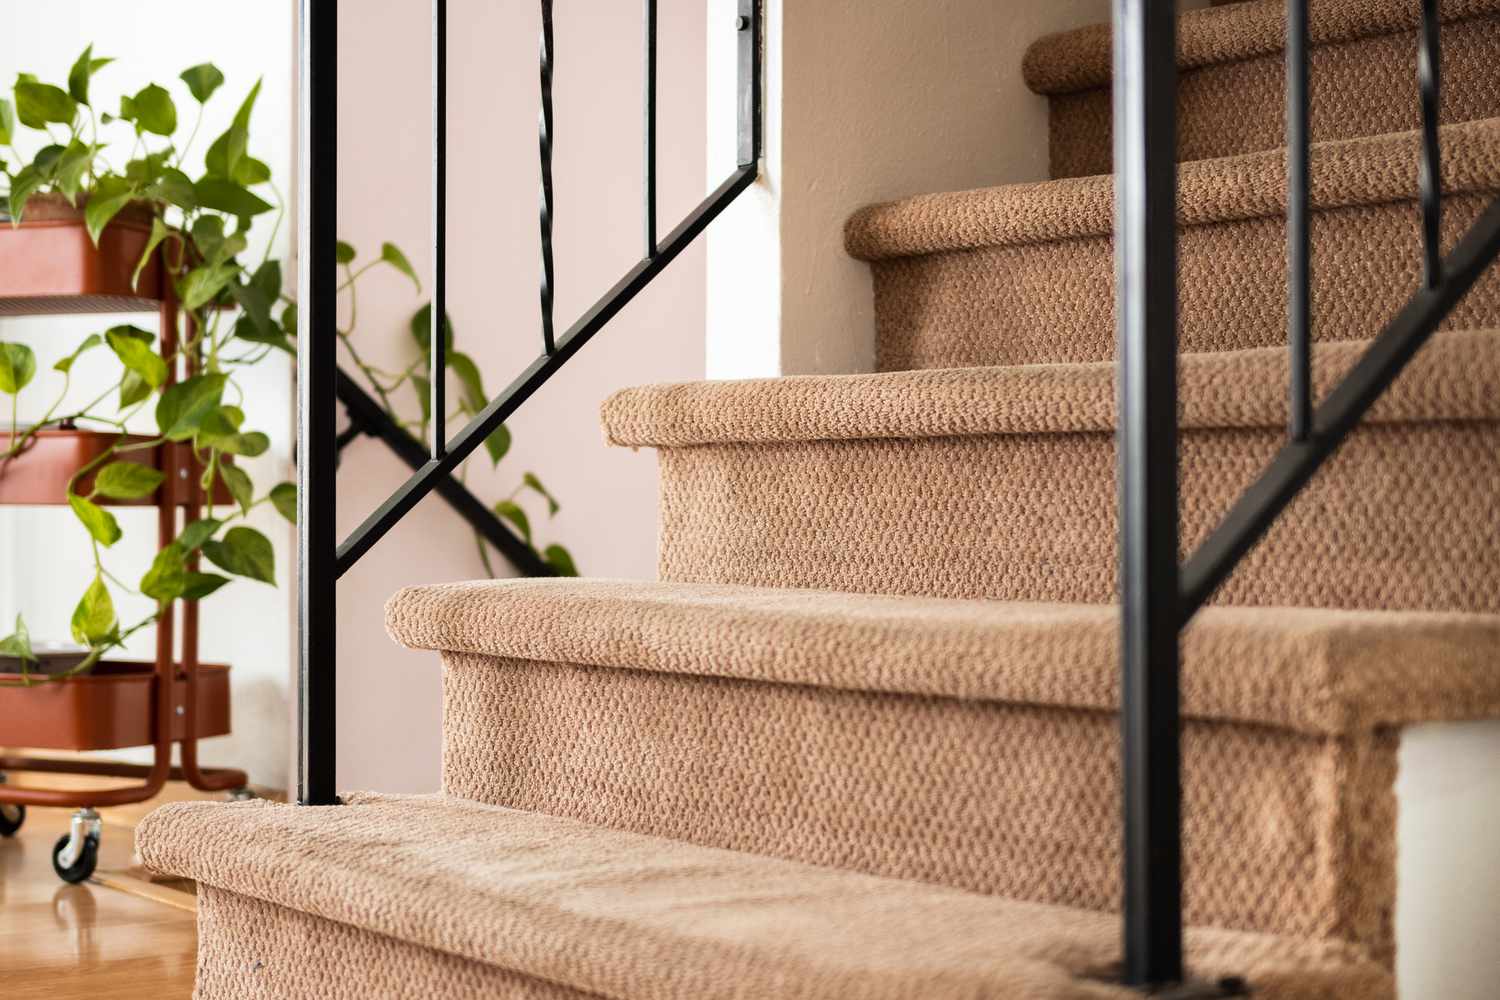
- Install Stair Nosing: To enhance safety and aesthetics, consider installing stair nosing on each tread. Stair nosing provides additional traction and helps prevent slips and falls. It also adds a finished look to the staircase. Measure and cut the nosing to fit each tread, then secure it in place with adhesive and screws or nails.
- Finishing Touches: Consider adding a fresh coat of paint, stain, or varnish to the stair stringers and handrails to refresh their appearance. Ensure that the chosen finish complements the overall style and design of your home. Take your time to properly cover and protect adjacent surfaces to avoid any unwanted drips or splatters.
- Install Handrails: If your staircase does not already have handrails or if they need to be replaced, now is the time to install them. Handrails provide an additional safety feature and support when ascending and descending the stairs. Follow the necessary guidelines and building codes for adequate height and placement of handrails.
- Clean Up: Once all the finishing touches are completed, take the time to clean up the workspace. Remove any debris, tools, and protective coverings. Dispose of waste materials appropriately and ensure that the area is safe and ready for regular use.
By securing the stairs and adding finishing touches, you will not only enhance the safety of your staircase but also improve its overall appearance and functionality. Take pride in your hard work and enjoy the transformed and improved staircase in your old house.
Remember, if you encounter any challenges or feel unsure about any of the steps, don’t hesitate to seek professional assistance. A carpenter or contractor experienced in staircase renovation can provide guidance and expertise to ensure a successful outcome.
With the completion of Step 7, you have accomplished the task of fixing steep stairs in your old house. Sit back, admire your work, and enjoy the safe and beautiful staircase you have created.
Conclusion
Fixing steep stairs in an old house can be a challenging but rewarding endeavor. By following the steps outlined in this guide, you have learned how to assess the problem, identify the causes of the steepness, and implement the necessary solutions to achieve a safer and more comfortable staircase.
Throughout the process, it’s important to prioritize safety, accuracy, and attention to detail. Assessing the problem and understanding its root causes allowed you to develop a plan of action. Adjusting the stair stringers and installing new treads helped correct the steepness and create a level surface for safe navigation.
Proper planning and preparation, along with the installation of new stair treads, transformed your old staircase into a functional and visually appealing feature of your home. By securing the stairs and adding finishing touches, you have ensured its stability and added a personal touch to reflect your style and taste.
It’s worth mentioning that while this guide provides comprehensive instructions, taking on such projects may require certain skills and tools. If you feel unsure or overwhelmed, consult with professionals who specialize in staircase renovations to ensure the best outcome.
Remember, the safety and comfort of yourself, your family, and others using the staircase are of utmost importance. When in doubt, don’t hesitate to seek professional advice or assistance.
By successfully fixing the steep stairs in your old house, you’ve not only improved the functionality and safety of your home but also enhanced its overall value and appeal. Enjoy the transformed staircase, and appreciate the hard work and dedication you’ve put into creating a better living space.
Now that you've learned how to tackle those steep stairs, why stop there? Dive into our guide on choosing hardwood floors perfect for any home renovation. From sleek oak to rustic cherry, find what suits your style and needs. If you're feeling hands-on, our article on DIY home projects is just right. It's packed with tips and tricks that'll get you rolling up your sleeves in no time!
Frequently Asked Questions about How To Fix Steep Stairs In Old House
Was this page helpful?
At Storables.com, we guarantee accurate and reliable information. Our content, validated by Expert Board Contributors, is crafted following stringent Editorial Policies. We're committed to providing you with well-researched, expert-backed insights for all your informational needs.


0 thoughts on “How To Fix Steep Stairs In Old House”