Home>diy>Architecture & Design>How To Design A House Plan Using AutoCAD
Architecture & Design
How To Design A House Plan Using AutoCAD
Modified: May 6, 2024
Learn how to design a house plan using AutoCAD, the leading software for architecture design. Master the art of architectural drafting with step-by-step tutorials and practical tips.
(Many of the links in this article redirect to a specific reviewed product. Your purchase of these products through affiliate links helps to generate commission for Storables.com, at no extra cost. Learn more)
Introduction
Welcome to the world of architectural design and the exciting realm of AutoCAD! If you have ever dreamed of designing your own house plan or exploring the field of architecture, this article is for you. In this comprehensive guide, we will walk you through the process of creating a house plan using AutoCAD, a leading software widely used in the architecture and design industry.
An accurate and well-designed house plan is essential for any construction project, whether it’s a new home, a renovation, or an addition. AutoCAD, a computer-aided design (CAD) software, provides architects, engineers, and designers with powerful tools to create detailed and precise drawings. With its extensive range of features and a user-friendly interface, AutoCAD makes the process of designing a house plan efficient and enjoyable.
Throughout this article, we will cover the fundamental principles of house design, guide you through the process of gathering information and requirements, and explain how to set up your workspace in AutoCAD. We will also delve into the various steps to create a floor plan, add walls, doors, and windows, and design the interior layout of your dream home.
Furthermore, we will explore the important aspects of adding furniture and fixtures, creating elevations and sections, incorporating the roof and exterior details, and even integrating electrical and plumbing systems into your house plan.
By the end of this article, you will have a solid understanding of how to design a comprehensive house plan using AutoCAD, and you will be ready to embark on your own architectural journey.
So, let’s dive in and explore the fascinating world of architectural design and AutoCAD!
Key Takeaways:
- Designing a house plan using AutoCAD involves understanding basic principles of house design, gathering information, setting up the workspace, creating the floor plan, adding details, and finalizing the design to meet functionality, aesthetics, and regulatory requirements.
- AutoCAD’s comprehensive tools and features enable efficient and accurate creation of house plans, including interior layout, furniture and fixtures, elevations, sections, roof and exterior details, and integration of electrical and plumbing systems, culminating in a well-prepared design ready for construction.
Read more: How To Design A House Floor Plan In AutoCAD
Understanding AutoCAD
Before we begin designing a house plan using AutoCAD, it’s important to have a basic understanding of the software and its capabilities. AutoCAD is a powerful CAD program developed by Autodesk and has become the industry standard for architects, engineers, and designers.
AutoCAD allows users to create and edit 2D and 3D drawings, making it ideal for architectural design. It offers a wide range of tools and features that enable designers to produce precise and detailed drawings with ease.
One of the key features of AutoCAD is its use of vector graphics, which ensures that drawings can be scaled without any loss of quality. This makes it possible to create floor plans, elevations, sections, and detailed building layouts accurately.
In addition to its drawing capabilities, AutoCAD provides a variety of tools for annotation, dimensioning, and labeling, allowing designers to add important information to their drawings. It also supports layering, which is crucial for organizing different elements of a drawing and managing visibility.
AutoCAD offers a vast library of pre-defined shapes and objects, including walls, doors, windows, furniture, and fixtures, which can be easily inserted into drawings. This extensive library saves designers time and effort by providing ready-made components that can be customized to suit specific design requirements.
Moreover, AutoCAD supports the creation and editing of 3D models, allowing designers to visualize their designs in three dimensions. This is particularly useful for presenting ideas to clients and stakeholders, as it provides a more realistic representation of the final structure.
One of the notable features of AutoCAD is its ability to automate repetitive tasks through the use of macros and scripts. This not only enhances productivity but also allows designers to create custom functions and workflows tailored to their specific needs.
Furthermore, AutoCAD supports compatibility with other CAD software and file formats, making it easy to collaborate with other professionals and import or export drawings seamlessly.
Now that we have a better understanding of AutoCAD and its capabilities, we are ready to delve into the process of designing a house plan. In the next section, we will explore the basic principles of house design to lay the foundation for our project.
Basic Principles of House Design
Designing a house involves considering a variety of factors to create a harmonious and functional living space. Understanding the basic principles of house design will help you create a house plan that meets the needs and desires of the occupants while adhering to architectural and structural guidelines. Here are some key principles to keep in mind:
- Functionality: The primary purpose of a house is to provide a comfortable and practical living environment. Consider the activities and lifestyle of the inhabitants when designing the layout and flow of the house. The placement of rooms, furniture, and fixtures should be aligned with how the space will be used.
- Aesthetics: A well-designed house should have a visually pleasing appearance. Create a cohesive and appealing design by considering elements such as balance, symmetry, proportion, and rhythm. Pay attention to the exterior facade as well as the interior finishes and materials.
- Space Planning: Careful space planning is crucial for an efficient and functional house design. Determine the optimal placement and size of rooms to ensure smooth circulation and convenient access. Pay attention to the relationship between different spaces and consider privacy needs.
- Natural Lighting: Harnessing natural light can greatly enhance the ambiance of a house. Strategically position windows and skylights to maximize daylight and minimize the need for artificial lighting during the day. This not only saves energy but also creates a more comfortable and inviting atmosphere.
- Energy Efficiency: Designing an energy-efficient house is not only environmentally friendly but also economical. Consider incorporating sustainable features such as adequate insulation, energy-efficient appliances, and passive solar design principles to reduce energy consumption and lower utility costs.
- Building Codes and Regulations: It’s essential to adhere to local building codes and regulations when designing a house plan. These regulations address safety, structural requirements, and zoning restrictions. Familiarize yourself with the relevant codes to ensure your design meets the necessary standards.
- Budget and Cost: Consider the budget and cost implications of your design choices. Balancing aesthetics and functionality within the constraints of a budget is important. Research the costs of materials, labor, and construction methods to align your design with the available resources.
By keeping these basic principles in mind, you can create a house plan that not only meets the needs of the occupants but also provides a beautiful and comfortable living environment. Now that we have a solid foundation of design principles, let’s move on to the next step: gathering information and requirements for your house plan.
Gathering Information and Requirements
Before delving into the design process, it’s crucial to gather the necessary information and requirements for your house plan. This phase involves understanding the needs, preferences, and lifestyle of the future occupants, as well as considering any specific site conditions or constraints. Here are some steps to guide you through the gathering process:
- Client Meeting: If you are designing a house plan for a specific client, schedule a meeting to discuss their requirements and expectations. Understand their lifestyle, family size, and any specific needs, such as accessibility features or space for hobbies or home offices.
- Site Analysis: If you have a specific site or lot in mind, conduct a thorough analysis of the site to understand its characteristics and constraints. Consider factors such as the size and shape of the plot, topography, climate, views, and any legal restrictions or zoning regulations that may impact the design.
- Research: Conduct research to gather inspiration and ideas for your design. Explore architectural styles, interior design trends, and innovative concepts that align with the client’s preferences and your design objectives. Collect images, sketches, and references to use as a basis for the design concept.
- Space Requirements: Determine the desired number and size of rooms based on the client’s needs and lifestyle. Consider factors such as bedrooms, bathrooms, kitchen, living areas, storage spaces, and any additional spaces like a garage, home gym, or outdoor area.
- Special Requirements: Identify any special requirements that need to be integrated into the design. This could include features like a home office, a guest suite, a playroom, or sustainable design elements.
- Functional Relationships: Analyze the functional relationships between different spaces and rooms. Consider the flow of movement, adjacency of rooms, privacy requirements, and the desired interaction between various areas of the house.
- Budget and Timeline: Discuss the budget and timeline with the client to establish realistic expectations. This will help guide your design decisions and ensure that the proposed house plan aligns with the available resources.
By gathering all the necessary information and requirements upfront, you lay the groundwork for a successful and well-aligned house plan. This comprehensive understanding of the client’s needs and the site’s conditions will inform the design process and ensure that the final design meets and exceeds expectations. With the information in hand, let’s move on to the next step: setting up the AutoCAD workspace.
Setting Up the AutoCAD Workspace
Before you begin designing your house plan in AutoCAD, it’s important to set up your workspace to ensure smooth and efficient workflow. Customizing the AutoCAD interface to suit your preferences and needs will enhance your productivity and make the design process more enjoyable. Here are some steps to help you set up your AutoCAD workspace:
- Workspace Selection: AutoCAD offers different workspaces tailored to specific disciplines. Choose the appropriate workspace based on your needs. For architectural design, the “Drafting and Annotation” workspace is commonly used.
- UI Customization: AutoCAD allows you to customize the User Interface (UI) to optimize your workflow. Rearrange or dock palettes, toolbars, and command line windows to create a layout that suits your preferences. Experiment with different configurations until you find a setup that works best for you.
- Command Line and Dynamic Input: Familiarize yourself with the use of the Command Line and Dynamic Input. The Command Line allows you to enter commands and options directly, while Dynamic Input provides a dynamic display of dimensions and options near the cursor. These features enhance efficiency and accuracy in drawing and editing.
- Keyboard Shortcuts and Customization: Take advantage of AutoCAD’s keyboard shortcuts to speed up your workflow. Set up custom keyboard shortcuts for frequently used commands or create macros to automate repetitive tasks. Customization options can be found in the “Customize” menu under “Keyboard Shortcuts” and “CUI Editor”.
- Tool Palette Setup: Utilize AutoCAD’s built-in Tool Palettes for quick access to commonly used blocks, commands, and tools. Customize the Tool Palette to include your preferred blocks, hatches, and frequently used commands. Ensure the Tool Palette is easily accessible within your workspace.
- Template Selection: AutoCAD provides various templates designed for different purposes. Select a template that is specifically tailored for architectural design. This will provide a starting point with pre-defined layers, units, and other settings that are commonly used in house plans.
- Units and Drawing Scale: Set the appropriate units and drawing scale for your house plan. Depending on your location and project requirements, choose between imperial or metric units. Ensure that the drawing scale matches the intended output, whether it’s for print or digital presentation.
- Layer Management: Establish a well-organized layer structure for your house plan. Create layers for different elements such as walls, doors, windows, furniture, and annotations. Assign appropriate colors and linetypes to different layers to make editing and visibility management easier.
By taking the time to personalize your AutoCAD workspace and familiarize yourself with the user interface and customization options, you will streamline your workflow and make the design process more efficient. Now that your workspace is set up, it’s time to start drawing the floor plan for your house in AutoCAD. Let’s move on to the next step.
Read more: How To Use AutoCAD For Landscape Design
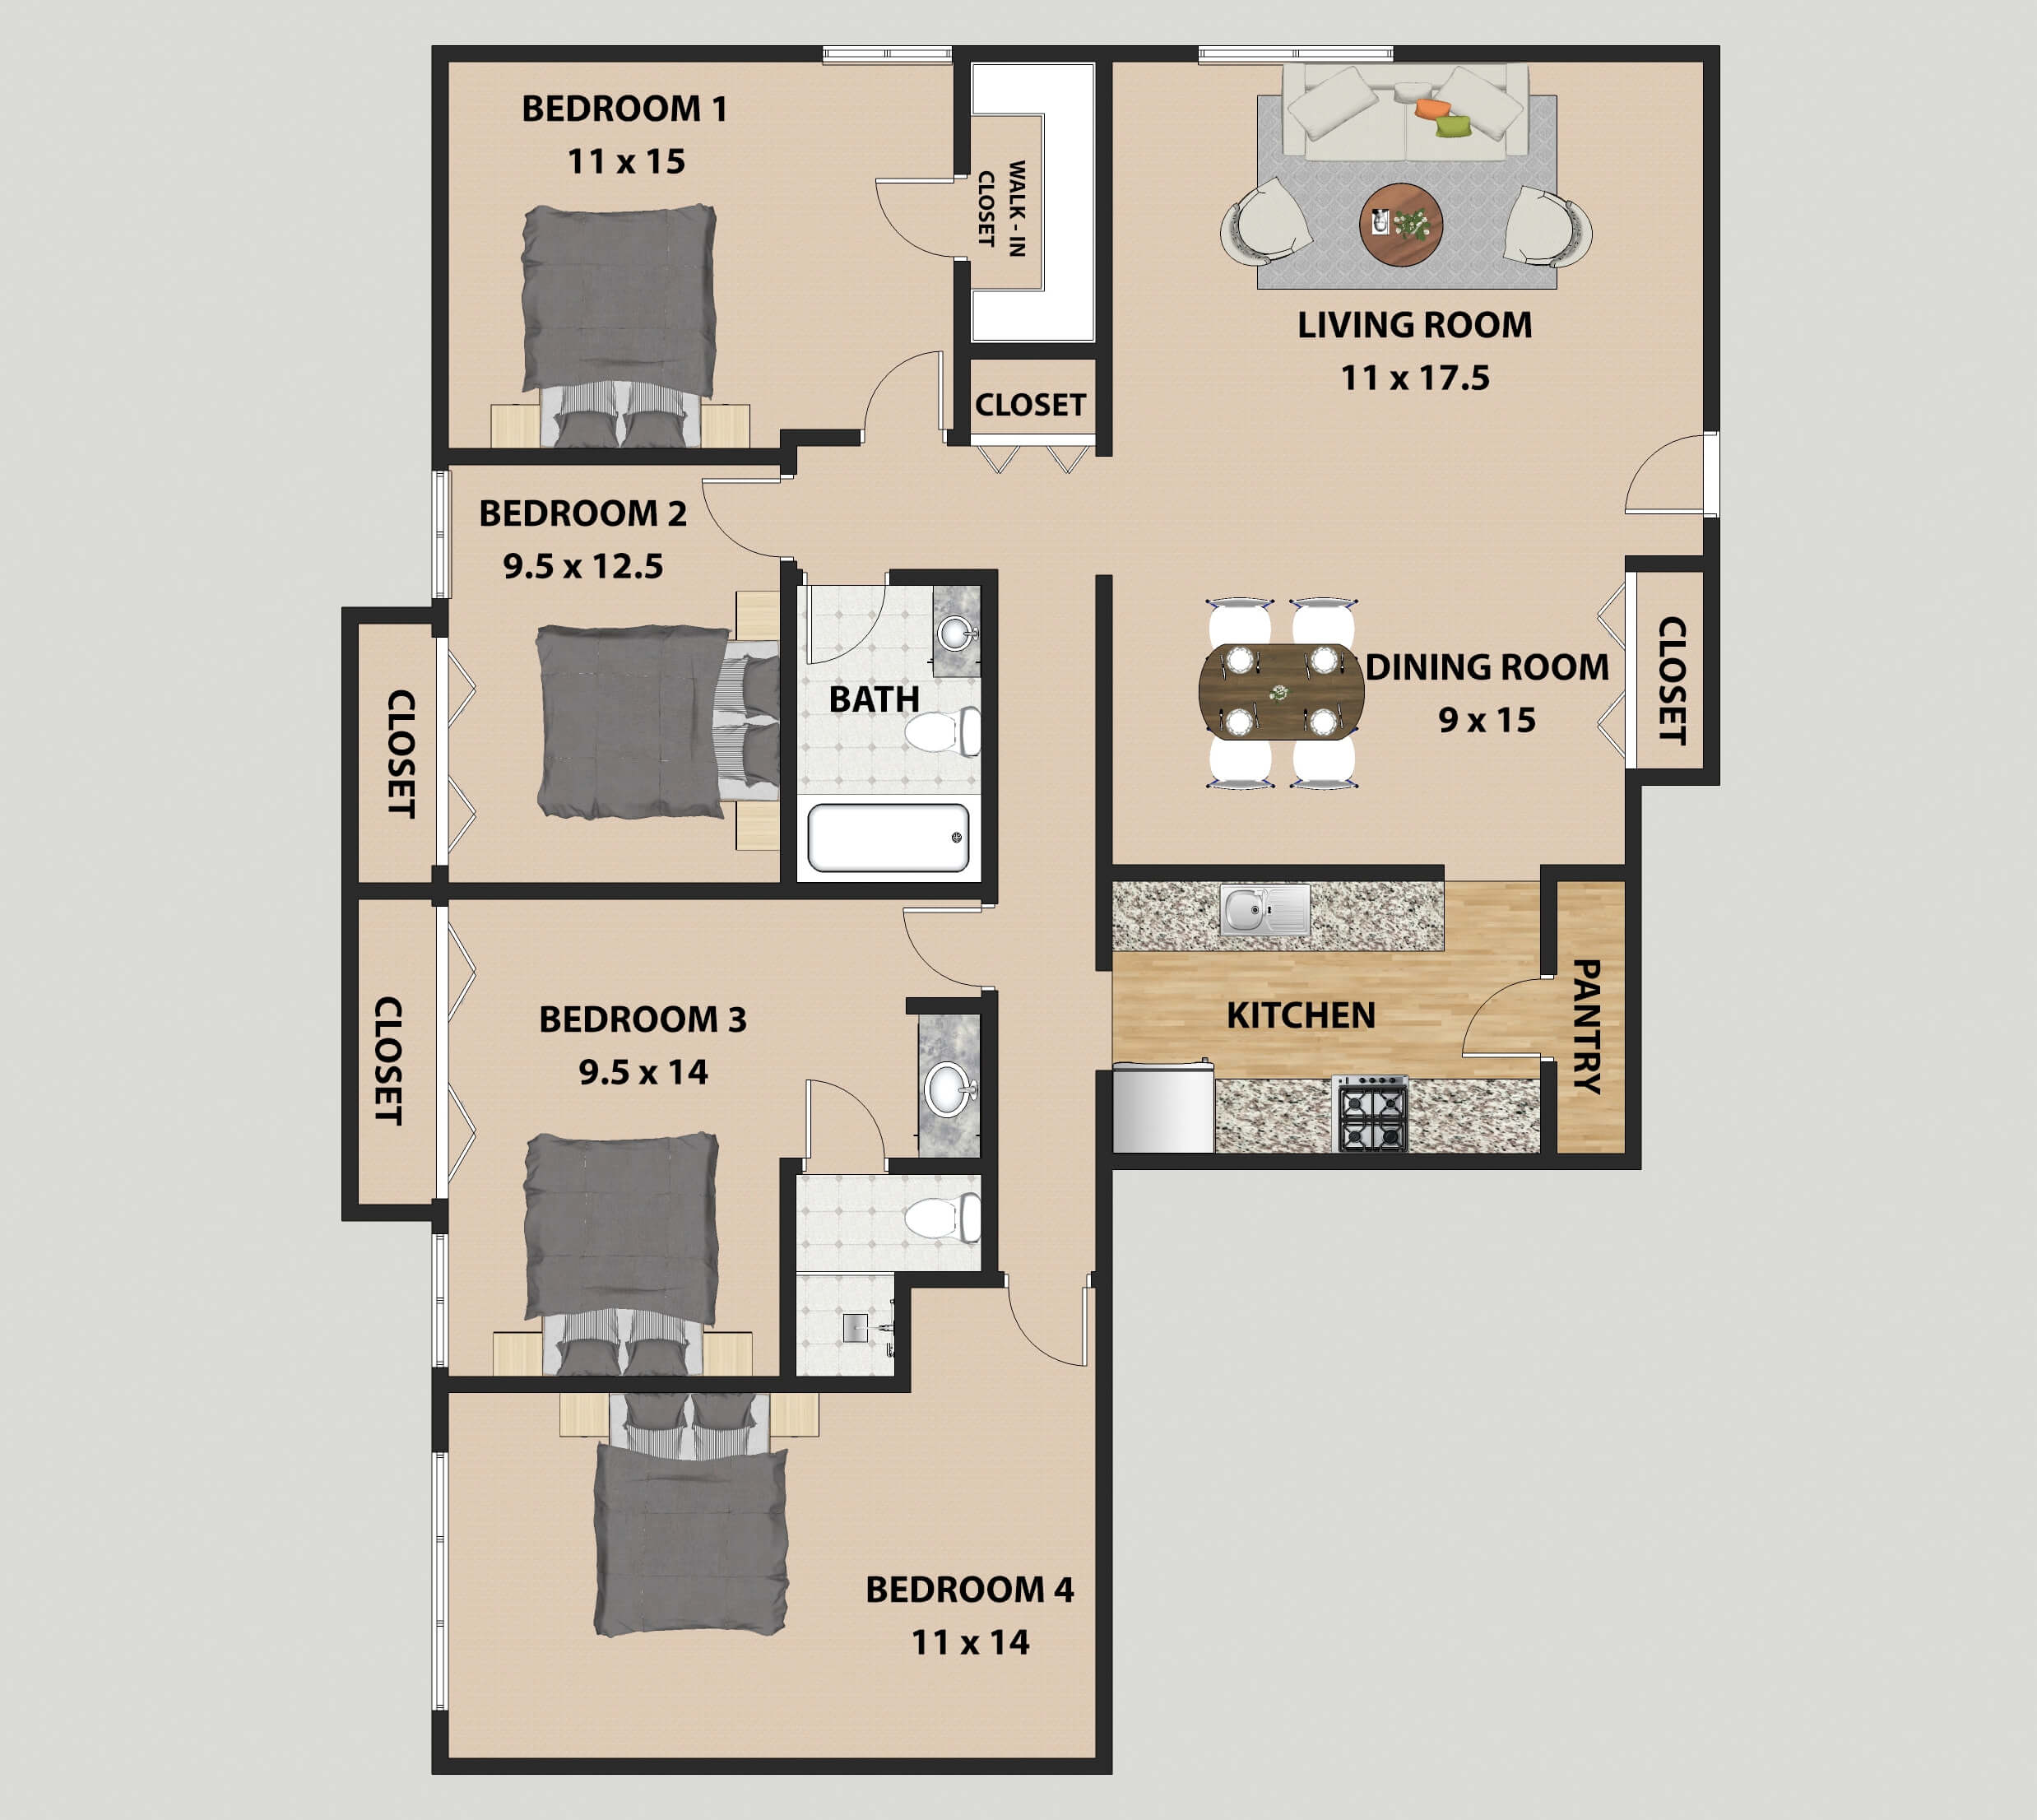
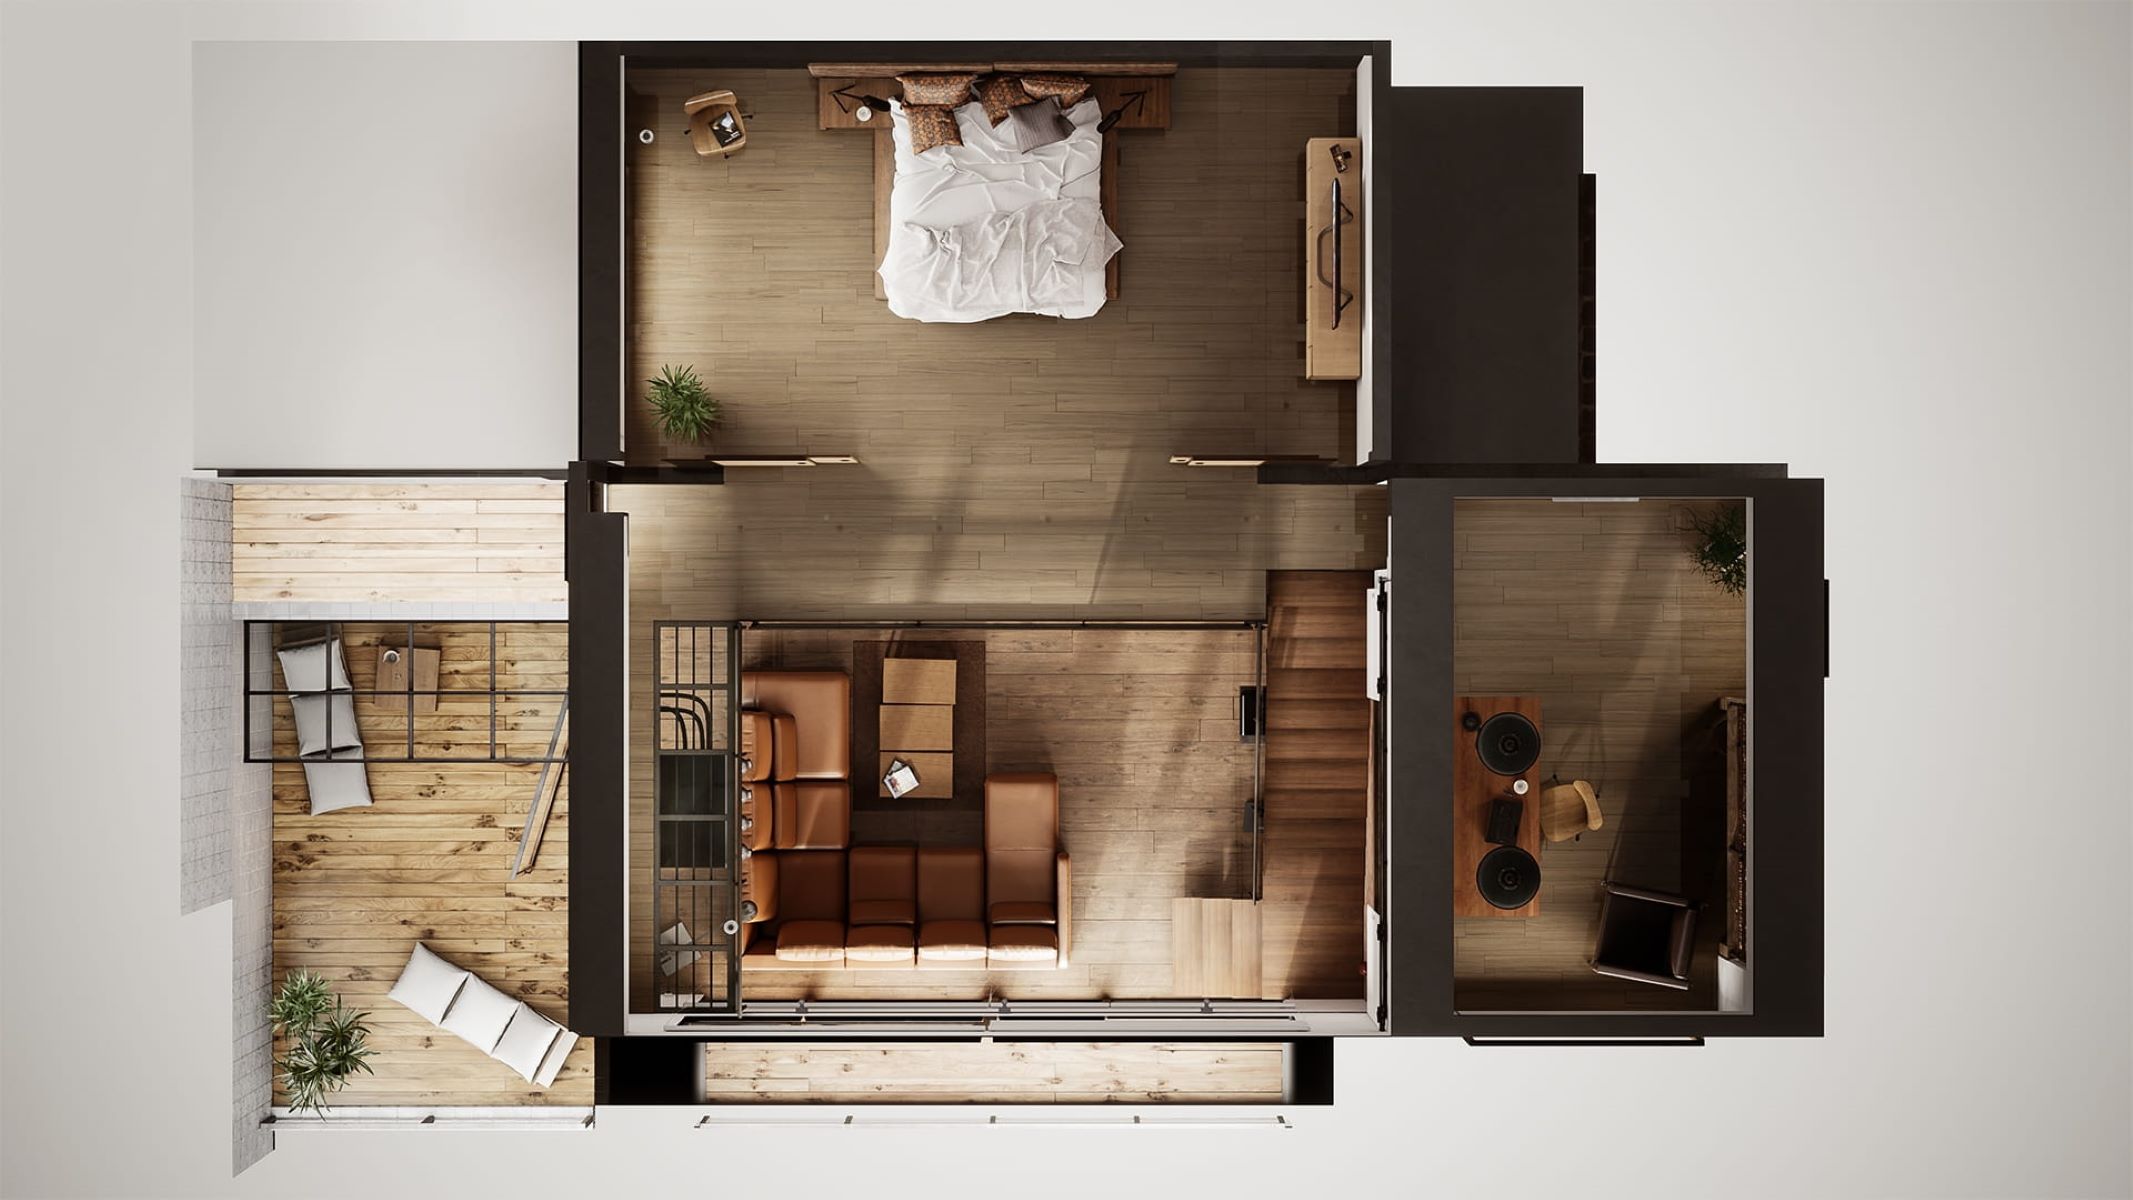
Drawing the Floor Plan
The floor plan is the foundation of your house design and serves as a visual representation of the layout and arrangement of spaces within the building. In AutoCAD, you can create a precise and detailed floor plan by following these steps:
- Set Up the Drawing: Open a new drawing in AutoCAD and set up the necessary drawing parameters such as the units, drawing scale, and page size. Consider the scale at which you want to depict the floor plan and adjust the viewport accordingly.
- Create the Walls: Start by drawing the external perimeter walls of the building. Use the Line or Polyline command to create a closed shape that represents the outline of the floor plan. Make sure to keep the lines straight and accurately aligned with the intended dimensions.
- Divide the Interior Spaces: Once the external walls are defined, use the Line or Offset command to create divisions for interior spaces. Draw lines or offset existing walls to establish the outlines of rooms, corridors, and other functional areas.
- Add Doors and Windows: Insert doors and windows into the walls by using the appropriate AutoCAD blocks or drawing them manually. Pay attention to the dimensions and placement of openings to ensure functionality and flow between spaces.
- Add Room Labels: Label each room or area by adding text or dimensions to clearly identify the purpose or use of each space. This will make it easier to understand the layout and assist during the design process.
- Add Annotations and Dimensions: Use the Dimension tool to add dimensions to the floor plan. This helps indicate the measurements of rooms, walls, and other elements accurately. Additionally, include any necessary annotations or notes to provide additional information or clarifications.
- Create Plumbing and Electrical Layout: Consider the placement of plumbing fixtures (such as sinks and toilets) and electrical outlets (such as sockets and switches). Indicate these elements on the floor plan, ensuring they are properly positioned and aligned with building codes and standards.
- Refine and Adjust: Review the floor plan, making any necessary adjustments and refinements. Ensure that the proportions, dimensions, and spatial relationships are accurate and align with the desired design concept and functionality.
- Organize Layers: Organize the various elements of the floor plan into different layers. Create separate layers for walls, doors, windows, text, dimensions, and any other components. Assign colors and linetypes to different layers to help differentiate them visually.
By following these steps, you can create a precise and detailed floor plan using AutoCAD. Remember to save your progress regularly to avoid losing any work. With the floor plan in place, you can now move on to the next step: adding walls, doors, and windows to finalize the building’s structure.
Adding Walls, Doors, and Windows
In the architectural design process, walls, doors, and windows play a crucial role in defining the structure and functionality of a building. AutoCAD provides powerful tools to accurately add and customize these elements in your floor plan. Follow these steps to add walls, doors, and windows to your AutoCAD house plan:
- Create Wall Layers: Before adding walls, set up separate layers for different wall types and construction materials. This will help keep your drawing organized and make it easier to manage the visibility and properties of the elements.
- Draw Walls: Use the Line or Polyline command to draw the walls according to your floor plan. Start by drawing the exterior walls and work your way towards the interior walls. Ensure that the walls are aligned with the dimensions and angles specified in your design.
- Assign Wall Thickness: After drawing the walls, use the Offset command to set the thickness of the walls. Specify the distance you want the walls to be offset and make sure to apply the offset inward to maintain the overall dimensions of the building.
- Add Doors: Insert doors into the walls using the appropriate AutoCAD blocks or by drawing them manually. Pay attention to the dimensions and placement of the doors to ensure proper functionality and accessibility between spaces. Adjust the layer properties to differentiate doors from walls visually.
- Add Windows: Insert windows into the walls using the appropriate AutoCAD blocks or by drawing them manually. Consider the size, placement, and type of windows to maximize natural light and views while maintaining the overall aesthetic and functionality of the design.
- Customize Door and Window Styles: AutoCAD allows you to customize the style, size, and properties of doors and windows. Modify the blocks or individual components to match your design requirements. Specify the swing direction of doors for accurate representation.
- Add Trim and Casing: Enhance the appearance of doors and windows by adding trim and casing details. Use AutoCAD’s drawing and editing tools to create these decorative elements, ensuring they are accurately aligned with the surrounding walls.
- Consider Building Codes: Verify that the dimensions, placement, and types of doors and windows comply with building codes and regulations. Take into account safety requirements, accessibility standards, and any local restrictions or guidelines.
- Refine and Adjust: Review the placement and properties of walls, doors, and windows, making any necessary adjustments or refinements. Verify that they align with the overall design concept, functionality, and structural requirements.
By following these steps, you can add walls, doors, and windows to your AutoCAD house plan and bring your design to life. Remember to save your progress regularly and maintain an organized layer structure for easy editing and management. With these essential elements in place, you can now focus on designing the interior layout of your dream home.
When designing a house plan using AutoCAD, start by creating a rough sketch of the floor plan and then use the software’s tools to accurately measure and draw the walls, doors, windows, and other features. Be sure to use layers to organize the different elements of the plan for easy editing and viewing.
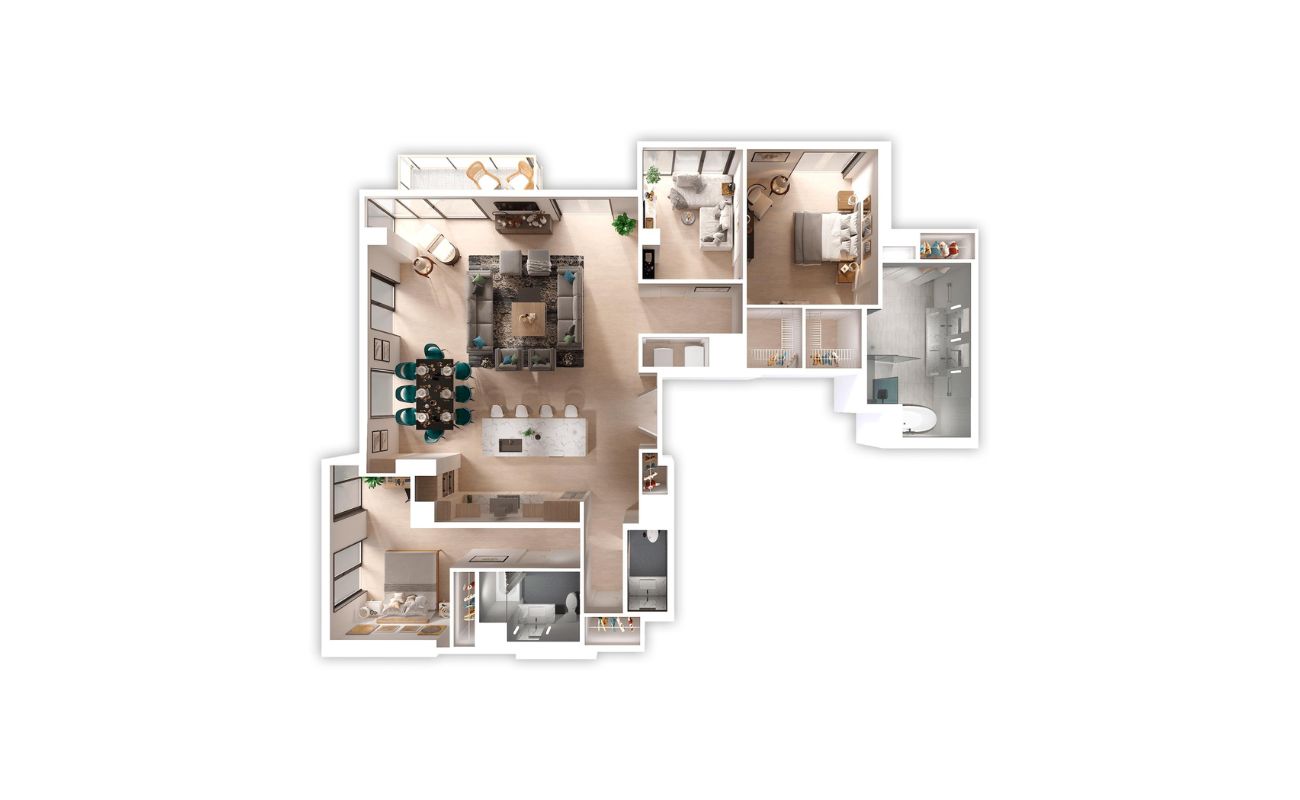
Designing the Interior Layout
The interior layout of a house greatly influences the functionality, flow, and aesthetic appeal of the space. Designing an efficient and visually pleasing interior requires careful consideration of various factors such as room arrangement, traffic flow, and the intended use of each space. Here are some steps to guide you through the process of designing the interior layout using AutoCAD:
- Plan Room Functions: Begin by determining the function of each room or area in the house. Consider the needs and preferences of the occupants and allocate rooms accordingly, such as bedrooms, bathrooms, living areas, kitchen, dining room, and utility spaces.
- Consider Traffic Flow: Analyze how people will move through the space and ensure there is a logical flow between rooms. Arrange the layout in a way that minimizes unnecessary obstructions and promotes ease of movement between different areas.
- Optimize Room Sizes and Proportions: Pay attention to the size and proportions of each room to provide ample space and a comfortable living environment. Consider the furniture and fixtures that will be placed in each room and leave sufficient room for circulation and functionality.
- Create Furniture Layouts: Use AutoCAD’s block library or create custom furniture blocks to add furniture to your floor plan. Experiment with different furniture arrangements to optimize the placement of key pieces, such as beds, sofas, dining tables, and storage solutions.
- Consider Lighting and Electrical Outlets: Plan the placement of light fixtures and electrical outlets to ensure adequate lighting and convenience in each room. Consider natural lighting opportunities and supplement with artificial lighting where necessary.
- Add Interior Walls and Partitions: Use AutoCAD’s drawing tools to add interior walls and partitions to create separate spaces within the house. Ensure that these walls align properly with the floor plan and have appropriate dimensions and thicknesses.
- Customize Wall Finishes: Add wall finishes and materials to the interior walls to represent the desired design style. Use AutoCAD’s hatching or fill tools to indicate the different materials or textures applied to each wall.
- Refine and Adjust: Review and refine the interior layout, making any necessary adjustments or modifications. Pay attention to details such as ergonomics, functionality, and aesthetic cohesion to create a well-designed and visually appealing interior space.
By following these steps, you can design an interior layout that maximizes functionality, promotes efficient traffic flow, and enhances the overall aesthetic appeal of the house. Remember to save your progress regularly and maintain an organized layer structure to facilitate easier editing and management. With the interior layout in place, you can now move on to adding furniture and fixtures to bring your design to life.
Adding Furniture and Fixtures
The addition of furniture and fixtures is a crucial step in designing the interior of a house. It not only brings life and functionality to the space but also helps to create a sense of style and personalization. By strategically placing furniture and fixtures, you can transform a house into a cozy and inviting home. Here’s how you can add furniture and fixtures to your AutoCAD house plan:
- Create a Furniture Library: Start by gathering a collection of furniture and fixture CAD blocks or symbols from online sources or by creating your own. Organize these blocks into a library for easy access during the design process.
- Insert Furniture Blocks: Use the Insert command in AutoCAD to insert the furniture blocks into your drawing. Position the blocks accurately within the rooms or areas where you want the furniture to be placed.
- Adjust Furniture Sizes and Positions: Modify the size and position of the furniture blocks to match the scale and layout of your floor plan. Ensure that the furniture is proportional to the room and properly aligned with the walls and other elements.
- Consider Traffic Flow and Functionality: Take into account the flow of traffic within each room and ensure that the placement of furniture does not hinder movement or create obstacles. Arrange the furniture in a way that suits the intended use of the space, considering comfort and functionality.
- Experiment with Different Layouts: Try out different furniture layouts to find the one that best fits the room and complements the overall design aesthetic. Consider the balance, symmetry, and visual appeal of the arrangement.
- Include Fixtures and Fittings: Add fixtures such as sinks, toilets, bathtubs, and showers to the appropriate locations in bathrooms and kitchens. Insert light fixtures, switches, and power outlets where needed.
- Specify Materials and Finishes: Use AutoCAD’s hatching or fill tools to indicate the materials and finishes of furniture and fixtures. Differentiate between upholstery, wood, metal, and other materials to visualize the design accurately.
- Refine and Adjust: Review the furniture and fixtures in each room, making any necessary adjustments or refinements. Ensure that the arrangement meets the functional needs, promotes comfort, and aligns with the aesthetic vision.
By following these steps, you can bring your AutoCAD house plan to life by adding furniture and fixtures that create a welcoming and functional interior space. Remember to save your progress regularly and maintain an organized layer structure for easier editing and management. With the furniture and fixtures in place, you can move forward to creating elevations and sections to visualize the building design from different angles.
Read more: How To Design An Electrical Plan For A House
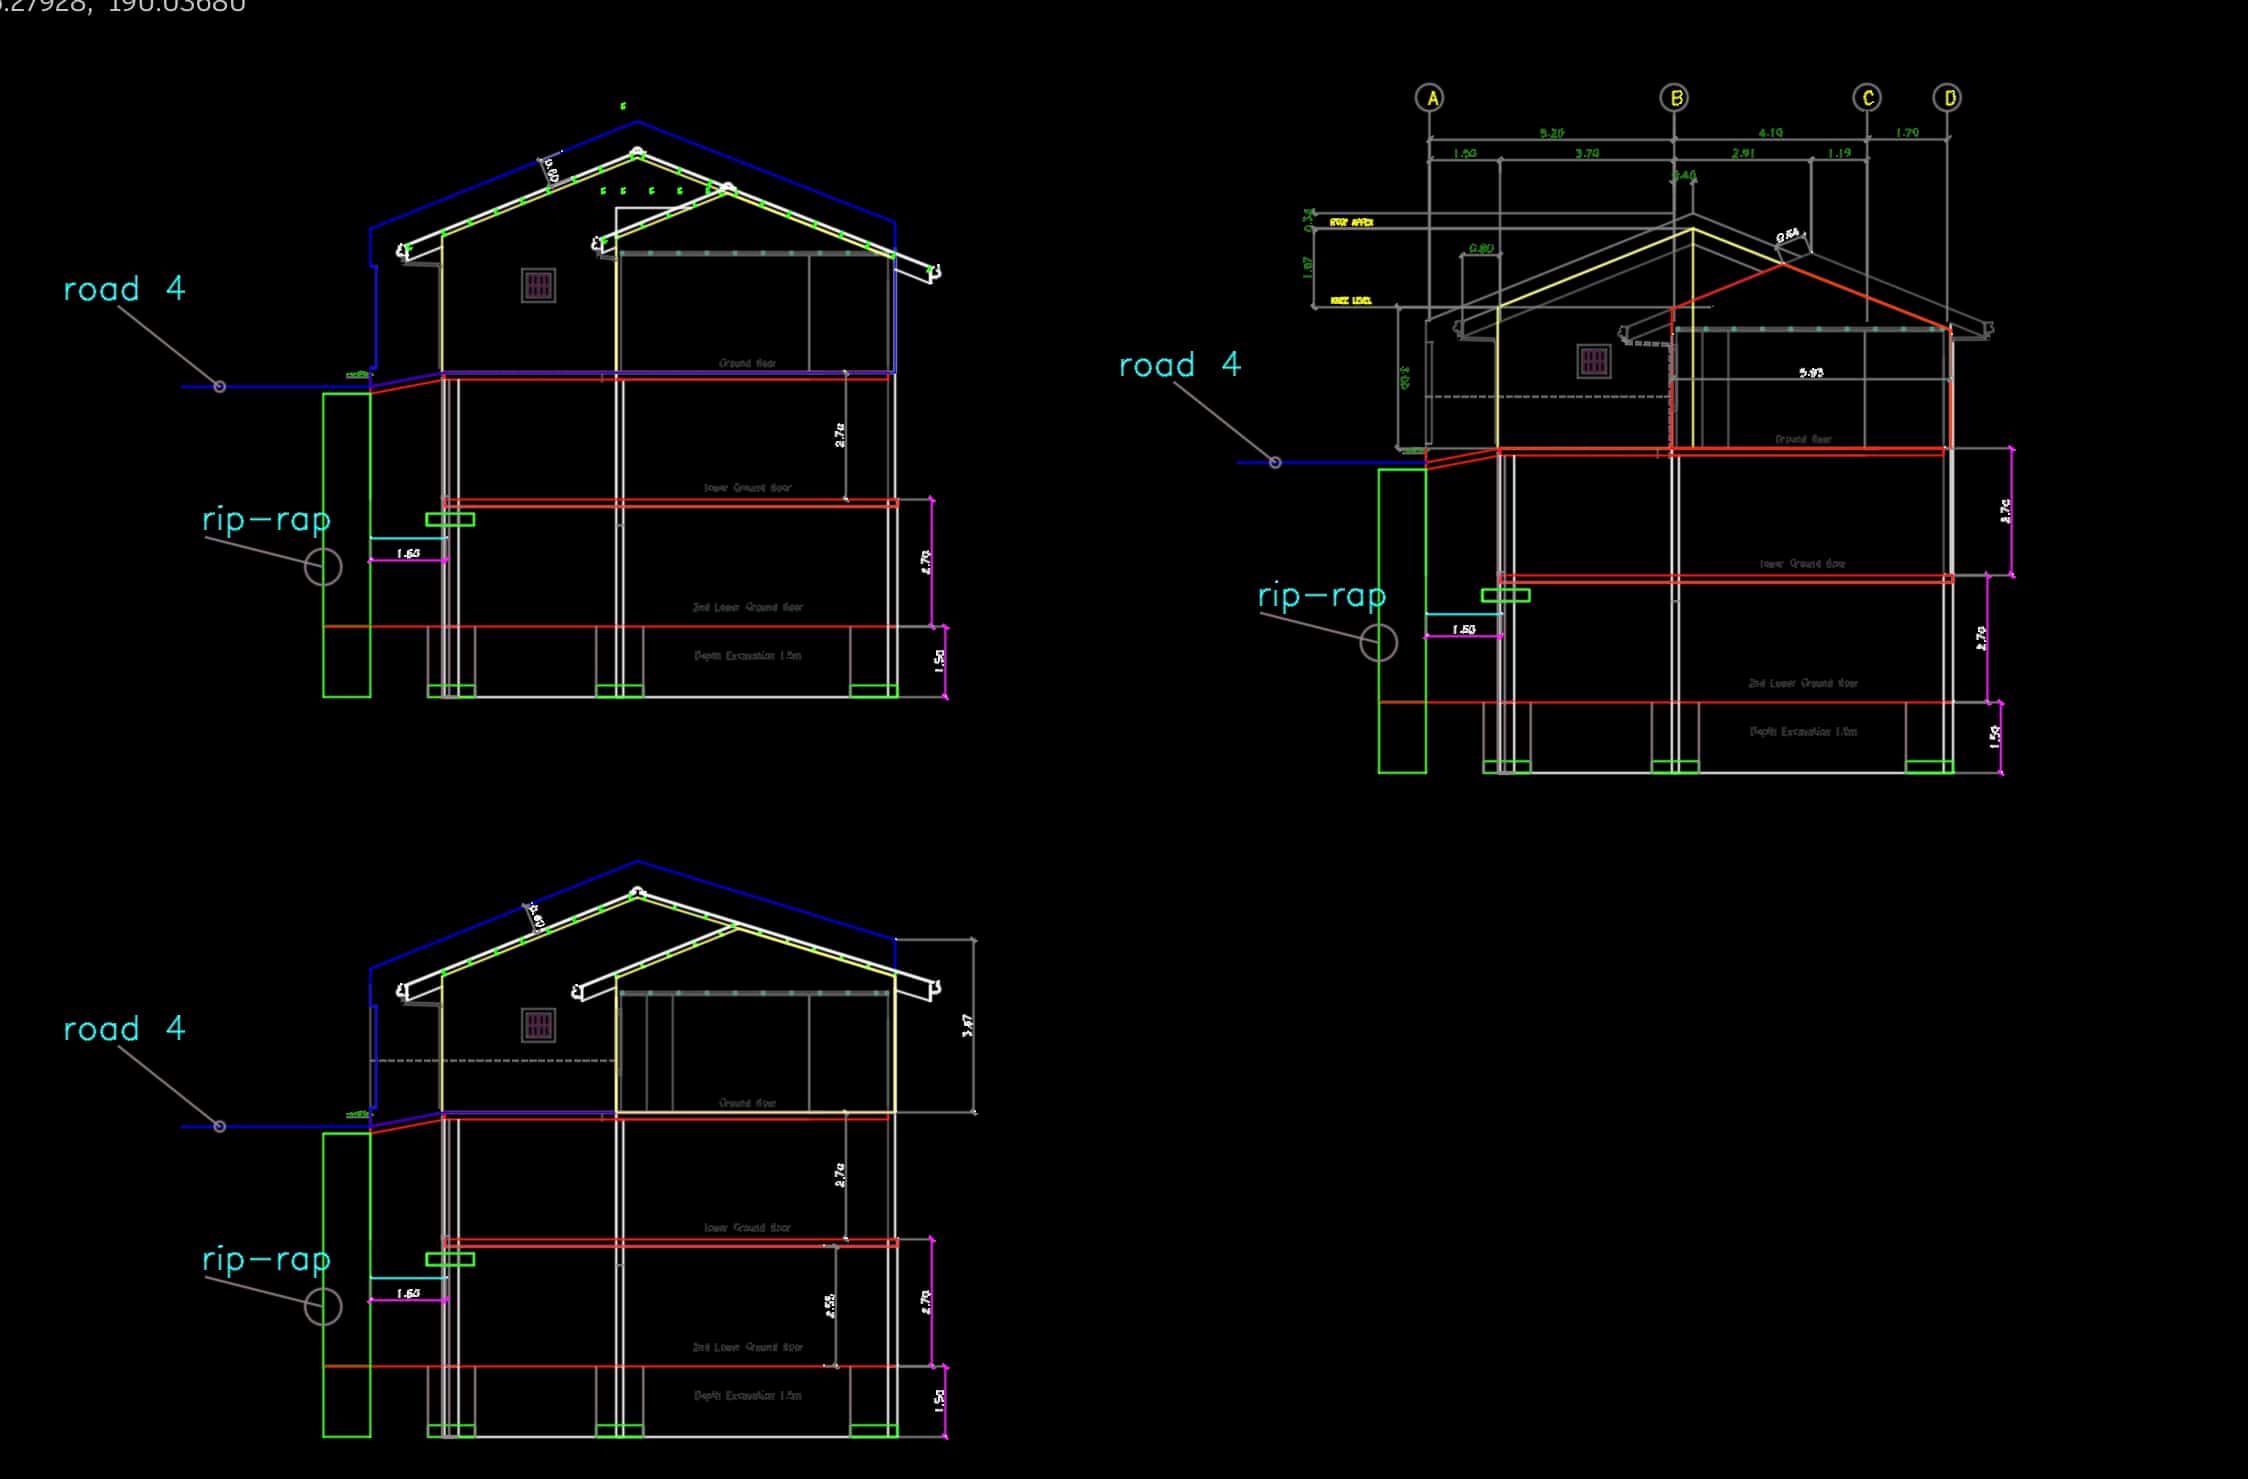
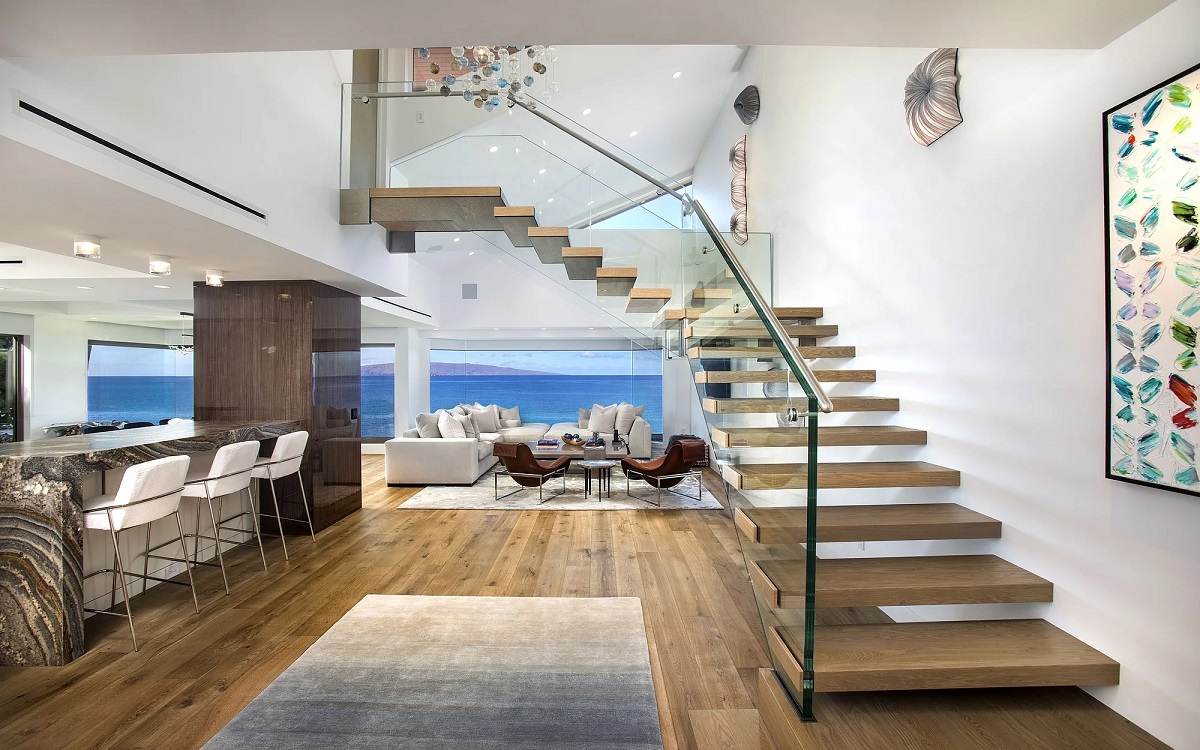
Creating Elevations and Sections
Elevations and sections are crucial in architectural design as they provide a comprehensive visual representation of the building design from different viewpoints. Creating accurate elevations and sections in AutoCAD allows you to study the aesthetics, proportions, and detailing of the building, ensuring that the design meets your vision and objectives. Here’s how you can create elevations and sections in AutoCAD:
- Select Viewpoints: Determine the viewpoints from which you want to create elevations and sections. Typically, the four main elevations (front, rear, left, and right) provide a comprehensive understanding of the building’s exterior design. Sections, on the other hand, are typically taken through specific areas of interest such as the living room or kitchen.
- Set Up Viewports: Use layout tabs in AutoCAD to create separate viewports for each elevation and section. Set the scale for each viewport based on the desired output size and level of detail required.
- Select Objects: Use the Object Selection tool to select the objects that will be included in each elevation or section viewport. This can include walls, windows, doors, rooflines, and any other architectural features that are key to the design.
- Create Elevation/Section Views: Use the “Section” or “Elevation” command in AutoCAD to generate the desired views for each selected viewport. Specify the view direction and cutting plane to define the exact perspective for the elevation or section.
- Annotate and Label: Add dimensions, annotations, and labels to the elevations and sections to provide additional information and clarity. This can include indicating the heights of windows and doors, labeling structural elements, and adding notes about materials or special features.
- Adjust Line Weights and Styles: Modify the line weights and styles of the elevation and section lines to enhance the visual representation. Use thicker lines to distinguish prominent features and thinner lines for less significant elements.
- Add Hatching or Shading: Use AutoCAD’s hatching or shading tools to differentiate between different materials or areas within the elevations and sections. Apply hatch patterns or colors to represent materials such as brick, wood, or concrete.
- Refine and Adjust: Review the elevations and sections, making any necessary adjustments or refinements. Ensure that the proportions, relationships, and details accurately represent the design concept and align with the overall vision of the building.
By following these steps, you can create detailed and accurate elevations and sections in AutoCAD, providing a comprehensive understanding of the building’s exterior design and specific internal areas. Remember to save your progress regularly and maintain an organized layer structure for easier editing and management. With the elevations and sections complete, you can now focus on incorporating the roof and adding exterior details to finalize the building’s design.
Adding Roof and Exterior Details
The roof and exterior details of a building are crucial elements that contribute to its overall aesthetic appeal and protection from the elements. Adding a well-designed roof and carefully considering the exterior details can enhance the style, functionality, and longevity of your building. In AutoCAD, you can create these elements with precision and attention to detail. Here’s how you can add the roof and exterior details to your design:
- Review the Architectural Style: Consider the architectural style of your building before adding the roof and exterior details. Different styles, such as traditional, modern, or contemporary, may have specific roof types and exterior elements that best suit the overall design.
- Create Roof Layers: Begin by creating separate layers for the roof elements. This will allow you to manage the visibility, colors, and linetypes of different roof components consistently throughout the drawing.
- Add Roof Slopes: Utilize AutoCAD’s drawing tools to define the slopes, angles, and pitches of your roof. Draw the roof planes over the top of your walls, ensuring that they align properly and accurately represent the intended design.
- Integrate Roof Details: Include roof details such as eaves, fascias, gutters, and downpipes. Use AutoCAD’s editing tools to add these elements to your roof planes, ensuring they align with the style and design principles of your building.
- Consider Roof Materials: Determine the type of roofing material you want to represent in your design, such as shingles, tiles, metal panels, or thatch. Utilize AutoCAD’s hatching or fill tools to represent these materials accurately and provide additional detail.
- Add Exterior Details: Pay attention to the exterior details that enhance the overall aesthetic of the building. This can include elements such as decorative moldings, window trims, porch columns, railings, and exterior finishes. Utilize AutoCAD’s drawing and editing tools to add these details with precision.
- Apply Material Textures and Colors: Use AutoCAD’s hatching, shading, or coloring tools to represent different materials or finishes on the building’s exterior. Apply textures, patterns, and colors to showcase the character and design intent of your building.
- Refine and Adjust: Review the roof and exterior details, making any necessary adjustments or refinements. Ensure that the roof slopes, materials, and details align with the overall vision and architectural style of the building.
By following these steps, you can add the roof and exterior details to your AutoCAD drawing, tying together the overall design concept of your building. Remember to save your progress regularly and maintain an organized layer structure for easier editing and management. With the roof and exterior details complete, you can now move on to incorporating electrical and plumbing systems into your house plan.
Incorporating Electrical and Plumbing Systems
In any building design, incorporating electrical and plumbing systems is essential to ensure functionality, convenience, and safety. AutoCAD provides powerful tools to accurately plan and integrate these systems into your house plan. Here’s how you can incorporate electrical and plumbing systems using AutoCAD:
- Create Electrical and Plumbing Layers: Start by setting up separate layers for electrical and plumbing components. This will allow you to manage the visibility and properties of these elements consistently throughout the drawing.
- Electrical System: Begin by planning the electrical system. Use AutoCAD’s drawing tools, such as lines and circles, to indicate electrical outlets, switches, fixtures, and other electrical components. Ensure that you adhere to relevant electrical codes and safety regulations.
- Label Electrical Symbols: Add labels or annotations to each electrical symbol to identify its purpose. Use AutoCAD’s text tools to provide clear and concise descriptions of each electrical component or connection.
- Plumbing System: Design the plumbing system by using AutoCAD’s drawing tools to indicate pipes, fixtures, drains, and other plumbing components. Consider the layout, connection points, and flow of water through each area of the building.
- Create Plumbing Schedules: Develop plumbing schedules to list and specify each plumbing fixture and component. Include important information such as manufacturers, model numbers, sizes, and quantities.
- Label Plumbing Symbols: Use text annotations to label each plumbing symbol and indicate its function or type. This will help ensure clarity and ease of understanding for contractors and other stakeholders.
- Coordinate with Other Design Disciplines: Collaborate with other design disciplines, such as structural and mechanical engineers, to ensure that the electrical and plumbing systems are properly integrated into the overall building design. Coordinate the placement of electrical panels, service drops, and conduit paths to avoid conflicts with structural elements.
- Verify Code Compliance: Ensure that the electrical and plumbing systems comply with local building codes and regulations. Familiarize yourself with the relevant codes related to electrical wiring, circuits, plumbing pipe sizes, and fixture clearances.
- Refine and Adjust: Review and refine the electrical and plumbing systems, making any necessary adjustments or refinements based on client feedback or site-specific requirements.
By following these steps, you can incorporate electrical and plumbing systems into your AutoCAD house plan, ensuring functionality and compliance with building codes. Remember to save your progress regularly and maintain an organized layer structure for easier editing and management. With the electrical and plumbing systems in place, you can move on to the final step: finalizing the house plan design.
Finalizing the House Plan Design
After going through the process of gathering information, designing the layout, adding details, and incorporating systems, it’s time to finalize your house plan design. This finalization phase involves reviewing and refining your design to ensure its accuracy, functionality, and aesthetic appeal. Here are some steps to help you in finalizing the house plan design:
- Review and Check for Accuracy: Go through your house plan design and carefully review each component, including walls, doors, windows, furniture, fixtures, electrical, and plumbing systems. Verify the dimensions, alignments, and relationships between elements to ensure accuracy.
- Seek Feedback and Input: Share your design with clients, stakeholders, or architectural professionals to gain valuable feedback and input. Consider their suggestions and incorporate necessary changes that align with the design objectives and meet the requirements of the project.
- Consider Structural and Engineering Considerations: Collaborate with structural engineers or other relevant professionals to ensure that your design is structurally sound. Address any concerns or modifications required to meet the structural requirements and building codes.
- Refine Details and Aesthetics: Pay attention to the finer details of your design, such as finishes, color schemes, material selections, and architectural elements. Refine these aspects to achieve the desired aesthetic appeal and create a cohesive and visually pleasing design.
- Perform Energy Efficiency Analysis: Evaluate the energy efficiency of your design by considering insulation, glazing, solar orientation, and other sustainable design strategies. Make necessary adjustments to optimize energy performance while reducing environmental impact.
- Create Construction Documents: Generate the necessary construction documents, including detailed floor plans, elevations, sections, schedules, and specifications. These documents provide a comprehensive guide for contractors and builders during the construction phase.
- Communicate and Coordinate: Maintain clear and open communication with the project team, including contractors, subcontractors, and suppliers. Ensure they have access to the finalized house plan design and construction documents, facilitating successful implementation of your design.
- Obtain Permits and Approvals: Depending on local regulations, obtain the necessary permits and approvals before proceeding with the construction. Familiarize yourself with the local building codes and requirements to ensure compliance.
- Make Digital and Physical Copies: Create digital copies and print physical copies of the final house plan documents. These copies will serve as references during construction and a record of your design for future use.
With these steps, you can finalize your house plan design in AutoCAD, ensuring that it meets the desired functionality, aesthetics, and regulatory requirements. Remember, the finalization phase is crucial for ensuring a successful construction process and ultimately, a beautiful and functional home. Congratulations on completing your house plan! You’re now ready to embark on the exciting journey of bringing your design to life.
Read more: How To Design Own House Plans
Conclusion
Congratulations on completing the comprehensive process of designing a house plan using AutoCAD! Throughout this journey, you have gained a solid understanding of AutoCAD’s capabilities, learned the basic principles of house design, gathered information and requirements, set up your workspace, created the floor plan, added walls, doors, and windows, designed the interior layout, incorporated furniture and fixtures, created elevations and sections, added the roof and exterior details, and integrated electrical and plumbing systems. Finally, you refined and finalized your house plan design.
By harnessing the power of AutoCAD, you have been able to create accurate and detailed drawings that bring your design to life. AutoCAD’s comprehensive set of tools and features has made the design process efficient, enabling you to easily customize your workspace, add annotations and dimensions, and visualize your design in three dimensions.
Throughout this journey, you have demonstrated the importance of understanding the basic principles of house design. By considering factors such as functionality, aesthetics, space planning, natural lighting, energy efficiency, and compliance with building codes, you have created a house plan that meets the needs and preferences of the occupants while adhering to architectural and structural guidelines.
Remember, the house plan is the foundation for the construction of a dream home. The finalization phase, including reviewing for accuracy, seeking feedback, considering structural elements, refining details and aesthetics, and creating construction documents, ensures that your design is ready to be implemented. Clear communication and coordination with the project team and obtaining the necessary permits and approvals are also essential for a successful construction process.
In conclusion, designing a house plan with AutoCAD requires a blend of creativity, technical knowledge, and attention to detail. With your newfound expertise, you are ready to embark on future architectural endeavors and continue creating stunning and functional spaces. Embrace the possibilities that AutoCAD offers and let your imagination and design skills soar!
If you've found our guide on designing house plans with AutoCAD helpful, you might be wondering more about the software itself. Perfect your skills by learning not just how AutoCAD functions but also why it's a preferred tool for architects and designers worldwide. Dive deeper into its capabilities, from basic commands to advanced features, ensuring you make the most of this powerful software. Don't miss your chance to get a solid grounding in the essentials of AutoCAD.
Frequently Asked Questions about How To Design A House Plan Using AutoCAD
Was this page helpful?
At Storables.com, we guarantee accurate and reliable information. Our content, validated by Expert Board Contributors, is crafted following stringent Editorial Policies. We're committed to providing you with well-researched, expert-backed insights for all your informational needs.


0 thoughts on “How To Design A House Plan Using AutoCAD”