Home>diy>Home Improvement>How To Start A Kitchen Renovation


Home Improvement
How To Start A Kitchen Renovation
Modified: February 19, 2024
Looking for a fresh start in your kitchen? Learn how to kickstart your home improvement journey with our ultimate guide on starting a kitchen renovation.
(Many of the links in this article redirect to a specific reviewed product. Your purchase of these products through affiliate links helps to generate commission for Storables.com, at no extra cost. Learn more)
Introduction
Welcome to the world of kitchen renovations! Whether you’ve just moved into a new home or you’ve been living with an outdated kitchen for years, embarking on a kitchen renovation can be an exciting and transformative experience. Not only will it enhance the functionality of your kitchen, but it can also breathe new life into your entire home.
However, the thought of starting a kitchen renovation might seem overwhelming at first. With so many decisions to make and factors to consider, it’s essential to have a clear plan in place to ensure a successful outcome. In this article, we’ll break down the steps involved in starting a kitchen renovation, guiding you through the process and offering helpful tips along the way.
Whether you’re aiming for a complete overhaul or just a minor facelift, these steps will serve as a roadmap to get you started. So, let’s roll up our sleeves and dive into the world of kitchen renovations!
Key Takeaways:
- Planning and thorough assessment are crucial for a successful kitchen renovation. From setting a budget to finding reliable contractors, each step plays a vital role in creating a functional and beautiful space.
- Attention to detail and careful execution are essential for the final touches. From painting and finishing to the final inspection and clean-up, every step ensures a polished and cohesive result for a newly transformed kitchen.
Read more: How To Start Home Renovation
Step 1: Assess Your Current Kitchen
The first step in starting a kitchen renovation is assessing your current kitchen. This involves taking a close look at the layout, functionality, and overall condition of your kitchen space. By doing so, you’ll gain a better understanding of what needs to be improved or changed.
Start by evaluating the layout of your kitchen. Consider the flow and accessibility of the space. Are there any bottlenecks or areas that feel cramped? Think about how you could optimize the layout to improve efficiency and make the most of the available space.
Next, assess the functionality of your kitchen. Take note of any features or appliances that are outdated or no longer serve their purpose. Consider the storage capacity and organization of your current cabinets and drawers. Determine if there’s a need for additional storage or if you can maximize the existing space more efficiently.
Additionally, evaluate the condition of your kitchen’s infrastructure. Check for any signs of wear and tear, such as cracked tiles, water damage, or faulty plumbing. These issues should be addressed during the renovation process to ensure a solid foundation for the new kitchen.
It’s also crucial to consider your lifestyle and cooking habits when assessing your current kitchen. Are you an avid cook who needs ample countertop space and high-quality appliances? Do you entertain frequently and require a larger dining area? Understanding your specific needs and preferences will help you tailor the renovation plans to suit your lifestyle.
Lastly, assess the natural light and ventilation in your kitchen. A well-lit and ventilated kitchen can make a significant difference in creating a pleasant cooking experience. Consider if there are any opportunities to introduce more natural light or improve airflow through windows, skylights, or ventilation systems.
By carefully assessing your current kitchen, you’ll have a clearer vision of what changes are necessary to create your dream kitchen. Take notes, measure the space, and start brainstorming ideas for the improvements you want to make.
Step 2: Set a Budget
Setting a budget is a crucial step in any home improvement project, including kitchen renovations. Without a clear budget in mind, it’s easy to overspend or underestimate the costs involved. By setting a budget from the start, you can make informed decisions about the scope of your renovation and ensure that your financial resources are allocated efficiently.
To set a budget, start by considering your overall financial situation. Determine how much you’re willing and able to spend on the kitchen renovation project. This will help you establish realistic expectations and guide your decision-making process.
Next, break down your budget into different categories. Allocate funds for major components such as cabinets, countertops, appliances, flooring, and lighting. Don’t forget to factor in additional costs such as labor, permits, and any unexpected expenses that may arise during the renovation process.
Researching the average costs of materials and services in your area can give you a rough estimate of how much you should allocate for each category. Keep in mind that prices can vary depending on the quality, brand, and size of the items you choose.
When setting a budget, it’s important to be realistic. Leave some room for unforeseen expenses or changes that may occur during the renovation process. It’s better to have a slightly higher budget and not need it than to run out of funds midway through the project.
Another essential aspect of budgeting is prioritizing your needs and wants. Decide which components of your kitchen renovation are non-negotiable and allocate a larger portion of your budget to these items. It’s okay to splurge on certain elements, but be mindful of how it impacts the overall budget.
Lastly, consider how you’ll finance your kitchen renovation. Do you have savings set aside specifically for home improvement projects? Will you be using a home equity loan or refinancing your mortgage to cover the costs? Understanding your financing options will help you determine the extent of your budget and any limitations you may have.
Setting a budget for your kitchen renovation requires careful consideration and planning. Be diligent and thorough in estimating the costs involved, and remember to keep track of your expenses throughout the project to make sure you stay within your budget.
Step 3: Research Design Inspiration
Before diving into the specifics of your kitchen renovation, it’s essential to gather design inspiration. Researching different design styles and trends will help you refine your vision and make informed decisions about the overall aesthetic of your new kitchen.
Start by exploring home design magazines, websites, and social media platforms for inspiration. Look for kitchen designs that capture your attention and resonate with your personal style. Pay attention to different color schemes, materials, and layouts that appeal to you.
Creating a mood board can be a helpful tool in gathering design inspiration. Collect images, colors, textures, and materials that reflect the look and feel you want to achieve in your kitchen. This visual representation will serve as a reference point throughout the renovation process.
Consider practical factors when researching design inspiration as well. Look for innovative storage solutions, clever organization ideas, and efficient layouts that can enhance the functionality and usability of your kitchen.
It’s also worth checking out local showrooms and home improvement expos to see kitchen displays in person. This allows you to experience different materials and appliances firsthand and can provide a clearer understanding of how they will look and feel in your own kitchen.
Don’t be afraid to think outside the box and explore unique design ideas. Mix and match styles, incorporate unexpected elements, and consider adding personal touches that reflect your personality and lifestyle.
As you gather inspiration, make note of specific design features or materials that you particularly love. This will help when it comes time to communicate your vision to contractors or designers.
Remember that design inspiration should not be limited to aesthetics alone. Functionality and practicality are equally important aspects to consider. Look for design ideas that prioritize efficiency, organization, and ease of use in the kitchen space.
Taking the time to research and gather design inspiration will ultimately result in a kitchen renovation that aligns with your tastes and meets your needs. It will also help you communicate your ideas effectively to professionals involved in the project, ensuring that your vision is brought to life.
Step 4: Find a Reliable Contractor
Finding a reliable contractor is a crucial step in your kitchen renovation journey. The right contractor can make all the difference in ensuring a smooth and successful project. To find a trustworthy professional who understands your vision and can bring it to life, follow these steps:
1. Ask for recommendations: Start by asking friends, family, and neighbors for recommendations. People who have undergone similar renovations can provide valuable insight and firsthand experiences with contractors they’ve worked with.
2. Research online: Use online platforms to search for local contractors specializing in kitchen renovations. Read reviews, look at their portfolios, and explore their websites to get a sense of their quality of work and level of professionalism.
3. Check credentials and certifications: Verify that the contractors you’re considering have the necessary licenses, insurance, and certifications required by your local regulations. This ensures that they meet industry standards and will adhere to legal requirements throughout the project.
4. Schedule consultations: Narrow down your list of potential contractors and schedule consultations with them. During the consultation, discuss your vision, ask questions, and gauge their level of expertise and communication skills. It’s important to feel comfortable and confident in their abilities.
5. Ask for references: Request references from previous clients. Reach out to these references to inquire about their experiences working with the contractor. Ask specific questions about the quality of work, timeliness, and their overall satisfaction with the renovation process.
6. Compare quotes: Once you’ve received proposals from different contractors, compare them carefully. Look beyond the bottom line and consider the scope of work, materials, and timelines outlined in each quote. Choose a contractor who offers a comprehensive and detailed proposal within your budget.
7. Review contracts: Before signing any contract, thoroughly review and understand the terms and conditions. The contract should clearly outline the scope of work, payment schedule, warranties, and any other relevant details. If you have any concerns, discuss them with the contractor before moving forward.
Remember, hiring a reliable and experienced contractor is essential to the success of your kitchen renovation. Take your time to conduct thorough research, ask for recommendations, and carefully evaluate potential contractors before making your final decision. By doing so, you’ll have peace of mind knowing that your project is in capable hands.
Read more: How To Start A Home Renovation Business
Step 5: Create a Plan/Layout
Creating a detailed plan and layout for your kitchen renovation is essential to ensure that your vision is translated into a functional and aesthetically pleasing space. This step involves careful consideration of the kitchen’s layout, storage needs, and overall design elements. Follow these guidelines to create an effective plan for your renovation:
1. Measure the space: Start by accurately measuring the dimensions of your kitchen, including the walls, windows, doors, and any existing fixtures. This will help you determine the available space and where different elements will be positioned.
2. Determine the layout: Consider the work triangle, consisting of the refrigerator, sink, and cooking area. Aim for an efficient and practical layout that allows for easy movement between these key elements. Common kitchen layouts include U-shaped, L-shaped, galley, and island designs. Choose a layout that suits your needs and the available space.
3. Consider storage needs: Assess the storage requirements of your kitchen and plan for adequate cabinets, drawers, and shelving. Take into account the type, size, and quantity of items you need to store, including cookware, utensils, small appliances, and pantry items. Optimize storage solutions to maximize functionality and organization.
4. Plan for appliances: Determine the location and size of major appliances, such as the refrigerator, oven, and dishwasher. Consider the workflow and accessibility when placing these appliances within your kitchen layout. If possible, opt for energy-efficient models that align with your needs and budget.
5. Set a focal point: Decide on a focal point in your kitchen, whether it’s a statement piece like an island or a beautifully designed backsplash. This creates a visual center and adds interest to the space.
6. Select materials and finishes: Choose materials and finishes that complement your desired design aesthetic and meet your practical needs. Consider the durability, maintenance requirements, and budget when selecting countertops, flooring, backsplash, and cabinetry materials.
7. Seek professional help if needed: If you’re unsure about the design and layout, consult with a kitchen designer or architect. They can offer expert advice and help you create a functional and visually appealing plan that suits your lifestyle and preferences.
8. Create a 3D visualization: Use design software or work with a designer to create a 3D visualization of your kitchen plan. This will give you a clear understanding of how the different elements will come together and allow you to make any necessary adjustments before starting the renovation.
By creating a comprehensive plan and layout, you’ll have a roadmap for your kitchen renovation. This will ensure that you’re making informed decisions and setting realistic expectations for the project.
Step 6: Choose Materials and Appliances
Choosing the right materials and appliances is a crucial step in bringing your kitchen renovation to life. The materials you select will not only contribute to the overall aesthetic of your kitchen but also impact its durability and functionality. Follow these guidelines to make informed decisions:
1. Countertops: Consider factors such as durability, maintenance, and aesthetics when choosing countertops. Popular options include granite, quartz, marble, and butcher block. Evaluate the pros and cons of each material and choose one that suits your lifestyle and design preferences.
2. Flooring: Selecting the right flooring material is essential, considering the amount of traffic and wear that a kitchen floor typically experiences. Popular choices include ceramic or porcelain tile, hardwood, vinyl, and laminate. Ensure that the flooring material is resistant to stains, moisture, and scratches.
3. Cabinetry: The style and finish of your kitchen cabinets will have a significant impact on the overall look and functionality of the space. Consider options such as traditional wood, modern laminate, or sleek stainless steel. Pay attention to the quality of the cabinetry hardware, such as hinges and drawer slides.
4. Backsplash: The backsplash provides an opportunity to add visual interest and personality to your kitchen. Choose a material that is easy to clean and complements the overall design. Options include tile, glass, stone, or even painted walls with a protective sealant.
5. Appliances: Selecting the right appliances is crucial for both functionality and energy efficiency. Consider the size, features, and finish of appliances such as the refrigerator, stove/oven, dishwasher, and microwave. Look for appliances with the ENERGY STAR label to ensure energy efficiency.
6. Lighting: The right lighting can enhance the functionality and ambiance of your kitchen. Plan for a combination of ambient, task, and accent lighting. LED lights are energy-efficient and provide excellent illumination. Consider under-cabinet lighting for task areas and pendant lights for added style.
7. Plumbing fixtures: Choose plumbing fixtures that match the overall design and provide durability and ease of use. Consider options such as faucets, sinks, and garbage disposals. Opt for high-quality fixtures that are resistant to corrosion and have water-saving features.
When choosing materials and appliances, it’s important to strike a balance between aesthetics and functionality. Consider your budget, lifestyle, and maintenance requirements. Take the time to research different options, read reviews, and consult with design professionals to make the best choices for your kitchen renovation.
Step 7: Obtain Permits (if necessary)
Before you start your kitchen renovation, it is crucial to determine if you need to obtain any permits or approvals from local authorities. Depending on the scope and nature of your project, permits may be required to ensure compliance with building codes, safety regulations, and zoning requirements. Here are some important considerations:
1. Research local regulations: Start by researching the specific permit requirements in your area. Check with your local building department or municipal office to understand what permits are needed for your kitchen renovation. Regulations and requirements can vary depending on your location.
2. Engage with professionals: If your renovation involves major structural changes, electrical or plumbing work, or modifications to load-bearing walls, it is advisable to consult with professionals such as architects or contractors. They can help you assess whether permits are needed and guide you through the application process.
3. Gather required documentation: Once you have identified the necessary permits, gather the required documentation. This may include detailed architectural plans, engineering calculations, product specifications, contractor licenses, insurance certificates, and proof of homeownership.
4. Plan for the application timeline: Keep in mind that obtaining permits can take time, ranging from a few days to several weeks or more, depending on your local jurisdiction. Plan your renovation timeline accordingly to account for potential delays in the permit application process.
5. Submit the permit application: Follow the guidelines provided by your local building department or municipal office to submit your permit application. Make sure to include all required documentation, pay any associated fees, and provide accurate information regarding the scope of your kitchen renovation.
6. Schedule inspections: Once your permit is approved, schedule inspections as required by your local building department. Inspections are typically conducted at various stages of the renovation to ensure compliance with building codes and safety standards. Common inspection points include electrical, plumbing, and structural work.
7. Maintain compliance: Throughout your kitchen renovation, it is important to adhere to the conditions and requirements outlined in your permit. Failure to comply may result in penalties, fines, or having to undo and redo work that does not meet regulations.
Obtaining the necessary permits ensures that your kitchen renovation is done safely, in compliance with regulations, and up to code. It protects you and future occupants of your home, and it also ensures that your project is not interrupted or delayed by legal issues. Take the time to understand and fulfill the permit requirements in your area to have a successful and hassle-free renovation experience.
Before starting a kitchen renovation, create a detailed budget to outline the costs of materials, labor, and any unexpected expenses. This will help you stay on track and avoid overspending.
Step 8: Demolition and Removal
Once you have obtained the necessary permits and have a clear plan in place, it’s time to move on to the demolition and removal phase of your kitchen renovation. This step involves removing the existing components of your kitchen to make way for the new design. Here are some important considerations:
1. Safety first: Before you begin any demolition work, prioritize safety. Wear appropriate protective gear such as safety goggles, gloves, and a dust mask. Ensure that the electricity and water supply to the kitchen are turned off.
2. Develop a demolition plan: Create a detailed plan for the demolition process, including the order in which items will be removed. Start with the cabinets, followed by countertops, appliances, and flooring. This systematic approach will help streamline the process and minimize disruptions.
3. Salvage reusable items: If you plan to recycle or reuse any components from your old kitchen, take the time to carefully remove and salvage them. This may include cabinets, hardware, light fixtures, or even appliances that are in good condition.
4. Dispose of waste responsibly: Properly dispose of all demolition waste. Rent a dumpster or arrange for a professional waste removal service to ensure that materials are disposed of in accordance with local regulations. Consider donating usable items to local charities or organizations in need.
5. Address structural changes: If your kitchen renovation involves structural changes such as removing or adding walls, consult with a professional contractor or engineer to ensure that the proper permits and approvals are in place. Structural changes should be executed with precision and expertise.
6. Clean and prepare the space: Once the demolition and removal are complete, clean the space thoroughly, removing any debris or dust. Take this opportunity to assess the condition of the underlying structure and address any issues that may require repair or reinforcement.
7. Update utilities if necessary: If you are making significant changes to the layout or location of plumbing or electrical components, work with licensed professionals to update these utilities. Ensure that all necessary permits and inspections are obtained.
Demolition and removal are integral steps in your kitchen renovation journey. Ensure that you approach this phase with caution, following safety protocols and adhering to local regulations. With proper planning and execution, you will be one step closer to creating your dream kitchen.
Read more: Where To Start Home Renovations
Step 9: Plumbing and Electrical Work
As you progress through your kitchen renovation, step 9 involves tackling the plumbing and electrical work. This crucial phase ensures that your kitchen’s utilities are updated, functional, and compliant with safety standards. Here are some key considerations:
1. Hire licensed professionals: Plumbing and electrical work should be carried out by licensed and experienced professionals. It is not recommended to attempt these tasks yourself unless you have the appropriate qualifications and expertise.
2. Develop a plan: Work with your contractor to develop a detailed plan for the plumbing and electrical layout in your new kitchen. Consider factors such as the placement of sinks, faucets, electrical outlets, lighting fixtures, and appliances.
3. Update plumbing: If your renovation involves relocating or adding plumbing fixtures, such as sinks, dishwashers, or refrigerators with water lines, it’s important to address these changes. Ensure that the plumbing is properly installed, with suitable drainage and water supply connections.
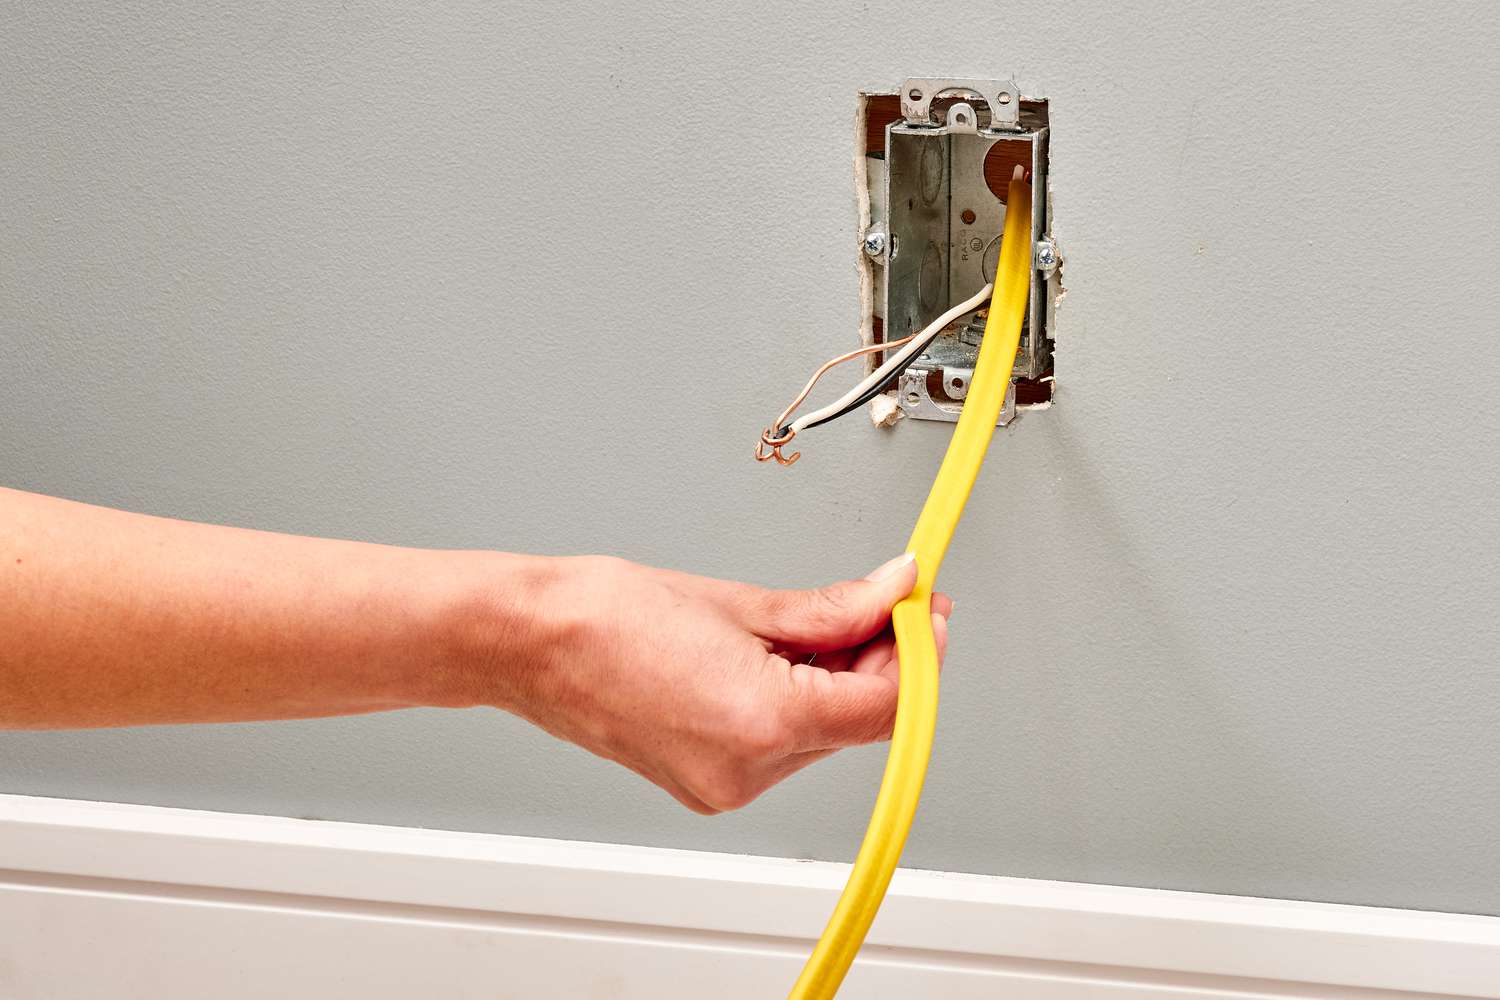
4. Upgrade electrical systems: If your existing electrical system needs upgrading to accommodate the increased load from new appliances and lighting, work with an electrician to install additional circuits and outlets. Ensure that the electrical work follows local safety codes and requirements.
5. Consider energy efficiency: Take this opportunity to incorporate energy-efficient upgrades into your kitchen. Install LED lighting, energy-efficient appliances, and consider motion sensors or timers for lights to reduce energy consumption.
6. Seek permits and inspections: In most jurisdictions, plumbing and electrical work require permits and inspections. Work with your contractor to obtain the necessary permits and schedule inspections to ensure that the work meets local building codes and safety regulations.
7. Communicate your needs: Throughout the plumbing and electrical work, communicate your needs and preferences to the professionals working on your project. Discuss the placement of outlets, switches, and lighting fixtures to ensure they align with your design vision and functional requirements.
8. Future-proofing considerations: As you update the plumbing and electrical systems, consider future needs. Install additional outlets and wiring to accommodate potential future appliances or technology upgrades. This will save you from having to make major changes later on.
Plumbing and electrical work require careful planning, adherence to regulations, and skilled professionals. By addressing these aspects during your kitchen renovation, you’ll ensure a safe and efficient workspace, providing the foundation for a functional and enjoyable kitchen for years to come.
Step 10: Installation of Cabinets and Countertops
Step 10 of your kitchen renovation involves the exciting phase of installing cabinets and countertops. This is where your new kitchen begins to take shape and reflect the design vision you’ve been working towards. Follow these guidelines to ensure a successful installation:
1. Confirm measurements: Before the installation begins, ensure that all measurements for cabinets and countertops are accurate and align with your plan. Double-check the dimensions of the space to avoid any issues during installation.
2. Choose professional installation: Cabinet and countertop installation should be done by experienced professionals who have the necessary skills and tools. Hiring professionals ensures a precise and efficient installation process.
3. Begin with cabinets: Start by installing the cabinets. Follow the layout plan and carefully mount each cabinet unit in its designated space. Use shims if necessary to ensure that the cabinets are level and plumb.
4. Secure cabinets properly: Cabinets should be securely attached to the wall, ensuring stability and safety. Use sturdy screws and brackets, following manufacturer guidelines and industry best practices.
5. Install countertops: Once the cabinets are in place, it’s time to install the countertops. Whether you’ve chosen quartz, granite, or another material, ensure that the countertops are cut and finished to fit precisely in the designated areas.
6. Seal and secure countertops: Properly seal the joints and edges of the countertops to prevent moisture infiltration and to provide a finished look. Follow manufacturer guidelines for the appropriate sealant and method of application.
7. Plumbing and electrical connections: Coordinate with professionals to ensure that necessary plumbing and electrical connections for sinks, faucets, and appliances are made before securing the countertops in their final position.
8. Test functionality: Before considering the installation complete, double-check that all cabinets and drawers open and close properly. Test the functionality of any built-in features, such as lazy Susans or pull-out shelves. Make sure all plumbing fixtures and appliances are functioning as intended.
9. Address any issues: If any issues or adjustments arise during the installation process, communicate them promptly with the installation team or contractor. Addressing these issues early on ensures that the final result meets your expectations.
10. Protect installed cabinets and countertops: Once the installation is complete, take steps to protect your newly installed cabinets and countertops. Use coasters, cutting boards, and heat-resistant pads to prevent damage from spills, scratches, and heat.
The installation of cabinets and countertops is a pivotal moment in your kitchen renovation. It brings the design elements together and provides the foundation for the overall look and functionality of your new kitchen. By entrusting this phase to professionals, you can ensure a high-quality installation and enjoy the transformative impact it has on your space.
Step 11: Flooring Installation
In step 11 of your kitchen renovation, it’s time to focus on the installation of the flooring. The choice of flooring material can greatly impact the overall aesthetic and functionality of your kitchen. Follow these guidelines to ensure a seamless installation process:
1. Choose the right flooring material: Select a flooring material that meets your design preferences, durability requirements, and maintenance needs. Common options for kitchen flooring include ceramic or porcelain tile, hardwood, vinyl, laminate, or natural stone.
2. Acclimate the flooring material: Prior to installation, allow the flooring material to acclimate to the room temperature and humidity levels. Follow the manufacturer’s guidelines for the recommended acclimation period to prevent issues like warping or buckling.
3. Prepare the subfloor: Ensure that the subfloor is clean, level, and free from any debris or damage. Repair or replace any damaged subfloor sections and ensure a smooth and even surface for the new flooring installation.
4. Begin with the layout plan: Consult your layout plan to determine the starting point for the flooring installation. This decision is crucial as it can impact the overall symmetry and aesthetics of the space. Consider natural focal points or transitions, such as the kitchen island or adjacent rooms.
5. Use the appropriate installation method: Different flooring materials require different installation methods. Follow the manufacturer’s instructions for the recommended installation technique, whether it’s adhesive, floating, or interlocking. Proper installation ensures the longevity and stability of the flooring.
6. Cut and fit the flooring: Measure and cut flooring pieces as needed to fit around cabinets, appliances, and other obstacles. Use precise cutting tools and techniques to ensure accurate and snug fits. Depending on the flooring material, consider hiring a professional installer for more complex cuts or intricate patterns.
7. Install transition pieces: Install transition strips or moldings between different flooring materials or areas, such as the kitchen and adjacent rooms. These pieces provide a smooth and finished transition while also protecting the edges of the flooring.
8. Leave expansion gaps: For certain flooring materials, such as hardwood or laminate, leave expansion gaps around the perimeter of the room to account for any natural expansion or contraction. Fill the gaps with appropriate molding or trim to provide a finished look while allowing for movement.
9. Follow proper maintenance and care instructions: Once the flooring is installed, follow the manufacturer’s recommendations for maintenance and care. This includes regular cleaning, proper use of cleaning products, and addressing any spills or stains promptly.
10. Protect the flooring during construction: During the remainder of your kitchen renovation, take measures to protect the newly installed flooring. Lay down protective coverings to prevent damage from tools, debris, or spills, especially if there is still work to be done in the space.
The installation of the flooring is a significant step that will provide the final touch to your kitchen renovation. By carefully selecting the right flooring material and ensuring a proper installation, you can create a stylish and durable foundation that enhances the overall beauty and functionality of your kitchen.
Step 12: Painting and Finishing Touches
In step 12 of your kitchen renovation, it’s time to add the final touches that will bring your vision to life. This includes painting the walls, adding finishing touches, and incorporating decorative elements. Follow these guidelines to ensure a polished and cohesive result:
1. Choose the right paint color: Select a paint color that complements your overall design aesthetic. Consider factors such as lighting, cabinetry, countertops, and flooring when making your decision. Opt for paint finishes that are durable and easy to clean in a kitchen environment.
2. Prepare the surfaces: Before painting, prepare the walls by cleaning them thoroughly and repairing any imperfections such as dents or cracks. Apply a primer to ensure proper paint adhesion and a smooth finish.
3. Protect surfaces: Cover cabinets, appliances, flooring, and any other surfaces that you want to keep paint-free with drop cloths or painter’s tape. This will prevent accidental spills or splatters.
4. Start with a base coat: Begin by applying a base coat of paint to the walls. Allow sufficient drying time and apply additional coats as needed for complete coverage and depth of color. Follow the manufacturer’s instructions on drying time between coats.
5. Consider accent walls: If you want to add visual interest or create a focal point in your kitchen, consider painting an accent wall. Choose a contrasting color or a patterned wallpaper to add depth and personality to the space.
6. Install trim and molding: Add finishing touches by installing trim or molding along the baseboards, ceilings, and around doors and windows. This provides a polished look and helps tie together the overall design elements in the kitchen.
7. Install cabinet hardware: Install cabinet hardware such as knobs or handles to enhance the functionality and style of your cabinets. Choose hardware that complements the overall design and provides ease of use.
8. Apply final coatings and finishes: Apply any final coatings or finishes to protect surfaces such as countertops, cabinet doors, or backsplashes. This may include sealants for natural stone surfaces or protective coatings for wood finishes.
9. Hang window treatments: Add window treatments such as blinds, curtains, or shades to provide privacy and control natural light. Choose treatments that coordinate with the overall design and allow for easy operation and maintenance.
10. Add decorative elements: Complete your kitchen renovation by adding decorative elements such as wall art, plants, or decorative accessories. These finishing touches personalize the space and add warmth and character.
Remember, the painting and finishing process requires attention to detail and patience. Take your time to ensure precise and even application. By adding the final touches, you’ll bring your kitchen renovation project to its full potential and create a space that reflects your personal style and taste.
Read more: How To Start A Food Pantry
Step 13: Final Inspection and Clean-Up
Congratulations! You’re nearing the end of your kitchen renovation journey. In step 13, it’s time to conduct a final inspection and complete the clean-up process. These final tasks are essential to ensure that your kitchen renovation is complete and meets your expectations:
1. Conduct a thorough inspection: Carefully inspect every aspect of your newly renovated kitchen. Check for any unfinished or incomplete work, ensure that all appliances and fixtures are functioning properly, and verify that everything is in accordance with your initial plan.
2. Test the functionality: Test all electrical outlets, switches, and lighting fixtures to ensure they are working correctly. Check plumbing fixtures such as sinks, faucets, and drains for any leaks or issues. Open and close cabinets and drawers to confirm smooth operation.
3. Inspect for any defects or damage: Look closely for any defects or damage that may have occurred during the renovation process. Address any issues with your contractor or renovator to have them rectified before considering the project complete.
4. Clean and remove debris: Remove any debris, dust, or construction materials that may have accumulated during the renovation. Thoroughly clean surfaces, including countertops, cabinets, appliances, and floors. Use appropriate cleaning products and techniques for each surface.
5. Organize and arrange: Take the time to organize and arrange items in your new kitchen. Set up your appliances, utensils, and cookware in their designated places. Consider storage solutions and organization systems to keep your kitchen clutter-free and functional.
6. Check for safety measures: Ensure that all safety measures are in place. Test smoke detectors, carbon monoxide detectors, and fire extinguishers to make sure they are functioning properly. Verify that all electrical wiring and connections are secure and up to code.
7. Enjoy your new kitchen: Take a moment to appreciate the transformation and enjoy your newly renovated kitchen. Celebrate your hard work and the result of your efforts.
8. Preserve warranties and documentation: Keep all warranties, manuals, and documentation related to your appliances, materials, and workmanship. This will come in handy for any future servicing requirements or warranty claims.
By conducting a final inspection and completing the necessary clean-up, you ensure that your kitchen renovation is fully finished and ready for use. It’s time to take pride in your newly transformed kitchen and start enjoying the benefits of a functional, beautiful space.
Conclusion
Congratulations on completing your kitchen renovation journey! You’ve put in the time, effort, and careful planning to transform your kitchen into a functional and beautiful space. Your new kitchen is not only a reflection of your personal style but also a place where you can create culinary masterpieces and gather with loved ones.
Throughout the renovation process, you’ve followed essential steps to ensure a successful outcome. From assessing your current kitchen and setting a budget to researching design inspiration and finding reliable contractors, you’ve made informed decisions every step of the way.
You’ve carefully considered the layout, chosen the right materials and appliances, and organized the plumbing and electrical work. You’ve installed cabinets and countertops, laid down beautiful flooring, and added the finishing touches that bring your vision to life. Finally, you’ve completed the final inspection and clean-up, ensuring that every detail is in place.
Undertaking a kitchen renovation is no small task, and you’ve shown dedication and determination in seeing it through to completion. The result is a kitchen that not only meets your practical needs but also enhances the overall value and enjoyment of your home.
As you settle into your new kitchen, take the time to appreciate the hard work and effort that went into creating this space. Enjoy the improved functionality, style, and efficiency that your renovated kitchen offers. Experiment with new recipes, host gatherings, and create memories with friends and family.
Remember to maintain your newly renovated kitchen by following any recommended maintenance guidelines for the materials, appliances, and finishes you’ve chosen. Regular cleaning and proper care will help keep your kitchen looking and functioning its best for years to come.
Thank you for joining us on this kitchen renovation journey. We hope that the steps and guidance provided in this article have been helpful to you. May your newly renovated kitchen bring you joy, inspiration, and countless moments of culinary delight!
Frequently Asked Questions about How To Start A Kitchen Renovation
Was this page helpful?
At Storables.com, we guarantee accurate and reliable information. Our content, validated by Expert Board Contributors, is crafted following stringent Editorial Policies. We're committed to providing you with well-researched, expert-backed insights for all your informational needs.











0 thoughts on “How To Start A Kitchen Renovation”