Home>Furniture & Design>Bathroom Accessories>How To Clean A Plastic Shower Curtain With Bleach
Bathroom Accessories
How To Clean A Plastic Shower Curtain With Bleach
Published: February 9, 2024
Learn how to effectively clean a plastic shower curtain with bleach to keep your bathroom accessories looking fresh and free from mold and mildew. Follow our simple steps for a sparkling clean bathroom.
(Many of the links in this article redirect to a specific reviewed product. Your purchase of these products through affiliate links helps to generate commission for Storables.com, at no extra cost. Learn more)
Introduction
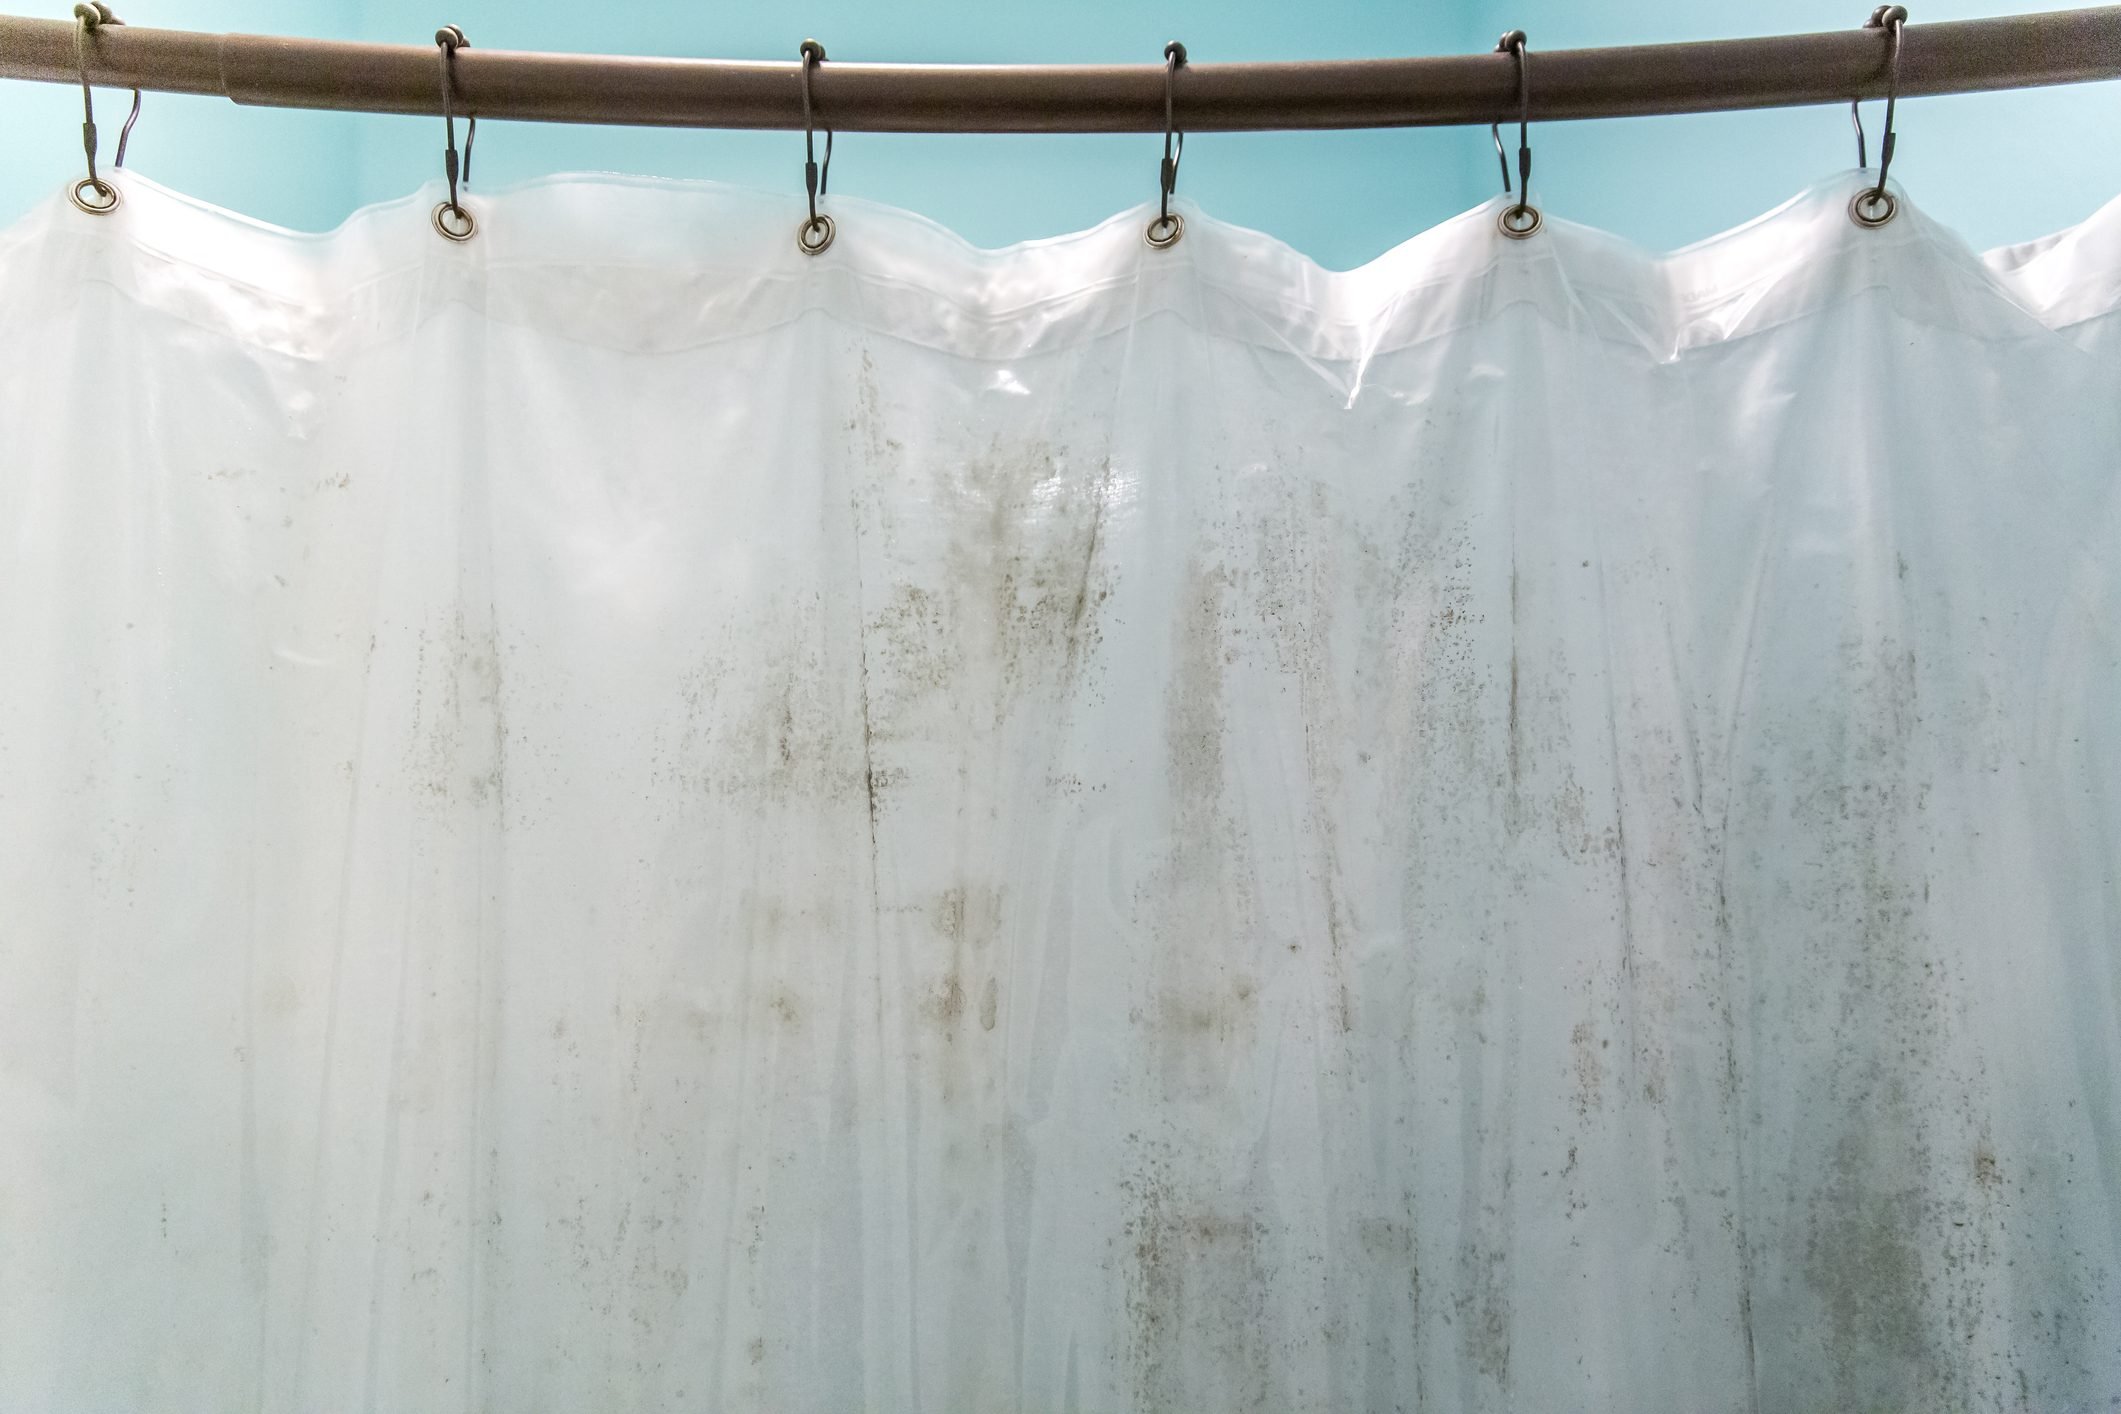
Cleaning a plastic shower curtain with bleach is an effective way to remove stubborn mold, mildew, and soap scum, restoring its pristine appearance and ensuring a hygienic bathing environment. Over time, plastic shower curtains can accumulate unsightly stains and odors, making regular cleaning essential for maintaining a fresh and inviting bathroom space. By following a few simple steps and using the right materials, you can easily revitalize your plastic shower curtain and prolong its lifespan.
In this comprehensive guide, we will walk you through the process of cleaning a plastic shower curtain with bleach, providing you with practical tips and insights to achieve optimal results. Whether you're dealing with mild discoloration or more stubborn buildup, this method can effectively eliminate grime and bacteria, leaving your shower curtain looking as good as new.
By taking the time to clean your plastic shower curtain regularly, you can not only enhance the aesthetic appeal of your bathroom but also promote a healthier living environment. With the power of bleach and a few basic supplies, you can tackle tough stains and ensure that your shower curtain remains a functional and visually pleasing element of your bathroom decor.
So, let's dive into the step-by-step process of rejuvenating your plastic shower curtain with the potent cleaning properties of bleach. With a little effort and the right approach, you can enjoy a sparkling clean shower curtain that contributes to a more enjoyable and hygienic bathing experience.
Key Takeaways:
- Revitalize your plastic shower curtain by soaking it in a bleach solution to eliminate mold, mildew, and stains. Scrub and rinse thoroughly, then dry it for a fresh and hygienic bathroom experience.
- Regularly cleaning your plastic shower curtain with bleach not only maintains its visual appeal but also promotes a healthier living environment by eliminating bacteria and mold spores.
Read more: How To Clean Your Plastic Shower Curtain
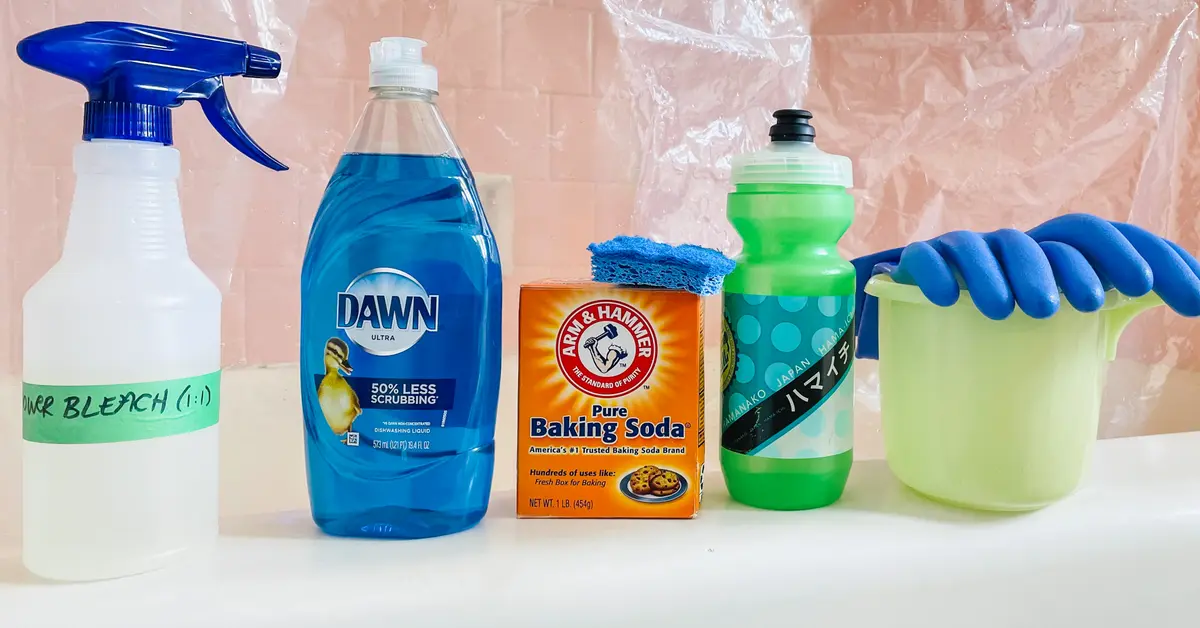
Materials Needed
Before embarking on the task of cleaning your plastic shower curtain with bleach, it's essential to gather the necessary materials to ensure a smooth and effective cleaning process. Here's a list of items you'll need:
-
Plastic Shower Curtain: The focal point of the cleaning process, the plastic shower curtain should be removed from the shower area and prepared for thorough cleaning.
-
Bleach: A powerful disinfectant and stain remover, bleach is a key component in restoring the cleanliness and freshness of your plastic shower curtain. Opt for regular household bleach, ensuring that it is suitable for the cleaning task at hand.
-
Rubber Gloves: To protect your hands from the potentially harsh effects of bleach, it's important to wear rubber gloves throughout the cleaning process. This simple precaution helps safeguard your skin while handling cleaning solutions.
-
Large Container or Bathtub: You'll need a spacious container or bathtub to accommodate the soaking process. Ensure that the chosen container is large enough to fully submerge the shower curtain, allowing the bleach solution to work its magic.
-
Water: Clean, lukewarm water will be used to dilute the bleach and create the cleaning solution. Having a readily available water source is crucial for preparing the solution and rinsing the curtain effectively.
-
Soft-Bristled Brush or Sponge: A gentle brush or sponge is essential for scrubbing the shower curtain and targeting stubborn stains. Opt for a tool with soft bristles to avoid damaging the plastic material while effectively removing grime and buildup.
-
Mild Detergent (Optional): In some cases, using a mild detergent in conjunction with bleach can enhance the cleaning process, especially for combating soap scum and residual grime. While optional, a mild detergent can provide an extra cleaning boost.
-
Ventilation: Adequate ventilation is crucial during the cleaning process, as bleach emits strong fumes that can be overwhelming. Ensure that the bathroom area is well-ventilated to minimize exposure to bleach fumes and promote a comfortable cleaning environment.
By gathering these essential materials, you'll be well-prepared to tackle the task of cleaning your plastic shower curtain with bleach. With the right supplies at your disposal, you can proceed confidently through each step of the cleaning process, revitalizing your shower curtain and maintaining a clean, inviting bathroom space.
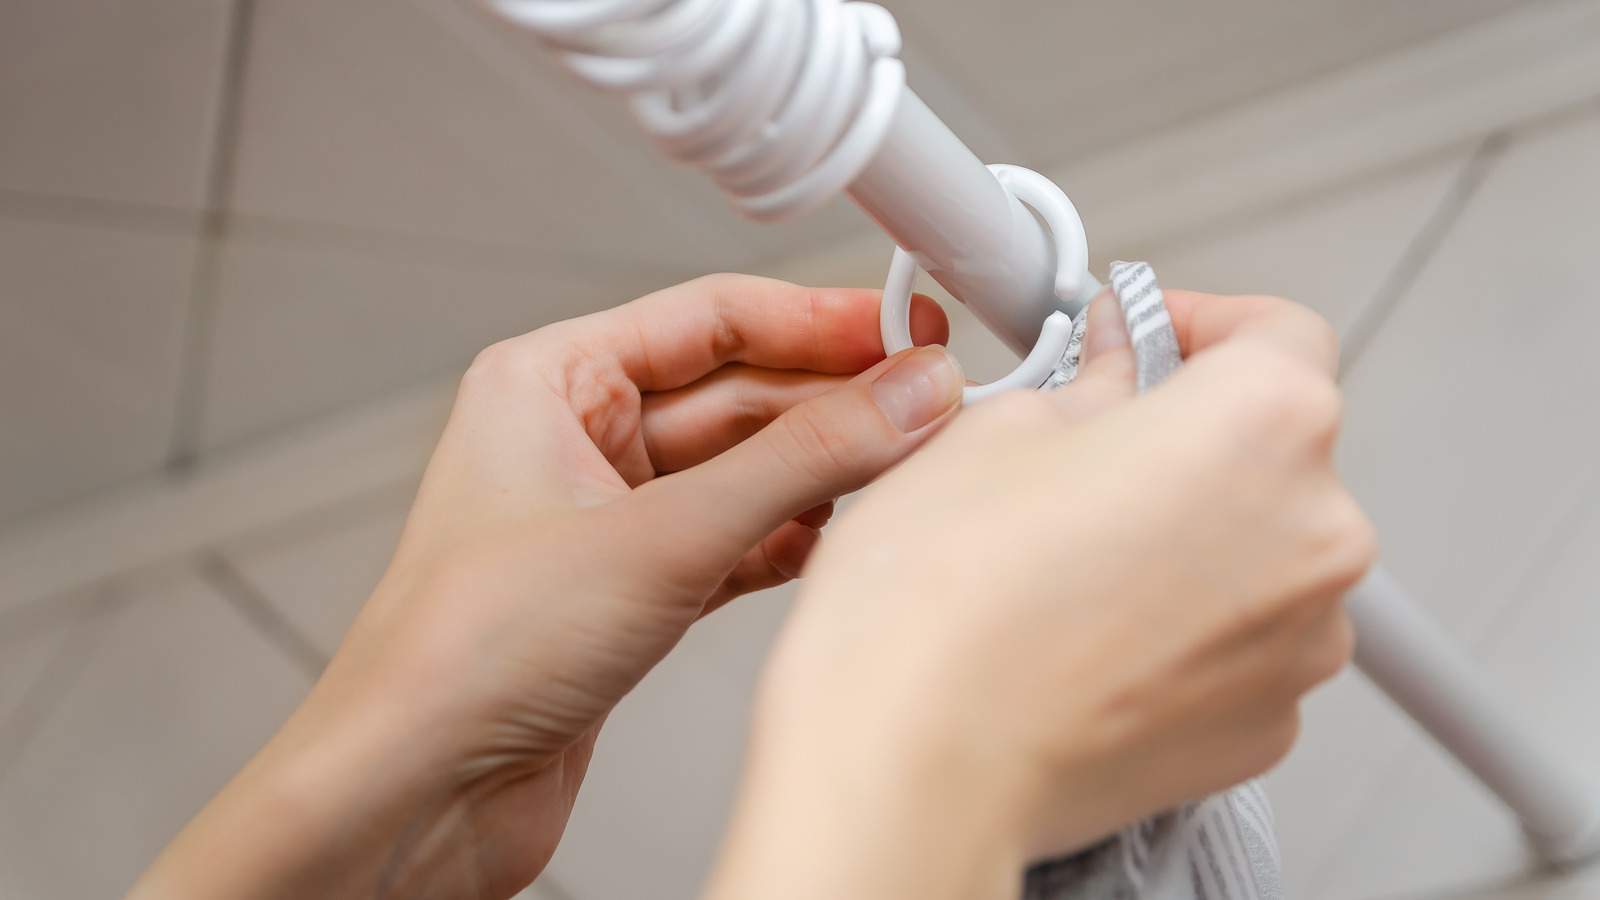
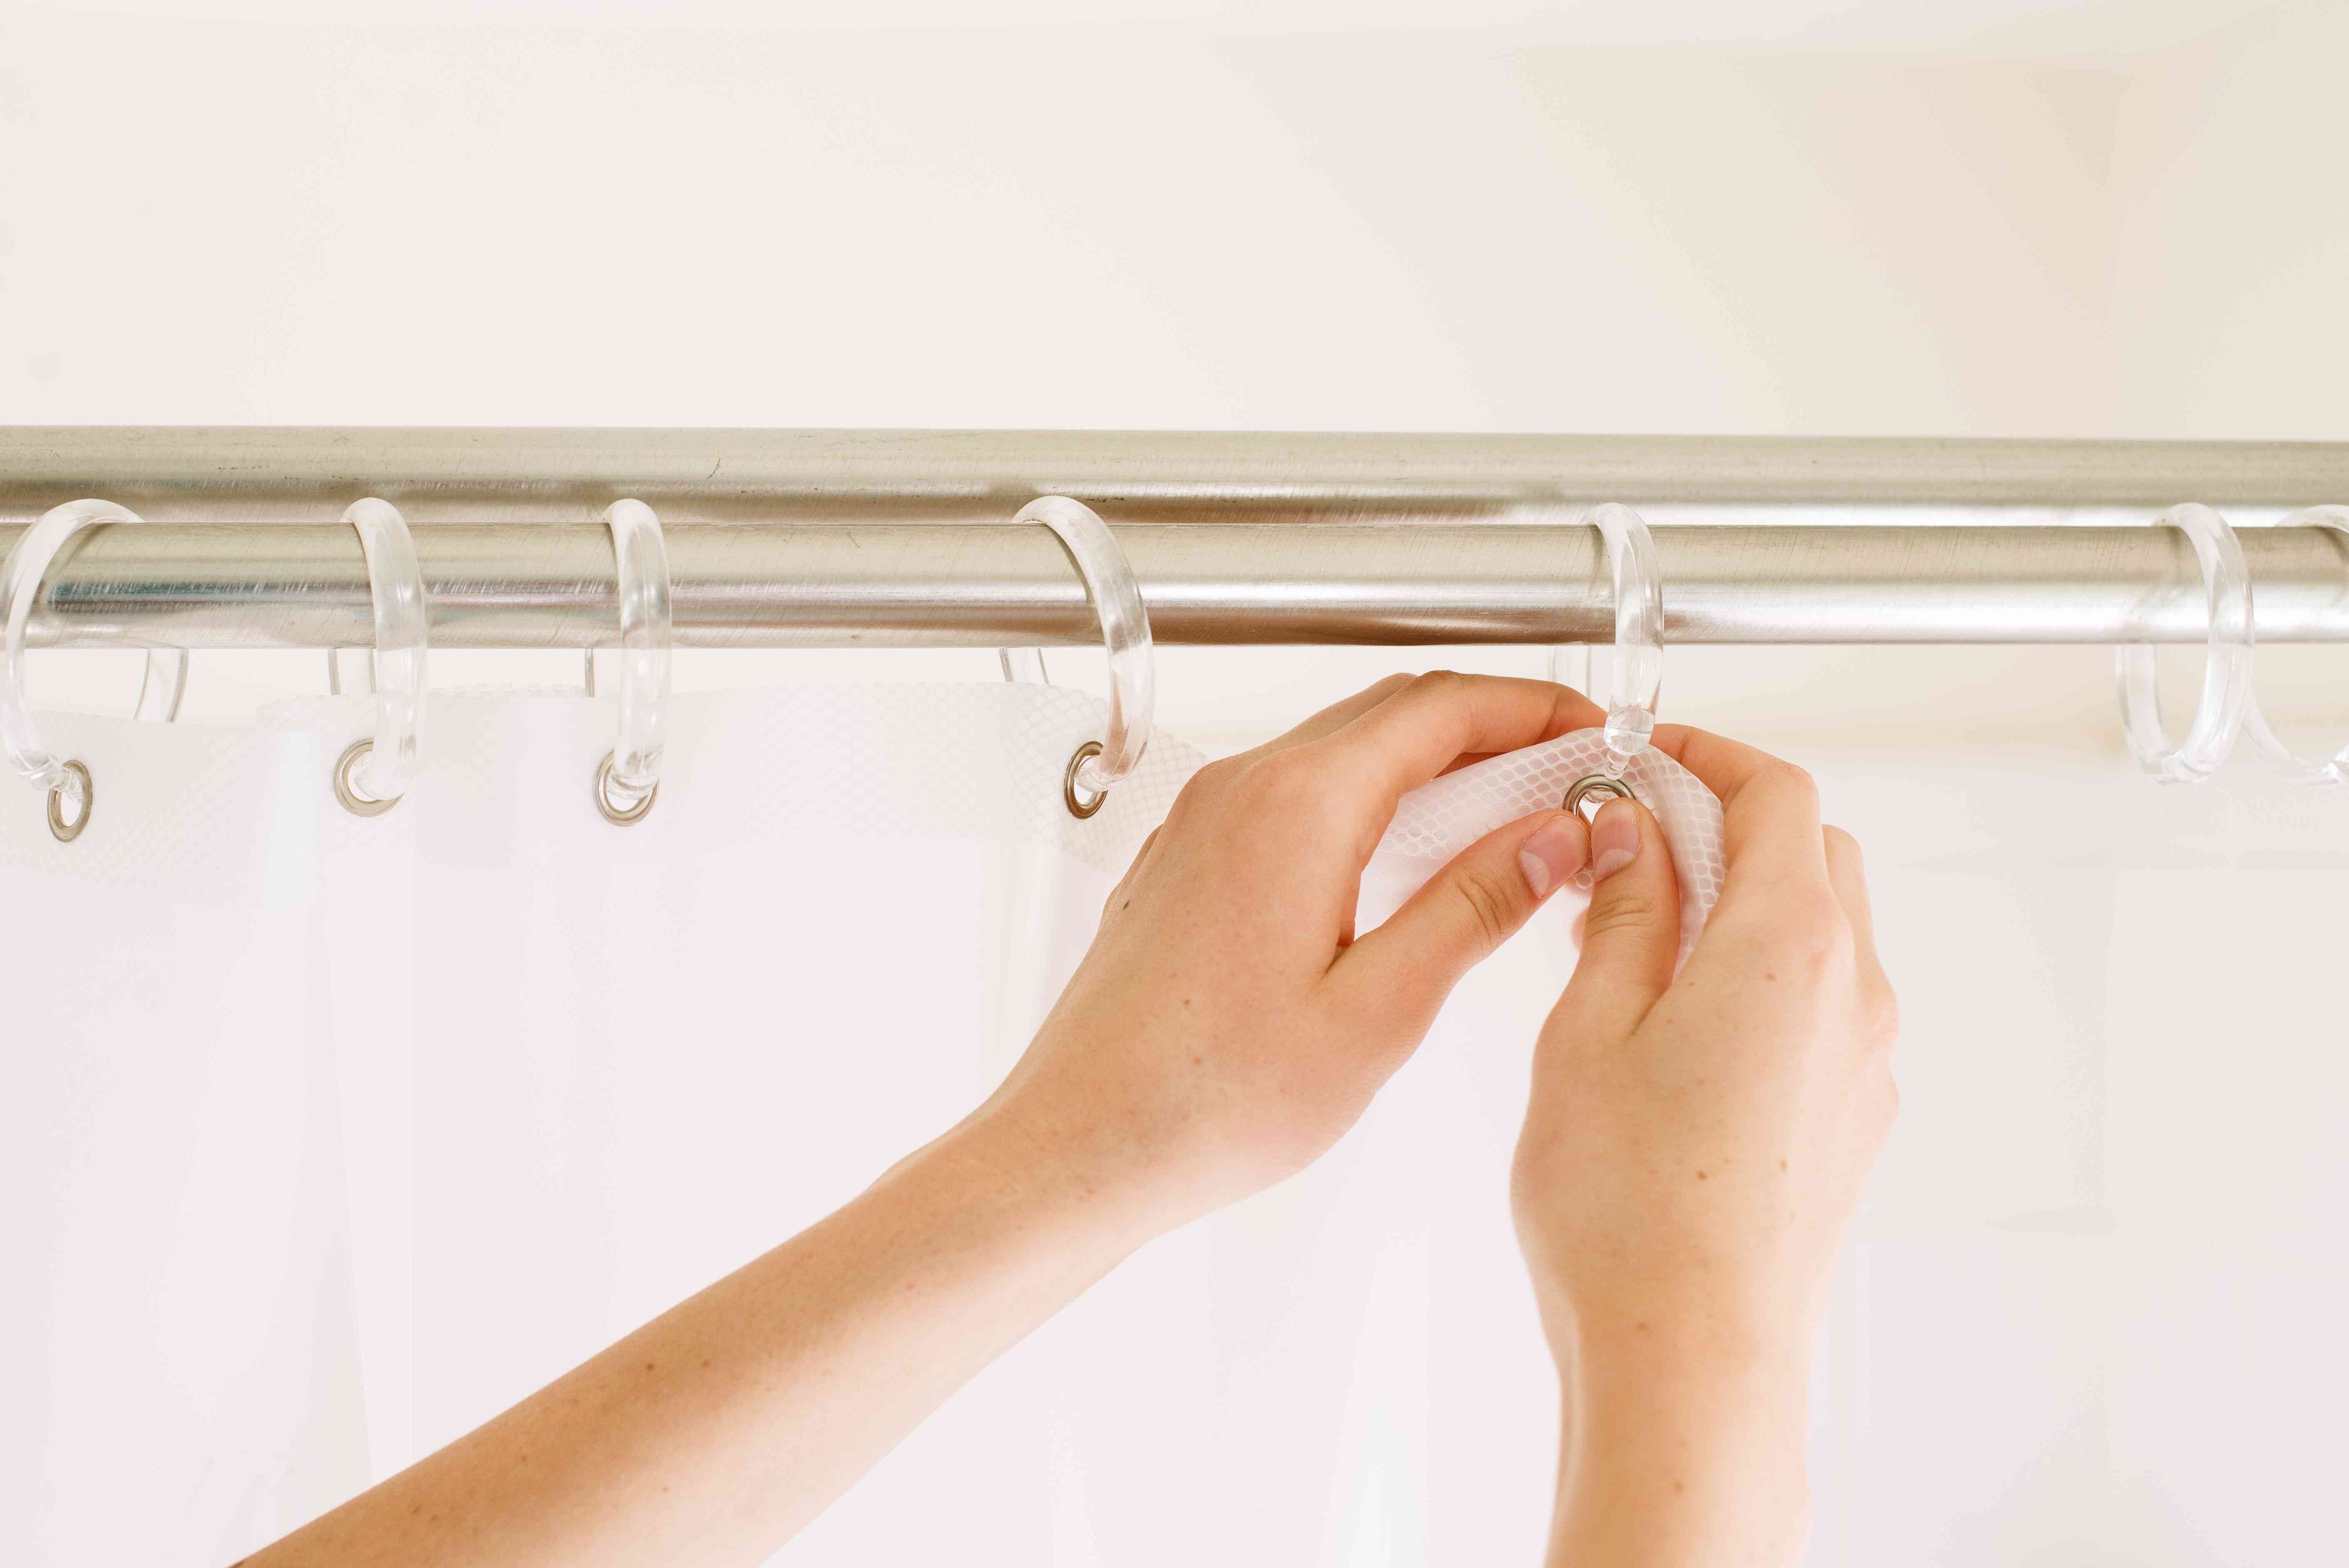
Step 1: Remove the Shower Curtain
To initiate the cleaning process, the first step involves carefully removing the plastic shower curtain from its hanging position. Start by unhooking the curtain rings or sliding it off the rod, ensuring a gentle and deliberate approach to prevent any damage to the curtain or the surrounding fixtures. If the curtain is accompanied by a liner, it's advisable to remove both components for thorough cleaning.
Once the curtain is detached, lay it flat on a clean surface to assess the extent of staining and buildup. This step allows for a closer inspection of any visible discoloration, mold, or mildew, providing valuable insight into the cleaning requirements. By removing the curtain from its usual position, you gain better access to all areas, facilitating a more comprehensive cleaning process.
During this stage, it's important to take note of any specific areas that require extra attention, such as localized mold patches or stubborn soap scum accumulation. By identifying these trouble spots early on, you can tailor your cleaning approach to address them effectively, ensuring that the entire curtain receives the necessary care and attention.
By taking the time to remove the shower curtain with care and conducting a thorough assessment of its condition, you set the stage for a successful cleaning endeavor. This proactive approach allows you to prepare for the subsequent cleaning steps, ensuring that the curtain is ready to undergo the rejuvenating effects of the bleach solution and targeted scrubbing.
With the shower curtain removed and its cleaning needs assessed, you're now poised to move on to the next step in the process, preparing the bleach solution to tackle the accumulated grime and restore the curtain's pristine appearance.
Step 2: Prepare the Bleach Solution
With the plastic shower curtain removed and its cleaning requirements identified, the next crucial step involves preparing the potent bleach solution to effectively combat stains, mold, and bacteria. The bleach solution serves as a powerful cleaning agent, capable of revitalizing the appearance of the shower curtain and eliminating stubborn buildup.
To create the bleach solution, begin by selecting a suitable container or bathtub large enough to accommodate the entire shower curtain. Ensure that the chosen vessel is clean and free of any residues that could potentially affect the effectiveness of the bleach solution. Once the container is ready, proceed to fill it with lukewarm water, leaving ample space to submerge the curtain without overflow.
Next, carefully measure the appropriate amount of bleach to be added to the water. It's essential to refer to the bleach manufacturer's guidelines for dilution ratios, as these may vary depending on the concentration of the bleach and the specific cleaning requirements. Typically, a recommended ratio of bleach to water is one cup of bleach per gallon of water, providing a potent yet safe cleaning solution.
When adding the bleach to the water, exercise caution and wear rubber gloves to protect your skin from direct contact with the undiluted bleach. Slowly pour the measured amount of bleach into the water, ensuring a thorough and even distribution within the container. Use a gentle stirring motion to mix the bleach and water, creating a well-blended solution that is ready to tackle the accumulated grime on the shower curtain.
As you prepare the bleach solution, it's important to work in a well-ventilated area to minimize exposure to bleach fumes. Open windows and turn on any available ventilation to promote air circulation and create a more comfortable environment for the cleaning process.
By taking the time to prepare the bleach solution with precision and care, you ensure that the cleaning process begins with a potent and effective cleaning agent. With the bleach solution ready for use, you're now prepared to move on to the next step: soaking the shower curtain to allow the powerful cleaning properties of bleach to work their magic.
Mix 1/2 cup of bleach with 1 gallon of water. Soak the plastic shower curtain in the solution for 10 minutes, then scrub with a brush. Rinse thoroughly and hang to dry.
Step 3: Soak the Curtain
With the potent bleach solution prepared and the shower curtain removed from its hanging position, it's time to immerse the curtain in the cleansing solution for an intensive soaking session. This crucial step allows the powerful cleaning properties of bleach to penetrate the fabric, effectively targeting and loosening stubborn stains, mold, and mildew.
Carefully lower the plastic shower curtain into the prepared bleach solution, ensuring that it is fully submerged and evenly exposed to the potent cleaning agent. Gently agitate the curtain within the solution to promote thorough saturation, allowing the bleach to reach all areas and work its magic on the accumulated grime.
The soaking duration may vary depending on the severity of the staining and buildup. For mild discoloration and general maintenance, a soaking period of 15 to 30 minutes may suffice. However, for more stubborn stains and extensive mold or mildew growth, a longer soaking time of up to an hour can be beneficial.
Throughout the soaking process, it's important to periodically check the curtain's progress, assessing the effectiveness of the bleach solution in lifting the stains and discoloration. This visual inspection provides valuable feedback on the cleaning process, guiding the subsequent steps for optimal results.
As the curtain undergoes the rejuvenating effects of the bleach solution, the potent disinfectant properties of bleach work to eliminate bacteria and mold spores, contributing to a hygienic and odor-free shower curtain. This thorough disinfection ensures that the curtain not only looks clean but also maintains a sanitary environment within the bathroom space.
By allowing the shower curtain to soak in the potent bleach solution, you harness the full cleaning potential of bleach, effectively targeting and eliminating the accumulated grime and microbial growth. This proactive approach sets the stage for the subsequent scrubbing and rinsing steps, ensuring that the curtain receives comprehensive cleaning and restoration.
With the curtain fully immersed in the potent bleach solution, you're now ready to proceed to the next step: scrubbing and rinsing the curtain to further enhance its cleanliness and visual appeal.
Step 4: Scrub and Rinse
After the soaking process, the next critical step in rejuvenating your plastic shower curtain involves thorough scrubbing and rinsing to remove loosened grime, mold, and mildew. This step is essential for ensuring that the curtain is completely cleansed of all residual buildup, leaving it fresh, sanitized, and visually appealing.
To begin the scrubbing process, carefully lift the shower curtain from the bleach solution, allowing any excess solution to drip back into the container or bathtub. With the curtain in an accessible position, equip yourself with a soft-bristled brush or sponge, ideally one specifically designated for cleaning purposes. The gentle bristles of the brush or sponge are crucial for effectively removing stains and buildup without causing damage to the plastic material.
Starting from the top of the curtain, begin scrubbing in a systematic manner, working your way down to cover the entire surface area. Focus on areas with visible staining, mold, or mildew, applying gentle yet firm pressure to lift and dislodge the loosened grime. For particularly stubborn spots, such as mold patches or soap scum accumulation, concentrate your efforts to ensure thorough cleansing.
As you scrub the curtain, periodically rinse the brush or sponge to remove dislodged grime, preventing recontamination of cleaned areas. This practice ensures that the cleaning tool remains effective throughout the process, allowing you to maintain consistent cleaning momentum.
Once the entire curtain has been scrubbed, it's time to proceed with the rinsing phase. Transfer the curtain to a clean, open area, such as a spacious bathtub or outdoor space, where you can thoroughly rinse it with clean, lukewarm water. The rinsing process is crucial for removing any residual bleach solution, as well as dislodged grime, ensuring that the curtain is left free of cleaning agents and thoroughly cleansed.
Using a handheld showerhead or a bucket of water, gently rinse the curtain, starting from the top and working your way down. Ensure that all traces of the bleach solution are thoroughly washed away, and the curtain is left smelling fresh and clean. As you rinse, periodically inspect the curtain to confirm that all visible grime and residue have been effectively removed.
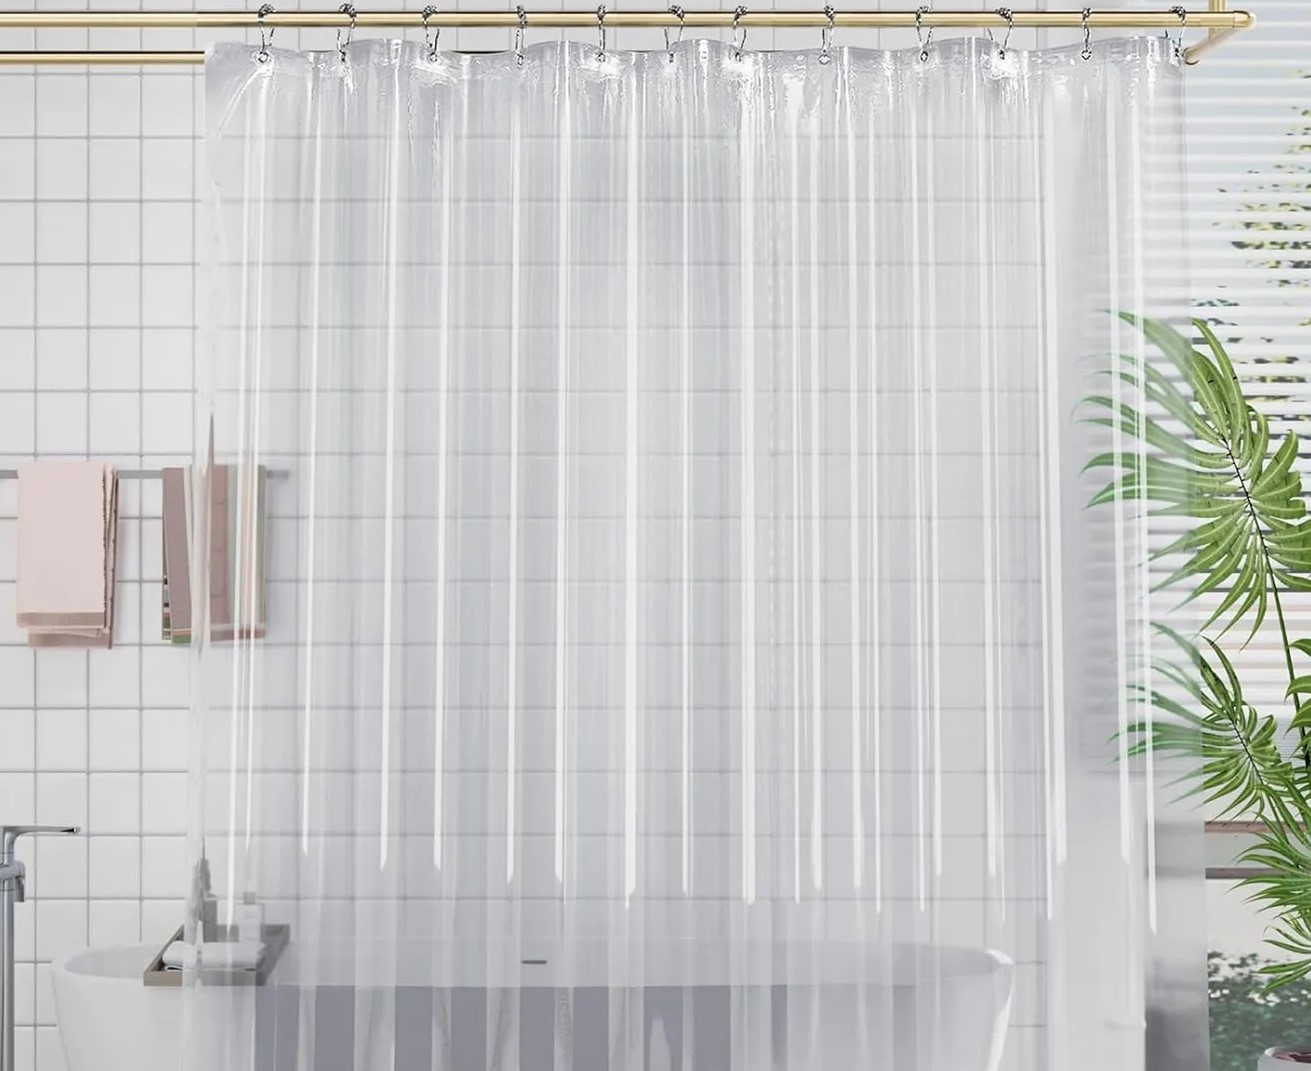
By diligently scrubbing and rinsing the shower curtain, you ensure that it undergoes a comprehensive cleansing process, effectively removing all traces of accumulated grime, mold, and mildew. This proactive approach sets the stage for the final step: drying the curtain to complete the rejuvenation process.
With the scrubbing and rinsing phase successfully completed, your plastic shower curtain is now ready for the final step: drying. This critical step ensures that the curtain is thoroughly dried and ready for reinstallation, allowing you to enjoy a revitalized and hygienic bathroom space.
Step 5: Dry the Curtain
After the thorough scrubbing and rinsing process, the final step in rejuvenating your plastic shower curtain involves ensuring that it is thoroughly dried before reinstallation. Proper drying not only completes the cleaning process but also helps prevent the development of mold and mildew in the future, maintaining the curtain's cleanliness and prolonging its lifespan.
To begin the drying process, carefully shake the shower curtain to remove excess water, facilitating a more efficient drying experience. If the weather permits, consider taking the curtain outdoors to hang and air dry in direct sunlight. Sunlight not only aids in drying the curtain quickly but also provides natural disinfection, further enhancing the cleanliness of the curtain.
If outdoor drying is not feasible, you can hang the curtain on a sturdy shower rod or clothesline within the bathroom. Ensure that the curtain is evenly spread out to promote efficient air circulation and thorough drying. It's important to leave adequate space between folds or pleats to prevent moisture retention, allowing the curtain to dry completely.
Throughout the drying process, periodically check the curtain's progress, gently patting it with a clean, dry towel to absorb any lingering moisture. This simple step can expedite the drying process and ensure that the curtain is left completely dry and ready for reinstallation.
As the curtain dries, take the opportunity to inspect it for any remaining stains or discoloration. If any stubborn spots persist, consider spot-treating them with a mild detergent or a diluted bleach solution, followed by targeted scrubbing and rinsing. This proactive approach ensures that the curtain receives the necessary attention to achieve optimal cleanliness.
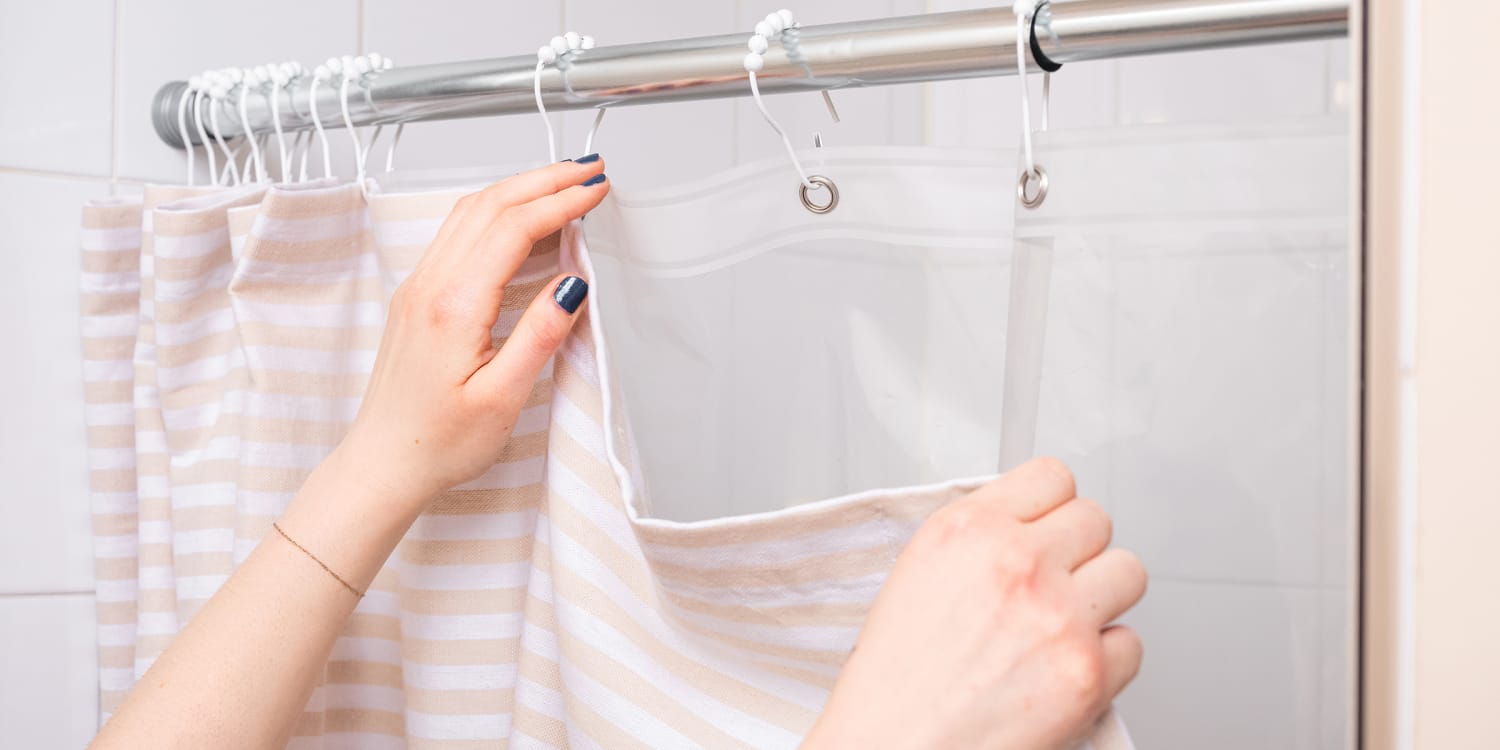
Once the curtain is thoroughly dried and free of moisture, it's ready to be reinstalled in the shower area. Carefully reattach the curtain rings or slide it back onto the rod, ensuring a secure and even placement. By returning the freshly cleaned curtain to its designated position, you can admire the results of your diligent cleaning efforts and enjoy a revitalized bathroom space.
By completing the drying process with precision and care, you ensure that your plastic shower curtain is thoroughly cleansed, sanitized, and ready to fulfill its role in maintaining a clean and inviting bathroom environment. With the curtain dried and reinstalled, you can take pride in knowing that your cleaning efforts have contributed to a hygienic and visually appealing bathing space.
Conclusion
In conclusion, cleaning a plastic shower curtain with bleach is a highly effective method for rejuvenating its appearance and ensuring a hygienic bathing environment. By following the step-by-step process outlined in this comprehensive guide, you can successfully tackle stubborn stains, mold, and mildew, restoring the curtain to its pristine condition.
The journey of cleaning a plastic shower curtain with bleach begins with the careful removal of the curtain from its hanging position, allowing for a thorough assessment of its cleaning requirements. The preparation of the potent bleach solution is a critical step, ensuring that the cleaning process starts with a powerful and effective cleaning agent. Subsequent steps, including soaking the curtain, thorough scrubbing, and meticulous rinsing, work in harmony to eliminate grime and microbial growth, leaving the curtain fresh and sanitized.
The final step of drying the curtain completes the rejuvenation process, ensuring that it is thoroughly dried and ready for reinstallation. Whether air-drying in sunlight or indoors, the drying process plays a crucial role in maintaining the curtain's cleanliness and preventing future mold and mildew development.
By investing time and effort into cleaning your plastic shower curtain with bleach, you not only enhance the aesthetic appeal of your bathroom but also contribute to a healthier living environment. The potent disinfectant properties of bleach effectively eliminate bacteria and mold spores, promoting a hygienic bathing space for you and your family.
Regular maintenance and cleaning of your plastic shower curtain with bleach can prolong its lifespan and preserve its visual appeal, allowing you to enjoy a fresh and inviting bathroom space. By incorporating this cleaning routine into your household maintenance, you can ensure that your shower curtain remains a functional and visually pleasing element of your bathroom decor.
In essence, the process of cleaning a plastic shower curtain with bleach empowers you to take proactive steps in maintaining a clean and hygienic bathroom environment. With the right approach and the potent cleaning properties of bleach, you can revitalize your shower curtain and elevate the overall cleanliness and appeal of your bathroom space.
Frequently Asked Questions about How To Clean A Plastic Shower Curtain With Bleach
Was this page helpful?
At Storables.com, we guarantee accurate and reliable information. Our content, validated by Expert Board Contributors, is crafted following stringent Editorial Policies. We're committed to providing you with well-researched, expert-backed insights for all your informational needs.


0 thoughts on “How To Clean A Plastic Shower Curtain With Bleach”