Home>Furniture & Design>Bathroom Accessories>How To Clean An Exhaust Fan In The Bathroom
Bathroom Accessories
How To Clean An Exhaust Fan In The Bathroom
Modified: February 18, 2024
Learn how to effectively clean your bathroom exhaust fan with our step-by-step guide. Keep your bathroom accessories in top condition with these expert tips.
(Many of the links in this article redirect to a specific reviewed product. Your purchase of these products through affiliate links helps to generate commission for Storables.com, at no extra cost. Learn more)
Introduction
Cleaning an exhaust fan in the bathroom is an essential yet often overlooked task in home maintenance. Over time, dust, dirt, and moisture can accumulate in the fan, leading to reduced efficiency and potential malfunctions. A clean exhaust fan not only improves air quality but also helps prevent mold and mildew growth in the bathroom. By following a few simple steps, you can ensure that your bathroom exhaust fan operates at its best, promoting a healthier and more comfortable environment in your home.
Regular cleaning of the exhaust fan also contributes to energy efficiency, as a clean fan requires less power to operate, ultimately reducing electricity consumption. Additionally, a clean fan is less likely to experience mechanical issues, prolonging its lifespan and saving you from costly repairs or replacements in the long run.
In this comprehensive guide, we will walk you through the step-by-step process of cleaning your bathroom exhaust fan. From gathering the necessary supplies to safely disassembling and cleaning the fan components, we will cover everything you need to know to maintain a clean and functional exhaust fan. Whether you are a seasoned DIY enthusiast or a novice homeowner, this guide will equip you with the knowledge and confidence to tackle this essential maintenance task with ease.
So, let's roll up our sleeves and dive into the process of cleaning your bathroom exhaust fan, ensuring that it operates efficiently and effectively for years to come.
Key Takeaways:
- Regularly cleaning your bathroom exhaust fan improves air quality, prevents mold growth, and saves energy, promoting a healthier and more comfortable home environment.
- By following a step-by-step cleaning process, you can ensure your bathroom exhaust fan operates efficiently, extends its lifespan, and contributes to a cleaner and more pleasant bathroom experience.
Read more: How To Fix Bathroom Exhaust Fan
Step 1: Gather the necessary supplies
Before embarking on the task of cleaning your bathroom exhaust fan, it's crucial to gather the necessary supplies to ensure a smooth and efficient cleaning process. Here's a list of essential items you'll need:
-
Screwdriver: A screwdriver, typically a Phillips head or flat head, will be required to remove the screws holding the fan cover in place. Ensure that the screwdriver is the appropriate size for the screws to avoid damaging them during removal.
-
Cleaning Brush or Vacuum: A small cleaning brush with soft bristles or a handheld vacuum with a brush attachment will be useful for removing dust and debris from the fan cover, blades, and housing. These tools will help you effectively dislodge and collect accumulated dirt without dispersing it into the air.
-
Mild Detergent or Cleaning Solution: Prepare a solution of mild detergent or a suitable cleaning solution diluted in water. This solution will be used to clean the fan cover, blades, and housing, effectively removing grime, grease, and other residues that may have accumulated over time.
-
Microfiber Cloth or Soft Towel: A microfiber cloth or a soft, lint-free towel will come in handy for wiping down the fan cover, blades, and housing after cleaning. These materials are gentle on the surfaces and help to achieve a streak-free finish.
-
Ladder or Step Stool: Depending on the height of your bathroom ceiling, you may need a stable ladder or step stool to safely reach the exhaust fan. Ensure that the ladder or step stool is in good condition and positioned securely to prevent accidents during the cleaning process.
-
Safety Glasses and Mask: It's important to prioritize safety when cleaning the exhaust fan. Wear safety glasses to protect your eyes from dust and debris, and consider wearing a mask to prevent inhalation of airborne particles during the cleaning process.
By gathering these supplies before you begin, you'll be well-prepared to tackle the task of cleaning your bathroom exhaust fan effectively and safely. With the right tools at your disposal, you can proceed to the next steps with confidence, knowing that you have everything you need to maintain a clean and efficient exhaust fan in your bathroom.
Step 2: Turn off the power
Before you begin the process of cleaning your bathroom exhaust fan, it is crucial to prioritize safety by turning off the power supply to the fan. This step is essential to prevent the risk of electric shock and ensure a safe working environment during the cleaning process.
To turn off the power to the exhaust fan, locate the circuit breaker or fuse box in your home. Depending on the electrical setup, the bathroom exhaust fan may have its own dedicated circuit or may be connected to a broader circuit that powers multiple fixtures in the bathroom. Identify the corresponding circuit breaker or fuse that controls the power supply to the exhaust fan.
Once you have located the correct circuit breaker or fuse, switch it to the "off" position to cut off the electricity supply to the fan. It is advisable to use a non-contact voltage tester to verify that the power has been successfully disconnected. This simple yet crucial step ensures that the fan is completely de-energized, minimizing the risk of electrical accidents while you proceed with the cleaning process.
After turning off the power, it is recommended to place a prominent note or a lockout tag at the circuit breaker or fuse box to alert other household members or maintenance personnel about the ongoing maintenance work. This precautionary measure helps prevent accidental restoration of power to the exhaust fan while it is being cleaned, reinforcing the importance of safety during the maintenance activity.
By diligently turning off the power supply and taking additional precautions to communicate the maintenance work to others in the household, you create a secure environment for cleaning the bathroom exhaust fan. With the power safely disconnected, you can proceed to the next steps with confidence, knowing that you have mitigated the risk of electrical hazards and prioritized safety throughout the cleaning process.
Step 3: Remove the cover
Removing the cover of your bathroom exhaust fan is the next crucial step in the cleaning process. The cover is typically held in place by screws or latches, and accessing it allows you to reach the fan blades and housing for thorough cleaning. Here's a detailed guide on how to safely remove the cover of your exhaust fan:
-
Locate the Screws or Latches: Inspect the perimeter of the fan cover to identify the screws or latches securing it in place. In most cases, you will find screws at each corner of the cover, although some models may feature a latch mechanism for easy removal.
-
Use the Appropriate Tool: If the cover is secured with screws, use a suitable screwdriver, typically a Phillips head, to carefully loosen and remove the screws. Ensure that the screwdriver fits snugly into the screw heads to avoid slippage and potential damage to the screws.
-
Handle Latch Mechanisms: For covers equipped with latches, gently press or release the latches to disengage them from the housing. Take care not to apply excessive force, as this may cause damage to the cover or the fan assembly.
-
Support the Cover: As you remove the final screws or release the latches, be prepared to support the cover to prevent it from falling. Depending on the design, the cover may remain attached by a hinge or may detach completely once the securing elements are disengaged.
-
Set the Cover Aside: Once the cover is detached, place it in a safe and stable location, away from the cleaning area. This ensures that the cover remains undamaged and ready for cleaning before reassembly.
By following these steps, you can safely and effectively remove the cover of your bathroom exhaust fan, granting access to the internal components for thorough cleaning. With the cover removed, you are ready to proceed to the next steps, addressing the fan blades, housing, and other components to ensure a comprehensive cleaning of your exhaust fan.
Step 4: Clean the cover
Once the cover of your bathroom exhaust fan is removed, it's time to focus on cleaning this essential component. Over time, the cover can accumulate dust, grime, and moisture, impacting both its appearance and functionality. By following these steps, you can effectively clean the cover of your exhaust fan, restoring its cleanliness and ensuring optimal performance:
-
Inspect the Cover: Before cleaning, take a close look at the cover to assess the extent of dirt and debris accumulation. Pay attention to corners, edges, and any intricate patterns or designs on the cover's surface. This visual inspection will guide your cleaning approach and help you target areas that require special attention.
-
Dust and Debris Removal: Use a soft-bristled brush or a handheld vacuum with a brush attachment to gently remove loose dust and debris from the cover. Work methodically across the surface, focusing on crevices and grooves where dirt may be trapped. This initial step helps prepare the cover for more thorough cleaning and prevents loose particles from scattering during the process.
-
Cleaning Solution Preparation: Prepare a mild cleaning solution by diluting a small amount of gentle detergent or a suitable cleaning solution in a bowl of water. Ensure that the solution is well-mixed and free from any abrasive or harsh chemicals that may damage the cover's finish.
-
Wipe Down the Cover: Dip a soft microfiber cloth or a lint-free towel into the cleaning solution, wringing out any excess liquid. Gently wipe the cover's surface, applying light pressure to remove stubborn grime and stains. Pay attention to areas with visible buildup, and continue wiping until the cover appears clean and refreshed.
-
Rinse and Dry: After cleaning, rinse the cover with clean water to remove any residual cleaning solution. Use a separate, dry microfiber cloth or towel to pat the cover dry, ensuring that no moisture remains on the surface. This step helps prevent water spots and streaks, leaving the cover looking pristine.
-
Air Drying: Allow the cover to air dry completely before reinstallation. Placing the cover in a well-ventilated area ensures that it dries evenly and thoroughly, ready to be reattached to the exhaust fan housing.
By following these steps, you can effectively clean the cover of your bathroom exhaust fan, removing accumulated dirt and grime to restore its appearance and functionality. Once the cover is clean and dry, you can proceed to address the fan blades, housing, and other components, ensuring a comprehensive cleaning of your exhaust fan.
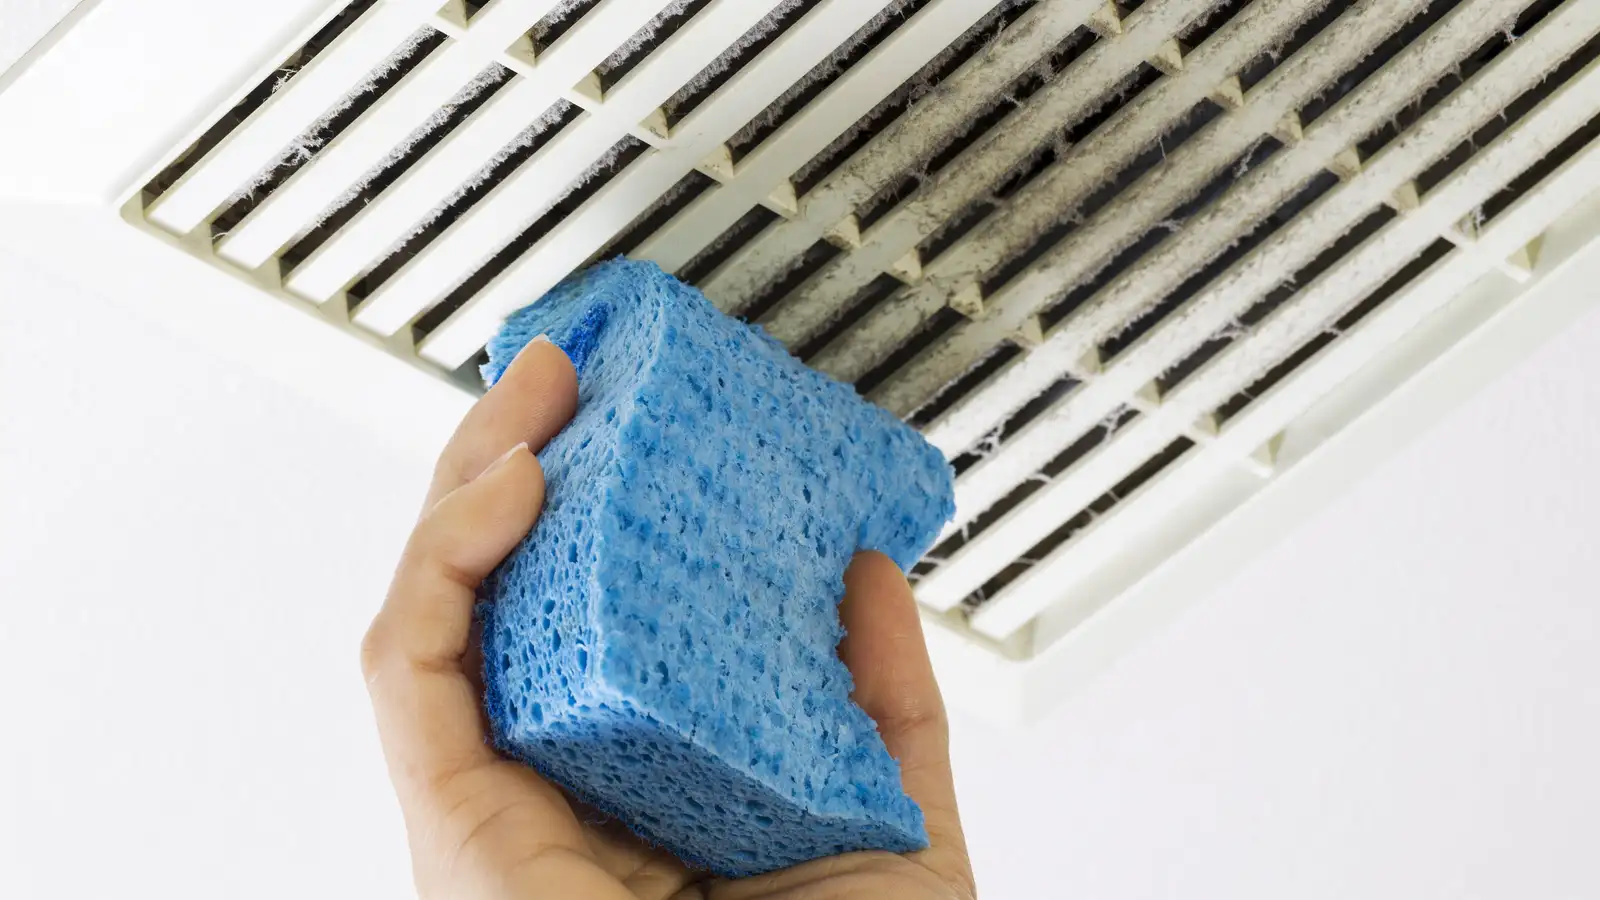
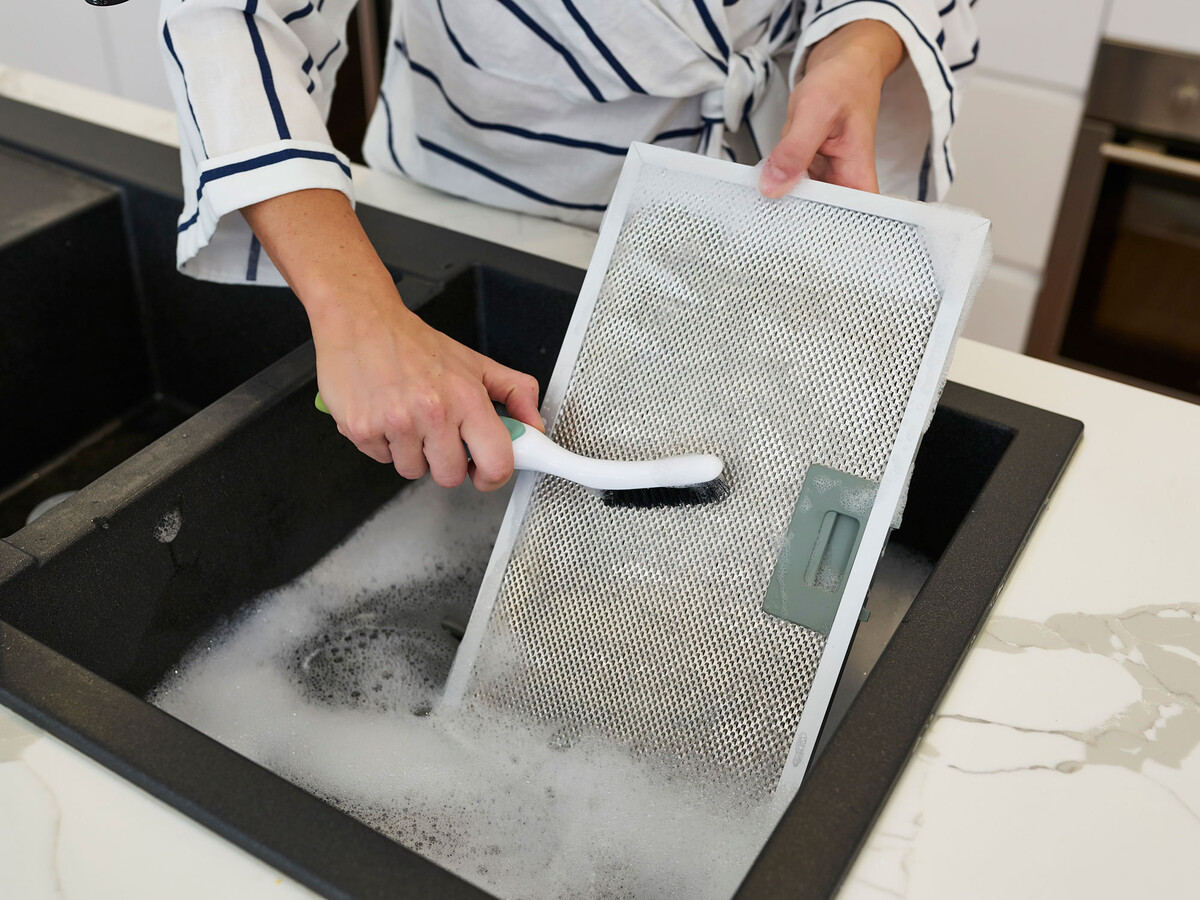
Use a vacuum with a brush attachment to remove dust and debris from the exhaust fan. Then, wipe the fan blades and cover with a damp cloth and mild cleaner. Be sure to turn off the power before cleaning.
Read more: What Is An Exhaust Fan
Step 5: Clean the fan blades
Cleaning the fan blades of your bathroom exhaust fan is a critical step in maintaining optimal air circulation and preventing the buildup of dust and debris. Over time, the fan blades can accumulate a layer of dirt and grime, hindering their ability to function efficiently. By following these detailed steps, you can effectively clean the fan blades, ensuring that your exhaust fan operates at its best:
-
Secure the Blades: Before cleaning, ensure that the fan blades are secured to prevent accidental movement or rotation. You may use a small piece of tape to gently hold the blades in place, minimizing the risk of unintended rotation during the cleaning process.
-
Dust Removal: Begin by using a soft-bristled brush or a handheld vacuum with a brush attachment to gently remove loose dust and debris from the fan blades. Work methodically across each blade, paying attention to the leading and trailing edges where dirt tends to accumulate.
-
Cleaning Solution Application: Prepare a mild cleaning solution by diluting a small amount of gentle detergent or a suitable cleaning solution in a bowl of water. Dip a soft microfiber cloth or a lint-free towel into the cleaning solution, ensuring that it is damp but not dripping with excess liquid.
-
Wipe Each Blade: Starting from the base of the fan blades, gently wipe each blade with the dampened cloth, applying light pressure to dislodge and remove stubborn grime and residues. Continue this process for each blade, ensuring thorough coverage and attention to areas with visible buildup.
-
Rinse and Dry: After cleaning, use a separate, clean cloth dampened with water to rinse the fan blades, removing any residual cleaning solution. Once rinsed, use a dry cloth to carefully pat the blades dry, ensuring that no moisture remains on the surface.
-
Air Drying: Allow the fan blades to air dry completely before reassembling the fan. This step is crucial to ensure that the blades are free from moisture, preventing the risk of water-related damage and promoting optimal performance when the fan is operational.
By meticulously following these steps, you can effectively clean the fan blades of your bathroom exhaust fan, removing accumulated dirt and grime to restore their functionality and promote efficient air circulation. Once the fan blades are clean and dry, you can proceed to address the housing and other components, ensuring a comprehensive cleaning of your exhaust fan.
Step 6: Clean the housing
Cleaning the housing of your bathroom exhaust fan is a crucial step in ensuring that the entire unit operates efficiently and effectively. Over time, the housing can accumulate dust, moisture, and debris, potentially impacting the fan's performance and air quality in the bathroom. By following these detailed steps, you can effectively clean the housing of your exhaust fan, promoting optimal functionality and prolonging its lifespan.
-
Assess the Housing: Before cleaning, carefully inspect the interior and exterior of the fan housing. Look for signs of dust accumulation, moisture stains, or any visible debris that may hinder the fan's performance. This visual assessment will guide your cleaning approach and help you identify areas that require thorough attention.
-
Dust and Debris Removal: Use a handheld vacuum with a brush attachment or a soft-bristled brush to remove loose dust and debris from the interior and exterior surfaces of the housing. Pay close attention to vents, grilles, and any openings where dirt may have accumulated. This initial step prepares the housing for more comprehensive cleaning and prevents loose particles from dispersing into the bathroom air.
-
Cleaning Solution Application: Prepare a mild cleaning solution by diluting a small amount of gentle detergent or a suitable cleaning solution in a bowl of water. Dampen a soft microfiber cloth or a lint-free towel with the cleaning solution, ensuring that it is not overly saturated.
-
Wipe Down the Housing: Gently wipe the interior and exterior surfaces of the housing with the dampened cloth, focusing on areas with visible dirt, stains, or moisture buildup. Take care to cover all accessible areas, including corners, edges, and any textured surfaces that may trap dirt. Continue wiping until the housing appears clean and refreshed.
-
Rinse and Dry: After cleaning, use a separate, clean cloth dampened with water to rinse the housing, removing any residual cleaning solution. Once rinsed, use a dry cloth to carefully pat the housing dry, ensuring that no moisture remains on the surfaces.
-
Air Drying: Allow the housing to air dry completely before reassembling the fan. Proper air drying ensures that the housing is free from moisture, preventing the risk of water-related damage and promoting optimal performance when the fan is operational.
By diligently following these steps, you can effectively clean the housing of your bathroom exhaust fan, removing accumulated dirt, moisture, and debris to ensure optimal functionality and air quality. Once the housing is clean and dry, you can proceed to reassemble the fan, knowing that you have completed a thorough cleaning of your exhaust fan.
Step 7: Reassemble the fan
After completing the comprehensive cleaning of your bathroom exhaust fan, the final step involves reassembling the fan to restore it to full functionality. Proper reassembly ensures that the fan operates efficiently and effectively, promoting optimal air circulation and maintaining a clean and healthy environment in your bathroom. Here's a detailed guide on how to reassemble the fan with precision and care:
-
Position the Cover: Begin by carefully positioning the clean fan cover over the fan housing. Ensure that the cover aligns correctly with the housing, taking note of any alignment markers or grooves that facilitate proper placement. If the cover features latches, engage them securely to hold the cover in place.
-
Secure the Cover: If the cover is secured with screws, use a suitable screwdriver to reattach the screws, ensuring that they are tightened evenly to secure the cover. Take care not to overtighten the screws, as this may damage the cover or the housing. For covers with latches, verify that they are firmly engaged to prevent the cover from dislodging.
-
Check for Stability: Once the cover is reattached, gently test its stability by applying light pressure to ensure that it is securely in place. Verify that there are no loose or protruding elements that may interfere with the fan's operation.
-
Restore Power: After confirming that the fan cover is securely reassembled, return to the circuit breaker or fuse box and switch the corresponding breaker or fuse to the "on" position to restore power to the exhaust fan. Use a non-contact voltage tester to verify that the fan is receiving power and is ready for operation.
-
Operational Test: Turn on the exhaust fan to verify that it functions smoothly and quietly. Listen for any unusual noises or vibrations that may indicate improper reassembly. Observe the fan's performance to ensure that it effectively expels air from the bathroom, indicating successful reassembly.
By following these steps, you can confidently reassemble your bathroom exhaust fan after completing the cleaning process. A properly reassembled fan operates at its best, promoting efficient air circulation and maintaining a clean and comfortable bathroom environment. With the fan successfully reassembled, you can enjoy the benefits of a clean and functional exhaust fan, contributing to a healthier and more pleasant home environment.
Step 8: Turn the power back on
After successfully reassembling the bathroom exhaust fan, the final step in the cleaning process is to restore power to the fan by turning the circuit breaker or fuse back on. This critical step ensures that the exhaust fan is ready to operate efficiently, promoting optimal air circulation and maintaining a clean and healthy environment in the bathroom.
To turn the power back on, return to the circuit breaker or fuse box in your home. Locate the corresponding breaker or fuse that controls the power supply to the bathroom exhaust fan. With caution and attentiveness, switch the breaker or fuse to the "on" position, effectively restoring electrical power to the fan.
As a safety precaution, it is advisable to use a non-contact voltage tester to verify that the fan is receiving power after the circuit is re-energized. This simple yet crucial step provides assurance that the fan is ready for operation and that the electrical connections are functioning as intended.
Once the power is restored, it is recommended to perform a brief operational test of the exhaust fan. Turn on the fan and listen for smooth and quiet operation, ensuring that it effectively expels air from the bathroom. Observing the fan's performance allows you to confirm that the reassembly process was successful and that the fan is functioning optimally.
By diligently following the process of turning the power back on and conducting an operational test, you can ensure that the bathroom exhaust fan is ready to fulfill its essential role in maintaining air quality and promoting a comfortable environment in your home. With the power safely restored, you can enjoy the benefits of a clean and fully functional exhaust fan, contributing to a healthier and more pleasant bathroom experience for you and your household.
Read more: How To Clean Exhaust Fan In Bathroom
Conclusion
In conclusion, the process of cleaning your bathroom exhaust fan is a fundamental aspect of home maintenance that contributes to a healthier and more comfortable living environment. By following the step-by-step guide outlined in this comprehensive article, you have gained the knowledge and confidence to effectively clean and maintain your exhaust fan, ensuring optimal functionality and air quality in your bathroom.
Regular cleaning of the exhaust fan cover, blades, and housing not only removes accumulated dust, dirt, and moisture but also promotes energy efficiency and prolongs the fan's lifespan. A clean exhaust fan operates more effectively, expelling humid air and odors while preventing the buildup of mold and mildew in the bathroom. Additionally, a well-maintained fan contributes to a reduction in electricity consumption, leading to potential cost savings and environmental benefits.
By gathering the necessary supplies, turning off the power, removing the cover, and meticulously cleaning the fan components, you have demonstrated a commitment to maintaining a clean and functional bathroom exhaust fan. The attention to detail in cleaning the cover, fan blades, and housing ensures that the entire unit operates at its best, promoting optimal air circulation and contributing to a pleasant bathroom environment for you and your household.
As you reassemble the fan and restore power, take pride in the accomplishment of completing this essential maintenance task. The operational test serves as a confirmation of your thorough cleaning efforts, affirming that the exhaust fan is ready to fulfill its vital role in maintaining air quality and comfort in your home.
By incorporating regular exhaust fan cleaning into your home maintenance routine, you contribute to a healthier living space and extend the longevity of this essential fixture. The benefits of a clean and well-maintained bathroom exhaust fan extend beyond air quality, encompassing energy efficiency, cost savings, and overall home comfort.
With the knowledge and skills acquired from this guide, you are well-equipped to maintain a clean and functional bathroom exhaust fan, ensuring that it continues to serve its purpose effectively for years to come. Embrace the satisfaction of a job well done as you enjoy the benefits of a clean and efficient bathroom exhaust fan in your home.
Frequently Asked Questions about How To Clean An Exhaust Fan In The Bathroom
Was this page helpful?
At Storables.com, we guarantee accurate and reliable information. Our content, validated by Expert Board Contributors, is crafted following stringent Editorial Policies. We're committed to providing you with well-researched, expert-backed insights for all your informational needs.


0 thoughts on “How To Clean An Exhaust Fan In The Bathroom”