Home>Furniture & Design>Interior Design Trends>How To Clean Water Marks Off Glass
Interior Design Trends
How To Clean Water Marks Off Glass
Modified: August 27, 2024
Learn how to effectively remove water marks from glass surfaces with our expert interior design tips. Keep your space looking pristine and on-trend. Discover more interior design trends now!
(Many of the links in this article redirect to a specific reviewed product. Your purchase of these products through affiliate links helps to generate commission for Storables.com, at no extra cost. Learn more)
Introduction
Glass surfaces can add a touch of elegance and sophistication to any space, whether it's in the form of windows, mirrors, or glass furniture. However, one common issue that can detract from the beauty of glass is the presence of water marks. These unsightly blemishes often result from hard water or mineral deposits, and they can be particularly stubborn to remove. Fortunately, with the right tools and techniques, you can effectively banish water marks and restore the pristine clarity of your glass surfaces.
In this comprehensive guide, we will delve into the art of cleaning water marks off glass, providing you with step-by-step instructions and valuable insights to help you achieve impeccable results. By understanding the nature of water marks and employing the appropriate cleaning methods, you can revitalize your glass surfaces and maintain a sparkling, flawless appearance throughout your living or working space.
Whether you're dealing with water marks on your shower doors, windows, or glass tabletops, this guide will equip you with the knowledge and practical know-how to tackle the issue with confidence. From preparing the glass surface for cleaning to selecting the right cleaning solution and executing the scrubbing process, each step is crucial in achieving a streak-free, crystal-clear finish. Additionally, we will share additional tips and tricks to enhance the effectiveness of the cleaning process, ensuring that your glass surfaces remain immaculate and free from water marks for the long haul.
With a commitment to preserving the beauty and functionality of your glass elements, this guide aims to empower you with the expertise needed to conquer water marks and elevate the visual appeal of your interior spaces. So, roll up your sleeves and get ready to bid farewell to those pesky water marks as we embark on this transformative journey to restore the brilliance of your glass surfaces.
Key Takeaways:
- Say goodbye to water marks on glass by using white vinegar, distilled water, and a microfiber cloth. Scrub gently and dry thoroughly for sparkling, blemish-free surfaces.
- Prevent water marks on glass by using a squeegee, distilled white vinegar soak, and professional glass sealants. Regular maintenance and environmental considerations also play a key role in preserving the pristine clarity of glass surfaces.
Read more: How To Clean Hard Water Off Glass
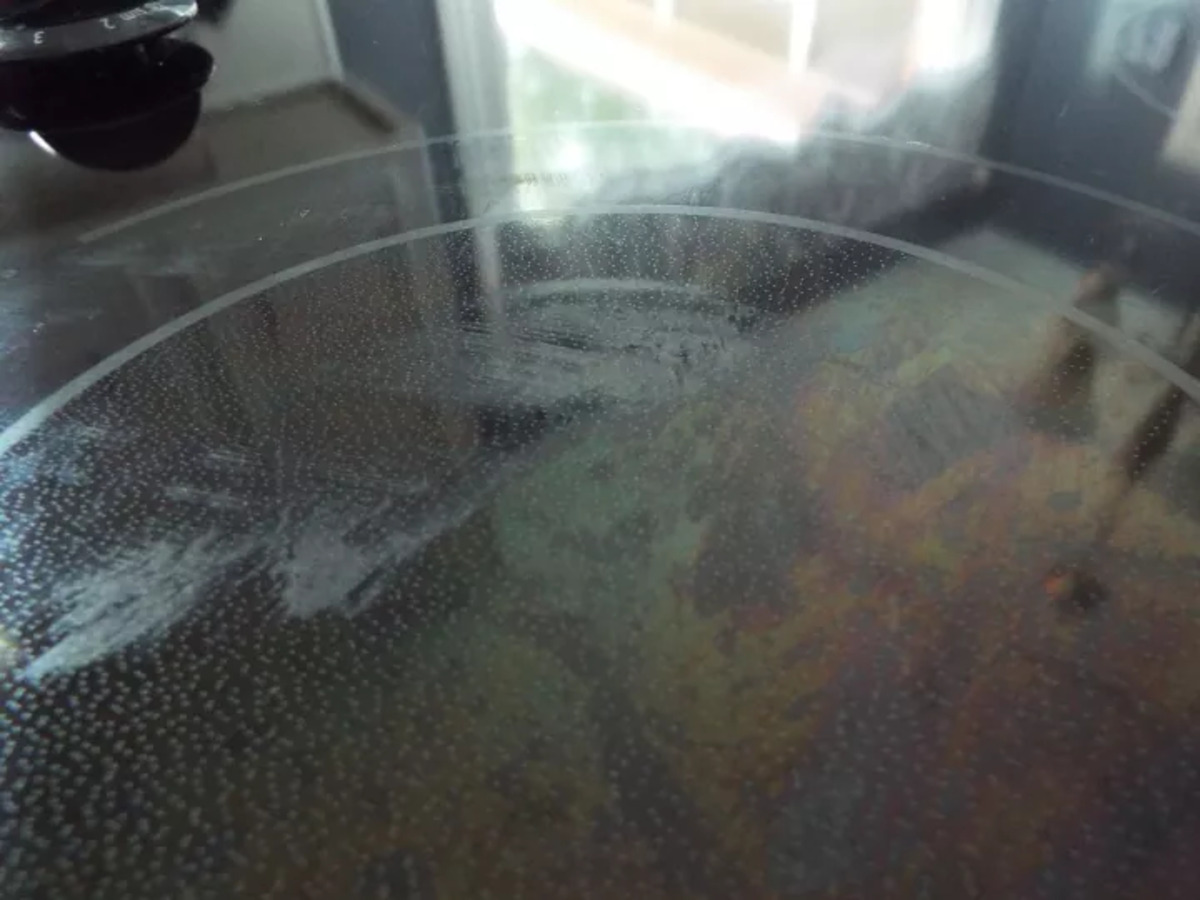
Understanding Water Marks on Glass
Water marks on glass surfaces are a common nuisance that can detract from the overall aesthetic appeal of your living or working space. These marks typically manifest as cloudy or hazy spots, often resulting from the accumulation of mineral deposits and impurities present in hard water. When water droplets evaporate on the glass, they leave behind these unsightly residues, creating an unattractive and stubborn blemish.
The mineral content in hard water, such as calcium, magnesium, and silica, can adhere to the glass surface, forming a thin film that is responsible for the appearance of water marks. Over time, if left unaddressed, these marks can become more pronounced and challenging to remove, necessitating a proactive approach to maintain the clarity and pristine condition of your glass elements.
Understanding the nature of water marks is crucial in devising an effective cleaning strategy. By recognizing the underlying causes and characteristics of these blemishes, you can select the appropriate cleaning solutions and techniques to dissolve and eliminate the mineral deposits, restoring the glass to its original luster.
In addition to hard water deposits, other factors such as environmental pollutants, soap scum, and residue from cleaning products can contribute to the formation of water marks on glass surfaces. These contaminants can further exacerbate the visibility of the marks, making it imperative to address them promptly and comprehensively.
By gaining insight into the composition and origins of water marks, you can approach the cleaning process with confidence and precision, ensuring that your efforts yield optimal results. Armed with this understanding, you are better equipped to select the right tools and materials, as well as execute the cleaning steps effectively, ultimately achieving a spotless and gleaming finish on your glass surfaces.
Tools and Materials Needed
To embark on the journey of removing water marks from glass surfaces, it is essential to gather the appropriate tools and materials that will facilitate a thorough and effective cleaning process. Equipping yourself with the following items will ensure that you are well-prepared to tackle the task at hand and achieve impeccable results.
Microfiber Cloth:
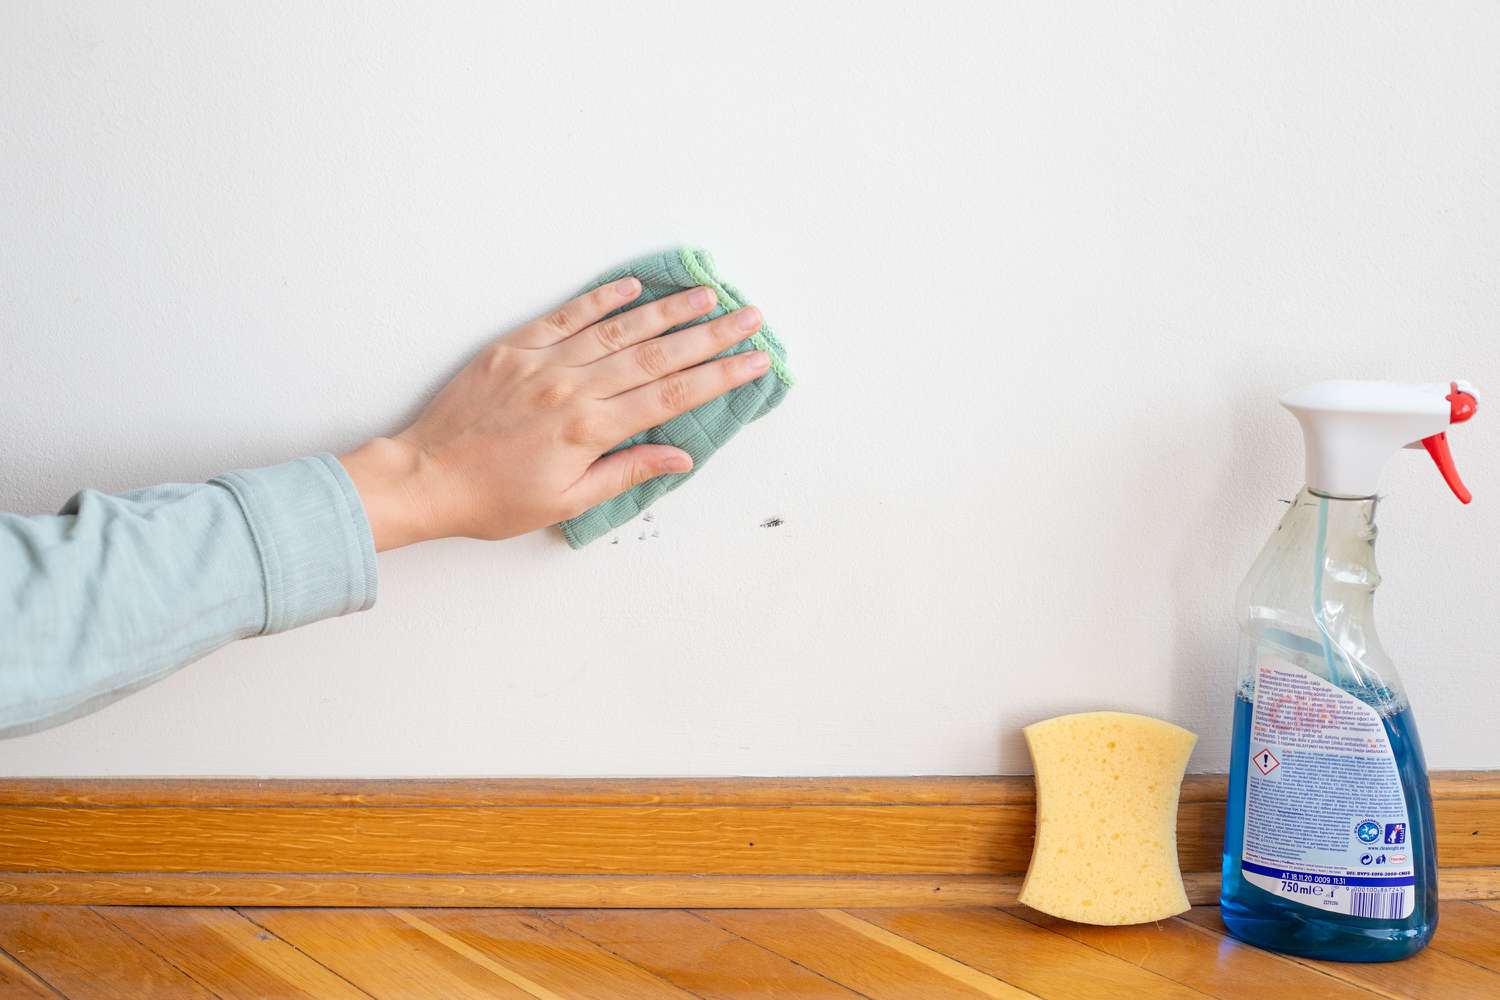
A high-quality microfiber cloth is an indispensable tool for cleaning glass surfaces. Its ultra-fine fibers are designed to attract and trap dust, dirt, and residues without leaving lint or streaks behind. When used in conjunction with a cleaning solution, a microfiber cloth becomes a powerful ally in removing water marks and restoring the pristine clarity of glass.
White Vinegar:
White vinegar is a versatile and eco-friendly cleaning agent that is highly effective in dissolving mineral deposits and eliminating water marks. Its acidic nature makes it ideal for breaking down the stubborn residues left behind by hard water, allowing for effortless removal and a sparkling finish. When diluted with water, white vinegar becomes a potent solution for combating water marks on glass surfaces.
Read more: How To Clean Burn Marks Off Toaster
Distilled Water:
Utilizing distilled water for the cleaning process is crucial, as it is free from the impurities and mineral content present in tap water. This ensures that no additional residues or streaks are left behind during the cleaning process, contributing to a flawless and crystal-clear result.
Spray Bottle:
A spray bottle is a convenient and practical tool for dispensing the cleaning solution onto the glass surface. It allows for precise application and even coverage, ensuring that the cleaning solution effectively targets the water marks and mineral deposits for thorough removal.
Rubber Gloves:
When working with cleaning solutions, particularly those containing acidic ingredients such as white vinegar, it is advisable to wear rubber gloves to protect your skin from potential irritation or dryness. Additionally, gloves provide a barrier against the transfer of oils and contaminants from your hands to the glass surface during the cleaning process.
Plastic Scraper or Squeegee:
For more stubborn water marks, a plastic scraper or squeegee can be employed to gently dislodge and remove the residues from the glass surface. When used with caution and a light touch, these tools can aid in the effective elimination of persistent water marks, contributing to a thorough and comprehensive cleaning process.
By assembling these essential tools and materials, you are poised to embark on a successful journey to banish water marks from your glass surfaces and restore their natural brilliance. With the right arsenal at your disposal, you can approach the subsequent cleaning steps with confidence and precision, ensuring that your glass elements emerge spotless and revitalized.
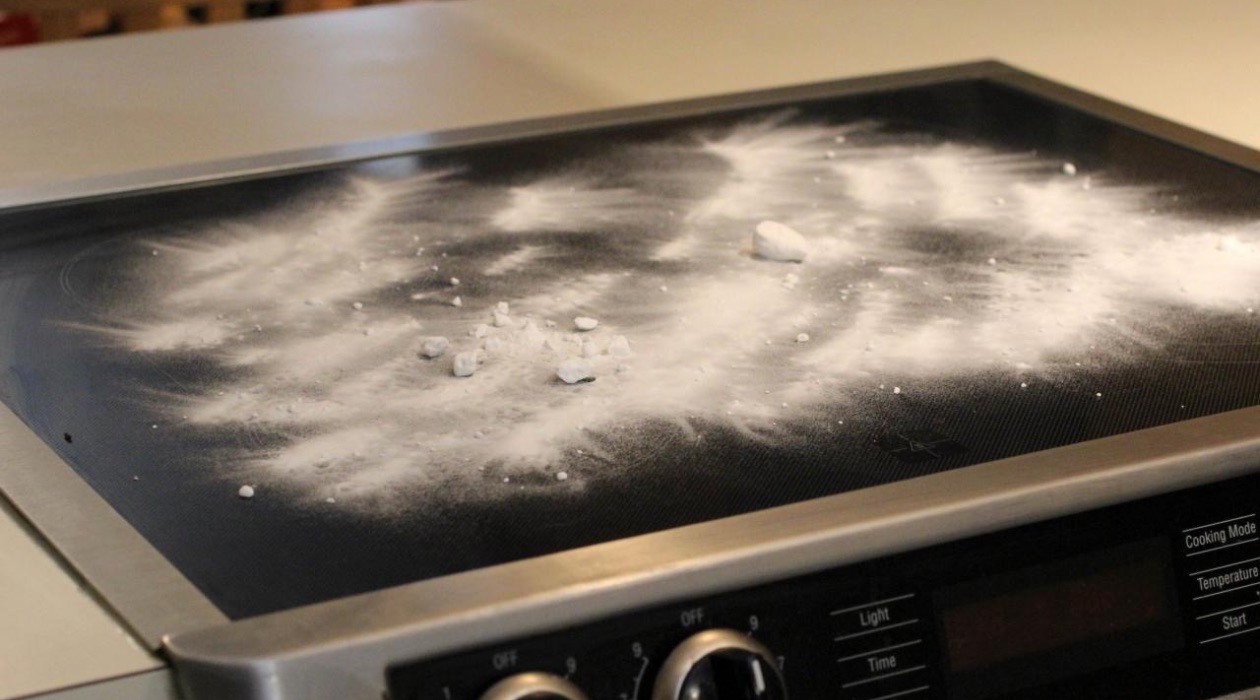
Read more: How To Get Burn Marks Off Glass Top Stove
Step 1: Preparing the Glass Surface
Before diving into the process of removing water marks from glass, it is essential to prepare the surface to optimize the effectiveness of the cleaning process. Proper preparation sets the stage for thorough and efficient removal of water marks, ensuring that the glass surfaces emerge pristine and free from blemishes. Here's a detailed breakdown of the crucial steps involved in preparing the glass surface for cleaning:
-
Clearing the Area: Begin by clearing the immediate area surrounding the glass surface to be cleaned. Remove any objects, decor, or items that may obstruct access to the glass, allowing for unobstructed movement and application of the cleaning solution.
-
Dusting and Wiping: Use a clean, dry microfiber cloth to gently dust and wipe the glass surface. This preliminary step helps eliminate loose particles, dust, and debris that may be present on the surface, ensuring that the subsequent cleaning process is focused on addressing the water marks without interference from external contaminants.
-
Ventilating the Space: If the glass surface is located in an enclosed or poorly ventilated area, ensure adequate ventilation by opening windows or using fans to promote air circulation. Proper ventilation minimizes the concentration of cleaning fumes and facilitates quicker drying of the glass surface after the cleaning process.
-
Protective Measures: If the glass surface is adjacent to other materials or surfaces that may be sensitive to the cleaning solution, consider using protective barriers such as masking tape or plastic sheeting to shield surrounding areas from potential contact with the cleaning solution.
-
Gloving Up: Prior to handling the cleaning solution, don a pair of rubber gloves to protect your skin from potential irritation or dryness. This precautionary measure ensures that your hands are shielded from the effects of the cleaning solution, particularly if it contains acidic ingredients such as white vinegar.
By meticulously preparing the glass surface through these essential steps, you establish an optimal environment for the subsequent cleaning process. This proactive approach sets the foundation for achieving exceptional results, as it minimizes potential obstacles and maximizes the efficacy of the cleaning solution in targeting and eliminating water marks from the glass surface. With the glass surface primed and ready, you are now poised to proceed to the next step of applying the cleaning solution and embarking on the transformative journey to restore the pristine clarity of your glass elements.
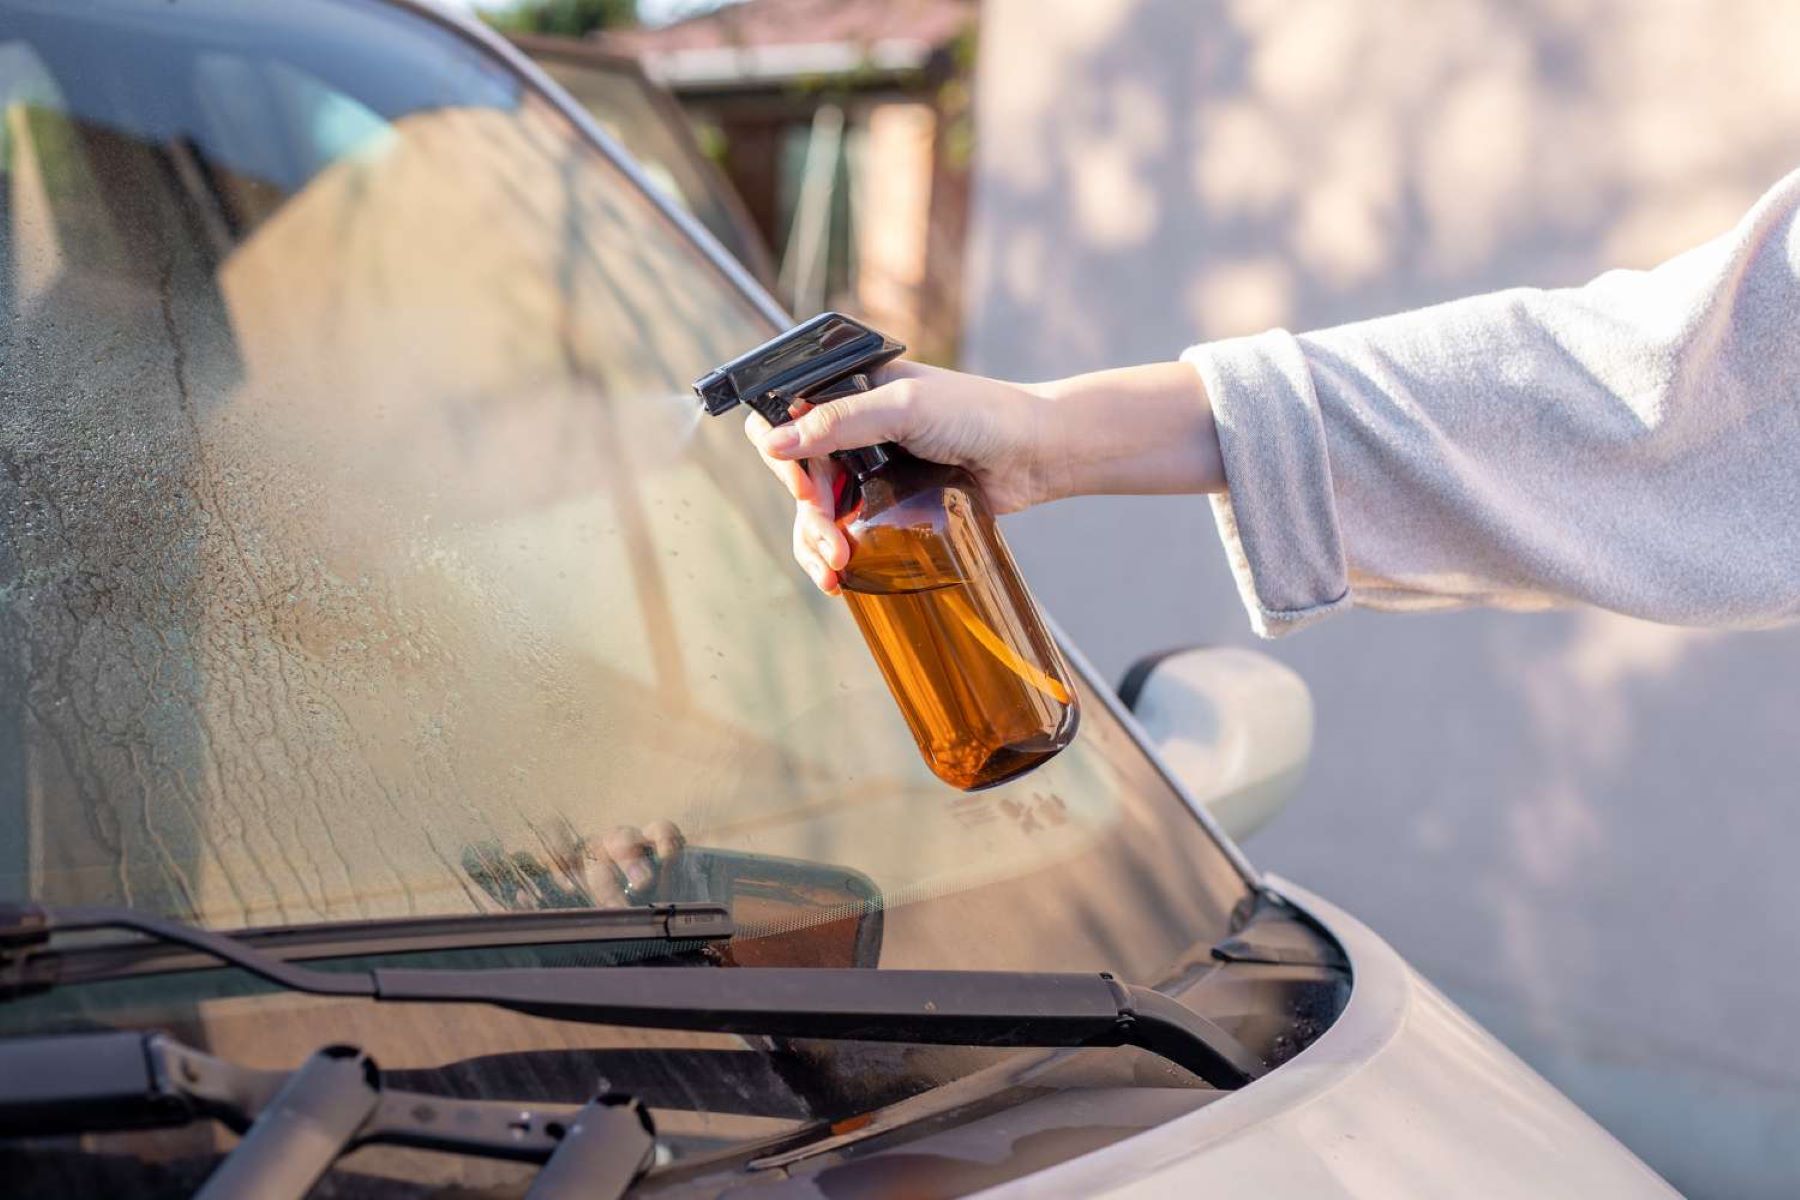
Step 2: Applying the Cleaning Solution
Once the glass surface is meticulously prepared, the next pivotal step in the process of removing water marks involves the precise application of the cleaning solution. This crucial phase sets the stage for dissolving and eliminating the mineral deposits and residues responsible for the unsightly blemishes, paving the way for a rejuvenated and gleaming glass surface. Here's a detailed exploration of the meticulous process of applying the cleaning solution:
Diluting White Vinegar:
Begin by preparing the cleaning solution, which consists of white vinegar diluted with distilled water. In a clean and empty spray bottle, combine equal parts of white vinegar and distilled water. The acidic properties of white vinegar make it an effective agent for breaking down mineral deposits and dissolving water marks, while the use of distilled water ensures that no additional impurities are introduced during the cleaning process.
Even Application:
Hold the spray bottle containing the diluted cleaning solution at a moderate distance from the glass surface to be cleaned. With a steady hand, apply a fine mist of the cleaning solution, ensuring even coverage across the entire surface affected by water marks. The goal is to saturate the marks with the solution, allowing it to penetrate and begin the process of dissolving the stubborn residues.
Read more: How To Clean Stickers Off Glass
Targeted Treatment:
For more concentrated or stubborn water marks, apply a slightly heavier concentration of the cleaning solution directly onto the affected areas. This targeted approach ensures that the solution effectively permeates the mineral deposits, facilitating their breakdown and subsequent removal.
Time for Penetration:
After applying the cleaning solution, allow it to sit and penetrate the water marks for a few minutes. This dwell time is essential for the acidic properties of the white vinegar to work on dissolving the mineral deposits, loosening their grip on the glass surface, and preparing them for the subsequent scrubbing process.
Precautionary Measures:
During the application of the cleaning solution, be mindful of adjacent materials or surfaces that may be sensitive to the acidic nature of white vinegar. If necessary, use protective barriers such as masking tape or plastic sheeting to shield surrounding areas from potential contact with the cleaning solution, ensuring that only the targeted glass surface is exposed to the solution.
By meticulously following these steps for applying the cleaning solution, you set the stage for the subsequent phase of scrubbing the water marks, armed with a potent and precisely applied solution that is primed to dissolve and eliminate the stubborn residues. With the glass surface infused with the cleaning solution, you are now ready to embark on the transformative process of scrubbing away the water marks and unveiling the radiant clarity of your glass elements.
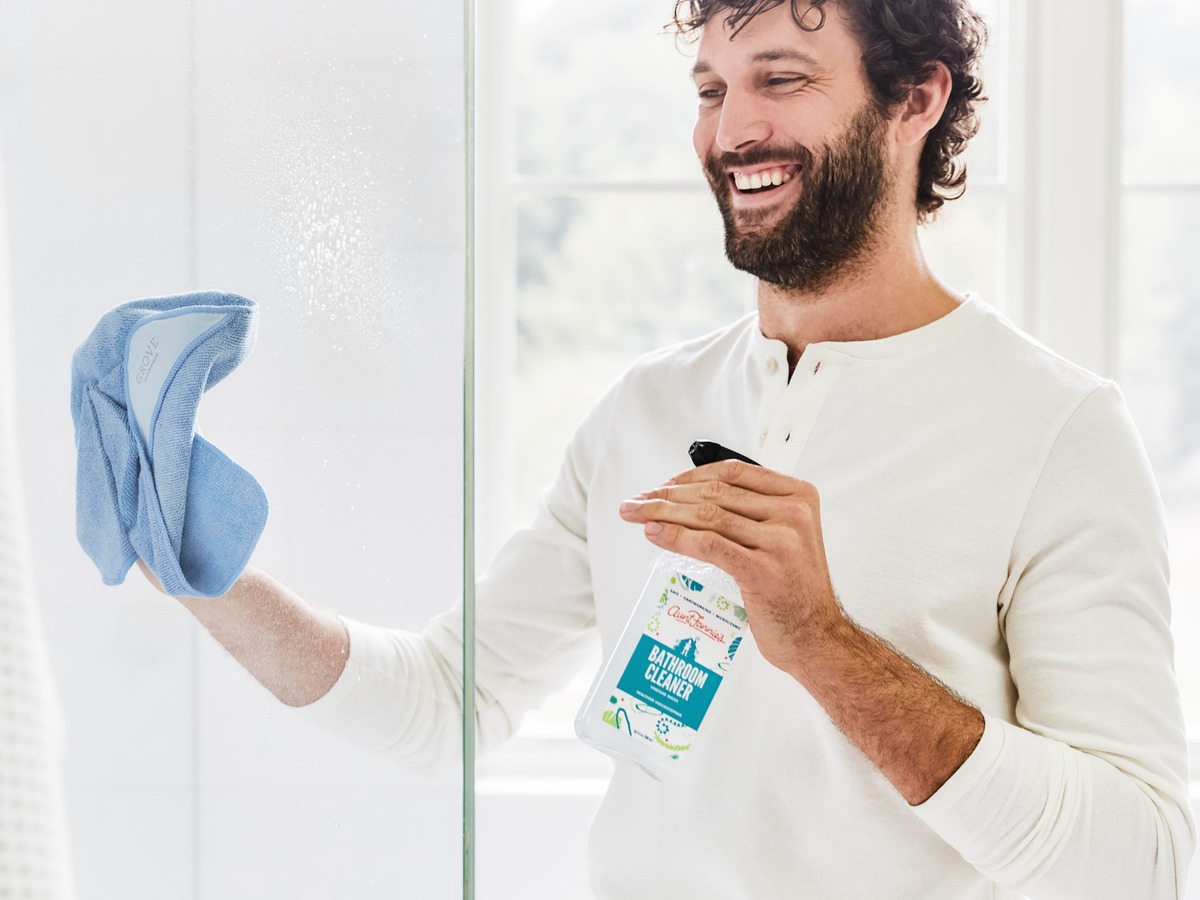
Step 3: Scrubbing the Water Marks
With the glass surface primed and infused with the cleaning solution, the pivotal phase of scrubbing the water marks commences, marking a transformative juncture in the journey to restore the pristine clarity of your glass elements. This meticulous process involves the strategic application of gentle yet effective scrubbing techniques to dislodge and eliminate the stubborn residues, unveiling a gleaming and unblemished glass surface. Here's a detailed exploration of the essential steps involved in the art of scrubbing the water marks:
-
Microfiber Cloth: Equip yourself with a clean and dry microfiber cloth, which will serve as your primary tool for scrubbing the water marks. The ultra-fine fibers of the cloth are designed to attract and trap loosened residues without leaving lint or streaks behind, ensuring a thorough and pristine finish.
-
Gentle Pressure: Begin by gently pressing the microfiber cloth against the glass surface, focusing on the areas affected by water marks. Apply light and even pressure, using circular or back-and-forth motions to agitate the surface and dislodge the mineral deposits. Avoid excessive force, as this may scratch or damage the glass.
-
Targeted Attention: Direct your attention to the specific areas where water marks are most pronounced, concentrating your scrubbing efforts on these blemished spots. By focusing on targeted treatment, you can effectively address the residues and gradually restore the clarity of the glass surface.
-
Reapplication of Solution: If the water marks prove to be particularly stubborn, consider reapplying a fine mist of the cleaning solution onto the affected areas. This additional application provides a renewed opportunity for the solution to penetrate and further dissolve the mineral deposits, facilitating their removal during the scrubbing process.
-
Persistence and Patience: Approach the scrubbing process with persistence and patience, recognizing that the gradual and methodical application of scrubbing techniques is essential for achieving optimal results. Continuously assess the progress and adjust your approach as needed to effectively dislodge the water marks.
-
Intermittent Inspection: Periodically pause to inspect the glass surface and evaluate the progress of the scrubbing process. Assess the diminishing visibility of the water marks and adjust your scrubbing technique as necessary to ensure comprehensive removal of the residues.
By meticulously executing these steps and employing a delicate yet purposeful approach to scrubbing the water marks, you are poised to achieve a transformative outcome, unveiling a glass surface that is free from blemishes and radiates a pristine clarity. With the water marks effectively dislodged and eliminated, the next phase of rinsing and drying the glass will complete the comprehensive cleaning process, culminating in a resplendent and unblemished glass surface that exudes timeless elegance and allure.
Read more: How To Clean Soot Off Glass
Step 4: Rinsing and Drying the Glass
As the culmination of the comprehensive cleaning process, the final step of rinsing and drying the glass is pivotal in ensuring that the glass surface emerges immaculate and free from any residual cleaning solution or moisture. This meticulous phase involves the strategic removal of the cleaning solution, followed by thorough drying to unveil a glistening and unblemished glass surface. Here's a detailed exploration of the essential steps involved in the art of rinsing and drying the glass:
Gentle Rinsing:
Commence the rinsing process by using a clean microfiber cloth dampened with distilled water to gently wipe the glass surface. This gentle rinsing action serves to remove any residual cleaning solution and dislodged mineral deposits, ensuring that the glass is thoroughly cleansed and free from lingering residues. Avoid using excessive water, as this may lead to streaking or the formation of new water marks.
Squeegee Technique:
For larger glass surfaces such as windows or shower doors, employing a squeegee can expedite the rinsing process and facilitate the removal of water and cleaning solution. With a steady hand, draw the squeegee across the glass surface in smooth, overlapping strokes, effectively sweeping away the moisture and residual traces of the cleaning solution. This technique promotes a streak-free and gleaming finish, enhancing the clarity of the glass.
Drying with Precision:
Following the rinsing process, use a dry microfiber cloth to meticulously dry the glass surface, ensuring that no moisture or streaks remain. Employing a gentle yet thorough drying technique, systematically work across the glass surface to absorb any residual water and achieve a flawless, crystal-clear finish. Pay particular attention to the edges and corners, where water may accumulate, to ensure uniform drying.
Read more: How To Get Water Stains Off Of Glass
Final Inspection:
Conduct a final inspection of the glass surface to assess the results of the rinsing and drying process. Examine the glass from various angles and under different lighting conditions to confirm that it is free from streaks, water marks, or residual cleaning solution. Address any lingering moisture or streaks with additional drying as needed, ensuring that the glass surface emerges immaculate and radiant.
By meticulously executing these steps and employing a delicate yet purposeful approach to rinsing and drying the glass, you complete the transformative journey of banishing water marks and restoring the pristine clarity of your glass elements. With the glass surface now immaculate and free from blemishes, it radiates a timeless elegance and allure, enhancing the visual appeal of your living or working space.
Additional Tips and Tricks
In addition to the fundamental steps outlined for cleaning water marks off glass, several supplementary tips and tricks can further enhance the efficacy and overall outcome of the cleaning process. These additional insights and strategies are designed to provide a comprehensive approach to addressing water marks and maintaining the pristine condition of glass surfaces. By incorporating these tips and tricks into your cleaning regimen, you can elevate the results and ensure long-lasting clarity and brilliance for your glass elements.
Distilled White Vinegar Soak
For particularly stubborn or persistent water marks, consider a distilled white vinegar soak as a pre-treatment step. Submerge a clean microfiber cloth in undiluted white vinegar and drape it over the affected glass surface, allowing it to sit for an extended period, such as overnight. This prolonged exposure to the acidic properties of white vinegar can effectively loosen and dissolve stubborn mineral deposits, preparing the water marks for easier removal during the subsequent cleaning process.
Preventative Maintenance
Implementing a regular preventative maintenance routine can mitigate the recurrence of water marks on glass surfaces. Consider using a squeegee to remove excess water from shower doors and windows after each use, minimizing the opportunity for water marks to form. Additionally, incorporating a weekly cleaning regimen using a diluted white vinegar solution can proactively dissolve and prevent the buildup of mineral deposits, preserving the pristine clarity of the glass.
Read more: How To Get Water Spots Off Glass
Buffing with Newspaper
After the glass surface has been thoroughly cleaned and dried, consider using a crumpled piece of newspaper to buff the glass to a sparkling finish. The mild abrasiveness of newspaper, combined with its absorbent properties, can effectively remove any residual streaks or smudges, leaving the glass with a flawless and gleaming appearance.
Professional Glass Sealants
Exploring the use of professional glass sealants or coatings can provide long-term protection against water marks and mineral deposits. These specialized products create a hydrophobic barrier on the glass surface, repelling water and impeding the formation of water marks. Regular application of glass sealants can significantly extend the intervals between cleaning sessions and preserve the pristine condition of the glass.
Environmental Considerations
Be mindful of environmental factors that may contribute to the formation of water marks, such as hard water quality or exposure to mineral-rich sources. Installing water softening systems or utilizing filtered water for cleaning purposes can reduce the mineral content that contributes to water marks, effectively minimizing their occurrence and simplifying the cleaning process.
By integrating these additional tips and tricks into your approach to cleaning water marks off glass, you can fortify your efforts and achieve exceptional results. These supplementary strategies not only enhance the effectiveness of the cleaning process but also contribute to the long-term maintenance and preservation of the pristine clarity and allure of your glass surfaces.
Conclusion
In conclusion, the journey to clean water marks off glass surfaces is a transformative endeavor that demands meticulous attention to detail, strategic application of cleaning solutions, and a delicate yet purposeful approach to scrubbing and drying. By understanding the nature of water marks and employing the appropriate tools and techniques, you can achieve remarkable results, restoring the pristine clarity and timeless allure of your glass elements.
Throughout this comprehensive guide, we have delved into the intricacies of addressing water marks on glass, from the initial preparation of the glass surface to the precise application of the cleaning solution and the strategic execution of scrubbing and drying techniques. Each step is integral to the comprehensive cleaning process, ensuring that water marks are effectively dislodged and eliminated, leaving behind a glistening and unblemished glass surface.
Furthermore, the incorporation of additional tips and tricks, such as the use of distilled white vinegar soaks, preventative maintenance, buffing with newspaper, and the exploration of professional glass sealants, serves to elevate the efficacy and long-term maintenance of the glass surfaces. These supplementary strategies empower you to proactively combat water marks and preserve the pristine condition of your glass elements, enhancing their enduring brilliance and allure.
As you embark on the journey to banish water marks from your glass surfaces, remember that persistence, patience, and a meticulous approach are key to achieving exceptional results. By integrating the insights and techniques presented in this guide into your cleaning regimen, you can elevate the visual appeal of your living or working space, ensuring that your glass surfaces radiate a timeless elegance and clarity that captivates the eye.
With a commitment to preserving the beauty and functionality of your glass elements, this guide equips you with the expertise needed to conquer water marks and elevate the visual appeal of your interior spaces. Armed with the knowledge and practical know-how gained from this guide, you are well-prepared to embark on a transformative journey to restore the brilliance of your glass surfaces, ensuring that they remain immaculate and free from water marks for the long haul.
Frequently Asked Questions about How To Clean Water Marks Off Glass
Was this page helpful?
At Storables.com, we guarantee accurate and reliable information. Our content, validated by Expert Board Contributors, is crafted following stringent Editorial Policies. We're committed to providing you with well-researched, expert-backed insights for all your informational needs.

0 thoughts on “How To Clean Water Marks Off Glass”