Home>Interior Design>How To Clean Walls: Get Rid Of Marks Or Prepare For Painting
Interior Design
How To Clean Walls: Get Rid Of Marks Or Prepare For Painting
Modified: January 9, 2024
Learn how to effectively clean your walls and remove marks or prepare them for painting with our expert interior design tips.
(Many of the links in this article redirect to a specific reviewed product. Your purchase of these products through affiliate links helps to generate commission for Storables.com, at no extra cost. Learn more)
Introduction
Welcome to the ultimate guide on how to clean walls! Whether you’re looking to get rid of unsightly marks and stains or preparing your walls for a fresh coat of paint, proper cleaning techniques are essential to achieving the best results. Cleaning your walls not only enhances the aesthetics of your space but also helps to maintain the overall cleanliness and hygiene of your home. In this article, we will cover everything you need to know about cleaning walls effectively and efficiently.
Before diving into the cleaning process, it is important to gather the necessary supplies. Having the right tools and materials will make your task easier and more effective. Let’s take a look at what you’ll need.
Key Takeaways:
- Properly cleaning and preparing your walls is essential for maintaining a clean and healthy living environment. From removing stains to priming for painting, attention to detail and the right tools are key to achieving pristine walls.
- By following the comprehensive guide, you can equip yourself with the knowledge and techniques to effectively clean and prepare your walls. Whether refreshing with paint or maintaining cleanliness, patience and the right tools will lead to beautifully transformed walls.
Read more: How To Prepare Exterior Walls For Painting
Gathering the necessary supplies
Before you begin cleaning your walls, make sure you have the following supplies on hand:
- Bucket
- Warm water
- Mild detergent or wall cleaner
- Sponge or soft cloth
- Microfiber cloth
- Gentle scrub brush
- Soft-bristle brush
- Protective gloves
- Protective goggles
- Drop cloth or plastic sheeting
- Painter’s tape
- Wall patching compound
- Sanding sponge or sandpaper
- Dust mask
- Primer (if you plan on painting)
Having these supplies readily available will save you time and ensure that you are well-equipped to tackle any wall cleaning or preparation task.
Now that you have your supplies ready, it’s time to prepare the area before cleaning. This step is essential for protecting your furnishings, floors, and yourself from any potential damage or mess that may occur during the cleaning process.
Let’s move on to the next section to learn about the necessary preparations.
Preparing the area
Before you start cleaning your walls, it’s important to prepare the area to minimize mess and potential damage. Here are the steps to follow:
- Clear the area: Remove any furniture, decorations, or other items that are near or against the walls. This will give you easy access to the entire wall surface and prevent any accidental damage or obstruction.
- Protect the floors: Lay down a drop cloth or plastic sheeting to protect your floors from any drips or splatters during the cleaning process. This will make cleanup easier and prevent any potential staining or damage to the flooring.
- Mask off edges: If you are only cleaning a specific section of the wall or preparing for painting, use painter’s tape to mask off any edges or trim to avoid getting cleaner or paint in unwanted areas.
- Wear protective gear: When working with cleaning solutions or performing any tasks that may create dust or debris, wear protective gloves and goggles to protect your skin and eyes.
By taking these precautions, you can ensure a smooth and well-protected cleaning process.
With the area properly prepared, it’s time to move on to removing marks and stains from your walls. Keep reading to learn some effective techniques for tackling common wall stains.
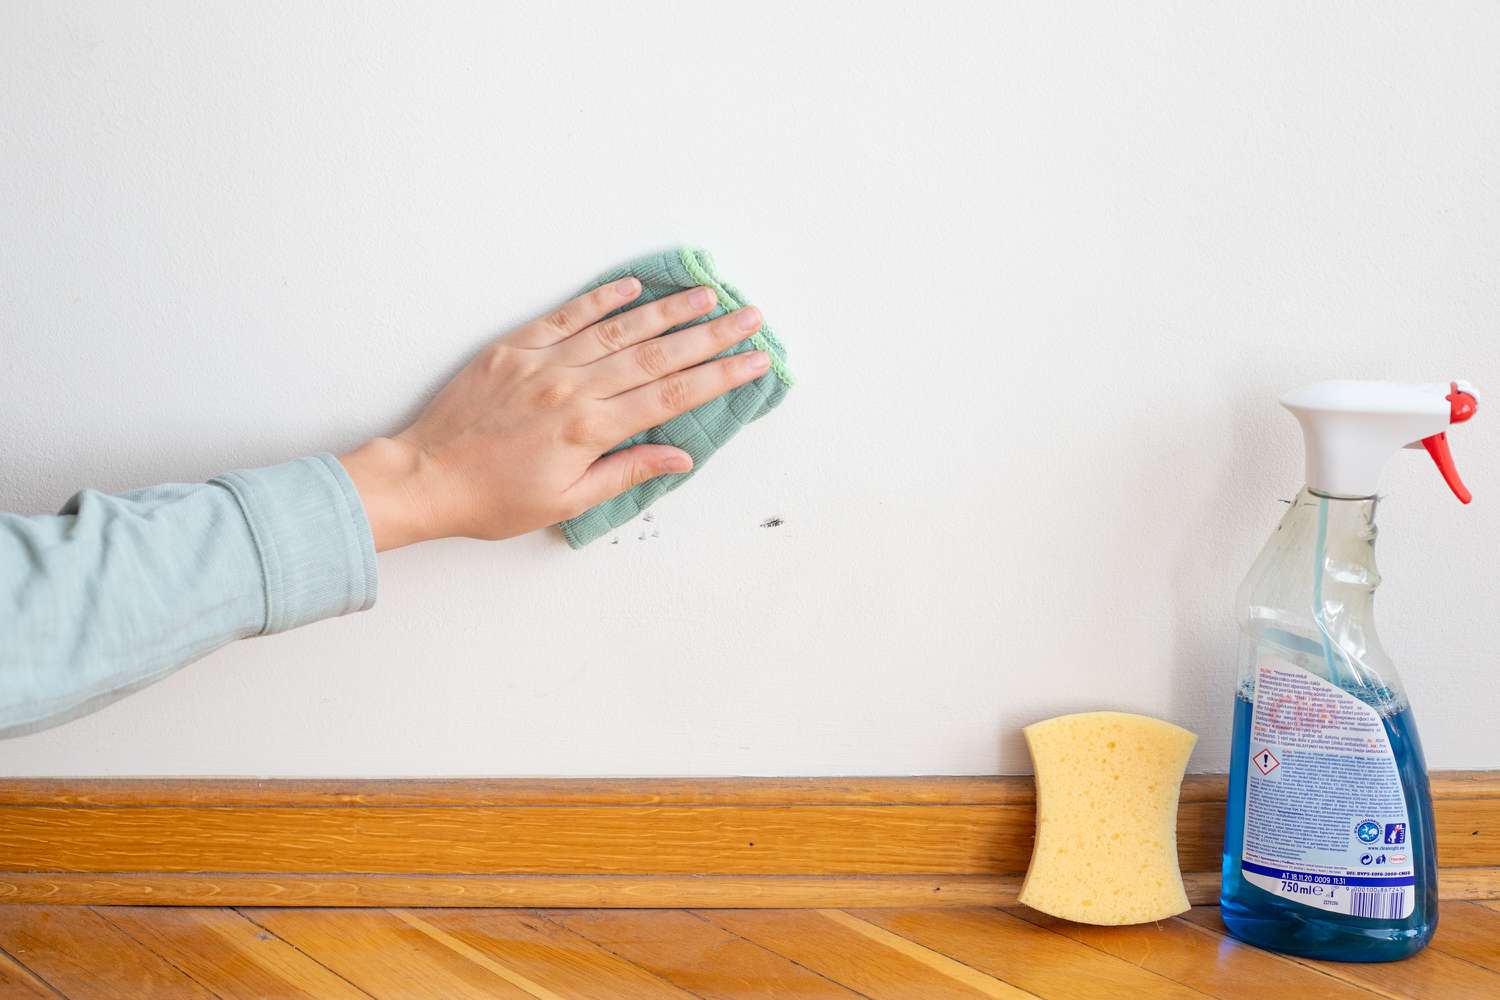
Removing marks and stains from walls
Over time, walls can accumulate various marks and stains, such as scuff marks, crayon marks, grease stains, and water stains. Here are some effective techniques for removing these unsightly marks:
- For scuff marks: Use a clean sponge or soft cloth dipped in warm water to gently rub the mark. If the scuff is stubborn, you can try using a pencil eraser or a melamine foam eraser to gently scrub the mark away.
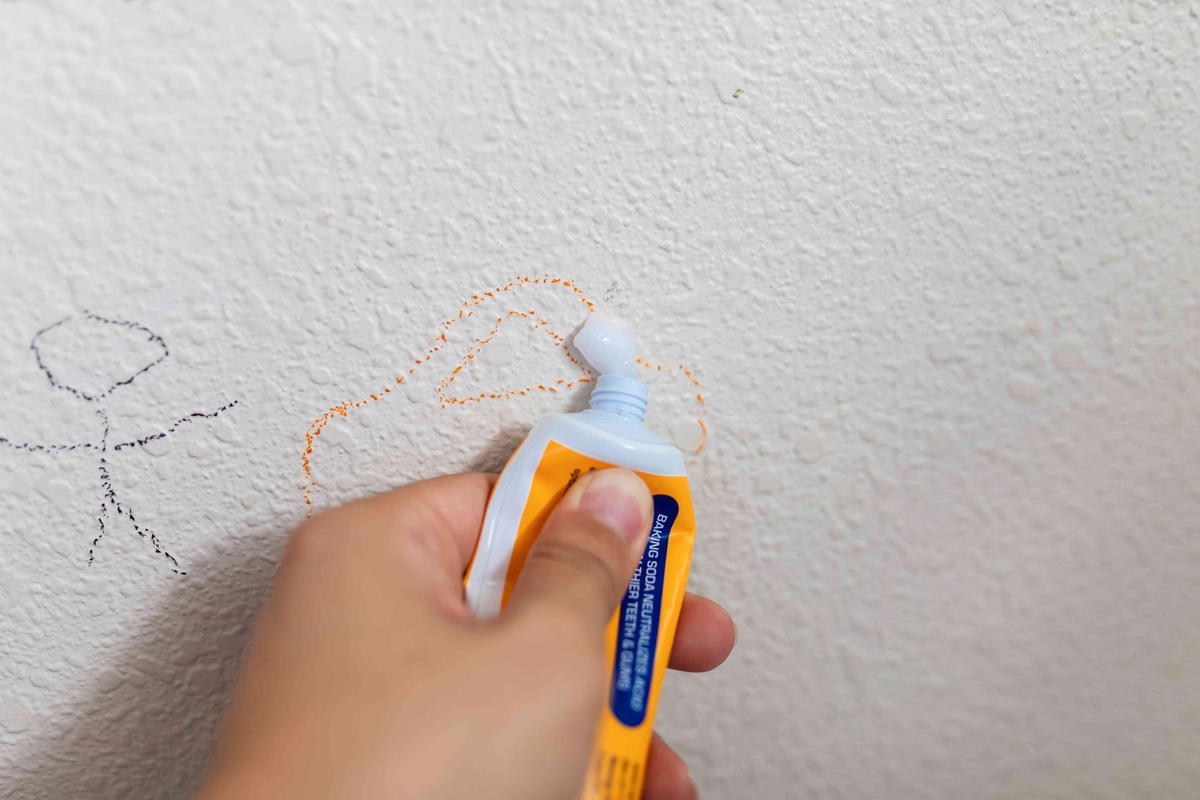
- For crayon marks: Apply a small amount of toothpaste or baking soda to a damp cloth or sponge and gently rub over the crayon mark. Rinse the area with water and wipe dry with a microfiber cloth.
- For grease stains: Mix a small amount of mild dish soap with warm water and use a soft cloth or sponge to gently scrub the stain. Rinse with clean water and dry with a microfiber cloth.
- For water stains: Mix equal parts white vinegar and water in a spray bottle. Spray the solution on the stain and let it sit for a few minutes. Gently scrub the area with a soft brush or sponge, then rinse with clean water.
If these methods don’t completely remove the stains, you can try using a commercial wall cleaner following the manufacturer’s instructions. It’s important to test any cleaning solution or product on a small, inconspicuous area of the wall first to ensure it doesn’t cause any discoloration or damage.
Now that you’ve successfully eliminated marks and stains from your walls, it’s time to give the entire wall surface a thorough cleaning. Let’s move on to the next section to learn how.
Cleaning wall surfaces
Once you have addressed any marks and stains on your walls, it’s time to give the entire wall surface a deep cleaning. Here’s how you can effectively clean your wall surfaces:
- Dust the walls: Begin by using a soft-bristle brush or a microfiber cloth to gently dust the walls. This will remove any loose dirt, cobwebs, or dust particles that may have accumulated on the surface. Make sure to pay attention to corners and edges.
- Prepare a cleaning solution: Fill a bucket with warm water and add a small amount of mild detergent or wall cleaner. Mix the solution until it is well-combined.
- Clean the walls: Dip a sponge or soft cloth into the cleaning solution and wring out any excess liquid. Start from the top of the wall and work your way down, using gentle circular motions. Avoid applying excessive pressure, as this could damage the wall surface.
- Rinse with clean water: Once you have cleaned the entire wall, rinse your sponge or cloth with clean water and go over the walls again to remove any soapy residue. This step is important to prevent streaks or soap buildup.
- Dry the walls: Use a clean microfiber cloth to dry the walls thoroughly. This will prevent any water spots from forming and ensure a clean, shiny finish.
It’s important to note that different wall finishes may require specific cleaning techniques or products. Always refer to the manufacturer’s guidelines for the recommended cleaning method for your specific type of wall surface.
If you’re dealing with stubborn stains, such as grease or oil marks, keep reading to learn how to effectively remove them.
Read more: How To Prepare Interior Walls For Painting
Washing walls with soap and water
If you have walls that are particularly dirty or have more stubborn stains, you may need to use a stronger cleaning solution. Here’s how you can effectively wash your walls with soap and water:
- Prepare a stronger solution: In a bucket, mix warm water with a mild detergent or wall cleaner. Follow the product instructions for the appropriate ratio of water to cleaner.
- Test the solution: Before applying the cleaning solution to the entire wall, it’s important to test it on a small, inconspicuous area of the wall first. This will ensure that the solution doesn’t cause any discoloration or damage.
- Work in sections: Divide the wall into manageable sections and focus on one section at a time. This will prevent the cleaning solution from drying on the wall before you can rinse it off.
- Clean the wall: Dip a clean sponge or soft cloth into the cleaning solution and squeeze out any excess liquid. Starting from the top of the wall, gently scrub the surface using circular motions. Pay extra attention to any areas with stains or dirt buildup.
- Rinse the wall: After cleaning each section, rinse the sponge or cloth with clean water and wipe down the wall to remove any soap residue. Repeat this step for each section until the entire wall has been cleaned.
- Dry the wall: Use a clean, dry microfiber cloth to dry the wall. This will prevent water spots and streaks from forming.
When washing your walls, it’s important to be gentle and avoid scrubbing too hard. Excessive force can damage the paint or wall surface, so take your time and work patiently.
For stubborn grease or oil stains, a different approach is needed. Read on to learn how to effectively remove these types of stains.
Remove grease and oil stains
Grease and oil stains can be particularly stubborn and challenging to remove from walls. However, with the right approach, you can successfully eliminate these stains. Here’s how:
- Identify the stain: Determine the extent of the grease or oil stain on your wall. If it’s a fresh stain, you may be able to remove it with basic cleaning methods. For older or more stubborn stains, you may need to take additional steps.
- Blot the stain: If the grease or oil is still wet, use a clean cloth or paper towel to blot the stain gently. Avoid rubbing, as it can spread the oil and make the stain worse.
- Apply a degreaser: For tougher stains, apply a commercial degreaser directly onto the stain and give it some time to work. Follow the manufacturer’s instructions for the appropriate application and wait time.
- Gently scrub the stain: After the degreaser has had time to penetrate the stain, use a soft sponge or cloth to gently scrub the area. Apply light pressure to avoid damaging the wall surface.
- Rinse and dry: Once you have successfully removed the grease or oil stain, rinse the area with clean water to remove any residue from the degreaser. Use a dry cloth to pat the area dry.
It’s important to note that different wall materials and finishes may require specific cleaning methods for grease and oil stains. Always refer to the manufacturer’s guidelines or consult a professional if you’re unsure about the best approach for your specific situation.
Now that you’ve tackled the stains and cleaned your walls, it’s time to address any damaged areas on the wall surface. Keep reading to learn how to patch or repair these areas effectively.
Use a mixture of warm water and mild dish soap to gently scrub away marks on walls. For tougher stains, try a mixture of baking soda and water. Always test in a small, inconspicuous area first.
Patching or repairing damaged areas
Over time, walls can develop small holes, cracks, or other types of damage. Before painting or giving your walls a refreshed look, it’s important to patch or repair these damaged areas. Here’s how you can do it:
- Inspect the walls: Take a close look at your walls and identify any areas that require patching or repair. Common types of damage include small nail holes, cracks, or dents.
- Prepare the damaged area: Use a putty knife or scraper to remove any loose debris or flaking paint around the damaged area. Clean the area with a mild detergent and water to ensure a clean surface for patching.
- Apply patching compound: Use a wall patching compound or spackling paste to fill in the damaged area. Apply the compound with a putty knife, spreading it evenly and smoothing out the surface. Follow the manufacturer’s instructions for drying time.
- Sand the patched area: Once the patching compound is fully dry, use a sanding sponge or sandpaper to smooth out the patched area. Sand in a circular motion until the surface feels even and blends seamlessly with the surrounding wall.
- Remove dust: After sanding, wipe down the repaired area with a clean, damp cloth to remove any dust or debris. Allow the wall to dry completely before moving on to the next step.
If you have larger or more extensive damage, such as large holes or extensive cracks, you may need to consult a professional for more advanced repair methods.
With the damaged areas patched and repaired, it’s important to prepare the entire wall surface before painting. Let’s move on to the next section to learn about the necessary preparations.
Sanding the walls
Sanding the walls is an important step in preparing them for painting or refinishing. It helps to create a smooth and even surface, removes imperfections, and promotes better paint adhesion. Here’s how you can sand your walls effectively:
- Gather your materials: You will need sandpaper or a sanding sponge, a sanding block or pole sander, and a dust mask to protect yourself from dust particles.
- Start with coarse-grit sandpaper: Begin by using a coarse-grit sandpaper (around 80-grit) or a sanding sponge to sand the wall surface. Hold the sandpaper or sponge firmly but not too aggressively. Sand in a circular or back-and-forth motion, applying even pressure.
- Smooth out rough areas: Focus on rough or uneven areas, such as patched areas or ridges. Sand gently until the surface feels smooth and level. Keep a light touch to avoid damaging the walls or creating gouges.
- Progress to finer grits: As you sand, gradually switch to finer grit sandpaper (around 120-grit or higher) to create a finer finish. This will help eliminate any remaining scratches or marks left by the coarse-grit sandpaper.
- Clean up the dust: After sanding, it’s important to remove the dust particles. Use a vacuum cleaner with a brush attachment or a clean, dry cloth to wipe down the walls and remove any sanding debris. Ensure that the surface is completely clean and dry before proceeding.
Remember to wear a dust mask when sanding walls to protect yourself from inhaling dust particles. Additionally, be cautious not to oversand, as this can damage the wall surface or remove too much paint, especially on delicate or thin areas.
With the walls sanded and dust-free, it’s time to dust them thoroughly before moving on to the final preparations. Keep reading to learn about dusting the walls.
Read more: How To Get Rid Of Tire Marks On Driveway
Dusting the walls
Dusting the walls is an important step in the wall cleaning process, as it helps to remove any remaining dust or debris after sanding. Dusting also helps to create a clean surface for painting or any other wall finishes. Here’s how you can effectively dust your walls:
- Gather your tools: You will need a microfiber cloth, a duster, or a soft-bristle brush.
- Start from the top: Begin dusting from the top of the wall and work your way down to prevent dust from falling onto areas you have already cleaned.
- Use a microfiber cloth or duster: Dampen a microfiber cloth slightly or use a dry duster to gently wipe the walls, capturing any dust or cobwebs. Work in a sweeping motion, applying light pressure to avoid damaging the wall surface.
- Pay attention to corners and edges: Dust tends to accumulate in corners and along the edges of walls. Use a soft-bristle brush to gently remove dust from these areas, ensuring a thorough clean.
- Check for any missed spots: After dusting, take a step back and inspect the walls for any missed spots. If you notice any remaining dust or debris, go back and give those areas another gentle wipe or brush.
Regular dusting of your walls can help maintain a clean and fresh appearance, especially in high-traffic areas or rooms prone to dust buildup. It is recommended to dust your walls at least once a month or as needed.
With your walls thoroughly dusted, it’s time to move on to the final preparations before painting or applying any wall treatments. Let’s explore these preparatory steps in the next section.
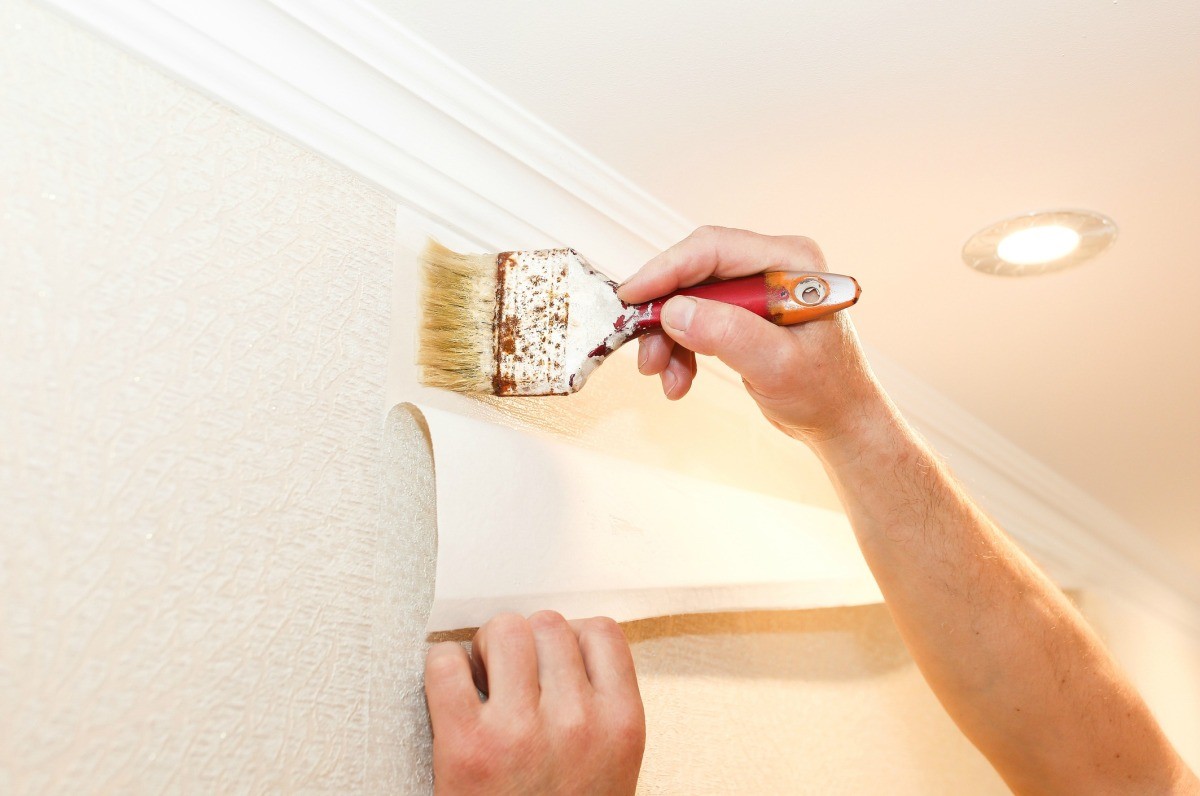
Priming the walls
Priming your walls is a crucial step before painting or applying any wall treatments. Priming helps to create a smooth and uniform surface, enhances paint adhesion, and prevents stains or color bleed-through. Here’s how you can prime your walls effectively:
- Gather your materials: You will need primer, a paintbrush or roller, a paint tray, and painter’s tape.
- Prepare the room: Remove any furniture or items from the area. Cover the floor with a drop cloth or plastic sheeting to protect it from paint drips or spills.
- Clean the walls: Ensure that your walls are clean and free from any dust, dirt, or grease. Use a damp cloth or sponge to wipe down the walls and allow them to dry completely.
- Protect the edges: Apply painter’s tape along the edges or trim of the walls to protect them from primer and paint. Make sure the tape is secure and applied in a straight line.
- Pour the primer: Pour the primer into a paint tray and load your brush or roller with an adequate amount of primer.
- Start from the top: Begin priming from the top of the wall and work your way down in manageable sections. Use a brush for edges and corners, and a roller for larger wall areas.
- Apply even coats: Apply an even and smooth coat of primer, making sure to cover the entire wall surface. Use long and overlapping strokes for a consistent finish.
- Allow drying time: Follow the manufacturer’s instructions for the recommended drying time of the primer. It usually takes a few hours for the primer to dry completely.
- Inspect for any missed spots: After the primer has dried, inspect the walls for any missed spots or areas that require a second coat. Touch up any missed areas before proceeding.
- Clean up: Clean your brushes or rollers with water or the recommended cleaning solution for the type of primer used. Remove the painter’s tape while the primer is still wet to prevent any paint from peeling off.
Priming your walls ensures a professional-looking finish and helps the paint adhere better, resulting in a more durable and long-lasting application. It’s an important step to achieve excellent results with your paint job.
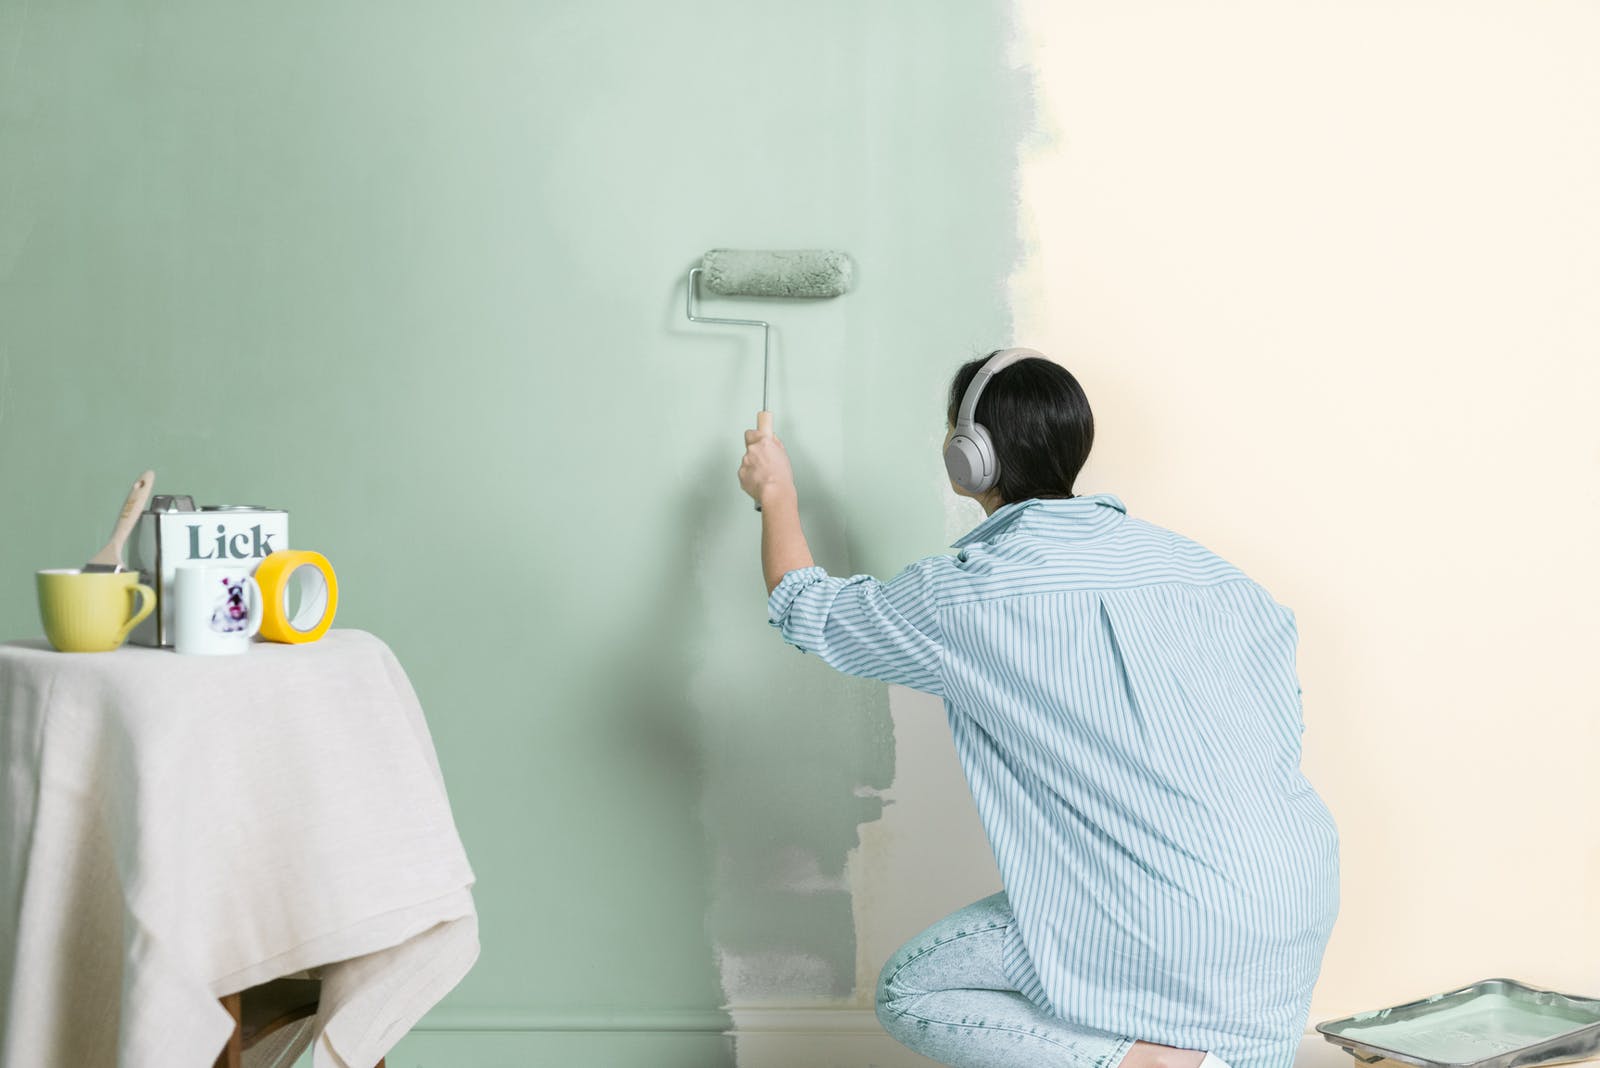
With the walls primed and ready, you’re now prepared to move on to your painting project or apply any desired wall treatments. Congratulations on completing the necessary preparations!
Final preparations before painting
Before you start the painting process, it’s essential to ensure that you have completed all the necessary final preparations. These steps will help create the ideal conditions for a successful and flawless paint job. Here are the final preparations to consider:
- Clean the walls (if needed): Take a final look at your walls to make sure they are clean and free from any dust, debris, or residue from the priming process. Use a damp cloth or sponge to wipe down the walls and allow them to dry completely.
- Check for imperfections: Inspect the walls for any remaining imperfections, such as bumps, nail holes, or uneven surfaces. Use putty or spackling compound to fill in any small holes or cracks, and sand them down to create a smooth surface.
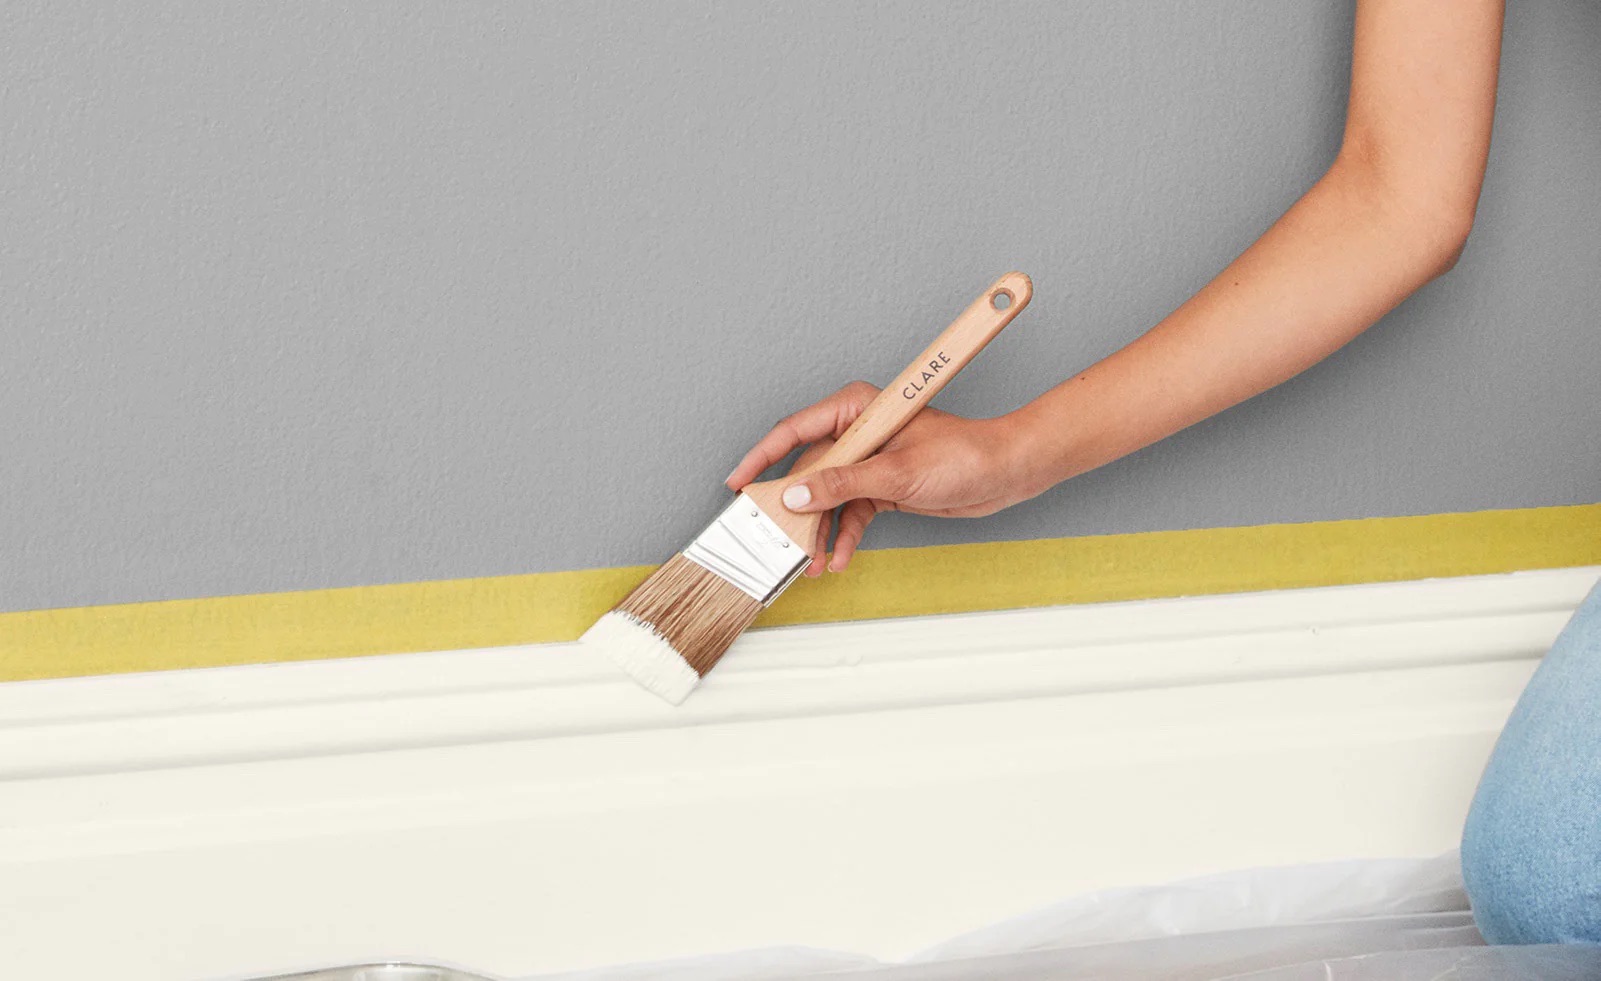
- Protect the surrounding areas: Use painter’s tape to protect any areas that you want to keep paint-free, such as trim, baseboards, windows, or outlets. Ensure that the tape is applied securely and straight for clean lines.
- Choose the right paint: Select high-quality paint in the desired color and finish for your project. Consider the type of paint that is appropriate for your walls, whether it’s latex, oil-based, or specialty paint for specific surfaces.
- Stir the paint: Before you start painting, thoroughly stir the paint with a stir stick to ensure that the color pigments are evenly distributed. This will result in a consistent color throughout the entire application.
- Set up your painting supplies: Get your paintbrushes, rollers, trays, and drop cloths ready. Ensure that your brushes and rollers are clean and free from any previous paint residue.
- Ventilate the room: Proper ventilation is important during the painting process to ensure good air circulation and to help the paint dry properly. Open windows or use fans to improve airflow and help dissipate any paint fumes.
- Plan your painting sequence: Determine the sequence in which you will paint the walls. Typically, it’s best to start with the ceiling, followed by the walls, and finish with any trim or baseboards.
- Follow the paint manufacturer’s instructions: Read and follow the instructions provided by the paint manufacturer regarding application techniques, drying times, and any additional recommendations.
By completing these final preparations before painting, you will set yourself up for a smooth and successful painting experience. Take your time, follow the necessary steps, and enjoy the process of transforming your walls with a fresh coat of paint!
Now that you’re fully prepared, it’s time to dive into your painting project and bring new life and color to your walls. Happy painting!
Conclusion
Cleaning and maintaining your walls not only enhances the aesthetics of your space but also promotes a clean and healthy living environment. From removing marks and stains to priming and preparing for painting, this comprehensive guide has equipped you with the knowledge and techniques to effectively clean and prepare your walls.
By gathering the necessary supplies, preparing the area, and following the appropriate cleaning methods, you can ensure that your walls are free from dirt, grime, and imperfections. Whether you are looking to refresh your walls with a new coat of paint or simply want to maintain their cleanliness and appearance, the steps outlined in this guide will guide you towards success.
Remember to approach each task with patience, attention to detail, and the right tools. Properly patching damaged areas, sanding for a smooth finish, dusting to remove debris, and priming before painting are critical steps that should not be overlooked.
Additionally, always follow the recommendations and instructions provided by manufacturers to achieve the best results. Take the time to properly clean and prepare your walls, and your efforts will be rewarded with a beautifully transformed space.
So, go ahead and enjoy the process of cleaning and preparing your walls. Whether you’re tackling a small room or an entire house, the knowledge and techniques you’ve gained will ensure that your walls are in pristine condition and ready for whatever treatment, be it a fresh coat of paint or a decorative touch, you have in mind.
Remember, a clean and well-maintained wall not only enhances the beauty of your home but also reflects your attention to detail and care for your living space. So, roll up your sleeves, gather your supplies, and get ready to give your walls the attention they deserve!
Frequently Asked Questions about How To Clean Walls: Get Rid Of Marks Or Prepare For Painting
Was this page helpful?
At Storables.com, we guarantee accurate and reliable information. Our content, validated by Expert Board Contributors, is crafted following stringent Editorial Policies. We're committed to providing you with well-researched, expert-backed insights for all your informational needs.

0 thoughts on “How To Clean Walls: Get Rid Of Marks Or Prepare For Painting”