Home>Furniture & Design>Interior Design Trends>How To Use Rub ‘n Buff On Etched Glass
Interior Design Trends
How To Use Rub ‘n Buff On Etched Glass
Published: February 7, 2024
Learn how to elevate your interior design with the latest trend of using Rub 'n Buff on etched glass. Transform your space with this innovative technique. Discover the possibilities today!
(Many of the links in this article redirect to a specific reviewed product. Your purchase of these products through affiliate links helps to generate commission for Storables.com, at no extra cost. Learn more)
Introduction
Rub 'n Buff is a versatile and easy-to-use product that can add a touch of elegance and sophistication to etched glass surfaces. Whether you're looking to revamp old glassware or add a decorative flair to your windows or mirrors, Rub 'n Buff offers a simple yet effective solution. This unique wax metallic finish is available in a variety of lustrous shades, allowing you to customize the look of your glass surfaces with ease.
By harnessing the power of Rub 'n Buff, you can transform ordinary glass items into stunning pieces that exude charm and character. The process of applying Rub 'n Buff to etched glass is a creative endeavor that yields impressive results, making it a popular choice for DIY enthusiasts and professional designers alike.
In this comprehensive guide, we will delve into the art of using Rub 'n Buff on etched glass, providing step-by-step instructions and valuable insights to help you achieve professional-looking results. From preparing the glass surface to applying the product and achieving a flawless finish, we will cover all the essential aspects of this transformative process. Additionally, we will share expert tips and tricks to ensure that your Rub 'n Buff project unfolds seamlessly, allowing you to unleash your creativity and elevate the aesthetic appeal of your glass items.
So, whether you're a seasoned crafter or a novice looking to embark on a new creative venture, this guide will equip you with the knowledge and confidence to master the art of using Rub 'n Buff on etched glass. Get ready to unlock the potential of your glass surfaces and infuse them with a touch of opulence and allure through the transformative power of Rub 'n Buff.
Key Takeaways:
- Transform ordinary glass items into stunning pieces with Rub ‘n Buff. Clean, apply, and buff for a professional finish that adds elegance and allure to etched glass surfaces.
- Experiment with precision application and custom color blending to unleash your creativity. Embrace the transformative power of Rub ‘n Buff to elevate glass items with captivating metallic allure.
Read more: How To Fix Etched Glass
Materials Needed
To embark on your Rub 'n Buff project, you'll need a few essential materials to ensure a seamless and successful application. Here's a comprehensive list of the items you'll require:
-
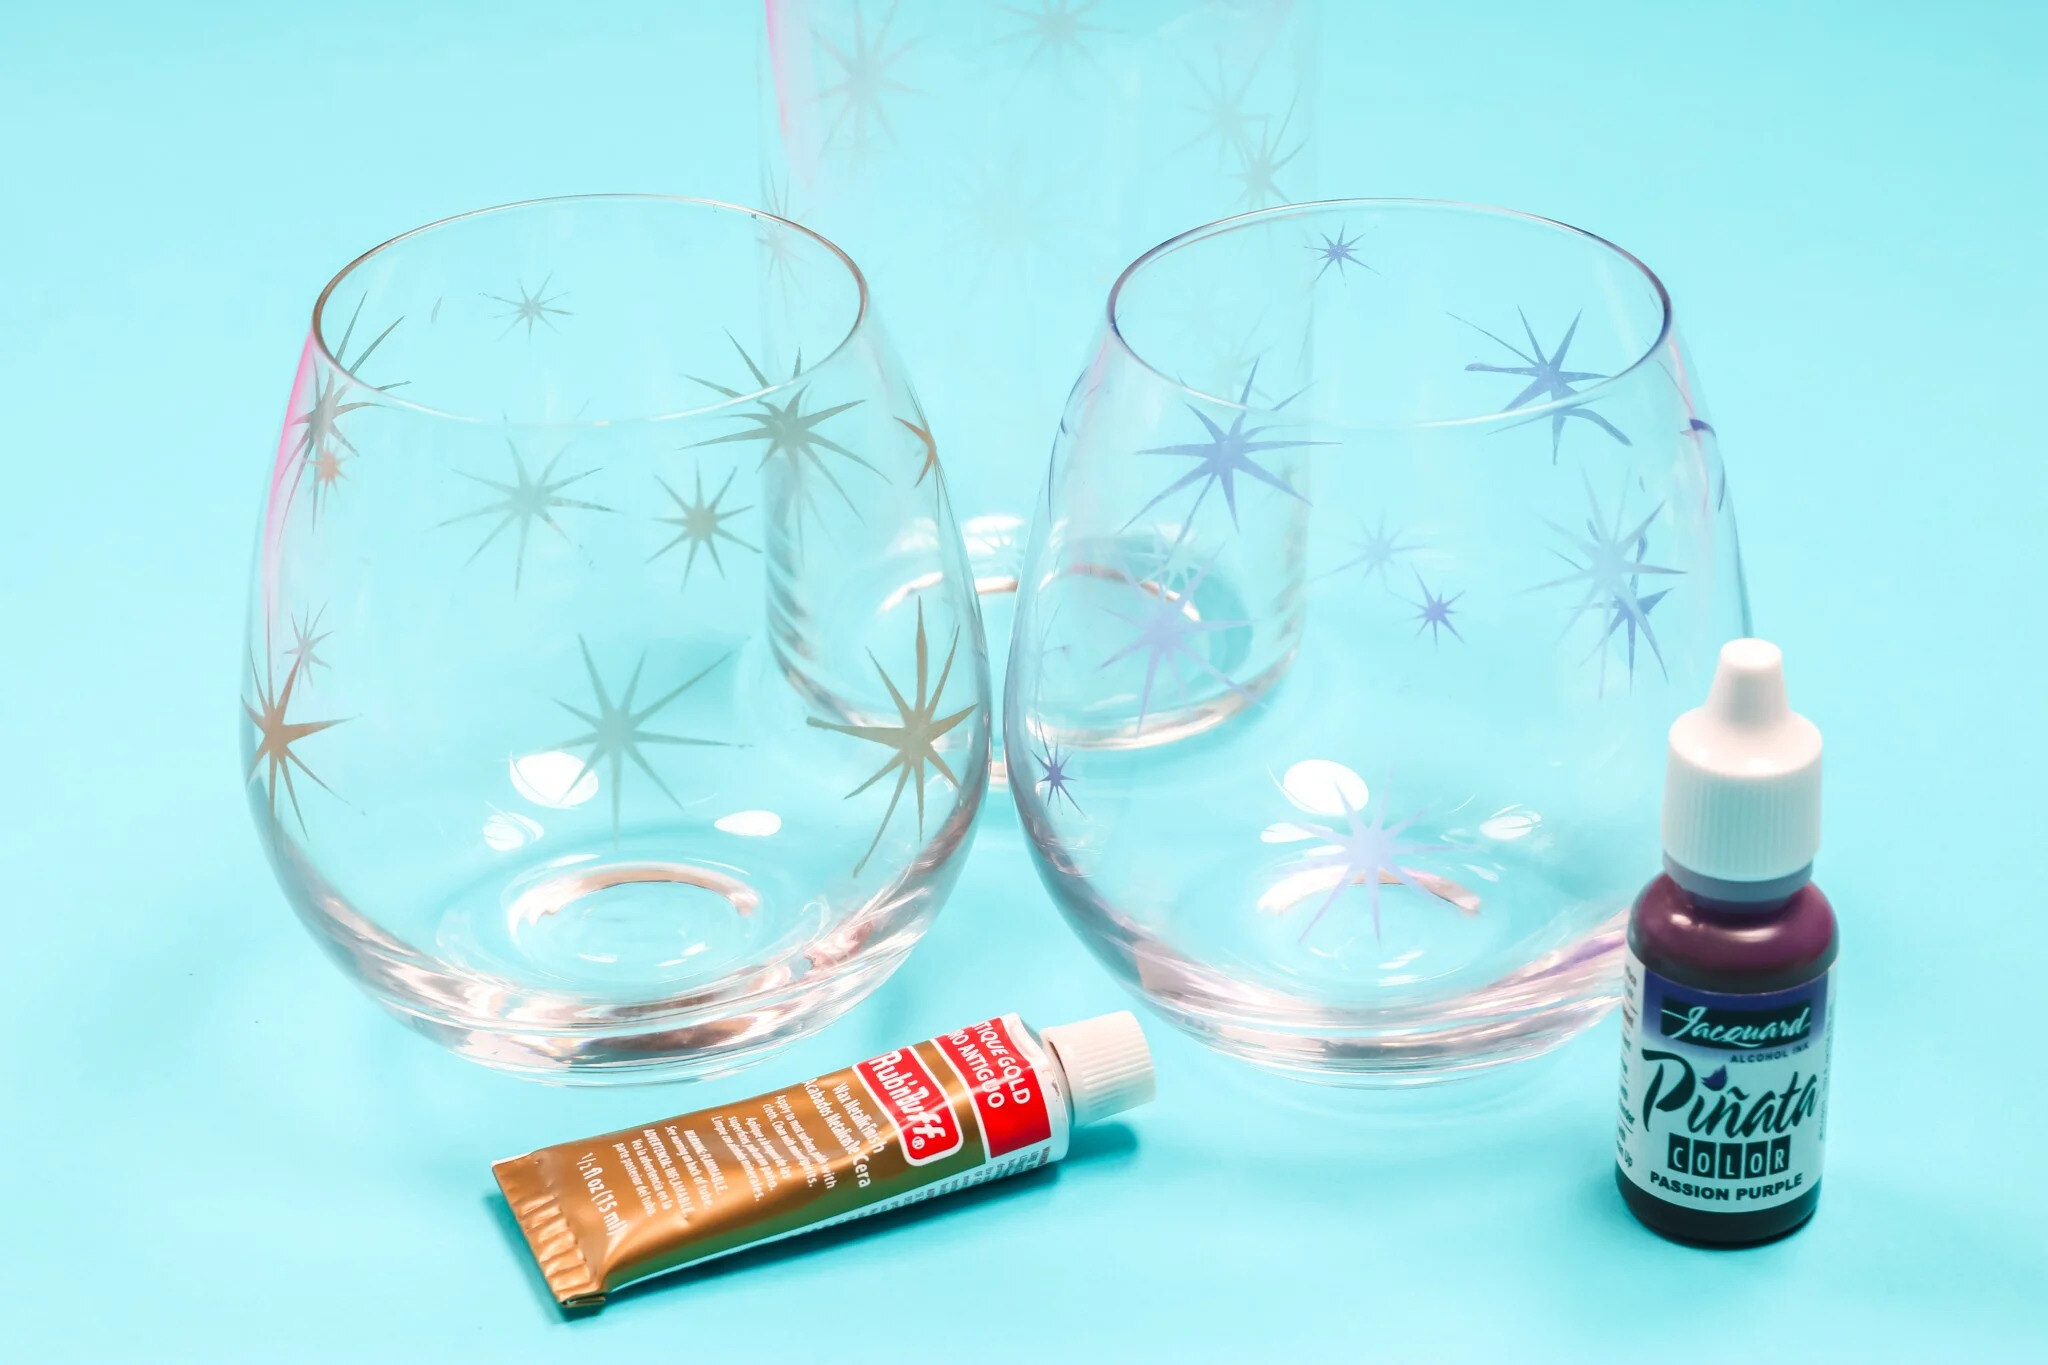
Rub 'n Buff: This is the star of the show! Select your preferred shade from the wide range of metallic finishes available, such as gold, silver, antique gold, or patina. Ensure that the Rub 'n Buff color complements the overall aesthetic you wish to achieve.
-
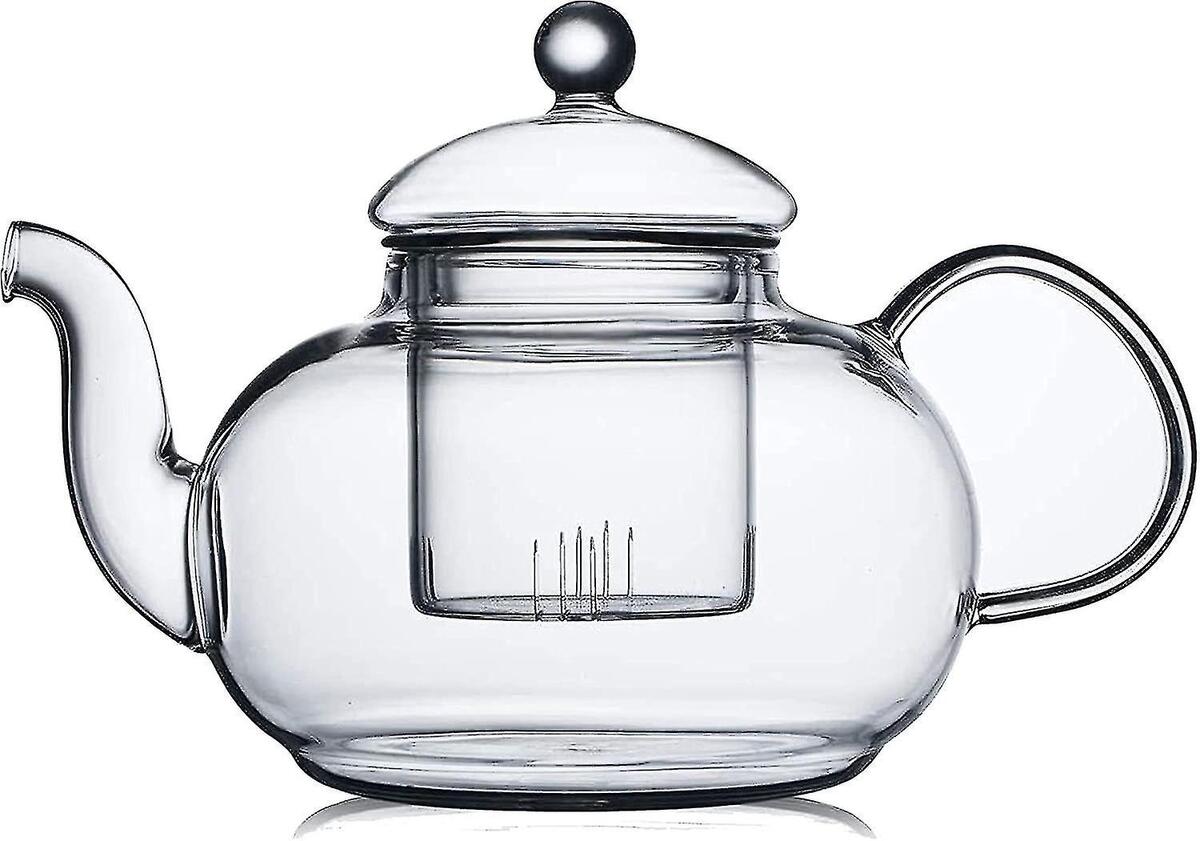
Etched Glass Surface: Whether it's a glass vase, mirror, window, or decorative glassware, choose the item you want to embellish with Rub 'n Buff. Ensure that the glass surface is clean and free from any dust or debris before starting the application process.
-
Rubbing Alcohol: This will be used to clean the glass surface thoroughly, removing any dirt, grease, or fingerprints that may hinder the adhesion of the Rub 'n Buff.
-
Soft Cloth or Cotton Balls: These will be used to apply the rubbing alcohol to the glass surface. Opt for lint-free materials to avoid leaving behind any fibers or residue.
-
Protective Gloves: Since Rub 'n Buff is a wax-based product, wearing gloves will prevent the product from adhering to your skin and make cleanup easier.
-
Q-Tips or Small Detail Brushes: These will come in handy for applying Rub 'n Buff to intricate or hard-to-reach areas, ensuring precise and controlled application.
-
Lint-Free Cloth: This will be used for buffing the Rub 'n Buff to achieve a smooth and lustrous finish on the glass surface.
-
Optional: Painter's Tape: If you want to create clean, defined lines or protect specific areas of the glass surface from the Rub 'n Buff, painter's tape can be used to mask off those sections.
By gathering these materials, you'll be well-equipped to begin your Rub 'n Buff project with confidence and precision. With the right tools at your disposal, you can unleash your creativity and elevate the visual appeal of your glass items through the transformative power of Rub 'n Buff.
Preparing the Glass Surface
Before diving into the application of Rub 'n Buff, it's crucial to prepare the glass surface adequately to ensure optimal adhesion and a flawless finish. The key to a successful Rub 'n Buff project lies in the meticulous cleaning and priming of the glass, setting the stage for the transformative application of the metallic wax finish.
To begin, gather your etched glass item and ensure that it is free from any dust, dirt, or residue. Using rubbing alcohol and a soft cloth or cotton balls, meticulously clean the entire surface of the glass. This step is essential for removing any lingering oils, fingerprints, or contaminants that could hinder the Rub 'n Buff from adhering effectively.
As you clean the glass, pay close attention to intricate details and hard-to-reach areas, ensuring that every nook and cranny is thoroughly cleansed. This meticulous approach will pave the way for a seamless application of Rub 'n Buff, allowing the metallic finish to bond securely with the glass surface.
If your etched glass item features specific areas that you wish to protect from the Rub 'n Buff application, consider using painter's tape to mask off those sections. This will create clean, defined lines and prevent any accidental smudges or excess product from affecting those areas.
Throughout the preparation process, it's essential to handle the glass with care, avoiding unnecessary contact with bare hands to prevent the transfer of oils or debris onto the surface. Wearing protective gloves can further safeguard the glass from potential contaminants and ensure a pristine canvas for the Rub 'n Buff application.
By meticulously preparing the glass surface, you are laying the groundwork for a successful Rub 'n Buff project. This diligent approach sets the stage for a seamless and professional-looking application, allowing the metallic wax finish to enhance the beauty of the etched glass with striking elegance and allure.
Applying Rub 'n Buff
With the glass surface meticulously prepared, it's time to embark on the transformative process of applying Rub 'n Buff. This stage is where the magic unfolds, as the lustrous metallic finish comes to life, imparting a touch of opulence and sophistication to the etched glass.
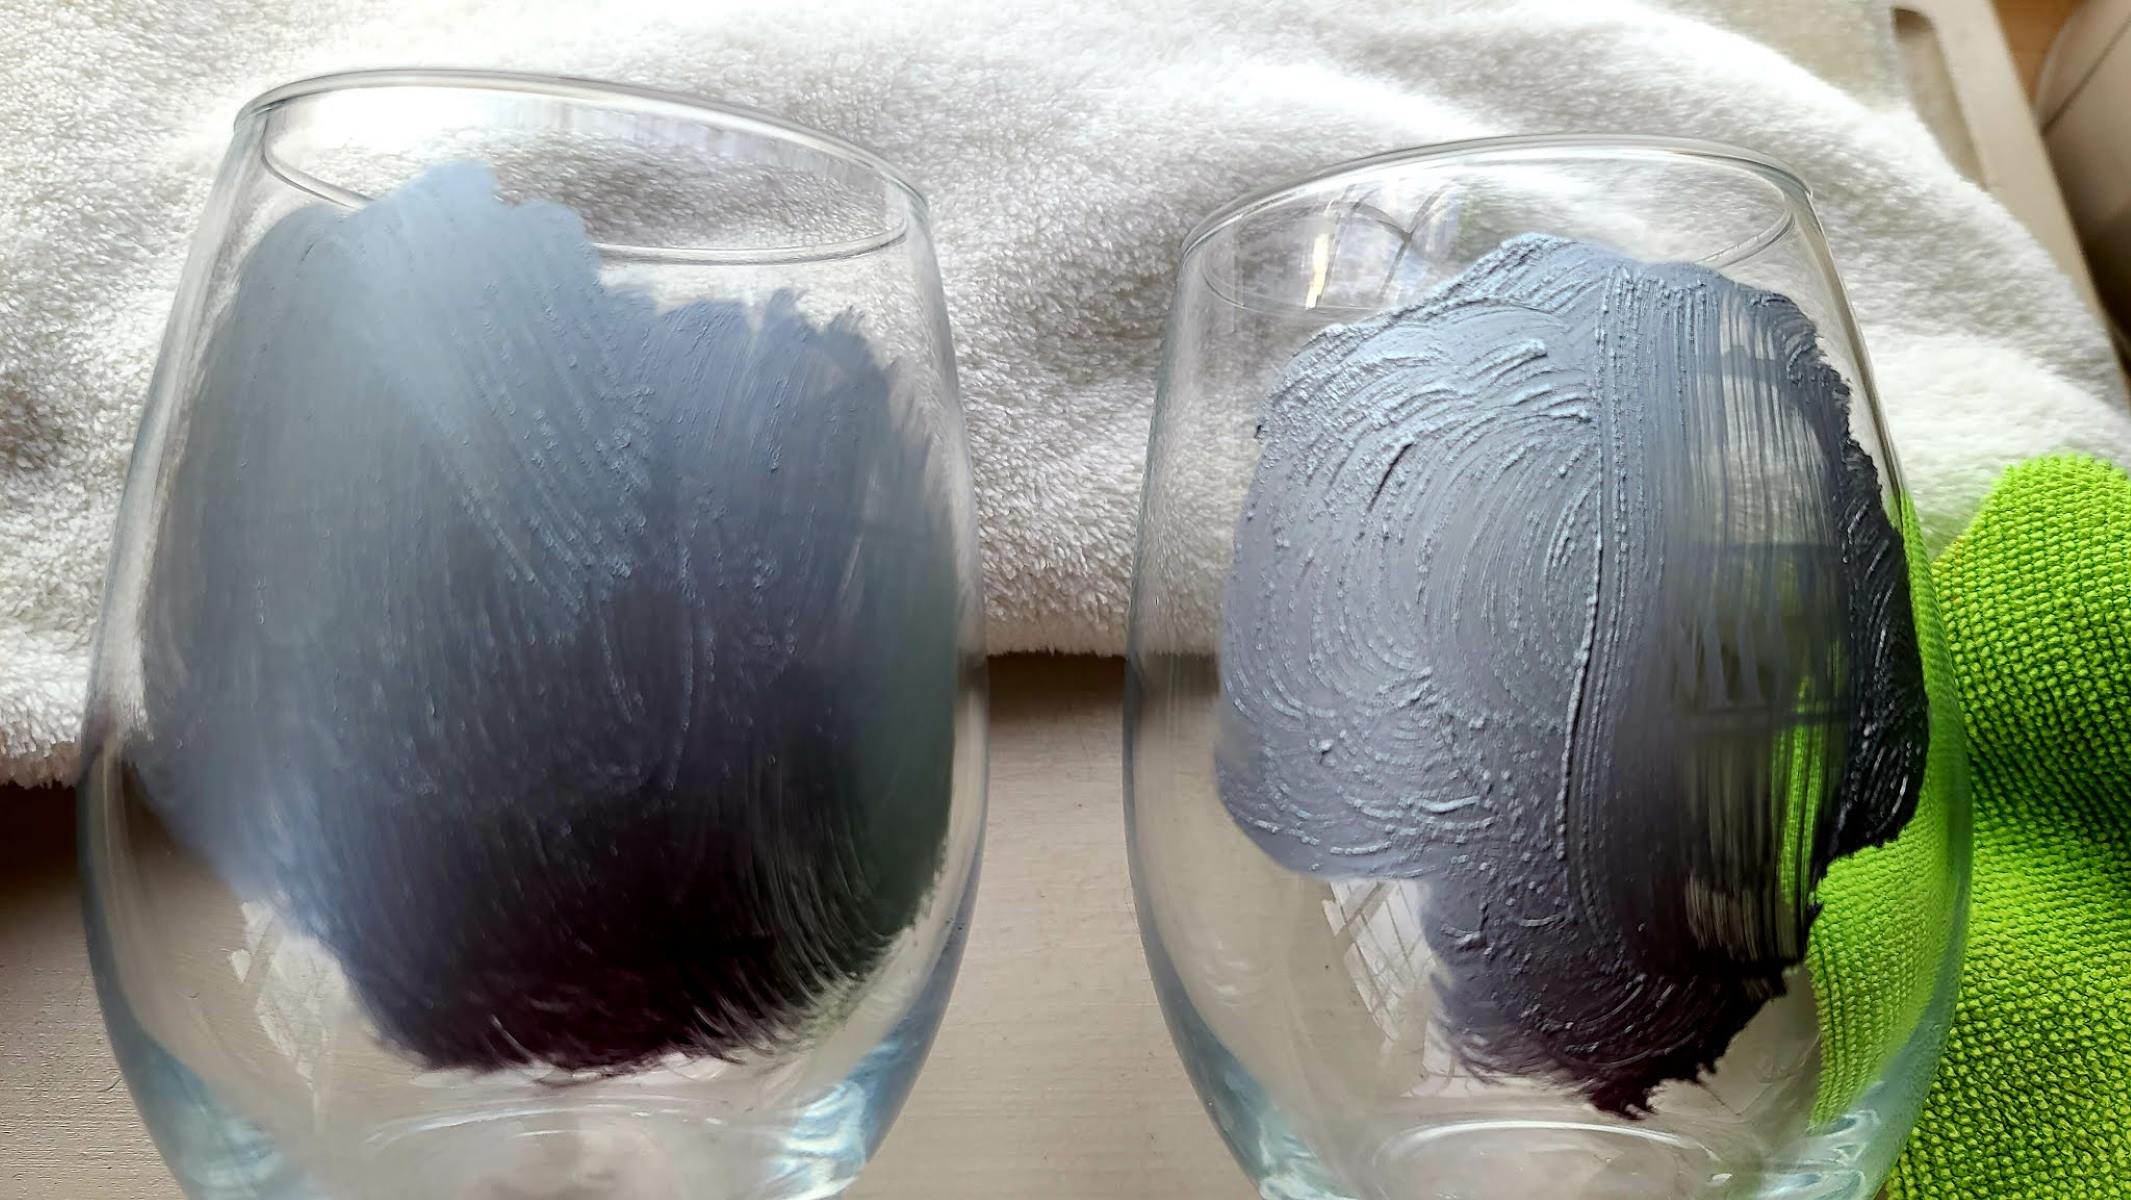
To begin, select your desired shade of Rub 'n Buff, ensuring that it harmonizes with the aesthetic you envision for the glass item. Using a soft cloth or a small amount of Rub 'n Buff on a cotton ball, gently dab a modest quantity of the product onto the glass surface. Start with a conservative amount, as a little Rub 'n Buff goes a long way, and you can always add more as needed.
As you apply the Rub 'n Buff, work in small sections to maintain control over the process and achieve an even distribution of the metallic finish. With a gentle, circular motion, spread the product across the glass surface, ensuring that it reaches all the etched grooves and crevices. This methodical approach allows the Rub 'n Buff to accentuate the intricate details of the etched design, enhancing its visual impact with a captivating sheen.
For areas with intricate or hard-to-reach details, such as delicate patterns or fine lines, utilize Q-tips or small detail brushes to apply the Rub 'n Buff with precision. This meticulous technique ensures that every aspect of the etched glass receives the transformative touch of the metallic wax finish, resulting in a cohesive and polished appearance.
Throughout the application process, maintain a light touch and exercise patience, allowing the Rub 'n Buff to meld seamlessly with the glass surface. As the metallic finish adorns the etched design, observe the captivating transformation taking place, infusing the glass item with a newfound allure and elegance.
Once the entire glass surface is adorned with Rub 'n Buff, step back and admire the remarkable metamorphosis that has taken place. The once-ordinary etched glass now exudes a radiant sheen, elevating its visual appeal and adding a touch of luxury to its aesthetic. The application of Rub 'n Buff has unlocked the inherent beauty of the glass, breathing new life into the etched design with a captivating metallic finish.
By following these meticulous steps and infusing the application process with care and precision, you can harness the full potential of Rub 'n Buff, elevating your etched glass items to new heights of elegance and allure. With the transformative power of Rub 'n Buff, your glass surfaces become stunning showcases of artistry and sophistication, captivating the eye with their radiant metallic sheen.
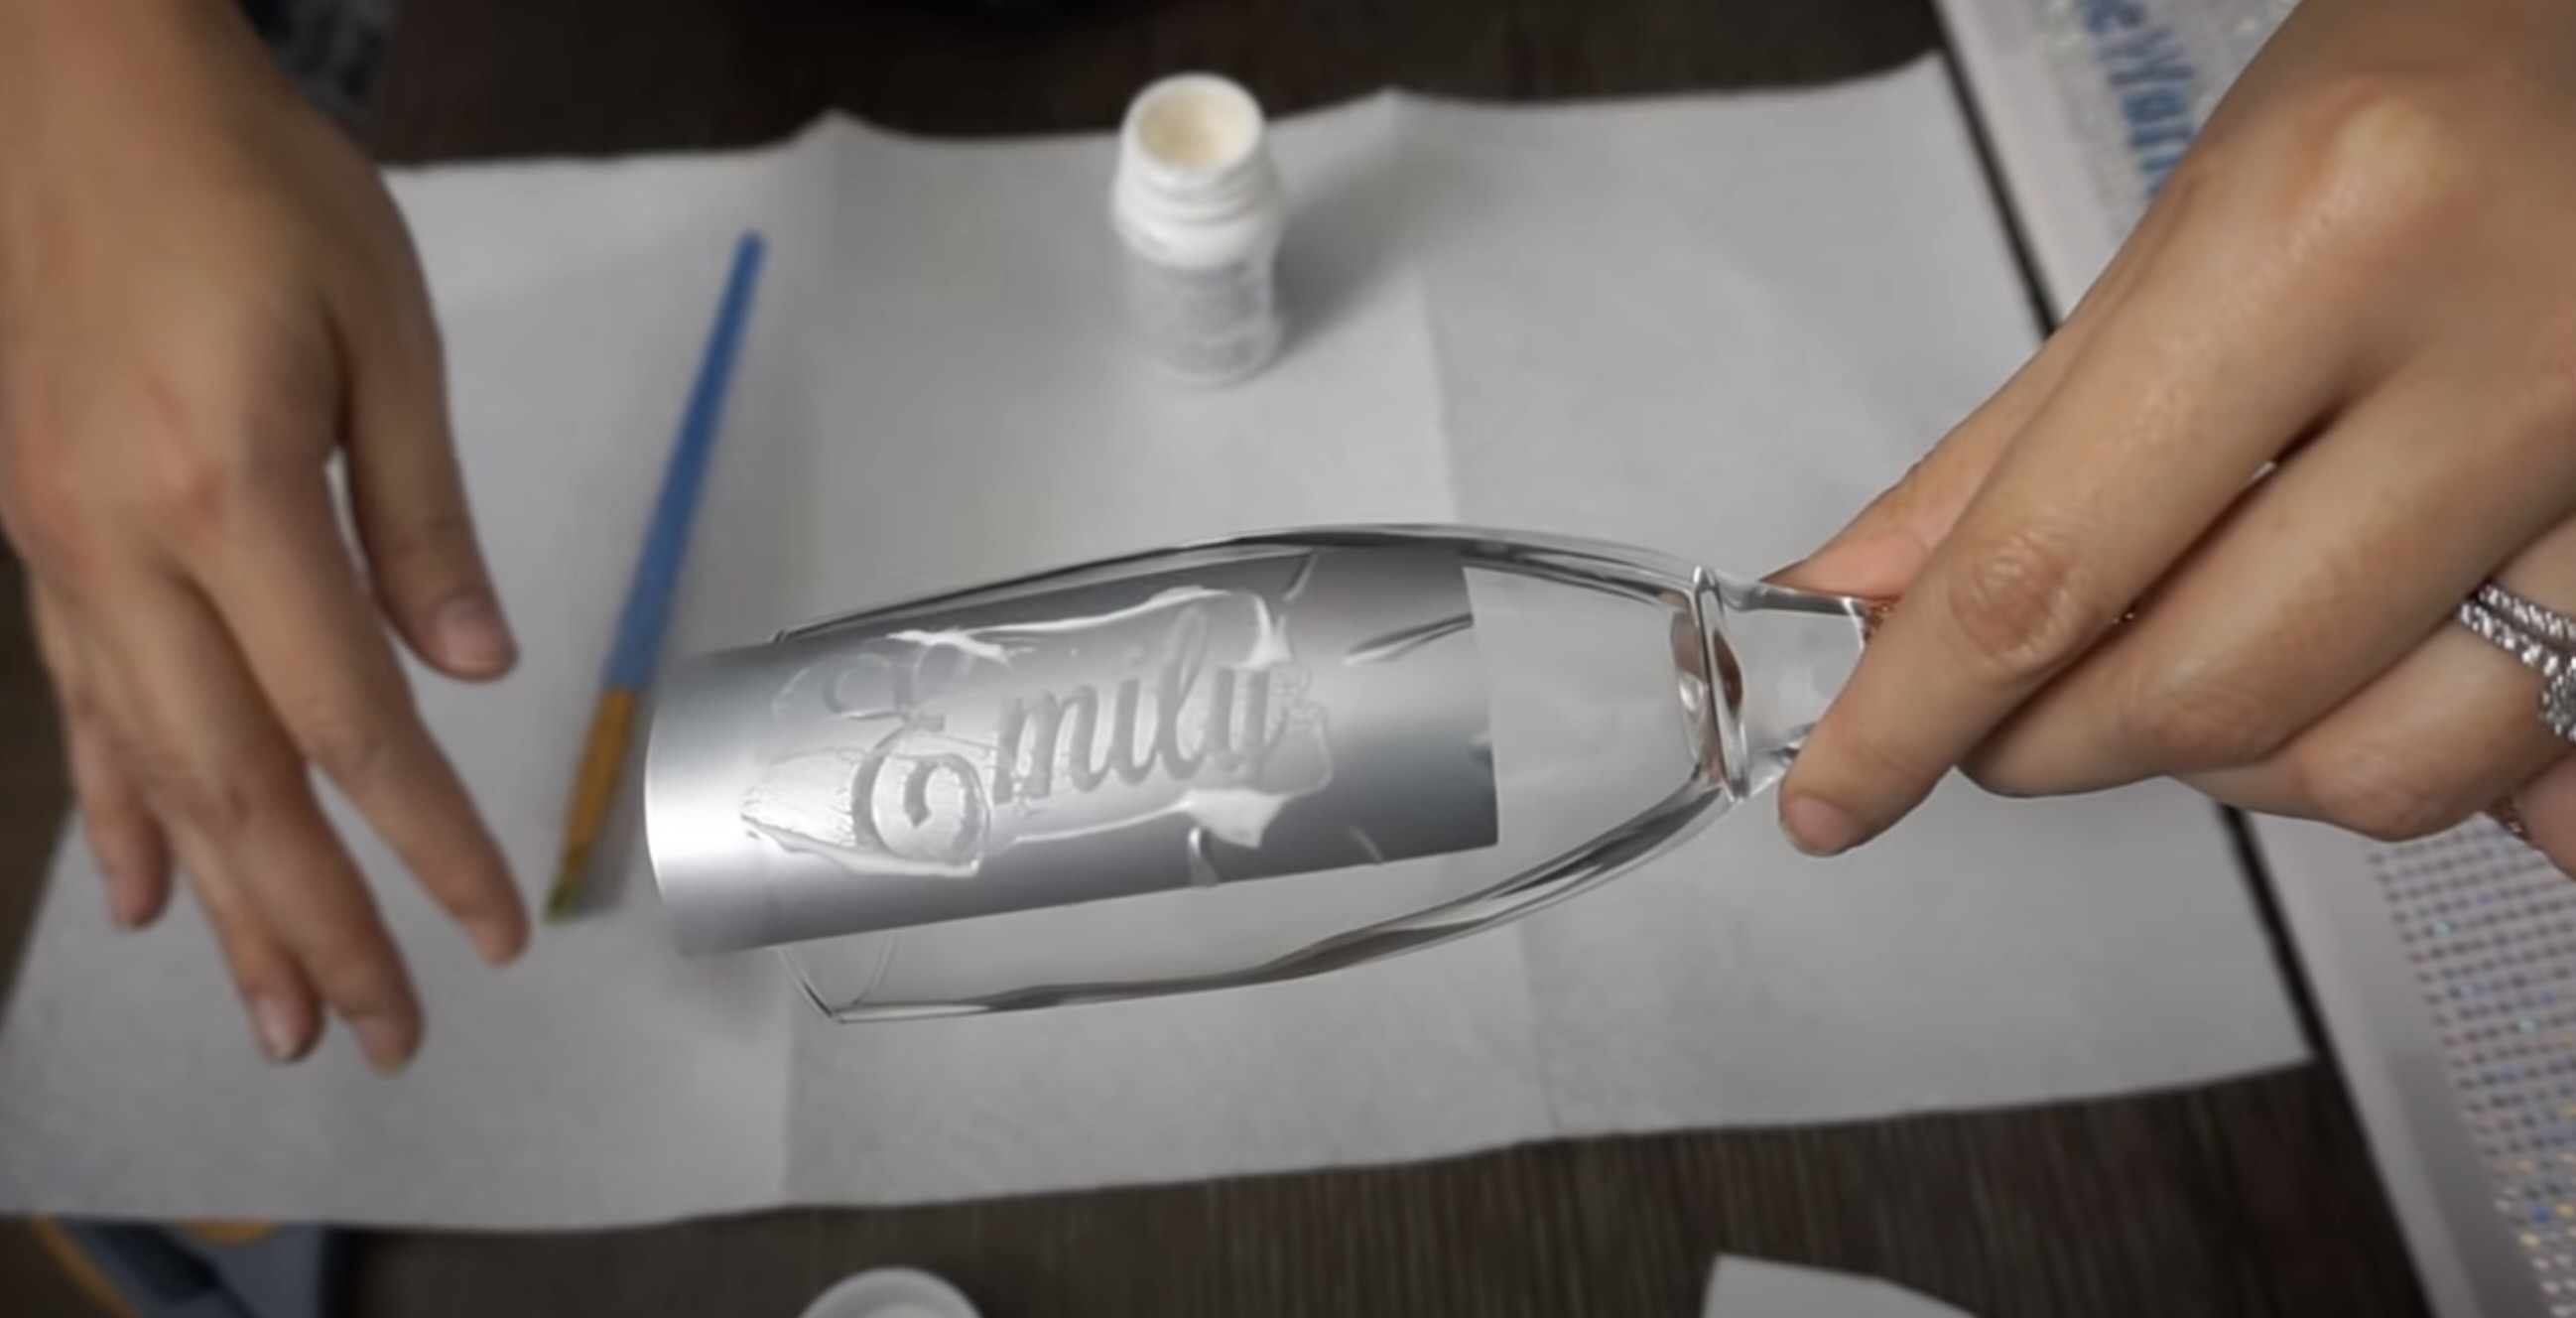
Apply a small amount of Rub ‘n Buff onto a soft cloth and gently rub it onto the etched glass in a circular motion. Use a light touch to avoid smudging and build up the color gradually for the desired effect.
Buffing and Finishing
After the application of Rub 'n Buff has adorned the etched glass with its lustrous metallic finish, the final steps of buffing and finishing are essential to refine the appearance and ensure a flawless, enduring result. This stage is where the transformative potential of Rub 'n Buff fully comes to fruition, culminating in a glass item that exudes opulence and sophistication.
To begin the buffing process, equip yourself with a lint-free cloth, ideally made of soft, non-abrasive material. With gentle yet deliberate motions, buff the glass surface where Rub 'n Buff has been applied. The buffing action serves to smooth out the metallic finish, enhancing its luster and ensuring an even, radiant sheen across the entire etched design. As you buff, the transformative impact of Rub 'n Buff becomes increasingly apparent, elevating the glass item to a new level of visual allure.
During the buffing process, pay close attention to achieving a uniform sheen, ensuring that the metallic finish glistens harmoniously across the entire glass surface. This meticulous approach results in a professional-looking finish, where the interplay of light and shadow accentuates the intricate details of the etched design, captivating the eye with its captivating radiance.
As the buffing nears completion, take a step back to admire the remarkable transformation that has unfolded. The once-ordinary etched glass now stands as a testament to the transformative power of Rub 'n Buff, exuding an air of elegance and refinement. The meticulous buffing process has elevated the glass item to a state of captivating beauty, where the metallic finish enhances the inherent charm of the etched design, creating a visual masterpiece that commands attention.
Upon completing the buffing process, take a moment to revel in the stunning results of your Rub 'n Buff project. The glass item now boasts a radiant, enduring finish that captivates with its opulent sheen, showcasing the artistry and sophistication infused by the transformative power of Rub 'n Buff. With the buffing and finishing stage concluded, your etched glass item stands as a testament to the seamless fusion of creativity and craftsmanship, embodying a captivating allure that enriches any space it graces.
By meticulously executing the buffing and finishing process, you have unlocked the full potential of Rub 'n Buff, elevating your etched glass items to new heights of elegance and allure. The transformative power of Rub 'n Buff has breathed new life into the glass surfaces, imbuing them with a captivating radiance that captivates the eye and elevates the aesthetic appeal of any space.
Read more: How To Make Etched Glass Stand Out
Tips and Tricks
-
Precision Application: When applying Rub 'n Buff to intricate etched designs, use a small amount of product and apply it with precision. This ensures that the metallic finish accentuates the fine details without overwhelming the overall design.
-
Layering for Depth: To achieve a multi-dimensional effect, consider layering different shades of Rub 'n Buff. Start with a base layer of a lighter shade and add accents of a darker hue to create depth and visual interest within the etched glass design.
-
Experiment with Techniques: Explore various application techniques, such as stippling or dry brushing, to create unique textural effects with Rub 'n Buff. These techniques can add depth and dimension to the metallic finish, enhancing the visual impact of the etched glass surface.
-
Custom Color Blending: Mix different Rub 'n Buff shades to create custom colors that complement your decor or artistic vision. Blend the metallic waxes on a palette or mixing surface to achieve the perfect hue before applying them to the glass surface.
-
Protective Sealant: Consider applying a clear protective sealant over the cured Rub 'n Buff to enhance its durability and longevity. This additional layer can safeguard the metallic finish from wear and tear, ensuring that your etched glass item maintains its stunning appearance over time.
-
Practice on Test Surface: Before applying Rub 'n Buff to a cherished glass item, practice the application technique on a test surface or spare piece of glass. This allows you to familiarize yourself with the product and refine your technique before working on your intended project.
-
Gentle Cleaning: When cleaning Rub 'n Buff-adorned glass items, use a soft, damp cloth to gently wipe the surface. Avoid harsh abrasives or vigorous scrubbing, as these can compromise the integrity of the metallic finish.
-
Storage and Maintenance: Store Rub 'n Buff in a cool, dry place and ensure that the lids are tightly sealed to prevent drying out. Additionally, when displaying or storing Rub 'n Buff-adorned glass items, avoid prolonged exposure to direct sunlight to preserve the integrity of the metallic finish.
-
Embrace Creativity: Let your creativity flow and embrace experimentation when using Rub 'n Buff on etched glass. Whether it's adding subtle metallic accents or creating bold, statement pieces, allow your artistic intuition to guide you in exploring the full potential of this versatile product.
By incorporating these tips and tricks into your Rub 'n Buff projects, you can elevate the art of embellishing etched glass surfaces, infusing them with a captivating metallic allure that captivates the eye and enriches any space.
Conclusion
In conclusion, the art of using Rub 'n Buff on etched glass represents a captivating fusion of creativity and craftsmanship, offering a transformative approach to enhancing the visual appeal of glass surfaces. Through meticulous preparation, precise application, and thoughtful finishing, Rub 'n Buff empowers individuals to elevate ordinary glass items to new heights of elegance and allure.
The journey of using Rub 'n Buff begins with the meticulous preparation of the glass surface, ensuring that it is pristine and free from any contaminants that could hinder the adhesion of the metallic finish. This initial step sets the stage for a seamless and professional application, allowing the inherent beauty of the etched design to shine through with captivating radiance.
As the Rub 'n Buff is delicately applied to the glass surface, the transformative potential of this versatile product unfolds, infusing the etched design with a lustrous metallic sheen that captivates the eye. The precision application and meticulous buffing process culminate in a glass item that exudes opulence and sophistication, becoming a stunning showcase of artistry and refinement.
Furthermore, the tips and tricks shared in this guide serve as valuable tools for unlocking the full potential of Rub 'n Buff, encouraging experimentation and creativity in the pursuit of creating unique and captivating glass pieces. From custom color blending to exploring various application techniques, these insights empower individuals to embark on Rub 'n Buff projects with confidence and ingenuity.
Ultimately, the application of Rub 'n Buff on etched glass transcends mere embellishment; it represents a celebration of artistry and individual expression. Whether adorning decorative glassware, mirrors, or windows, the transformative power of Rub 'n Buff breathes new life into glass surfaces, enriching any space with a touch of opulence and allure.
As you embark on your Rub 'n Buff journey, may this guide serve as a source of inspiration and guidance, empowering you to unleash your creativity and elevate the aesthetic appeal of your glass items. With the transformative power of Rub 'n Buff at your fingertips, every glass surface becomes a canvas for artistic expression, radiating with captivating beauty and sophistication.
After mastering the art of using Rub 'n Buff on etched glass, why not continue your creative journey with some festive projects? Dive into our collection of Easter craft ideas that are perfect for adding a touch of elegance to your celebrations. These DIY crafts are not only fun but also a great way to personalize your decor. Get ready to impress guests and make this Easter unforgettable!
Frequently Asked Questions about How To Use Rub 'n Buff On Etched Glass
Was this page helpful?
At Storables.com, we guarantee accurate and reliable information. Our content, validated by Expert Board Contributors, is crafted following stringent Editorial Policies. We're committed to providing you with well-researched, expert-backed insights for all your informational needs.

0 thoughts on “How To Use Rub ‘n Buff On Etched Glass”