Home>Furniture & Design>Office Furniture>How To Clean An Office Chair Mesh
Office Furniture
How To Clean An Office Chair Mesh
Published: January 11, 2024
Learn how to effectively clean and maintain your office chair mesh to keep it looking fresh and new. Discover expert tips for maintaining office furniture and design.
(Many of the links in this article redirect to a specific reviewed product. Your purchase of these products through affiliate links helps to generate commission for Storables.com, at no extra cost. Learn more)
Introduction
Welcome to the comprehensive guide on how to clean an office chair mesh. Office chairs are essential for providing comfort and support during long working hours. However, over time, the mesh on these chairs can accumulate dust, dirt, and stains, diminishing both the aesthetic appeal and hygiene of the workspace. Regular cleaning not only maintains the chair's appearance but also ensures a healthy and pleasant work environment.
In this guide, we will walk you through a step-by-step process to effectively clean your office chair mesh, restoring its pristine condition. From removing the chair from the workspace to deep cleaning with a suitable solution, we've got you covered. By following these simple yet effective methods, you can extend the lifespan of your office chair while enhancing the overall cleanliness of your workspace.
Whether you're dealing with stubborn stains or simply want to freshen up your office chair, this guide will equip you with the knowledge and techniques to achieve a spotless and inviting workspace. So, roll up your sleeves and let's dive into the process of revitalizing your office chair mesh!
Key Takeaways:
- Regularly cleaning your office chair mesh can maintain its appearance and create a healthier workspace, contributing to a more pleasant and productive environment for work.
- By following simple steps like vacuuming, spot cleaning, and deep cleaning, you can revitalize your office chair mesh and extend its lifespan, ensuring a clean and inviting workspace.
Read more: How To Clean Mesh Patio Chairs
Step 1: Remove the Chair from the Workspace
Before embarking on the cleaning process, it’s crucial to remove the office chair from the workspace. This step serves multiple purposes, including preventing the spread of dirt and cleaning agents to surrounding areas and ensuring a more convenient and thorough cleaning experience.
First and foremost, ensure that the chair is positioned on a stable surface to facilitate safe and hassle-free removal. If your office chair is equipped with wheels, lock them in place to prevent any unintended movement during the cleaning process. Once the chair is stationary, carefully lift it and transport it to a suitable cleaning area. This could be an outdoor space, a well-ventilated room, or any area with sufficient space to maneuver around the chair comfortably.
By relocating the chair to a dedicated cleaning area, you minimize the risk of spreading dirt and grime to other surfaces within your workspace. Additionally, this separation allows for focused attention on the chair, enabling a more meticulous and effective cleaning process. Remember, a clean and clutter-free workspace contributes to a more productive and pleasant work environment, making the effort of removing the chair well worth it.
Once the chair is in its designated cleaning space, you’re ready to proceed with the next steps to rejuvenate the mesh and revitalize your office chair. With the chair now removed from the workspace, you can embark on the journey to restore its cleanliness and appeal, ensuring a refreshed and inviting atmosphere for your work endeavors.
Step 2: Vacuum the Mesh
With the office chair removed from the workspace, the next crucial step in the cleaning process involves vacuuming the mesh. Over time, dust, crumbs, and debris can accumulate within the mesh, compromising both the cleanliness and comfort of the chair. By effectively vacuuming the mesh, you can eliminate these unwanted particles and restore the chair to its optimal condition.
To begin, equip your vacuum cleaner with a soft brush attachment. This attachment is specifically designed to gently dislodge and remove debris from delicate surfaces such as mesh without causing damage. Before commencing the vacuuming process, ensure that the brush attachment is securely fastened to the vacuum cleaner to facilitate efficient and thorough cleaning.
Starting from the top of the chair, gently run the vacuum cleaner over the mesh in a methodical manner, moving in overlapping strokes to ensure comprehensive coverage. Pay particular attention to areas where debris and dust tend to accumulate, such as the seat and backrest. The gentle suction of the vacuum, coupled with the soft brush attachment, effectively dislodges and removes particles from the mesh, contributing to a cleaner and more hygienic chair.
As you vacuum the mesh, be mindful of any seams, edges, or crevices where dirt may be trapped. Take the time to navigate the vacuum cleaner along these areas, ensuring that no debris is left behind. Additionally, consider adjusting the suction power of the vacuum cleaner to a level that effectively removes dirt while safeguarding the integrity of the mesh.
By thoroughly vacuuming the mesh, you not only eliminate visible debris but also address hidden particles that may compromise the chair’s cleanliness. This step sets the foundation for a more comprehensive cleaning process, preparing the mesh for targeted stain removal and deep cleaning. With the mesh now free of surface debris, you’re ready to tackle any lingering stains and revitalize your office chair to its pristine state.
Step 3: Spot Clean Stains
Spot cleaning stains on the office chair mesh is a crucial step in restoring its appearance and hygiene. Over time, spills, marks, and blemishes can detract from the chair’s aesthetic appeal and overall cleanliness. By addressing these stains promptly and effectively, you can rejuvenate the mesh and enhance the visual appeal of your office chair.
Before initiating the spot cleaning process, it’s essential to identify the nature of the stains. Different types of stains, such as coffee spills, ink marks, or food stains, may require specific cleaning approaches to achieve optimal results. Additionally, consider conducting a spot test on a discreet area of the mesh using the chosen cleaning solution to ensure compatibility and prevent any adverse effects.
To commence the spot cleaning process, prepare a mild cleaning solution by mixing a small amount of gentle detergent or upholstery cleaner with water. Dampen a clean, soft cloth with the diluted cleaning solution, ensuring that it is not overly saturated, and gently blot the stained areas on the mesh. Avoid vigorous rubbing, as this may spread the stain or damage the mesh fabric.
As you address each stain, exercise patience and persistence, gradually lifting the blemish from the mesh. For stubborn or dried-on stains, consider using a soft-bristled brush to delicately agitate the affected area while being mindful of the mesh’s delicate nature. Continue blotting and treating the stains until they are visibly diminished, taking care not to oversaturate the mesh with the cleaning solution.
Throughout the spot cleaning process, periodically inspect the treated areas to gauge the effectiveness of the cleaning efforts. If necessary, prepare fresh cleaning solution as needed and continue the targeted treatment of individual stains until they are satisfactorily removed or minimized.
By diligently spot cleaning stains on the office chair mesh, you can significantly improve its visual appeal and cleanliness. This proactive approach not only enhances the chair’s aesthetics but also contributes to a more inviting and professional workspace. With the stains addressed and the mesh on its way to renewed freshness, you’re ready to proceed to the next step of deep cleaning to further elevate the chair’s condition.
Use a vacuum with a brush attachment to remove dust and debris from the mesh. Mix mild detergent with warm water and gently scrub the mesh with a soft brush. Rinse with clean water and allow to air dry completely before using the chair again.
Step 4: Deep Clean with a Cleaning Solution
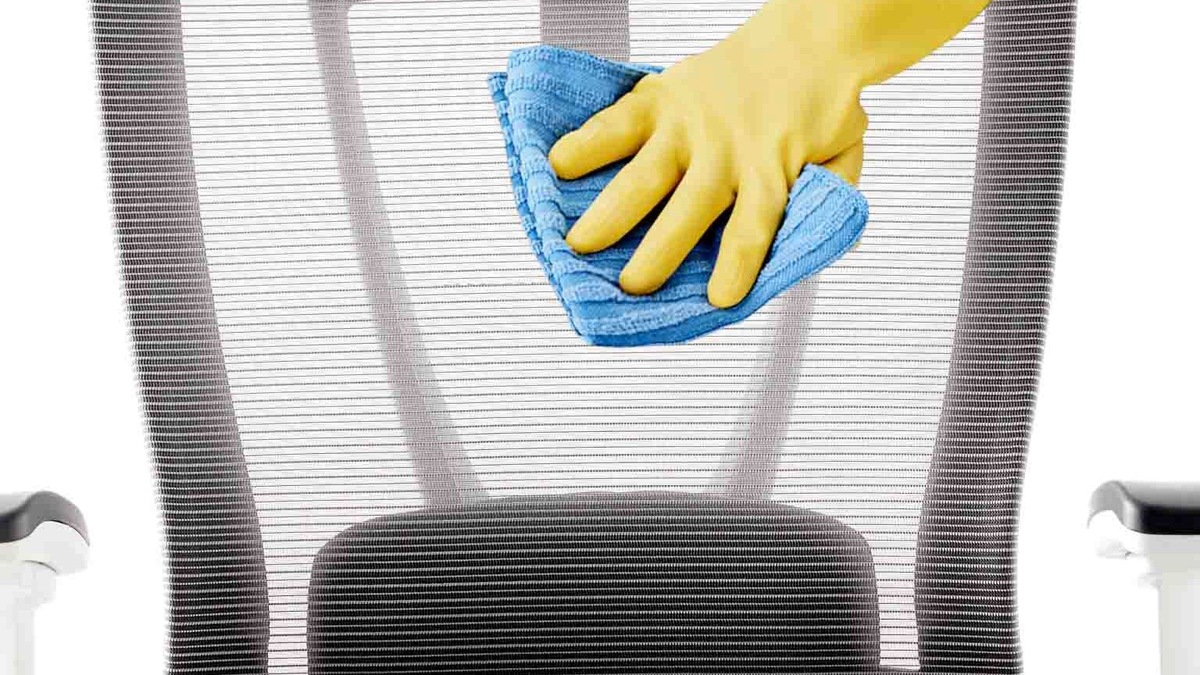
Deep cleaning the office chair mesh with a suitable cleaning solution is a pivotal step in revitalizing its appearance and hygiene. This comprehensive approach effectively targets embedded dirt, odors, and residual stains, restoring the mesh to a pristine condition and ensuring a fresh and inviting workspace.
To initiate the deep cleaning process, begin by preparing a gentle yet effective cleaning solution suitable for the mesh fabric. A popular and versatile option is a mixture of mild detergent or upholstery cleaner with water. This diluted solution provides the cleansing power necessary to lift embedded dirt and odors while being gentle enough to preserve the integrity of the mesh.
With the cleaning solution prepared, dampen a clean, soft cloth or sponge with the diluted mixture, ensuring that it is not excessively saturated, and begin gently wiping the entire surface of the mesh. Employing light and methodical strokes, work your way across the chair, paying attention to areas that may harbor accumulated dirt or residual stains. As you navigate the mesh, periodically rinse and wring out the cloth or sponge to prevent the spread of dirt and ensure effective cleaning.
For areas with particularly stubborn stains or noticeable discoloration, consider gently agitating the mesh with the cleaning solution using a soft-bristled brush. This targeted approach helps to dislodge embedded dirt and revitalize the appearance of the mesh, contributing to a more thorough and comprehensive cleaning process.
Throughout the deep cleaning endeavor, maintain a keen eye for areas that may require additional attention, such as armrests, headrests, and areas of high contact. By systematically addressing these regions with the cleaning solution, you ensure that the entire chair is rejuvenated and free from accumulated grime and residues.
Upon completing the deep cleaning process, allow the chair to air dry in a well-ventilated area, ensuring that it is positioned away from direct sunlight and heat sources. This critical step allows the mesh to dry thoroughly, preventing the development of musty odors and ensuring that the chair is ready to be reintroduced to the workspace in its revitalized state.
By undertaking a meticulous deep cleaning with a suitable solution, you can effectively eliminate embedded dirt, odors, and residual stains from the office chair mesh, contributing to a cleaner and more inviting workspace. With the chair now undergoing the drying process, you’re on the cusp of witnessing the transformative results of your cleaning efforts.
Read more: How To Clean Outdoor Mesh Chairs
Step 5: Allow the Chair to Dry
After completing the thorough cleaning process, it is essential to allow the office chair mesh to dry completely. This crucial step ensures that the mesh fabric, as well as any residual moisture from the cleaning process, is fully evaporated, thereby preventing the development of musty odors and maintaining the chair’s pristine condition.
To commence the drying process, position the cleaned office chair in a well-ventilated area, away from direct sunlight and heat sources. This strategic placement facilitates the natural evaporation of moisture from the mesh, promoting a thorough and even drying process. Additionally, the absence of direct sunlight helps prevent potential discoloration or damage to the mesh fabric.
As the chair begins to air dry, periodically inspect the mesh to gauge the progress of the drying process. Depending on factors such as ambient humidity and airflow, the drying duration may vary. Exercise patience and allow adequate time for the mesh to dry completely, ensuring that no residual moisture lingers within the fabric.
To expedite the drying process, consider utilizing a fan or increasing airflow in the vicinity of the chair. This supplemental airflow aids in the evaporation of moisture, accelerating the drying time and expediting the chair’s readiness for reintroduction to the workspace.
Throughout the drying period, maintain a vigilant eye for any signs of lingering moisture or dampness within the mesh. Address any areas that appear to retain moisture by gently blotting them with a clean, dry cloth, facilitating the absorption of residual moisture and expediting the drying process.
Once the office chair mesh is thoroughly dry, conduct a final inspection to ensure that it is free from residual moisture and exhibits a revitalized appearance. With the chair now restored to its pristine condition, it is ready to be reintroduced to the workspace, enhancing the overall cleanliness and appeal of the environment.
By allowing the chair to dry completely, you safeguard the mesh fabric from musty odors and ensure that the cleaning efforts culminate in a revitalized and inviting office chair. With the chair now dry and poised for reintegration into the workspace, you can revel in the transformative results of your dedicated cleaning endeavors.
Conclusion
Congratulations on successfully navigating the comprehensive process of cleaning an office chair mesh! By following the step-by-step guide outlined in this article, you have revitalized the appearance and hygiene of your office chair, contributing to a cleaner and more inviting workspace.
Commencing with the removal of the chair from the workspace, you embarked on a journey to restore its pristine condition. The meticulous vacuuming of the mesh effectively eliminated surface debris, laying the groundwork for targeted stain removal and deep cleaning. Through the strategic spot cleaning of stains and the methodical deep cleaning with a suitable solution, you addressed embedded dirt, odors, and residual blemishes, breathing new life into the chair.
As the chair underwent the critical drying process, you ensured that it was free from residual moisture and poised for reintegration into the workspace. The revitalized mesh, now thoroughly dry and rejuvenated, stands as a testament to your dedication to maintaining a clean and professional work environment.
Remember, regular maintenance and cleaning practices are key to preserving the cleanliness and appeal of your office chair. By incorporating these cleaning techniques into your routine, you can prolong the lifespan of your chair while fostering a more pleasant and hygienic workspace.
With a revitalized office chair mesh and a refreshed workspace, you are poised to embark on your work endeavors with renewed energy and focus. Embrace the transformative impact of a clean and inviting workspace, and revel in the positive atmosphere that your efforts have cultivated.
Thank you for joining us on this journey to clean and revitalize an office chair mesh. Here’s to a workspace that exudes cleanliness, comfort, and productivity!
Frequently Asked Questions about How To Clean An Office Chair Mesh
Was this page helpful?
At Storables.com, we guarantee accurate and reliable information. Our content, validated by Expert Board Contributors, is crafted following stringent Editorial Policies. We're committed to providing you with well-researched, expert-backed insights for all your informational needs.


0 thoughts on “How To Clean An Office Chair Mesh”