Home>Furniture & Design>Office Furniture>How To Fix An Office Chair Armrest
Office Furniture
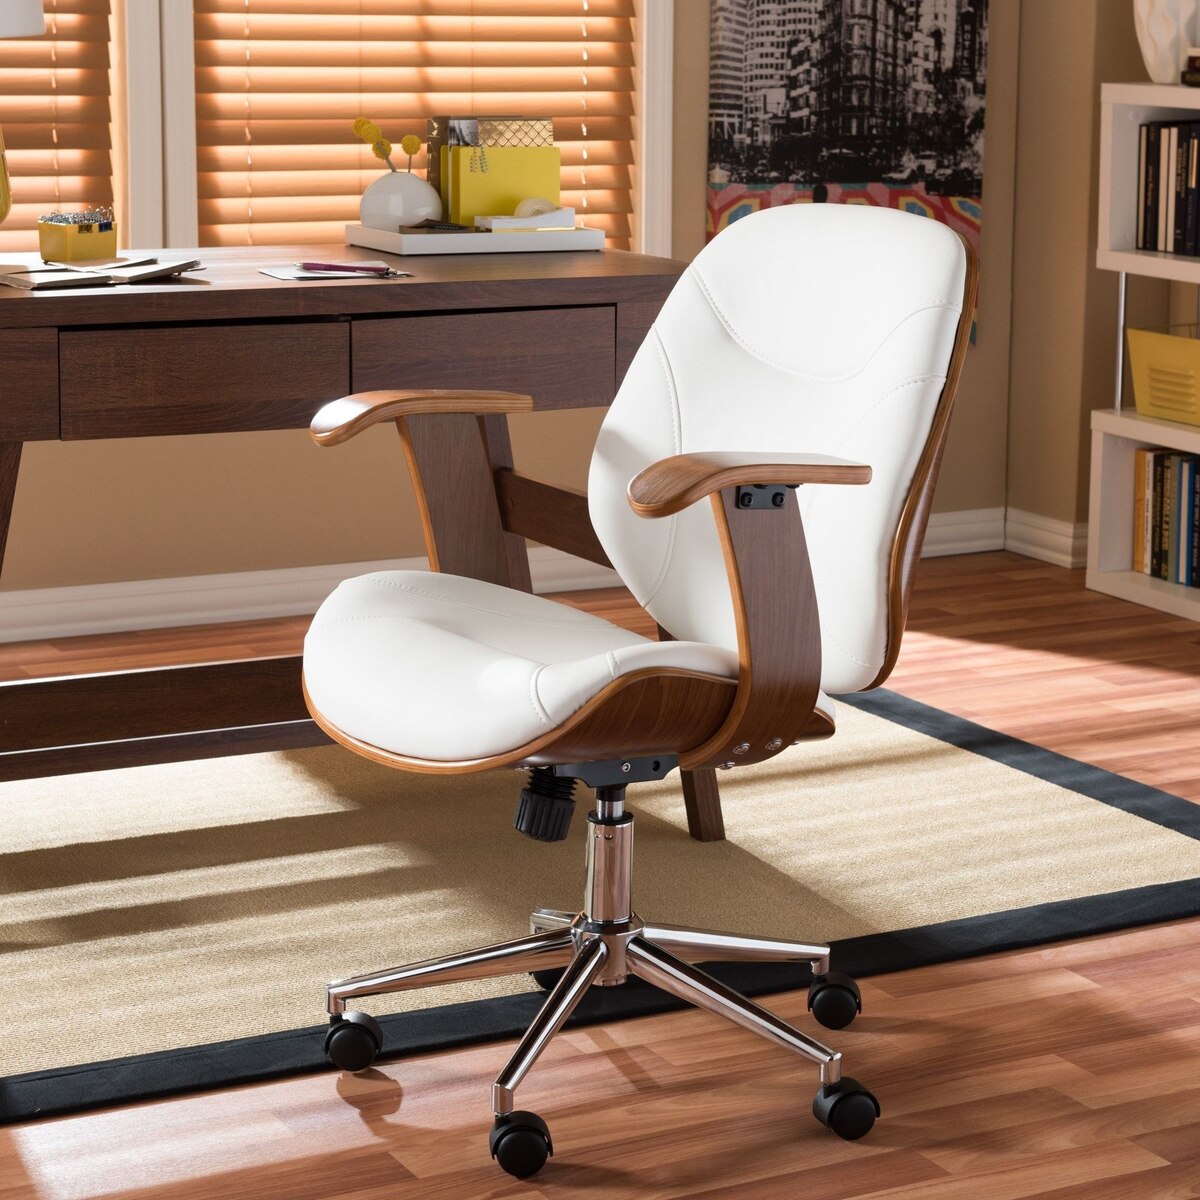
How To Fix An Office Chair Armrest
Modified: January 14, 2024
Learn how to easily fix the armrest of your office chair with our step-by-step guide. Get your office furniture back in top shape today!
(Many of the links in this article redirect to a specific reviewed product. Your purchase of these products through affiliate links helps to generate commission for Storables.com, at no extra cost. Learn more)
Introduction
Welcome to the ultimate guide on fixing an office chair armrest! If you're reading this, chances are you've encountered the frustrating issue of a broken or malfunctioning armrest on your office chair. Fear not, as we're about to embark on a journey to restore comfort and functionality to your trusty seat.
An office chair is more than just a piece of furniture; it's a vital tool that directly impacts your posture, productivity, and overall well-being during those long hours at work. When one of its components, such as the armrest, becomes compromised, it can lead to discomfort, reduced support, and even potential strain on your body.
In this comprehensive guide, we'll delve into the step-by-step process of assessing the damage, gathering the necessary tools and materials, removing the armrest, conducting the repair, and reattaching the armrest to ensure it's as good as new. Whether your armrest is wobbly, cracked, or entirely detached, we've got you covered with practical solutions to address the issue.
By the end of this journey, you'll not only have a fully functional armrest but also a deeper understanding of the mechanics behind it. So, grab your toolkit and let's dive into the world of office chair repair. It's time to reclaim the comfort and support you deserve as you conquer the demands of your day-to-day tasks. Let's get started!
Key Takeaways:
- Revive your office chair armrest for enhanced comfort and support. By mastering the repair process, you’ve personalized your seating experience and empowered yourself with valuable maintenance skills.
- Overcoming the challenge of fixing your office chair armrest has not only revitalized your workspace but also instilled a sense of satisfaction and accomplishment. Embrace the comfort and productivity it brings!
Read more: How To Fix Hydraulics On An Office Chair
Assessing the Damage
Before diving into the repair process, it's crucial to assess the extent of the damage to your office chair armrest. This initial step will provide valuable insight into the specific issues at hand and guide the subsequent course of action.
Start by carefully examining the armrest for any visible signs of damage. This may include cracks, loose components, or structural weaknesses. Pay close attention to the attachment points where the armrest connects to the chair, as these areas are prone to wear and tear over time.
Next, test the armrest for stability and functionality. Does it wobble excessively when pressure is applied? Is there any noticeable give or movement in the attachment mechanism? Additionally, check for any squeaking or creaking sounds that may indicate internal damage or friction within the armrest assembly.
If your armrest is adjustable, assess whether the adjustment mechanism is functioning correctly. Ensure that it can be raised, lowered, or angled as intended without encountering resistance or irregular movement.
It's also essential to consider the material of the armrest. Is it made of plastic, metal, or a combination of materials? Different materials may require specific repair techniques and compatible adhesives or fasteners.
By thoroughly evaluating the damage, you'll gain a clear understanding of the issues affecting your office chair armrest. This assessment will serve as the foundation for the subsequent steps, guiding your approach to the repair process and ensuring that the necessary tools and materials are readily available. Armed with this knowledge, you're ready to embark on the journey of restoring your armrest to its former glory.
Tools and Materials Needed
Before commencing the repair of your office chair armrest, it’s essential to gather the necessary tools and materials to ensure a smooth and effective restoration process. Here’s a comprehensive list of items you’ll need to have on hand:
Tools:
- Screwdriver set: Ensure you have both flat-head and Phillips head screwdrivers to accommodate various types of screws.
- Adjustable wrench: Useful for tightening or loosening nuts and bolts.
- Needle-nose pliers: Ideal for gripping small components and reaching confined spaces.
- Utility knife: Helpful for precise cutting and trimming, especially when dealing with upholstery or padding.
- Clamps: These are valuable for securing components during the repair process.
- Drill (if necessary): If the armrest requires new screw holes or fasteners, a drill may be needed.
Materials:
- Replacement parts: If specific components of the armrest are irreparably damaged, such as brackets, screws, or padding, having suitable replacements on hand is essential.
- Adhesives: Depending on the material of the armrest, you may need adhesive solutions such as epoxy, super glue, or specialized plastic adhesives for repairs.
- Fasteners: Stock up on screws, nuts, bolts, and washers that match the size and type used in the original construction of the armrest.
- Padding or upholstery material: If the armrest features cushioning or fabric covering that requires repair or replacement, having matching padding or upholstery material is crucial.
- Cleaning supplies: Prepare cleaning agents and cloths to remove dirt, adhesive residue, or grime from the armrest during the repair process.
By ensuring that you have these tools and materials at your disposal, you’ll be well-equipped to address a wide range of issues that may arise during the repair of your office chair armrest. Having a comprehensive toolkit and a selection of materials readily available will streamline the repair process and contribute to achieving a professional-quality restoration.
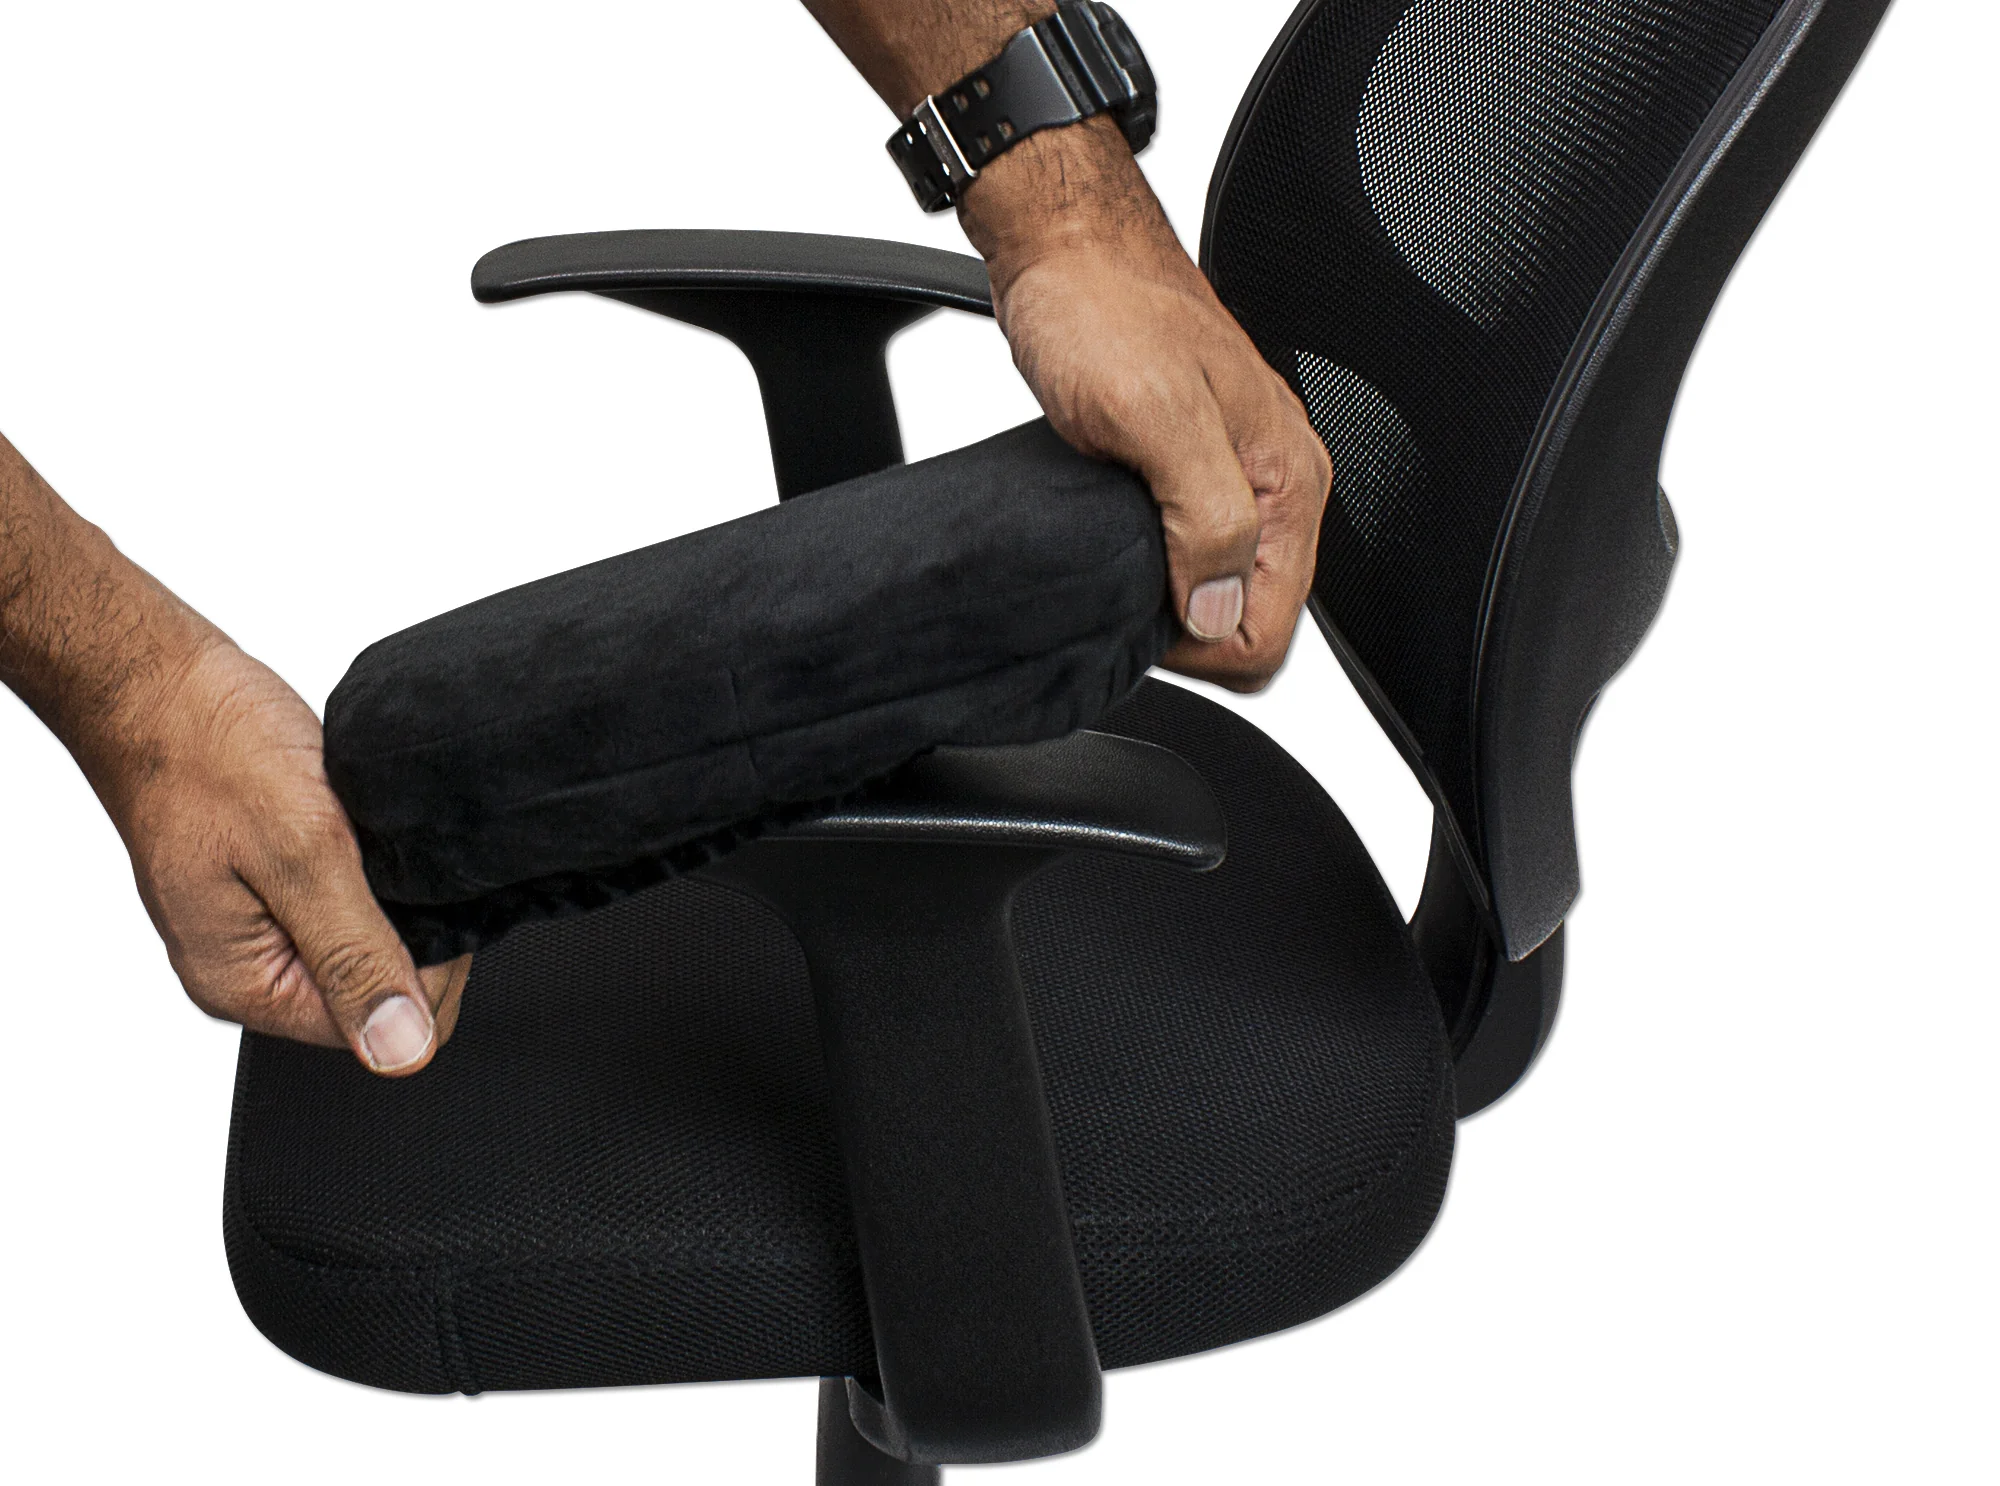
Removing the Armrest
Before delving into the repair process, it’s essential to safely remove the damaged armrest from your office chair. This step will provide clear access to the components in need of repair or replacement and facilitate a thorough restoration. Here’s a systematic guide to removing the armrest:
1. Position the Chair:
Start by positioning the chair on a stable surface, ensuring that it’s securely supported and won’t tip over during the removal process. If the chair has wheels, consider locking them in place to prevent unintended movement.
2. Locate Attachment Points:
Examine the underside of the armrest to identify the attachment points where it connects to the chair. These attachment points may be secured with screws, bolts, or other fasteners, depending on the chair’s design.
3. Remove Fasteners:
Using the appropriate tools from your toolkit, carefully remove the fasteners securing the armrest to the chair. This may involve using a screwdriver, wrench, or other implements to loosen and extract screws or bolts. Keep track of the removed fasteners to ensure they can be reinstalled during the reassembly process.
Read more: How To Fix A Wobbly Office Chair
4. Detach the Armrest:
Once the fasteners are removed, gently detach the armrest from the chair. Be mindful of any electrical wiring or cables that may be present if the armrest features integrated controls or mechanisms. Ensure that these components are disconnected safely to avoid damage.
5. Set Aside the Armrest:
After removing the armrest, set it aside in a safe and clear workspace. This will provide a dedicated area for inspecting the armrest, conducting repairs, and preparing it for reattachment once the restoration process is complete.
By following these steps, you’ll effectively remove the armrest from your office chair, setting the stage for the subsequent repair and restoration efforts. With the armrest detached, you can focus on addressing the specific issues affecting its functionality and structural integrity, paving the way for a successful repair process.
Repairing the Armrest
With the armrest safely removed from the office chair, it’s time to embark on the crucial phase of repairing the damaged components and restoring functionality to this essential part of your seating experience. Whether the armrest is cracked, wobbly, or in need of upholstery repair, the following steps will guide you through the restoration process:
1. Assess the Damage:
Begin by conducting a detailed assessment of the armrest’s condition. Identify any cracks, fractures, or structural weaknesses that require attention. If the armrest features padding or upholstery, evaluate the state of these elements and determine if they need repair or replacement.
Read more: How To Fix A Broken Office Chair
2. Structural Repairs:
If the armrest exhibits structural damage, such as cracks or instability, consider using suitable adhesives or fasteners to reinforce and mend the affected areas. Epoxy adhesives are effective for bonding various materials, while specialized plastic adhesives can be used for repairing plastic armrests.
3. Upholstery Restoration:
For armrests with fabric or cushioning, carefully remove any damaged upholstery material and padding. Replace it with new, matching upholstery material, ensuring a secure and uniform application. Use a utility knife and appropriate adhesives to achieve a professional-looking restoration.
4. Reinforcement and Padding:
If the armrest lacks sufficient padding or support, consider adding additional padding or reinforcement to enhance comfort and durability. This may involve inserting foam padding or supportive inserts to improve the armrest’s ergonomic qualities.
5. Cleaning and Finishing:
Before reattaching the armrest, thoroughly clean and prepare the repaired components. Remove any adhesive residue, dust, or debris, and ensure that the armrest’s surface is smooth and free from imperfections. This step will contribute to a polished and professional finish for your repaired armrest.
By meticulously addressing the specific repair needs of your office chair armrest, you’ll effectively restore its functionality and visual appeal. Whether it’s reinforcing the structure, replacing upholstery, or enhancing comfort, the repair process will breathe new life into your trusty armrest, ensuring that it provides the support and comfort you need during long hours of work.
Read more: How To Fix A Flat Office Chair Cushion
Reattaching the Armrest
After successfully repairing and restoring the armrest, it’s time to reattach it to your office chair, completing the comprehensive repair process. Proper reattachment ensures that the armrest is securely fixed in place, providing reliable support and functionality. Follow these steps to seamlessly reattach the armrest:
1. Position the Chair:
Place the chair on a stable surface, ensuring that it’s securely supported and positioned for the reattachment process. If the chair has wheels, consider locking them to prevent unintended movement during the reassembly.
2. Align Attachment Points:
Align the armrest with the corresponding attachment points on the chair. Ensure that any electrical wiring or cables, if present, are positioned to facilitate a secure and unobstructed reattachment.
3. Secure Fasteners:
Using the appropriate tools and fasteners, such as screws, bolts, or nuts, carefully secure the armrest to the chair. Tighten the fasteners securely, ensuring that the armrest is stable and firmly attached without excessive movement or play.
4. Test Stability and Functionality:
After reattaching the armrest, test its stability and functionality. Apply gentle pressure and verify that the armrest remains securely in place, with no wobbling or shifting. If the armrest is adjustable, test its range of motion and locking mechanisms to ensure they operate smoothly.
5. Conduct Final Inspections:
Thoroughly inspect the reattached armrest, checking for any signs of misalignment, loose fasteners, or irregularities. Address any issues promptly to guarantee that the armrest is securely affixed and fully functional.
6. Clean and Polish:
Once the armrest is securely reattached, take the opportunity to clean and polish the restored components. Remove any smudges, adhesive residues, or marks, ensuring that the armrest presents a clean and professional appearance.
By following these steps, you’ll successfully reattach the repaired armrest to your office chair, completing the restoration process with a secure and reliable outcome. Your diligence in ensuring a proper reattachment will contribute to the long-term durability and functionality of the armrest, providing you with the support and comfort you need during your daily work routine.
Final Adjustments and Testing
As you near the completion of the office chair armrest repair process, it’s essential to perform final adjustments and thorough testing to ensure that the restored armrest meets your comfort and functionality expectations. This phase allows you to fine-tune the armrest’s positioning and ergonomics, providing a personalized touch to enhance your seating experience. Follow these steps to carry out final adjustments and testing:
1. Ergonomic Positioning:
Adjust the height, angle, and lateral positioning of the armrest to suit your personal comfort and ergonomic preferences. Ensure that the armrest aligns comfortably with your seated posture, providing optimal support for your arms and shoulders.
2. Locking Mechanism Testing:
If the armrest features adjustable settings, thoroughly test the locking mechanisms and adjustment controls. Verify that the armrest maintains its selected position without slipping or unexpected movement, ensuring a stable and reliable configuration.
3. Comfort Assessment:
Sit in the chair and evaluate the comfort and support provided by the repaired armrest. Pay attention to any pressure points, discomfort, or inconsistencies in the armrest’s functionality. Make minor adjustments as needed to achieve an ideal seating experience.
4. Range of Motion Testing:
Test the armrest’s range of motion by performing natural arm movements and adjustments during various tasks. Confirm that the armrest accommodates your arm positioning without hindrance, allowing for seamless and intuitive movement as you work at your desk.
5. Stability and Durability Check:
Apply gentle pressure to the armrest and assess its stability and durability. Ensure that the repaired components remain secure and resilient, with no signs of weakness or compromise. This step is crucial for verifying the long-term reliability of the repair work.
6. Fine-Tuning and Customization:
Make any additional fine-tuning adjustments to the armrest, addressing specific comfort preferences or ergonomic considerations. This may involve subtle modifications to the armrest’s positioning or padding to achieve an optimal fit for your individual needs.
By meticulously performing final adjustments and testing, you’ll elevate the repaired armrest to a tailored and functional state, perfectly aligned with your comfort and ergonomic requirements. The attention to detail in this phase ensures that the repaired armrest seamlessly integrates with your office chair, providing reliable support and enhancing your overall work environment.
Conclusion
Congratulations on successfully restoring your office chair armrest to its former functionality and comfort! The journey from assessing the damage to performing meticulous repairs and final adjustments has culminated in a rejuvenated armrest that enhances your daily work experience. As you reflect on this transformative process, consider the following key takeaways:
Enhanced Comfort and Support:
By addressing the issues affecting your office chair armrest, you’ve reclaimed essential comfort and support during your work hours. The repaired armrest now complements your seated posture, alleviating strain and enhancing your overall well-being as you tackle your tasks.
Read more: What Is A Task Chair Vs. Office Chair
Personalized Ergonomics:
Through final adjustments and testing, you’ve tailored the armrest to your unique ergonomic preferences, ensuring that it seamlessly integrates with your seated position and arm movements. This personalized touch elevates your seating experience, promoting a more comfortable and productive work environment.
Empowerment Through Repair Skills:
The repair journey has empowered you with valuable skills and insights into office chair maintenance and restoration. As you’ve navigated the process, you’ve gained a deeper understanding of the mechanics behind the armrest and honed your ability to address similar issues in the future.
Long-Term Durability:
Through careful attention to detail and thorough testing, you’ve established a foundation for the long-term durability of the repaired armrest. Your dedication to quality repair work ensures that the armrest will continue to provide reliable support and functionality for an extended period.
Satisfaction in Overcoming Challenges:
Finally, the successful repair of your office chair armrest is a testament to your perseverance and commitment to overcoming challenges. As you enjoy the benefits of the restored armrest, take pride in the accomplishment of revitalizing an essential component of your work environment.
As you return to your daily tasks with a renewed sense of comfort and support, remember the journey you’ve undertaken to restore your office chair armrest. Your dedication to maintaining a functional and ergonomic workspace has not only revitalized a piece of furniture but has also contributed to a more comfortable and productive work environment for yourself. Embrace the empowerment and satisfaction that come with mastering the art of office chair repair, and may your revitalized armrest continue to support you through the demands of each workday.
Frequently Asked Questions about How To Fix An Office Chair Armrest
Was this page helpful?
At Storables.com, we guarantee accurate and reliable information. Our content, validated by Expert Board Contributors, is crafted following stringent Editorial Policies. We're committed to providing you with well-researched, expert-backed insights for all your informational needs.


0 thoughts on “How To Fix An Office Chair Armrest”