Home>Furniture & Design>Office Furniture>How To Remove The Gas Lift From An Office Chair
Office Furniture
How To Remove The Gas Lift From An Office Chair
Modified: August 17, 2024
Learn how to easily remove the gas lift from your office chair with our step-by-step guide. Keep your office furniture in top condition with our expert tips. Ideal for office furniture, furniture and design enthusiasts.
(Many of the links in this article redirect to a specific reviewed product. Your purchase of these products through affiliate links helps to generate commission for Storables.com, at no extra cost. Learn more)
Introduction
Office chairs are essential for providing comfort and support during long hours of work. However, over time, the gas lift mechanism in an office chair may start malfunctioning, making it difficult to adjust the height or causing the chair to sink unexpectedly. In such cases, it becomes necessary to replace the gas lift to restore the chair’s functionality.
Removing the gas lift from an office chair may seem like a daunting task, but with the right tools and a systematic approach, it can be accomplished effectively. In this guide, we will walk you through the step-by-step process of removing the gas lift from your office chair, enabling you to tackle this maintenance task with confidence.
By following these instructions, you can prolong the lifespan of your office chair and ensure that it continues to provide the comfort and support you need to stay productive throughout the workday.
Key Takeaways:
- Don’t panic if your office chair’s gas lift malfunctions. With the right tools and careful steps, you can remove and replace it, ensuring continued comfort and support for your workday.
- Remember to prepare your workspace, handle the gas lift with care, and consider a replacement if needed. By following these steps, you can maintain your office chair’s functionality and comfort.
Tools and Materials Needed
Before you begin the process of removing the gas lift from your office chair, it’s important to gather the necessary tools and materials. Here’s what you’ll need:
- Adjustable wrench
- Flathead screwdriver
- Lubricating spray
- Clean cloth
- Replacement gas lift
- Protective gloves
- Protective eyewear
Having these tools and materials on hand will ensure that you can proceed with the gas lift removal process smoothly and safely. The adjustable wrench and flathead screwdriver will be used to loosen and remove various components, while the lubricating spray can help loosen any stubborn parts. Additionally, having a clean cloth will allow you to wipe down the chair components as needed.
When purchasing a replacement gas lift, be sure to verify that it is compatible with your specific office chair model. Taking the time to gather these tools and materials beforehand will streamline the removal process and help you avoid any unnecessary delays.
Step 1: Prepare the Chair
Before diving into the process of removing the gas lift from your office chair, it’s important to prepare the chair and create a safe working environment. Here’s how to get started:
- Clear the Area: Begin by clearing the space around the chair to ensure ample room to maneuver and work comfortably. Remove any obstacles or nearby objects that may hinder your movement.
- Inspect the Chair: Take a moment to inspect the chair for any visible damage or signs of wear and tear. This initial assessment can help you identify any additional maintenance needs that may require attention.
- Secure the Chair: To prevent accidental tipping or movement during the gas lift removal process, ensure that the chair is placed on a stable and level surface. If necessary, consider placing the chair against a wall for added stability.
- Protective Gear: Prioritize your safety by wearing protective gloves and eyewear. These items can shield your hands and eyes from potential hazards and ensure a safer working experience.
By taking these preparatory steps, you can create an organized and secure workspace, setting the stage for a smooth and efficient gas lift removal process. This careful preparation will contribute to a safer and more manageable maintenance task, allowing you to proceed with confidence.
Step 2: Remove the Base
Once the chair is prepared, the next step in removing the gas lift is to focus on detaching the base. Follow these steps to remove the base of the office chair:
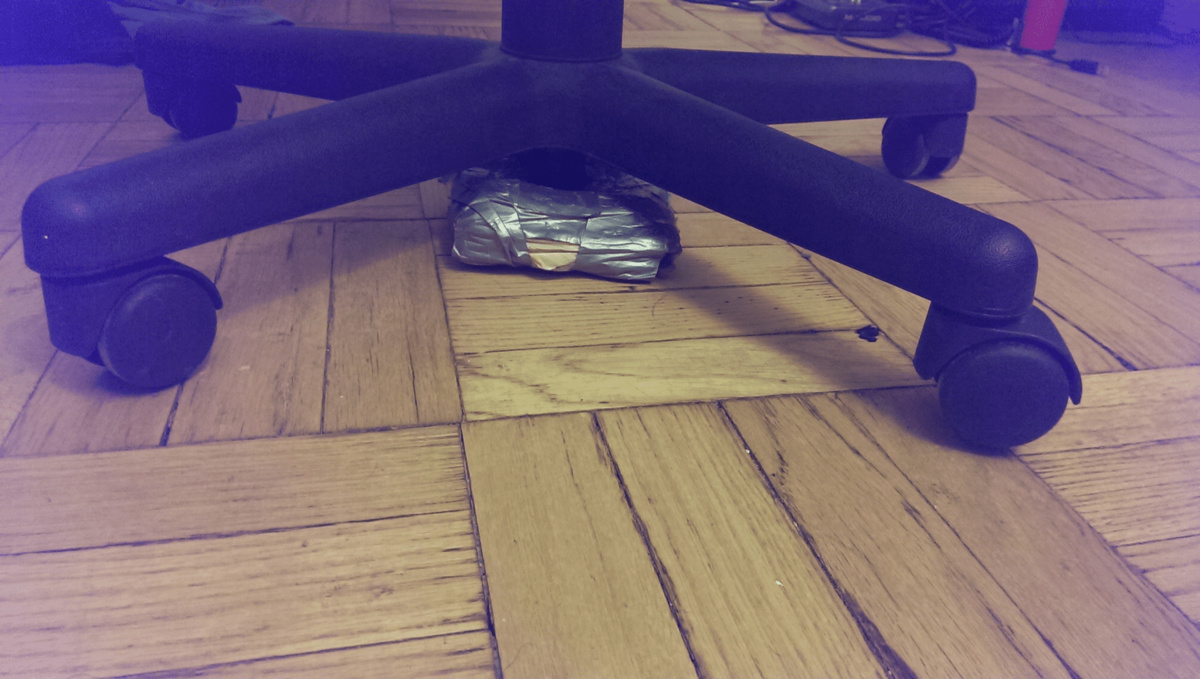
- Flip the Chair: Carefully flip the chair upside down to gain access to the underside where the base is attached. Ensure that the chair is supported and stable in this position to avoid any accidents.
- Locate the Fasteners: Inspect the underside of the chair to identify the fasteners securing the base to the seat mechanism. These fasteners may be screws or bolts, and they are typically located around the center of the base.
- Use the Adjustable Wrench: Select the appropriate size of the adjustable wrench and begin loosening and removing the fasteners. Keep the removed screws or bolts in a secure place to prevent misplacement.
- Detach the Base: Once all the fasteners are removed, gently lift and detach the base from the seat mechanism. Set the base aside in a safe location, ensuring that it won’t pose a tripping hazard or obstruction.
By carefully following these steps, you can successfully separate the base from the chair, bringing you one step closer to accessing the gas lift for removal. It’s essential to handle the base with care to avoid any damage or mishaps during this part of the process.
To remove the gas lift from an office chair, first, turn the chair upside down. Then, use a rubber mallet to gently tap the base of the chair to loosen the gas lift. Once it’s loose, twist and pull the gas lift out of the chair.
Step 3: Disconnect the Gas Lift
With the chair’s base removed, the next crucial step is to disconnect the gas lift from the seat mechanism. Follow these instructions to proceed with this part of the process:
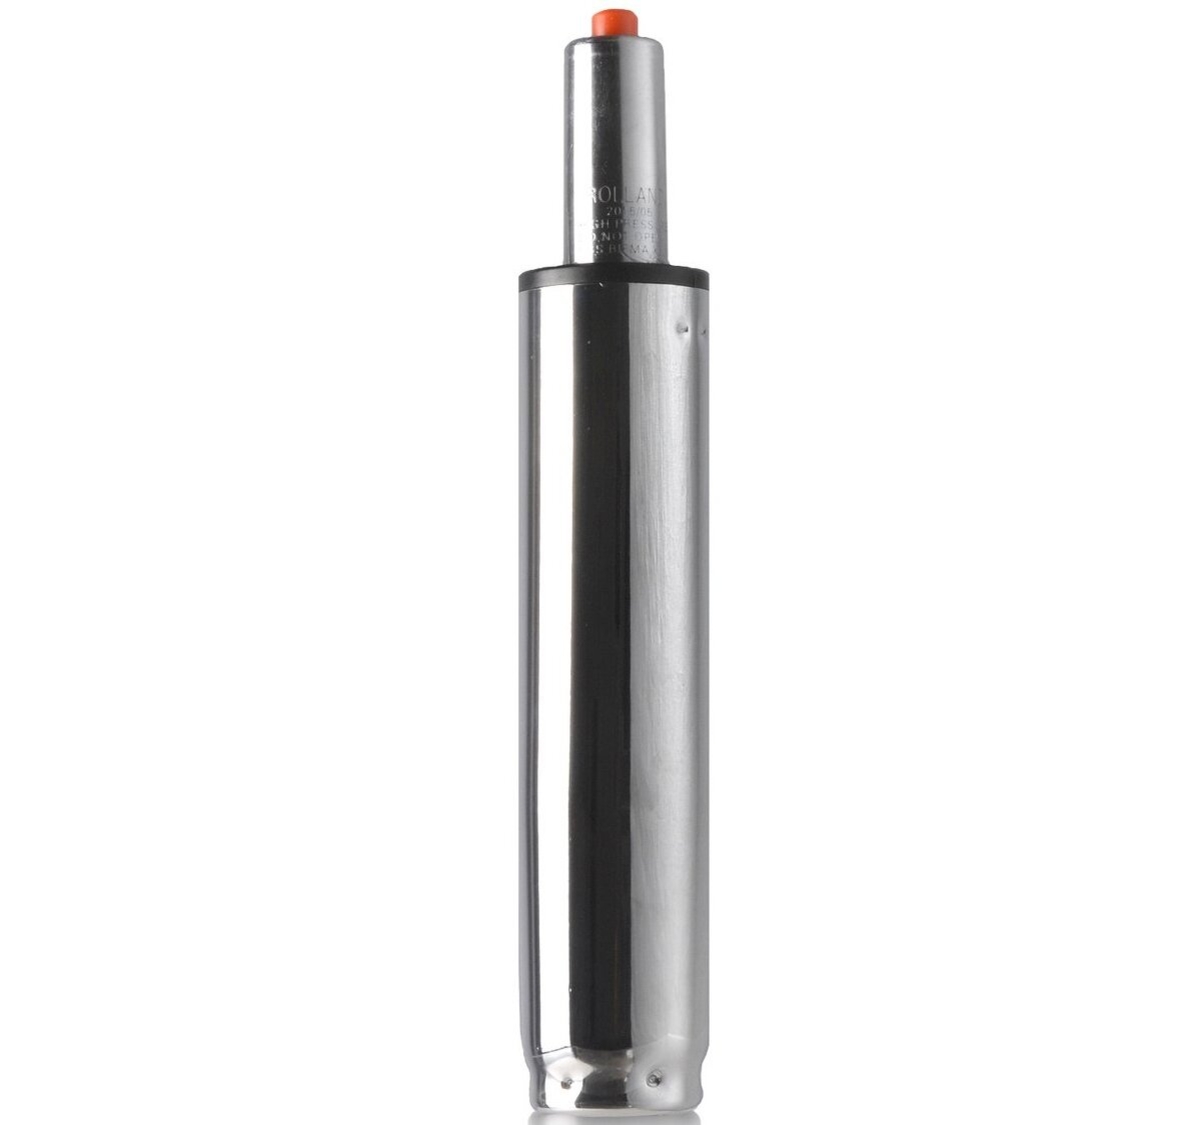
- Identify the Gas Lift: Locate the gas lift cylinder, which extends from the seat mechanism to the base of the chair. It is typically covered by a protective sleeve or housing.
- Remove the Retaining Clip: Look for the retaining clip that secures the gas lift in place. Using a flathead screwdriver, carefully pry off the retaining clip to release the gas lift. Exercise caution to prevent damage to the clip or surrounding components.
- Separate the Gas Lift: Once the retaining clip is removed, gently pull the gas lift cylinder out of the seat mechanism. Be mindful of any resistance and proceed slowly to avoid any sudden movements.
- Inspect for Damage: Take this opportunity to inspect the gas lift for any signs of wear, damage, or malfunction. This assessment can help you determine the condition of the gas lift and whether a replacement is necessary.
By following these steps, you can effectively disconnect the gas lift from the seat mechanism, paving the way for its removal and potential replacement. It’s important to handle the gas lift with care to prevent any accidental damage or mishandling during this phase of the process.
Read more: How To Remove Smell From An Office Chair
Step 4: Remove the Gas Lift
After disconnecting the gas lift from the seat mechanism, the final step involves removing the gas lift from the office chair. Here’s how to proceed with this essential task:
- Apply Lubricating Spray: If the gas lift appears to be stuck or difficult to remove, apply a small amount of lubricating spray at the point where it connects to the seat mechanism. Allow the spray to penetrate for a few minutes to help loosen any stubborn components.
- Gently Twist and Pull: Grasp the gas lift firmly and begin gently twisting it while applying upward pressure. This twisting motion can help dislodge the gas lift from its housing within the seat mechanism. Proceed with caution to avoid excessive force that may cause damage.
- Remove the Gas Lift: Once the gas lift begins to loosen, continue to apply steady upward pressure while twisting until it is completely free from the seat mechanism. Ensure that the gas lift is clear of any obstructions before fully removing it from the chair.
- Dispose or Replace: Depending on the condition of the gas lift, you can either dispose of it properly or proceed with installing a replacement gas lift. If you opt for a replacement, ensure that it is compatible with your chair model and follow the manufacturer’s guidelines for installation.
By carefully executing these steps, you can successfully remove the gas lift from your office chair, addressing any issues related to its functionality and paving the way for potential replacement. It’s important to handle the gas lift with care throughout this process to avoid any damage to the chair or its components.
Conclusion
Removing the gas lift from an office chair is a manageable task that can restore the functionality and comfort of your seating. By following the step-by-step process outlined in this guide, you can effectively address issues related to a malfunctioning gas lift and prepare for potential replacement. Here’s a recap of the key takeaways:
- Preparation is Key: Clear the workspace, inspect the chair, and secure it in a stable position before initiating the gas lift removal process.
- Systematic Approach: Methodically remove the chair’s base to gain access to the gas lift and disconnect it from the seat mechanism with precision.
- Handle with Care: Exercise caution and patience when removing the gas lift, ensuring that no unnecessary force is applied to prevent damage to the chair or its components.
- Consider Replacement: Assess the condition of the gas lift and proceed with replacing it if necessary, following the manufacturer’s guidelines for compatibility and installation.
By adhering to these guidelines, you can maintain the longevity and functionality of your office chair, ensuring that it continues to provide the support and adjustability needed for a comfortable work environment.
Remember, safety should always be a priority when undertaking maintenance tasks, so be sure to wear protective gear and handle tools with care throughout the process. With the right tools, a methodical approach, and attention to detail, you can successfully remove and potentially replace the gas lift in your office chair, prolonging its usability and enhancing your overall comfort.
Frequently Asked Questions about How To Remove The Gas Lift From An Office Chair
Was this page helpful?
At Storables.com, we guarantee accurate and reliable information. Our content, validated by Expert Board Contributors, is crafted following stringent Editorial Policies. We're committed to providing you with well-researched, expert-backed insights for all your informational needs.


0 thoughts on “How To Remove The Gas Lift From An Office Chair”