Home>Furniture & Design>Outdoor Furniture>How To Add An Outdoor Electrical Outlet

Outdoor Furniture
How To Add An Outdoor Electrical Outlet
Modified: February 18, 2024
Learn how to safely and efficiently add an outdoor electrical outlet to your outdoor furniture. Get expert tips and advice on outdoor furniture and design.
(Many of the links in this article redirect to a specific reviewed product. Your purchase of these products through affiliate links helps to generate commission for Storables.com, at no extra cost. Learn more)
Introduction
When it comes to enjoying your outdoor space to the fullest, having access to electrical outlets can make a world of difference. Whether you want to set up outdoor lighting, power a sound system for a lively gathering, or simply charge your devices while relaxing in the fresh air, having an outdoor electrical outlet can greatly enhance the functionality and convenience of your outdoor living area.
Adding an outdoor electrical outlet may seem like a daunting task, but with the right guidance and precautions, it can be a manageable and rewarding project. In this comprehensive guide, we will walk you through the step-by-step process of adding an outdoor electrical outlet, from ensuring safety to selecting the appropriate outlet and installing it correctly.
By following these instructions, you can empower yourself to take on this project with confidence, knowing that you are enhancing the functionality and versatility of your outdoor space while prioritizing safety and adherence to electrical codes. So, let's dive in and explore the essential steps to bring power to your outdoor oasis.
Key Takeaways:
- Safety First!
Before adding an outdoor electrical outlet, always prioritize safety. Turn off the power, use proper tools, and protect wiring from the elements to ensure a secure and reliable installation. - Plan and Test Carefully
Carefully plan the wiring route and test the outlet after installation. This ensures a safe and dependable power source for outdoor activities, enhancing your outdoor living space.
Read more: How To Replace An Outdoor Electrical Outlet
Safety Precautions
Before embarking on the task of adding an outdoor electrical outlet, it is crucial to prioritize safety. Working with electricity requires careful attention to detail and adherence to safety protocols to prevent accidents and ensure a successful outcome. Here are some essential safety precautions to keep in mind:
- Turn off the Power: Before beginning any electrical work, turn off the power supply to the area where you will be installing the outdoor outlet. Locate the circuit breaker that controls the intended area and switch it off to prevent the risk of electric shock.
- Use Proper Tools and Equipment: Ensure that you have the appropriate tools and equipment for the job, including insulated screwdrivers, wire cutters, wire strippers, and a voltage tester. Using tools that are in good condition and designed for electrical work can help prevent accidents.
- Check Local Codes and Regulations: Familiarize yourself with the electrical codes and regulations in your area. Different regions may have specific requirements for outdoor electrical installations, and it is important to comply with these standards to ensure safety and legal compliance.
- Protect Wiring from the Elements: When installing the outdoor outlet, make sure that all wiring and connections are properly protected from moisture and other environmental factors. Use weatherproof outlet covers and outdoor-rated wiring to safeguard against damage and ensure longevity.
- Avoid Overloading Circuits: Be mindful of the electrical load on the circuit where you are adding the outdoor outlet. Avoid overloading the circuit by calculating the power requirements of the devices you plan to connect to the outlet and ensuring that the circuit can handle the additional load.
- Seek Professional Assistance if Needed: If you are uncertain about any aspect of the installation process or if the electrical work seems beyond your expertise, it is advisable to seek the assistance of a qualified electrician. Your safety and the proper functioning of the outdoor outlet are paramount.
By observing these safety precautions and approaching the project with a focus on safety, you can minimize risks and create a secure and reliable outdoor electrical outlet that enhances the functionality of your outdoor space while prioritizing the well-being of yourself and others.
Locate a Power Source
Before you can add an outdoor electrical outlet, you need to identify a suitable power source to connect the new outlet to. In most cases, this will involve tapping into an existing indoor circuit to extend power to the outdoor location. Here are the essential steps to locate a power source for your outdoor electrical outlet:
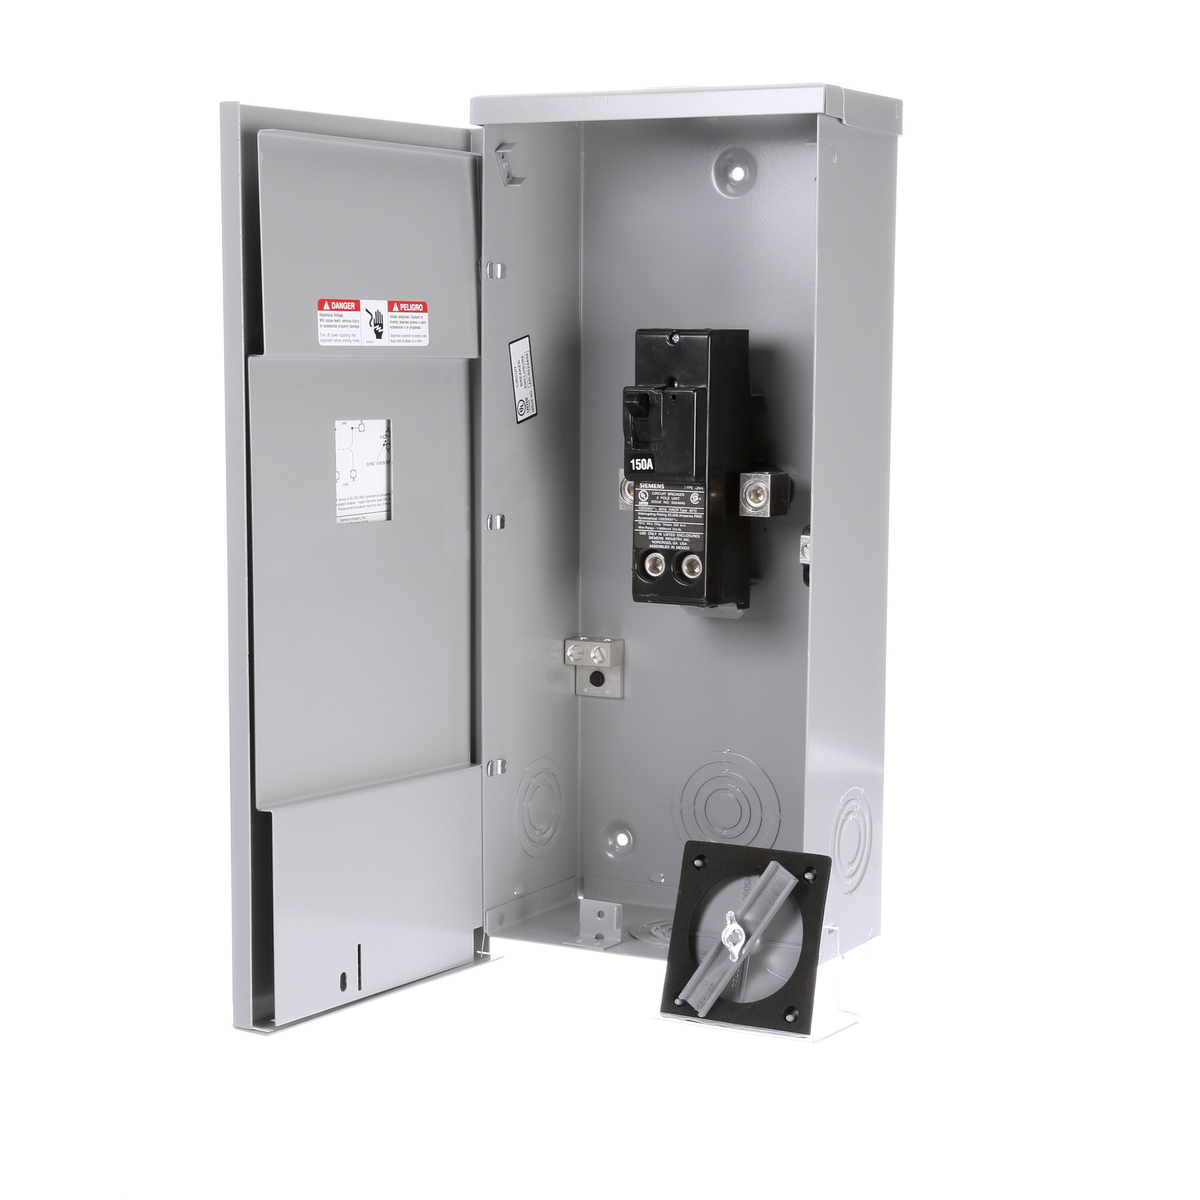
- Assess Indoor Circuits: Begin by assessing the indoor circuits in your home to identify a suitable power source for the outdoor outlet. Look for a nearby indoor outlet or junction box that is on a circuit with sufficient capacity to support the additional load of the outdoor outlet.
- Turn Off Power: Once you have identified the indoor circuit to connect to, turn off the power to that circuit at the main electrical panel. This step is crucial for safety and prevents the risk of electrical shock while working on the wiring.
- Plan the Wiring Route: Determine the most practical and efficient route for running the wiring from the indoor power source to the outdoor location where the outlet will be installed. Consider factors such as the distance, obstacles, and the need to protect the wiring from the elements.
- Use Conduit if Necessary: If the wiring will be exposed to the elements or vulnerable to physical damage, such as from landscaping activities, consider using conduit to protect the wiring. Conduit provides an added layer of protection and can help prolong the lifespan of the wiring.
- Choose a GFCI-Protected Circuit: For outdoor outlets, it is recommended to connect them to a Ground Fault Circuit Interrupter (GFCI)-protected circuit. GFCI outlets are designed to quickly cut off power in the event of a ground fault, providing an extra layer of protection against electrical hazards.
By carefully locating a power source and planning the wiring route, you can ensure that the outdoor electrical outlet is connected to a reliable and appropriately protected circuit. This foundational step sets the stage for the successful installation and functionality of the outdoor outlet, providing power where you need it in your outdoor living space.
Choose the Right Outlet
When adding an outdoor electrical outlet, selecting the appropriate outlet for the intended use and environmental conditions is crucial. Outdoor outlets are designed to withstand exposure to the elements and provide a safe and reliable power source for outdoor activities. Here are key considerations for choosing the right outdoor outlet:
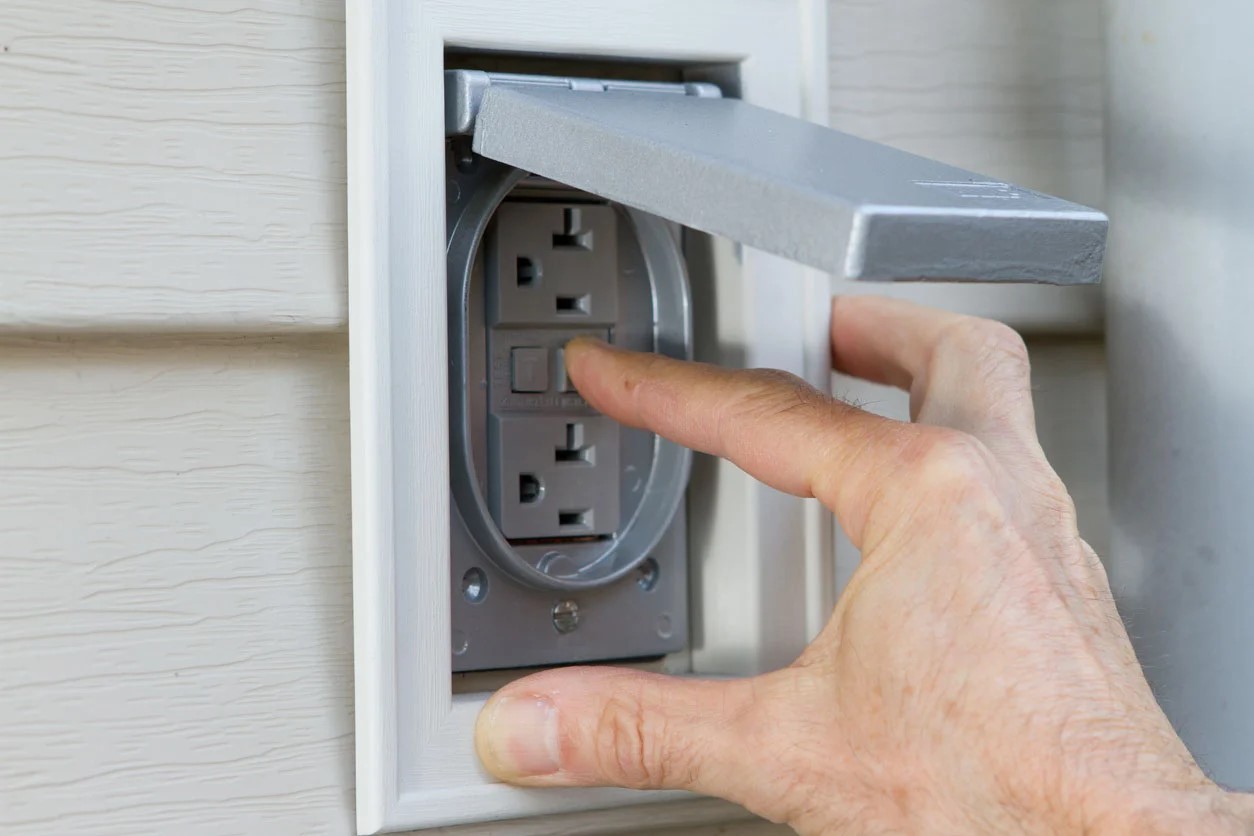
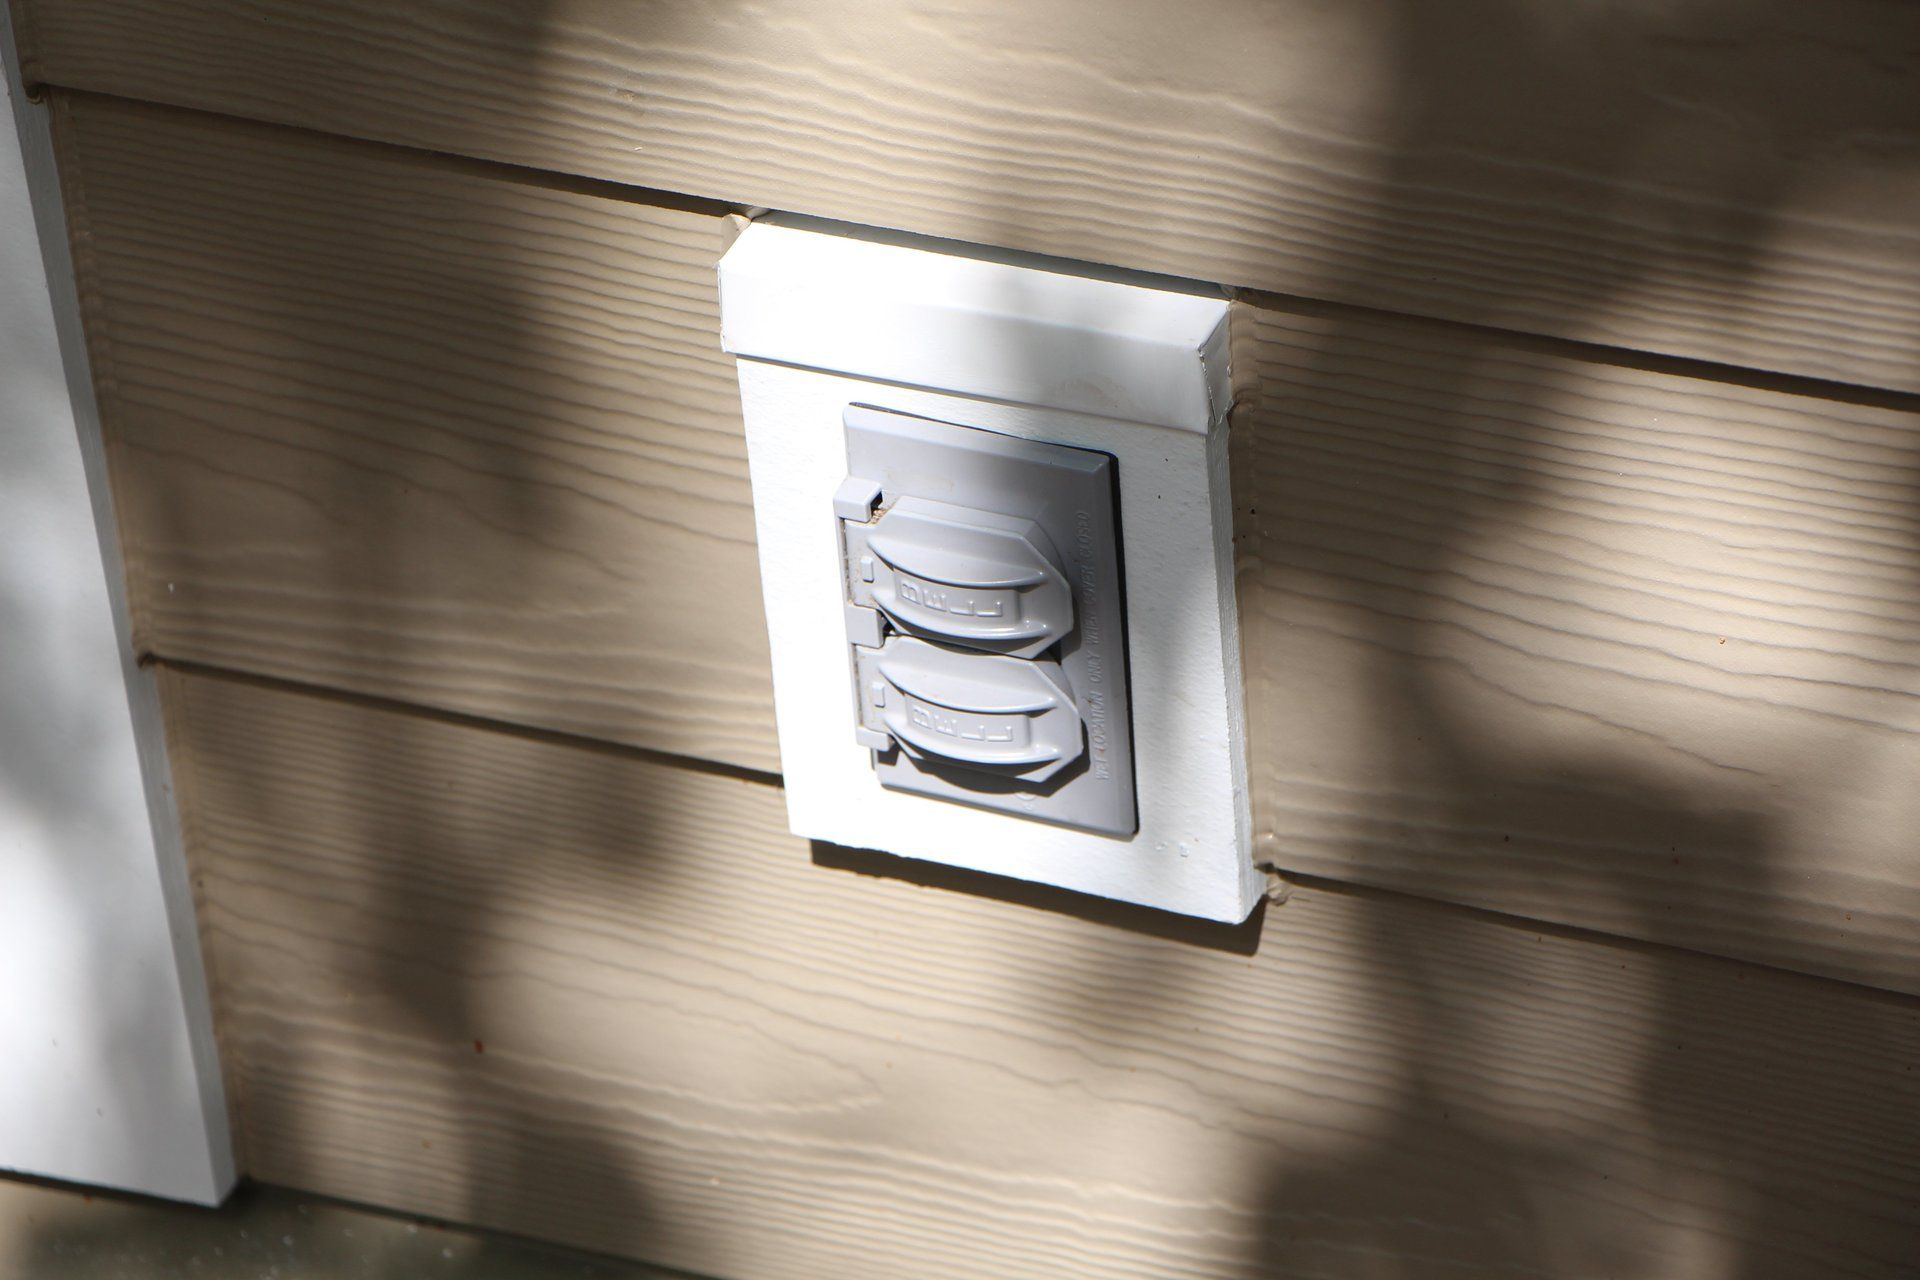
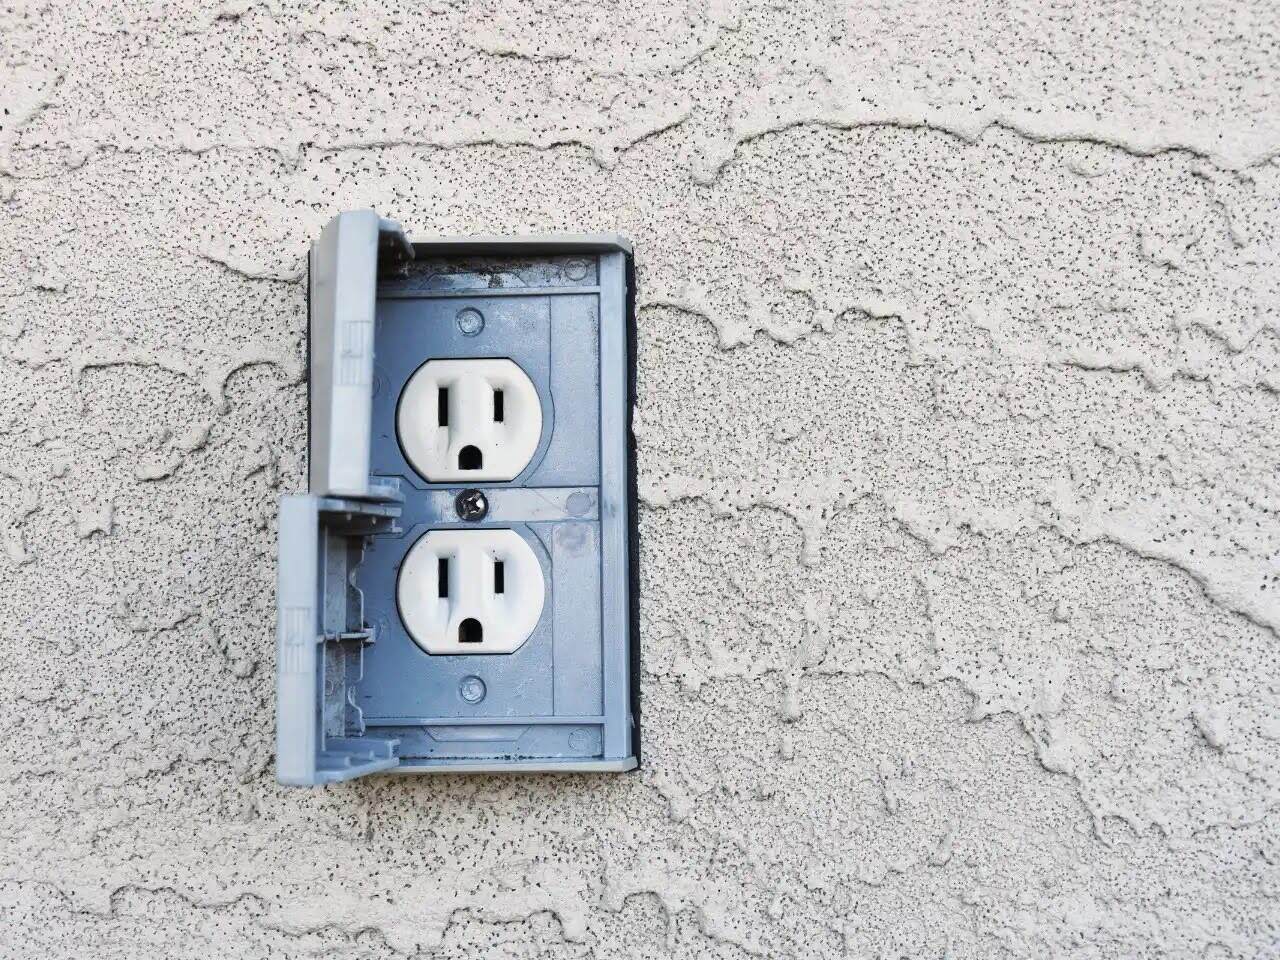
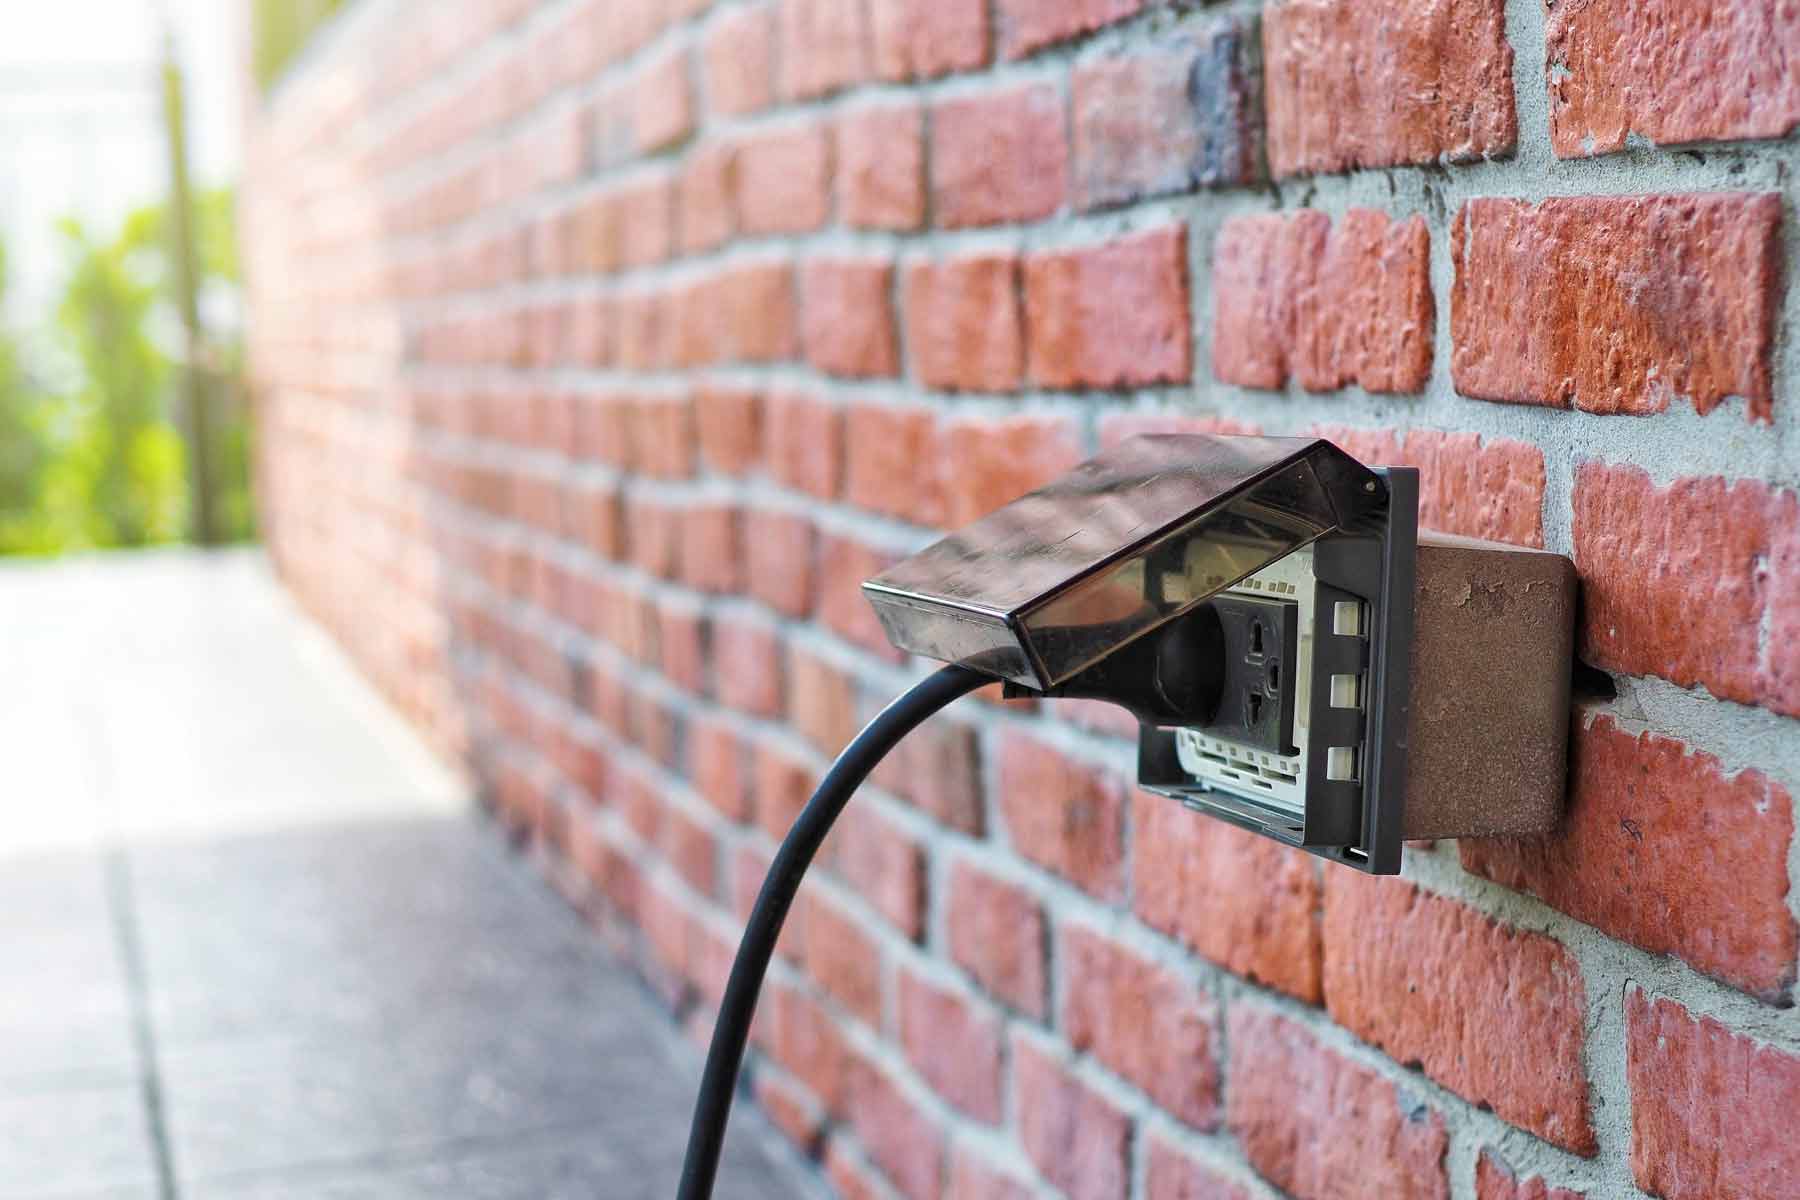
- Weatherproof Rating: Look for outdoor outlets with a weatherproof rating, typically indicated by an “In-Use” cover. These covers are designed to protect the outlet from moisture, dust, and debris, ensuring safe and reliable operation in outdoor environments.
- GFCI Protection: Opt for an outdoor outlet that includes built-in Ground Fault Circuit Interrupter (GFCI) protection. GFCI outlets are essential for outdoor use as they quickly cut off power in the event of a ground fault, reducing the risk of electric shock and enhancing safety.
- Multiple Outlets: Consider the number of outlets needed for your outdoor activities. If you anticipate using multiple devices or appliances simultaneously, choosing an outdoor outlet with multiple receptacles can provide added convenience and functionality.
- Heavy-Duty Construction: Ensure that the outdoor outlet is constructed with durable and heavy-duty materials designed to withstand outdoor conditions. Look for outlets with rugged enclosures and corrosion-resistant components to ensure longevity and reliability.
- Tamper-Resistant Design: For enhanced safety, consider an outdoor outlet with a tamper-resistant design. These outlets feature internal shutters that prevent the insertion of foreign objects, reducing the risk of electrical hazards, especially in outdoor environments frequented by children.
By carefully selecting the right outdoor outlet, you can ensure that your outdoor electrical installation meets the necessary safety standards and provides a dependable power source for your outdoor activities. Investing in a high-quality outdoor outlet designed for durability and performance can contribute to the long-term functionality and enjoyment of your outdoor living space.
Gather Necessary Materials
Before beginning the installation of an outdoor electrical outlet, it’s essential to gather all the necessary materials and tools to ensure a smooth and efficient process. Having the right materials on hand will enable you to proceed with the installation without unnecessary interruptions. Here’s a list of the essential materials and tools required for adding an outdoor electrical outlet:
Read more: How To Install An Outdoor Electrical Outlet
Materials:
- Outdoor-Rated Outlet: Choose a weatherproof outdoor electrical outlet with the appropriate configuration and features for your specific needs, such as GFCI protection and multiple receptacles if necessary.
- Weatherproof Outlet Cover: Select a weatherproof cover designed to protect the outdoor outlet from moisture, dust, and debris while in use. The cover should allow for cords to remain connected while providing a secure seal.
- Outdoor-Rated Wiring: Use outdoor-rated electrical wire suitable for underground or above-ground installations, ensuring that it is designed to withstand exposure to the elements and is compatible with the intended electrical load.
- Conduit (if applicable): If the wiring will be exposed to potential damage or environmental hazards, consider using conduit to protect the wiring and provide an additional layer of safety.
- Wire Connectors: Obtain wire connectors suitable for outdoor use to secure and protect electrical connections, ensuring proper insulation and preventing moisture intrusion.
- Mounting Hardware: Depending on the installation location, gather the necessary mounting hardware, such as screws and anchors, to securely install the outdoor outlet box.
- Electrical Tape: Have electrical tape on hand to insulate and secure wire connections, providing an additional layer of protection against moisture and wear.
Tools:
- Screwdrivers: Ensure you have both flathead and Phillips screwdrivers for various fastening tasks during the installation process.
- Wire Cutters and Strippers: Use wire cutters to trim the electrical wire to the required length and wire strippers to remove the insulation from the wire ends for proper connections.
- Voltage Tester: Have a voltage tester available to verify that the power is turned off before working on the electrical connections and to confirm proper wiring at each stage of the installation.
- Drill and Bits: If mounting the outdoor outlet box to a surface, a drill and appropriate drill bits will be necessary to create the mounting holes.
- Utility Knife: A utility knife can be useful for cutting and stripping wire insulation, as well as for opening packaging and materials.
By gathering these essential materials and tools, you will be well-prepared to proceed with the installation of the outdoor electrical outlet, ensuring that you have everything needed to complete the project efficiently and safely.
Plan the Wiring Route
Planning the wiring route for your outdoor electrical outlet is a crucial step that ensures the safe and efficient installation of the wiring from the power source to the outdoor location. Careful consideration of the wiring path and protection measures can contribute to the long-term functionality and safety of the outdoor electrical setup. Here’s how to plan the wiring route for your outdoor outlet:
- Assess the Outdoor Location: Determine the precise location where the outdoor electrical outlet will be installed. Consider factors such as proximity to the indoor power source, accessibility, and the intended use of the outlet.
- Map the Wiring Path: Identify the most direct and practical route for running the wiring from the indoor power source to the outdoor location. Take into account any obstacles, such as landscaping features or structures, and plan the path to minimize exposure to potential damage or environmental hazards.
- Consider Conduit Protection: If the wiring will be exposed to the elements, buried underground, or susceptible to physical damage, consider using conduit to protect the wiring. Conduit provides an additional layer of insulation and safeguards the wiring from moisture, impact, and other external factors.
- Ensure Proper Elevation: When routing the wiring, ensure that it is positioned at an appropriate elevation to prevent water accumulation and minimize the risk of exposure to moisture. Avoid low-lying areas where water may collect, and take measures to secure the wiring in place along its route.
- Verify Compliance with Codes: Familiarize yourself with the electrical codes and regulations in your area pertaining to outdoor wiring installations. Ensure that the planned wiring route adheres to the necessary standards and safety requirements, taking into account factors such as burial depth for underground wiring.
By thoughtfully planning the wiring route for your outdoor electrical outlet, you can ensure that the wiring is installed in a manner that prioritizes safety, functionality, and longevity. Taking the time to map out the wiring path and consider protective measures can contribute to a successful and reliable outdoor electrical installation.
When adding an outdoor electrical outlet, make sure to use a weatherproof outlet box and cover to protect it from the elements. Always consult a professional if you are unsure about the installation process.
Install the Outdoor Outlet Box
Installing the outdoor outlet box is a fundamental step in the process of adding an outdoor electrical outlet. The outlet box serves as the housing for the electrical connections and provides protection for the outlet and wiring from the outdoor elements. Here’s a guide to installing the outdoor outlet box:
- Choose the Installation Location: Select the precise location where the outdoor outlet box will be mounted. Ensure that it is strategically positioned to provide convenient access to power while being protected from direct exposure to water, debris, and physical damage.
- Turn Off Power: Before beginning the installation, ensure that the power to the designated circuit is turned off at the main electrical panel. Use a voltage tester to verify that the power is indeed off before proceeding with the installation.
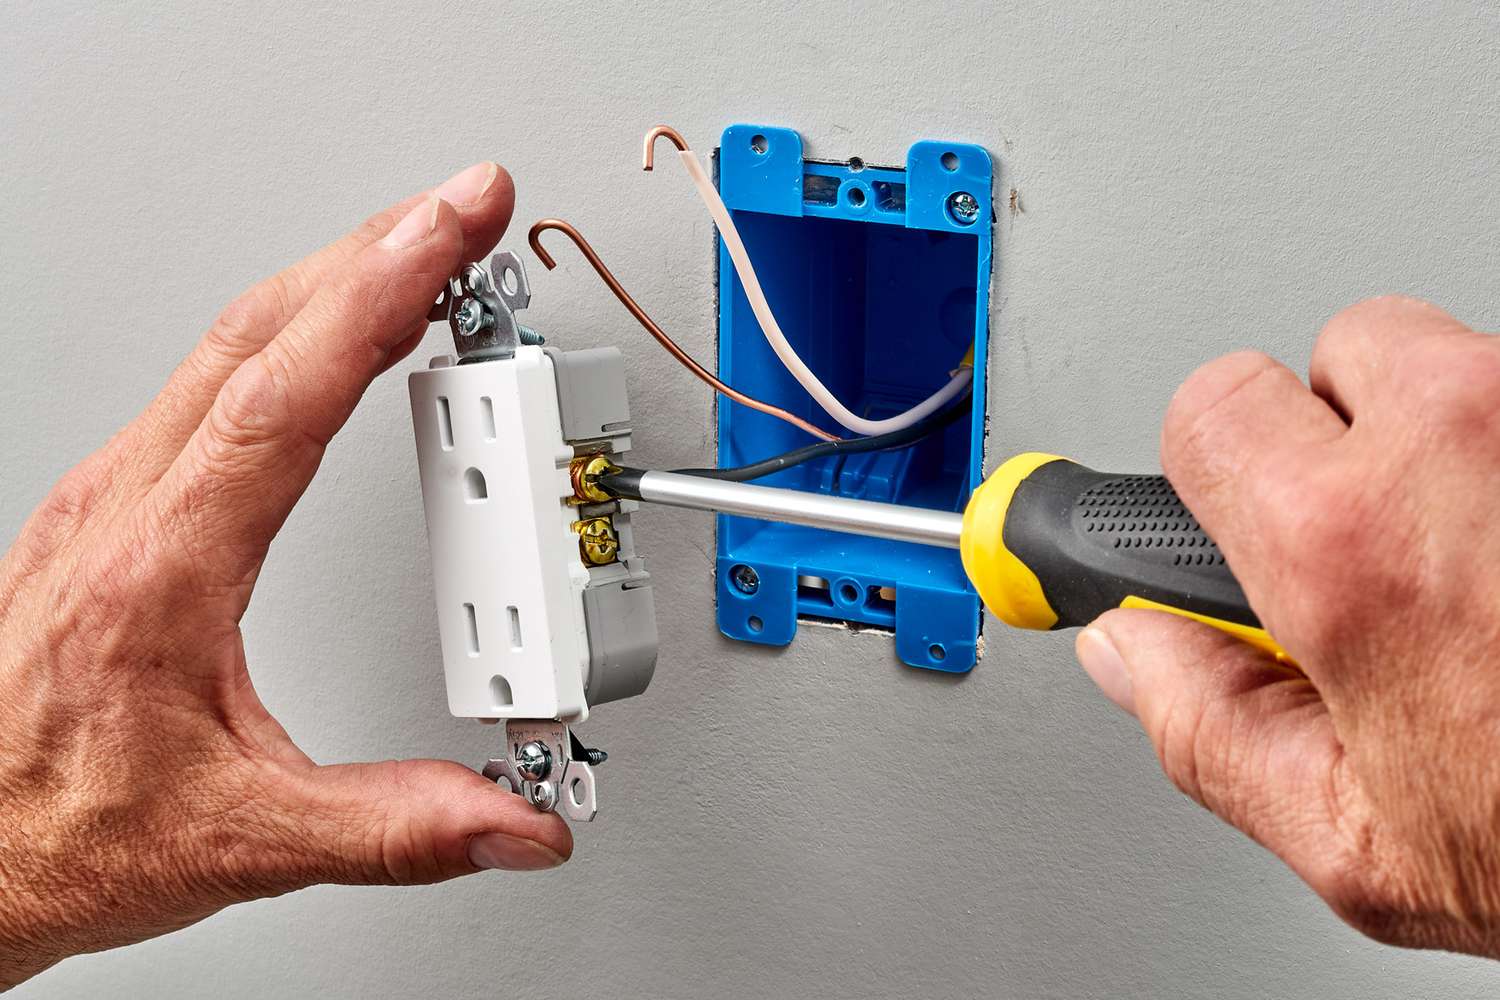
- Prepare the Mounting Surface: If mounting the outlet box to a wall or other surface, prepare the mounting area by ensuring it is clean, level, and suitable for secure attachment. Use appropriate hardware, such as screws and anchors, to fasten the outlet box in place.
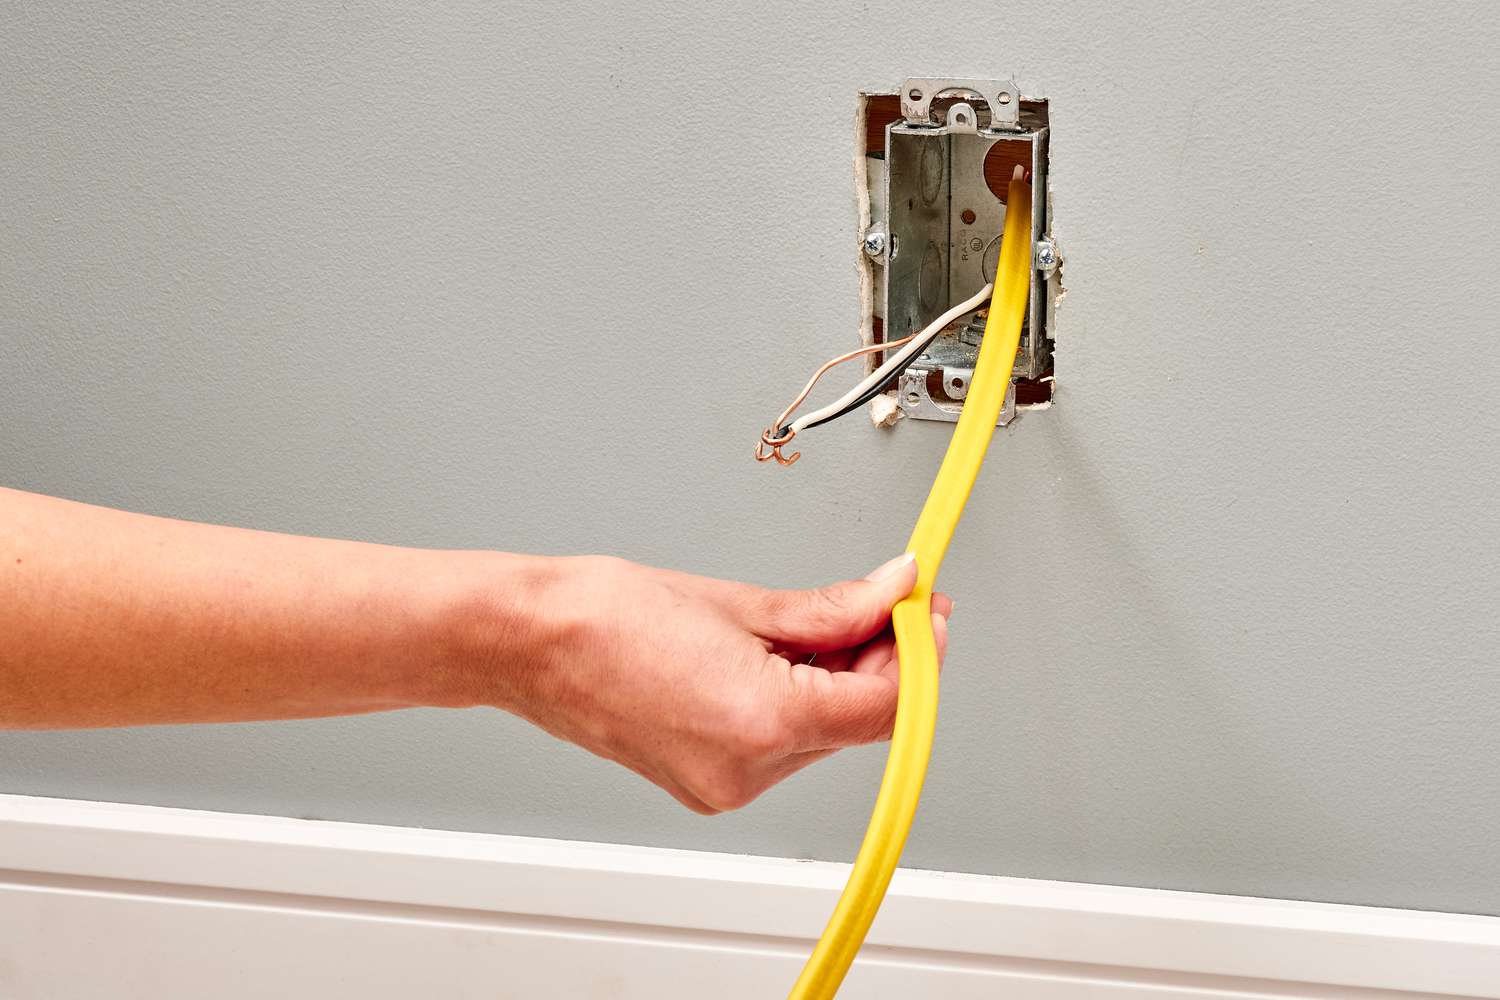
- Make Cable Entries: Create the necessary cable entries in the outdoor outlet box to accommodate the incoming and outgoing electrical wiring. Ensure that the cable entries are properly sized and positioned to facilitate the secure passage of the wiring.
- Secure the Wiring: Once the cable entries are prepared, carefully route the electrical wiring into the outdoor outlet box. Use cable clamps or other suitable securing methods to hold the wiring in place and prevent strain on the connections.
- Attach the Outlet Box Cover: After the wiring is securely in place, attach the appropriate cover to the outdoor outlet box. Ensure that the cover provides a weatherproof seal and protects the electrical components from exposure to moisture and debris.
By following these steps, you can effectively install the outdoor outlet box, creating a secure and protected enclosure for the electrical connections. The proper installation of the outlet box sets the stage for the subsequent wiring and connection of the outdoor electrical outlet, ensuring a safe and reliable power source for your outdoor activities.
Read more: How To Cover An Outdoor Outlet
Connect the Wiring
Connecting the wiring is a critical phase in the installation of an outdoor electrical outlet, requiring precision and attention to detail to ensure safe and reliable electrical connections. Properly securing and insulating the wiring is essential for the functionality and longevity of the outdoor outlet. Here’s a step-by-step guide to connecting the wiring for your outdoor electrical outlet:
- Prepare the Wiring: Strip the insulation from the ends of the electrical wires to expose the conductors. Use wire strippers to carefully remove the appropriate length of insulation, ensuring that the conductors are clean and undamaged.
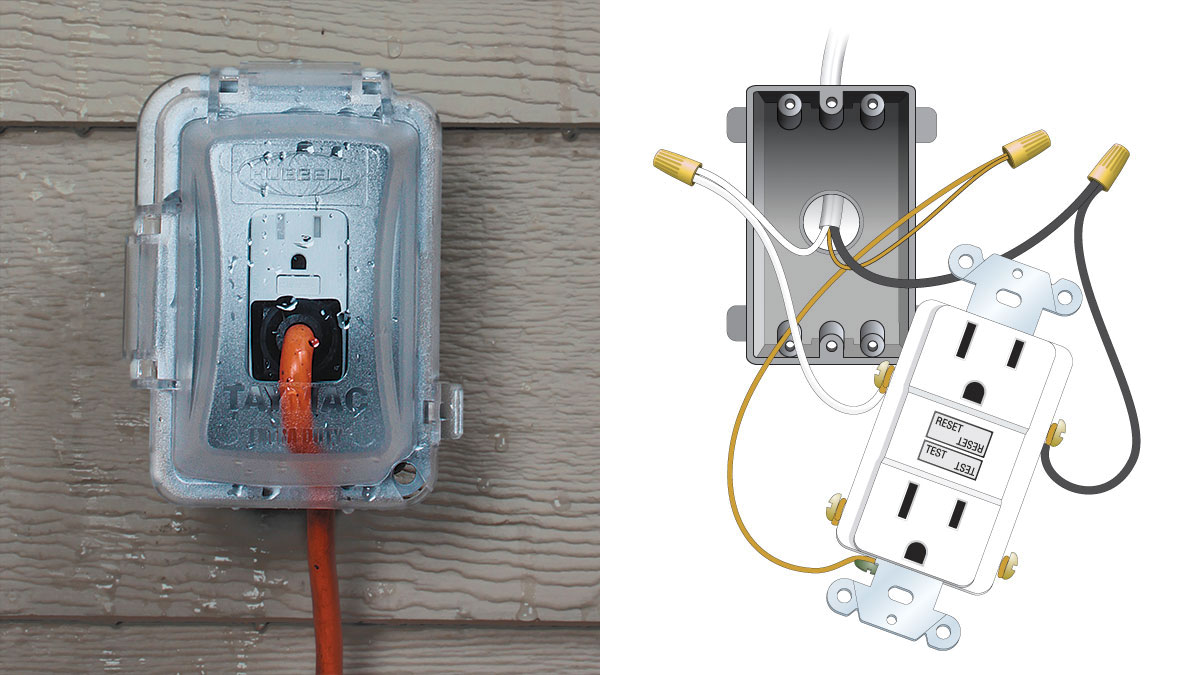
- Identify Hot, Neutral, and Ground Wires: Identify the hot (black), neutral (white), and ground (green or bare) wires within the electrical cable. It is crucial to correctly identify and differentiate these wires to ensure proper connections and adherence to electrical standards.
- Make Electrical Connections: Connect the hot, neutral, and ground wires to their respective terminals on the outdoor electrical outlet. Follow the manufacturer’s instructions for the specific outlet model, ensuring that the connections are secure and properly insulated.
- Secure Wire Connectors: After making the electrical connections, use appropriate wire connectors to secure and insulate the wire terminations. Ensure that the wire connectors are rated for outdoor use and provide a reliable and moisture-resistant seal.
- Ground the Outlet: Connect the ground wire to the grounding terminal on the outdoor outlet. Proper grounding is essential for electrical safety and helps protect against the risk of electrical shock and equipment damage.
- Test the Connections: Once the wiring is connected, use a voltage tester to verify that the connections are secure and that the wiring is correctly configured. Test for proper voltage and ensure that there are no loose connections or wiring errors.
By carefully following these steps and paying close attention to the wiring connections, you can ensure that the outdoor electrical outlet is properly wired and ready for safe and reliable operation. Taking the time to make secure and accurate electrical connections is essential for the functionality and safety of the outdoor outlet.
Test the Outlet
After completing the installation and wiring of the outdoor electrical outlet, it is crucial to perform thorough testing to ensure that the outlet is functioning properly and adhering to safety standards. Testing the outlet helps identify any potential issues and provides assurance that the electrical connections are secure and reliable. Here’s a guide to testing the outdoor outlet:
- Turn on the Power: Restore power to the circuit at the main electrical panel. Once the power is turned back on, proceed with caution and prepare to test the outdoor outlet for functionality.
- Verify Outlet Power: Use a voltage tester to verify that the outdoor outlet is receiving power. Test each receptacle within the outlet to confirm that it is properly energized and capable of providing electrical power.
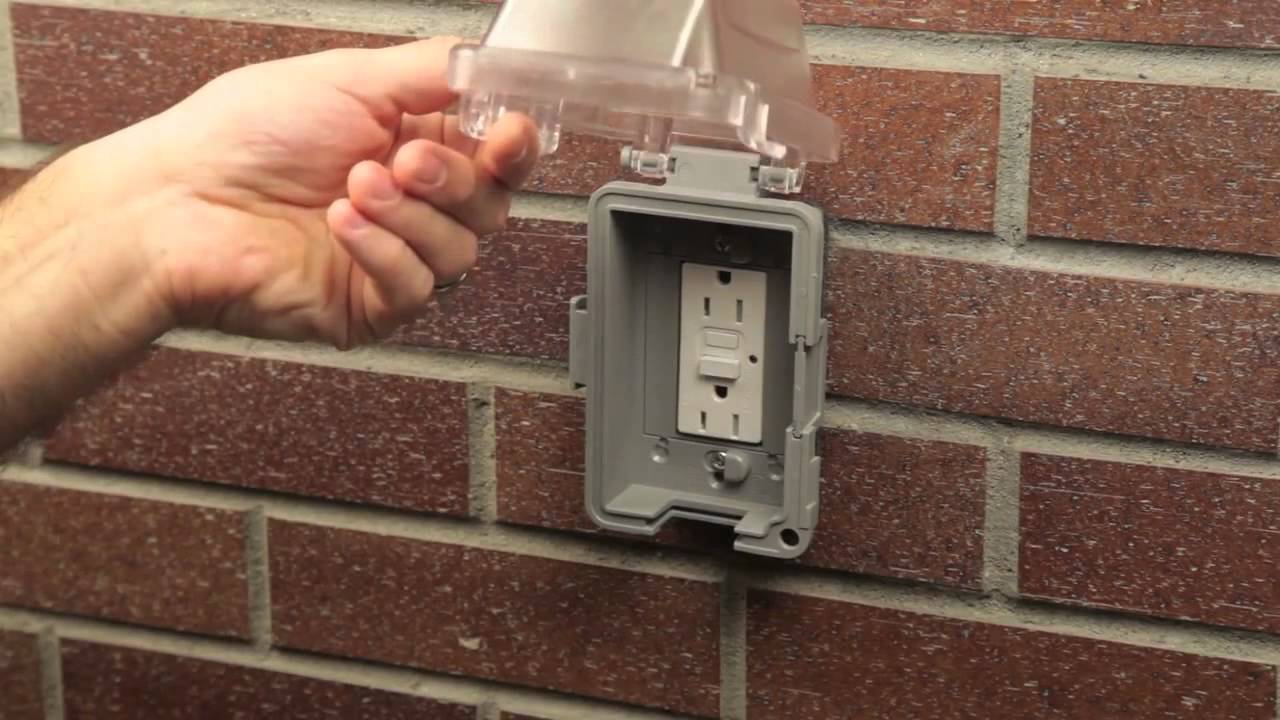
- Test GFCI Functionality: If the outdoor outlet is equipped with Ground Fault Circuit Interrupter (GFCI) protection, test the GFCI functionality by pressing the “Test” and “Reset” buttons on the outlet. Ensure that the GFCI trips as intended and that it can be reset without issues.
- Check for Wiring Errors: Inspect the outlet and its surroundings for any signs of wiring errors, loose connections, or visible damage. Ensure that the wiring is properly secured within the outlet box and that there are no exposed conductors.
- Test with Electrical Device: Plug in a suitable electrical device, such as a lamp or small appliance, to the outdoor outlet and verify that it functions as expected. This test confirms that the outlet can supply power and that the electrical connections are reliable.
- Verify Weatherproof Cover Seal: Ensure that the weatherproof cover for the outdoor outlet provides a secure seal and effectively protects the outlet from moisture and debris. Confirm that the cover closes properly and maintains a weather-resistant barrier.
By conducting these comprehensive tests, you can confirm that the outdoor electrical outlet is operational, safe, and compliant with electrical standards. Thorough testing provides peace of mind and ensures that the outdoor outlet is ready to deliver reliable power for your outdoor activities.
Conclusion
Adding an outdoor electrical outlet can significantly enhance the functionality and convenience of your outdoor living space, providing access to power for lighting, entertainment, and various electrical devices. By following the step-by-step process outlined in this guide, you can confidently tackle the installation of an outdoor outlet while prioritizing safety and adherence to electrical standards.
Throughout the installation process, it is crucial to prioritize safety precautions, including turning off the power, using proper tools and materials, and complying with local electrical codes. These measures help create a secure and reliable outdoor electrical setup that minimizes the risk of electrical hazards.
From locating a suitable power source and choosing the right outdoor outlet to planning the wiring route, installing the outlet box, connecting the wiring, and thorough testing, each step plays a vital role in the successful implementation of the outdoor electrical outlet. Careful consideration of environmental factors, such as weatherproofing and protection from the elements, contributes to the longevity and functionality of the outdoor power source.
By gathering the necessary materials and tools, planning the wiring route, and meticulously connecting and testing the outlet, you can create a safe and dependable power source that enhances the versatility and enjoyment of your outdoor space.
As you embark on the journey of adding an outdoor electrical outlet, remember to approach the project with patience and attention to detail. Whether you are powering outdoor lighting, audio systems, or other electrical devices, a well-executed outdoor electrical installation can elevate your outdoor experience and provide added convenience for various activities.
With the knowledge and guidance provided in this comprehensive guide, you are well-equipped to bring power to your outdoor oasis, creating a versatile and functional outdoor living space that meets your electrical needs while prioritizing safety and quality.
Frequently Asked Questions about How To Add An Outdoor Electrical Outlet
Was this page helpful?
At Storables.com, we guarantee accurate and reliable information. Our content, validated by Expert Board Contributors, is crafted following stringent Editorial Policies. We're committed to providing you with well-researched, expert-backed insights for all your informational needs.


0 thoughts on “How To Add An Outdoor Electrical Outlet”