Home>Furniture & Design>Outdoor Furniture>How To Open Plastic Outdoor Outlet Cover
Outdoor Furniture
How To Open Plastic Outdoor Outlet Cover
Modified: February 18, 2024
Learn how to easily open a plastic outdoor outlet cover with our step-by-step guide. Keep your outdoor furniture safe and secure with this helpful DIY tip. Outdoor-furniture-furniture-and-design.
(Many of the links in this article redirect to a specific reviewed product. Your purchase of these products through affiliate links helps to generate commission for Storables.com, at no extra cost. Learn more)
Introduction
Welcome to the comprehensive guide on how to open a plastic outdoor outlet cover. Whether you're a seasoned DIY enthusiast or a novice looking to tackle a home improvement project, understanding the process of opening a plastic outdoor outlet cover is essential. This guide will walk you through the steps required to safely and effectively replace your outdoor outlet cover, ensuring that you can complete the task with confidence.
Outdoor outlet covers are crucial for protecting electrical outlets from the elements, such as rain, snow, and debris. Over time, these covers may become worn, damaged, or simply need to be replaced to maintain the safety and functionality of your outdoor electrical outlets. By following the steps outlined in this guide, you'll be able to open a plastic outdoor outlet cover with ease, allowing for the installation of a new cover that will provide the necessary protection for your outdoor electrical outlets.
Whether you're preparing for an outdoor gathering, looking to spruce up your outdoor living space, or simply addressing a maintenance issue, knowing how to open a plastic outdoor outlet cover is a valuable skill for any homeowner. So, let's dive into the step-by-step process and get you on your way to a safer and more aesthetically pleasing outdoor environment.
Key Takeaways:
- Safety First!
Before opening a plastic outdoor outlet cover, always turn off the power and use insulated gloves for protection. Following safety protocols ensures a secure and risk-free DIY experience. - DIY Confidence
By learning how to open and replace a plastic outdoor outlet cover, you gain a valuable skill for maintaining your outdoor space. Embrace the satisfaction of completing a successful home improvement project!
Read more: How To Open Plastic Cover On Outdoor Outlet
Step 1: Gather Necessary Tools and Materials
Before you begin the process of opening a plastic outdoor outlet cover, it’s essential to gather the necessary tools and materials to ensure a smooth and efficient workflow. Here’s a list of items you’ll need:
- Flathead screwdriver or a drill with a suitable bit
- Replacement plastic outdoor outlet cover
- Voltage tester or multimeter
- Insulating gloves (optional but recommended for added safety)
- Clean cloth for wiping the area around the outlet
- Step stool or ladder, if the outlet is located at a height
Having these tools and materials at your disposal will enable you to proceed with the task seamlessly, ensuring that you have everything you need to open the plastic outdoor outlet cover safely and effectively. Additionally, it’s important to prioritize safety throughout the process, so be sure to use insulated gloves and follow proper electrical safety protocols.
Once you’ve gathered the necessary tools and materials, you’ll be ready to move on to the next step in the process of opening the plastic outdoor outlet cover.
Step 2: Turn Off Power
Before you proceed with opening the plastic outdoor outlet cover, it is crucial to ensure that the power to the outlet is completely turned off. This step is paramount for your safety and the integrity of the electrical components. Follow these essential guidelines to safely turn off the power:
- Locate the Circuit Breaker: Identify the circuit breaker that controls the outdoor outlet. It is typically labeled in the breaker panel. If the outdoor outlet is not labeled, use a voltage tester to determine which breaker controls the power supply to the outlet.
- Switch Off the Circuit: Once you’ve located the correct breaker, switch it to the “off” position. It’s advisable to use a voltage tester to double-check that the power to the outlet has been successfully disconnected. This additional precaution ensures that the outlet is safe to work on.
- Test the Outlet: After turning off the power, use a voltage tester or multimeter to verify that the outlet is no longer energized. This step is crucial for your safety and should not be overlooked.
By diligently following these steps to turn off the power, you can proceed with confidence, knowing that you’ve taken the necessary precautions to ensure a safe working environment. With the power to the outlet safely turned off, you’re now ready to move on to the next step in the process of opening the plastic outdoor outlet cover.
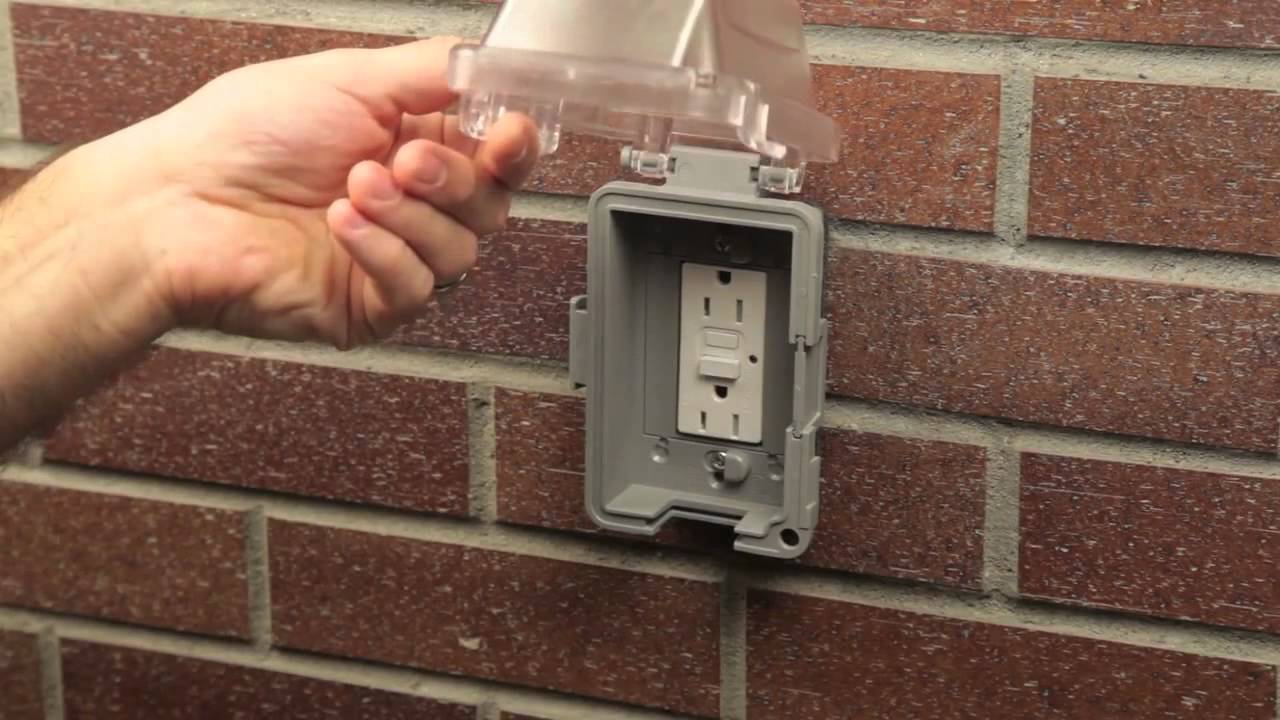
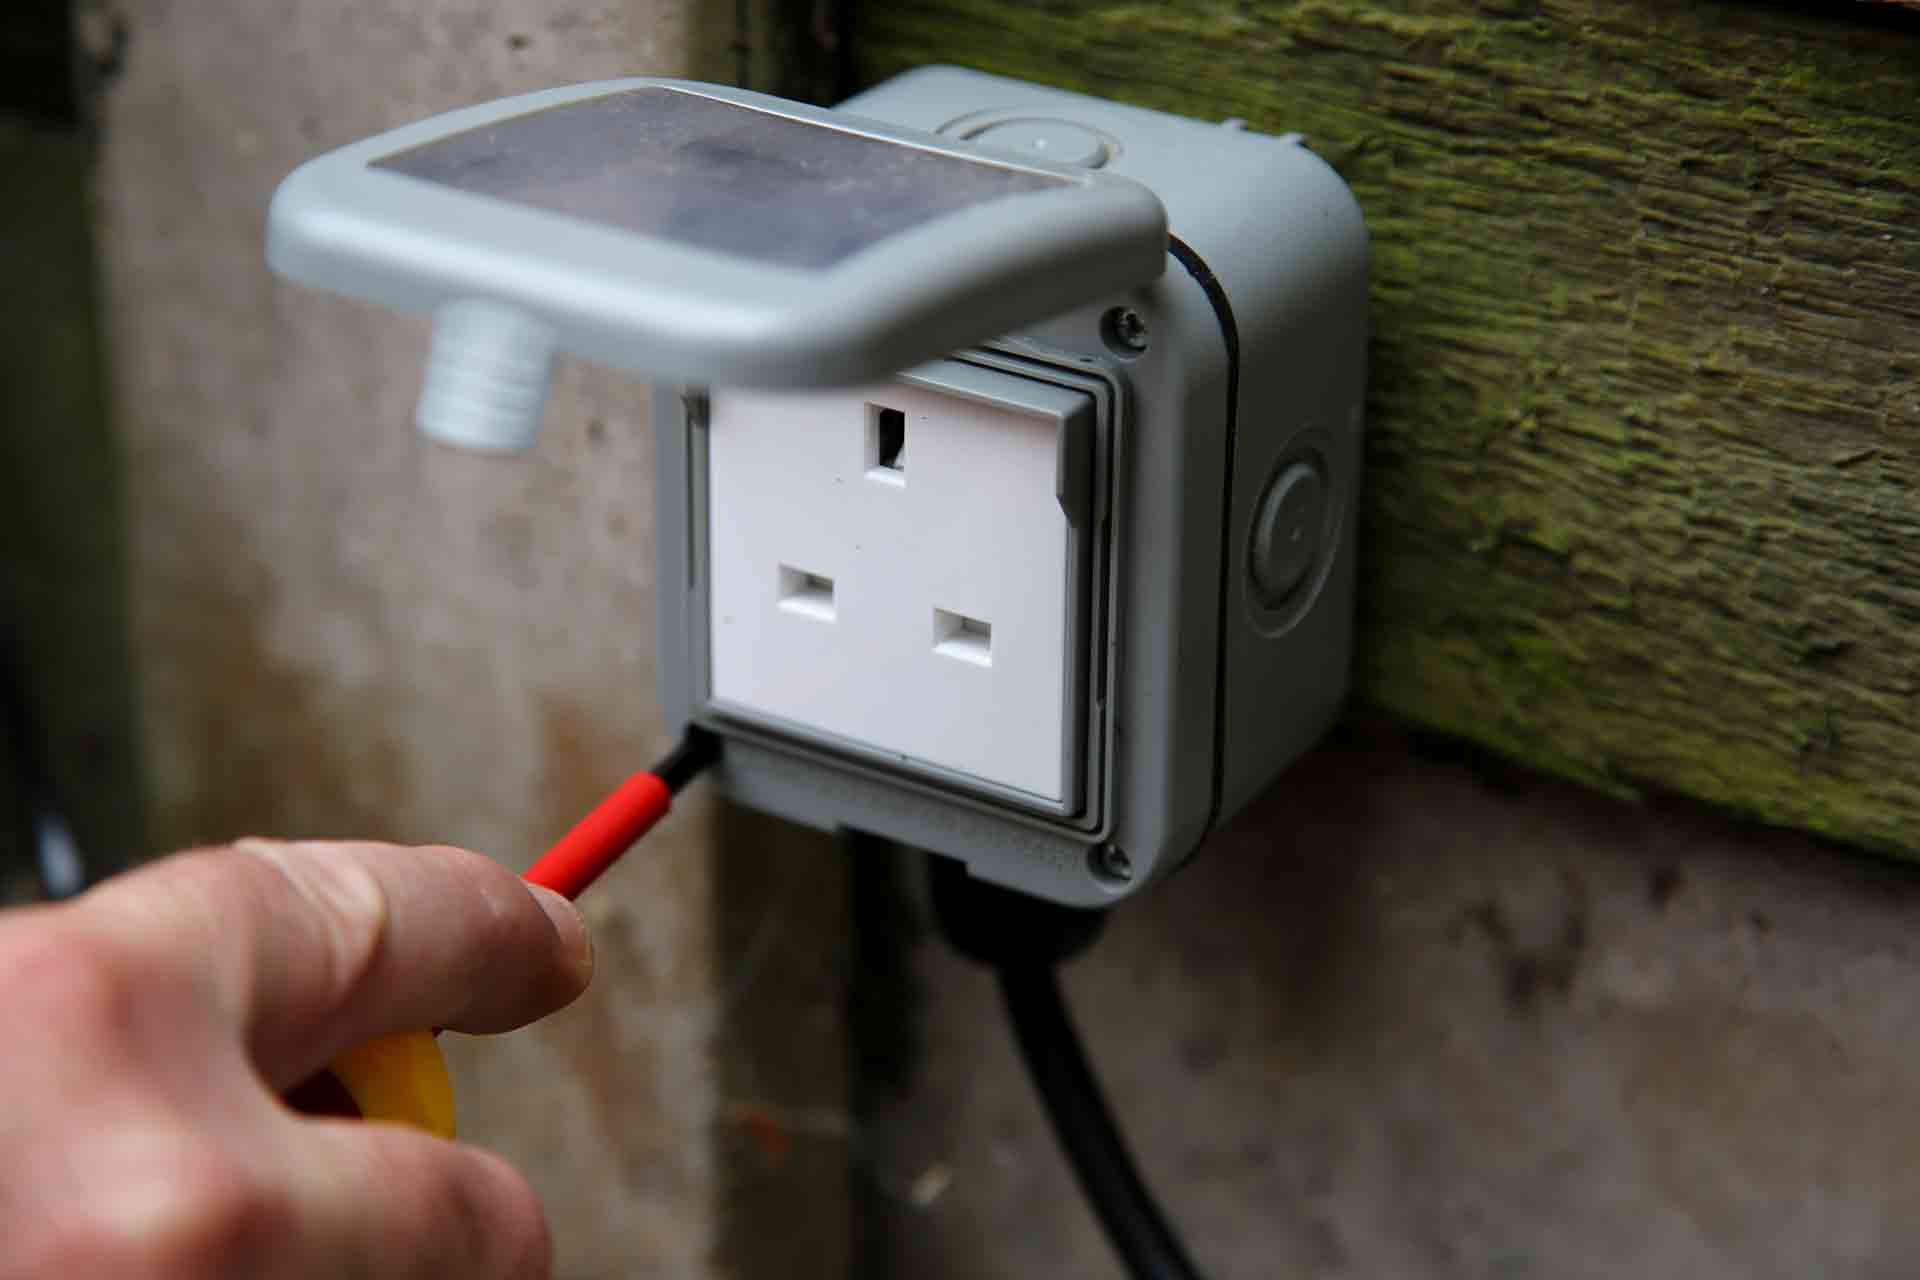
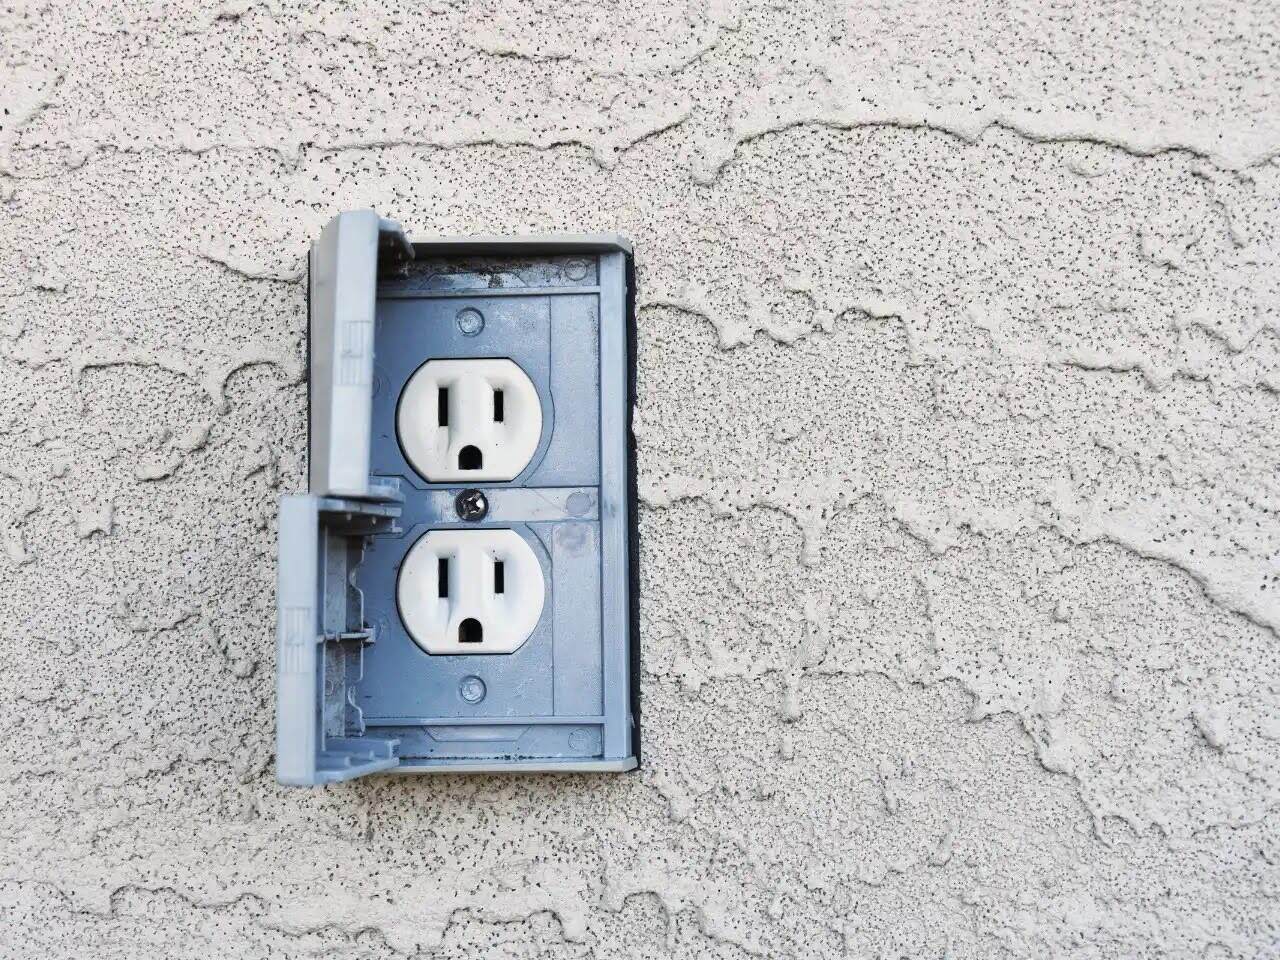
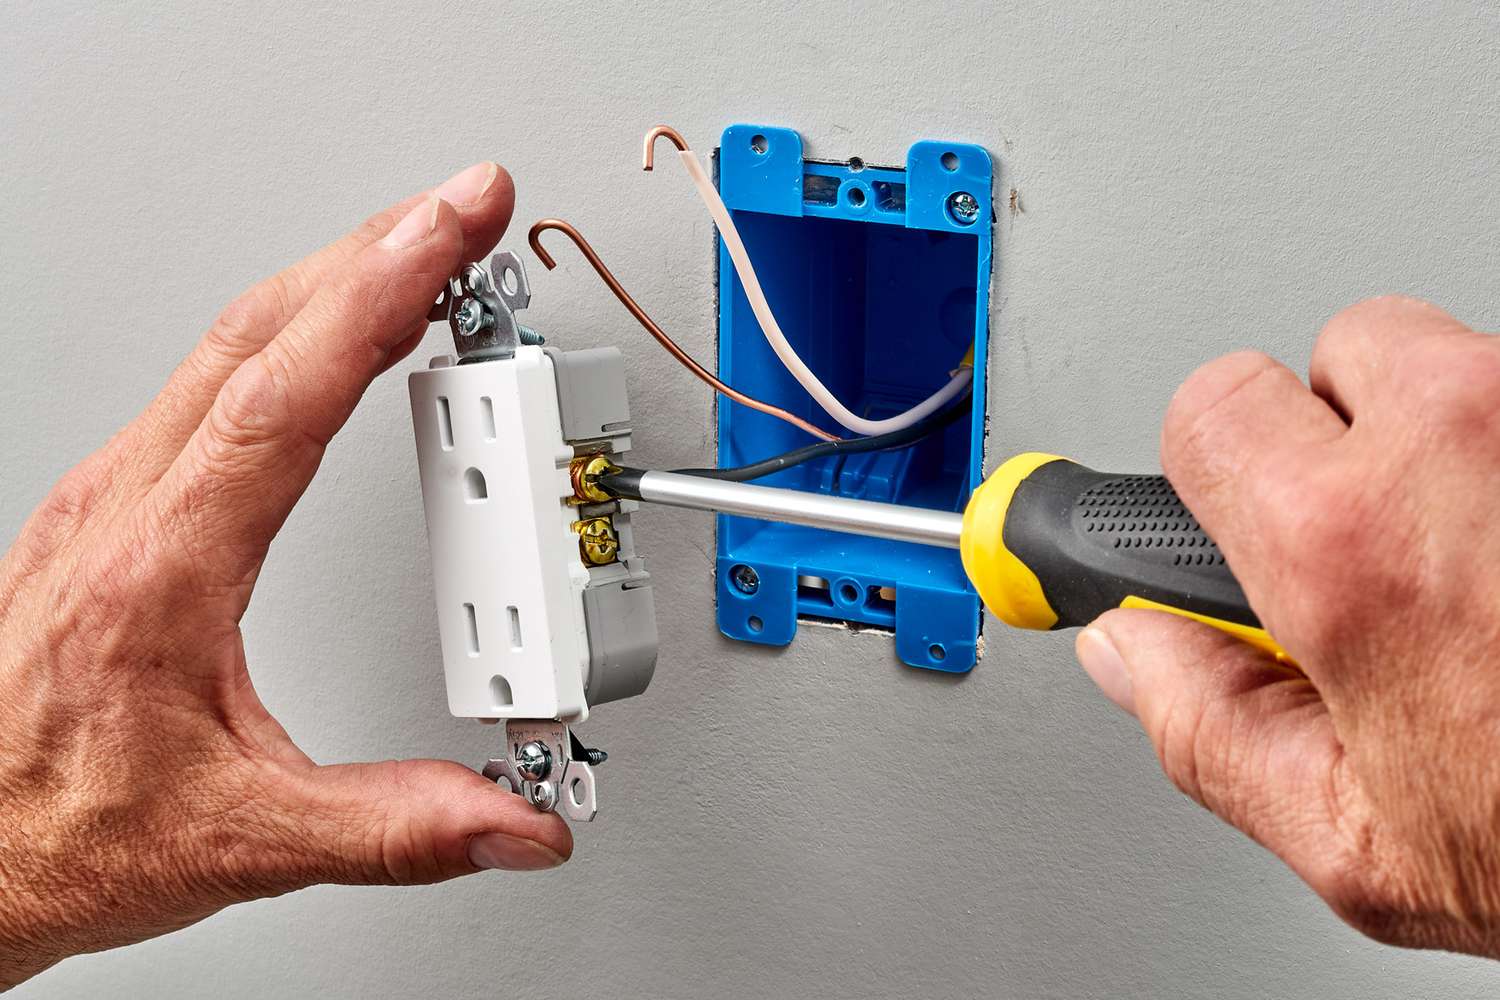
Step 3: Remove the Old Cover
With the power safely turned off, you can now proceed to remove the old plastic outdoor outlet cover. Follow these steps to complete this part of the process:
- Inspect the Cover: Before removing the old cover, take a moment to inspect it for any signs of damage or wear. This may include cracks, discoloration, or brittleness. Additionally, ensure that there are no insects or debris inside the cover that may have accumulated over time.
- Loosen the Screws: Using a flathead screwdriver or a suitable drill bit, carefully loosen and remove the screws that secure the old cover to the outlet. Place the screws in a safe location, as you may need them for securing the new cover.
- Remove the Cover: Once the screws are removed, gently pull the old cover away from the outlet. Be mindful of any resistance, as there may be a gasket or sealant holding the cover in place. If necessary, use a gentle rocking motion to release the cover from the outlet.
- Clean the Area: With the old cover removed, take a moment to clean the area around the outlet. Use a clean cloth to wipe away any dirt, dust, or debris that may have accumulated. This will ensure a clean surface for installing the new cover.
By carefully following these steps, you can safely remove the old plastic outdoor outlet cover, preparing the outlet for the installation of a new cover. With the old cover removed and the area cleaned, you’re now ready to proceed to the next step in the process.
Use a screwdriver to remove the screws holding the cover in place. Gently pull the cover away from the outlet to open it. Be careful not to force it to avoid damaging the cover or the outlet.
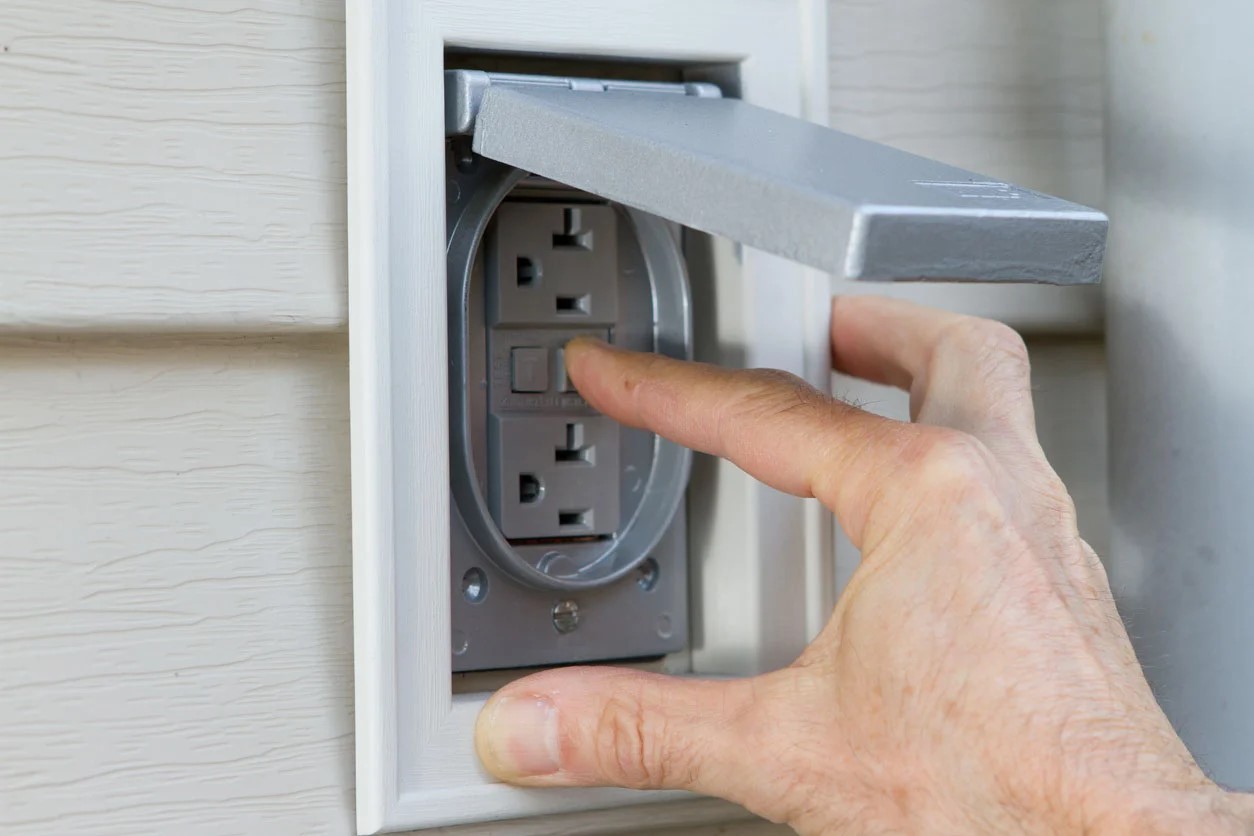
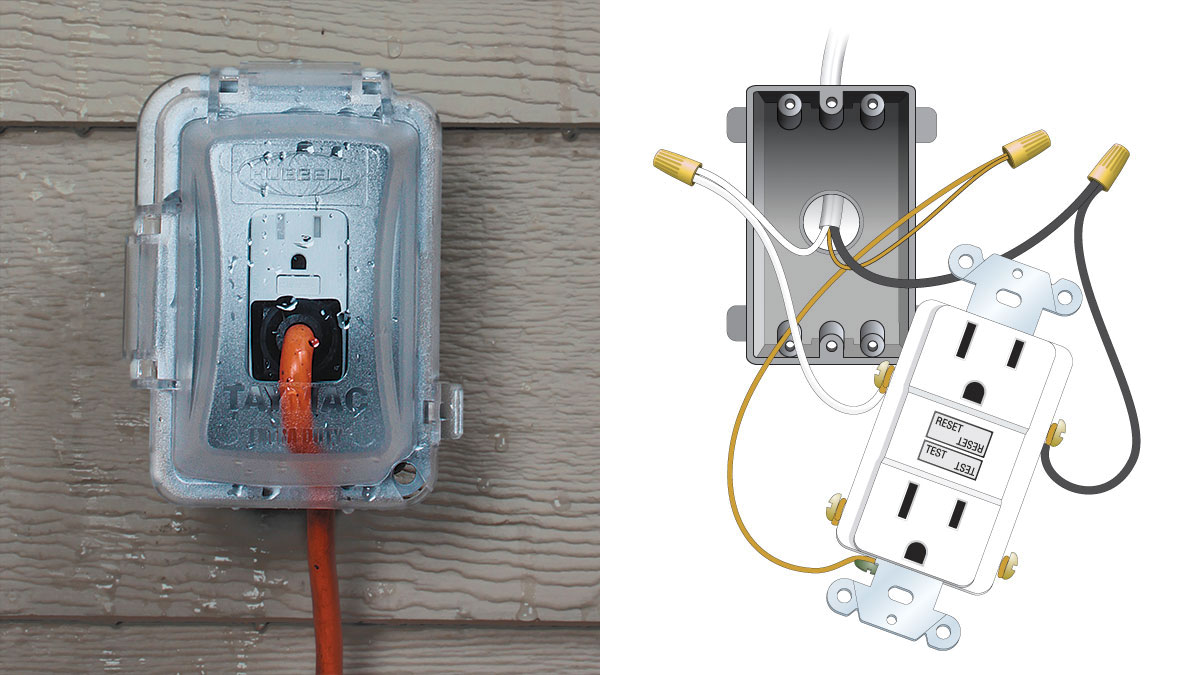
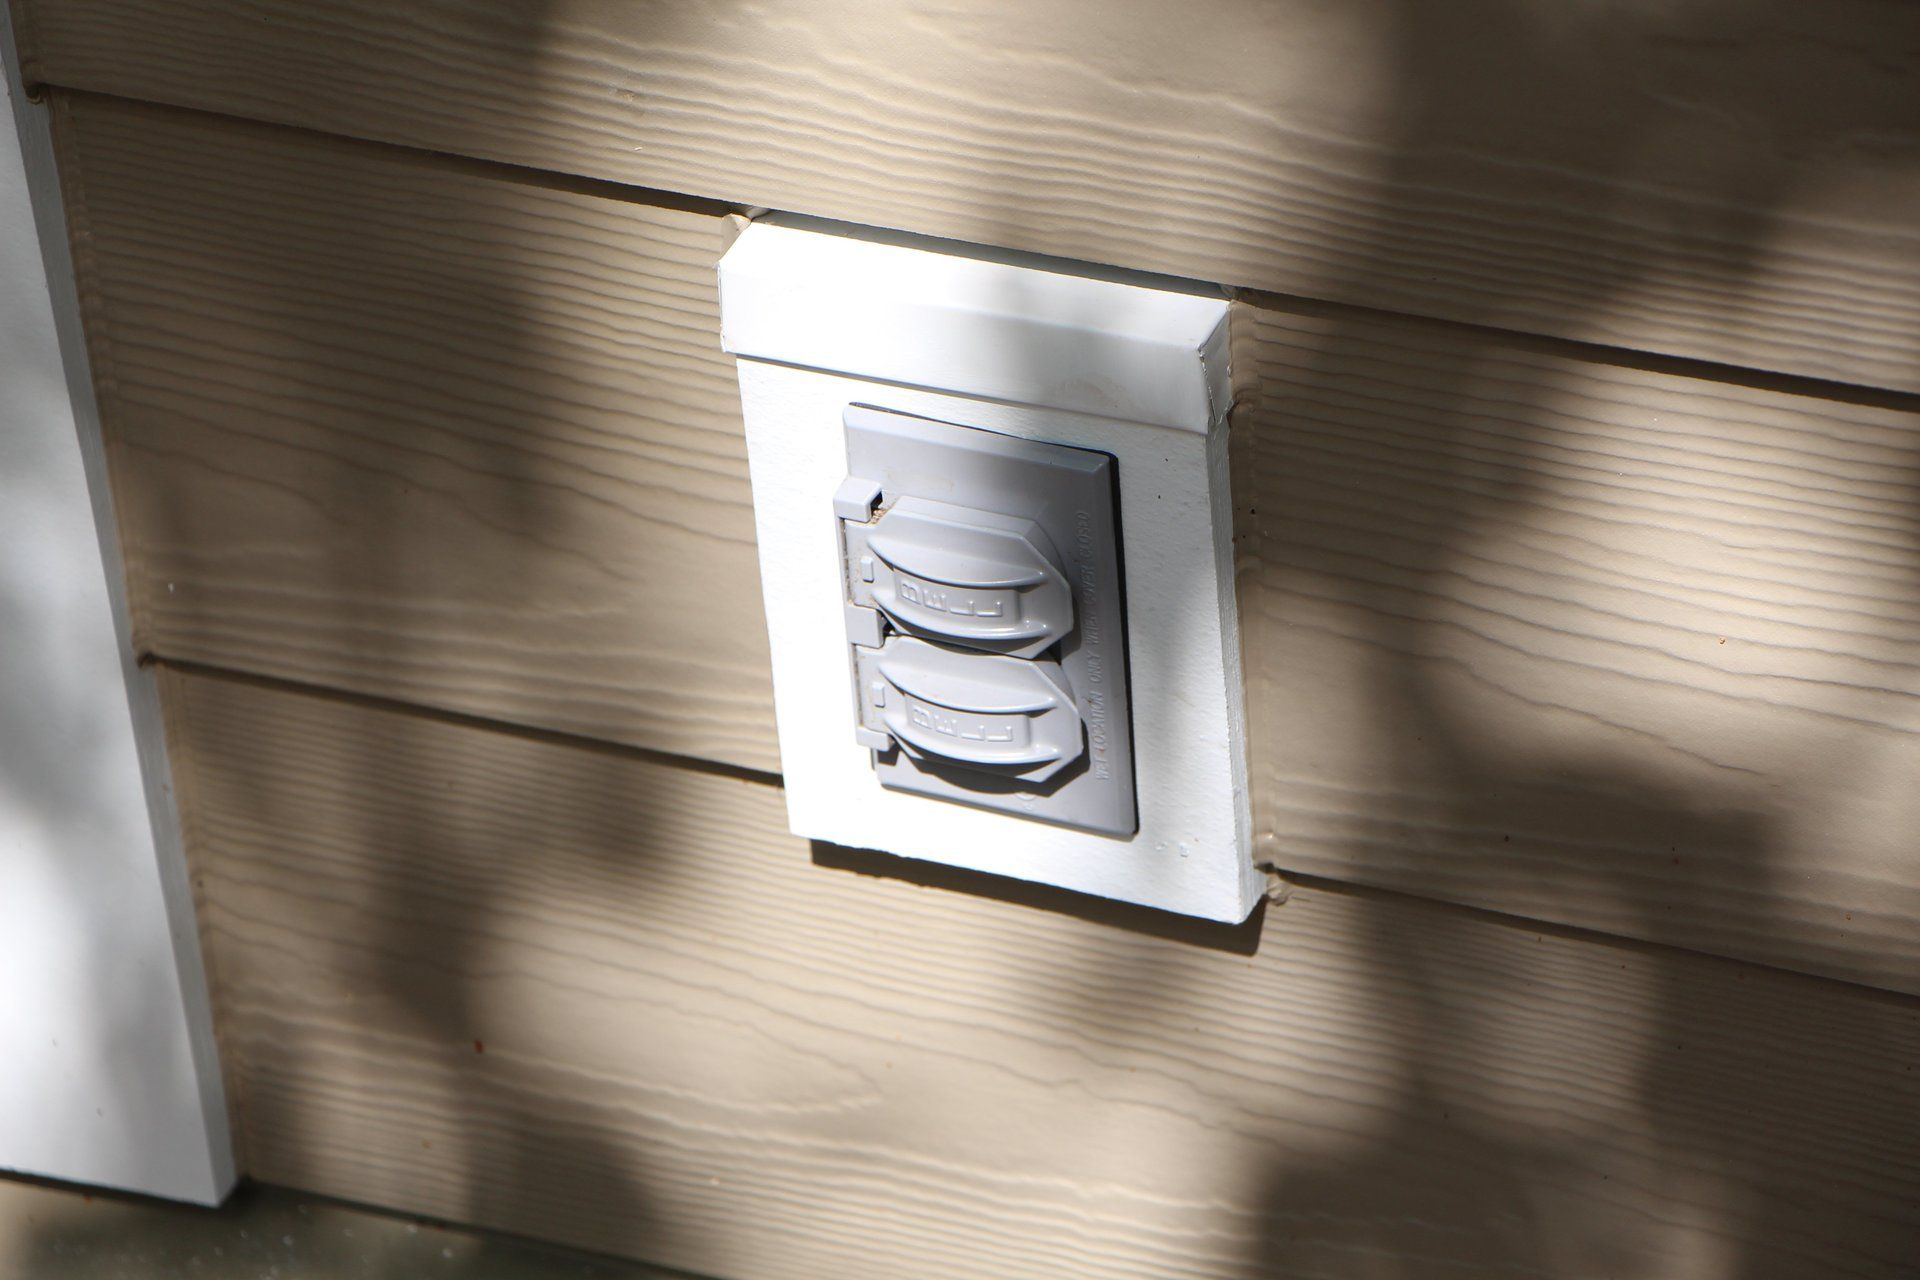
Step 4: Install the New Cover
Now that the old cover has been removed and the area around the outlet has been cleaned, it’s time to install the new plastic outdoor outlet cover. Follow these steps to ensure a successful installation:
- Position the New Cover: Place the new cover over the outlet, aligning it properly to ensure that it fits securely. Take note of the orientation of the cover to ensure that any hinge or latch aligns correctly with the outlet.
- Secure the Cover: Using the screws that were removed from the old cover, carefully secure the new cover in place. Ensure that the screws are tightened sufficiently to hold the cover securely, but be cautious not to overtighten them, as this may cause damage to the cover or the outlet.
- Check for Proper Fit: Once the new cover is secured, inspect it to ensure that it fits snugly and evenly over the outlet. Verify that any gaskets or seals are properly aligned and that the cover provides adequate protection for the outlet.
- Test the Cover: With the new cover in place, perform a visual inspection to confirm that it is installed correctly. Additionally, consider using a voltage tester to ensure that the outlet remains deactivated while the cover is being installed.
By following these steps, you can effectively install the new plastic outdoor outlet cover, providing the necessary protection for the outlet while enhancing the aesthetics of your outdoor space. With the new cover securely in place, you’re now ready to proceed to the final step in the process.
Read more: How To Cover An Outdoor Outlet
Step 5: Turn On Power and Test
After successfully installing the new plastic outdoor outlet cover, the final step is to turn on the power to the outlet and perform a thorough test to ensure that everything is functioning as intended. Follow these essential steps to complete the process:
- Restore Power: Return to the circuit breaker panel and switch the breaker that controls the outdoor outlet back to the “on” position. This will restore power to the outlet, allowing it to be tested.
- Test the Outlet: Using a voltage tester or a suitable electrical device, carefully test the outlet to ensure that it is receiving power and functioning correctly. This step is crucial for verifying that the outlet is operational and safe to use.
- Check the Cover: Once the power has been restored and the outlet has been tested, inspect the new cover to ensure that it remains securely in place and provides the necessary protection for the outlet. Verify that the cover closes properly and that it effectively shields the outlet from the elements.
- Perform a Device Test: Plug in a suitable electrical device, such as a lamp or a phone charger, to confirm that the outlet is supplying power and that the device functions as expected. This step provides a practical test of the outlet’s functionality.
By diligently following these steps to turn on the power and test the outlet, you can ensure that the installation of the new plastic outdoor outlet cover has been completed successfully. With the outlet functioning as intended and the new cover providing the necessary protection, you can take pride in knowing that your outdoor electrical outlet is in optimal condition.
Conclusion
Congratulations! You’ve successfully learned how to open a plastic outdoor outlet cover and replace it with a new one. By following the step-by-step process outlined in this guide, you’ve not only enhanced the safety and functionality of your outdoor electrical outlet but also contributed to the overall aesthetics of your outdoor space.
Understanding the importance of maintaining outdoor outlet covers is essential for any homeowner. These covers serve a critical role in protecting electrical outlets from environmental elements, ensuring that they remain safe and operational. By mastering the process of opening a plastic outdoor outlet cover, you’ve equipped yourself with a valuable skill that can be applied to future maintenance and improvement projects.
Remember, safety should always be a top priority when working with electrical components. Before beginning any work, ensure that the power to the outlet is turned off and use appropriate safety gear, such as insulated gloves, to minimize any potential risks. Additionally, following local electrical codes and regulations is crucial to ensure compliance and safety.
As you enjoy the benefits of your newly installed plastic outdoor outlet cover, take pride in the knowledge and skills you’ve gained throughout this process. Whether you’re preparing for outdoor gatherings, enhancing your outdoor living space, or simply addressing maintenance needs, the ability to confidently open and replace a plastic outdoor outlet cover is a valuable asset.
Thank you for taking the time to learn and engage in this process. By prioritizing safety, following the outlined steps, and embracing the satisfaction of completing a DIY project, you’ve contributed to the overall well-being and functionality of your outdoor environment. Here’s to many more successful home improvement endeavors in the future!
Frequently Asked Questions about How To Open Plastic Outdoor Outlet Cover
Was this page helpful?
At Storables.com, we guarantee accurate and reliable information. Our content, validated by Expert Board Contributors, is crafted following stringent Editorial Policies. We're committed to providing you with well-researched, expert-backed insights for all your informational needs.


0 thoughts on “How To Open Plastic Outdoor Outlet Cover”