Home>Furniture & Design>Outdoor Furniture>How To Build An Outdoor Cat Condo

Outdoor Furniture
How To Build An Outdoor Cat Condo
Modified: August 27, 2024
Discover the ultimate guide to building an outdoor cat condo with our expert tips and designs. Create a stylish and functional space for your feline friend with our outdoor furniture and design ideas.
(Many of the links in this article redirect to a specific reviewed product. Your purchase of these products through affiliate links helps to generate commission for Storables.com, at no extra cost. Learn more)
Introduction
Welcome to the world of outdoor cat condos! If you're a devoted cat parent who wants to provide your feline friend with a safe and stimulating outdoor space, you're in the right place. Building an outdoor cat condo is not only a rewarding DIY project but also a fantastic way to enrich your cat's life and encourage their natural behaviors.
Imagine your fur baby basking in the sunshine, leaping from platform to platform, and surveying their kingdom from a cozy shelter. By constructing a custom outdoor cat condo, you can create a haven that meets your cat's unique needs and preferences while adding a stylish touch to your outdoor space.
In this guide, we'll delve into the essential steps and considerations for building an outdoor cat condo that strikes the perfect balance between functionality and aesthetic appeal. From selecting the right materials to designing a structure that maximizes your cat's enjoyment, we'll cover everything you need to know to embark on this exciting endeavor.
So, roll up your sleeves, unleash your creativity, and get ready to embark on a fun and fulfilling journey of crafting a purrfect outdoor retreat for your beloved feline companion. Let's dive into the world of outdoor cat condos and unleash our inner feline architects!
Key Takeaways:
- Building an outdoor cat condo is a fun DIY project that creates a safe and stimulating space for your cat to explore, play, and relax in the great outdoors.
- By carefully planning, designing, and constructing the cat condo, you can provide your feline friend with a multi-level paradise that satisfies their natural instincts and enhances their outdoor experience.
Read more: How To Build An Outdoor Cat Enclosure
Materials Needed
Before you embark on the construction of an outdoor cat condo, it’s crucial to gather all the necessary materials and tools. By having everything at your fingertips, you can streamline the building process and ensure that your cat condo turns out sturdy, safe, and visually appealing. Here’s a comprehensive list of materials and tools you’ll need:
Materials:
- Pressure-treated lumber or cedar for outdoor use
- Plywood or oriented strand board (OSB)
- Outdoor-grade carpet or artificial turf
- Sisal rope
- Wood screws and nails
- Wood glue
- Outdoor-grade paint or sealant
- Hinges and latches for the shelter door
- Roofing material such as shingles or corrugated metal
- Brackets and corner braces for added stability
- Mesh or wire for safety enclosures
- Corrugated plastic sheets for weatherproofing
- Plastic or PVC piping for additional structural support
- Fast-drying concrete for anchoring the base
Tools:
- Measuring tape and ruler
- Saw (circular saw or hand saw)
- Drill and drill bits
- Screwdriver set
- Staple gun
- Utility knife
- Sandpaper or electric sander
- Paintbrushes and rollers
- Work gloves and safety goggles
By ensuring that you have all the required materials and tools on hand, you can proceed with confidence and tackle each step of the construction process efficiently. With your supplies ready, it’s time to move on to the exciting phase of planning and designing your outdoor cat condo!
Planning and Design
Before hammering the first nail, it’s essential to lay a solid foundation for your outdoor cat condo through meticulous planning and thoughtful design. Consider the following factors to ensure that your feline masterpiece aligns with your cat’s needs and your outdoor space:
Space and Location: Assess the available outdoor area and select a suitable location for the cat condo. Consider factors such as sunlight exposure, proximity to your home, and the overall layout of your outdoor space. Ideally, the location should offer a balance of shade and sunlight while providing a clear view of the surroundings for your cat.
Size and Height: Determine the dimensions of the cat condo based on the number of cats it will accommodate and the available space. Consider incorporating multiple levels and platforms to encourage climbing and exploration. The height of the condo should allow your cat to indulge their natural instinct to perch and observe their territory.
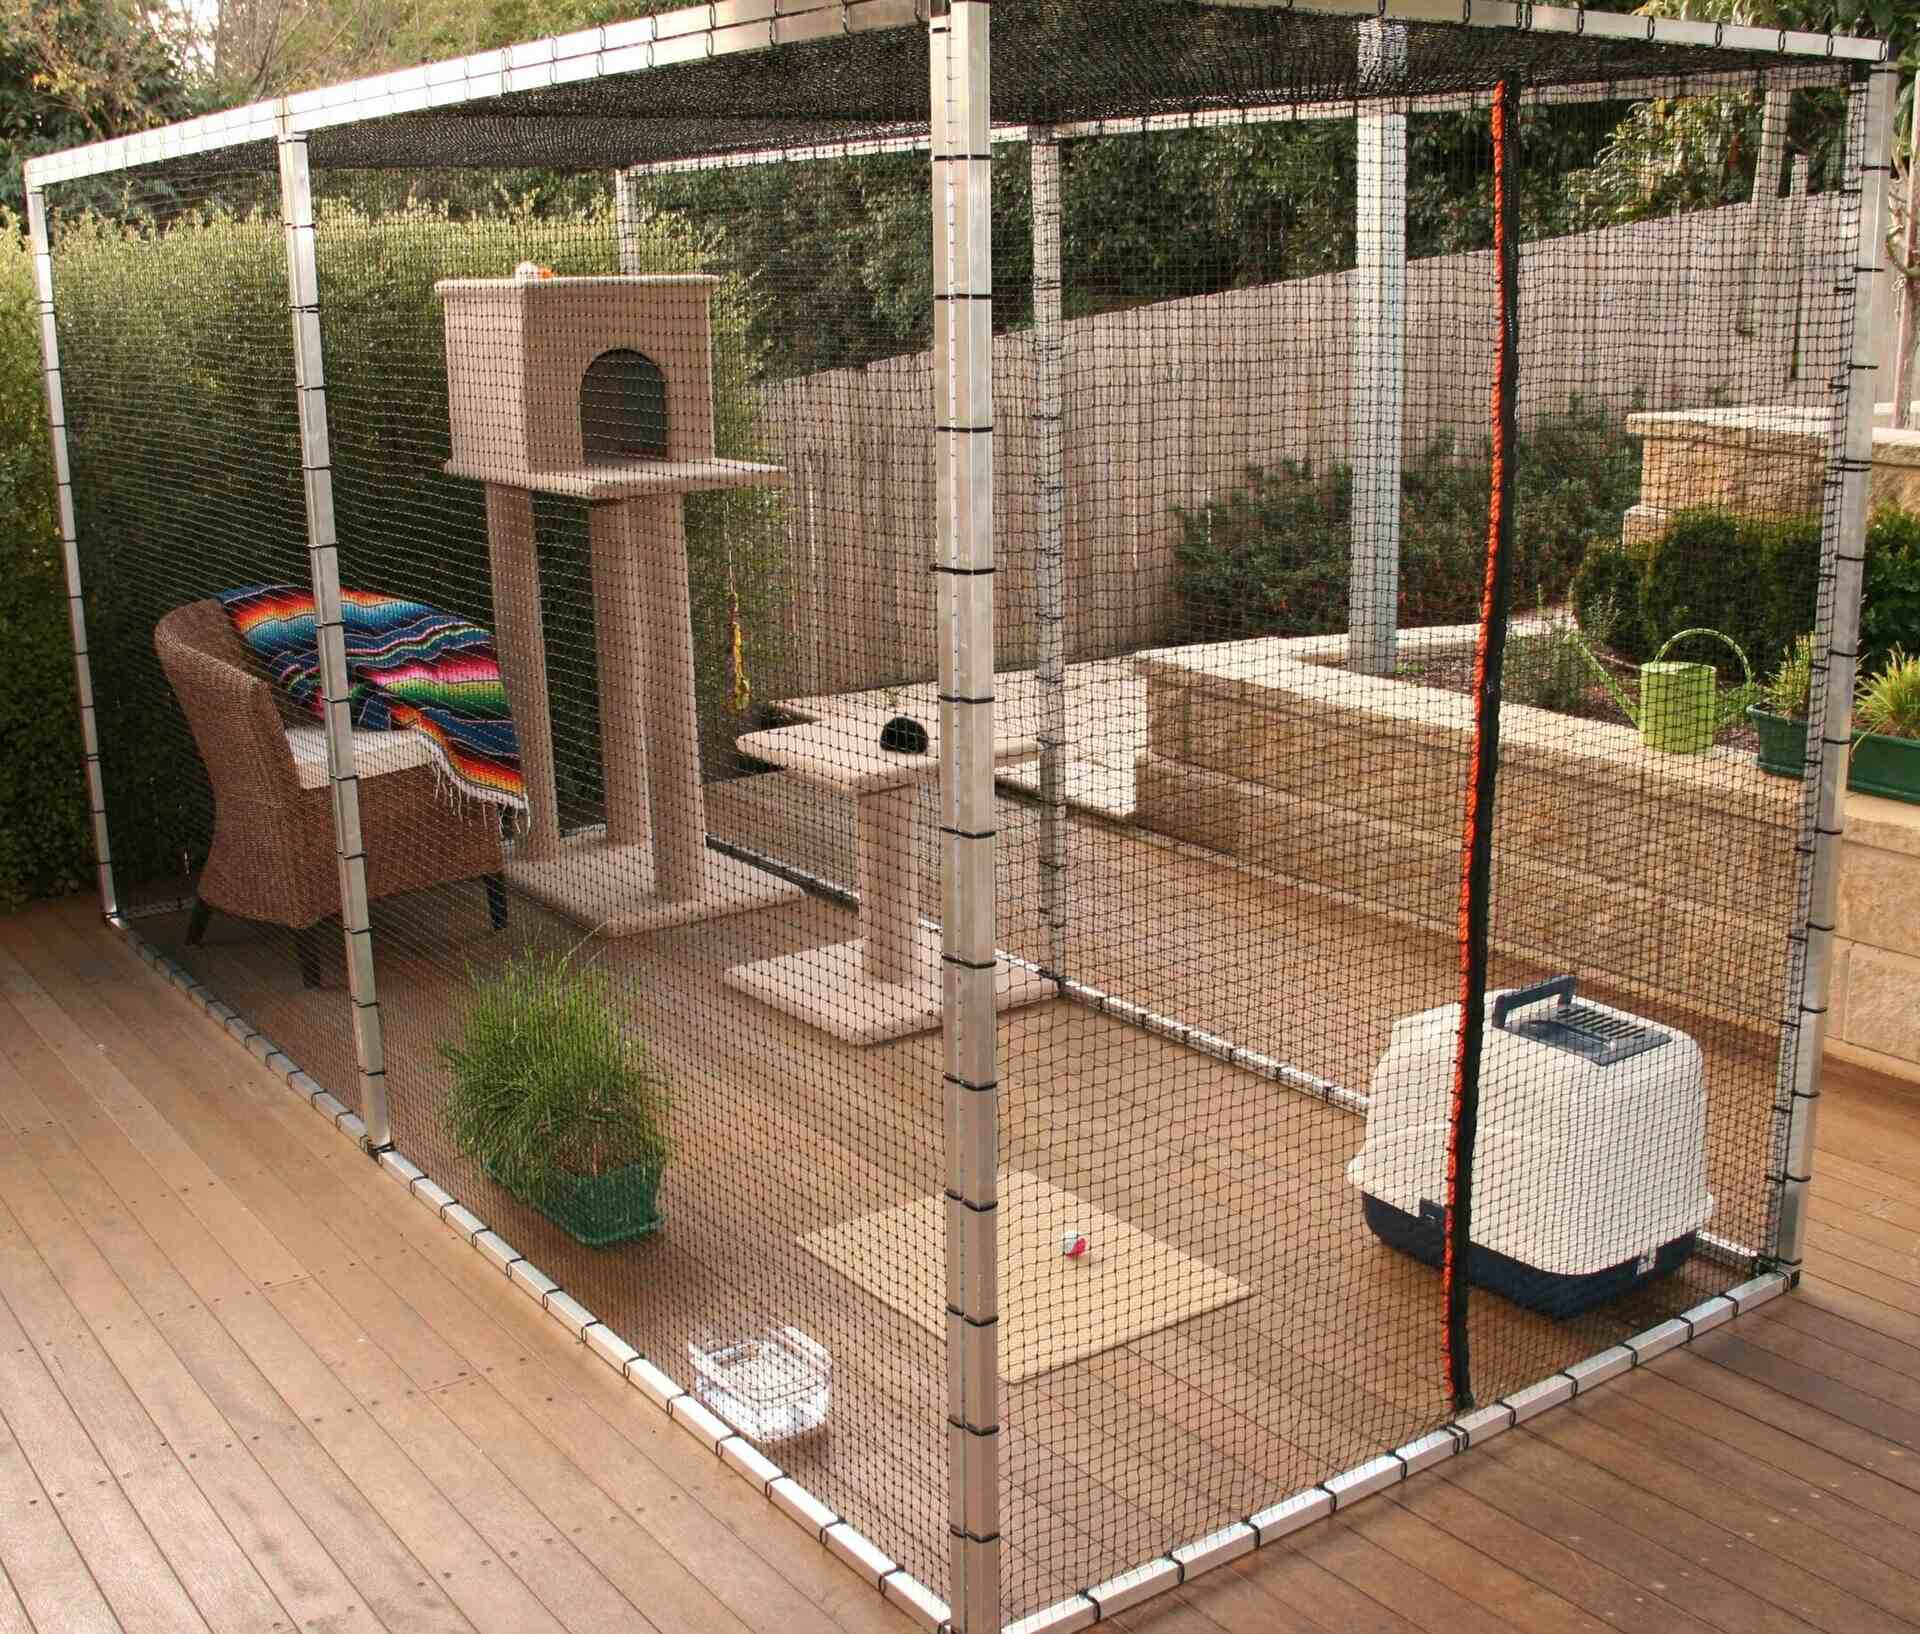
Design Features: Sketch a rough design or create a digital blueprint that outlines the key features of the cat condo, including platforms, ramps, scratching posts, and a sheltered area. Incorporate elements that cater to your cat’s preferences, such as cozy hideaways, dangling toys, and scratching surfaces.
Material Selection: Choose materials that are durable, weather-resistant, and safe for outdoor use. Opt for pressure-treated lumber or cedar to ensure longevity, and select outdoor-grade carpet or artificial turf that can withstand the elements while providing a comfortable surface for your cat to lounge on.
Safety Considerations: Prioritize safety by ensuring that the structure is stable and secure. Consider adding enclosures or mesh barriers to prevent your cat from wandering off or encountering potential hazards. Additionally, use non-toxic materials and avoid any sharp edges or protruding hardware.
Integration with Nature: Embrace the natural surroundings by incorporating elements that complement your outdoor environment. Whether it’s a rustic wood finish or a color scheme that harmonizes with your garden, integrating the cat condo seamlessly into its surroundings can elevate its visual appeal.
By investing time in meticulous planning and creative design, you can set the stage for a cat condo that not only meets your cat’s needs but also enhances the aesthetic charm of your outdoor space. With a clear vision in mind, it’s time to roll up your sleeves and commence the construction of the base for your feline sanctuary!
Read more: How To Build An Outdoor Play Area For Cat
Building the Base
The base serves as the sturdy foundation upon which the entire outdoor cat condo will be built. A well-constructed base ensures stability and durability, providing a safe and reliable structure for your cat to enjoy. Here’s a step-by-step guide to building the base:
1. Measure and Cut the Lumber: Begin by measuring and cutting the pressure-treated lumber or cedar to the desired dimensions for the base. Use a saw to achieve precise cuts, ensuring that the pieces fit together seamlessly.
2. Assemble the Frame: Arrange the cut lumber to form a rectangular frame, securing the corners with wood screws and wood glue. Use a level to ensure that the frame is perfectly aligned and balanced.
3. Add Support Beams: Strengthen the base by adding support beams across the interior of the frame. These beams will provide additional stability and prevent the base from sagging under the weight of the structure.
4. Anchor the Base: Position the base in the chosen location and use fast-drying concrete to anchor it to the ground. This step is crucial for ensuring that the cat condo remains steadfast, especially in outdoor environments exposed to wind and other elements.
5. Weatherproofing: Apply a weather-resistant sealant or outdoor-grade paint to the base to protect it from moisture, rot, and insect damage. This extra layer of protection will extend the lifespan of the base and contribute to the overall longevity of the cat condo.
Once the base is constructed and securely in place, you’ll have a solid groundwork on which to build the rest of the outdoor cat condo. With the base completed, it’s time to elevate the structure by constructing the frame that will support the various levels and platforms for your cat’s enjoyment.
Constructing the Frame
With the base securely in place, it’s time to construct the frame that will serve as the backbone of your outdoor cat condo. The frame provides the structural support for the platforms, ramps, and shelter, ensuring that the entire structure is stable and resilient. Follow these steps to build a robust and reliable frame:
1. Cut the Frame Components: Measure and cut the pressure-treated lumber or cedar to create the vertical supports and horizontal beams for the frame. Precision in cutting is essential to ensure that the frame components fit together seamlessly.
2. Assemble the Vertical Supports: Position the cut lumber to form the vertical supports for the frame, ensuring that they are evenly spaced and aligned. Secure the supports to the base using wood screws, creating a solid connection between the frame and the foundation.
3. Install Horizontal Beams: Attach the horizontal beams to the vertical supports, forming the framework for the various levels and platforms of the cat condo. Use a level to confirm that the beams are perfectly horizontal, maintaining the structural integrity of the frame.
4. Reinforce the Joints: Strengthen the joints of the frame by adding corner braces and brackets where the vertical supports and horizontal beams intersect. This reinforcement enhances the stability of the frame, especially in outdoor settings exposed to variable weather conditions.
5. Consider Additional Support: Depending on the height and complexity of your design, consider incorporating additional support beams or diagonal bracing to fortify the frame further. This step is crucial for ensuring that the structure can withstand the weight and activity of your cat.
By meticulously constructing a sturdy frame, you’re laying the groundwork for a secure and dependable outdoor cat condo that will provide your feline companion with a safe and enjoyable space to explore and relax. With the frame in place, it’s time to add the various platforms and shelves that will transform the structure into a multi-level playground for your cat.
Adding Platforms and Shelves
As you progress with the construction of your outdoor cat condo, the addition of platforms and shelves introduces the elements that will transform the structure into a multi-level paradise for your feline friend. These elevated surfaces provide opportunities for climbing, lounging, and surveying their surroundings. Here’s how to incorporate platforms and shelves into your cat condo:
1. Design Considerations: Determine the placement and size of the platforms based on the dimensions of the frame and the available space. Consider incorporating a variety of platform shapes and sizes to offer your cat diverse areas for perching and resting.
2. Secure the Platforms: Attach the platforms to the frame using wood screws and brackets, ensuring that they are firmly anchored and can support the weight of your cat. Consider covering the platforms with outdoor-grade carpet or artificial turf to provide a comfortable and inviting surface for your cat to enjoy.
3. Incorporate Ramps and Steps: If your cat condo features multiple levels, consider adding ramps or steps to facilitate easy access for your cat. Ramps can be constructed using plywood or lumber, providing gentle inclines for your cat to navigate between platforms.
4. Integrate Scratching Surfaces: Attach sisal rope or sisal fabric to designated areas of the frame or platforms to create scratching surfaces for your cat. This not only satisfies their natural urge to scratch but also helps to preserve your furniture and other surfaces in your home.
5. Create Cozy Hideaways: Introduce enclosed spaces or partially covered shelves to serve as cozy hideaways for your cat. These sheltered areas provide a sense of security and privacy, catering to your cat’s instinctual desire for a safe retreat.
By strategically adding platforms, ramps, and other elevated features, you’re transforming the frame into a dynamic and engaging environment that will captivate your cat’s curiosity and provide endless opportunities for play and relaxation. With the platforms and shelves in place, it’s time to infuse the cat condo with an essential element that satisfies your cat’s natural instincts – the incorporation of sisal rope for scratching.
When building an outdoor cat condo, make sure to use materials that are weather-resistant and safe for cats. Avoid using toxic substances or materials that could harm your feline friends.
Attaching the Sisal Rope
Integrating sisal rope into your outdoor cat condo serves as a vital component in satisfying your feline companion’s natural urge to scratch and sharpen their claws. By strategically placing sisal rope on designated surfaces, you can protect your furniture while providing an enriching and instinctually gratifying feature for your cat. Here’s how to attach sisal rope to your cat condo:
1. Select Sisal Rope: Choose high-quality sisal rope that is durable and suitable for outdoor use. Opt for a thickness that offers ample resistance for your cat to engage with, promoting healthy scratching behavior.
2. Prepare the Surfaces: Identify the areas of the frame, platforms, or posts where you intend to attach the sisal rope. Ensure that these surfaces are smooth and free of any rough edges or protruding hardware that could pose a hazard to your cat during scratching sessions.
3. Secure the Starting Point: Begin by securing the end of the sisal rope to the designated surface using a staple gun or heavy-duty staples. Wrap the rope tightly around the surface, ensuring that it is firmly anchored and will withstand your cat’s enthusiastic scratching.
4. Apply Tension and Consistency: As you continue wrapping the sisal rope around the surface, maintain consistent tension to create a taut and uniform appearance. This not only enhances the visual appeal but also ensures that the sisal rope provides an effective and satisfying scratching experience for your cat.
5. Secure the End Point: Once you have covered the desired area with sisal rope, secure the end point by stapling the rope in place. Trim any excess rope and ensure that the final attachment is secure and free of any loose ends that could pose a risk to your cat.
6. Monitor and Replenish: Regularly inspect the condition of the sisal rope and monitor its wear and tear. Over time, you may need to replenish or replace sections of the sisal rope to maintain its effectiveness and appeal for your cat.
By incorporating sisal rope into your outdoor cat condo, you’re providing your feline companion with an essential outlet for their natural scratching behavior while safeguarding your indoor furniture. With the sisal rope in place, it’s time to create a sheltered area that offers your cat a cozy retreat from the elements.
Read more: How To Decorate A Condo Living Room
Creating a Roof and Shelter
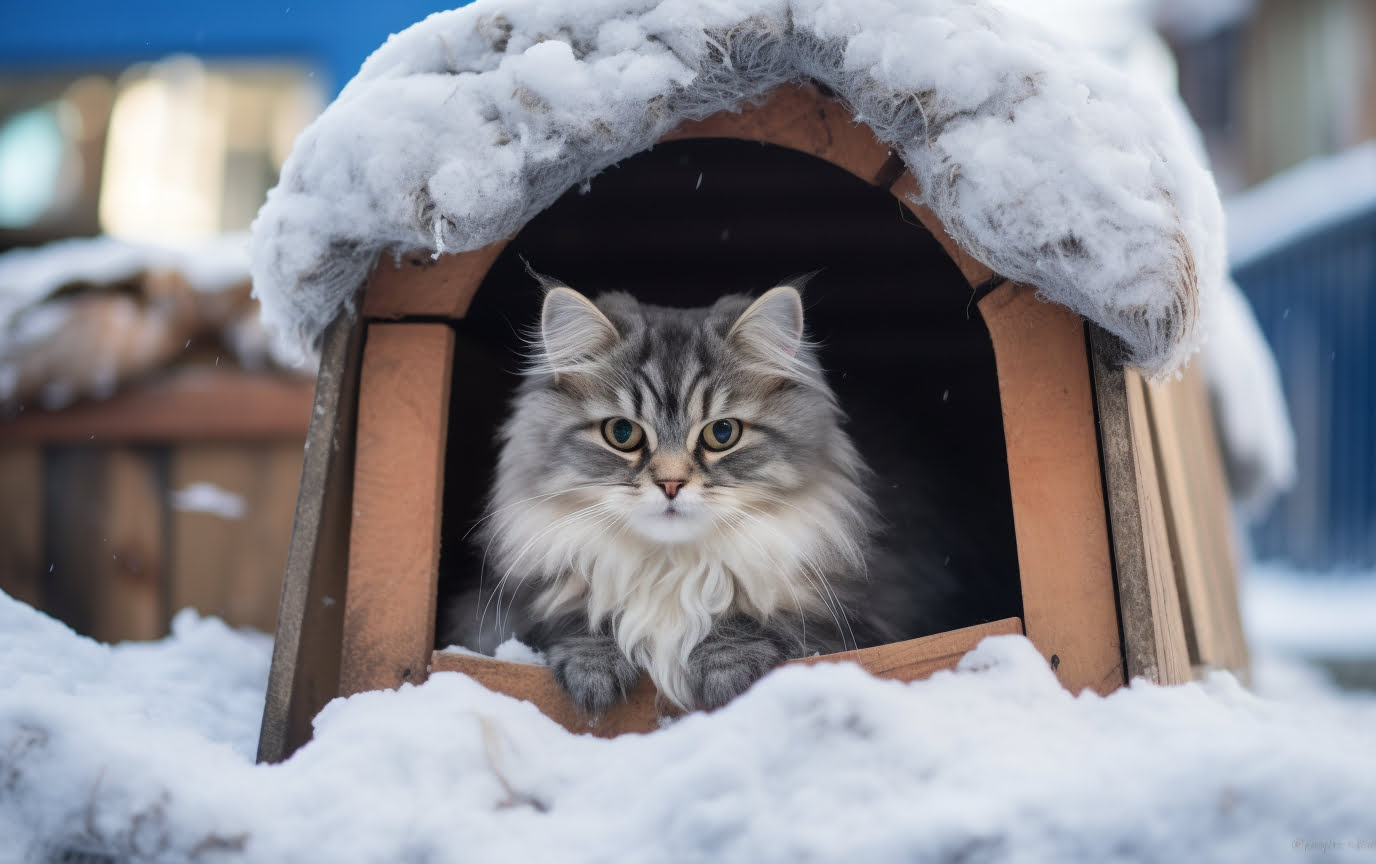
Providing your outdoor cat condo with a roof and sheltered area offers your feline companion a cozy retreat from the elements, ensuring their comfort and safety in various weather conditions. Whether it’s a sunny day, a light rain, or a gentle breeze, a well-designed shelter adds an extra layer of protection and comfort for your cat. Here’s how to create a roof and shelter for your outdoor cat condo:
1. Design the Sheltered Space: Determine the size and layout of the sheltered area, considering the dimensions of your cat condo and the space available. The shelter should offer ample room for your cat to comfortably rest and seek refuge from inclement weather.
2. Construct the Shelter Walls: Use plywood or oriented strand board (OSB) to build the walls of the sheltered area, ensuring that they are sturdy and weather-resistant. Consider adding a small entrance or opening that allows your cat to access the shelter with ease.
3. Install the Roofing Material: Cover the sheltered area with roofing material such as shingles or corrugated metal to provide protection from rain, snow, and sunlight. Ensure that the roofing material is securely attached and that it effectively repels moisture and UV rays.
4. Position the Shelter: Secure the sheltered area to the frame of the cat condo, ensuring that it is stable and firmly anchored. Consider elevating the shelter slightly to prevent water accumulation and provide additional insulation for your cat.
5. Add Insulating Material: If you anticipate colder weather, consider adding insulating material such as foam board or blankets to the interior of the shelter to provide warmth and comfort for your cat during chilly days and nights.
6. Enhance with Cozy Bedding: Place a soft and cozy bedding material, such as a plush blanket or pet bed, inside the shelter to create a welcoming and snug environment for your cat to relax and unwind.
By incorporating a roof and sheltered area into your outdoor cat condo, you’re providing your feline companion with a secure and inviting space where they can seek refuge and enjoy moments of tranquility amidst the outdoor ambiance. With the shelter in place, it’s time to add the finishing touches that will elevate the visual appeal and functionality of your cat condo.
Adding Finishing Touches
As you near the completion of your outdoor cat condo, adding finishing touches not only enhances the aesthetic appeal but also contributes to the functionality and comfort of the structure. These final details will elevate the overall design while ensuring that your feline companion has a captivating and enriching outdoor retreat. Here are the essential finishing touches to consider:
1. Weatherproofing and Sealing: Apply a final coat of outdoor-grade paint or sealant to all exposed surfaces of the cat condo. This protective layer safeguards the structure from moisture, UV exposure, and the effects of changing weather conditions, prolonging its lifespan.
2. Safety Enclosures: If your outdoor space allows, consider adding mesh or wire enclosures around the cat condo to create a safe and secure environment for your cat. These enclosures prevent your cat from wandering off and provide a barrier against potential outdoor hazards.
3. Decorative Elements: Infuse your cat condo with decorative elements such as hanging toys, colorful accents, or personalized touches that reflect your cat’s personality. These additions contribute to the visual appeal while stimulating your cat’s curiosity and engagement.
4. Elevated Perches: Introduce elevated perches or lookout points that offer your cat a commanding view of their outdoor surroundings. Cats are natural observers, and providing elevated vantage points enriches their experience and satisfies their instinctual desire to survey their territory.
5. Personalized Name Plate: Consider adding a personalized name plate or sign to the cat condo, showcasing your cat’s name and adding a charming, customized touch to the structure. This small detail adds a delightful and endearing element to the outdoor space.
6. Reflective Elements: Incorporate reflective elements into the design to enhance visibility during low-light conditions. This can include reflective tape or strategically placed lighting to ensure that your cat can navigate the outdoor environment safely, especially during dusk or dawn.
By attending to these finishing touches, you’re infusing your outdoor cat condo with character, functionality, and safety, creating a space that harmonizes with your outdoor setting while providing your cat with a captivating and enriching environment. With the completion of the finishing touches, your outdoor cat condo is ready to become a cherished haven for your feline companion.
Conclusion
Congratulations on crafting a remarkable outdoor cat condo that promises to be a source of joy and enrichment for your beloved feline companion. By embarking on this DIY journey, you’ve not only created a safe and stimulating outdoor space for your cat but also demonstrated your unwavering commitment to their well-being and happiness.
As you witness your cat exploring the multi-level platforms, basking in the sheltered area, and indulging in satisfying scratching sessions, you’ll find immense satisfaction in knowing that you’ve provided them with a sanctuary that aligns with their natural instincts and desires.
It’s important to regularly monitor and maintain the outdoor cat condo, ensuring that it remains in optimal condition and continues to offer a secure and inviting environment for your cat. Additionally, observe your cat’s interactions with the condo, noting their preferences and behaviors, and consider making adjustments to further tailor the space to their needs.
Remember that the outdoor cat condo is not only a testament to your dedication as a cat parent but also a testament to the bond you share with your feline companion. It’s a space where unforgettable moments will unfold, where your cat will find solace and adventure, and where the beauty of the outdoors converges with the warmth of a loving home.
As you witness your cat reveling in their new outdoor retreat, take pride in knowing that you’ve created a space where their natural instincts, comfort, and contentment converge, and where your shared bond can flourish amidst the tranquility of the outdoors.
Embrace the journey ahead as you and your cat embark on countless adventures within the captivating realm of the outdoor cat condo. Cherish the memories, revel in the shared moments, and continue to nurture the extraordinary companionship that defines the unique bond between you and your feline friend.
Frequently Asked Questions about How To Build An Outdoor Cat Condo
Was this page helpful?
At Storables.com, we guarantee accurate and reliable information. Our content, validated by Expert Board Contributors, is crafted following stringent Editorial Policies. We're committed to providing you with well-researched, expert-backed insights for all your informational needs.





0 thoughts on “How To Build An Outdoor Cat Condo”