Articles
How To Accurately Measure And Mark Lumber
Modified: January 6, 2024
Learn the best techniques for measuring and marking lumber accurately in this informative article. Discover pro tips and tricks to ensure precise cuts and minimize waste.
(Many of the links in this article redirect to a specific reviewed product. Your purchase of these products through affiliate links helps to generate commission for Storables.com, at no extra cost. Learn more)
Introduction
Accurately measuring and marking lumber is essential in woodworking projects. Whether you are building a small shelf or constructing a large piece of furniture, precise measurements and markings are crucial for achieving a professional-looking result.
Proper measurement and marking ensure that the lumber pieces fit together accurately, minimizing gaps and inconsistencies. This not only improves the structural integrity of your project but also enhances its visual appeal.
In this article, we will explore the importance of accurate measurement and marking in woodworking, discuss the necessary tools for the task, and provide a step-by-step guide on how to measure and mark lumber effectively. Whether you are a beginner or an experienced woodworker, this article will provide you with valuable insights and techniques to achieve precise results in your woodworking projects.
Key Takeaways:
- Accurate measurement and marking are crucial for woodworking projects, ensuring precise fits, clean lines, and efficient material usage. Utilize proper tools and techniques to elevate the quality and professionalism of your creations.
- Understanding lumber dimensions, choosing the correct measuring tools, and avoiding common mistakes are essential for precise measurement and marking. Attention to detail and consistent practice will lead to successful and visually appealing woodworking projects.
Read more: How Accurate Are Digital Calipers
Importance of Accurate Measurement and Marking
Accurate measurement and marking are fundamental aspects of woodworking. They play a significant role in ensuring the success of any project. Here are some reasons why proper measurement and marking are essential:
- Fit and Functionality: Accurate measurements ensure that the lumber pieces fit together perfectly, creating a sturdy and stable structure. If the measurements are not precise, the pieces may not align correctly, resulting in gaps or uneven joints. This can compromise the functionality and integrity of the project.
- Aesthetics: Accurate marking allows for precise cuts and joinery, resulting in clean lines and seamless integration of the wood pieces. When the measurements are precise, the finished project looks professional, polished, and visually appealing.
- Time and Material Efficiency: When you measure and mark accurately, you minimize errors and waste. Precise measurements ensure that you use the right amount of lumber, reducing unnecessary cutting and potential material wastage. Additionally, accurate markings eliminate the need for guesswork and multiple adjustments, saving you time and effort.
- Consistency: Accurate measurement and marking promote consistency throughout the project. Consistency in size and shape provides a uniform appearance, making all the elements blend seamlessly. It also helps in creating symmetrical designs, especially when working on projects that require multiple identical pieces.
- Professionalism: Accurate measurement and marking are attributes of skilled craftsmanship. When your measurements and markings are precise, it demonstrates your attention to detail and commitment to quality. This enhances your reputation as a woodworker and increases the value of your finished products.
By understanding the importance of accurate measurement and marking, you can develop good practices and techniques that will improve the overall quality of your woodworking projects.
Necessary Tools for Measuring and Marking Lumber
Measuring and marking lumber accurately requires the use of specific tools designed for the task. Here are the essential tools you need to have in your woodworking toolbox:
- Tape Measure: A tape measure is a versatile tool used for measuring length, width, and height. Look for a quality tape measure with clear and accurate markings. A lockable tape measure allows for easy and secure measurements.
- Ruler or Straight Edge: A ruler or straight edge is ideal for measuring and marking small distances accurately. Choose a ruler with clear and precise markings for reliable measurements.
- Combination Square: A combination square is a versatile tool that can be used for measuring, marking, and checking for squareness. It consists of a ruler and a sliding head that can be adjusted and locked at various angles.
- Marking Gauge: A marking gauge is specifically designed for marking precise measurements on lumber. It typically consists of a rod with a marking wheel or blade that can be set to the desired measurement, ensuring consistent markings.
- Pencil or Marking Knife: A sharp pencil or marking knife is essential for making accurate marks on the lumber surface. Make sure to use a pencil with a fine tip or a marking knife with a sharp edge for precision.
- Squares: Squares are critical tools for ensuring precise right angles. A combination square, try square, and speed square are common types of squares used in woodworking. These tools help in marking perpendicular lines and checking for squareness during the layout process.
- Clamps: Clamps are indispensable for securing lumber in place during measurement and marking. They ensure stability and prevent movement, allowing for accurate and consistent markings.
These tools are essential for accurately measuring and marking lumber. Investing in high-quality tools will not only make your woodworking tasks easier but also ensure accurate and reliable results.
Step 1: Choosing the Correct Measuring Tool
Choosing the right measuring tool is crucial for accurately measuring and marking lumber. Here are some factors to consider when selecting the correct tool:
- Measurement Accuracy: Look for tools that provide precise measurements. Ensure that the markings on the tool are clear, easy to read, and accurately calibrated.
- Type of Measurement: Consider the type of measurement you need to take. If you are measuring length, a tape measure or ruler is suitable. For more specific measurements, such as marking angles or checking for squareness, a combination square or speed square may be more appropriate.
- Project Size: Take into account the size of your project when choosing a measuring tool. For small-scale projects, a ruler or small tape measure may suffice. However, for larger projects or when measuring longer distances, a longer tape measure would be more efficient.
- Ease of Use: Consider how easy the tool is to use and handle. Ensure that it feels comfortable in your hand and is easy to maneuver. This will make it easier to take accurate measurements and markings.
- Durability: Invest in tools made from high-quality materials that are built to last. Durable tools will withstand frequent use and provide accurate measurements for years to come.
- Personal Preferences: Consider your personal preferences and the techniques you are most comfortable with. Some woodworkers may have a preference for a specific type of measuring tool based on their experience and familiarity.
By considering these factors and choosing the appropriate measuring tool, you can ensure accurate and reliable measurement and marking throughout your woodworking project.
Step 2: Understanding Lumber Dimensions
Before you can accurately measure and mark lumber, it’s essential to understand lumber dimensions. Lumber is typically sold in standard sizes, and being familiar with these dimensions will help you make precise measurements and markings. Here are some key points to understand:
- Nominal Dimensions: Lumber is commonly referred to by its nominal dimensions, which are rounded figures. For example, a 2×4 piece of lumber has a nominal dimension of 2 inches by 4 inches, but the actual dimensions may be slightly smaller.
- Actual Dimensions: The actual dimensions of lumber can be slightly smaller than the nominal dimensions due to processes like planing and drying. For instance, a 2×4 piece of lumber may have actual dimensions of 1.5 inches by 3.5 inches.
- Thickness and Width: The thickness refers to the measurement across the narrower side of the lumber, while the width refers to the measurement across the wider side. These dimensions are crucial for accurate measurements and determining how the pieces will fit together.
- Length: The length of lumber refers to the measurement from one end to the other. It’s important to measure and mark the correct length when cutting or joining pieces together.
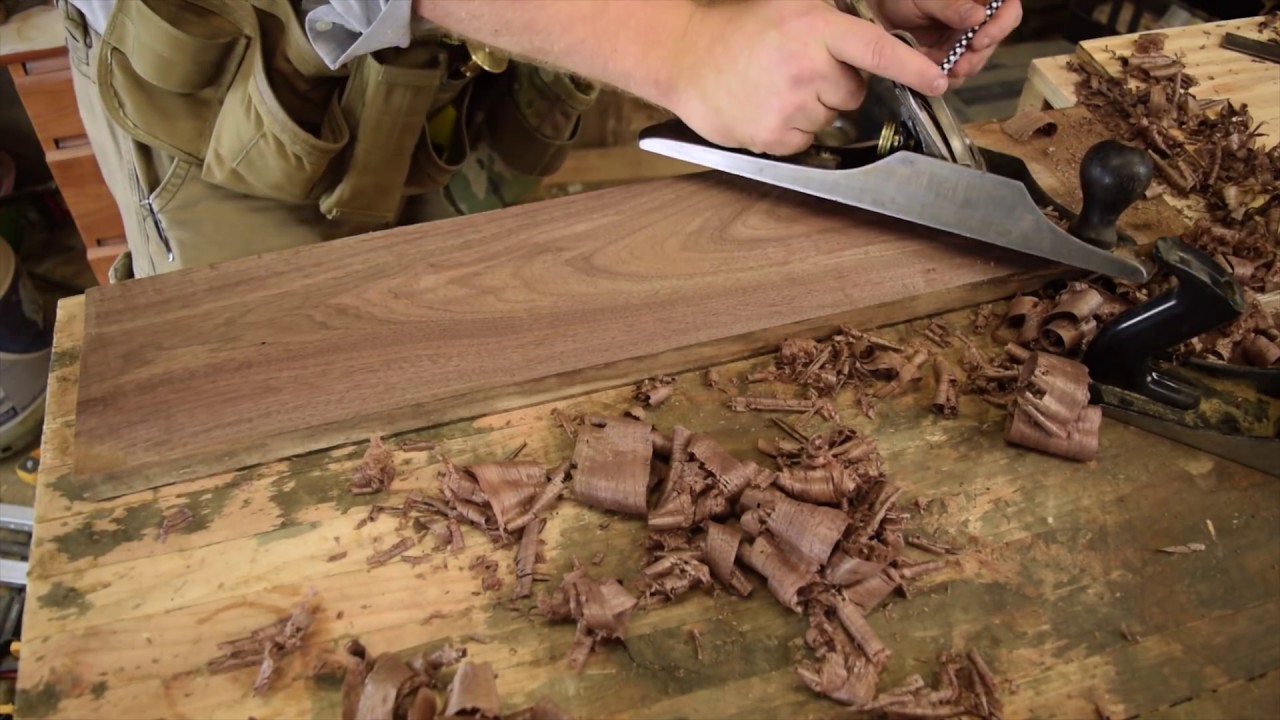
- Grain Direction: Understanding the grain direction of lumber is also essential for woodworking. The grain direction affects the stability, strength, and appearance of the wood. Make sure to consider the grain direction when planning your project and making measurements.
By understanding lumber dimensions and how they relate to your project, you can make more accurate measurements and markings. Remember that actual dimensions can vary slightly, so always measure the specific piece of lumber you are working with to ensure precision.
When measuring and marking lumber, always use a sharp pencil and a reliable measuring tool to ensure accuracy. Double-check your measurements before making any cuts.
Read more: How To Mark A Quilt
Step 3: Measuring Length and Width of Lumber
Measuring the length and width of lumber accurately is crucial for ensuring that your project pieces fit together properly. Follow these steps to measure the length and width of your lumber:
- Prepare the Lumber: Clear any debris or obstructions from the surface of the lumber to ensure an accurate measurement.
- Measure the Length: Place one end of your measuring tool (such as a tape measure or ruler) at one end of the lumber and extend it to the other end. Ensure that the measuring tool is straight and parallel to the edge of the lumber. Read and note the measurement shown at the other end. If the lumber is longer than your measuring tool, measure partially, move the tool, and continue until you have measured the entire length.
- Measure the Width: To measure the width of the lumber, place the measuring tool perpendicular to the length. Position the tool at one end of the lumber and extend it across to the other end, ensuring that it is aligned with the edge of the lumber. Read and note the measurement shown on the tool.
- Take Multiple Measurements: Sometimes, lumber may not have uniform thickness or width throughout its length. In such cases, take multiple measurements at different points along the length and width to account for any variations. This will ensure that you have accurate and reliable measurements for your project.
Remember to take your time and double-check your measurements to ensure accuracy. It is always better to re-measure than to make cuts or markings based on incorrect measurements.
Once the length and width of your lumber has been measured accurately, you can proceed to the next step of marking the measurements for precise cuts and joinery.
Step 4: Marking Measurements on Lumber
After accurately measuring the length and width of your lumber, the next step is to mark the measurements for precise cuts and joinery. Proper marking ensures that you make accurate and clean cuts, resulting in well-fitted pieces for your woodworking project. Here’s how to mark measurements on lumber:
- Clean the Surface: Use a brush or cloth to remove any sawdust, debris, or moisture from the surface of the lumber. A clean surface will allow the markings to adhere properly.
- Choose the Marking Tool: Depending on your preference and the type of lumber, you can use a sharp pencil, marking knife, or a combination of both. A pencil provides clear and visible markings, while a marking knife creates precise and defined lines.
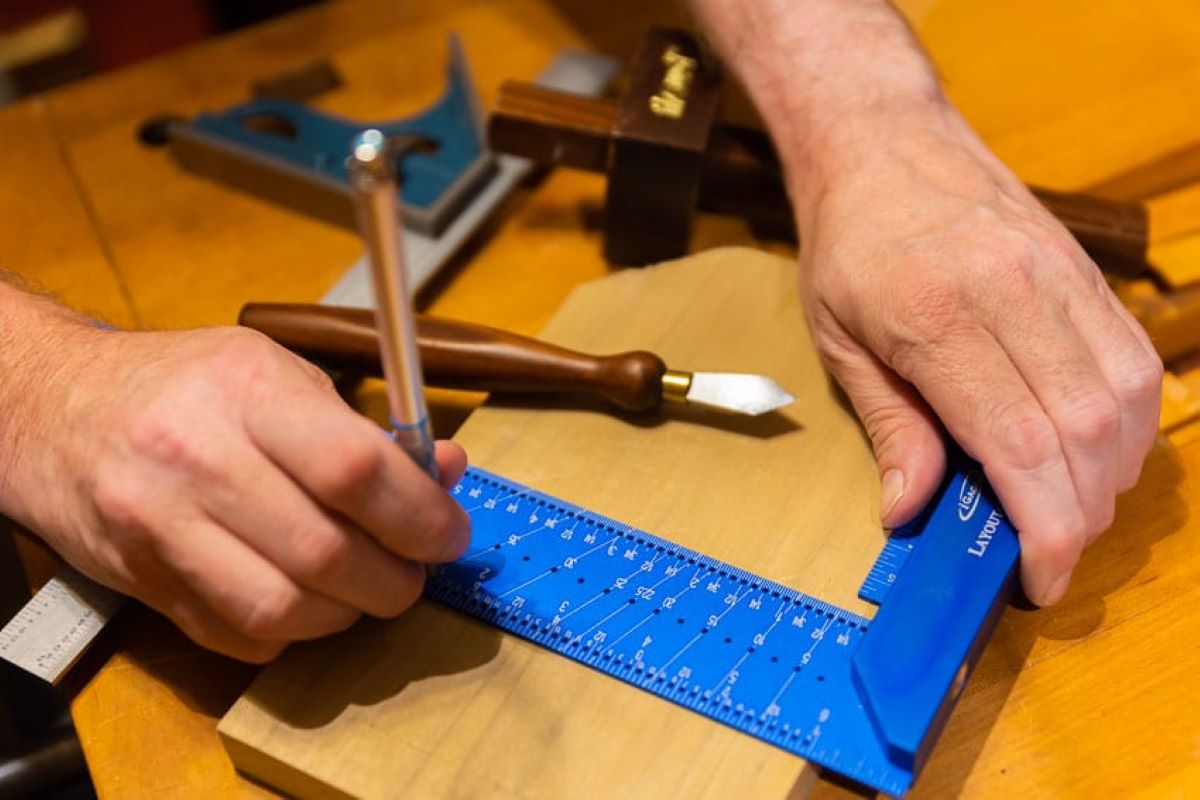
- Mark the Cut Lines: Using your measuring tool as a reference, mark the cut lines on the lumber. Make a small, clear, and precise mark at the desired measurement point. If you’re marking a long distance, use a straight edge or a square to ensure a straight line.
- Indicate Joinery Points: If your project requires joinery, such as mortise and tenon or dowel joints, mark the locations of these joinery points on the lumber. This will ensure that you have accurate reference points for cutting or drilling later on.
- Add Labels or Symbols: If you have multiple pieces of lumber, especially when working on larger projects, it can be helpful to label or symbolize your marks to indicate the corresponding parts. This will help you stay organized and prevent confusion during the assembly process.
Take your time and ensure that the markings are clear and defined. Double-check your measurements and marks before proceeding to the cutting or joinery stage. Accuracy in marking will greatly contribute to the overall precision and quality of your woodworking project.
Step 5: Using Squares and Guides for Accurate Marking
Using squares and guides is a helpful technique for achieving accurate and precise markings on your lumber. These tools ensure that your measurements are perfectly perpendicular and aligned, resulting in clean cuts and seamless joinery. Here’s how to use squares and guides for accurate marking:
- Choose the Right Square: Depending on your project requirements, select a square that suits your needs. A combination square, speed square, or try square can be used for various types of measurements and markings.
- Align the Square: Position the square against the edge of the lumber, ensuring that it is perpendicular to the surface. Make sure it is firmly in place and does not move during the marking process.
- Mark the Line: Using the edge of the square as a guide, draw a line on the lumber. The line should be parallel to the edge of the lumber and accurately indicate the desired measurement or cut.
- Repeat for Multiple Sides: If you need to make markings on multiple sides of the lumber, flip the piece and repeat the process with the square against the new edge. This ensures consistency and accuracy in the markings across all sides.
- Use Guides for Repeated Markings: If you need to make repeated markings at the same interval, consider using a guide or template. A piece of scrap wood with the desired measurements can serve as a guide for consistent and efficient marking.
- Check for Accuracy: Double-check your markings using the square to ensure they are in the correct position and aligned accurately. This step is crucial before proceeding with cutting or joinery to avoid any mistakes.
Using squares and guides can significantly enhance your precision when marking lumber. These tools help maintain consistency and ensure that your measurements and markings are perfectly perpendicular and aligned.
Remember to handle the squares and guides carefully and securely to avoid any accidental movements or misalignments during the marking process.
Step 6: Common Mistakes to Avoid
While measuring and marking lumber, it is important to be aware of common mistakes that can compromise the accuracy and quality of your woodworking project. Here are some common mistakes to avoid:
- Inaccurate Measurements: Rushing through measurements can lead to inaccuracies. Take your time to ensure precise measurements, double-checking each one before proceeding.
- Poor Marking Techniques: Sloppy or unclear markings can result in incorrect cuts or joinery. Use sharp pencils or marking knives and make clean, well-defined marks to avoid confusion during the construction process.
- Ignoring Grain Direction: Failing to consider the grain direction of the lumber can weaken the structure and affect the appearance of your project. Always measure and mark with the grain direction in mind, especially for cuts and joinery.
- Not Using Squares or Guides: Neglecting to use squares or guides can lead to misaligned markings and inaccurate cuts. Always utilize these tools to ensure perpendicularity and alignment in your measurements.
- Relying on One Measurement: Depending on a single measurement can be risky. Take multiple measurements at different points along the lumber to account for any variations and ensure accuracy.
- Not Verifying Markings: Before proceeding with cuts or joinery, always double-check your markings with measuring tools and squares. Verifying the accuracy of your markings can prevent costly mistakes and wasted materials.
- Ignoring Safety Precautions: When measuring and marking, it is important to prioritize safety. Use proper tools, follow safety guidelines, and take necessary precautions to avoid accidents or injuries.
Avoiding these common mistakes will help maintain accuracy and precision in your measurements and markings, resulting in a successful woodworking project.
Remember, practice makes perfect. The more you refine your measuring and marking techniques, the better your woodworking skills will become.
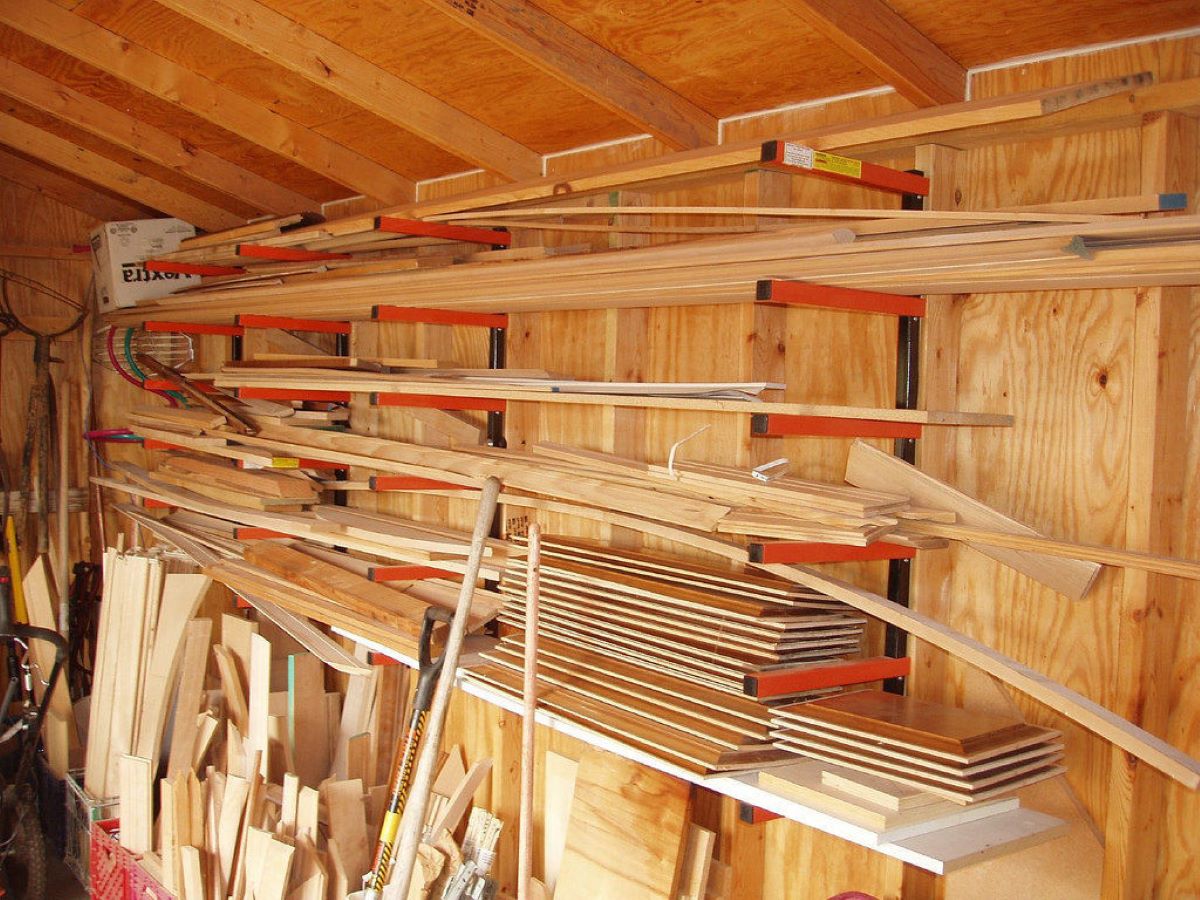
Read more: How To Store Lumber Outside
Conclusion
Accurate measurement and marking are fundamental skills in woodworking that are essential for achieving professional and precise results in your projects. By following the steps outlined in this article and utilizing the necessary tools, you can ensure that your lumber is measured and marked accurately. This, in turn, will lead to properly fitting pieces, clean cuts, and seamless joinery.
Understanding lumber dimensions is the first step in accurate measurement. Knowing the difference between nominal and actual dimensions helps you make precise calculations and achieve the desired fit in your project. Choosing the correct measuring tools, such as tape measures, rulers, and squares, is crucial for obtaining accurate measurements.
Once you have measured the length and width of your lumber, marking the measurements accurately becomes the next important step. Clear and well-defined markings ensure that you make precise cuts and achieve the desired results. Using squares and guides helps maintain perpendicularity and alignment in your markings, ensuring consistency throughout your project.
It’s important to be aware of common mistakes and pitfalls to avoid while measuring and marking lumber. Inaccurate measurements, poor marking techniques, ignoring grain direction, and not using proper tools can lead to errors and subpar results. Therefore, taking your time, practicing precision, and double-checking your measurements and markings are essential for success.
By honing your measurement and marking skills, you can elevate the quality and professionalism of your woodworking projects. Accurate measurements and markings not only improve the functionality and structural integrity of your creations but also enhance their visual appeal. With practice and attention to detail, you can master these skills and embark on fulfilling woodworking endeavors.
Remember, measurement and marking are the foundation of every woodworking project. By investing time and effort in these foundational steps, you set yourself up for success and ensure the satisfaction of a job well done.
Frequently Asked Questions about How To Accurately Measure And Mark Lumber
Was this page helpful?
At Storables.com, we guarantee accurate and reliable information. Our content, validated by Expert Board Contributors, is crafted following stringent Editorial Policies. We're committed to providing you with well-researched, expert-backed insights for all your informational needs.


0 thoughts on “How To Accurately Measure And Mark Lumber”