Home>Furniture & Design>Outdoor Furniture>How To Build An Outdoor Lounge Chair
Outdoor Furniture
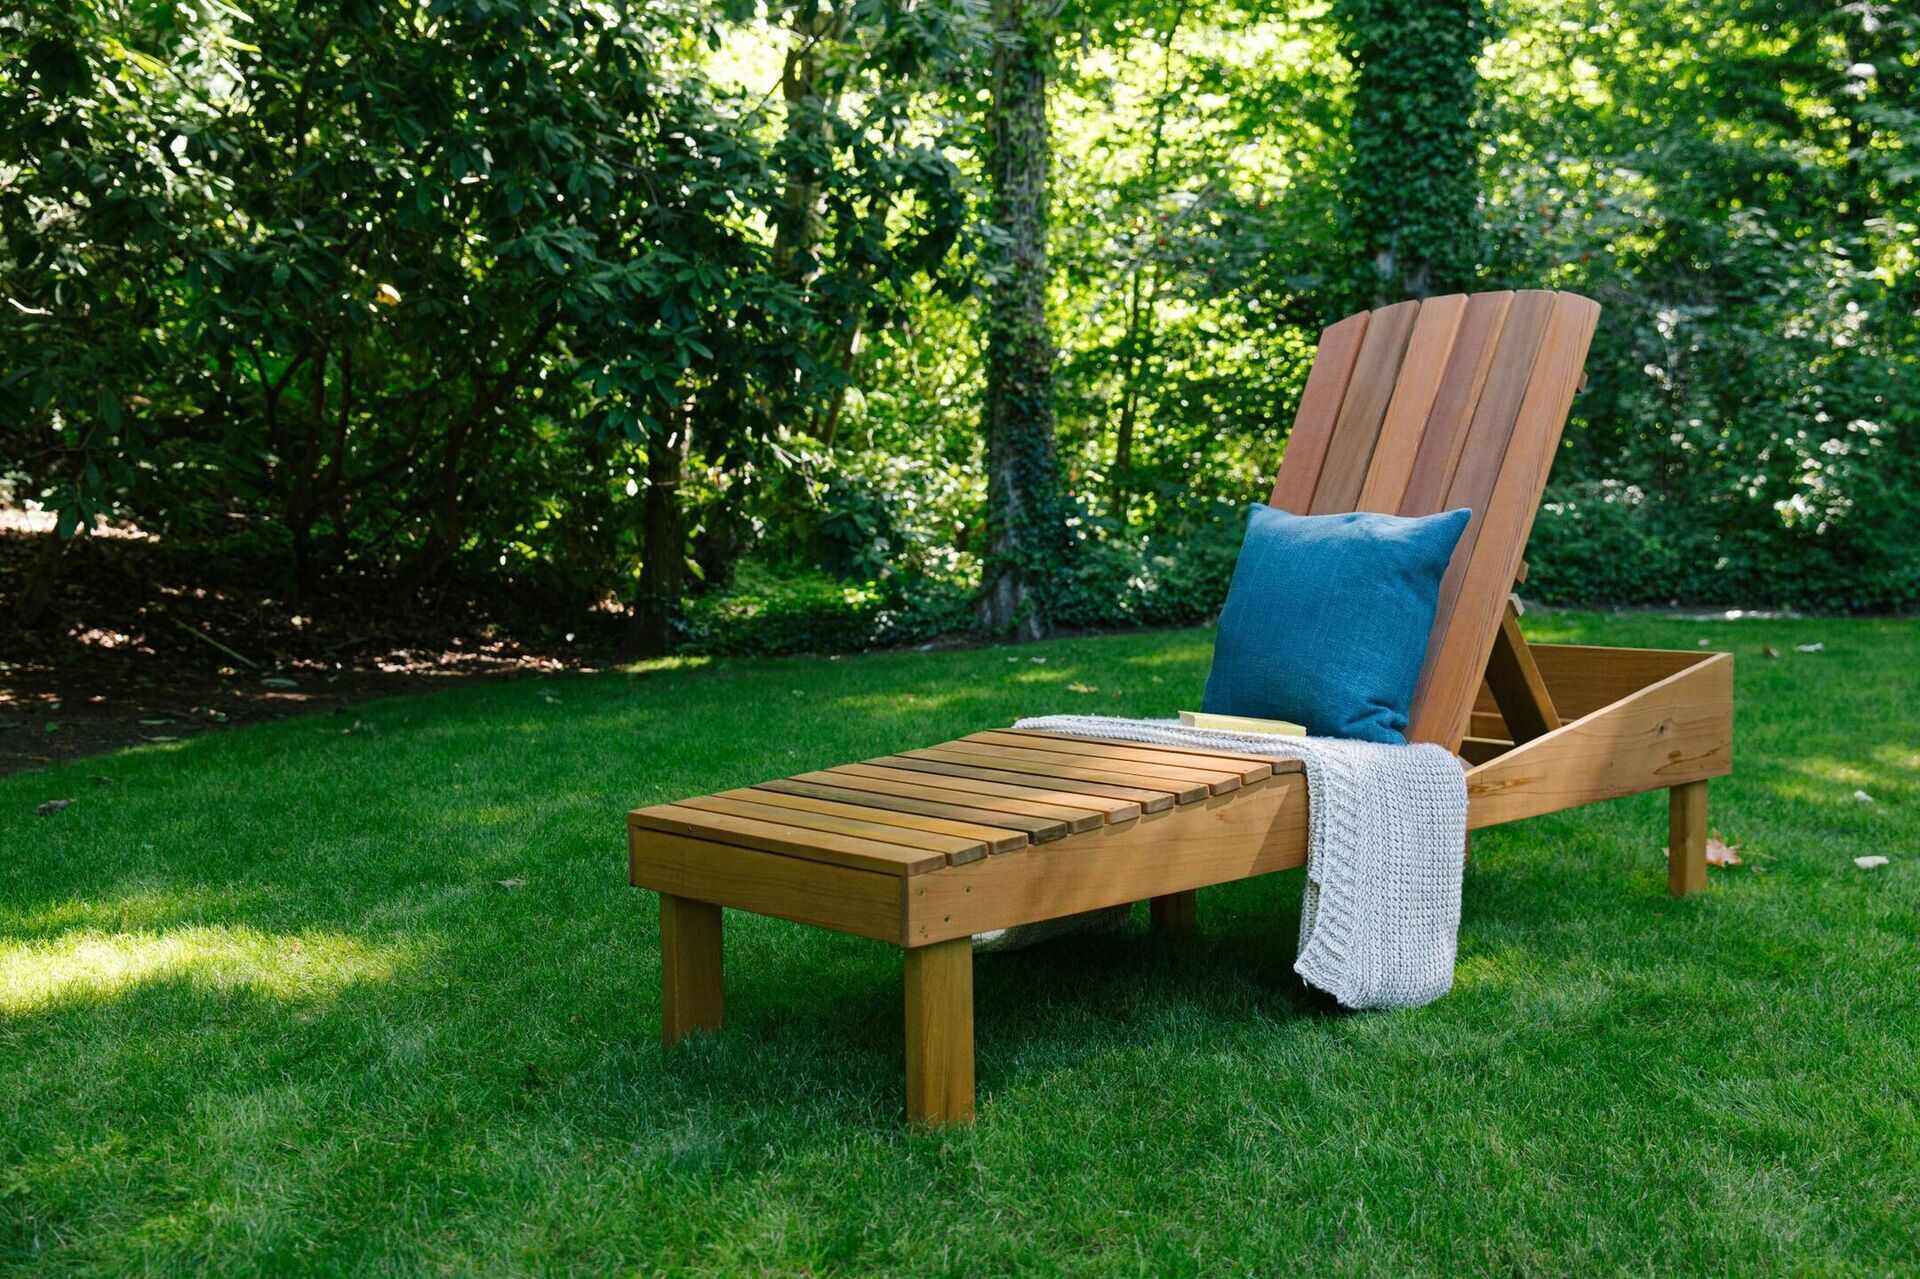
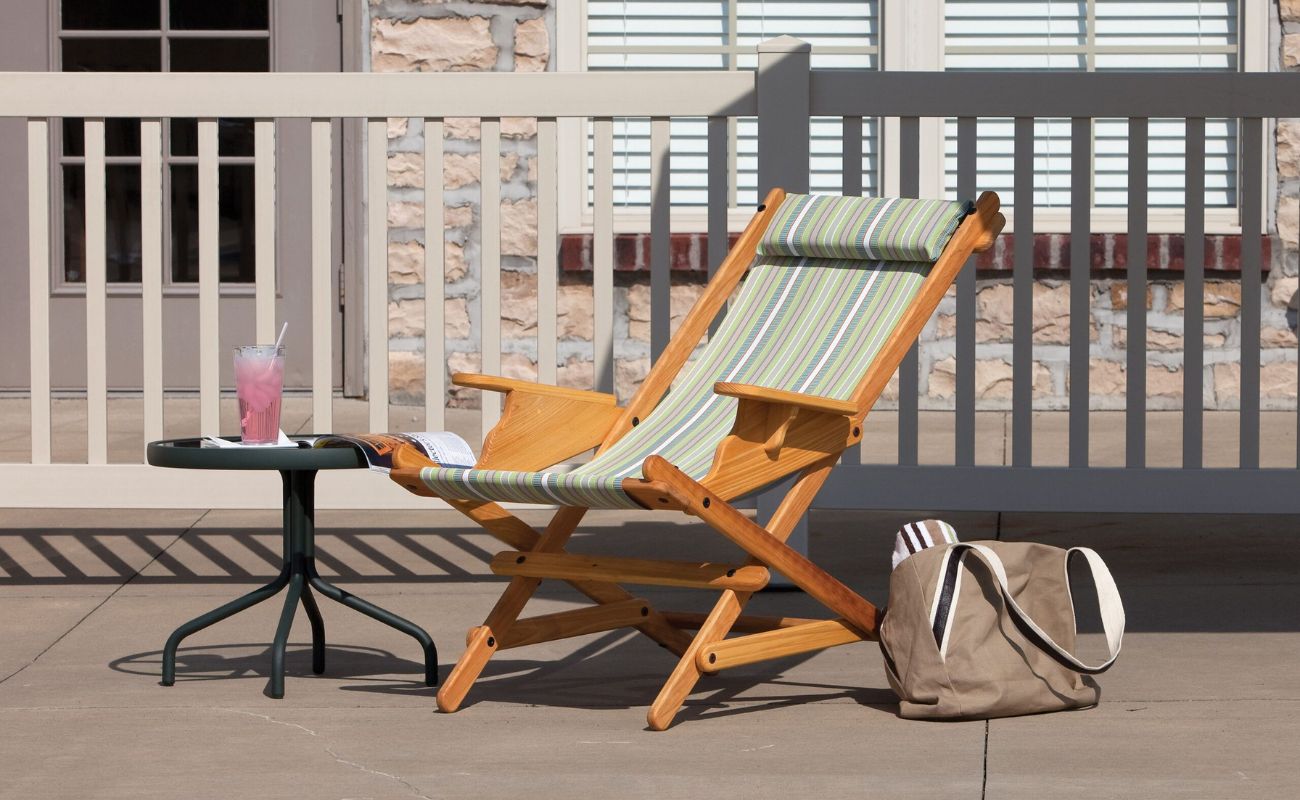
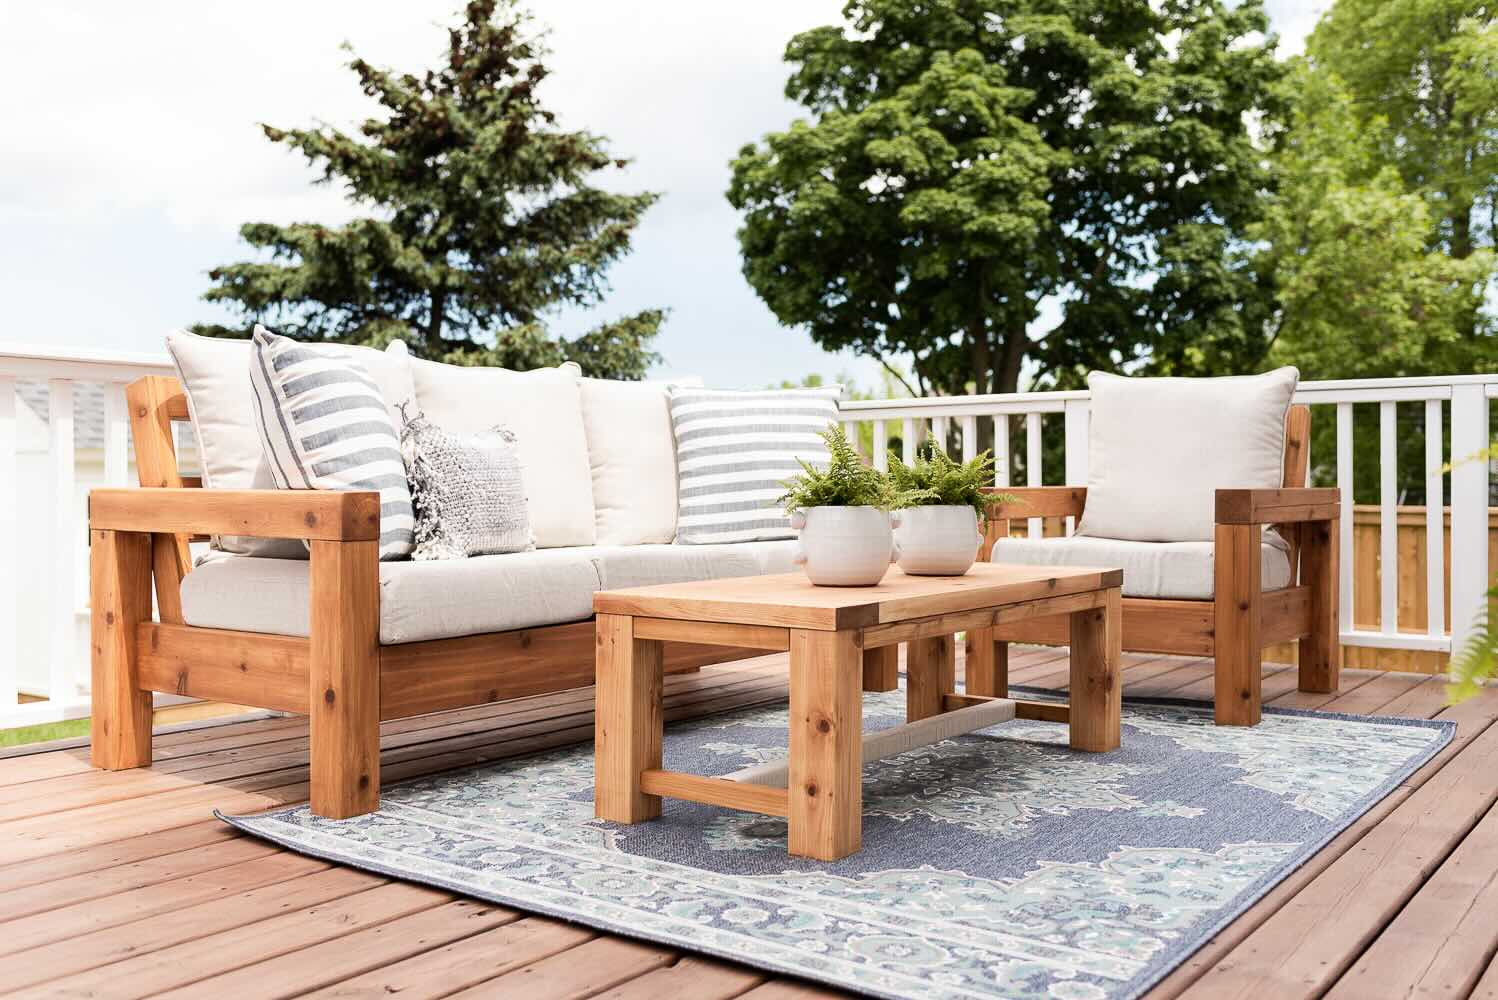
How To Build An Outdoor Lounge Chair
Modified: February 18, 2024
Learn how to build your own stylish outdoor lounge chair with our comprehensive guide. Perfect for your outdoor furniture and design needs. Step-by-step instructions and tips included.
(Many of the links in this article redirect to a specific reviewed product. Your purchase of these products through affiliate links helps to generate commission for Storables.com, at no extra cost. Learn more)
Introduction
Welcome to the world of DIY outdoor furniture! Building your own outdoor lounge chair can be a rewarding and enjoyable project that not only adds a personal touch to your outdoor space but also allows you to tailor the design to your specific preferences. Whether you're a seasoned woodworking enthusiast or a novice looking to embark on your first furniture-building endeavor, this guide will walk you through the process of creating a stylish and comfortable outdoor lounge chair.
Imagine basking in the warm sunshine, lounging on a chair that you've meticulously crafted with your own hands. The sense of accomplishment and pride that comes with creating a functional piece of furniture from scratch is truly unmatched. Additionally, by customizing the chair to suit your unique style and comfort needs, you can ensure that it perfectly complements your outdoor oasis.
Throughout this guide, we will delve into the materials and tools required for the project, as well as the step-by-step process of constructing an outdoor lounge chair. From cutting and sanding the wood to assembling the frame and adding the finishing touches, each stage will be carefully explained to help you navigate the construction process with confidence.
So, roll up your sleeves, grab your tools, and get ready to embark on a fulfilling journey of craftsmanship and creativity. By the end of this guide, you'll not only have a stunning outdoor lounge chair to relax in but also a newfound sense of accomplishment and woodworking prowess. Let's dive in and bring your outdoor furniture dreams to life!
Key Takeaways:
- Crafting your own outdoor lounge chair allows you to personalize your outdoor space while honing woodworking skills. From cutting and sanding to assembly, each step brings a sense of accomplishment and creativity.
- By using durable materials and adding finishing touches, you can create a comfortable and stylish chair that withstands outdoor elements. Embrace the satisfaction of handmade craftsmanship and enjoy your outdoor oasis.
Read more: How To Build A Chaise Lounge Chair
Materials and Tools
Before diving into the construction process, it's essential to gather all the necessary materials and tools for building your outdoor lounge chair. Here's a comprehensive list to ensure you have everything on hand before getting started:
Materials:
- Pressure-treated lumber or cedar for outdoor use
- Stainless steel or galvanized screws
- Wood glue
- Waterproof wood sealer or outdoor wood finish
- Outdoor cushions or weather-resistant fabric
Tools:
- Measuring tape
- Circular saw or miter saw
- Drill with screwdriver bits
- Sandpaper (medium and fine grit)
- Clamps
- Square
- Safety goggles and ear protection
When selecting the lumber for your chair, opt for materials specifically designed for outdoor use, such as pressure-treated lumber or cedar. These woods are naturally resistant to decay and can withstand the elements, making them ideal for outdoor furniture construction. Additionally, stainless steel or galvanized screws are essential for securing the chair's components, as they are corrosion-resistant and well-suited to outdoor applications.
Once the chair is assembled, applying a waterproof wood sealer or outdoor wood finish will help protect the wood from moisture and UV exposure, prolonging the chair's lifespan and maintaining its aesthetic appeal. Furthermore, outdoor cushions or weather-resistant fabric can be added to enhance comfort and style, ensuring that your outdoor lounge chair is both inviting and weather-ready.
Equipping yourself with the right tools, from a reliable measuring tape to a quality drill and safety gear, is crucial for executing each step of the construction process accurately and safely. With the materials and tools at your disposal, you're ready to embark on the exciting journey of bringing your outdoor lounge chair to life.
Step 1: Cutting the Wood
The first step in constructing your outdoor lounge chair is to carefully measure and cut the wood components according to the chair design. Using a circular saw or miter saw, cut the lumber into the necessary pieces based on the chair plans or your custom design. It’s crucial to double-check the measurements and ensure precise cuts to guarantee a well-constructed and visually appealing chair.
When cutting the wood, pay close attention to the angles and dimensions required for the chair’s frame, seat, and backrest. If you’re following a specific chair design, refer to the provided cut list and diagrams to guide your cutting process. Alternatively, if you’re crafting a custom design, take the time to sketch out the dimensions and angles before proceeding with the cuts.
While cutting the wood, prioritize safety by wearing appropriate eye protection and ear defenders. Additionally, secure the wood firmly in place using clamps to prevent any movement during the cutting process, ensuring clean and precise cuts. Remember, the accuracy of the wood cuts will significantly impact the structural integrity and overall aesthetics of your outdoor lounge chair.
By meticulously cutting the wood components to the required specifications, you’ll set the stage for a successful and visually appealing construction process. The precision and care invested in this initial step will lay a solid foundation for the subsequent stages of assembling the chair frame and adding the seat and backrest.
Read more: How To Build Outdoor Chaise Lounges
Step 2: Sanding the Wood
Once the wood components have been cut to size, the next crucial step in the construction process is to sand the surfaces thoroughly. Sanding serves multiple purposes, including smoothing rough edges, removing splinters, and preparing the wood for a flawless finish. By dedicating time to this essential step, you’ll ensure that your outdoor lounge chair not only looks refined but also feels comfortable and safe to use.
Begin the sanding process by using medium-grit sandpaper to address any rough spots, uneven edges, or imperfections on the wood surfaces. Pay particular attention to the areas that will come into direct contact with the body, such as the seat and armrests, to create a smooth and inviting touch. Once the initial sanding is complete, transition to fine-grit sandpaper to further refine the surfaces and achieve a silky-smooth finish.
While sanding, it’s important to maintain a consistent and even pressure to avoid creating uneven surfaces or dips in the wood. Additionally, be mindful of the wood grain and sand parallel to the grain direction for optimal results. This meticulous approach will contribute to the overall aesthetic appeal of the chair and elevate the tactile experience for anyone using it.
After sanding, take the time to inspect the wood surfaces thoroughly, running your hands over the sanded areas to detect any remaining roughness or imperfections. Address any lingering rough patches with additional sanding as needed, ensuring that every surface is impeccably smooth and free from blemishes.
By meticulously sanding the wood components, you’ll not only enhance the visual allure of your outdoor lounge chair but also prioritize comfort and safety. The effort invested in this crucial step will lay the groundwork for the subsequent stages of assembling the chair frame and adding the seat and backrest, bringing you closer to the realization of your custom-crafted outdoor furniture masterpiece.
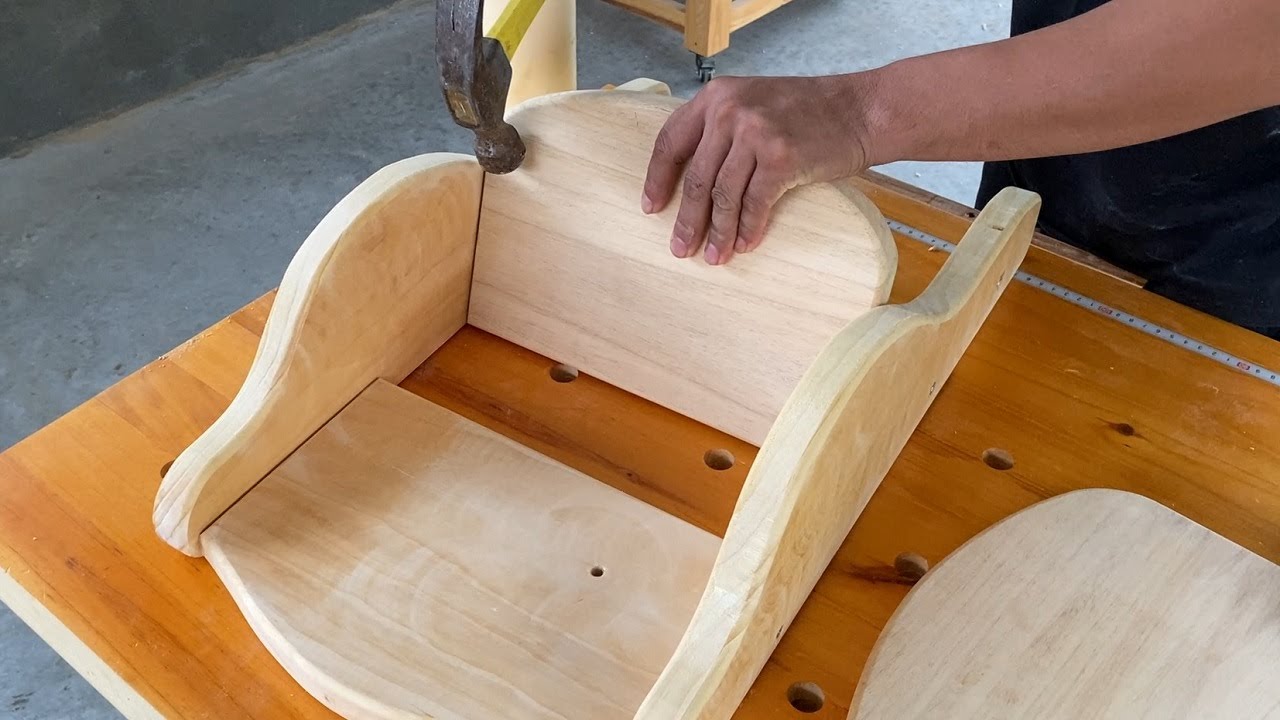
Step 3: Assembling the Chair Frame
With the wood components cut to size and meticulously sanded, it’s time to embark on the exciting phase of assembling the chair frame. This pivotal step brings the individual elements together, laying the foundation for the structural integrity and visual appeal of your outdoor lounge chair. Whether you’re following a predefined chair design or bringing your custom vision to life, the assembly process is where the chair truly begins to take shape.
Start by arranging the frame components according to the chair plans or your custom design, ensuring that each piece aligns seamlessly with the next. Utilize clamps to hold the components in place during assembly, facilitating precise positioning and secure attachment. As you progress, periodically check for squareness and alignment to guarantee that the chair frame maintains its intended shape and stability.
When fastening the frame components together, utilize stainless steel or galvanized screws designed for outdoor applications. These corrosion-resistant fasteners will ensure the long-term durability of the chair frame, withstanding the rigors of outdoor exposure and environmental elements. Additionally, consider applying wood glue at the joints for added strength and stability, reinforcing the structural integrity of the frame.
As the chair frame begins to take form, take a moment to visualize the end result and appreciate the transformation from individual wood pieces to a cohesive and robust structure. The assembly process marks a significant milestone in the construction journey, signaling the imminent completion of the foundational framework upon which the seat and backrest will be mounted.
By methodically assembling the chair frame with precision and care, you’re not only creating a sturdy and reliable foundation for your outdoor lounge chair but also laying the groundwork for the subsequent steps of adding the seat and backrest. This pivotal phase brings you one step closer to realizing your vision of a stylish and inviting outdoor furniture piece that reflects your craftsmanship and creativity.
Step 4: Making the Seat and Backrest
As you progress in the construction of your outdoor lounge chair, the creation of the seat and backrest marks a pivotal stage that directly impacts the comfort and visual appeal of the final piece. Crafting these essential components requires careful attention to detail and a focus on ergonomics to ensure that the chair provides a relaxing and supportive seating experience.
When designing the seat, consider the dimensions and contours that will promote comfort and relaxation. Whether you opt for a contoured seat or a flat surface, prioritize smooth edges and a comfortable seating area that complements the overall design of the chair. Similarly, the backrest should be crafted to provide adequate support while harmonizing with the chair’s aesthetic appeal.
Utilize the previously cut and sanded wood components to fashion the seat and backrest, ensuring that each piece aligns seamlessly with the chair frame. Whether you’re incorporating slats, panels, or a solid surface, secure the components firmly to the frame, maintaining even spacing and alignment for a polished and professional finish.
Throughout the construction of the seat and backrest, meticulous attention to detail is paramount. Verify that the components are securely attached and that the seating surfaces are level and free from imperfections. This meticulous approach will not only enhance the visual allure of the chair but also prioritize comfort and functionality.
Consider incorporating weather-resistant cushions or fabric to enhance the comfort and style of the seat and backrest, elevating the overall appeal of the outdoor lounge chair. By selecting cushions or fabric designed for outdoor use, you can infuse the chair with a touch of luxury while ensuring that it remains resilient to the elements.
By crafting the seat and backrest with precision and care, you’re not only enhancing the comfort and visual appeal of your outdoor lounge chair but also bringing the design to fruition. These essential components serve as the focal point of the chair, beckoning relaxation and leisure in your outdoor sanctuary.
When building an outdoor lounge chair, make sure to use weather-resistant materials like cedar or teak to ensure durability and longevity.
Step 5: Attaching the Seat and Backrest
With the seat and backrest meticulously crafted, the next critical phase in the construction of your outdoor lounge chair involves securely attaching these essential components to the assembled frame. This pivotal step not only completes the visual aesthetic of the chair but also ensures that the seating area is stable, supportive, and ready to invite moments of relaxation in your outdoor space.
Position the seat and backrest securely within the frame, verifying that they align seamlessly with the chair’s design and contours. Utilize clamps to hold the components in place during the attachment process, facilitating precise positioning and secure fastening. Prioritize even spacing and alignment to guarantee a polished and professional finish.
When attaching the seat and backrest to the frame, opt for stainless steel or galvanized screws designed for outdoor applications. These durable fasteners will ensure the long-term stability and resilience of the chair, withstanding the environmental elements and providing enduring support for years to come.
Consider applying wood glue at the joints where the seat and backrest meet the frame, reinforcing the connection for added strength and stability. This additional measure will contribute to the overall robustness of the chair while fortifying the bond between the structural elements.
As the seat and backrest become seamlessly integrated with the frame, take a moment to appreciate the transformation from individual components to a unified and inviting seating area. This phase marks a significant milestone in the construction process, bringing you one step closer to realizing your vision of a stylish and comfortable outdoor lounge chair.
By methodically attaching the seat and backrest with precision and care, you’re not only completing the visual allure of your outdoor lounge chair but also ensuring that it is poised to provide a relaxing and supportive seating experience. This pivotal phase brings you one step closer to the realization of your custom-crafted outdoor furniture masterpiece, ready to grace your outdoor sanctuary with comfort and style.
Step 6: Finishing Touches
As the construction of your outdoor lounge chair nears completion, the application of finishing touches plays a pivotal role in enhancing the chair’s visual appeal, durability, and overall allure. This phase allows you to infuse the chair with personalized details and protective measures, ensuring that it not only exudes style but also withstands the rigors of outdoor use with resilience.
Begin by applying a waterproof wood sealer or outdoor wood finish to the entire chair, safeguarding the wood from moisture, UV exposure, and environmental wear. This protective coating will prolong the chair’s lifespan while accentuating the natural beauty of the wood, creating a lustrous and inviting aesthetic.
Consider adding weather-resistant cushions or fabric to the seat and backrest, elevating the comfort and style of the chair. By selecting cushions or fabric designed for outdoor use, you can infuse the chair with a touch of luxury while ensuring that it remains resilient to the elements, ready to beckon moments of relaxation.
Embellish the chair with decorative elements or personalized accents that reflect your unique style and taste. Whether it’s adding carved details, a custom finish, or decorative hardware, these embellishments serve as a testament to your craftsmanship and creativity, infusing the chair with character and individuality.
Once the finishing touches are applied, take a moment to inspect the chair thoroughly, ensuring that every detail aligns with your vision and standards of quality. Run your hands over the surfaces, verifying that the finish is smooth and inviting, and that the chair exudes a sense of craftsmanship and refinement.
With the completion of the finishing touches, your outdoor lounge chair is transformed into a personalized and inviting sanctuary, ready to grace your outdoor space with comfort, style, and enduring allure. This final phase marks the culmination of your craftsmanship and creativity, yielding a custom-crafted furniture piece that reflects your dedication and passion for woodworking.
Conclusion
Congratulations on successfully crafting your very own outdoor lounge chair! Through meticulous planning, precise execution, and a passion for woodworking, you’ve brought to life a stylish and comfortable furniture piece that complements your outdoor sanctuary. As you reflect on the journey from raw materials to a personalized seating oasis, consider the invaluable skills and satisfaction gained from this fulfilling project.
Building an outdoor lounge chair isn’t just about creating a functional piece of furniture; it’s a testament to your creativity, craftsmanship, and dedication to transforming raw materials into a tangible and inviting creation. The process of measuring, cutting, sanding, assembling, and adding finishing touches has not only yielded a beautiful chair but has also honed your woodworking skills and provided a sense of accomplishment that only a handmade creation can offer.
As you envision the chair nestled in your outdoor space, picture the moments of relaxation and serenity it will facilitate. Whether basking in the sunshine with a good book or enjoying conversations with loved ones, your custom-crafted chair stands as a testament to your ability to infuse functionality and style into your surroundings.
Furthermore, the knowledge and experience gained from this project will undoubtedly serve as a foundation for future woodworking endeavors, inspiring you to embark on new creations and refine your skills. The satisfaction of crafting a personalized piece of outdoor furniture can fuel a passion for woodworking and a desire to continue exploring the realms of creativity and design.
As you admire your completed outdoor lounge chair, take pride in the fact that you’ve not only built a functional piece of furniture but also woven a narrative of dedication, creativity, and craftsmanship. Your chair stands as a symbol of your ability to transform raw materials into a cherished creation, enriching your outdoor space with comfort and style.
With your newfound woodworking prowess and a stunning outdoor lounge chair to enjoy, may this project inspire you to embark on further creative pursuits and continue shaping your surroundings with the warmth of handmade craftsmanship. Cheers to your accomplishment and the enduring allure of your custom-crafted outdoor furniture masterpiece!
Frequently Asked Questions about How To Build An Outdoor Lounge Chair
Was this page helpful?
At Storables.com, we guarantee accurate and reliable information. Our content, validated by Expert Board Contributors, is crafted following stringent Editorial Policies. We're committed to providing you with well-researched, expert-backed insights for all your informational needs.


0 thoughts on “How To Build An Outdoor Lounge Chair”