Home>Furniture>Outdoor Furniture>How To Build Patio Chairs
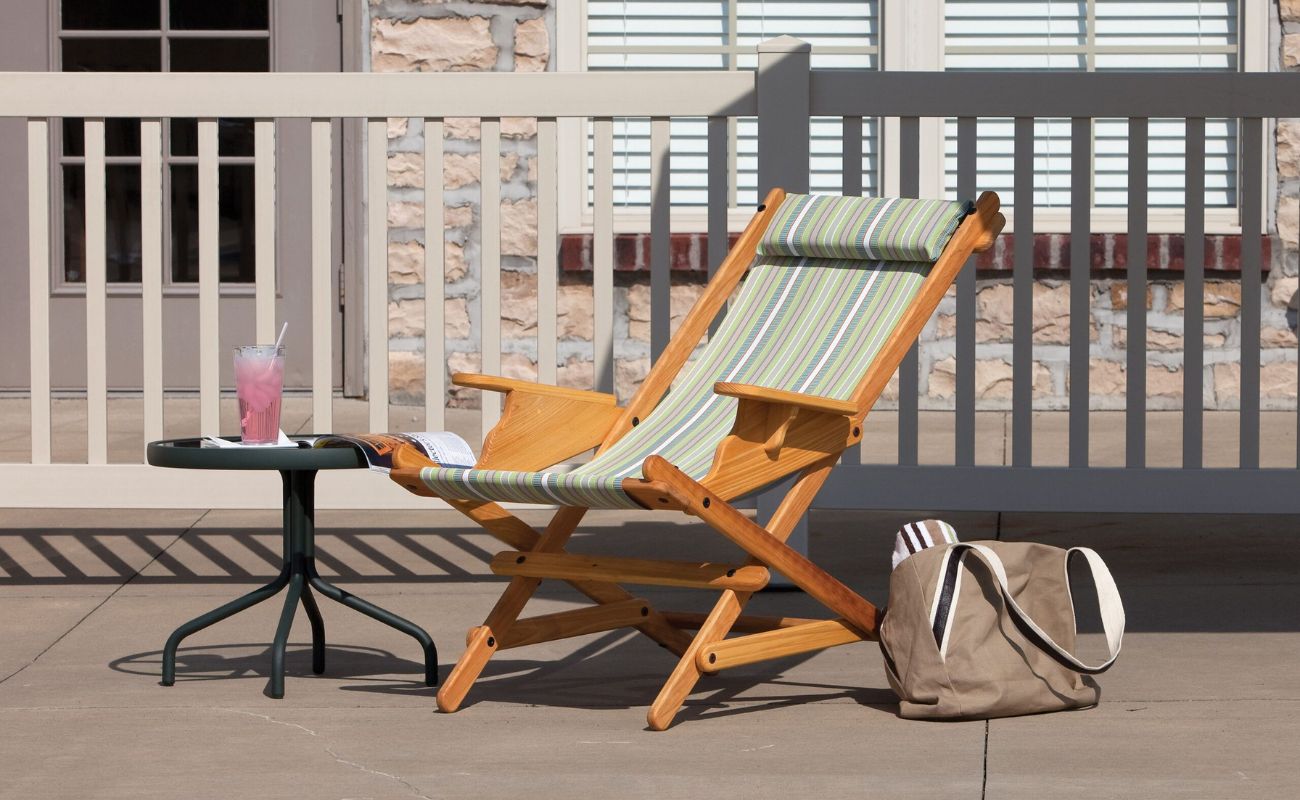
Outdoor Furniture
How To Build Patio Chairs
Modified: August 25, 2024
Learn how to build your own outdoor furniture with this step-by-step guide on constructing patio chairs. Create a comfortable and stylish outdoor space with our easy-to-follow instructions.
(Many of the links in this article redirect to a specific reviewed product. Your purchase of these products through affiliate links helps to generate commission for Storables.com, at no extra cost. Learn more)
Introduction
Welcome to our comprehensive guide on how to build your own patio chairs! As a DIY enthusiast, there’s nothing quite as rewarding as creating your own outdoor furniture and enjoying the fruits of your labor. Building patio chairs not only allows you to customize the design to perfectly fit your outdoor space, but it also gives you the opportunity to save money compared to purchasing them pre-made.
In this step-by-step guide, we’ll walk you through the process of building patio chairs from scratch. Whether you’re a seasoned carpenter or a beginner looking for a weekend project, this guide is designed to provide you with all the essential knowledge and tips you need to successfully complete this project.
Before we dive into the detailed instructions, it’s important to note that building patio chairs requires some basic woodworking skills and tools. If you’re new to woodworking, we recommend starting with simpler projects to familiarize yourself with the tools and techniques.
Now, let’s gather our materials and get started!
Key Takeaways:
- Building your own patio chairs allows you to customize your outdoor space, save money, and enjoy the satisfaction of creating something unique. It’s a rewarding DIY project for all skill levels!
- Remember to gather all necessary materials, measure and cut the wood accurately, and pay attention to detail during assembly. With patience and creativity, you can enjoy the comfort and beauty of your handmade patio chairs.
Read more: How To Reupholster Patio Chairs
Step 1: Gather the Necessary Materials
Before you embark on building your patio chairs, it’s important to gather all the necessary materials. Having everything you need on hand will make the process smoother and ensure that you don’t have to pause midway to fetch additional supplies.
Here’s a list of the materials you’ll need:
- Pressure-treated lumber or cedar boards: These will be used for the chair frame and panels. Opt for wood that is resistant to rot and weather conditions.
- Screws: Choose rust-resistant screws that are appropriate for outdoor use. The size of the screws will depend on the thickness of the wood you’re using.
- Wood glue: This will help secure the joints and add strength to the chair.
- Sandpaper: Get a range of sandpaper grits, from coarse to fine, for smoothing and finishing the wood.
- Finish: Select a finish that is suitable for outdoor furniture, such as varnish, sealant, or outdoor-rated paint.
- Protective gear: Don’t forget safety goggles, gloves, and a dust mask to protect yourself during the construction process.
- Measuring tape, pencil, and carpenter’s square: These tools will help you measure accurately and ensure precise cuts and angles.
- Saw: Depending on your preference and the availability of tools, a circular saw, miter saw, or jigsaw will be suitable for cutting the wood.
- Drill: A power drill with drill bits and screwdriver bits will be essential for assembling the chair.
Take the time to gather all the materials listed above before starting your project. This will save you the hassle of interrupting your workflow and allow you to focus on constructing your patio chairs seamlessly.
Step 2: Measure and Cut the Wood
Once you have all the necessary materials, it’s time to move on to measuring and cutting the wood for your patio chairs. This step is crucial as accurate measurements and precise cuts will ensure that all the components fit together seamlessly.
Start by measuring and marking the dimensions of each chair component on your lumber. Use a measuring tape, pencil, and carpenter’s square to ensure accuracy. Pay attention to the chair’s frame, seat panels, and back panels.
When measuring, take into account the desired height, width, and depth of the chair. Consider the comfort of the seat and the angle of the backrest to create a chair that suits your preferences. Keep in mind that the measurements may vary depending on the design you choose.
Once you’ve marked the measurements on the wood, carefully cut along the lines using a saw. Make sure to follow safety guidelines and wear protective gear throughout the cutting process.
For straight cuts, a circular saw or miter saw will provide clean and precise edges. If you need to make curved or intricate cuts, a jigsaw may be more suitable. Take your time and cut slowly to maintain accuracy.
After cutting the individual components, use sandpaper to smooth any rough edges or surfaces. This will prevent splinters and provide a more polished appearance to your chairs.
Remember to label each piece of wood as you cut them to avoid confusion during the assembly process. Organization is key to a successful construction project.
With the wood pieces measured and cut, you’re now ready to move on to the next step: building the seat and back panels for your patio chairs.
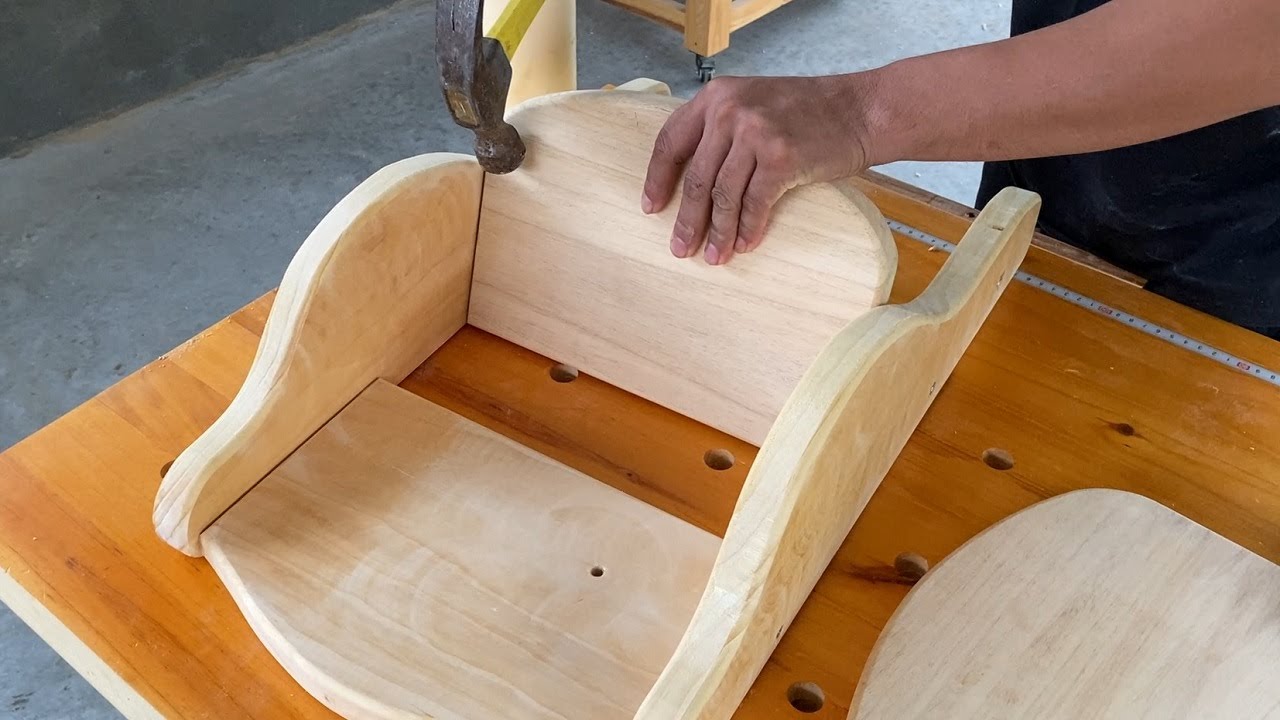
Step 3: Build the Seat and Back Panels
Now that you have your wood pieces measured and cut, it’s time to assemble the seat and back panels of your patio chairs. The seat and back panels provide the comfort and support for anyone sitting in the chair.
Start by laying out the necessary pieces for each panel. For the seat panel, you will typically need two long pieces for the sides and several shorter pieces for the slats. The number of slats will depend on the desired width of your seat.
Apply a thin layer of wood glue to the edges of each slat, then position them evenly between the side pieces. Ensure that the slats are flush with the top of the side pieces to create a flat seating surface.
Once the slats are in place, secure them by drilling pilot holes through the side pieces and into each slat. Use screws to attach the slats and create a sturdy seat panel. Repeat this process for the back panel, following the desired height and angle for the backrest.
Take the time to double-check your measurements and make any necessary adjustments before permanently attaching the slats. This will ensure that your chairs are comfortable and well-proportioned.
After the seat and back panels are assembled, set them aside temporarily and move on to the next step: building the chair frame.
Remember, attention to detail and precision during the construction process will result in a more professional and polished final product.
Step 4: Assemble the Chair Frame
With the seat and back panels complete, it’s time to move on to assembling the chair frame. The frame provides the structural support and stability for the chairs.
Start by laying out the necessary frame pieces, including the legs, armrests, and support beams. Begin by attaching the legs to the seat panel. Position each leg at the corners of the seat, ensuring they are aligned and perpendicular to the ground.
Secure the legs to the seat panel by drilling pilot holes through the legs and into the seat. Use screws to attach them firmly.
Next, attach the armrests to the top of the legs. Make sure they are positioned at a comfortable height for resting your arms. Secure the armrests by drilling pilot holes through them and into the legs, then use screws to fasten them securely.
Once the legs and armrests are securely attached to the seat panel, it’s time to add the support beams. These beams will provide additional stability and prevent the chairs from wobbling.
Measure and cut the support beams according to the desired length and width of your chairs. Attach them between the front and back legs, positioning them at the height you desire. Drill pilot holes through the support beams and into the legs, then secure them with screws.
Take the time to check that the chair frame is level and stable. If adjustments are needed, make them before moving on to the next step.
Now that the chair frame is assembled, it’s time to attach the seat and back panels to complete your patio chairs. This step will bring the chairs together and provide a comfortable seating experience.
Stay tuned for the next step: attaching the seat and back panels!
When building patio chairs, make sure to use weather-resistant materials such as cedar or teak to ensure durability and longevity. Properly seal and finish the wood to protect it from the elements.
Read more: How To Build An Office Chair
Step 5: Attach the Seat and Back Panels to the Frame
With the chair frame assembled, it’s time to attach the seat and back panels. This step will bring your patio chairs together, providing a comfortable and supportive seating experience.
Start by positioning the seat panel on top of the chair frame, aligning it with the legs and support beams. Make sure it is centered and evenly spaced.
Once the seat panel is in place, secure it to the frame by drilling pilot holes through the seat panel and into the support beams and legs. Use screws to attach the seat panel firmly, ensuring it is securely fastened.
Next, it’s time to attach the back panel. Position it at the desired angle against the back legs and support beams. Make sure it provides comfortable support for the upper body.
Secure the back panel to the chair frame by drilling pilot holes through the back panel and into the support beams. Use screws to attach it securely, ensuring stability and support.
Double-check that both the seat and back panels are securely attached and aligned with the chair frame. Give the chairs a gentle shake to ensure they are stable and there is no wobbling.
Once the seat and back panels are properly attached, take a step back and admire your work. You have successfully assembled the main structure of your patio chairs!
Now, it’s time to move on to the next step: sanding and finishing the chairs to make them smooth and visually appealing.
Step 6: Sand and Finish the Chairs
After assembling the chairs, it’s important to sand and finish them to create a smooth and polished surface. This step will not only enhance the overall look of your patio chairs but also provide protection against the elements.
Start by using coarse-grit sandpaper to sand the entire surface of the chairs, including the seat, back, legs, and armrests. This will help to remove any rough spots, splinters, or imperfections from the wood.
Next, switch to finer-grit sandpaper to smooth the surface further and achieve a flawless finish. Sand in the direction of the wood grain to ensure a consistent and even result.
Be thorough but gentle during the sanding process, paying attention to every detail. Round the edges and corners slightly to prevent any sharp edges that may cause discomfort.
Once the chairs are sanded to your satisfaction, it’s time to apply the finish. Consider using a sealant, varnish, or outdoor-rated paint that is suitable for exterior wood surfaces.
Follow the manufacturer’s instructions carefully when applying the finish. Use a brush or roller to evenly coat the chairs, making sure no areas are missed. Apply multiple coats if necessary, allowing sufficient drying time between each coat.
By applying a protective finish, you’ll enhance the durability of the wood and ensure that your patio chairs are ready to withstand outdoor conditions, such as sun exposure, rain, and humidity.
After the finish has dried, give the chairs a final light sanding with fine-grit sandpaper. This will help to smoothen any raised grain or imperfections caused by the finish.
Once you’re satisfied with the smoothness and appearance of the chairs, wipe them down with a clean cloth to remove any dust or debris.
Congratulations! Your patio chairs are now sanded, finished, and ready to be enjoyed in your outdoor living space.
Step 7: Add Protective Coating
Adding a protective coating to your patio chairs is an essential step to ensure their longevity and resistance to outdoor elements. A protective coating will help preserve the wood, prevent damage from moisture, UV rays, and general wear and tear.
Before applying the protective coating, make sure the chairs are clean and free from any dust or debris. Use a soft brush or cloth to remove any loose particles.
There are various options for protective coatings, including outdoor wood sealers, waterproofing sprays, or polyurethane finishes. Choose a coating that is specifically designed for outdoor use and provides long-lasting protection.
Apply the protective coating according to the manufacturer’s instructions. Ensure that you coat all the exposed surfaces of the chairs evenly, including the seat, back, legs, and armrests. Use a brush, roller, or sprayer for an even application.
Allow the coating to dry completely before moving the chairs or using them. Follow the drying time specified by the manufacturer to ensure optimal results.
Once the protective coating has cured, give the chairs a final inspection. Check for any missed spots or areas that may require an additional coat of the protective coating. Apply extra coats if necessary, allowing sufficient drying time between each coat.
By adding a protective coating to your patio chairs, you’re investing in their long-term durability and maintaining their appearance. The coating will help prevent moisture from seeping into the wood, minimize fading caused by sun exposure, and protect against scratches and stains.
Remember to periodically inspect the chairs and reapply the protective coating as needed, especially after prolonged exposure to the elements or if you notice signs of wear.
Now that your patio chairs are coated and protected, it’s time to sit back, relax, and enjoy the beauty and comfort of your handmade outdoor furniture.
Step 8: Enjoy Your New Patio Chairs
Congratulations! You have successfully completed the process of building your own patio chairs. Now, it’s time to sit back, relax, and enjoy the fruits of your labor.
Place your new patio chairs in your outdoor living space, whether it’s a patio, deck, or garden. Arrange them in a way that maximizes comfort and allows you to fully appreciate your surroundings.
Invite friends and family over to share in the enjoyment of your handmade chairs. Whether it’s for outdoor gatherings, barbecues, or simply lounging in the sun, your patio chairs will provide a comfortable and stylish seating option.
Take the time to appreciate the craftsmanship and effort you put into building these chairs. Your hard work has paid off, and now you have unique and personalized furniture that adds charm and character to your outdoor space.
Maintain your patio chairs by periodically cleaning them with a mild soap and water solution. Remove any debris or stains promptly to keep them looking their best. Additionally, consider covering your chairs during inclement weather or storing them in a sheltered area during winter months to prolong their lifespan.
Remember, your patio chairs are not only functional but also serve as a reflection of your creativity and craftsmanship. Be proud of your accomplishment and share your DIY journey with others who may be inspired to embark on their own outdoor furniture projects.
So go ahead, take a seat, and enjoy the comfort and beauty of your new patio chairs. Embrace the outdoor relaxation and create lasting memories in a space that you have created with your own hands. Cheers to your DIY success!
Read more: How To Build Patio
Conclusion
Building your own patio chairs is a rewarding and fulfilling DIY project that allows you to create customized furniture for your outdoor space. By following the step-by-step guide outlined in this article, you have learned how to gather the necessary materials, measure and cut the wood, build the seat and back panels, assemble the chair frame, attach the seat and back panels, sand and finish the chairs, add a protective coating, and, finally, enjoy your new patio chairs.
Throughout this process, you have honed your woodworking skills, exercised your creativity, and invested time and effort into crafting furniture that reflects your personal style and preferences. The ability to build your own patio chairs not only saves you money but also gives you the opportunity to create objects with sentimental value that will enhance your outdoor living experience.
Remember, when building patio chairs, safety should always be a priority. Use appropriate protective gear, follow the manufacturer’s instructions for tools and materials, and exercise caution while handling sharp objects.
Now that you have successfully completed your patio chair project, take the time to tend to your newly constructed furniture. Maintain it through regular cleaning, occasional repairs, and necessary touch-ups to ensure its longevity and continued enjoyment.
Whether you’re lounging with a good book, hosting a gathering of friends, or simply taking in the beauty of nature, your patio chairs will provide comfort and style to your outdoor space for years to come.
We hope this comprehensive guide has been helpful in guiding you through the process of building your own patio chairs. Embrace your creativity, enjoy the satisfaction of a job well done, and make the most of your outdoor oasis with your custom-made furniture.
Happy building, and may your patio chairs bring joy and relaxation to your outdoor adventures!
Frequently Asked Questions about How To Build Patio Chairs
Was this page helpful?
At Storables.com, we guarantee accurate and reliable information. Our content, validated by Expert Board Contributors, is crafted following stringent Editorial Policies. We're committed to providing you with well-researched, expert-backed insights for all your informational needs.


0 thoughts on “How To Build Patio Chairs”