Home>Furniture & Design>Outdoor Furniture>How To Build An Outdoor Ping Pong Table
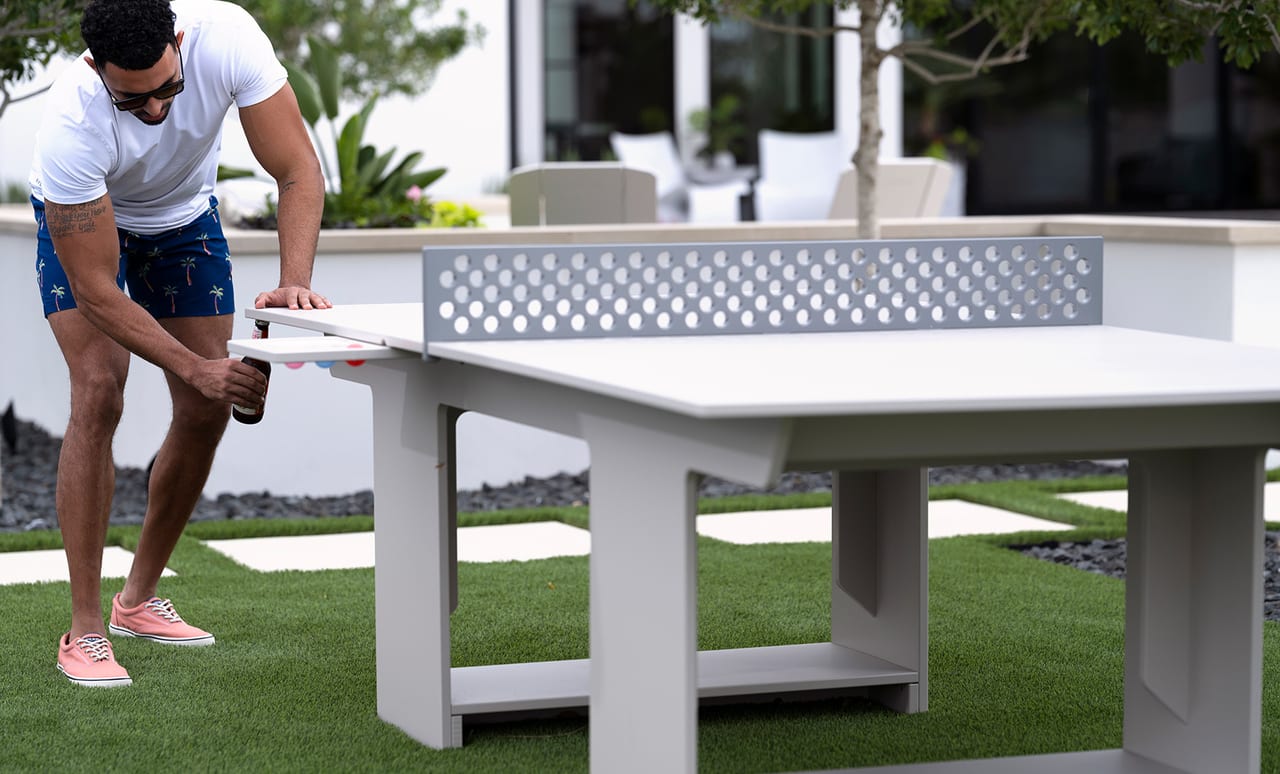

Outdoor Furniture
How To Build An Outdoor Ping Pong Table
Published: January 14, 2024
Learn how to build your own outdoor ping pong table with our expert guide. Create a durable and stylish addition to your outdoor furniture collection. Perfect for any outdoor space.
(Many of the links in this article redirect to a specific reviewed product. Your purchase of these products through affiliate links helps to generate commission for Storables.com, at no extra cost. Learn more)
Introduction
Welcome to the world of outdoor entertainment and recreation! Building your very own outdoor ping pong table can be a rewarding and enjoyable project that brings family and friends together for hours of fun and friendly competition. Whether you're a seasoned DIY enthusiast or just looking for a new weekend project, constructing an outdoor ping pong table can be a fulfilling endeavor that adds a touch of creativity and functionality to your outdoor space.
Imagine the satisfaction of crafting a durable and stylish ping pong table that not only provides countless hours of enjoyment but also enhances the aesthetic appeal of your backyard or patio. By following this comprehensive guide, you'll learn how to construct a sturdy and weather-resistant outdoor ping pong table that can withstand the elements while maintaining a professional playing experience.
From selecting the right materials and tools to assembling the table frame, attaching the tabletop, and adding the finishing touches, this step-by-step guide will walk you through the entire process with detailed instructions and helpful tips. Whether you're a woodworking enthusiast, a design aficionado, or simply someone who loves to engage in outdoor activities, building an outdoor ping pong table is a fantastic way to combine your passion for craftsmanship with the joy of outdoor recreation.
So, roll up your sleeves, gather your tools, and get ready to embark on an exciting journey of creating your very own outdoor ping pong table. Whether it's for family gatherings, neighborhood get-togethers, or leisurely afternoons with friends, this DIY project is sure to become a centerpiece of outdoor fun and entertainment. Let's dive into the materials and tools you'll need to get started on this exciting endeavor.
Key Takeaways:
- Building an outdoor ping pong table is a fun and rewarding DIY project that brings family and friends together for hours of entertainment. With the right materials and tools, you can create a durable and stylish table for outdoor fun.
- Adding the finishing touches, such as weather-resistant coatings and personalized details, ensures that your outdoor ping pong table is not only functional but also visually appealing and well-protected against outdoor elements.
Read more: How Large Is A Ping Pong Table
Materials and Tools
Before diving into the construction process, it’s essential to gather all the necessary materials and tools to ensure a smooth and efficient build. Here’s a comprehensive list of what you’ll need to bring your outdoor ping pong table to life:
Materials:
- Pressure-treated lumber for the frame and legs
- Exterior-grade plywood for the tabletop
- Weather-resistant paint or sealant
- Outdoor-friendly adhesive
- Galvanized screws and bolts
- Net and post set designed for outdoor use
- Leveling feet or adjustable leg hardware
- Rubber or plastic bumpers for the table edges
- Outdoor-friendly clear coat for added protection
Tools:
- Measuring tape and pencil
- Saw (circular saw or miter saw)
- Drill and drill bits
- Screwdriver (manual or power)
- Sanding block or electric sander
- Paintbrushes or paint sprayer
- Carpenter's square
- Clamps for securing wood during assembly
- Protective gear, including safety glasses and gloves
By ensuring that you have all the required materials and tools on hand, you’ll be well-prepared to tackle each phase of the construction process with confidence and precision. With your workshop or outdoor workspace set up and your materials organized, you’re ready to begin building the frame for your outdoor ping pong table. Let’s move on to the next step and start constructing the table frame.
Building the Table Frame
Constructing a sturdy and stable frame is the foundation of a well-built outdoor ping pong table. The frame provides the structure and support for the tabletop, ensuring a level playing surface and overall durability. Here’s a step-by-step guide to building the table frame:
Read more: How To Refinish A Ping Pong Table
Step 1: Cutting the Lumber
Begin by measuring and cutting the pressure-treated lumber to the specified lengths for the frame components. You’ll need to cut pieces for the top and bottom rails, as well as the legs and cross braces. Use a saw, such as a circular saw or miter saw, to achieve clean and precise cuts.
Step 2: Assembling the Frame
Using a carpenter’s square for accuracy, assemble the cut lumber pieces to form the outer frame of the table. Secure the corners with galvanized screws and bolts, ensuring that the frame is square and level. This step is crucial for maintaining the structural integrity of the table.
Step 3: Adding Cross Braces
To reinforce the frame and prevent warping or twisting, add cross braces between the legs. Position the cross braces diagonally across the frame and attach them securely using screws and bolts. This additional support will contribute to the stability of the table.
Step 4: Installing Leveling Feet
For optimal gameplay and adaptability to various outdoor surfaces, consider installing leveling feet or adjustable leg hardware at the base of each leg. This feature allows you to adjust the height of the table and compensate for uneven ground, ensuring a level playing surface.
Once the table frame is assembled and the necessary reinforcements are in place, you’ll have a solid foundation for the tabletop installation. The next step involves attaching the tabletop to the frame, a critical phase in completing your outdoor ping pong table. Let’s move on to the tabletop assembly and explore the process of securing the playing surface to the frame.
Read more: Where To Donate A Ping Pong Table
Attaching the Tabletop
With the frame of your outdoor ping pong table securely in place, it’s time to focus on attaching the tabletop, a crucial element that directly impacts the playing experience. The tabletop not only serves as the playing surface but also contributes to the overall aesthetics of the table. Here’s a detailed guide to attaching the tabletop:
Step 1: Preparing the Plywood
Ensure that the exterior-grade plywood selected for the tabletop is smooth and free of imperfections. If necessary, sand the surface to achieve a uniform and splinter-free playing area. Additionally, apply an outdoor-friendly clear coat to the plywood to enhance its weather resistance and durability.
Step 2: Securing the Tabletop
Position the prepared plywood on top of the assembled frame, ensuring that it overhangs evenly on all sides. Using outdoor-friendly adhesive and galvanized screws, secure the plywood to the frame, ensuring a snug and stable fit. Pay close attention to the corners and edges to achieve a seamless and professional finish.
Step 3: Adding Edge Protection
To safeguard the edges of the tabletop and prevent damage during gameplay, consider adding rubber or plastic bumpers along the perimeter. These protective bumpers not only enhance the safety of the table but also contribute to its visual appeal, creating a polished and professional look.
By following these steps, you’ll successfully attach the tabletop to the frame, resulting in a well-constructed outdoor ping pong table that’s ready for the next phase of assembly. With the playing surface securely in place, the focus shifts to adding the net and other essential accessories that complete the table’s functionality. Let’s explore the process of adding the net and accessories to transform your table into a fully equipped outdoor ping pong setup.
Read more: How To Transport A Ping Pong Table
Adding the Net and Accessories
As you near the completion of your outdoor ping pong table construction, it’s time to add the essential components that elevate its functionality and transform it into a fully equipped playing surface. From the net and posts to other accessories, these elements are crucial for creating an authentic and enjoyable ping pong experience. Here’s a comprehensive guide to adding the net and accessories:
Step 1: Attaching the Net Posts
Install the designated net posts at each end of the table, ensuring that they are positioned precisely to accommodate the regulation net length and height. Secure the posts firmly to the tabletop, providing a stable anchor for the net and ensuring proper tension for optimal gameplay.
Step 2: Securing the Net
Attach the ping pong net to the installed posts, ensuring that it is taut and level across the entire width of the table. The net should conform to standard playing regulations, providing a consistent division between the two halves of the table while maintaining the appropriate height above the playing surface.
Step 3: Adding Accessories
Consider adding additional accessories to enhance the playing experience, such as paddle and ball holders mounted on the sides of the table. These convenient features provide easy access to essential equipment, keeping the playing area organized and ensuring that players can quickly retrieve paddles and balls during intense matches.
By completing these steps, you’ll successfully integrate the net and other essential accessories, culminating in a fully functional outdoor ping pong table that’s ready to deliver hours of entertainment and friendly competition. With the finishing touches in place, the next phase involves adding protective finishes and detailing to enhance the table’s resilience and visual appeal. Let’s proceed to the final steps of this exciting construction journey and explore the process of adding the finishing touches to your outdoor ping pong table.
Read more: How Thick Should A Ping Pong Table Be?
Finishing Touches
As the construction of your outdoor ping pong table nears completion, it’s time to focus on the finishing touches that will enhance its durability, aesthetics, and overall playing experience. From protective coatings to detailing, these final steps will ensure that your table is not only resilient against outdoor elements but also visually appealing and ready for countless hours of gameplay. Here’s a comprehensive guide to adding the finishing touches:
Step 1: Applying Weather-Resistant Finish
Protect the table from the effects of outdoor exposure by applying a weather-resistant paint or sealant. Choose a finish that is specifically formulated for outdoor use and capable of withstanding varying weather conditions, including sunlight, moisture, and temperature fluctuations. This protective coating will safeguard the table from premature wear and maintain its appearance over time.
Step 2: Sealing Exposed Wood Surfaces
Apply an outdoor-friendly clear coat or sealant to any exposed wood surfaces, including the frame and legs. This additional layer of protection will further enhance the table’s resilience, preventing moisture absorption and minimizing the risk of warping or deterioration due to environmental factors.
Step 3: Detailing and Personalization
Add personalized details or decorative elements to the table, such as custom graphics, stenciled designs, or your family’s name. This unique touch not only adds a personal flair to the table but also serves as a testament to your craftsmanship and creativity, making the table a standout feature in your outdoor space.
By completing these final steps, you’ll ensure that your outdoor ping pong table is not only structurally sound and functional but also visually appealing and well-protected against outdoor elements. With the finishing touches in place, your table is ready to take center stage in your outdoor recreational area, providing endless opportunities for enjoyment and friendly competition. As you admire your completed creation, take a moment to appreciate the craftsmanship and dedication that went into building a unique and functional piece of outdoor furniture and design. Congratulations on successfully constructing your very own outdoor ping pong table!
Read more: How To Fold A Stiga Ping Pong Table
Conclusion
Congratulations on completing the construction of your outdoor ping pong table! Through careful planning, precise craftsmanship, and attention to detail, you’ve transformed a collection of materials into a functional and visually appealing centerpiece for outdoor recreation. As you stand back and admire your creation, envision the countless hours of fun and friendly competition that await family and friends around this newly built table.
Building an outdoor ping pong table is not just a DIY project; it’s an opportunity to infuse your outdoor space with creativity, functionality, and the joy of shared experiences. Whether it’s a casual game with loved ones, a neighborhood tournament, or a leisurely afternoon match, your table is poised to be a source of entertainment and camaraderie for years to come.
As you reflect on the construction process, from selecting materials and assembling the frame to adding the finishing touches, take pride in the craftsmanship and dedication that went into creating a durable and professional-grade playing surface. Your outdoor ping pong table is a testament to your skills as a craftsman and your commitment to fostering an engaging and inviting outdoor environment.
As you embark on future projects and continue to explore the world of outdoor furniture and design, remember the satisfaction and sense of accomplishment that come with building something truly unique and functional. Your outdoor ping pong table stands as a symbol of creativity, craftsmanship, and the enduring allure of outdoor recreation.
So, gather your paddles and balls, invite your friends and family, and let the games begin! Your outdoor ping pong table is ready to be the focal point of laughter, friendly competition, and cherished memories in your outdoor oasis. Enjoy the fruits of your labor, and may your table bring joy and entertainment to all who gather around it.
Frequently Asked Questions about How To Build An Outdoor Ping Pong Table
Was this page helpful?
At Storables.com, we guarantee accurate and reliable information. Our content, validated by Expert Board Contributors, is crafted following stringent Editorial Policies. We're committed to providing you with well-researched, expert-backed insights for all your informational needs.

0 thoughts on “How To Build An Outdoor Ping Pong Table”