Home>Gardening & Outdoor>Outdoor Recreation & Activities>How To Paint A Beer Pong Table
Outdoor Recreation & Activities
How To Paint A Beer Pong Table
Modified: May 6, 2024
Learn how to paint a beer pong table for your outdoor recreation and activities. Follow our step-by-step guide to create a custom and durable design.
(Many of the links in this article redirect to a specific reviewed product. Your purchase of these products through affiliate links helps to generate commission for Storables.com, at no extra cost. Learn more)
Introduction
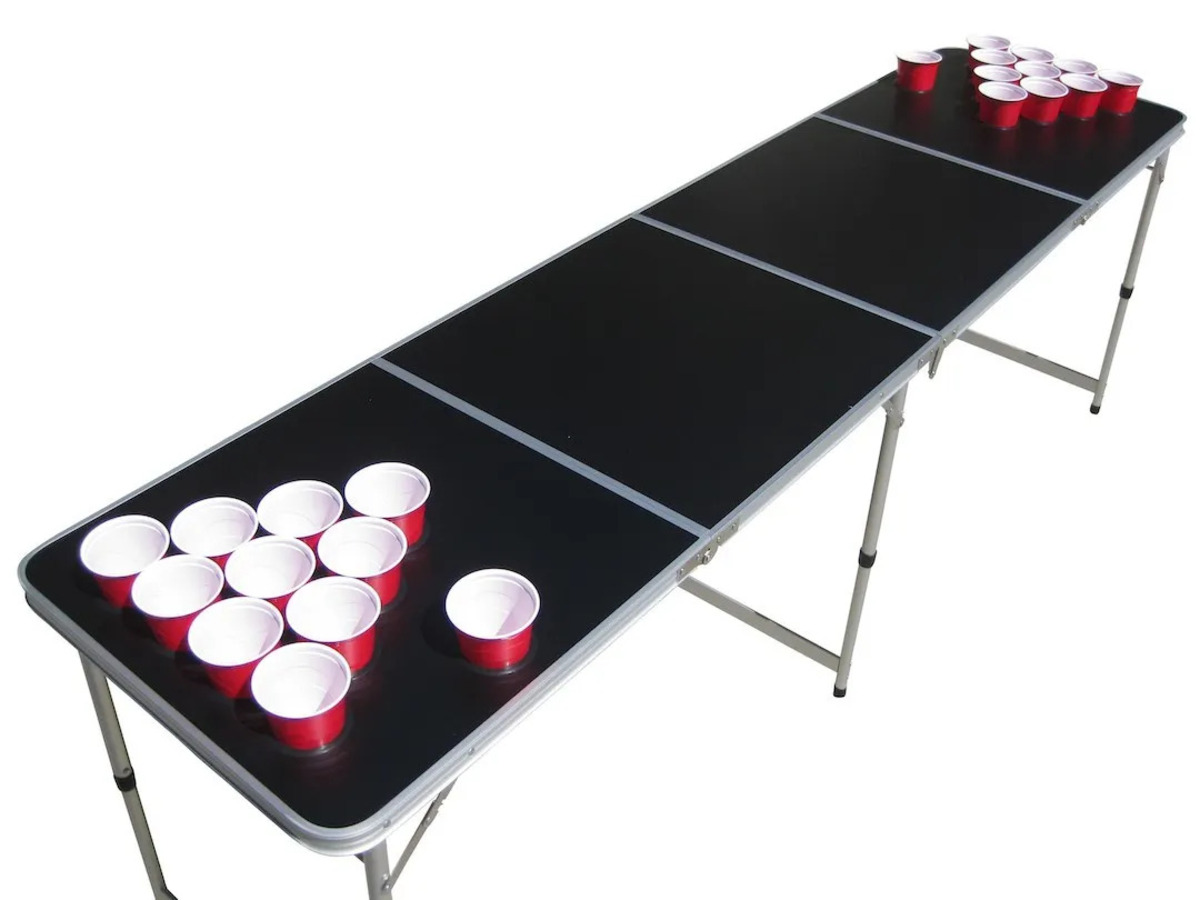
Are you a fan of beer pong and looking to add a personal touch to your gaming experience? One of the best ways to elevate your beer pong setup is by customizing your own beer pong table. Whether you want to showcase your favorite sports team, display a unique design, or simply add a personal touch, painting a beer pong table can be a fun and rewarding project.
Creating a custom beer pong table allows you to express your creativity and personality while enhancing the overall gaming atmosphere. From selecting the perfect materials to adding intricate designs, the process of painting a beer pong table provides ample opportunities for customization and self-expression.
In this comprehensive guide, we will walk you through the step-by-step process of painting a beer pong table, covering everything from the materials needed to the final touches. By the end of this article, you will be equipped with the knowledge and inspiration to transform a standard beer pong table into a one-of-a-kind masterpiece that reflects your style and interests. So, gather your supplies and get ready to embark on a creative and exciting journey to personalize your beer pong experience!
Key Takeaways:
- Personalize your beer pong table by following these steps to create a unique masterpiece that reflects your style and interests. From prep to finishing touches, enjoy the creative journey!
- Elevate your gaming experience with a custom beer pong table. Infuse your personality into the design, protect it with a clear coat, and share the joy of creativity with friends. Cheers to fun and customization!
Read more: How To Paint A Ping Pong Table
Materials Needed
Before diving into the painting process, it’s essential to gather all the necessary materials to ensure a smooth and successful project. Here’s a comprehensive list of items you’ll need:
- Beer pong table
- Sandpaper (medium and fine grit)
- Primer suitable for the table’s surface material (wood, aluminum, etc.)
- Paint (acrylic or spray paint, depending on your preference)
- Paintbrushes and/or spray paint nozzles
- Painter’s tape
- Stencils (if using specific designs or logos)
- Clear polyurethane top coat for added durability
- Drop cloth or newspaper to protect your work area
- Protective gear (gloves, mask, goggles) for safety during sanding and painting
- Clean cloth for wiping the table surface
- Optional: Decals, stickers, or additional decorative elements
By ensuring you have all these materials on hand, you’ll be well-prepared to begin the beer pong table painting process with confidence. Each item plays a crucial role in achieving a professional and long-lasting finish, so be sure to gather everything before starting your project.
Preparation
Before you start painting, it’s important to prepare the beer pong table to ensure optimal paint adhesion and a smooth finish. Follow these steps to get the table ready for the painting process:
- Clean the Surface: Begin by thoroughly cleaning the surface of the table to remove any dirt, dust, or residue. Use a mild detergent and water to wipe down the entire tabletop, and allow it to dry completely before proceeding.
- Disassemble if Possible: If your beer pong table is collapsible or consists of separate pieces, consider disassembling it to make the painting process more manageable. This will allow you to paint each section with greater precision and ease.
- Choose a Well-Ventilated Area: Select a well-ventilated and well-lit workspace for painting. Whether you’re working in a garage, outdoor space, or a well-ventilated room, adequate ventilation is crucial for a safe and efficient painting experience.
- Protect the Surrounding Area: Lay down a drop cloth or spread out newspapers to protect the floor or work surface from paint drips and spills. This will help maintain a clean and organized workspace throughout the painting process.
- Ensure Proper Safety Measures: Prioritize safety by wearing protective gear, including gloves, a mask, and goggles, especially during sanding and painting. This will help safeguard against potential hazards and ensure a safe working environment.
By following these preparatory steps, you’ll set the stage for a successful and enjoyable painting experience. Taking the time to prepare the table and the workspace will contribute to the overall quality and longevity of the finished product, allowing you to fully enjoy your custom beer pong table for years to come.
Sanding and Priming
Once the beer pong table is prepped and the workspace is ready, it’s time to focus on the crucial steps of sanding and priming. These initial stages are essential for creating a smooth and durable surface that will hold the paint effectively. Here’s how to approach sanding and priming:
- Sanding the Tabletop: Use medium-grit sandpaper to gently sand the entire tabletop surface. This step helps remove any existing finish, smooth out imperfections, and create a slightly rough texture for better paint adherence. After sanding, switch to fine-grit sandpaper to further refine the surface and ensure a uniform texture.
- Clean the Surface: After sanding, wipe the tabletop with a clean, dry cloth to remove any dust or debris resulting from the sanding process. It’s crucial to start the priming process with a clean and smooth surface.
- Apply Primer: Select a high-quality primer suitable for the material of your beer pong table (wood, aluminum, etc.). Using a paintbrush or a paint sprayer, apply an even coat of primer to the entire tabletop. The primer will not only enhance paint adhesion but also provide a consistent base for the paint color you choose.
- Allow for Proper Drying: Follow the manufacturer’s instructions regarding drying times for the primer. It’s essential to allow sufficient drying time to ensure the primer fully adheres to the surface and creates an ideal foundation for the subsequent paint layers.
By meticulously sanding and applying a suitable primer, you’re setting the stage for a professional and long-lasting paint finish. These preparatory steps are fundamental in ensuring that the paint adheres effectively and results in a vibrant and durable custom design for your beer pong table.
Painting the Base Coat
With the beer pong table properly prepped, sanded, and primed, it’s time to embark on the exciting phase of applying the base coat. The base coat sets the foundation for your custom design and serves as the backdrop for any additional artwork or embellishments. Here’s how to approach painting the base coat:
- Select Your Paint: Choose high-quality acrylic paint or spray paint in your desired base color. Consider using a paint that offers good coverage and adheres well to the primed surface. Whether you opt for a classic solid color or a bold hue, the base coat will set the tone for the overall aesthetic of your custom beer pong table.
- Even Application: Using a paintbrush or a paint sprayer, apply the base coat evenly across the entire tabletop. Ensure that the paint layer is smooth and consistent, covering the surface with a uniform finish. If using spray paint, maintain an appropriate distance to achieve an even application without causing drips or pooling.
- Allow for Drying Time: After applying the base coat, allow the paint to dry thoroughly according to the manufacturer’s recommendations. It’s crucial to ensure that the base coat is completely dry before proceeding to the next steps, as this will prevent smudging or blending of colors during the customization process.
- Inspect for Coverage: Once the base coat has dried, inspect the tabletop to ensure that the paint provides full coverage and a consistent finish. If necessary, apply a second coat of the base color to achieve the desired depth and opacity, allowing each layer to dry completely before assessing the coverage.
By carefully applying the base coat, you’re laying the groundwork for the visual impact of your custom beer pong table. The base color will serve as the canvas for your creative vision, providing a solid backdrop for the subsequent design elements and personal touches that will make your table truly unique.
Before painting your beer pong table, make sure to sand it down to create a smooth surface for the paint to adhere to. This will help prevent the paint from chipping or peeling off during use.
Read more: How Large Is A Ping Pong Table
Adding Designs and Logos
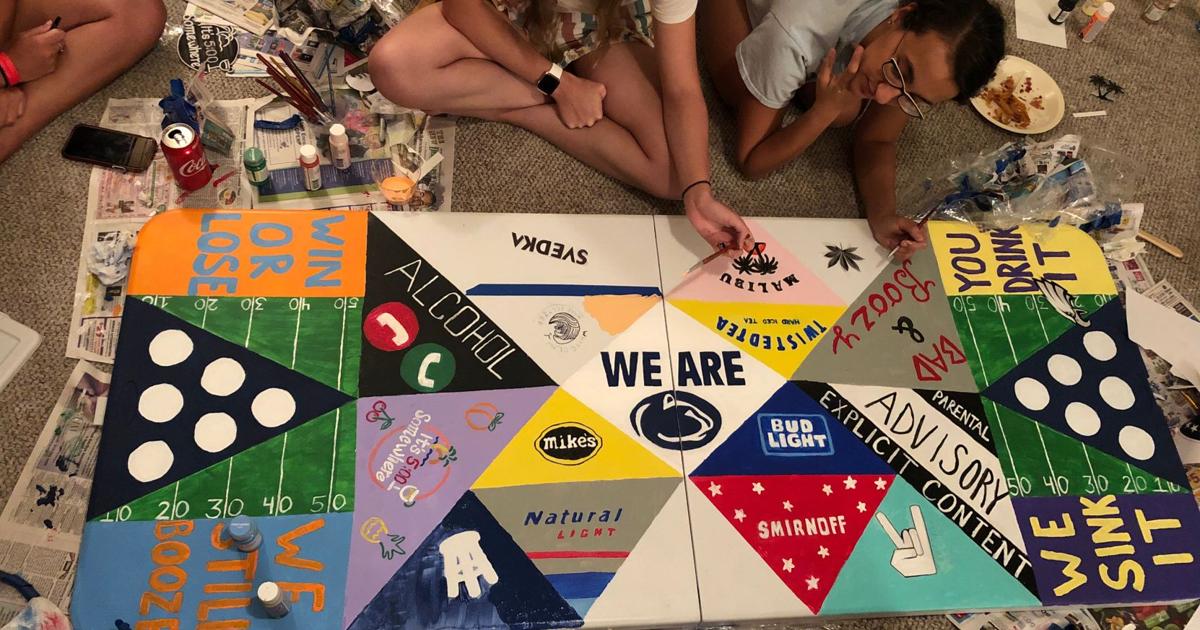
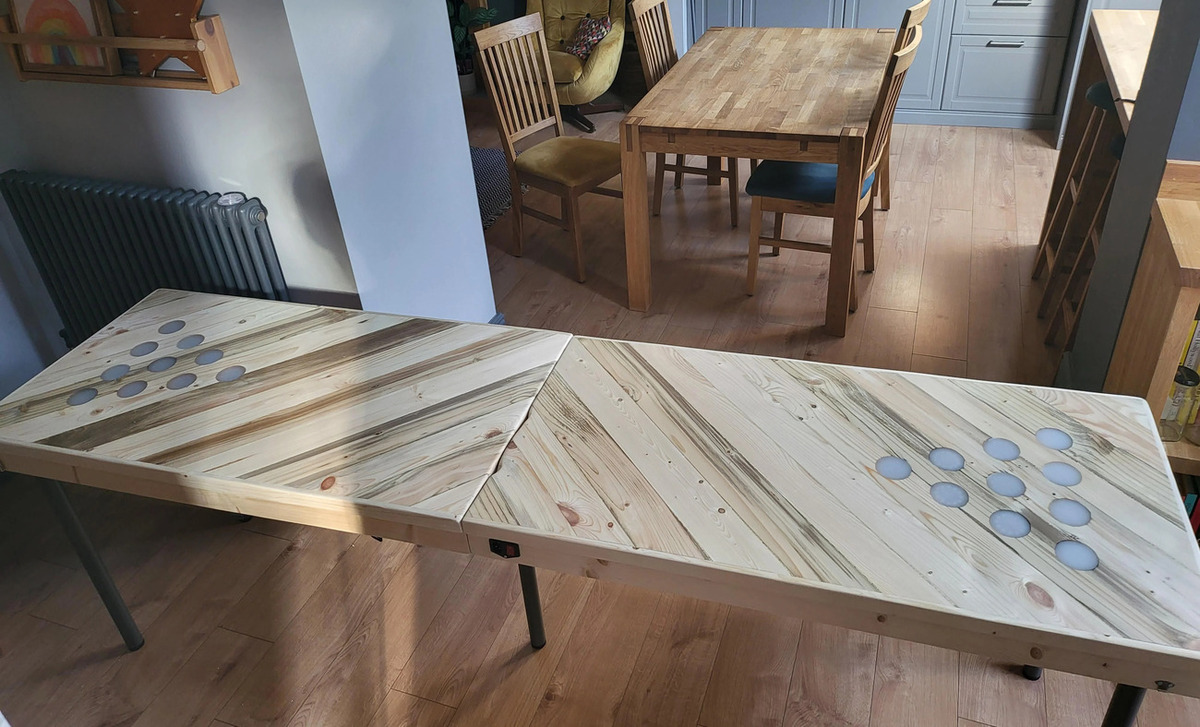
Once the base coat is dry and provides the perfect canvas, it’s time to infuse your personality and creativity into the beer pong table by adding custom designs and logos. Whether you’re showcasing your favorite sports team, incorporating intricate patterns, or featuring personalized emblems, this stage allows for artistic expression and customization. Here’s how to approach adding designs and logos to your beer pong table:
- Plan Your Design: Before applying any designs or logos, carefully plan and visualize the layout. Consider the placement of logos, patterns, or images to ensure a balanced and visually appealing composition. You can sketch out your ideas on paper or use design software to create a digital mock-up.
- Use Stencils or Freehand Techniques: Depending on your artistic skills and the complexity of your desired designs, you can use stencils for precise shapes and patterns or opt for freehand techniques for more organic and spontaneous artwork. Stencils provide a structured approach, while freehand painting allows for artistic freedom and unique detailing.
- Employ Multiple Layers: If your design involves multiple colors or intricate details, consider applying the elements in layers. Start with the background elements and gradually add finer details, allowing each layer to dry before proceeding to the next. This approach ensures a professional and polished outcome.
- Incorporate Logos and Emblems: If you’re featuring specific logos or emblems, ensure that they are accurately represented and positioned on the table. Utilize reference images and precision to capture the essence of the logos, paying attention to details such as colors, proportions, and typography.
- Personalize with Meaningful Elements: Infuse your designs with personal significance by incorporating symbols, quotes, or imagery that holds sentimental value. This personal touch will not only make the table visually appealing but also imbue it with deeper meaning and relevance to your interests and experiences.
By adding custom designs and logos, you’re transforming the beer pong table into a reflection of your individuality and passions. This stage allows for artistic expression and personalization, culminating in a visually captivating and meaningful centerpiece for your gaming and social gatherings.
Applying a Clear Coat
After adding your custom designs and logos, the next crucial step in the beer pong table painting process is applying a clear coat. The clear coat serves as a protective layer, enhancing the durability of the table while providing a glossy and professional finish. Here’s how to effectively apply a clear coat to your custom beer pong table:
- Select a Quality Clear Polyurethane: Choose a high-quality clear polyurethane top coat that is suitable for the material of your beer pong table. Opt for a finish that offers durability, UV protection, and resistance to scratches and moisture, ensuring the longevity of your custom design.
- Prepare the Workspace: Ensure that the workspace is clean, well-ventilated, and free from dust or debris. Lay down a drop cloth or protective covering to safeguard the surrounding area from overspray or drips during the clear coat application.
- Apply the Clear Coat Evenly: Using a paintbrush or a paint sprayer, apply the clear coat evenly across the entire tabletop. Work in smooth, overlapping strokes to achieve a consistent finish. Be mindful of drips or pooling, and ensure that the clear coat is spread uniformly to avoid uneven patches.
- Allow for Adequate Drying Time: After applying the clear coat, allow the table to dry completely according to the manufacturer’s instructions. It’s essential to provide ample drying time to ensure that the clear coat cures properly and forms a protective barrier over your custom designs and base coat.
- Assess the Finish: Once the clear coat has dried, assess the finish to ensure that it provides the desired level of gloss and protection. If necessary, consider applying an additional coat of clear polyurethane to further enhance the durability and sheen of the tabletop.
By applying a clear coat, you’re not only safeguarding your custom designs and logos but also elevating the overall aesthetic and professionalism of the beer pong table. The clear coat serves as a shield, preserving your creative artwork and ensuring that your custom table remains vibrant and resilient for countless games and gatherings to come.
Final Touches and Finishing
As you near the completion of your custom beer pong table painting project, it’s time to add the final touches and ensure that every detail is perfected. These finishing steps will elevate the overall appearance and functionality of the table, creating a polished and professional result. Here’s how to approach the final touches and finishing of your custom beer pong table:
- Inspect for Imperfections: Carefully examine the tabletop for any imperfections, such as uneven areas, drips, or blemishes. If necessary, lightly sand any rough spots and touch up the affected areas with the base coat or clear coat to achieve a seamless and flawless finish.
- Trim and Protect Edges: Pay attention to the edges of the table, ensuring that they are neatly painted and free from any excess paint or smudges. Consider adding protective edge trim or rubber bumpers to safeguard the edges and enhance the table’s durability during gameplay and transportation.
- Personalize with Additional Elements: If desired, personalize the table further by adding decals, stickers, or additional decorative elements that complement your custom design. These embellishments can add character and individuality to the table, making it a standout feature in your gaming space.
- Ensure Stability and Leveling: If your beer pong table is collapsible or consists of multiple sections, ensure that it is stable and level for optimal gameplay. Check the hinges, legs, and overall structural integrity to guarantee a sturdy and reliable gaming surface.
- Share and Showcase: Once the final touches are complete, take pride in your custom creation and share it with friends and fellow beer pong enthusiasts. Showcase your personalized table at social gatherings, game nights, or tailgate events, allowing others to appreciate and enjoy the unique craftsmanship and design.
By attending to the final touches and finishing details, you’re refining the custom beer pong table to perfection. These steps not only enhance the visual appeal and durability of the table but also demonstrate your dedication to creating a stunning and personalized centerpiece for memorable gaming experiences.
Conclusion
Congratulations on completing the exhilarating journey of painting your very own custom beer pong table! From the initial preparations to the final touches, each step has contributed to the transformation of a standard table into a personalized masterpiece that reflects your creativity and style. As you admire the finished product, you can take pride in knowing that your custom beer pong table is a testament to your passion for gaming and artistic expression.
By embarking on this project, you’ve not only created a unique gaming surface but also a focal point for social gatherings, celebrations, and friendly competitions. Your custom designs and logos have infused the table with character and individuality, setting the stage for countless memorable moments and lighthearted camaraderie among friends and fellow players.
As you share your custom beer pong table with others, you’ll undoubtedly inspire creativity and ignite the imagination of those around you. Your personalized creation serves as a conversation starter, a source of admiration, and a symbol of the joy and camaraderie that gaming activities bring to our lives.
Remember that the journey doesn’t end here. Your custom beer pong table will continue to evolve with each game played, each victory celebrated, and each new design idea brought to life. Embrace the versatility of your creation, and let it be a canvas for future inspirations and artistic endeavors.
Whether you’re a seasoned beer pong enthusiast or a newcomer to the game, your custom table stands as a testament to the creativity and passion that infuse every aspect of outdoor recreation and social interaction. As you enjoy the countless games and gatherings around your personalized beer pong table, may it serve as a reminder of the joy found in both the gaming experience and the creative process that brought your vision to life.
So, raise a cup, gather your friends, and let the games begin on your one-of-a-kind beer pong table, a true embodiment of fun, friendship, and the spirit of customization!
Now that you've mastered customizing your beer pong table, why not dive into more creative ventures? Our next feature unravels the allure of DIY projects. Whether you're looking to enhance your skills or seeking enjoyable activities, there's something inherently rewarding about crafting something with your own hands. Discover the numerous benefits, from personalized home decor to the joy of accomplishment, which make DIY projects a favorite for many.
Frequently Asked Questions about How To Paint A Beer Pong Table
Was this page helpful?
At Storables.com, we guarantee accurate and reliable information. Our content, validated by Expert Board Contributors, is crafted following stringent Editorial Policies. We're committed to providing you with well-researched, expert-backed insights for all your informational needs.

0 thoughts on “How To Paint A Beer Pong Table”