Home>Furniture & Design>Outdoor Furniture>How To Hang Outdoor Lights On Siding

Outdoor Furniture
How To Hang Outdoor Lights On Siding
Modified: August 17, 2024
Learn how to properly hang outdoor lights on siding with our expert tips and techniques. Create a warm and inviting ambiance for your outdoor furniture and design.
(Many of the links in this article redirect to a specific reviewed product. Your purchase of these products through affiliate links helps to generate commission for Storables.com, at no extra cost. Learn more)
Introduction
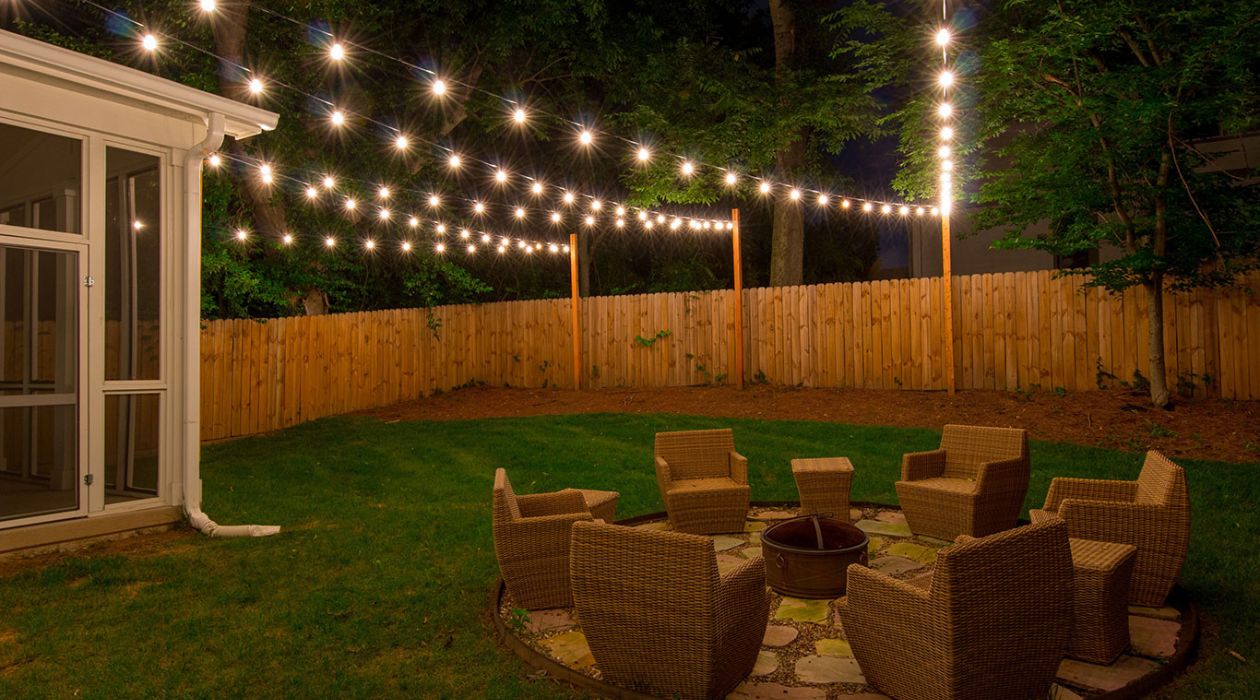
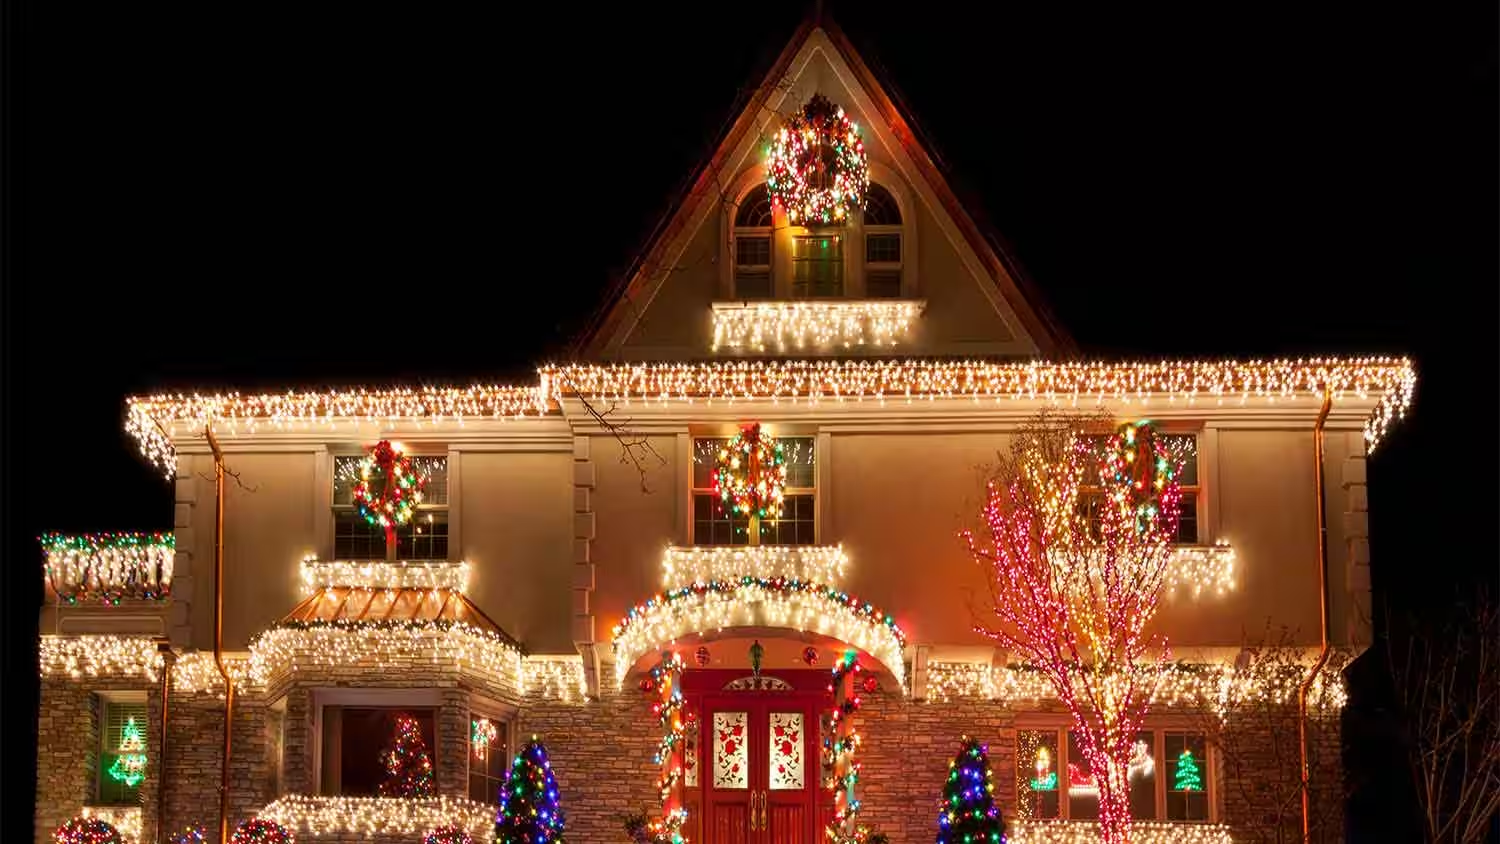
When the sun sets and the stars begin to twinkle, there's something magical about the warm glow of outdoor lights. Whether you're hosting a gathering, enjoying a quiet evening on the patio, or simply adding ambiance to your outdoor space, hanging lights on your siding can transform your home into a welcoming oasis. With a few simple steps and the right materials, you can easily illuminate your outdoor area and create a cozy atmosphere for any occasion.
In this guide, we'll walk you through the process of hanging outdoor lights on your siding, from gathering the necessary materials to testing the final display. By following these steps, you'll be able to effortlessly enhance your outdoor space and bring a touch of enchantment to your home. So, let's dive in and shed some light on this illuminating project!
Key Takeaways:
- Create a captivating outdoor oasis by hanging lights on your siding. Plan the layout, install mounting hooks, and test the lights for a magical ambiance.
- Transform your outdoor space into an enchanting retreat with carefully hung outdoor lights. Secure cords, test the display, and enjoy the warm, inviting glow.
Read more: How To Hang Lights From Siding
Step 1: Gather Your Materials
Before you begin the process of hanging outdoor lights on your siding, it’s essential to gather all the necessary materials. By having everything on hand, you’ll streamline the installation process and ensure that you have the right tools for the job. Here’s a list of materials you’ll need:
- Outdoor Lights: Select the type of lights that best suit your outdoor space, whether it’s classic string lights, elegant lanterns, or festive LED bulbs. Consider the length and style of the lights to complement your siding and create the desired ambiance.
- Mounting Hooks or Clips: Choose hooks or clips designed specifically for outdoor use and suitable for siding installation. Opt for durable, weather-resistant options that can securely hold the weight of the lights without damaging the siding.
- Extension Cords (if needed): Depending on the distance from the power source to the desired lighting area, you may require outdoor-rated extension cords to connect the lights to an electrical outlet. Ensure that the extension cords are designed for outdoor use and are long enough to reach the desired location.
- Measuring Tape: A measuring tape will be essential for determining the length of the area where you plan to hang the lights and ensuring that you have adequate coverage.
- Ladder: Depending on the height of your siding, a sturdy ladder will be necessary for reaching the installation area safely. Choose a ladder that provides stable support and allows you to access the entire length of the siding.
- Timer or Remote Control (optional): For added convenience, consider a timer or remote control system to automate the lighting schedule or adjust the brightness and patterns of the lights without manual intervention.
- Outdoor Outlet Timer (if using a power source): If you plan to connect the lights to an outdoor electrical outlet, an outdoor outlet timer can be a valuable addition, allowing you to schedule the lighting duration and conserve energy.
By gathering these materials before you begin, you’ll be well-prepared to embark on the process of hanging outdoor lights on your siding. With the right tools at your disposal, you can proceed to the next step with confidence, knowing that you have everything you need to create a captivating outdoor lighting display.
Step 2: Plan Your Layout
Before you start installing the outdoor lights, it’s crucial to plan the layout to ensure that the final display achieves the desired aesthetic and functional goals. By carefully considering the placement and arrangement of the lights, you can create an enchanting ambiance while optimizing the visual impact. Here’s how to plan your layout effectively:
- Assess the Siding: Take a close look at the siding of your home to identify the areas where you can securely attach the mounting hooks or clips for the lights. Consider the spacing and height at which you want to hang the lights to achieve an even and balanced appearance.
- Determine the Power Source: Locate the nearest outdoor electrical outlet if you plan to connect the lights directly to a power source. Alternatively, if you’re using battery-operated or solar-powered lights, ensure that they will receive adequate sunlight or have easy access to replaceable batteries.
- Measure the Length: Use a measuring tape to determine the length of the area where you intend to hang the lights. This measurement will guide you in selecting the appropriate length of lights to ensure full coverage without leaving any gaps.
- Consider the Design: Visualize the design or pattern you want to create with the lights. Whether you prefer straight lines, gentle curves, or cascading drapes, envision how the lights will enhance the architectural features of your home and complement the outdoor environment.
- Account for Accessibility: If you’re planning to install lights in hard-to-reach areas, such as above a tall entryway or along a high gable, ensure that you have safe and convenient access using a ladder or suitable equipment.
- Factor in Weather Conditions: Consider the weather patterns in your area and how they may impact the lights. Choose outdoor lights that are designed to withstand various weather conditions, and plan the layout to minimize exposure to harsh elements.
By carefully planning the layout of your outdoor lights, you’ll set the stage for a stunning and well-executed display. Taking the time to consider these key factors will ensure that the installation process proceeds smoothly and that the end result exceeds your expectations, creating a captivating and inviting atmosphere in your outdoor space.
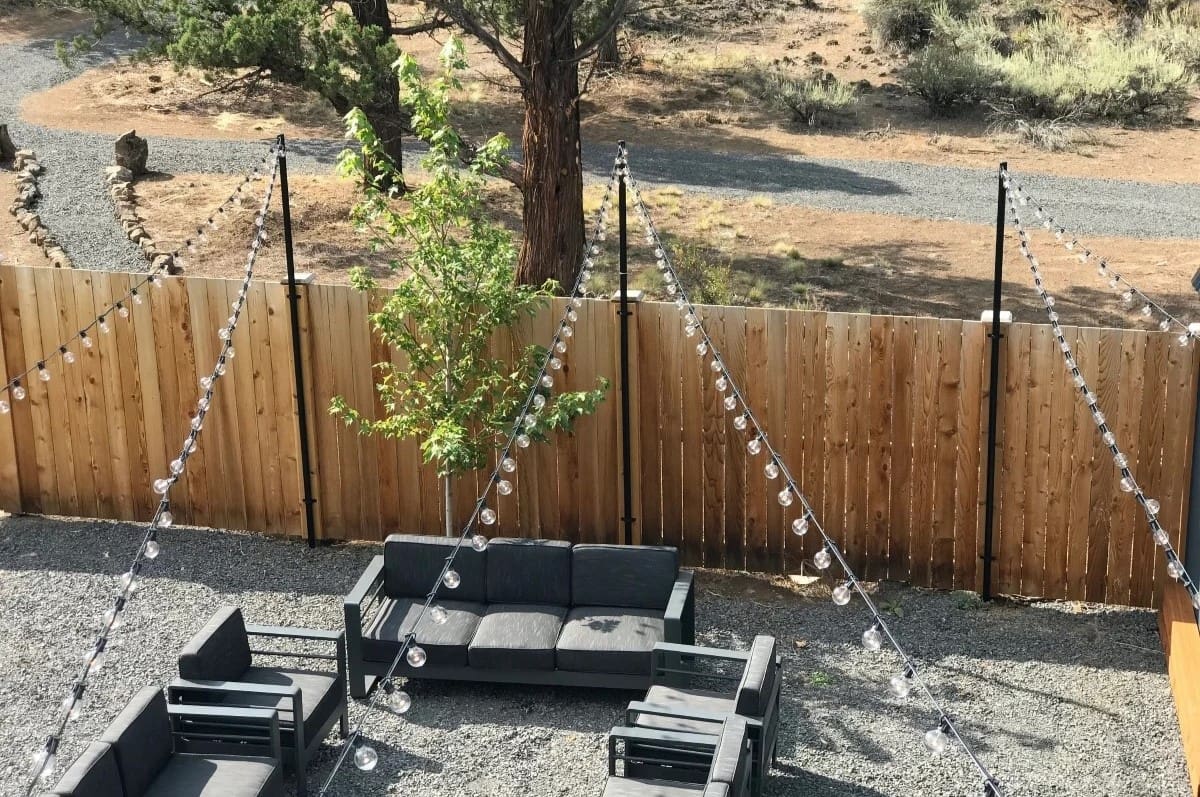
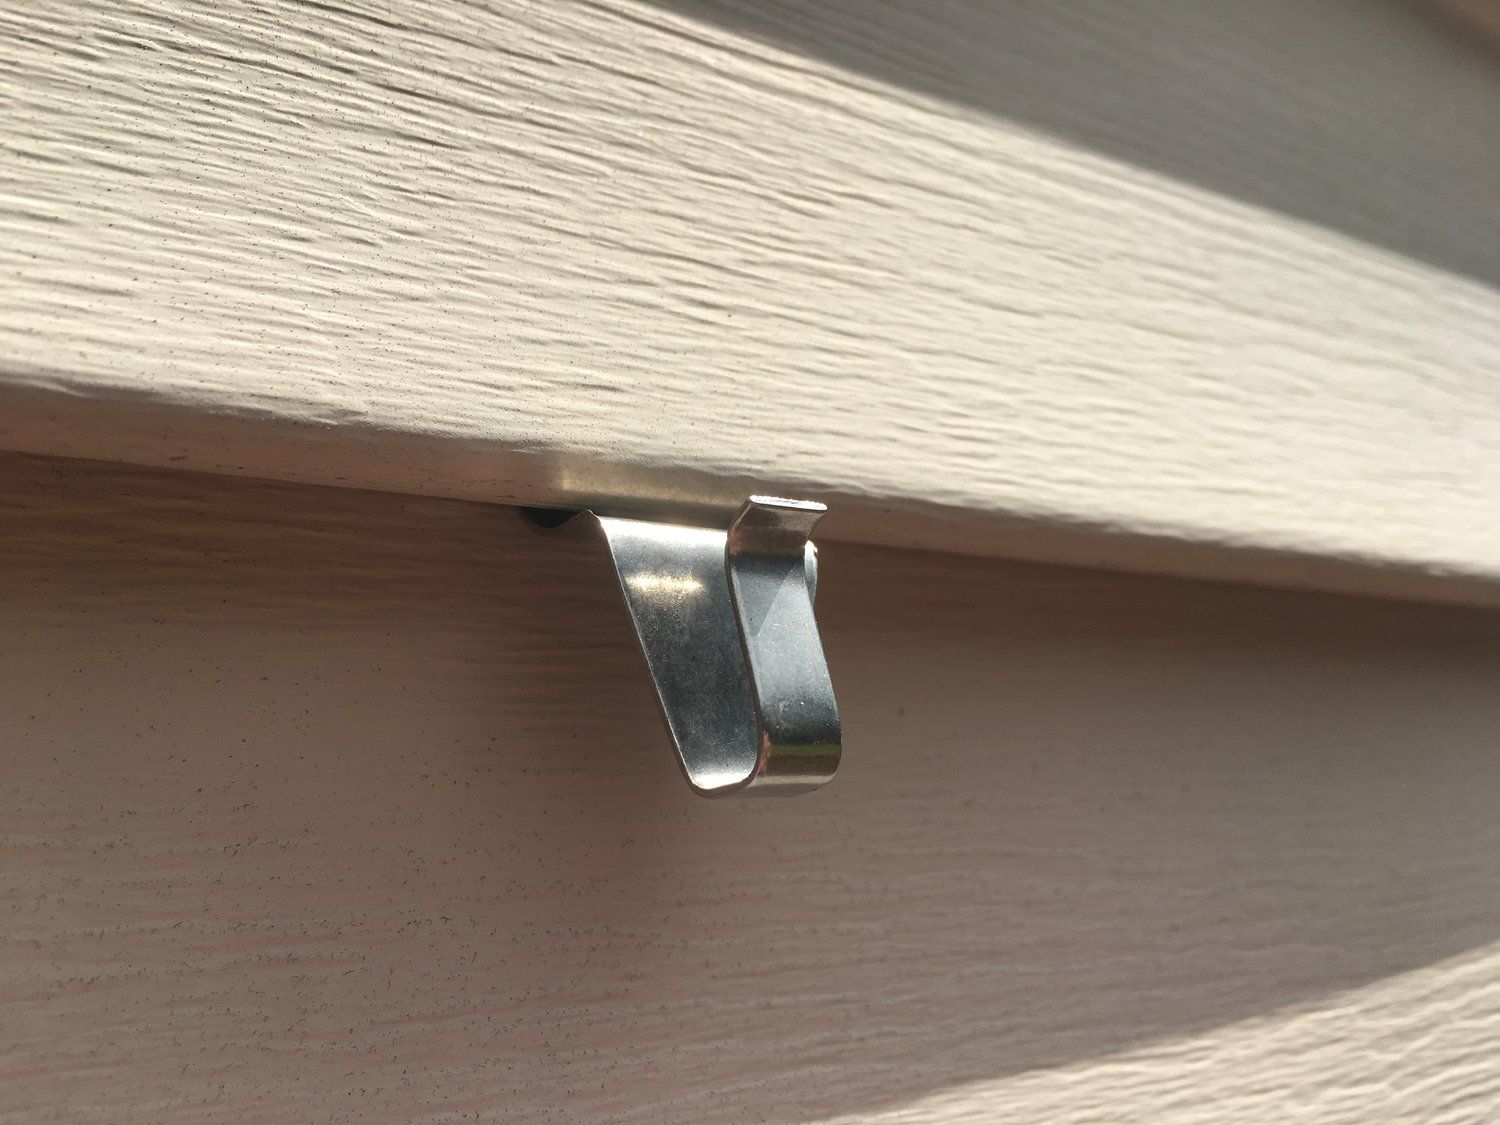
Step 3: Install Mounting Hooks
Once you’ve planned the layout for your outdoor lights, it’s time to install the mounting hooks or clips that will securely hold the lights in place along the siding of your home. Proper installation of the mounting hardware is essential to ensure the stability and longevity of the lighting display. Follow these steps to install the mounting hooks effectively:
- Select the Right Hooks: Choose mounting hooks or clips that are specifically designed for outdoor use and compatible with your siding material. Ensure that the hooks can support the weight of the lights and are suitable for the chosen lighting style.
- Clean the Siding: Before attaching the mounting hooks, clean the area of the siding where they will be installed. Use a gentle cleanser and a soft brush or cloth to remove any dirt, dust, or debris that could affect the adhesion of the hooks.
- Position the Hooks: Determine the spacing and placement of the mounting hooks along the length of the siding, following the layout plan you established in the previous step. Maintain consistent spacing between the hooks to ensure a uniform and balanced appearance for the lights.
- Secure the Hooks: Carefully attach the mounting hooks to the siding according to the manufacturer’s instructions. Depending on the type of hooks, you may need to use screws, adhesive backing, or other fastening methods to secure them firmly in place.
- Test the Stability: After installing the mounting hooks, gently tug on each one to ensure that it is securely attached to the siding and can support the weight of the lights. Make any necessary adjustments to enhance the stability of the hooks.
- Consider Cable Management: If you’re using multiple strands of lights or extension cords, plan the cable management to conceal and secure the cords along the siding, preventing tripping hazards and maintaining a tidy appearance.
By meticulously installing the mounting hooks, you’ll create a reliable foundation for hanging the outdoor lights, ensuring that they remain safely and attractively displayed. With the hooks securely in place, you’re ready to proceed to the next step and bring your outdoor lighting vision to life.
When hanging outdoor lights on siding, use plastic clips designed for the purpose to avoid damaging the siding. Make sure to measure and plan the layout before installing the clips.
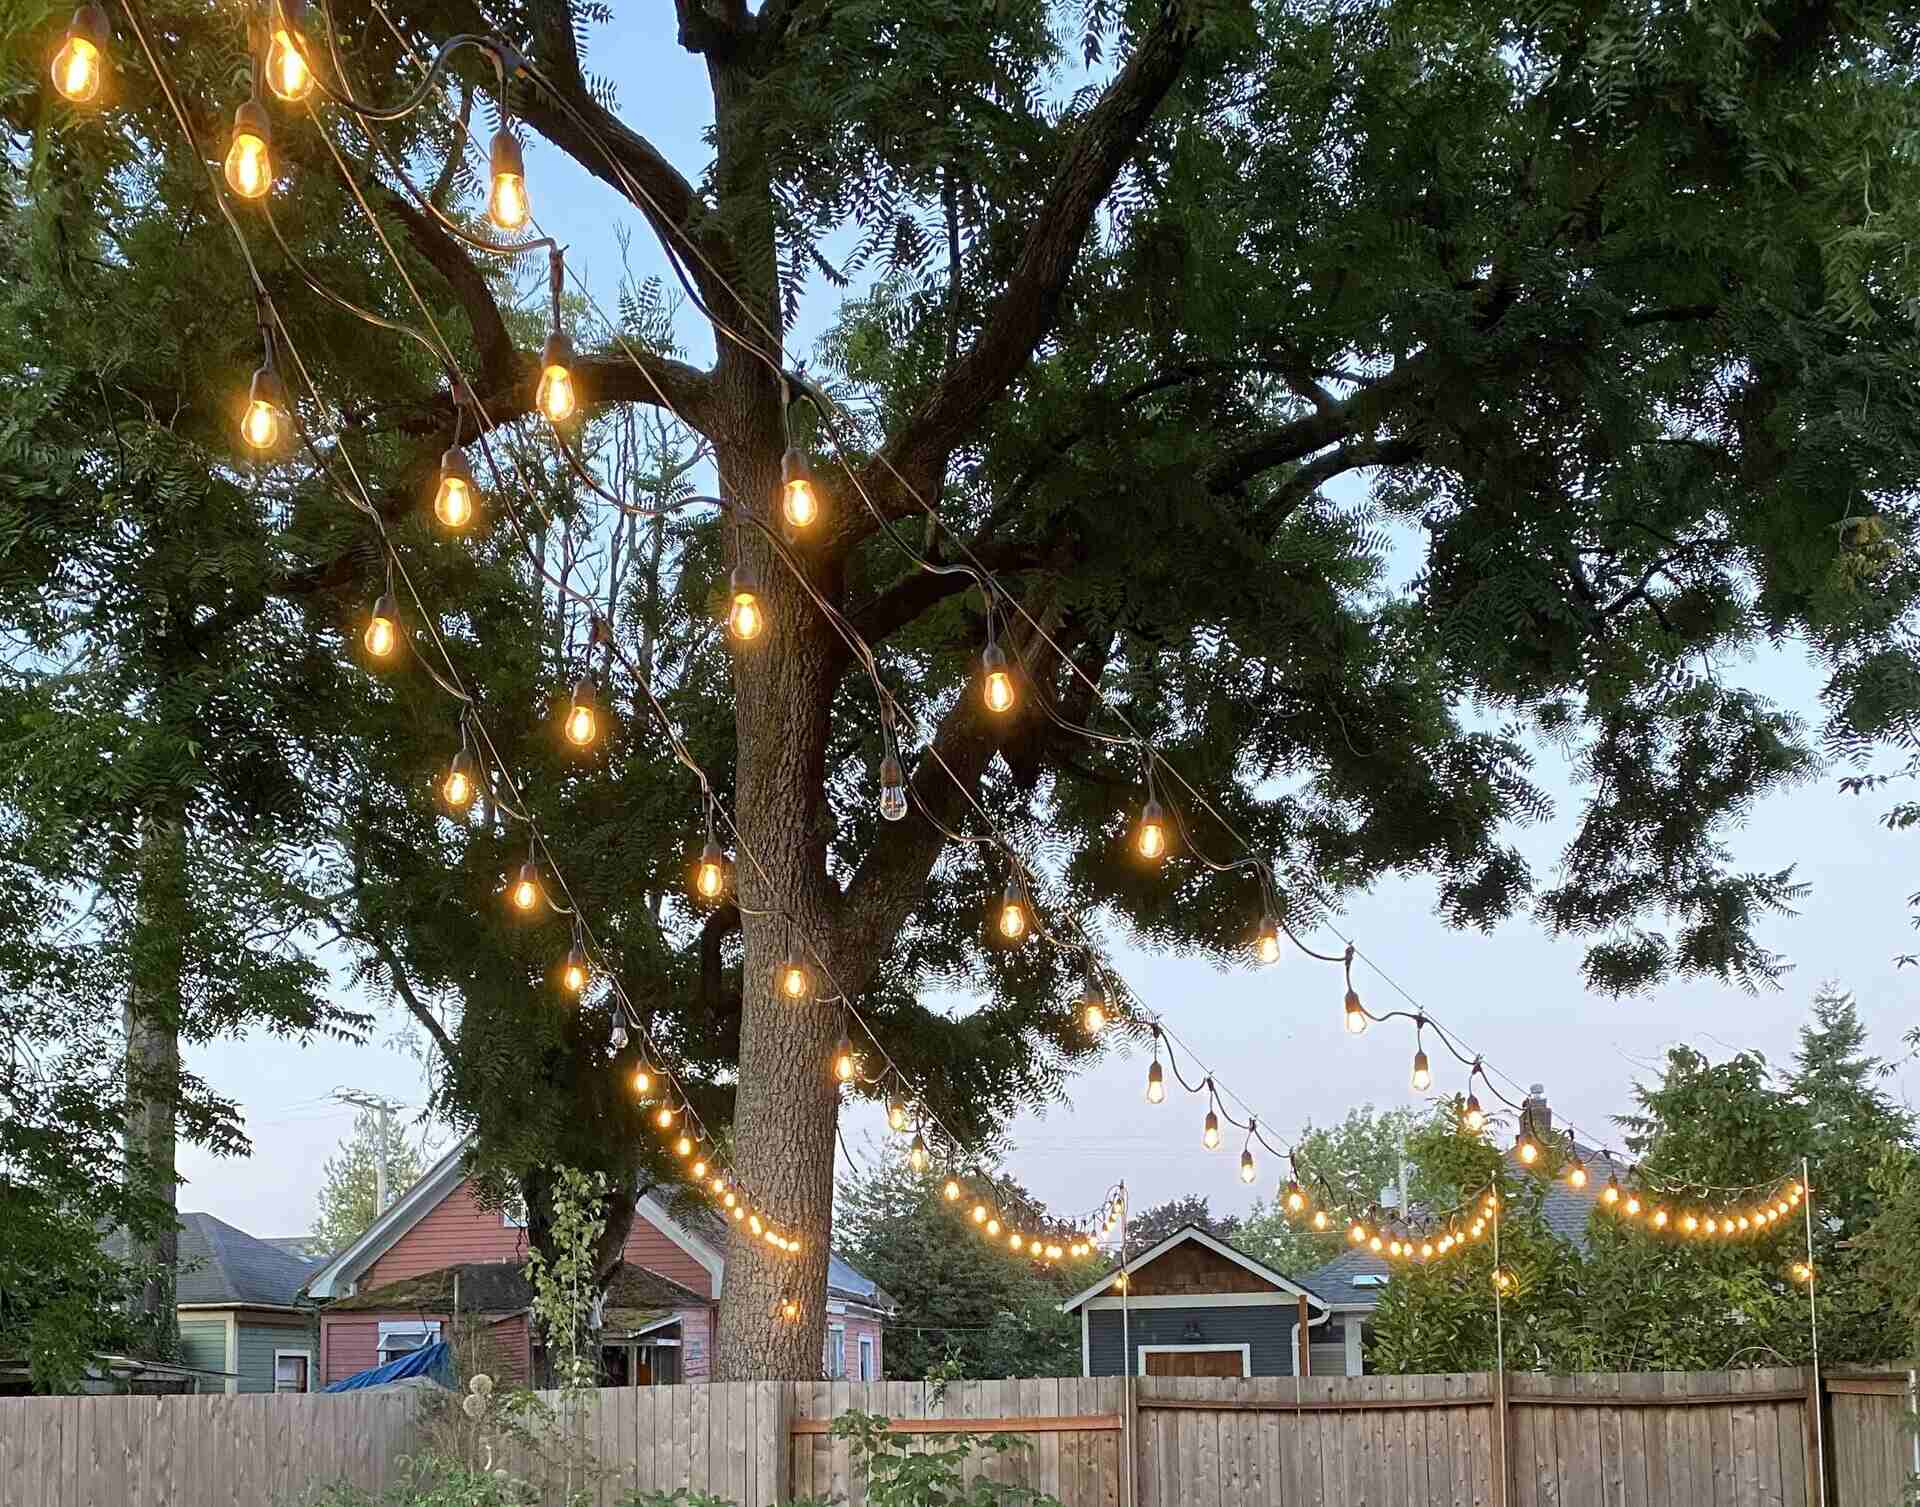
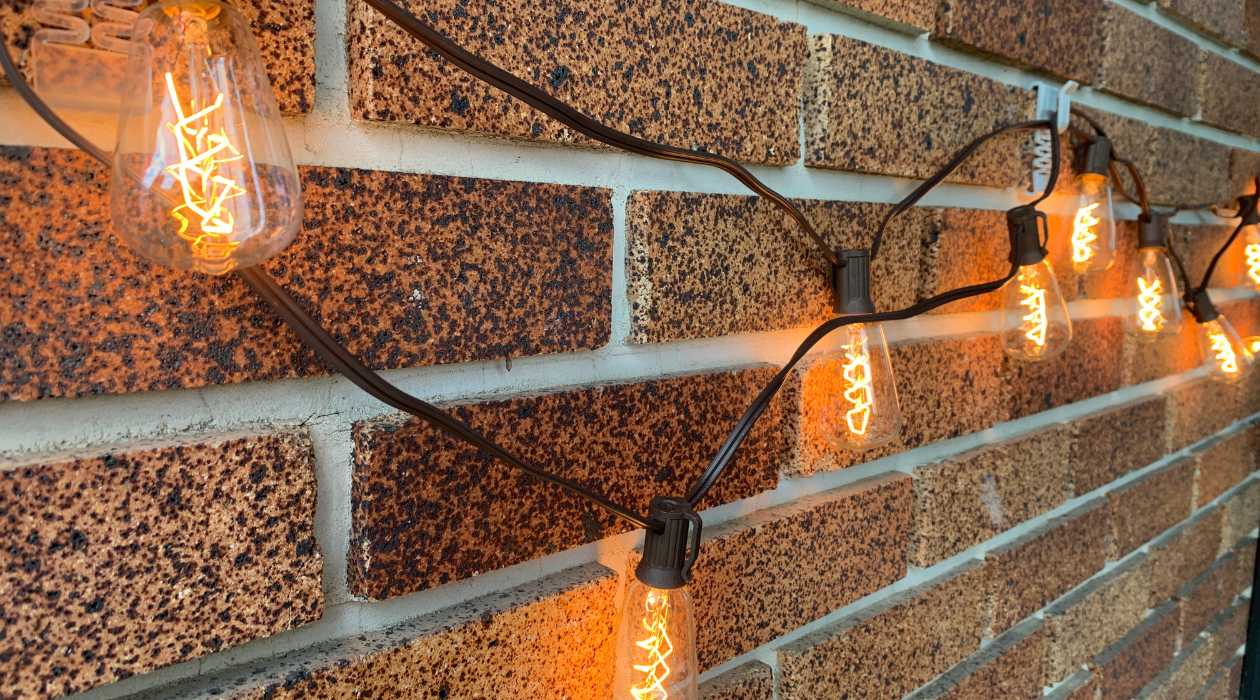
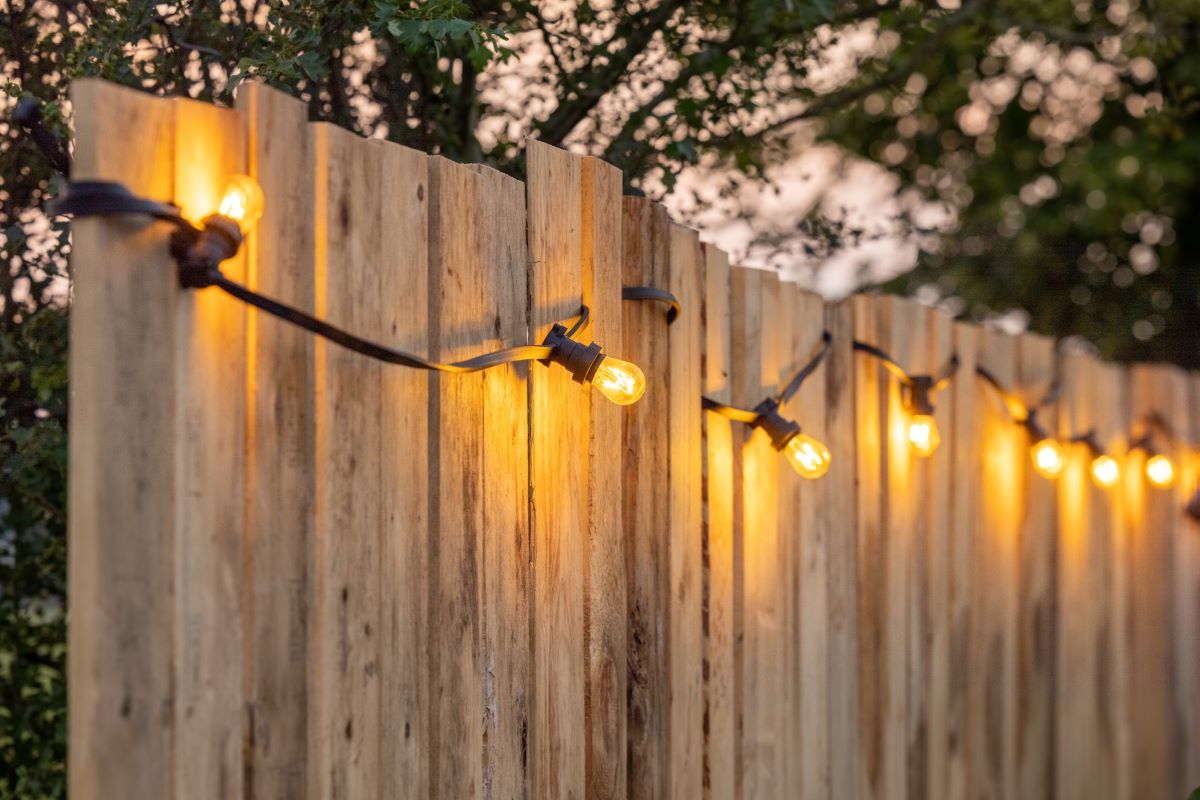
Step 4: Hang the Lights
With the mounting hooks in place, it’s time to bring your outdoor lighting display to life by hanging the lights along the siding of your home. This step allows you to transform your outdoor space into a captivating and inviting environment. Follow these guidelines to effectively hang the lights and achieve a stunning visual impact:
- Attach the Lights: Begin by securing one end of the lights to the first mounting hook, ensuring that they are firmly in place. Depending on the type of lights you’re using, you may need to loop them around the hook, clip them in position, or follow the specific attachment method recommended by the manufacturer.
- Follow the Layout Plan: As you continue to hang the lights, adhere to the layout plan you established, maintaining the desired spacing and arrangement along the length of the siding. Pay close attention to creating smooth, flowing lines and avoiding any tangling or uneven sections.
- Check the Alignment: Periodically step back and assess the alignment and positioning of the lights to ensure that they create the intended visual impact. Make adjustments as needed to maintain a cohesive and aesthetically pleasing display.
- Secure Additional Strands: If you’re using multiple strands of lights to cover a larger area, carefully connect and secure the additional strands to maintain a seamless and continuous lighting effect. Conceal the connections and ensure that the transition between strands is seamless.
- Adjust the Tension: As you progress, adjust the tension of the lights to create a taut and uniform appearance. Avoid excessive sagging or pulling, aiming for a balanced and visually appealing display that complements the architecture of your home.
- Consider Creative Arrangements: Depending on your design preferences, explore creative arrangements such as draping the lights in gentle arcs, creating zigzag patterns, or incorporating vertical swags to add depth and dimension to the lighting display.
By methodically hanging the lights according to your planned layout, you’ll witness the transformation of your outdoor space into a captivating and enchanting setting. As the lights adorn the siding of your home, they’ll create a warm and inviting atmosphere, elevating the ambiance for gatherings, relaxation, and everyday enjoyment.
Read more: How To Hang Christmas Lights On Siding
Step 5: Secure the Cords
Once the lights are elegantly draped along the siding, it’s essential to address the cords and ensure that they are securely managed to maintain a tidy and safe outdoor lighting display. Properly securing the cords will not only enhance the visual appeal but also minimize tripping hazards and protect the electrical connections. Follow these steps to effectively secure the cords of your outdoor lights:
- Conceal Excess Cord Length: If you’re using extension cords to connect the lights to a power source, carefully conceal any excess cord length along the siding. Tuck the extra cord behind nearby fixtures or foliage, ensuring that it remains inconspicuous and does not disrupt the overall aesthetic.
- Utilize Cable Clips or Ties: Secure the cords along the siding using outdoor-rated cable clips or ties. These accessories will help keep the cords neatly aligned and prevent them from dangling or becoming entangled with surrounding objects.
- Adhere to Safe Routing: Route the cords along a path that minimizes exposure to foot traffic and potential hazards. Avoid placing the cords in areas where they could be tripped over or damaged, prioritizing safety and unobtrusive placement.
- Protect Electrical Connections: If there are exposed electrical connections or junctions between the lights and extension cords, shield them from the elements using weatherproof covers or enclosures. This precaution will safeguard the connections from moisture and debris, prolonging the lifespan of the lighting system.
- Test Cord Security: After securing the cords, gently tug on each section to confirm that they are firmly in place and resistant to accidental displacement. Verify that the cords remain discreetly integrated with the lighting display and do not detract from the overall visual impact.
- Ensure Accessibility for Maintenance: While securing the cords, maintain accessibility to the connection points and any components that may require maintenance or adjustment in the future. By balancing security and accessibility, you’ll be prepared to address any potential issues efficiently.
By diligently securing the cords of your outdoor lights, you’ll achieve a polished and professional-looking display that enhances the allure of your outdoor space. With the cords neatly managed and the electrical connections protected, you can relish in the enchanting glow of your outdoor lighting while maintaining a safe and organized environment for all to enjoy.
Step 6: Test the Lights
With the installation and cord management complete, it’s time to test the outdoor lights to ensure that they illuminate your outdoor space as intended. This step allows you to verify the functionality of the lighting display and make any necessary adjustments before showcasing the enchanting ambiance to guests or enjoying it for your own relaxation. Follow these steps to effectively test the lights and confirm their performance:
- Connect to Power: If your lights are not battery-operated or solar-powered, connect them to the power source, ensuring that the electrical connections are secure and weather-protected. If you’re using a timer or remote control system, program the settings according to your preferences.
- Activate the Lights: Switch on the lights and observe their illumination across the siding of your home. Take note of any areas that may require additional adjustments, such as uneven brightness, flickering, or areas with insufficient coverage.
- Assess the Ambiance: Step back and evaluate the overall ambiance created by the lights. Consider the warmth and inviting glow they impart to your outdoor space, and assess whether the arrangement aligns with your initial vision and design objectives.
- Adjust as Needed: Make any necessary adjustments to the positioning of the lights, the tension of the strands, or the brightness settings to achieve the desired effect. Address any areas where the lighting may be obstructed or uneven, striving for a harmonious and captivating display.
- Verify Remote Control Functionality: If you’re using a remote control to adjust the lighting settings, test its functionality to ensure that you can conveniently modify the brightness, patterns, or timing of the lights without difficulty.
- Observe from Different Angles: Walk around your outdoor space and view the lighting display from various angles and vantage points. Confirm that the lights create an enchanting atmosphere that enhances the architectural features of your home and complements the surrounding environment.
By meticulously testing the lights, you’ll confirm that your outdoor lighting display achieves the desired ambiance and visual impact. This step allows you to fine-tune the arrangement and settings, ensuring that the lights radiate a captivating glow that enriches your outdoor space and sets the stage for memorable gatherings and tranquil evenings under the stars.
Conclusion
Congratulations on successfully hanging outdoor lights on the siding of your home! By following the comprehensive steps outlined in this guide, you’ve transformed your outdoor space into a captivating and inviting environment, where the warm glow of the lights creates an enchanting ambiance for various occasions. As you bask in the radiant glow of your outdoor lighting display, you’ve not only elevated the aesthetic appeal of your home but also set the stage for memorable gatherings, cozy evenings, and tranquil moments under the stars.
Through careful planning, precise installation, and thoughtful adjustments, you’ve orchestrated a symphony of light that harmonizes with the architectural features of your home and enhances the natural beauty of your outdoor environment. The captivating allure of your outdoor lights serves as a beacon, drawing family and friends to share in the enchantment of your outdoor space and creating lasting memories in its luminous embrace.
As you enjoy the captivating ambiance created by your outdoor lights, take pride in the artistry and craftsmanship that went into their installation. The meticulous attention to detail and the seamless integration of the lighting display with your home’s siding reflect your dedication to creating a welcoming and visually stunning outdoor retreat.
With the installation complete and the lights aglow, take a moment to revel in the enchanting transformation of your outdoor space. Whether you’re hosting a festive gathering, savoring a quiet evening with loved ones, or simply admiring the magical ambiance from your patio, the radiant glow of your outdoor lights will continue to cast a warm and inviting spell, making your home a beacon of comfort and hospitality.
May the gentle radiance of your outdoor lights illuminate countless cherished moments and infuse your outdoor space with an enduring sense of enchantment. Embrace the allure of your illuminated oasis, and let the captivating glow of the lights kindle an atmosphere of warmth, joy, and serenity in your outdoor haven.
Frequently Asked Questions about How To Hang Outdoor Lights On Siding
Was this page helpful?
At Storables.com, we guarantee accurate and reliable information. Our content, validated by Expert Board Contributors, is crafted following stringent Editorial Policies. We're committed to providing you with well-researched, expert-backed insights for all your informational needs.


0 thoughts on “How To Hang Outdoor Lights On Siding”