Home>Articles>How To Hang Outdoor String Lights On Your Patio Or Deck
Articles
How To Hang Outdoor String Lights On Your Patio Or Deck
Modified: October 19, 2024
Learn how to hang outdoor string lights on your patio or deck with these step-by-step articles. Create a cozy and inviting ambiance for your outdoor space.
(Many of the links in this article redirect to a specific reviewed product. Your purchase of these products through affiliate links helps to generate commission for Storables.com, at no extra cost. Learn more)
Introduction
Welcome to the world of outdoor ambiance and enchanting evenings! Adding string lights to your patio or deck can transform it into a mesmerizing space perfect for relaxing or entertaining. The warm glow of the lights creates a cozy atmosphere and adds a touch of magic to any outdoor gathering. Whether you’re hosting a dinner party or simply unwinding after a long day, hanging outdoor string lights can elevate your outdoor experience.
In this comprehensive guide, we will take you through the step-by-step process of hanging outdoor string lights on your patio or deck. From planning and gathering materials to installation and testing, we’ll cover every aspect to ensure you achieve the perfect lighting setup.
Before we dive into the details, it’s important to note that safety should be a top priority when undertaking any electrical project. If you’re not comfortable working with electricity or are unsure about any step of the process, it’s always best to consult a professional electrician. Now, let’s get started on creating your own outdoor oasis!
Key Takeaways:
- Create a captivating outdoor oasis by carefully planning, measuring, and selecting the right materials for hanging string lights. Personalize the ambiance and enjoy magical evenings with friends and family under the warm glow.
- Transform your patio or deck into a mesmerizing space with the perfect lighting arrangement. Test, adjust, and savor the enchanting atmosphere created by your beautifully illuminated outdoor string lights.
Read more: How To Hang Outdoor String Lights On Brick
Step 1: Planning and Prep Work
Before you begin the installation process, it’s crucial to spend some time planning and preparing for hanging your outdoor string lights. This step will help you determine the best layout and ensure a smooth installation process. Here are some key considerations:
- Assess the desired lighting area: Determine where you want to hang the string lights and evaluate the available space. Consider the size and shape of your patio or deck, as well as any existing structures or fixtures that can be used to support the lights.
- Create a design layout: Sketch out a design layout for your string lights, taking into account the shape, height, and distance between each anchor point. This will help you visualize the end result and ensure a balanced and aesthetically pleasing arrangement.
- Measure the distance: Measure the length of the area where you intend to hang the lights. This will help you determine the amount of string lights needed and the spacing between each anchor point.
- Consider power source: Determine the nearest power source for your string lights. It could be an outdoor electrical outlet, an extension cord from inside your home, or a battery-powered option. Ensure that the power source is easily accessible and can handle the load of your lights.
- Check for any restrictions or regulations: Before proceeding, check with your local homeowners’ association, building management, or city regulations to ensure there are no restrictions on outdoor lighting installations. You may need to obtain permission or follow specific guidelines before proceeding.
- Gather the required tools: Make a list of tools and equipment you’ll need for the installation. This may include a ladder, drill, screws, hooks, zip ties, and a string light hanging kit. Having all the necessary tools handy will make the process more efficient.
By taking the time to plan and prepare, you’ll have a clear roadmap for hanging your outdoor string lights. This will help minimize any hiccups along the way and allow you to create a stunning lighting display that meets your vision.
Step 2: Determine the Length and Placement
Now that you have completed the planning stage, it’s time to determine the length and placement of your outdoor string lights. This step is crucial as it will dictate the overall look and feel of your lighting arrangement. Here’s how to do it:
- Measure the distance: Measure the total length of the area where you want to hang the string lights. This will help you determine the number of lights and the spacing between each anchor point.
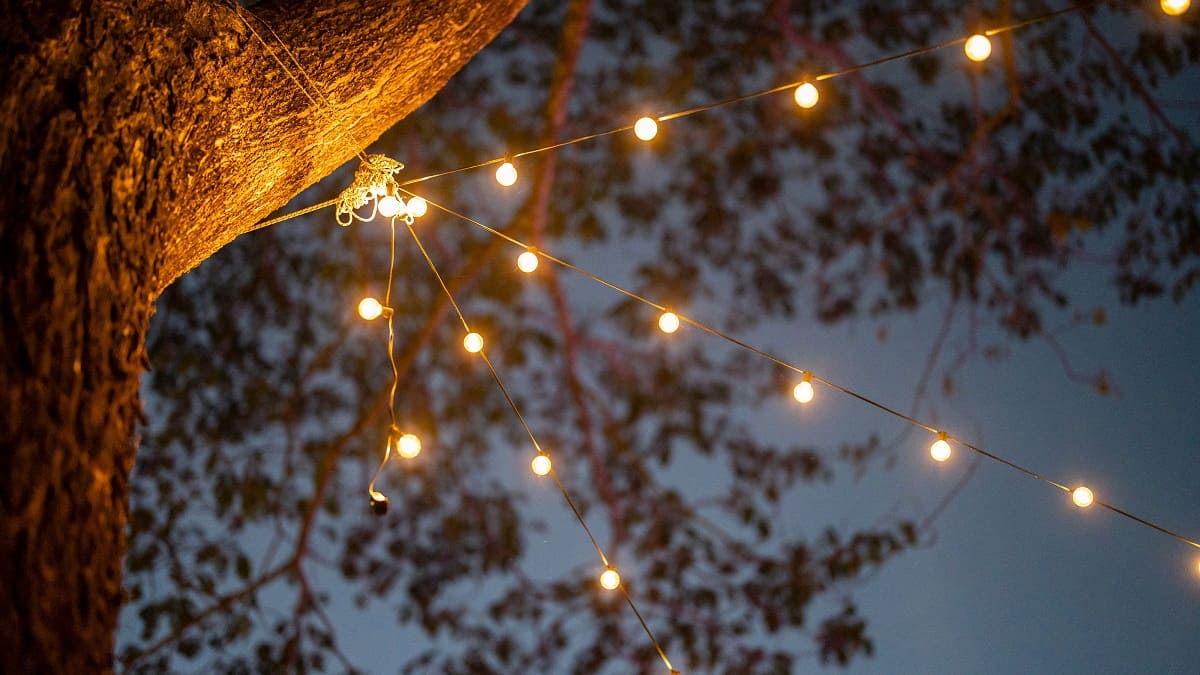
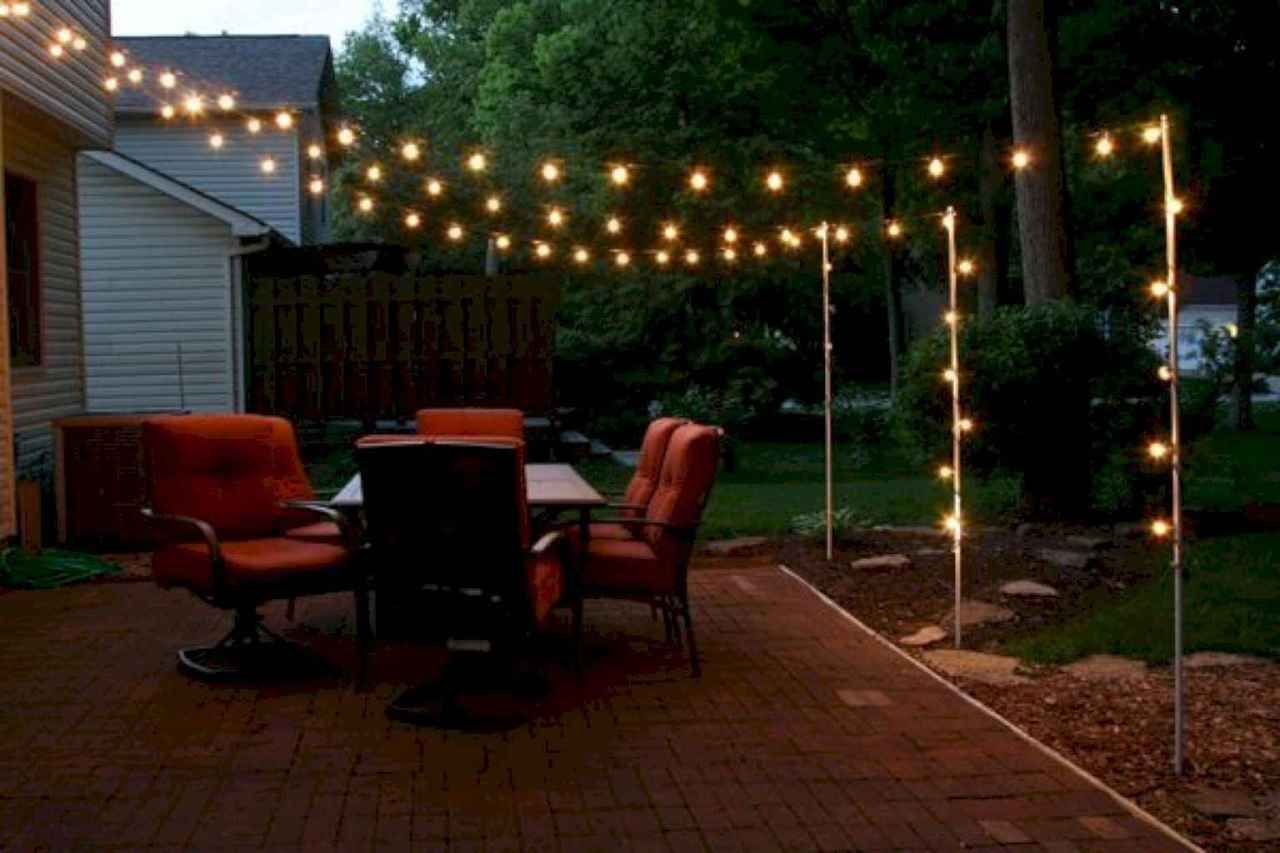
- Create anchor points: Identify the best locations for attaching the string lights. This can be done by spotting existing structures such as posts, trees, walls, or pergolas that can serve as anchor points. Ensure that the chosen anchor points are sturdy enough to support the weight of the lights.
- Determine the height: Decide how high you want to hang the string lights. For a cozy ambiance, consider hanging the lights at a slightly lower height, while for a more dramatic effect, you can opt for higher placement. Keep in mind the proximity to the ground and any obstructions like doorways or furniture.
- Calculate the spacing: Once you have the total length and the desired height, calculate the spacing between each anchor point. Ideally, the lights should be evenly distributed for a balanced look. You can adjust the spacing based on the size and shape of the area.
- Account for sag: Take into consideration that the string lights may sag slightly once they are hung. To compensate for this, plan for a slightly higher starting point or use additional supports in the middle of longer spans.
By determining the length and placement of your outdoor string lights, you’ll have a clear vision of how they will illuminate your patio or deck. This step ensures that the lights are positioned in the most visually appealing way, creating the perfect ambiance for your outdoor space.
Step 3: Gather the Necessary Materials
Before you begin the installation process, it’s essential to gather all the necessary materials and tools. Having everything ready beforehand will make the process smoother and more efficient. Here’s a list of the materials you’ll need for hanging outdoor string lights:
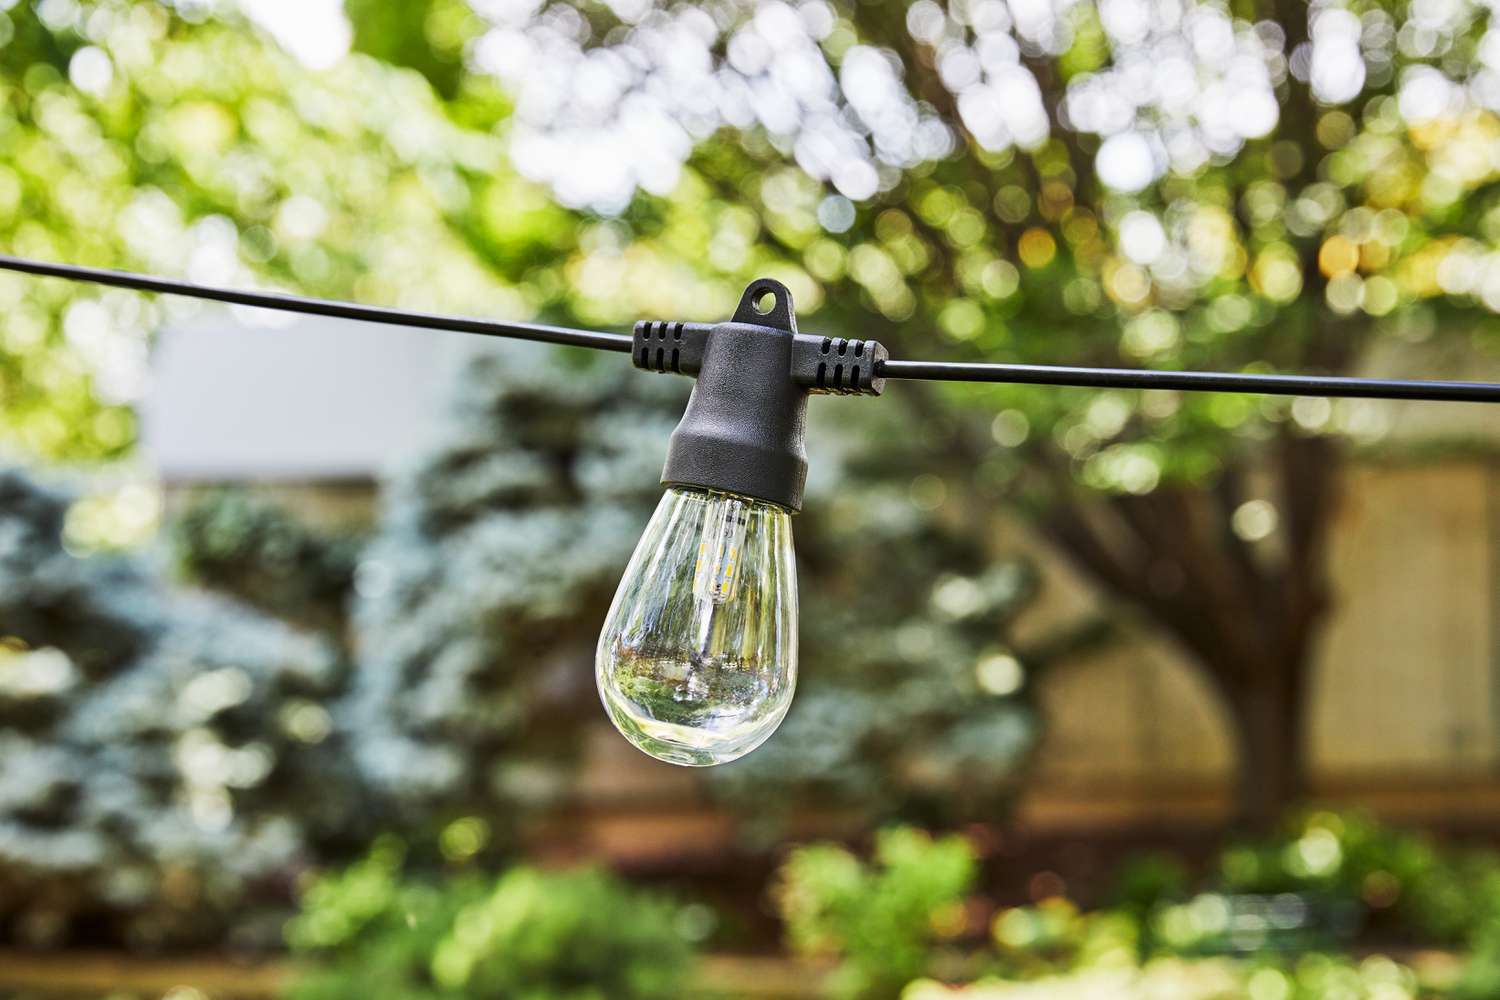
- String lights: Choose high-quality, weather-resistant string lights that are suitable for outdoor use. Opt for LED lights, as they are energy-efficient and last longer than traditional incandescent bulbs.
- Extension cords: If your power source is not located near the desired lighting area, you may need extension cords to connect the string lights to the power outlet.
- Timers or smart plugs: Consider using timers or smart plugs to automate the lighting schedule, allowing you to easily control when the lights turn on and off.
- Anchors or hooks: Depending on your chosen anchor points, you’ll need anchors, hooks, or clips to securely attach the string lights. Ensure they are suitable for outdoor use and can withstand the weight of the lights.
- Zip ties or twist ties: These will come in handy for securing the string lights along the length or at specific anchor points.
- Duct tape or electrical tape: Use these tapes to secure any connectors or joints between different strands of string lights.
- Ladder or step stool: A sturdy ladder or step stool will make it easier to reach the anchor points and hang the lights at the desired height.
- Protective gloves: It’s always a good idea to wear gloves while handling and installing the lights to protect your hands and prevent any accidental cuts or injuries.
- Measuring tape or ruler: Use a measuring tape or ruler to ensure accurate placement and spacing of the lights.
- Drill and screws: If you need to create additional anchor points, have a drill and appropriate screws on hand.
Having all these materials ready will save you time and ensure a hassle-free installation of your outdoor string lights. Make sure to check that all the components are in good working condition before you get started.
Step 4: Attach the Supports
Once you have gathered all the necessary materials, it’s time to attach the supports for your outdoor string lights. The supports will serve as anchor points and provide stability to ensure that the lights are securely hung. Here’s how to attach the supports:
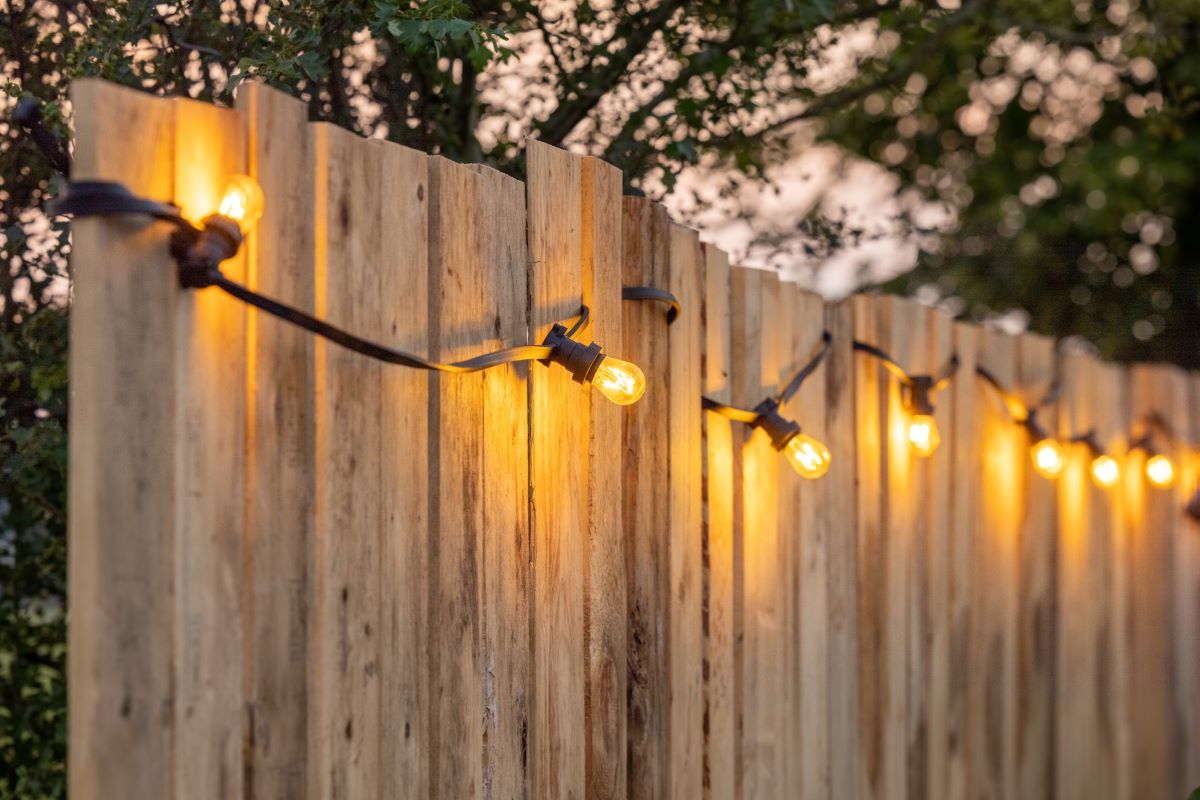
- Identify the anchor points: Based on your design layout and placement decisions, locate the anchor points where you will attach the string lights. These can be trees, posts, walls, pergolas, or any other sturdy structure.
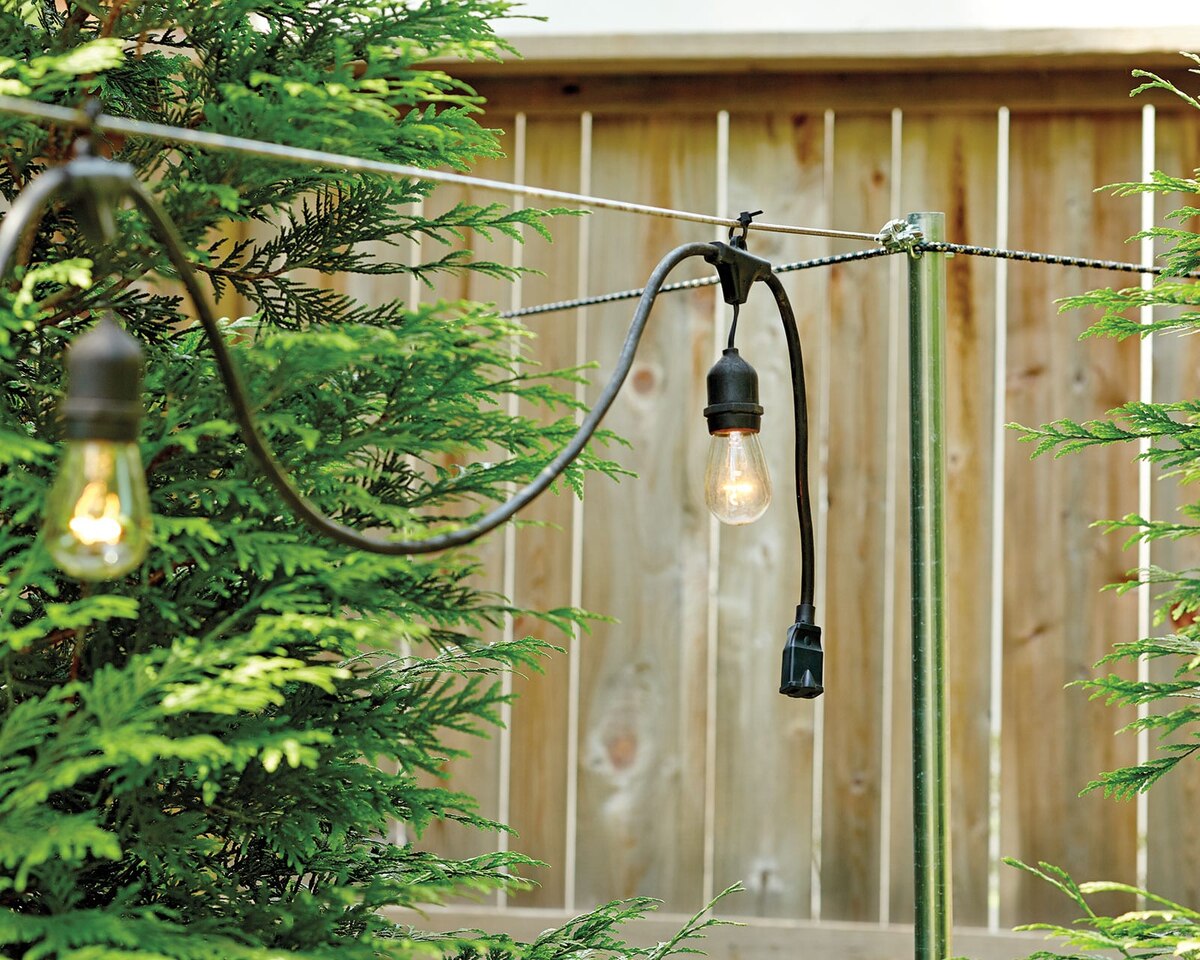
- Choose the appropriate method: Depending on the anchor points and their material, select the appropriate method to attach the supports. This could include using hooks, anchors, clips, or screws.
- Prepare the supports: If you are using hooks or anchors, make sure they are suitable for outdoor use and can securely hold the weight of the string lights. If necessary, pre-drill holes to easily attach the supports.
- Attach the supports: Install the supports at the chosen anchor points. Ensure they are level and secure. If you are using screws, make sure they are tightly screwed into place.
- Check stability: Once all the supports are attached, give them a gentle shake to ensure they are stable and will hold the weight of the string lights. Make any necessary adjustments or reinforce the supports if needed.
By properly attaching the supports for your outdoor string lights, you ensure that they will be securely held in place and withstand the elements. Take your time with this step to ensure a sturdy setup that will provide a stable foundation for hanging your string lights.
When hanging outdoor string lights on your patio or deck, make sure to use sturdy hooks or clips that can support the weight of the lights. This will ensure that the lights stay securely in place, even in windy conditions.
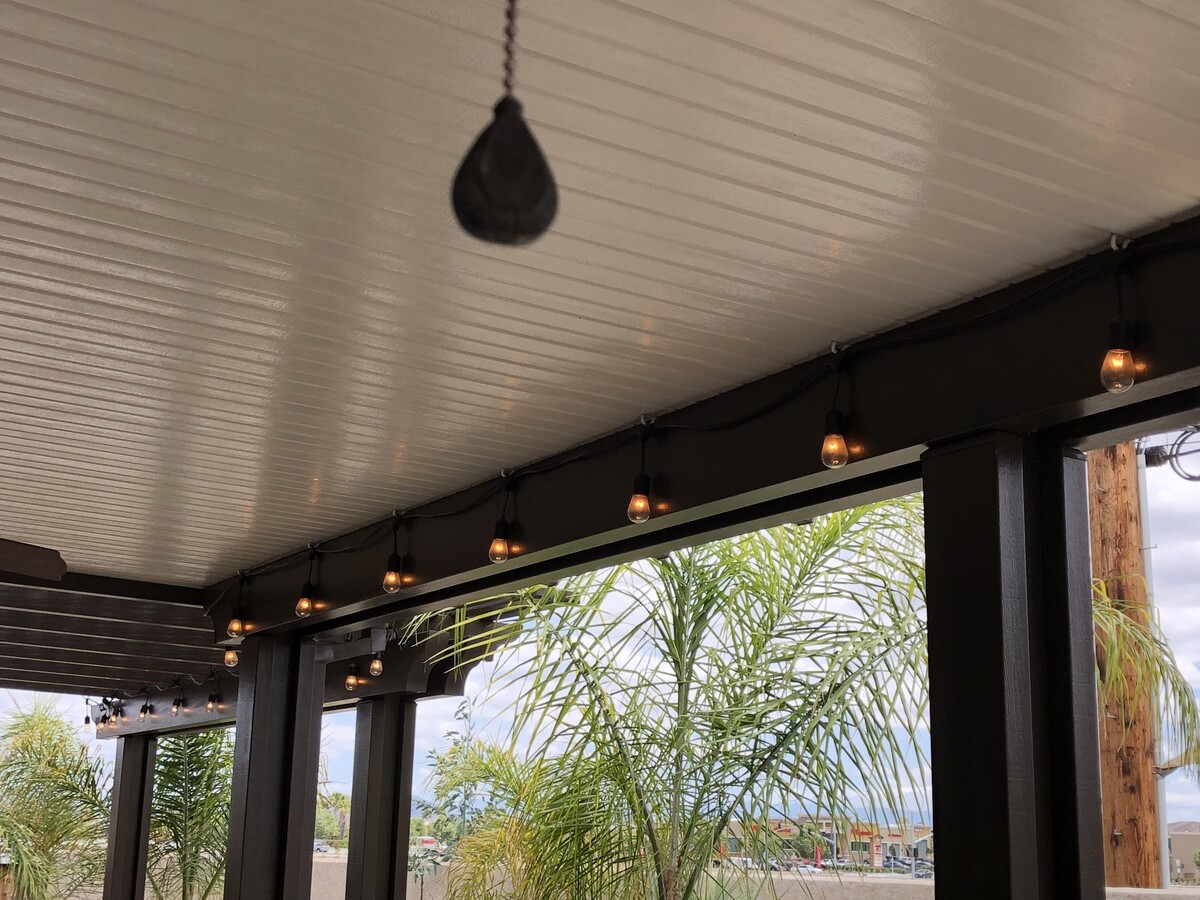
Step 5: Install the String Lights
Now that the supports are in place, it’s time to install the string lights and bring your outdoor space to life. Installing the lights requires careful handling and attention to detail to ensure a seamless and visually pleasing display. Here’s how to install the string lights:
- Begin at the power source: Start by plugging in the string lights at the power source, ensuring that they are turned off.
- Determine the starting point: Identify the anchor point where you want to begin hanging the lights. This is typically the one closest to the power source.
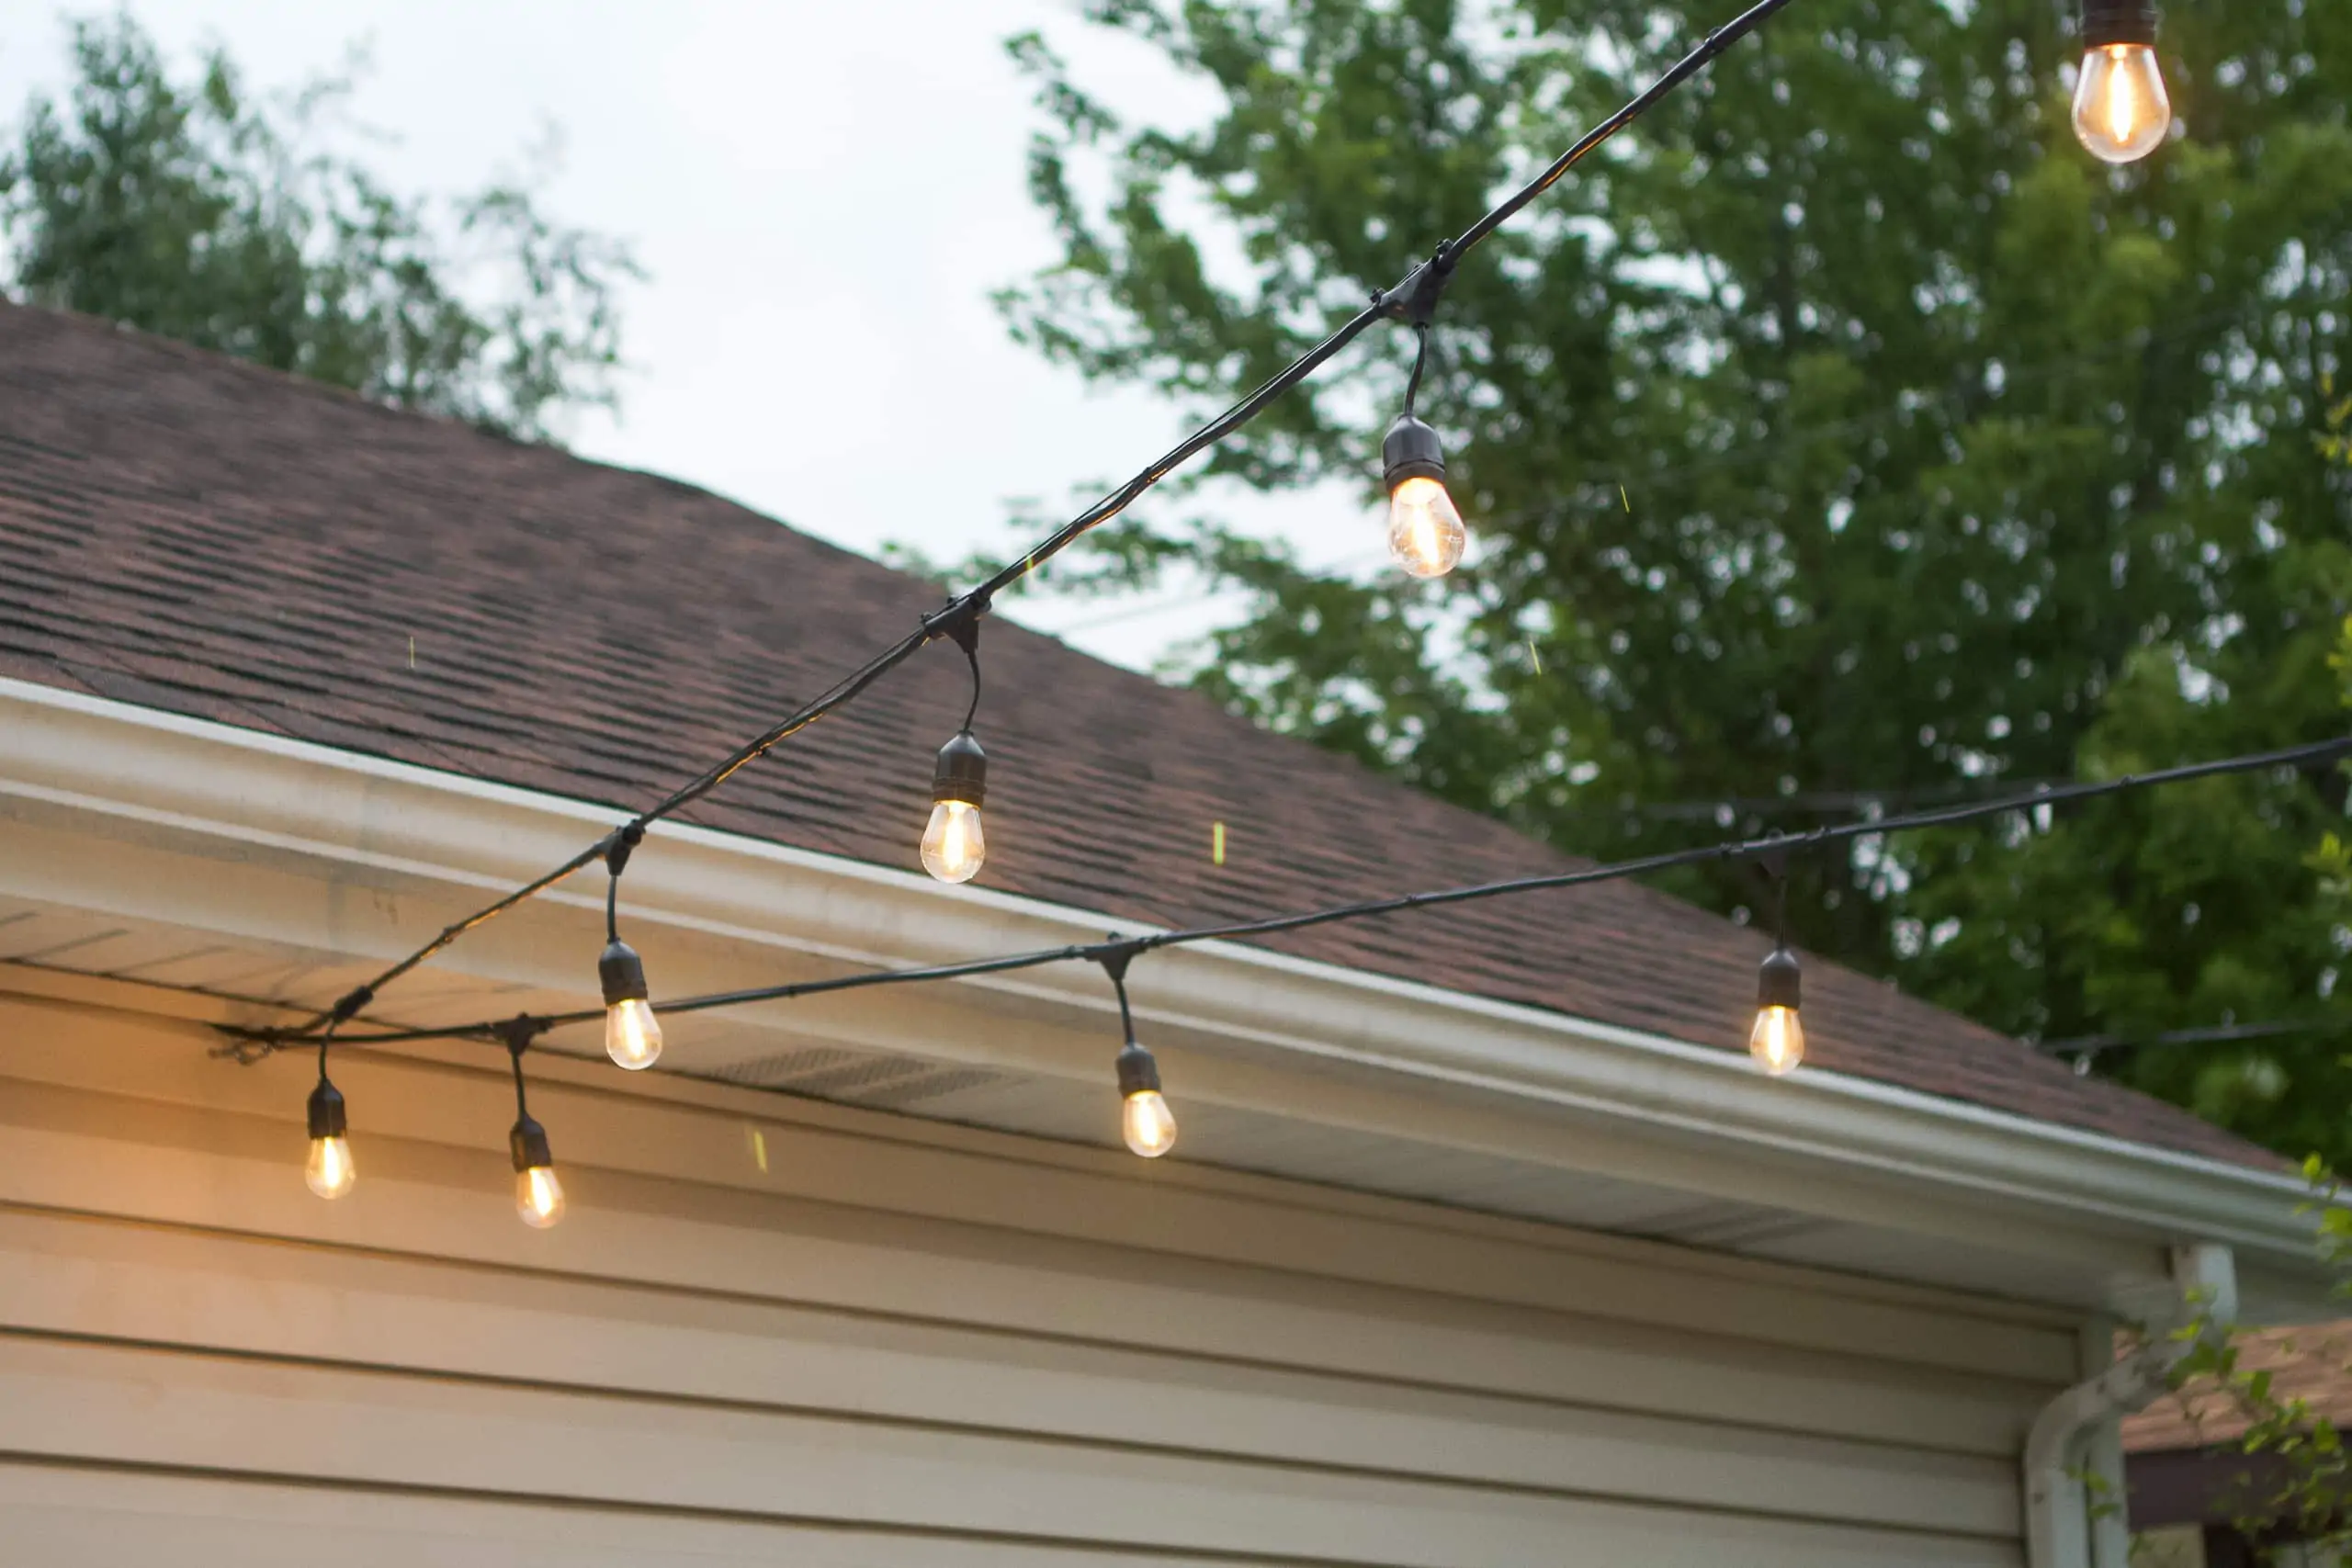
- Secure the first end: Attach the end of the string lights to the anchor point using the appropriate method. This could be a hook, clip, or any other type of support that ensures a secure connection.
- String the lights: Carefully string the lights along the desired path, following your design layout. Use the built-in hooks or clips on the lights, if available, or use zip ties or twist ties to secure them to the supports.
- Ensure even spacing: While hanging the lights, ensure that the spacing between each anchor point is even and visually appealing. Adjust the string lights as needed to maintain a balanced and symmetrical look.
- Avoid tangling: Be mindful of the length of the string lights and make sure they don’t become tangled or twisted as you hang them. Take your time to untangle any knots or loops to maintain a neat and clean display.
- Stay safe: If you are working at a height, use a ladder or step stool that is stable and secure. Have someone assist you if needed to minimize the risk of accidents.
- Continue hanging: Follow the path and hang the lights until you reach the last anchor point. Secure the final end of the string lights to complete the installation.
As you install the string lights, step back periodically to assess the overall look and make any adjustments if necessary. Taking your time during this step will result in a beautifully installed set of string lights that enhances the ambiance of your outdoor space.
Step 6: Connect and Secure the Lights
With the string lights hung in place, it’s time to connect and secure them to ensure they stay in position and provide a steady and reliable lighting display. Properly connecting and securing the lights will help prevent them from swaying or falling, especially during windy conditions. Here’s how to connect and secure your outdoor string lights:
- Check connections: Before proceeding to secure the lights, make sure all the connections between each strand of lights are secure and properly aligned. Use duct tape or electrical tape to secure any loose or exposed connectors.
- Plug the lights: Plug in the lights at the power source and ensure they are functioning properly. Test the lights to ensure all bulbs are lit and that there are no issues with the electrical connection.
- Secure the lights: As you go along the string lights, secure them to the supports using zip ties, twist ties, or clips. This will help keep the lights in place and prevent them from sagging or swaying.
- Adjust tension: Check the tension of the string lights and make any necessary adjustments to ensure they are evenly and tightly strung. You can slightly tighten or loosen the zip ties or twist ties to achieve the desired tension.
- Double-check connections: After securing the lights, double-check all the connections at each anchor point to ensure they are secure and won’t come loose over time. Make any needed reinforcements or adjustments.
- Trim excess: If there is any excess length of the string lights, trim it off carefully using scissors or wire cutters. Be cautious not to cut the main electrical wire in the process.
By connecting and securing the lights properly, you ensure that they stay in place and maintain a consistent illumination throughout your outdoor space. This step adds stability and longevity to your outdoor string lights, giving you peace of mind when enjoying your illuminated patio or deck.
Step 7: Test and Adjust the Lighting
With the outdoor string lights installed and secured, it’s time to test and adjust the lighting to ensure you achieve the desired ambiance and effect. Testing the lights before finalizing the setup allows you to make any necessary adjustments to create the perfect lighting display. Here’s how to test and adjust your outdoor string lights:
- Turn on the lights: Switch on the string lights and observe their brightness and overall effect. Take note of any areas that are too bright or too dim.
- Assess the overall lighting: Step back and evaluate the overall lighting in your outdoor space. Pay attention to the distribution of light, any areas of shadow or darkness, and the general atmosphere created by the lights.
- Make adjustments: If certain areas are too bright, consider using fabric or drapes to diffuse the light or repositioning the lights to reduce the intensity. If certain areas are too dim, add additional lights or adjust the spacing between the bulbs.
- Experiment with different configurations: If you’re not satisfied with the current layout, don’t be afraid to experiment with different configurations. Try changing the height, spacing, or angle of the lights to achieve the desired effect.
- Consider dimming options: If you want more control over the brightness of your outdoor string lights, consider using dimming options such as dimmable bulbs or adding a dimmer switch to the electrical circuit.
- Test during different times: Test the lighting at different times of the day and night to see how it appears in various lighting conditions. This will help you make adjustments for optimal lighting throughout the day.
- Ask for feedback: Invite friends or family members to provide feedback on the lighting display. They may notice elements that you might have missed and can offer valuable insights to make further adjustments.
- Make any final adjustments: Based on your observations and feedback, make any final adjustments to the lighting setup. This could include repositioning lights, changing bulb colors, or adding additional decorative elements.
Testing and adjusting the lighting ensures that your outdoor string lights create the desired ambiance and atmosphere in your patio or deck. Take the time to experiment and make any necessary changes so that you can fully enjoy your beautifully lit outdoor space.
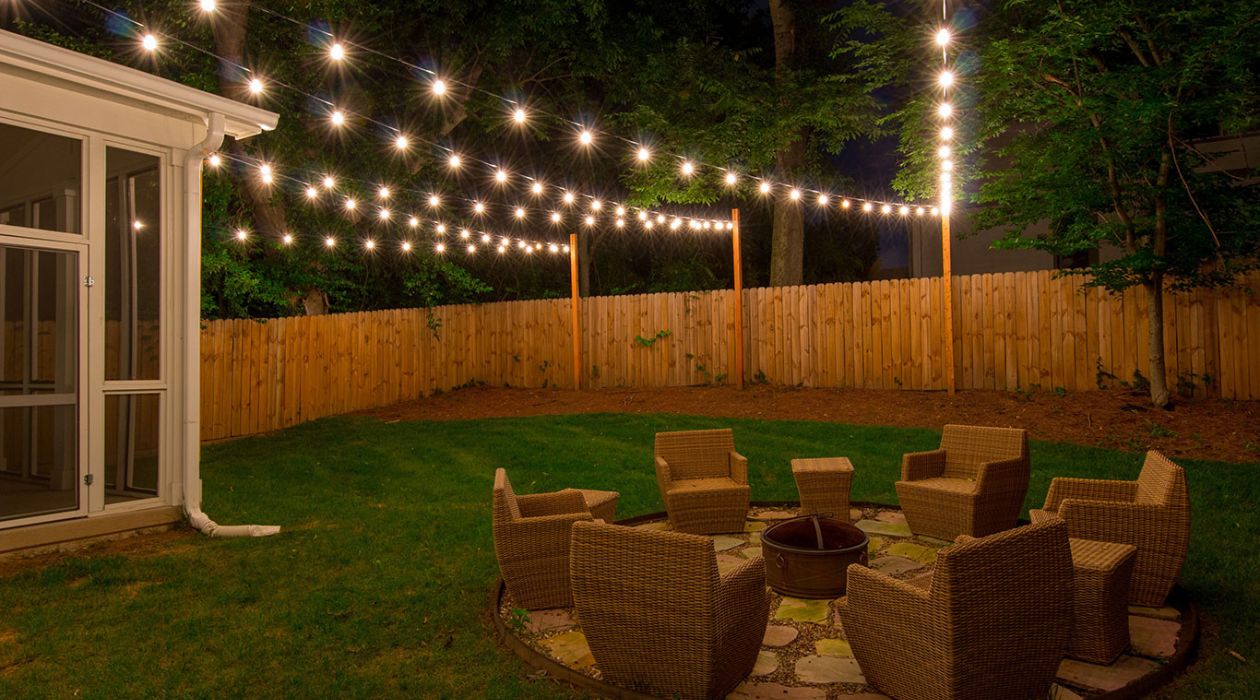
Step 8: Enjoy your Outdoor String Lights
Congratulations! You’ve successfully completed the installation and adjustment of your outdoor string lights. Now it’s time to sit back, relax, and fully enjoy the magical ambiance they create in your outdoor space. Here’s how to make the most of your beautifully lit patio or deck:
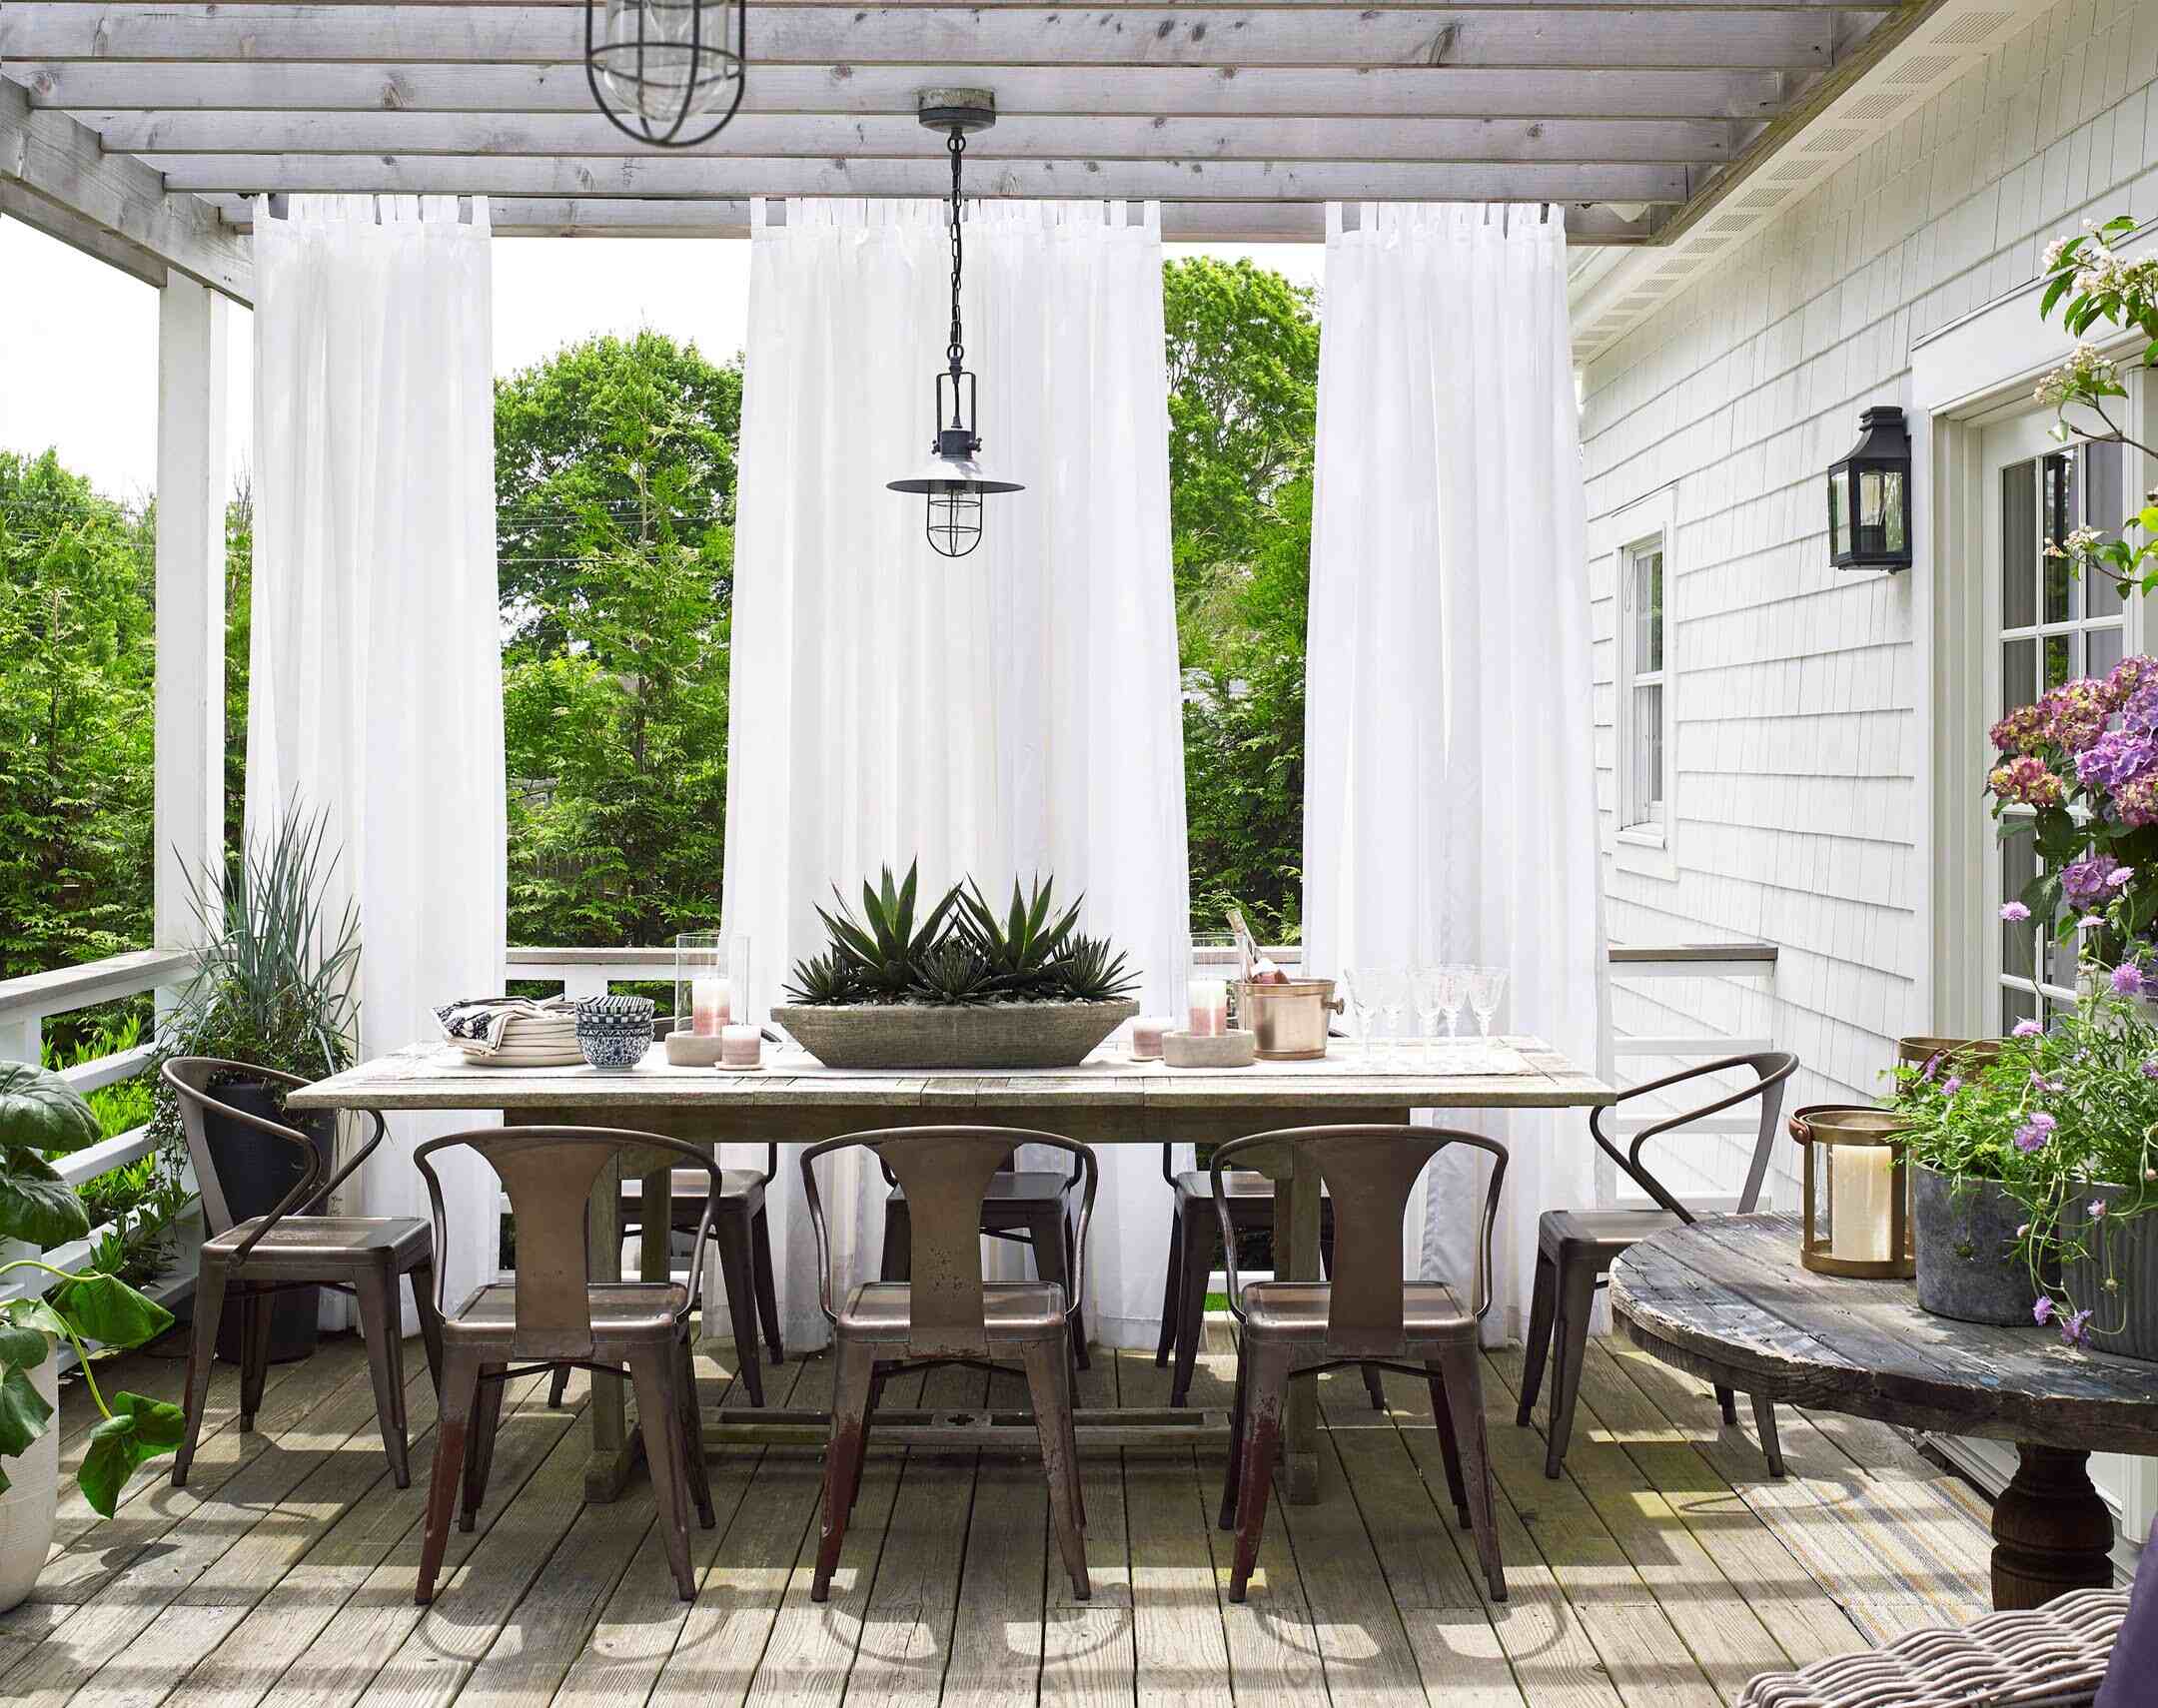
- Create a cozy seating area: Arrange outdoor furniture, such as comfortable chairs or a cozy lounge area, under the string lights. This will provide a perfect spot to relax, entertain, and enjoy the enchanting atmosphere.
- Add complementary decor: Enhance the beauty of your outdoor string lights by adding complementary decor. Consider incorporating lanterns, potted plants, or decorative elements that complement the style and ambiance you want to create.
- Host gatherings and gatherings: Plan gatherings, parties, or intimate dinners under the warm glow of the string lights. Your outdoor space will now become an inviting and magical setting for memorable moments with friends and loved ones.
- Experiment with different lighting effects: Play around with different lighting effects by connecting your string lights to dimmer switches or using colored bulbs. This will allow you to create different moods and atmospheres for various occasions.
- Extend the outdoor season: With the addition of string lights, you can extend the usability of your outdoor space well into the evening and cooler seasons. Embrace the cozy atmosphere created by the lights, even when the temperature drops.
- Maintain and care for your lights: Regularly inspect and clean your outdoor string lights to keep them in optimal condition. Check for any loose connections, replace bulbs if needed, and store them properly when not in use to prolong their lifespan.
- Capture the beauty: Take photos of your beautifully lit outdoor space to capture the magic and share it with others. Share your creativity and inspire others to create their own stunning outdoor lighting arrangements.
- Enjoy the moment: Above all, take the time to appreciate and enjoy the serene, inviting ambiance created by your outdoor string lights. Spend peaceful evenings reading, stargazing, or simply unwinding in the enchanting glow.
By following these steps and fully embracing the beauty of your outdoor string lights, you can create a captivating and inviting space that you’ll love spending time in. So go ahead, relax, and savor the enchanting atmosphere of your beautifully illuminated patio or deck.
Conclusion
Congratulations on successfully hanging your outdoor string lights! By following the step-by-step guide, you’ve transformed your patio or deck into a captivating and magical space. The warm glow of the lights creates a cozy ambiance and sets the stage for memorable moments with friends and family.
Throughout the process, you’ve learned the importance of planning, measuring, and choosing the right materials to ensure a seamless installation. By carefully determining the length, placement, and spacing of the lights, you’ve created a visually appealing lighting arrangement. Connecting and securing the lights has provided stability and prevented any swaying or falling during inclement weather.
Testing and adjusting the lighting allowed you to personalize and perfect the ambiance, ensuring a stunning display that suits your style and desired atmosphere. Now, it’s time to sit back and enjoy the enchanting beauty of your outdoor string lights. Whether you’re hosting a gathering, relaxing after a long day, or simply enjoying the serene glow, your new outdoor oasis is sure to bring joy and tranquility.
Remember to maintain and care for your outdoor string lights to keep them shining brightly for years to come. Regularly inspecting, cleaning, and storing them properly will ensure their longevity and continued enjoyment.
So, grab a cup of your favorite beverage, gather loved ones, and bask in the beauty of your illuminated outdoor space. Let the soft glow of the lights create unforgettable memories and inspire moments of connection and joy. Cheers to many evenings filled with laughter, tranquility, and the magical ambiance of your outdoor string lights!
Now that you've mastered hanging string lights, why not brighten your evenings even further? Dive into our guide on patio lighting ideas, where you'll find various ways to illuminate your outdoor space beautifully. For those feeling crafty, our collection of DIY projects is perfect for boosting your home's curb appeal. Whether you're lighting up a garden party or upgrading your front yard, these resources will surely spark your creativity and help transform your space.
Frequently Asked Questions about How To Hang Outdoor String Lights On Your Patio Or Deck
Was this page helpful?
At Storables.com, we guarantee accurate and reliable information. Our content, validated by Expert Board Contributors, is crafted following stringent Editorial Policies. We're committed to providing you with well-researched, expert-backed insights for all your informational needs.


0 thoughts on “How To Hang Outdoor String Lights On Your Patio Or Deck”