Home>Renovation & DIY>Home Renovation Guides>How To Cover A Crawl Space Opening
Home Renovation Guides
How To Cover A Crawl Space Opening
Modified: August 17, 2024
Learn how to cover a crawl space opening with our comprehensive home renovation guide. Find step-by-step instructions and expert tips.
(Many of the links in this article redirect to a specific reviewed product. Your purchase of these products through affiliate links helps to generate commission for Storables.com, at no extra cost. Learn more)
Introduction
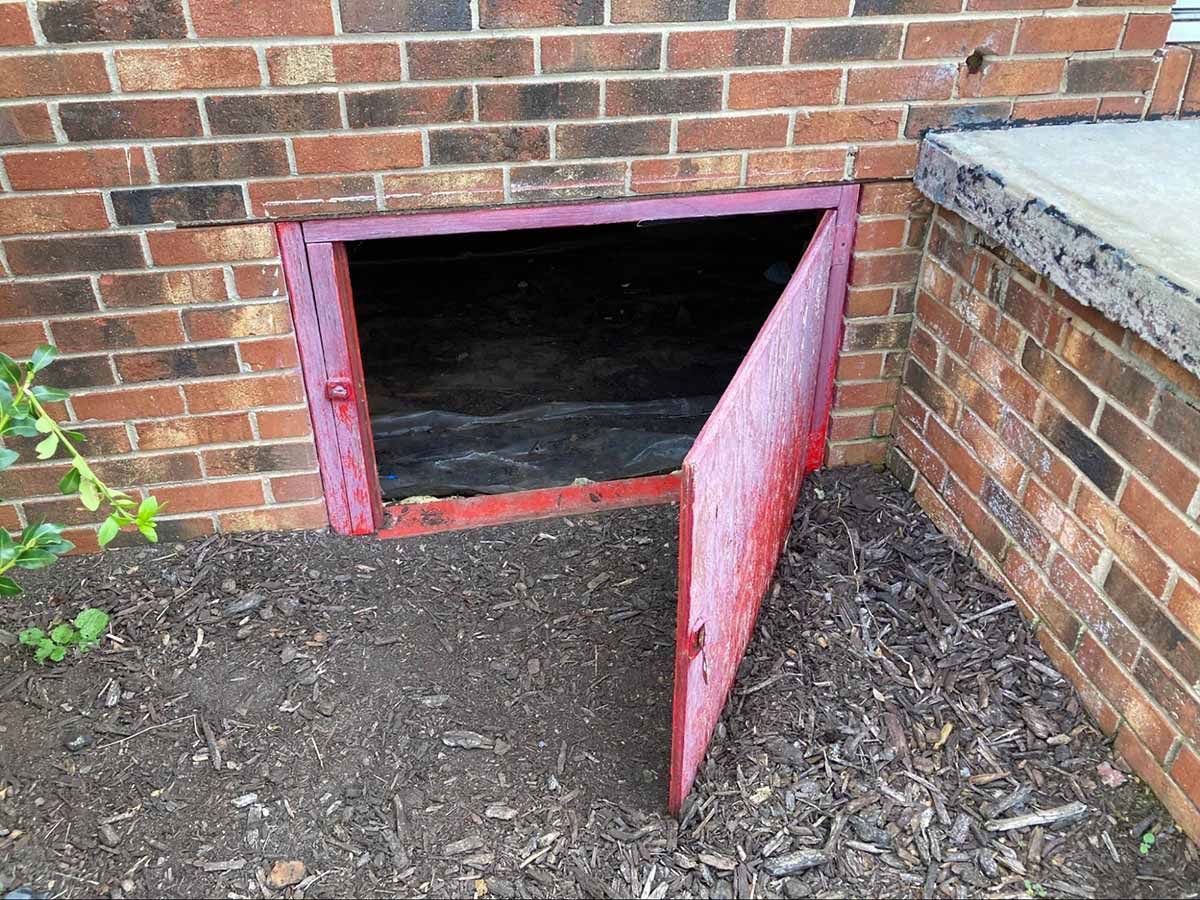
Covering a crawl space opening is a crucial step in maintaining the integrity and functionality of your home. Whether you're looking to enhance energy efficiency, prevent pests from entering, or simply improve the overall appearance of your property, properly covering a crawl space opening is a task that requires attention to detail and the right materials. By following the steps outlined in this guide, you can effectively tackle this project and enjoy the benefits of a well-protected crawl space.
A crawl space serves as a vital component of a home's foundation, providing access to essential utilities such as plumbing, electrical wiring, and HVAC systems. However, an uncovered crawl space opening can lead to a range of issues, including increased energy costs, moisture accumulation, and unwanted intrusions from pests and wildlife. By taking the time to cover the opening with the appropriate materials, you can mitigate these potential problems and create a more secure and efficient environment within your home.
In addition to practical considerations, covering a crawl space opening can also contribute to the overall aesthetic appeal of your property. A well-designed cover can seamlessly blend with the exterior of your home, enhancing its visual appeal while maintaining functionality. Whether you opt for a simple, utilitarian cover or a more decorative solution, the process of covering a crawl space opening offers an opportunity to improve the curb appeal of your home.
As you embark on this home improvement project, it's important to approach it with a clear understanding of the steps involved and the materials required. By following the comprehensive guide provided here, you'll gain the knowledge and confidence needed to successfully cover a crawl space opening and reap the benefits of a more secure, efficient, and visually appealing home.
Key Takeaways:
- Protect your home by covering the crawl space opening with the right materials and precise measurements. This helps prevent energy loss, moisture buildup, and unwanted pests, while enhancing your home’s appearance.
- Ensure a secure and visually appealing crawl space cover by following the steps from gathering materials to adding finishing touches. This project improves your home’s resilience, functionality, and curb appeal.
Read more: When Should You Open Crawl Space Vents
Step 1: Gather Necessary Materials
Before embarking on the task of covering a crawl space opening, it's essential to gather all the necessary materials to ensure a smooth and efficient process. By having the right supplies on hand, you can streamline the installation and create a durable and effective cover for the crawl space. Here's a detailed list of the materials you'll need:
Materials:
- Measuring Tape: Accurately measuring the dimensions of the crawl space opening is crucial for ensuring a precise fit for the cover.
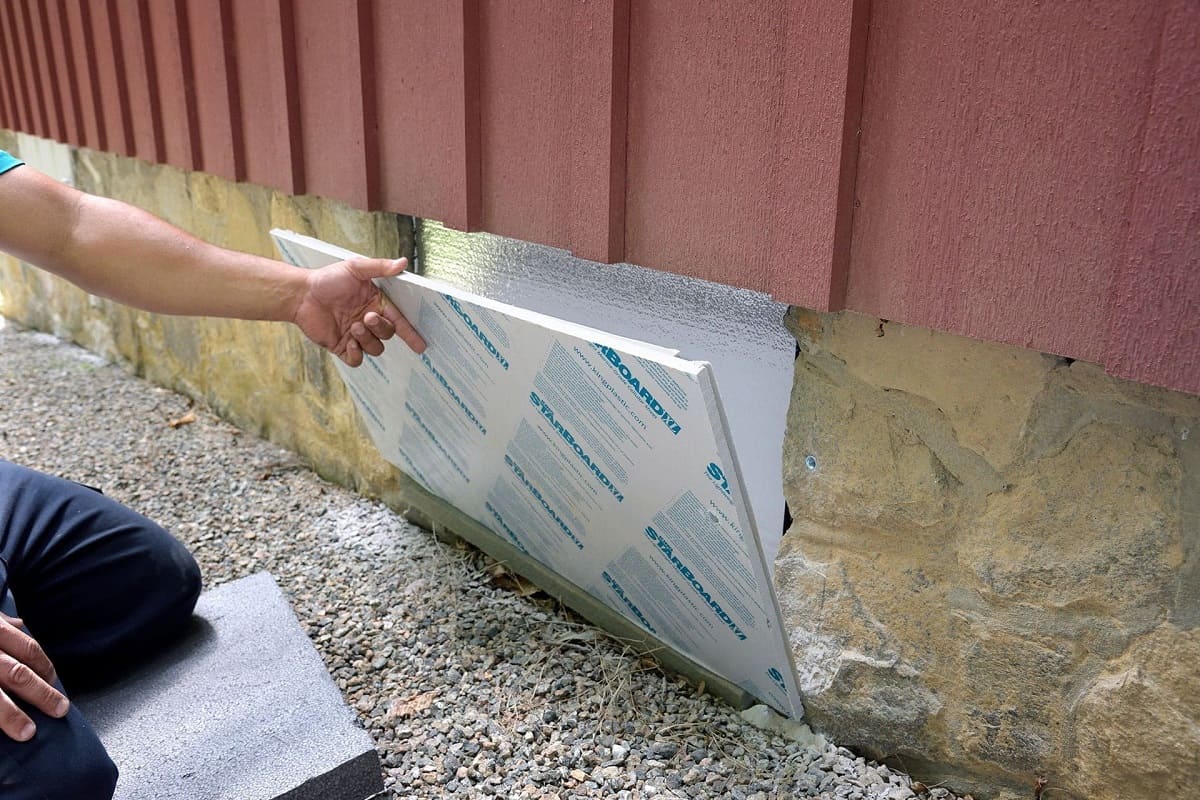
- Plywood or Composite Board: Select a sturdy and weather-resistant material that can withstand outdoor conditions and provide adequate protection for the crawl space.
- Hinges and Latches: These hardware components will be essential for securing the cover in place while still allowing for easy access when needed.
- Screws or Nails: Depending on the chosen cover material, you'll need appropriate fasteners to securely attach the cover to the crawl space opening.
- Drill or Hammer: A drill with the appropriate drill bits or a hammer will be necessary for affixing the hinges, latches, and fasteners to the cover material.
- Weatherproof Sealant: To enhance the durability and weather resistance of the cover, a high-quality weatherproof sealant is essential for treating the edges and seams.
- Paint and Primer (Optional): If you desire a more polished and visually appealing cover, consider obtaining paint and primer to match the cover to the exterior of your home.
Additional Considerations:
- Safety Equipment: It's important to prioritize safety, so be sure to have protective gear such as gloves and safety glasses on hand.
- Assistance: Depending on the size and weight of the cover material, enlisting the help of a friend or family member may be beneficial during the installation process.
By gathering these materials in advance, you'll be well-prepared to proceed with the subsequent steps of measuring, cutting, and installing the cover for the crawl space opening. With the right materials at your disposal, you can approach this home improvement project with confidence and efficiency, ultimately achieving a well-protected and visually appealing crawl space cover.
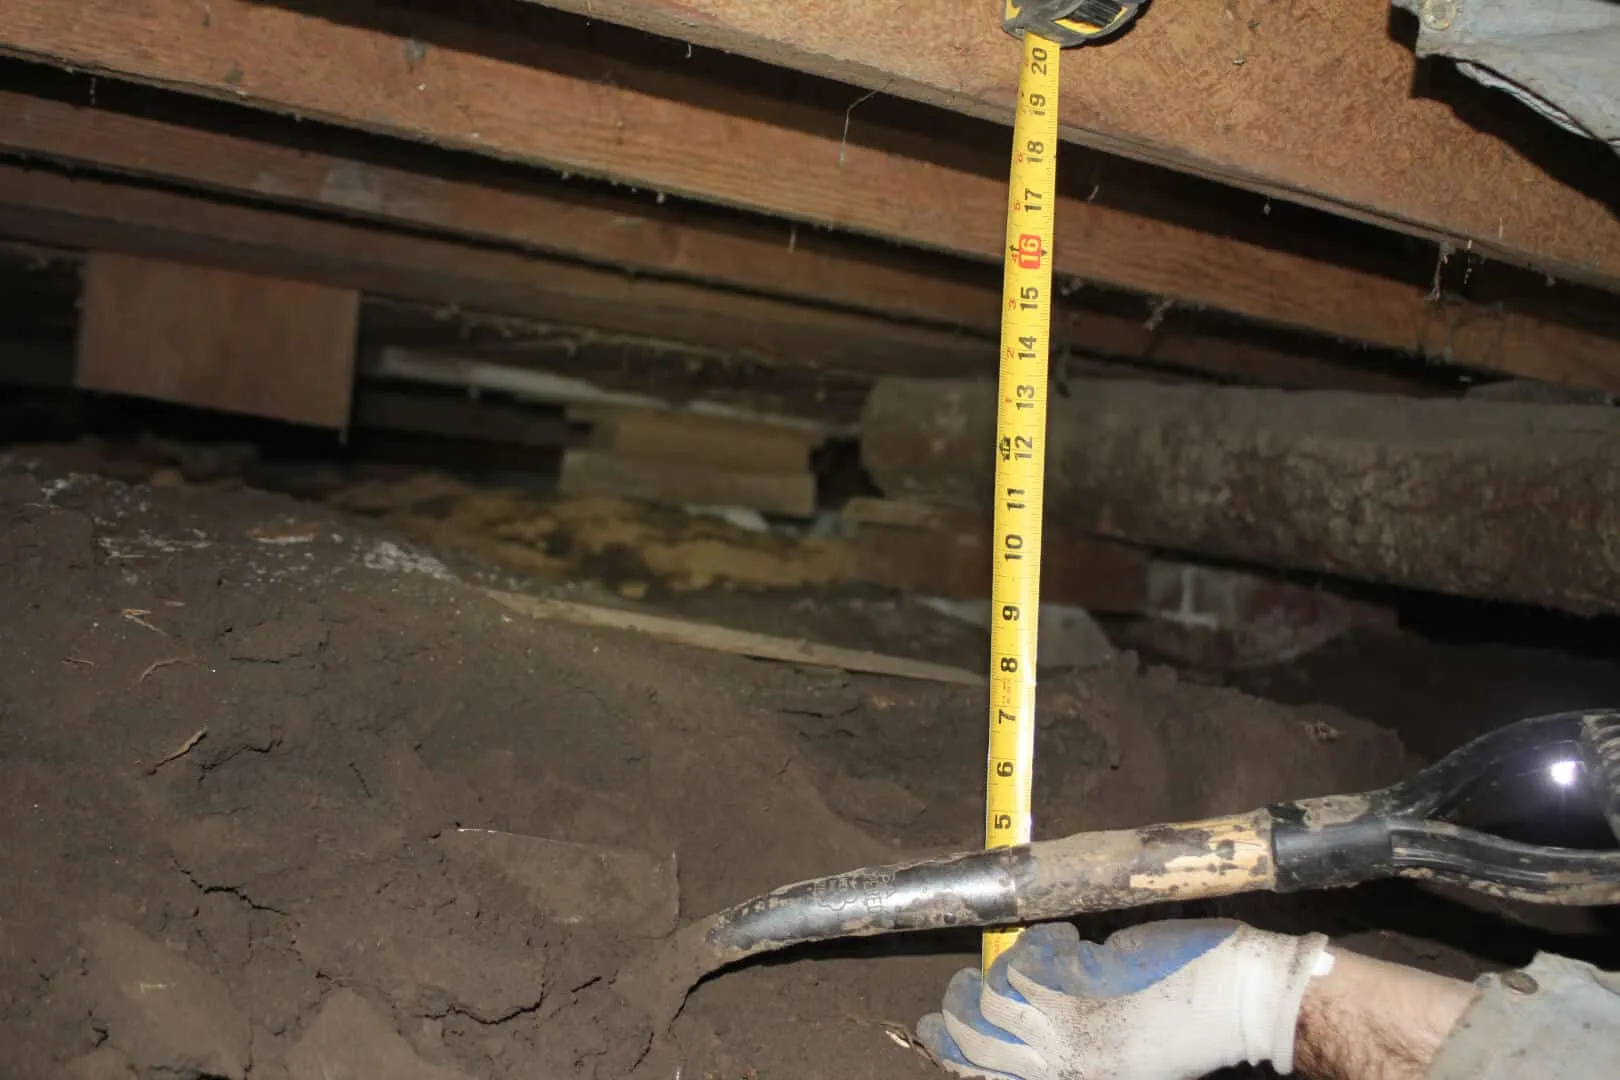
Step 2: Measure the Crawl Space Opening
Accurately measuring the dimensions of the crawl space opening is a critical initial step in the process of covering it effectively. By obtaining precise measurements, you can ensure that the cover will fit securely and provide the necessary protection for the crawl space. Here's a detailed guide on how to measure the crawl space opening with precision:
-
Gather the Necessary Tools: Before beginning the measurement process, gather a measuring tape, pencil, and paper to record the dimensions. It's essential to use a reliable measuring tape that allows for accurate readings.
-
Measure the Width and Length: Start by measuring the width and length of the crawl space opening. Position the measuring tape horizontally across the width to obtain an exact measurement. Then, repeat the process vertically to measure the length. Record these measurements carefully to avoid errors during the subsequent steps.
-
Check for Irregularities: In some cases, crawl space openings may not have perfectly straight edges or uniform dimensions. It's crucial to account for any irregularities or variations in the shape of the opening. Take additional measurements at different points along the width and length to capture any discrepancies.
-
Consider Clearance Requirements: Depending on the type of cover material and the method of installation, it's important to consider any necessary clearance around the edges of the crawl space opening. If the cover will be hinged or require space for latches, factor in these clearance requirements when recording the measurements.
-
Double-Check the Measurements: Once you have obtained the initial measurements, double-check them to ensure accuracy. It's common for errors to occur during the measuring process, so taking the time to verify the dimensions can prevent potential issues during the later stages of cover installation.
-
Record the Measurements: Document the precise measurements of the crawl space opening on paper, noting the width, length, and any irregularities or clearance requirements. Having a clear record of the measurements will serve as a valuable reference point when cutting the cover material to size.
By meticulously measuring the crawl space opening and documenting the dimensions accurately, you can lay the groundwork for a successful cover installation. These precise measurements will guide the subsequent steps of cutting the cover material to size and ultimately result in a well-fitted and secure cover for the crawl space opening.
Read more: What To Use To Cover Crawl Space Vents
Step 3: Cut the Cover Material to Size
With the precise measurements of the crawl space opening in hand, the next crucial step is to cut the cover material to the appropriate size. This process requires careful attention to detail and the use of the right tools to ensure a precise fit for the cover. Here's a detailed guide on how to cut the cover material to size effectively:
-
Prepare the Work Area: Before beginning the cutting process, create a designated work area with ample space to maneuver the cover material. Lay the material on a flat, stable surface, ensuring that it is adequately supported to prevent shifting during cutting.
-
Mark the Measurements: Transfer the recorded measurements of the crawl space opening onto the cover material using a pencil or marker. Use the measuring tape to mark the precise width and length, taking into account any irregularities or clearance requirements identified during the measurement process.
-
Use the Right Tools: Depending on the type of cover material, select the appropriate cutting tools to achieve clean and accurate cuts. For plywood or composite board, a circular saw or jigsaw may be suitable for cutting straight lines, while a handsaw can be used for more intricate cuts.
-
Follow the Marked Lines: Carefully align the cutting tool with the marked lines on the cover material. Exercise caution and precision as you guide the tool along the designated cutting path, ensuring that the cuts are straight and in accordance with the measured dimensions.
-
Account for Hinge and Latch Clearances: If the cover will be hinged or require latches, make additional cuts or adjustments to accommodate the necessary clearances. This may involve creating notches or recessed areas in the cover material to ensure a seamless fit when installed over the crawl space opening.
-
Double-Check the Fit: Once the cover material has been cut to size, place it over the crawl space opening to verify the fit. Ensure that the dimensions align accurately with the opening and make any minor adjustments if needed to achieve a snug and secure fit.
By meticulously following these steps and exercising precision during the cutting process, you can create a cover that fits the crawl space opening with precision. This attention to detail sets the stage for the subsequent installation of the cover, ensuring a seamless and effective solution for protecting the crawl space.
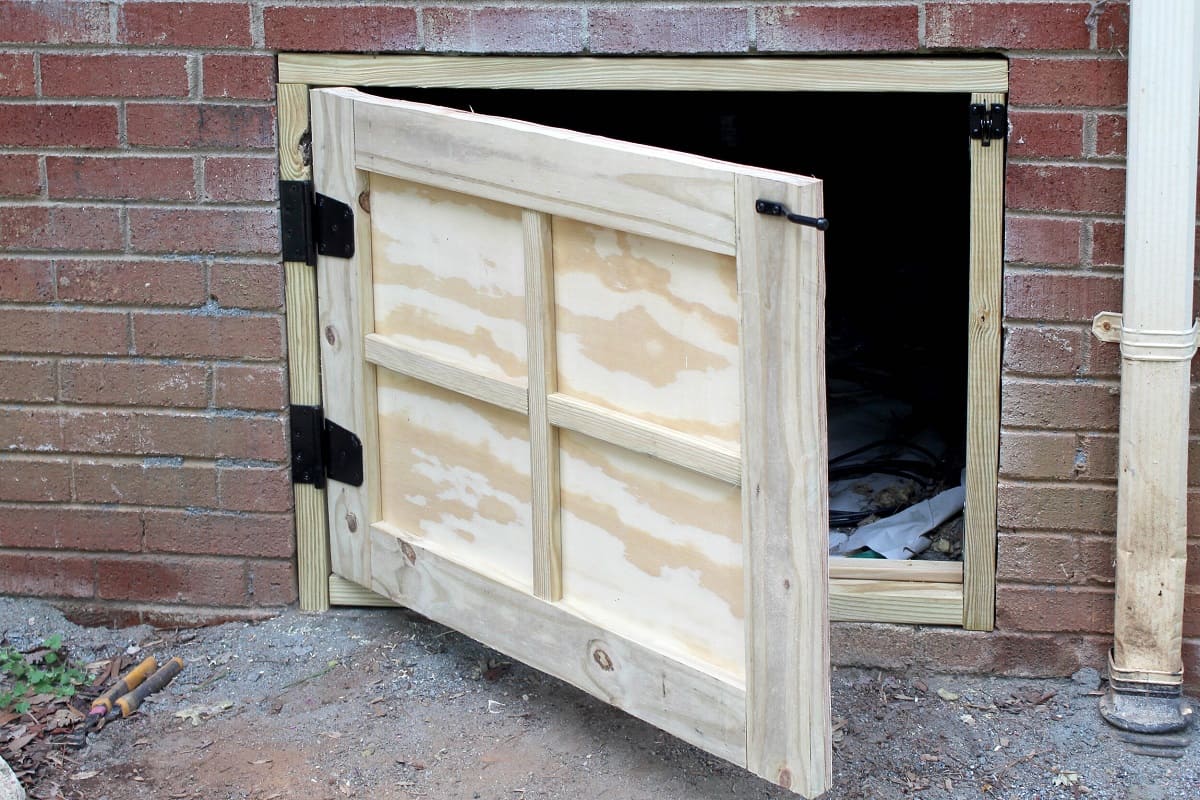
Step 4: Install the Cover
With the cover material cut to the precise dimensions of the crawl space opening, the next pivotal step is the installation process. Proper installation is essential to ensure that the cover fits securely, provides effective protection, and seamlessly integrates with the exterior of your home. Here's a comprehensive guide on how to install the cover with precision and efficiency:
-
Position the Cover: Carefully lift the cover material and position it over the crawl space opening, ensuring that it aligns accurately with the edges. Enlist the assistance of a friend or family member if the cover is large or heavy to prevent any mishaps during positioning.
-
Attach Hinges: If the cover is designed to be hinged for easy access to the crawl space, affix the hinges to the cover and the adjacent surface around the opening. Use a drill and appropriate screws to secure the hinges in place, ensuring that they allow for smooth movement when opening and closing the cover.
-
Secure Latches: For covers that require latches to hold them in place, install the latches at strategic points along the edges of the cover. Ensure that the latches provide a secure closure, preventing any unauthorized access to the crawl space while still allowing for convenient entry when necessary.
-
Weatherproof Sealant: Apply a high-quality weatherproof sealant along the edges of the cover where it meets the surrounding surface. This sealant serves to enhance the weather resistance of the installation, preventing moisture infiltration and ensuring long-term durability.
-
Fasten the Cover: Use screws or nails to fasten the cover securely to the crawl space opening, ensuring that it remains firmly in place. Pay attention to the spacing and distribution of fasteners to create a uniform and stable attachment.
-
Test the Functionality: Once the cover is installed, test its functionality by opening and closing it to ensure smooth operation. Verify that the hinges and latches function as intended, providing both security and accessibility as needed.
-
Optional Finishing Touches: If desired, consider applying a coat of paint and primer to the cover to match it with the exterior of your home. This step adds a polished and cohesive look to the installation, enhancing the overall aesthetic appeal.
By following these detailed steps and exercising care and precision during the installation process, you can achieve a well-installed cover for the crawl space opening. This installation not only provides essential protection for the crawl space but also contributes to the overall functionality and visual appeal of your home.
Step 5: Secure the Cover in Place
Securing the cover in place is a critical aspect of the installation process, ensuring that it remains stable, provides effective protection, and integrates seamlessly with the surrounding environment. By following a systematic approach to securing the cover, you can enhance its durability and functionality while maintaining the overall aesthetic appeal of your home.
1. Evaluate Attachment Points
Before securing the cover, carefully evaluate the attachment points around the crawl space opening. Identify strategic locations where screws or nails can be inserted to fasten the cover securely. It's essential to distribute the attachment points evenly to create a uniform and stable connection between the cover and the opening.
Read more: How To Maintain A Crawl Space
2. Choose the Right Fasteners
Selecting the appropriate fasteners is crucial for ensuring a secure and long-lasting installation. Depending on the type of cover material and the surrounding surface, opt for corrosion-resistant screws or nails that are suitable for outdoor applications. Consider the thickness and composition of the cover material when choosing the size and type of fasteners to achieve optimal strength and stability.
3. Maintain Alignment and Stability
As you begin securing the cover in place, prioritize maintaining alignment and stability throughout the process. Ensure that the cover remains positioned accurately over the crawl space opening, and use a level to confirm that it sits flush with the surrounding surface. This attention to detail contributes to a professional and visually appealing installation while preventing potential issues with misalignment.
4. Implement Uniform Fastening
Carefully drive the selected fasteners through the cover material and into the adjacent surface, maintaining a consistent and uniform fastening pattern. Avoid over-tightening the fasteners, as this can lead to warping or damage to the cover material. Instead, aim for a secure but not overly tight connection that provides stability without compromising the integrity of the cover.
5. Weatherproofing and Sealing
Incorporate weatherproofing measures during the securing process by applying a high-quality sealant around the edges of the cover where it meets the surrounding surface. This sealant serves as a protective barrier, preventing moisture infiltration and enhancing the long-term durability of the installation. Pay particular attention to areas where fasteners are inserted, ensuring that they are effectively sealed against the elements.
Read more: How To Inspect A Crawl Space
6. Test Stability and Security
Upon completing the securing process, conduct a thorough assessment of the cover's stability and security. Apply gentle pressure to various points on the cover to verify its resistance to shifting or movement. Additionally, test the fasteners to ensure that they provide a reliable and steadfast connection, reinforcing the overall integrity of the installation.
By meticulously following these steps and prioritizing precision and stability during the securing process, you can achieve a well-secured cover for the crawl space opening. This meticulous approach not only enhances the functionality and protection provided by the cover but also contributes to the overall resilience and visual harmony of your home's exterior.
Step 6: Add Finishing Touches
After successfully installing and securing the cover for your crawl space opening, adding finishing touches can elevate the overall aesthetic appeal and functionality of the installation. These final enhancements not only contribute to the visual harmony of your home's exterior but also serve to reinforce the durability and longevity of the cover. Here's a detailed guide on how to add finishing touches to the crawl space cover:
1. Paint and Primer Application
Consider applying a coat of paint and primer to the cover to match it with the exterior of your home. Opt for high-quality exterior paint that is designed to withstand outdoor conditions and provides long-lasting protection. Before painting, ensure that the cover is clean and free of any debris or dust. Apply a layer of primer to promote adhesion and enhance the durability of the paint. Once the primer has dried, carefully apply the chosen paint color, ensuring even coverage and a smooth finish.
2. Decorative Accents
If you seek to infuse a touch of personal style and creativity into the cover, consider incorporating decorative accents. This could involve adding trim, molding, or decorative hardware elements that complement the architectural style of your home. Select accents that are weather-resistant and capable of withstanding outdoor exposure, ensuring that they enhance the visual appeal of the cover while maintaining functionality.
Read more: What Is A Crawl Space?
3. Weatherproof Sealant Application
Revisit the edges of the cover and apply an additional layer of weatherproof sealant to reinforce the protection against moisture and environmental elements. Pay particular attention to any areas where fasteners are inserted, ensuring that they are effectively sealed to prevent water infiltration. The application of weatherproof sealant serves as a proactive measure to safeguard the cover against potential weather-related damage and prolong its lifespan.
4. Routine Maintenance Considerations
Incorporate routine maintenance considerations into the final touches by establishing a maintenance schedule for the cover. This may involve periodic inspections to ensure that the cover remains secure and free of any signs of wear or damage. Additionally, consider applying a protective coating or sealant at regular intervals to maintain the cover's resilience and appearance over time.
By attending to these finishing touches, you can elevate the crawl space cover from a functional necessity to a visually appealing and enduring addition to your home's exterior. These final enhancements not only contribute to the overall cohesion and aesthetics of your property but also reinforce the long-term durability and functionality of the cover, ensuring that it continues to serve its protective purpose effectively.
Conclusion
In conclusion, covering a crawl space opening is a fundamental aspect of maintaining a secure, efficient, and visually appealing home environment. By following the comprehensive steps outlined in this guide, you can successfully navigate the process of covering a crawl space opening with precision and confidence. From gathering the necessary materials to adding the final finishing touches, each step contributes to the creation of a well-protected and seamlessly integrated cover for the crawl space.
The significance of covering a crawl space opening extends beyond mere functionality, encompassing essential aspects of energy efficiency, pest prevention, and overall property aesthetics. A well-designed and properly installed cover not only safeguards the crawl space from potential moisture infiltration and unwanted intrusions but also contributes to the overall visual harmony of the home's exterior.
By meticulously measuring the crawl space opening, cutting the cover material to size, and securing the cover in place, you establish a foundation for a durable and effective installation. The attention to detail and precision exercised during these steps ensures that the cover fits securely and provides the necessary protection for the crawl space, enhancing the overall resilience of your home.
Furthermore, the addition of finishing touches, such as paint and primer application, decorative accents, and weatherproof sealant, elevates the cover from a functional necessity to a visually appealing and enduring addition to your home's exterior. These final enhancements not only contribute to the overall cohesion and aesthetics of your property but also reinforce the long-term durability and functionality of the cover, ensuring that it continues to serve its protective purpose effectively.
In essence, covering a crawl space opening is a home improvement project that encompasses practicality, functionality, and visual appeal. By embracing this process with the knowledge and guidance provided in this comprehensive guide, you can enhance the overall integrity and aesthetics of your home while creating a more secure and efficient environment within your property.
Now that you've mastered covering a crawl space, why not delve deeper into understanding what a crawl space really is? Our next article breaks down everything you need to know about crawl spaces, from their functions in home construction to the best ways to maintain them. Whether you're a DIY enthusiast or just curious about home structures, this guide is packed with valuable insights that will surely pique your interest.
Frequently Asked Questions about How To Cover A Crawl Space Opening
Was this page helpful?
At Storables.com, we guarantee accurate and reliable information. Our content, validated by Expert Board Contributors, is crafted following stringent Editorial Policies. We're committed to providing you with well-researched, expert-backed insights for all your informational needs.

0 thoughts on “How To Cover A Crawl Space Opening”