Home>Furniture>Bedroom Furniture>How To Convert A Queen Bed Frame To A King
Bedroom Furniture
How To Convert A Queen Bed Frame To A King
Modified: November 2, 2024
Learn how to easily convert a queen bed frame to a king to update your bedroom furniture. Upgrade your sleeping space without buying a new bed.
(Many of the links in this article redirect to a specific reviewed product. Your purchase of these products through affiliate links helps to generate commission for Storables.com, at no extra cost. Learn more)
Introduction
Welcome to the world of bedroom furniture where comfort, style, and functionality intersect. Your bed frame plays a crucial role in creating the perfect sleeping sanctuary. But what happens when you want to upgrade from a queen-sized bed to a king-sized one? Don’t worry, we’ve got you covered!
In this article, we will guide you through the process of converting your queen bed frame to accommodate a king-sized mattress. By following these step-by-step instructions, you can save money by repurposing your existing bed frame while enjoying the benefits of a larger sleeping space.
Before diving into the conversion process, it’s important to assess the feasibility of transforming your queen bed frame. Some bed frames are not designed to be resized, so make sure to check the construction and materials of your frame before proceeding. If you’re unsure, consult the manufacturer’s instructions or seek the advice of a professional.
Now that we’ve established the groundwork, let’s begin our journey of transforming your queen bed frame into a king-sized dreamland!
Key Takeaways:
- Transform your queen bed frame into a king-sized oasis by carefully assessing, measuring, and modifying the frame to accommodate a larger mattress. Enjoy a cost-effective upgrade with personalized style and comfort.
- With patience and attention to detail, convert your queen bed frame to a king-sized haven. Thoroughly test and adjust the modified frame for optimal stability and comfort, ensuring a restful night’s sleep in your newly transformed sleeping sanctuary.
Read more: What Bed Is Bigger: King Or Queen
Step 1: Assess the Queen Bed Frame
The first step in converting your queen bed frame to a king is to carefully assess the current frame. Examine its construction, materials, and overall condition to determine if it is suitable for modification.
Start by inspecting the frame’s structure. Is it sturdy and in good shape? Look for any signs of wear and tear, such as loose joints or broken slats. If you notice any major issues, it’s best to consider purchasing a new bed frame instead of attempting to convert the existing one.
Next, consider the materials used in the construction of the frame. Wood and metal bed frames are common, and each has its own advantages and challenges when it comes to resizing. Metal frames, for example, may be easier to modify due to their adjustable nature, while wooden frames may require more extensive alterations.
Another important factor to consider is the design of the queen bed frame. Some frames have decorative elements or intricate features that may not be easily adjustable. If your frame has elaborate headboards, footboards, or side rails, you’ll need to plan accordingly to ensure they can be incorporated into the modified king-sized frame.
Additionally, check if your queen bed frame has a center support beam. This beam provides extra stability and prevents your mattress from sagging. If your frame doesn’t have one, you may need to install one during the conversion process to support the larger size of the king mattress.
After thoroughly examining your queen bed frame, consider whether it is worth the effort and cost involved in converting it to a king-sized frame. Keep in mind that while converting may save you money compared to purchasing a new frame, it does require time, effort, and potentially additional materials.
Once you’ve assessed your queen bed frame and determined that it is suitable for conversion, you’re ready to move on to step 2: measuring and purchasing the required materials.
Step 2: Measure and Purchase the Required Materials
Now that you’ve assessed your queen bed frame and confirmed it’s suitable for conversion, it’s time to measure the frame and purchase the materials needed for the transformation.
The first measurement you’ll need is the length of the queen bed frame. Use a tape measure to determine the distance from the headboard to the footboard. This measurement will help you determine if the frame can accommodate the length of a king-sized mattress. Typically, a king-sized mattress is longer than a queen, so make sure there is enough space for the bed frame to be extended.
Next, measure the width of the queen bed frame. This measurement will determine if the frame can be modified to support the wider dimensions of a king-sized mattress.
With these measurements in hand, it’s time to purchase the required materials. Depending on the type of bed frame and the modifications needed, you may need additional wooden slats, metal support brackets, screws, or other hardware.
If your queen bed frame lacks a center support beam, this is an opportunity to purchase a sturdy one to provide added stability for the larger mattress. Ensure the support beam is compatible with the frame and sized appropriately for a king bed.
Consider the aesthetic appeal as well. If you want the converted frame to match the original design, purchase paint or stain that matches the existing color and finish. This will help maintain the cohesive look of your bedroom furniture.
When purchasing materials, it’s important to ensure they are of high quality and will withstand the weight and stress of a king-sized mattress. Invest in sturdy materials that will provide ample support for your new sleeping arrangement.
Once you have all the necessary materials, you’re ready to move on to step 3: disassembling the queen bed frame.
Step 3: Disassemble the Queen Bed Frame
With the required materials in hand, it’s time to disassemble the queen bed frame. This step is essential to prepare the frame for the necessary modifications.
Start by removing the mattress, bedding, and any accessories from the bed frame. Clear the area around the frame to ensure you have enough space to work comfortably.
Next, carefully remove any headboards, footboards, and side rails that are attached to the frame. Be sure to keep track of any screws or hardware that may be required for reassembly later. Place these components in a safe location where they won’t get damaged or misplaced.
Once all additional components have been removed, it’s time to disassemble the frame itself. Use a screwdriver or Allen wrench (depending on the type of hardware used) to loosen and remove the screws or bolts that hold the frame together.
As you disassemble the frame, keep track of the order in which the pieces come apart. This will make it easier to reassemble the modified frame later on. Consider taking pictures or drawing diagrams to help you remember the configuration and placement of the various components.
As you remove each piece of the frame, set them aside in a neat and organized manner. This will prevent any confusion or misplacement of parts. Keep all hardware and screws in a separate container or bag, making sure it’s labeled and easily accessible.
Once the entire bed frame has been disassembled, take a moment to assess its condition. Look for any signs of damage or wear that may need to be addressed before proceeding with the conversion. If necessary, make any necessary repairs or replacements to ensure a sturdy and stable frame for your king-sized bed.
With the queen bed frame fully disassembled, you’re now ready to move on to step 4: adjusting the bed frame length.
Step 4: Adjust the Bed Frame Length
Now that you’ve disassembled the queen bed frame, it’s time to adjust its length to accommodate the larger dimensions of a king-sized mattress. This step is crucial to ensure the proper fit and functionality of the modified frame.
Start by measuring the length of the king-sized mattress to determine the required length of the bed frame extension. Typically, a king-sized mattress is around 80 inches in length. Compare this measurement to the original length of the queen bed frame to determine the necessary extension.
If your queen bed frame has an adjustable length feature or extension brackets, you may be able to simply extend the frame to the desired length. Make sure to follow the manufacturer’s instructions for proper extension techniques and secure the frame in place using the provided hardware.
If your queen bed frame doesn’t have an extension feature, you will need to add length to the frame manually. This can be done by acquiring additional wooden slats or boards that match the existing frame’s material and color.
Using a saw, trim the additional wooden slats or boards to the desired length. It’s important to ensure a precise and accurate cut to maintain a seamless and sturdy frame extension.
Next, align the additional slats or boards with the existing frame and secure them in place using appropriate screws or brackets. Make sure to space them evenly and align them with the original slats for optimal support.
As you attach the additional slats or boards, double-check their alignment and stability. Ensure they are securely fastened to prevent any movement or sagging of the mattress.
Once the frame extension is attached, give it a thorough inspection to ensure it is level, stable, and properly aligned with the rest of the frame. Make any necessary adjustments and tighten any loose screws or hardware.
With the bed frame length adjusted and secured, you’re one step closer to enjoying your king-sized bed. The next step, step 5, involves modifying the bed frame width to accommodate the wider dimensions of a king mattress.
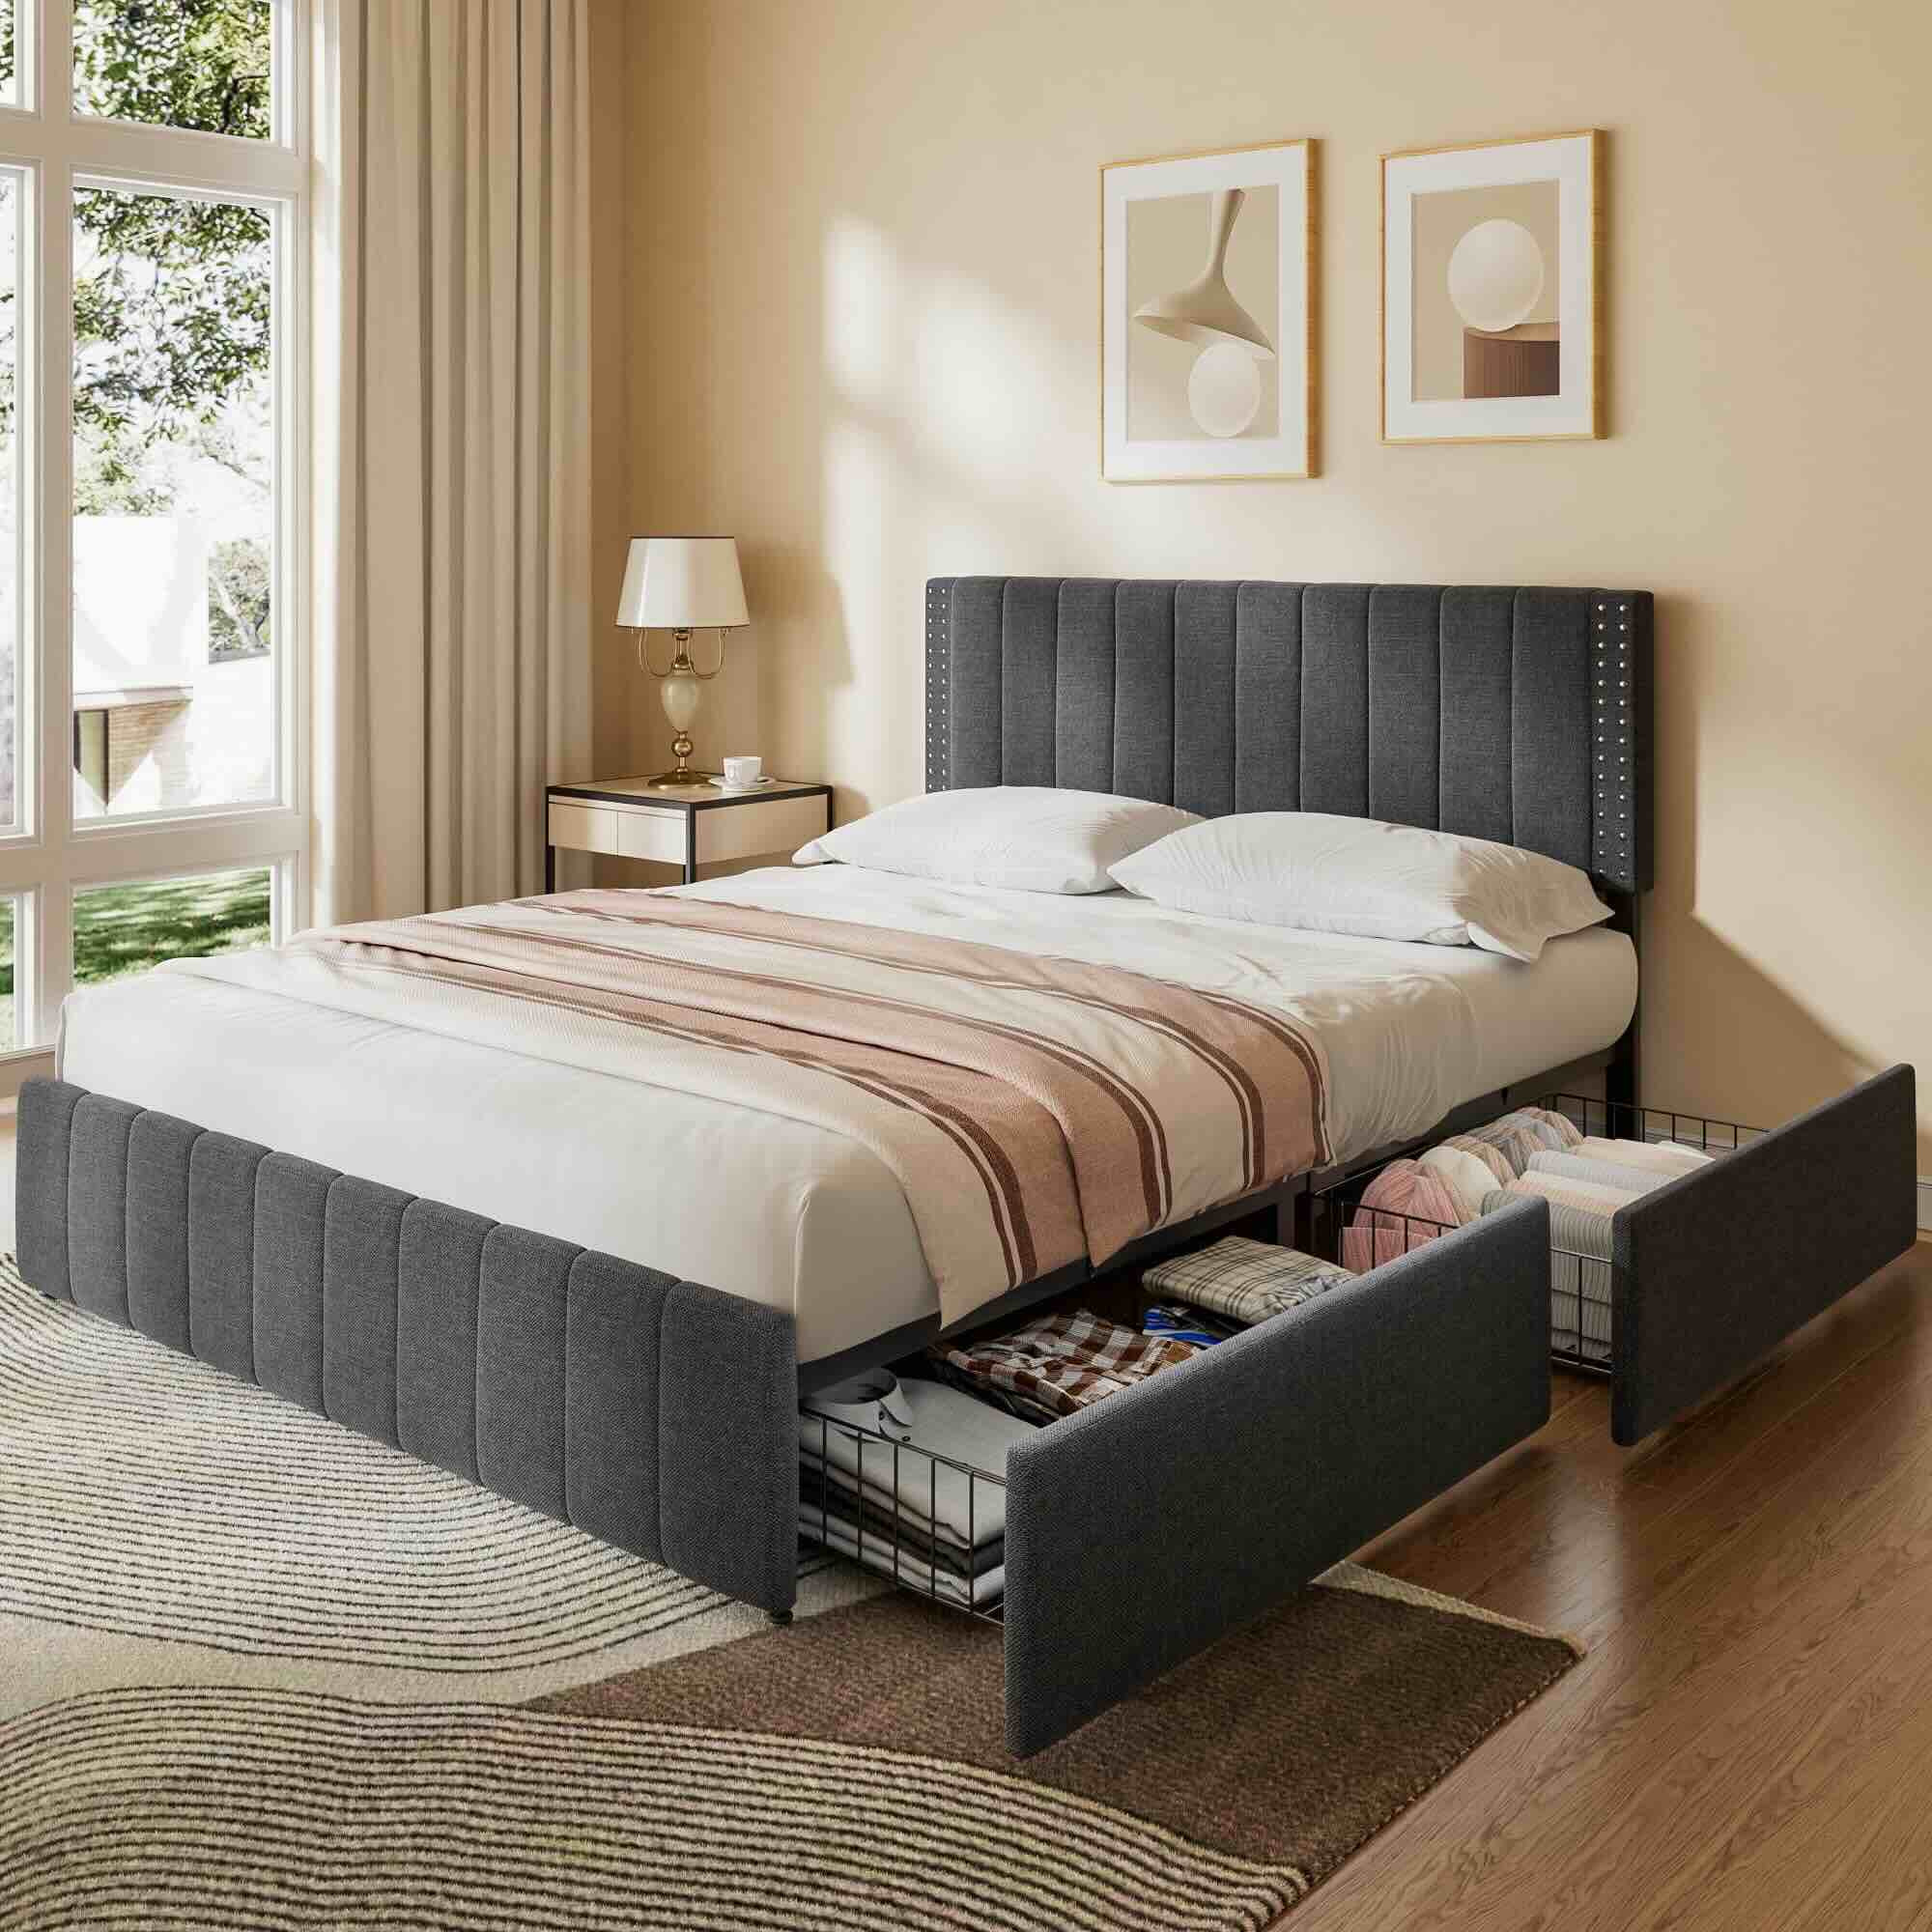
You can convert a queen bed frame to a king by using a bed frame converter kit. These kits typically include extenders for the headboard and footboard, as well as support rails to accommodate the larger mattress size.
Read more: How To Build A Queen Bed Frame
Step 5: Modify the Bed Frame Width
After adjusting the length of your bed frame, it’s time to tackle the width to accommodate the wider dimensions of a king-sized mattress. Modifying the bed frame width is crucial for a proper fit and optimal support.
Start by measuring the width of the king-sized mattress to determine the required width of the modified bed frame. Typically, a king-sized mattress is around 76 inches wide. Compare this measurement to the original width of the queen bed frame to identify the necessary modifications.
If your queen bed frame has adjustable width features or extension brackets, you may be able to simply extend the frame to the desired width. Follow the manufacturer’s instructions to properly adjust the width and secure the frame in place using the provided hardware.
For bed frames without adjustable width features, you will need to make modifications manually. One option is to acquire additional wooden slats or boards that match the material and color of the existing frame.
Measure and cut the additional slats or boards to the required width. It’s important to maintain a precise and accurate cut to ensure a seamless fit and optimal support.
Align the additional slats or boards with the existing frame and secure them in place using appropriate screws or brackets. Make sure to space them evenly and align them with the original slats for consistent support.
As you attach the additional slats or boards, ensure they are securely fastened to prevent any movement or sagging of the mattress. Test the stability of the modified bed frame by applying gentle pressure and checking for any excessive flexing or wobbling.
Once the bed frame width modification is complete, give it a thorough inspection to ensure it is level, stable, and aligned with the rest of the frame. Make any necessary adjustments and tighten any loose screws or hardware.
With the bed frame width modified, you’re now one step closer to enjoying your king-sized bed. The next step, step 6, involves attaching support brackets to ensure optimal stability and strength.
Step 6: Attach Support Brackets
As you near the completion of converting your queen bed frame into a king-sized one, it’s time to focus on attaching support brackets. Support brackets are essential for providing stability and strength to the modified frame, ensuring a solid foundation for your king-sized mattress.
Start by determining the appropriate placement of the support brackets. These brackets usually attach to the side rails or headboard and footboard of the bed frame.
If your queen bed frame already has support brackets that align with the width of a king-sized mattress, you may be able to reuse them. Ensure that the brackets are in good condition and securely fasten them to the newly modified sections of the frame.
If your queen bed frame doesn’t have suitable support brackets, you will need to acquire them. Look for brackets specifically designed to provide support for king-sized beds. These brackets typically come with screws or bolts for easy installation.
Align the support brackets with the side rails or headboard and footboard. Ensure that they are centered and level, providing even support across the width and length of the frame.
Once the brackets are positioned correctly, secure them in place using the provided screws or bolts. Make sure to tighten them adequately, but avoid over-tightening, as it may damage the frame or cause instability.
Test the newly attached support brackets by applying gentle pressure and checking for any wobbling or movement. If any instability is detected, double-check the alignment and tightness of the brackets and make any necessary adjustments.
With the support brackets securely attached, your converted king-sized bed frame is now better equipped to handle the weight and demands of a larger mattress. The next step, step 7, involves reassembling the bed frame to its complete form.
Step 7: Reassemble the Bed Frame
With the necessary modifications and enhancements made to the bed frame, it’s time to put all the pieces back together and reassemble it into its complete form. This step brings your converted queen bed frame into its new life as a king-sized bed.
Begin by gathering all the components of the bed frame that were previously disassembled. Lay them out in an organized manner, ensuring that all screws, bolts, and hardware are easily accessible.
Start by reattaching the headboard and footboard to the side rails. Align them carefully, making sure they are level and securely fastened. Use the appropriate screws or bolts and tighten them adequately.
If your bed frame had side rails that were detached during the modification process, it’s time to reattach them. Align the side rails with the headboard and footboard, ensuring they are symmetrically positioned. Secure them firmly using screws or brackets.
Ensure that all connections are tight and stable, taking extra care to inspect the areas where modifications were performed. Test the stability of the reassembled frame by gently shaking it and checking for any signs of movement or wobbling. Make any necessary adjustments or tighten any loose screws or bolts.
Once the frame is securely assembled, it’s time to place the king-sized mattress onto it. Carefully position the mattress on top of the frame, ensuring it fits snugly and evenly.
Finally, add the bedding and any additional accessories to complete the transformation. Arrange pillows, cushions, and covers to create the desired aesthetic and comfort level.
Take a moment to step back and admire your newly converted king-sized bed frame. You have successfully transformed your existing queen bed frame into a spacious, comfortable, and stylish sleeping haven.
Lastly, before you jump onto your newly converted king-sized bed, don’t forget to test it by lying down and adjusting to the new dimensions. Ensure that the frame provides adequate support and comfort, and make any necessary adjustments if needed.
Congratulations! You have completed the process of converting your queen bed frame into a king-sized one. Enjoy the benefits of your larger sleeping space and indulge in a restful night’s sleep.
The final step, step 8, involves testing and adjusting the bed frame to ensure optimal performance and comfort.
Step 8: Test and Adjust
Now that you have reassembled your converted king-sized bed frame, it is important to thoroughly test and make any necessary adjustments. This step ensures that your bed frame provides optimal performance, stability, and comfort for a restful sleep experience.
Start by carefully inspecting the frame for any signs of instability or misalignment. Check all the connections, joints, and support brackets to ensure they are securely in place. Use a screwdriver or wrench if needed to tighten any loose screws or bolts.
Next, apply gentle pressure in various areas of the bed frame to test for any excessive flexing or creaking. A well-constructed and properly modified frame should feel sturdy and solid, without any noticeable movement or noise.
Lie down on the bed and test its stability and comfort. Observe if there are any areas where the mattress sags or feels unevenly supported. If necessary, you can add additional support in the form of plywood or additional slats to ensure an even distribution of weight.
Take some time to adjust the positioning and alignment of the headboard and footboard if necessary. Ensure that they are properly aligned and securely attached, enhancing the visual appeal of your bed frame.
If you encounter any issues during the testing process, such as instability or discomfort, make note of them and plan to address them accordingly. This may involve further modifications, additional support, or consulting with a professional if necessary.
As you continue to use your newly converted king-sized bed frame, monitor its performance over time. Pay attention to any signs of wear and tear, loose connections, or changes in stability. Regular maintenance and occasional tightening of screws or bolts will help ensure the longevity and performance of your bed frame.
Remember, every bed frame is unique, and adjustments may need to be made based on individual needs and preferences. It’s important to regularly assess the condition and performance of your bed frame to ensure a comfortable and supportive sleeping environment.
By properly testing and adjusting your converted bed frame, you can enjoy the benefits of a king-sized bed while ensuring its performance and durability. With that, you have successfully completed the journey of converting your queen bed frame into a spacious and inviting king-sized oasis.
Enjoy your newfound sleeping sanctuary and may you have many nights of restful sleep ahead!
With that, we conclude our guide on how to convert a queen bed frame to a king. We hope you found this article helpful and informative. If you have any additional questions or need further assistance, feel free to reach out.
Read more: How To Assemble A Queen Size Bed Frame
Conclusion
Converting a queen bed frame to accommodate a king-sized mattress is a rewarding project that allows you to repurpose your existing furniture while enjoying the benefits of a larger sleeping space. With careful planning, measurement, and adjustments, you can transform your bedroom into a comfortable and stylish oasis.
Throughout this guide, we have walked you through the step-by-step process of converting your queen bed frame to a king-sized one. From assessing the frame’s suitability to disassembling, modifying, and reassembling the frame, each step has been carefully explained to ensure a successful conversion.
Remember to assess your bed frame’s construction and materials, measure and purchase the necessary materials, and disassemble the frame before making any modifications. Adjust the length and width of the frame to accommodate a king-sized mattress, attach support brackets for stability, and reassemble the frame with care.
Finally, thoroughly test the modified bed frame, making any necessary adjustments to ensure stability and comfort. Regularly monitor the frame’s performance and address any potential issues promptly to maintain a durable and supportive foundation for your mattress.
Converting your queen bed frame to a king is a cost-effective and sustainable solution that allows you to save money while enjoying the benefits of a larger bed. It also gives you the opportunity to unleash your creativity and personalize your sleeping space.
We hope this guide has provided you with valuable insights and guidance. Remember to always consider your specific bed frame and seek professional advice if needed. With patience, attention to detail, and a little creativity, you can successfully convert your queen bed frame into the king-sized sanctuary you’ve been dreaming of.
Now, it’s time to enjoy your new and improved sleeping quarters. Rest easy and wake up refreshed in your spacious and comfortable king-sized bed.
Frequently Asked Questions about How To Convert A Queen Bed Frame To A King
Was this page helpful?
At Storables.com, we guarantee accurate and reliable information. Our content, validated by Expert Board Contributors, is crafted following stringent Editorial Policies. We're committed to providing you with well-researched, expert-backed insights for all your informational needs.


0 thoughts on “How To Convert A Queen Bed Frame To A King”