Home>Furniture>Bedroom Furniture>How To Build A King Size Bed Frame With Drawers

Bedroom Furniture
How To Build A King Size Bed Frame With Drawers
Modified: November 1, 2024
Learn how to build a spacious and practical king size bed frame with drawers for your bedroom. Enhance your bedroom furniture with this DIY project.
(Many of the links in this article redirect to a specific reviewed product. Your purchase of these products through affiliate links helps to generate commission for Storables.com, at no extra cost. Learn more)
Introduction
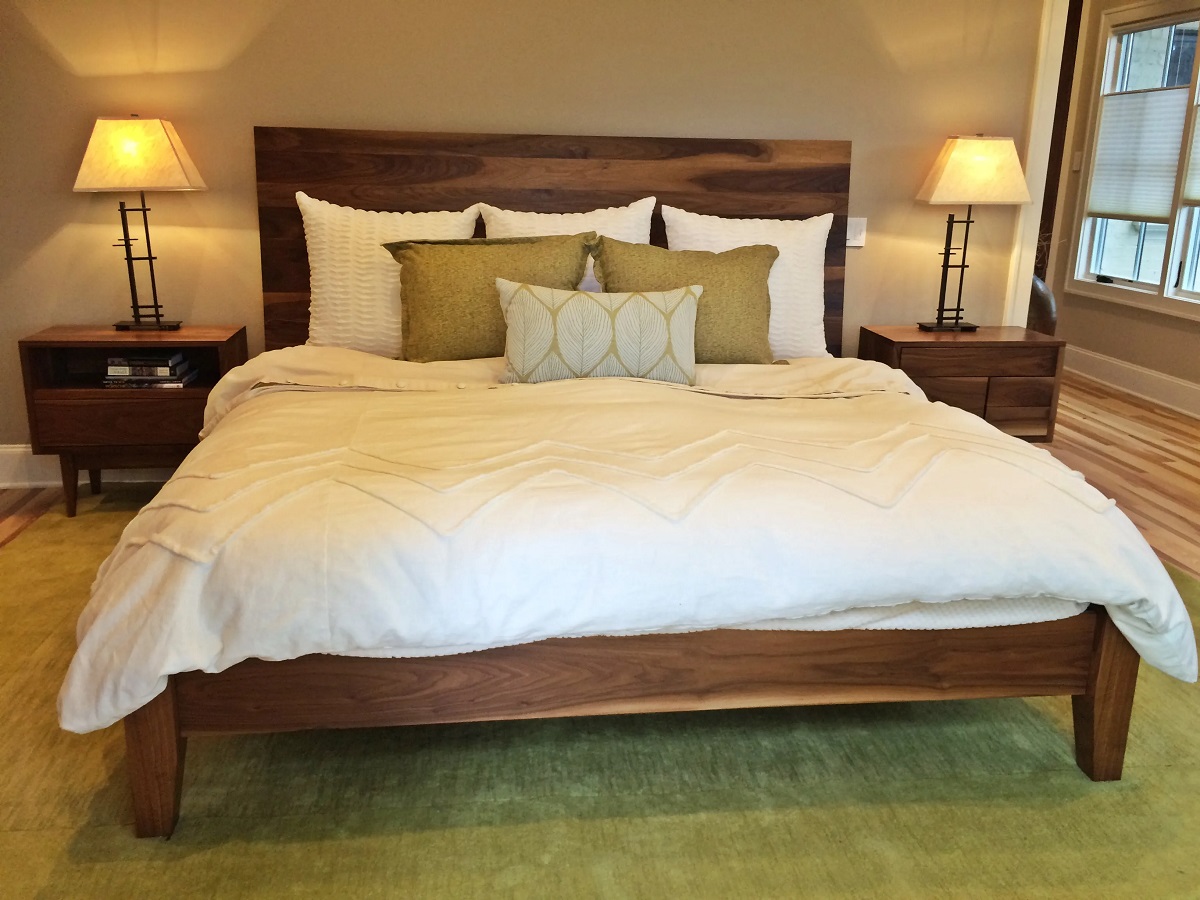
Building a king-size bed frame with drawers is a great way to add both style and functionality to your bedroom. Not only does it provide a comfortable sleeping space, but it also offers extra storage for your belongings. Whether you have a large bedroom or just want to make the most of the available space, a DIY bed frame with drawers is a fantastic option.
This article will guide you through the process of building a king-size bed frame with drawers, ensuring that you have all the necessary information and steps to complete the project successfully. By following these instructions, you will be able to create a sturdy and aesthetically pleasing bed frame that fits your needs and complements your bedroom decor.
Before diving into the step-by-step guide, let’s quickly go over the materials you will need for this project.
Key Takeaways:
- Building a king-size bed frame with drawers is a rewarding DIY project that combines style and functionality, providing a comfortable sleeping space and convenient storage solutions for your bedroom.
- Careful planning, precise measurements, and attention to detail are crucial for successfully creating a sturdy and aesthetically pleasing bed frame. With the right materials and tools, you can customize a bed frame that fits your space and meets your storage needs.
Read more: What Size Is A California King Bed Frame
Materials Needed
Before you begin building your king-size bed frame with drawers, it’s important to gather all the necessary materials and tools. Here’s a list of what you’ll need:
- 4×4 lumber for the bed frame posts
- 2×4 lumber for the bed frame rails and supports
- 1×6 lumber for the drawer fronts and sides
- Plywood for the drawer bottoms
- Drawer slides
- Screws
- Wood glue
- Sandpaper
- Stain or paint
- Brushes or rollers for staining/painting
- Measuring tape
- Saw (circular saw or miter saw)
- Drill
- Clamps
Make sure to gather all these materials before you start your project. It’s also a good idea to measure your bedroom space to ensure that the bed frame will fit correctly.
Now that you have all the necessary materials, let’s move on to the next step: planning and measurements.
Step 1: Planning and Measurements
The first step in building a king-size bed frame with drawers is to carefully plan and take accurate measurements. This will ensure that your bed frame fits perfectly in your bedroom space.
Start by measuring the dimensions of your mattress. Standard king-size mattresses are usually 76 inches wide and 80 inches long. However, it’s always best to double-check the measurements to be certain.
Next, determine the height you want for your bed frame. Consider the overall height of the bed, including the mattress thickness, and factor in any additional space you may need for under-bed storage.
Once you have your mattress dimensions and desired bed height, sketch out a rough design for your bed frame. This will help you visualize how the finished product will look and will serve as a guide during the construction process.
Take into account any additional features you want to include, such as headboard and footboard designs or decorative elements. Make sure to incorporate these into your design plan.
Remember to consider the size and placement of the drawers. Decide how many drawers you want and where they will be located on the bed frame. This will help you determine the dimensions and placement of the supporting beams and drawer slides.
With your plan and measurements in hand, you can now move on to gathering the necessary lumber and cutting the wood pieces.
Keep in mind that accurate measurements and careful planning are crucial for a successful construction process. Taking the time to plan everything out will save you from costly mistakes later on.
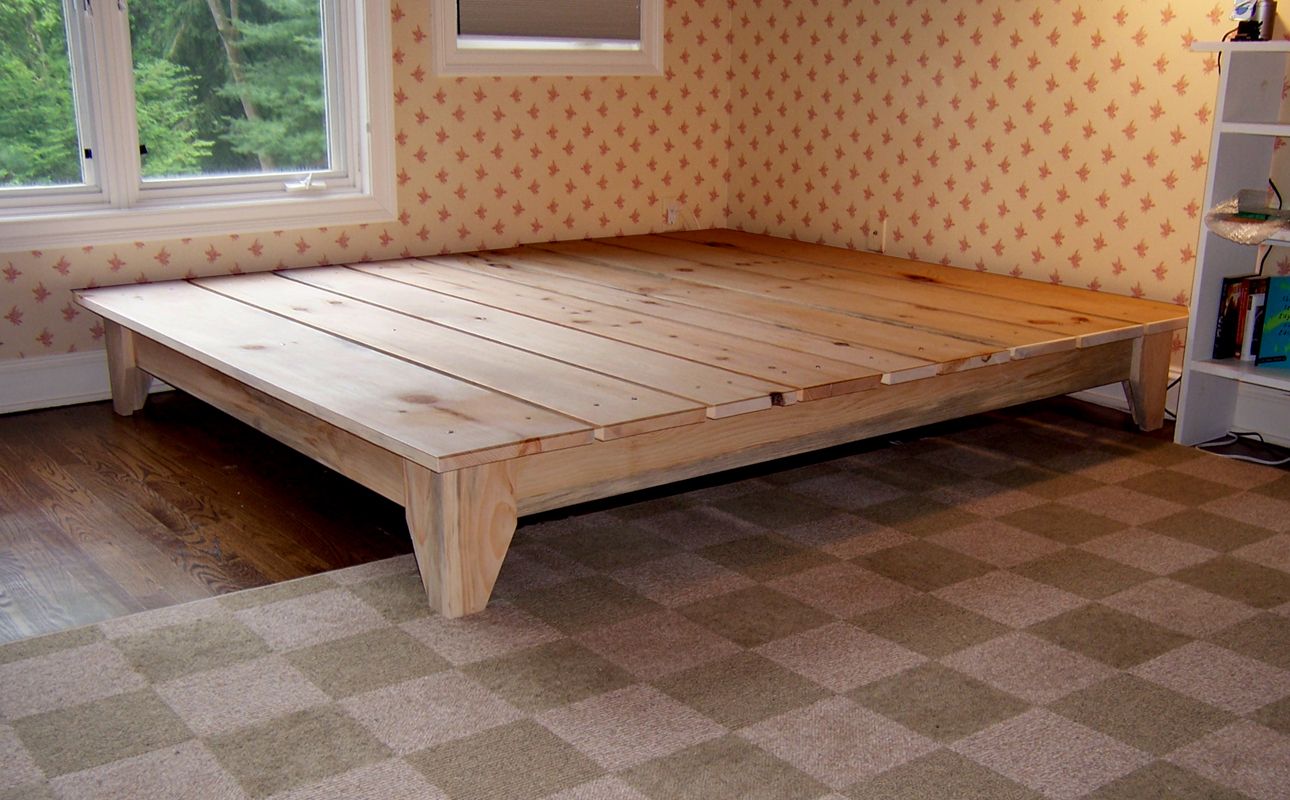
Step 2: Cutting the Wood Pieces
Now that you have your design plan and measurements, it’s time to start cutting the wood pieces for your king-size bed frame with drawers. This step requires precision and careful attention to detail.
Begin by cutting the 4×4 lumber to the desired height of your bed frame posts. Measure and mark the appropriate length on each piece before making the cuts.
Next, cut the 2×4 lumber to the lengths needed for the bed frame rails and supports. Remember to cut two longer pieces for the sides and two shorter pieces for the head and foot of the bed frame.
Use a saw, such as a circular saw or miter saw, to make clean and straight cuts. Make sure to wear appropriate safety gear, including safety glasses and gloves, while operating power tools.
For the drawer fronts and sides, cut the 1×6 lumber into the desired lengths. These pieces will determine the size of your drawers, so be sure to measure and cut them accurately.
Finally, cut the plywood for the drawer bottoms. Measure the dimensions needed and cut the plywood pieces to fit snugly inside the drawer frames.
Take your time and double-check your measurements before making any cuts. It’s better to measure twice and cut once to avoid any unnecessary waste of lumber.
Once all the wood pieces are cut, set them aside and proceed to the next step: assembling the bed frame.
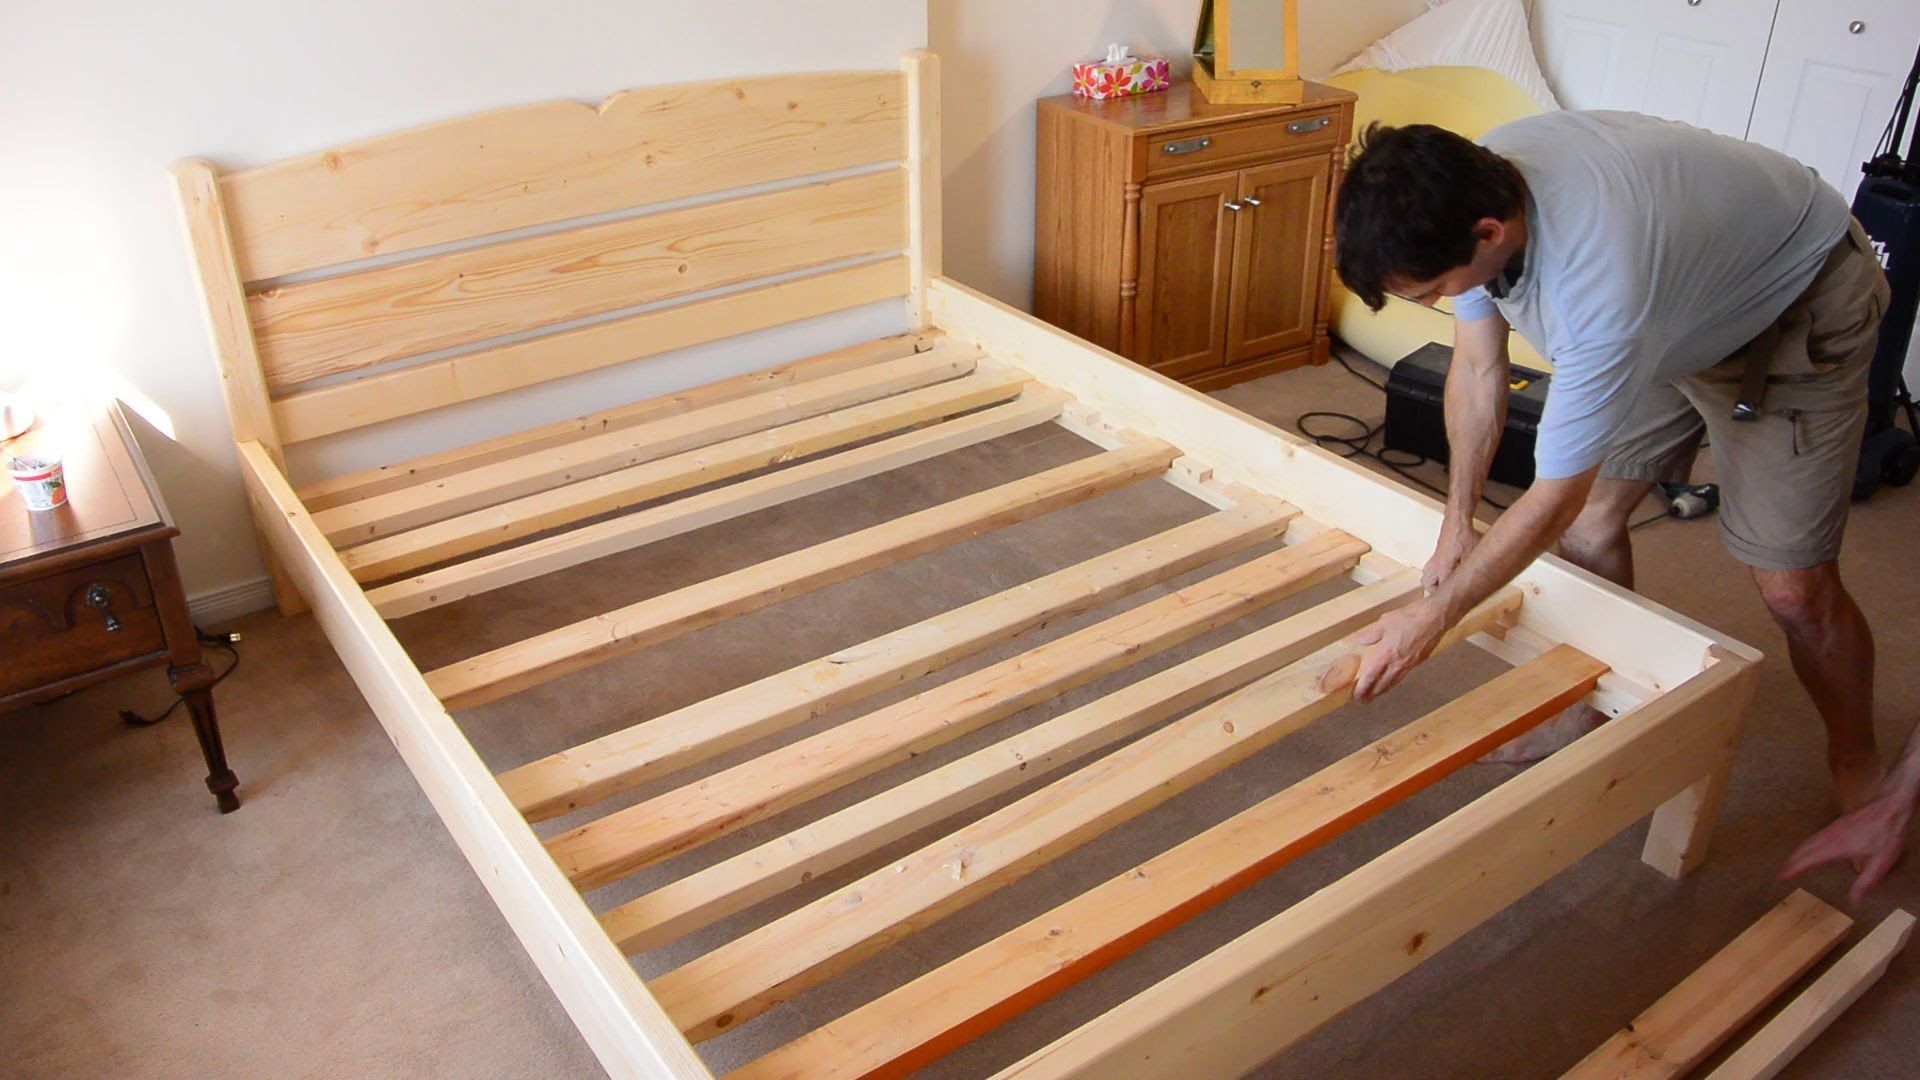
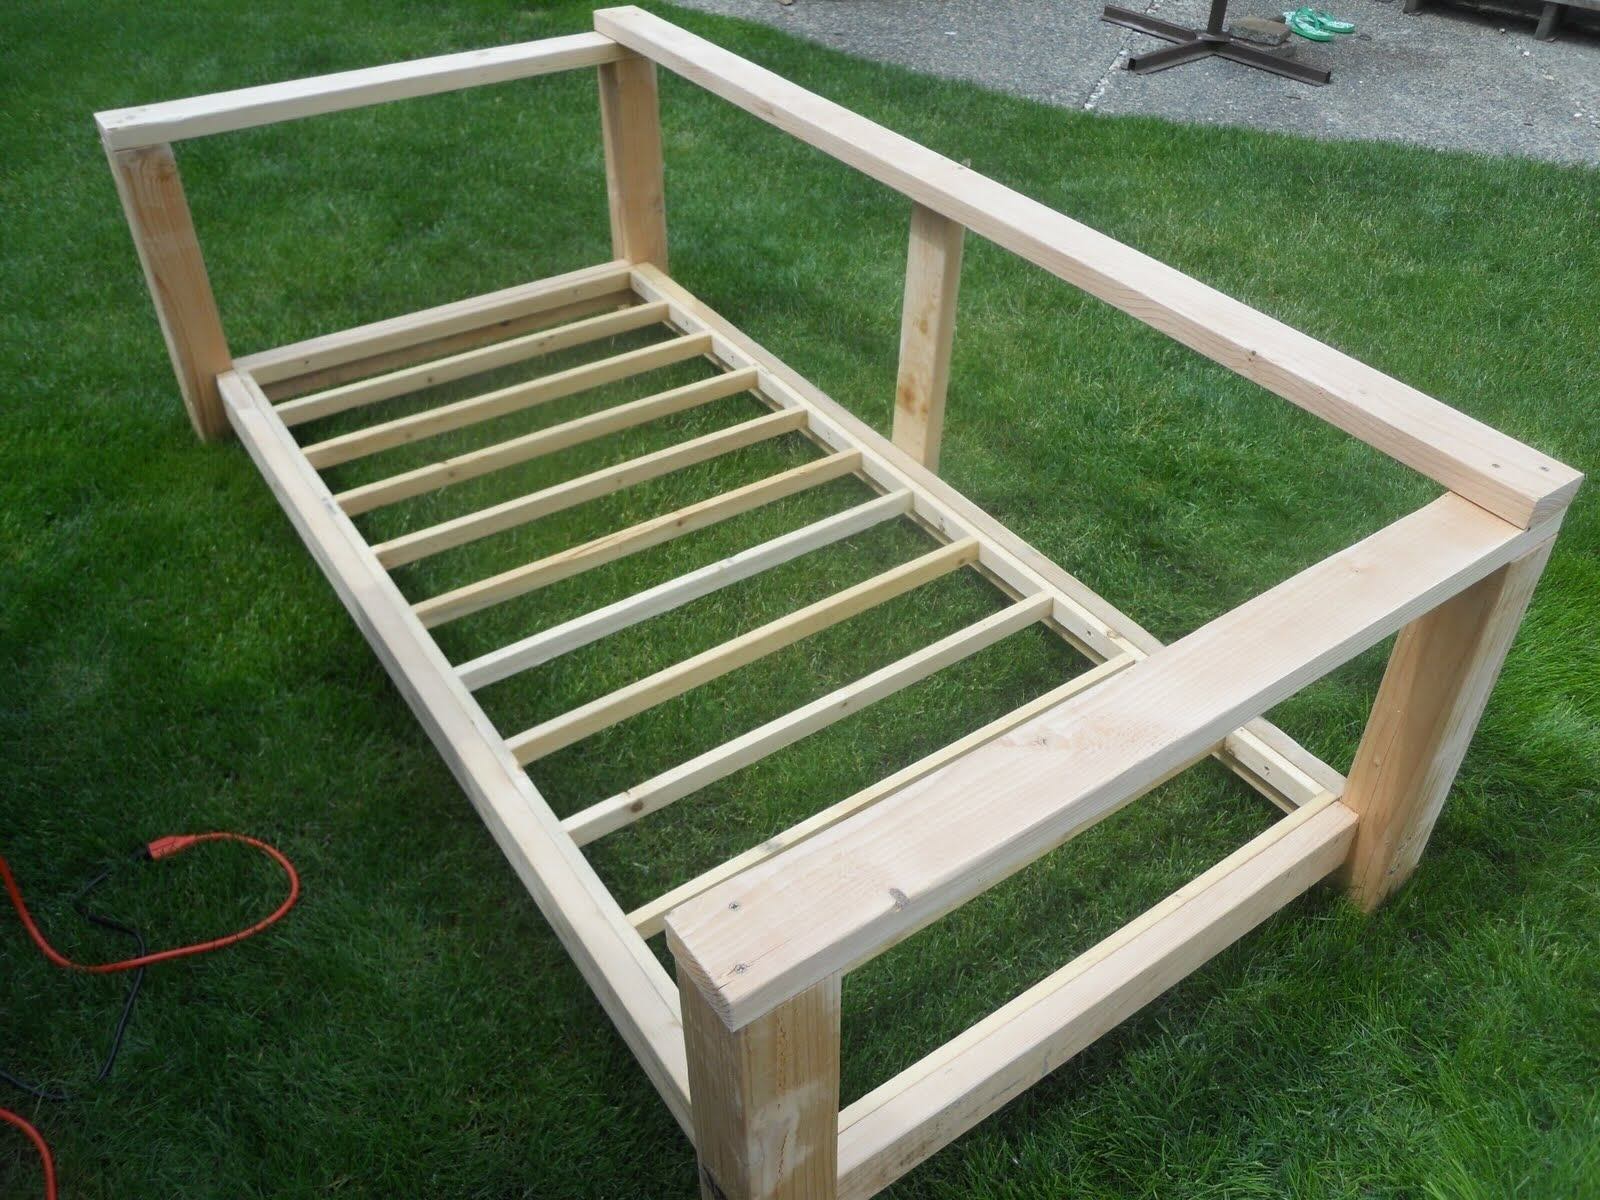
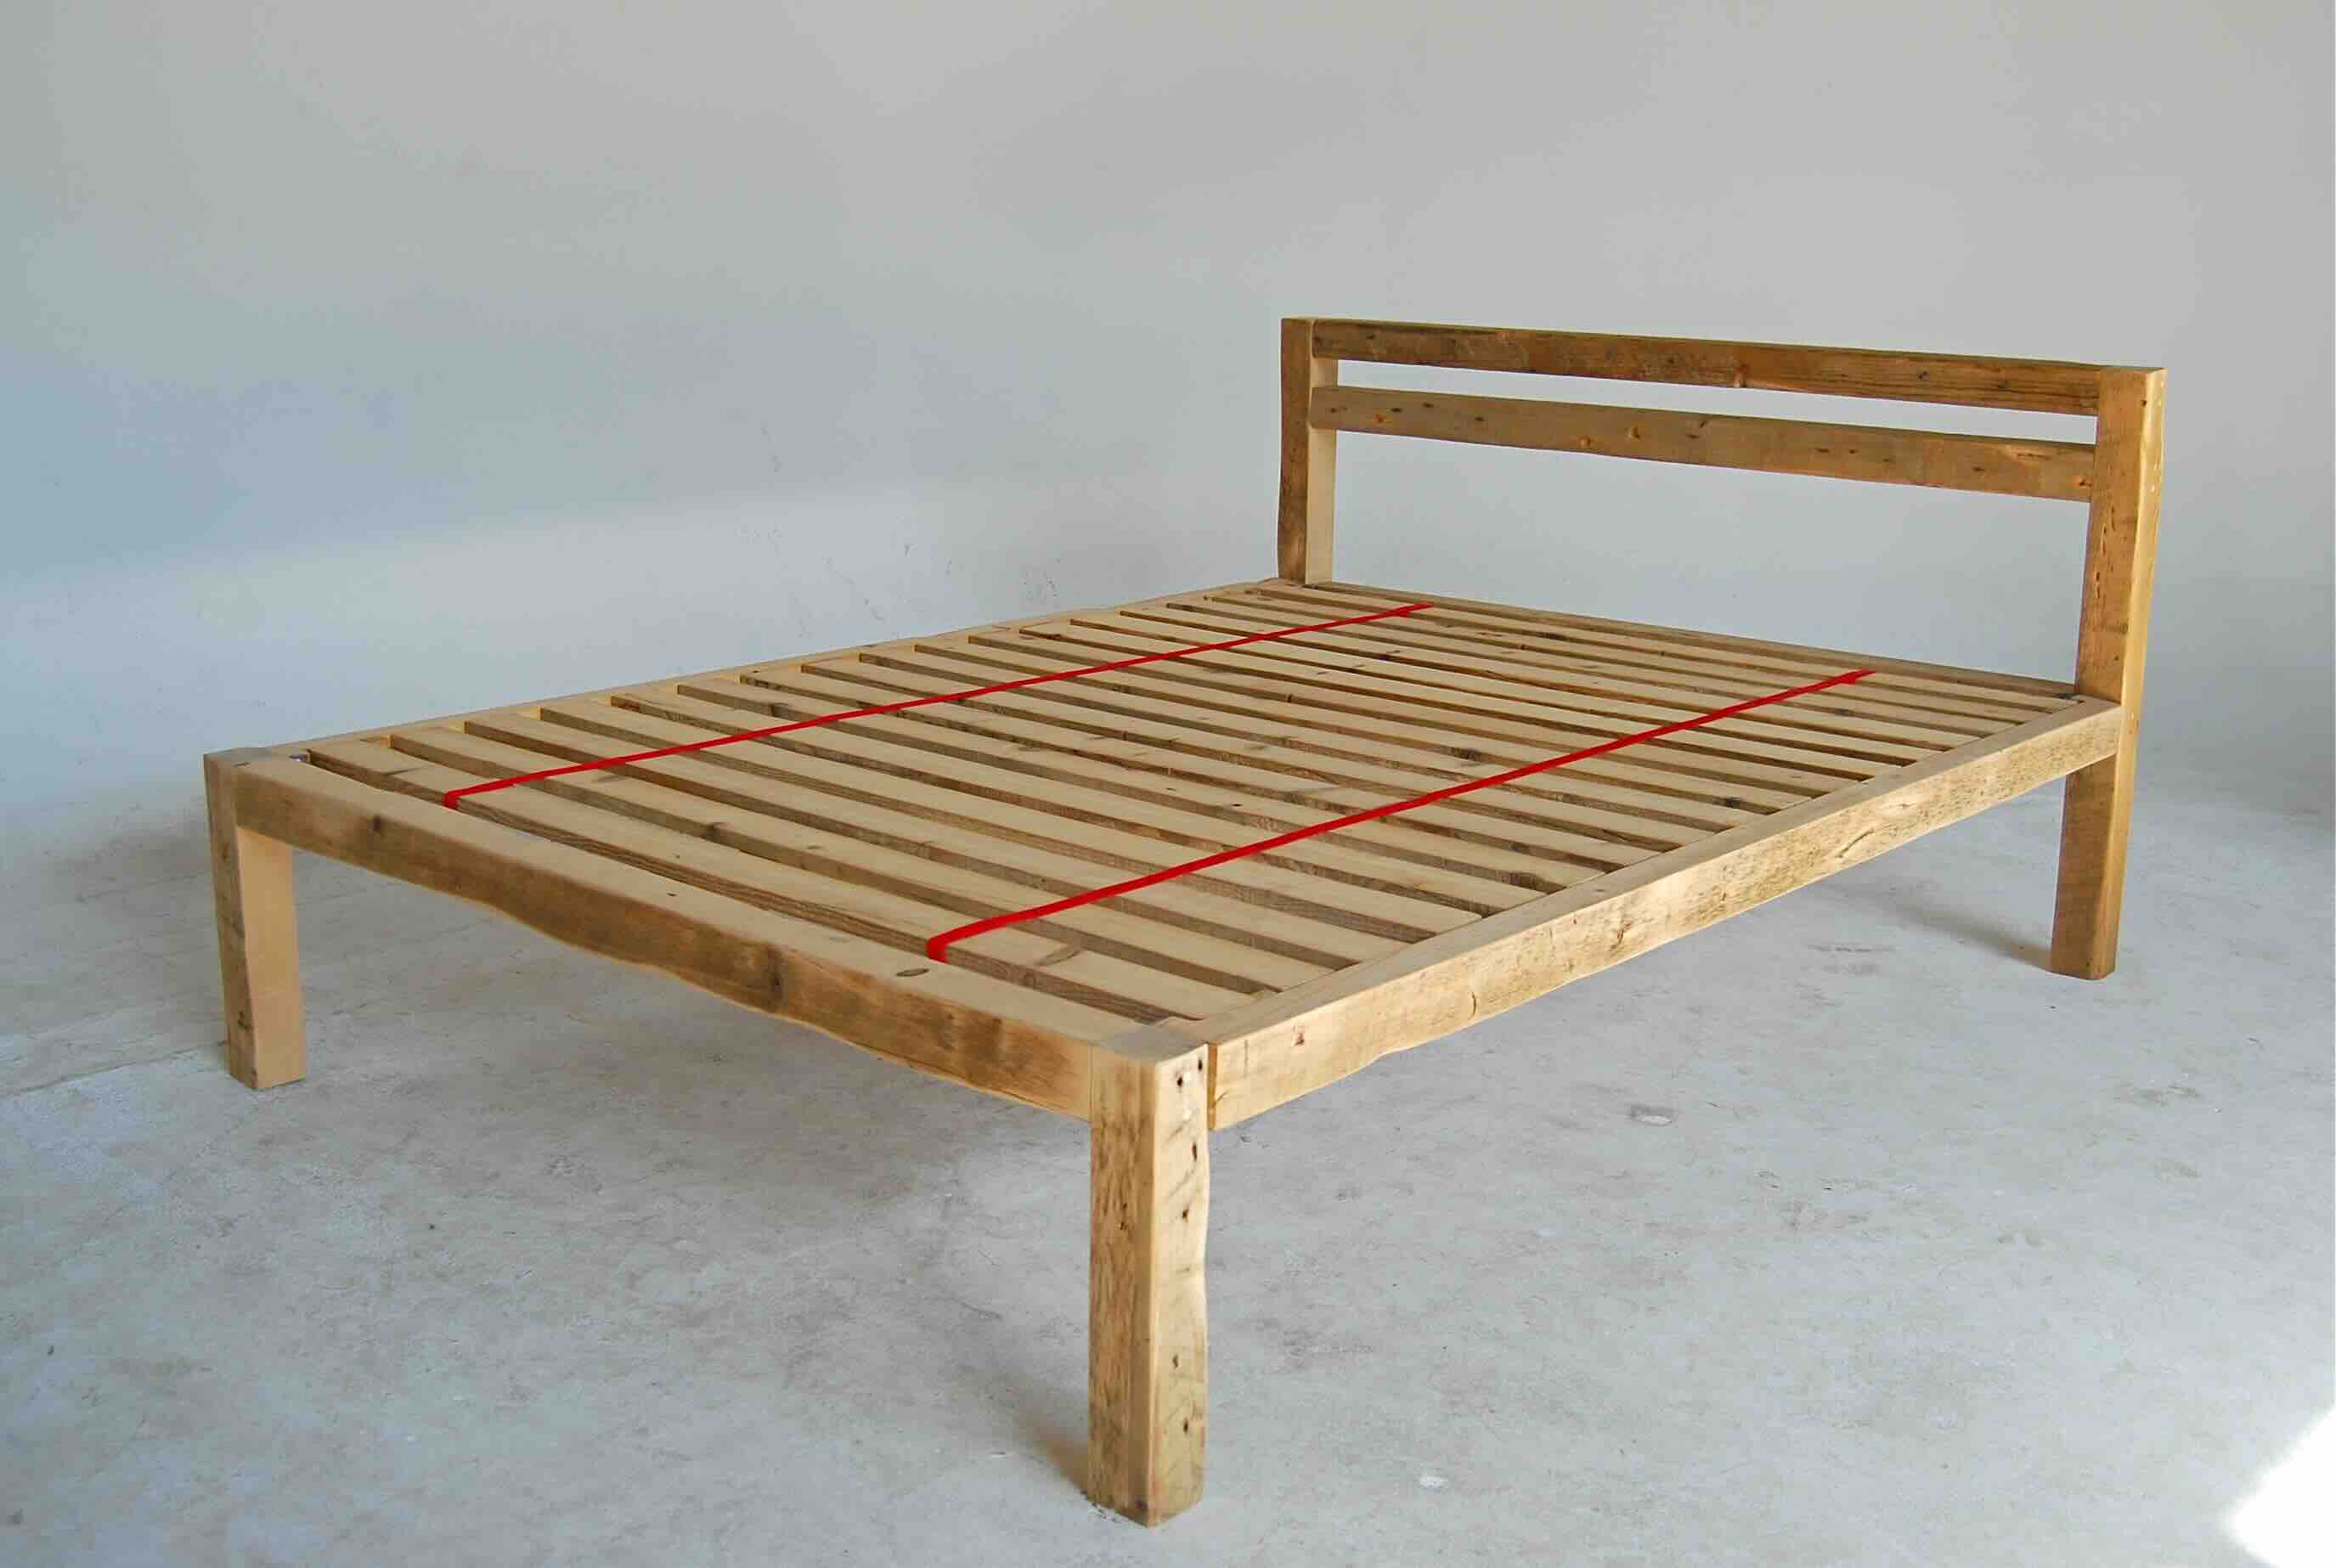
Step 3: Assembling the Frame
With all the wood pieces cut to the appropriate measurements, it’s time to assemble the frame of your king-size bed with drawers. This step will require some basic woodworking skills, but with patience and attention to detail, you’ll be able to create a sturdy and stable bed frame.
Start by laying out the four 4×4 lumber posts on the floor in the desired position. These will serve as the corners of your bed frame. Use clamps to hold the pieces together and ensure they are aligned properly.
Attach the 2×4 bed frame rails to the posts. Position them flush with the top of the post, making sure they are level and square. Drill pilot holes through the rails and secure them to the posts with screws. Repeat this step for all four corners of the bed frame.
Next, install the support beams inside the bed frame. Measure and cut the 2×4 lumber to fit horizontally between the side rails. Place them evenly along the length of the frame, ensuring proper support for the mattress.
Secure the support beams by drilling pilot holes and using screws to attach them to the side rails. Additionally, you can reinforce the joints with wood glue for added stability.
Once the main structure of the bed frame is assembled, it’s time to attach the slats that will support the mattress. Cut the 2×4 lumber to fit across the support beams, leaving a small gap between each slat for ventilation.
Place the slats evenly across the support beams and secure them with screws. This will provide a sturdy and even surface for your mattress to rest on.
Double-check all the connections and ensure everything is securely fastened. Give the bed frame a gentle shake to test its stability. If there are any loose or wobbly parts, tighten the screws or make any necessary adjustments.
With the bed frame assembled, it’s time to move on to the next step: installing the drawers.
When building a king size bed frame with drawers, make sure to measure and cut all pieces accurately to ensure a proper fit. Use quality materials and hardware for a sturdy and durable frame.
Step 4: Installing the Drawers
Adding drawers to your king-size bed frame not only provides convenient storage space but also enhances the functionality of your bedroom. Follow these steps to install the drawers and make the most of your DIY bed frame:
Start by attaching the drawer slides to the inside of the bed frame. Measure and mark the appropriate placement for the slides on both sides of the frame, ensuring they are parallel and level.
Align the slides with your markings and secure them in place using screws. Make sure the slides are properly aligned and allow for smooth opening and closing of the drawers.
Next, assemble the drawer frames using the 1×6 lumber pieces you previously cut. Use wood glue and screws to join the corners and create sturdy frames.
Attach the drawer slides to the drawer frames, ensuring they are aligned with the slides already installed in the bed frame. This will allow the drawers to glide smoothly in and out.
Place the plywood pieces you cut earlier for the drawer bottoms onto the frames and secure them with screws or nails.
Once you have completed the assembly of the drawers, carefully slide them into the bed frame. Make sure they fit snugly and slide in and out smoothly along the installed drawer slides.
Test the drawers by opening and closing them several times to ensure they operate correctly. Make any necessary adjustments to the slides or frames if needed.
With the drawers successfully installed, you can move on to the next step: adding support beams for additional sturdiness.
Step 5: Adding Support Beams
To further reinforce your king-size bed frame with drawers and ensure its stability, adding support beams is a crucial step. These support beams will distribute the weight evenly and provide additional strength to the bed frame.
Measure and cut the 2×4 lumber pieces to fit horizontally between the side rails of the bed frame. These support beams should be evenly spaced along the length of the frame.
Place the support beams perpendicular to the side rails and attach them using screws. Make sure they are securely fastened and aligned with the height of the side rails.
For added stability, consider adding a central support beam through the middle of the bed frame. This will prevent any sagging in the middle and provide even more support.
Measure the distance between the head and foot of the bed frame, cut the appropriate length of 2×4 lumber, and position it in the center. Attach it securely to the side rails and the existing support beams using screws.
Double-check all the connections and ensure the support beams are sturdy and properly aligned. Give the bed frame a gentle shake to test its stability. If there are any signs of wobbliness, tighten the screws or make any necessary adjustments.
With the support beams in place, you are one step closer to completing your king-size bed frame with drawers. The next step is sanding and finishing.
Step 6: Sanding and Finishing
After all the hard work of building and assembling your king-size bed frame with drawers, it’s time to focus on the final touches that will give your creation a polished and professional look.
Start by sanding down the entire bed frame, including the posts, rails, and drawer fronts. Use sandpaper of medium grit to smooth out any rough edges, remove any splinters, and create a smooth surface.
Pay extra attention to the areas where the wood pieces join together, as these can often have sharp or uneven edges. Sand them down until they are smooth and seamless.
Once you have finished sanding, wipe down the bed frame with a clean cloth to remove any dust or debris. This will ensure a clean surface for the finishing process.
Now it’s time to apply your chosen finish, whether it’s stain, paint, or varnish. Apply the finish using a brush or roller, following the manufacturer’s instructions for best results.
If you’re using stain, apply it evenly in the direction of the wood grain and allow it to penetrate for the recommended amount of time. Wipe off any excess stain with a clean cloth.
If you prefer to paint the bed frame, apply multiple thin coats, allowing each coat to dry completely before applying the next. This will ensure a smooth and even finish.
After applying the finish, allow it to dry completely according to the manufacturer’s instructions. This may take a few hours or even overnight, so be patient and avoid handling the bed frame until it’s fully dry.
Once the finish is dry, give the bed frame a final inspection. Check for any areas that may need touch-ups or additional coats of finish. Make any necessary adjustments to ensure a flawless end result.
With the sanding and finishing complete, your king-size bed frame with drawers is now ready to be placed in your bedroom and enjoyed for years to come!
Congratulations on successfully building a functional and stylish bed frame that not only provides a comfortable sleeping area but also offers convenient storage solutions.
Remember to maintain and clean your bed frame regularly to keep it in top condition. With proper care, it will continue to enhance your bedroom decor and serve as a reliable piece of furniture.
Enjoy your new king-size bed frame and the added comfort and organization it brings to your space!
Conclusion
Building a king-size bed frame with drawers is a rewarding and fulfilling DIY project that allows you to create a customized and functional piece of furniture for your bedroom. By following the steps outlined in this guide, you can successfully create a sturdy and stylish bed frame that not only provides a comfortable sleeping space but also offers convenient storage solutions.
From planning and taking measurements to cutting the wood pieces, assembling the frame, installing the drawers, adding support beams, and finally sanding and finishing, each step is crucial in creating a high-quality and durable bed frame.
With the right materials, tools, and attention to detail, you can build a bed frame that perfectly fits your space and meets your storage needs. The additional drawers will help you declutter your bedroom and keep your essentials organized and easily accessible.
Throughout the process, remember to prioritize safety by wearing appropriate protective gear and using tools correctly. Take your time and double-check your measurements and connections to ensure a secure and stable end result.
Once your bed frame is complete, don’t forget to give it some personal flair with your choice of stain, paint, or finish. This will add the final touch and help it blend seamlessly with your bedroom decor.
Now, it’s time to enjoy the fruits of your labor. Lie down on your comfortable mattress and relish the satisfaction of knowing that you built a customized king-size bed frame with drawers that perfectly suits your style and storage needs.
Remember, building your own furniture is not only a cost-effective option but also allows you to unleash your creativity and showcase your woodworking skills. So go ahead, give it a try, and create a beautiful and functional bed frame that will be the envy of all your friends and family.
Happy building!
Frequently Asked Questions about How To Build A King Size Bed Frame With Drawers
Was this page helpful?
At Storables.com, we guarantee accurate and reliable information. Our content, validated by Expert Board Contributors, is crafted following stringent Editorial Policies. We're committed to providing you with well-researched, expert-backed insights for all your informational needs.


0 thoughts on “How To Build A King Size Bed Frame With Drawers”