Home>Home Maintenance>How To Remove A Bathroom Floor (Step-By-Step) – By Home Repair Tutor
Home Maintenance
How To Remove A Bathroom Floor (Step-By-Step) – By Home Repair Tutor
Modified: October 18, 2024
Learn how to remove a bathroom floor step-by-step with our easy-to-follow tutorial. Home maintenance made simple and stress-free.
(Many of the links in this article redirect to a specific reviewed product. Your purchase of these products through affiliate links helps to generate commission for Storables.com, at no extra cost. Learn more)
Introduction
Welcome to our step-by-step guide on how to remove a bathroom floor! Whether you’re looking to update the look of your bathroom or facing issues with your existing flooring, removing the bathroom floor is a crucial first step in any home improvement project. In this comprehensive guide, we will walk you through the entire process, providing valuable tips and insights along the way.
Removing a bathroom floor may seem like a daunting task, but with the right tools, materials, and know-how, you can successfully complete the job. By following our step-by-step instructions, you’ll be able to remove your old flooring and prepare the space for a fresh and stunning new look.
Before we dive into the specifics, it’s important to understand that removing a bathroom floor entails more than just tearing up the visible surface. There may be layers of subflooring, adhesives, and even plumbing fixtures that need to be addressed. Proper preparation, careful handling of plumbing connections, and taking safety precautions are essential throughout the process.
So, whether you’re removing tile, vinyl, laminate, or any other type of flooring, this guide will equip you with the knowledge and guidance you need. Let’s get started!
Key Takeaways:
- Removing a bathroom floor involves careful preparation, disconnection of fixtures, and step-by-step removal of old flooring and subflooring. Proper cleaning and installation of new flooring are crucial for a successful renovation.
- Safety, patience, and attention to detail are essential when removing and replacing a bathroom floor. Following the right tools, techniques, and professional guidance can lead to a satisfying and transformative home improvement project.
Read more: How To Tile A Floor – In Easy Steps
Tools and Materials Needed
Before you begin removing the bathroom floor, gather the following tools and materials:
Tools:
- Protective gear (safety goggles, gloves, dust mask)
- Hammer
- Pry bar
- Utility knife
- Chisel
- Power drill
- Adjustable wrench
- Screwdriver set
- Bucket or garbage bags
- Vacuum cleaner
Materials:
- Replacement flooring
- Plywood or oriented strand board (OSB) for subfloor repairs
- Underlayment (if necessary)
- Screws and nails
- Plumber’s tape or pipe wrench
- Plastic sheeting (to protect adjacent areas)
- Construction adhesive
- Grout removal tool (if removing tile)
Having the right tools and materials on hand will make the process smoother and more efficient. Safety should be your top priority, so don’t forget to wear protective gear throughout the project to avoid any injuries.
If you’re uncertain about the specific tools and materials you’ll need for your specific bathroom floor removal project, consult with a professional or an expert at your local home improvement store. They can provide guidance and recommendations based on your specific situation.
Now that you have everything you need, let’s move on to the step-by-step process of removing a bathroom floor.
Step 1: Prepare the Bathroom
Before you start removing the bathroom floor, it’s essential to prepare the space properly. This will help protect other areas of your bathroom and make the removal process easier.
Here are the key steps to follow when preparing the bathroom:
- Clear the area: Remove any furniture, rugs, or other items from the bathroom. This will give you ample space to work and prevent any damage or obstructions.
- Turn off the water supply: Locate the shut-off valves for the toilet, sink, and shower/bathtub. Turn them clockwise to shut off the water supply. This step is crucial to avoid any water leaks or damage during the removal process.
- Disconnect electrical connections: If you have any electrical outlets or switches near the floor, turn off the power and remove the cover plates. Use a voltage tester to ensure there is no electricity running through the wires before proceeding.
- Protect adjacent areas: Cover nearby surfaces, such as the bathtub, cabinets, or walls, with plastic sheeting to protect them from debris, dust, and damage.
- Open windows and use proper ventilation: Proper ventilation is crucial during the removal process to prevent the accumulation of dust and fumes. Open windows and use fans to improve airflow.
By following these steps, you’ll create a clean and safe working environment for the floor removal process. Remember to take the necessary precautions to ensure your safety and protect other elements of your bathroom.
Once you have prepared the bathroom, you’re ready to move on to the next step: removing the baseboard.
Step 2: Remove the Baseboard
Before you can start removing the bathroom floor, it’s important to remove the baseboard first. The baseboard is the molding that covers the joint where the flooring meets the wall. Removing the baseboard will make it easier to lift the flooring without causing any damage.
Follow these steps to remove the baseboard:
- Use a putty knife or utility knife: Start by running a putty knife or utility knife along the top edge of the baseboard. This will help loosen any paint or caulk that may be securing it to the wall. Be careful not to damage the wall surface.
- Insert a pry bar: Once the paint or caulk is loosened, insert a pry bar or a flathead screwdriver between the baseboard and the wall. Gently pry the baseboard away from the wall, using a back-and-forth motion. Place a thin piece of scrap wood between the pry bar and the wall to protect the wall from damage.
- Work your way along the baseboard: Move along the baseboard, repeating the process of inserting the pry bar and gently prying the baseboard away from the wall. Take your time to avoid any unnecessary damage.
- Remove any nails or screws: As you remove the baseboard, you may encounter nails or screws that secure it to the wall. Use pliers or a screwdriver to remove them carefully. Set aside the baseboard for reinstallation later if desired.
Remember to be patient and gentle when removing the baseboard to avoid damaging the wall or the baseboard itself. If the baseboard is damaged during removal, consider replacing it with a new one to maintain a clean and polished look.
Once the baseboard is removed, you’re ready to move on to the next steps of disconnecting plumbing fixtures and removing the toilet, sink, and shower/bathtub.
Step 3: Disconnect Plumbing Fixtures
Before you can proceed with removing the bathroom floor, it’s vital to disconnect the plumbing fixtures. This step ensures that you can safely remove the fixtures without causing any damage or leaks. The fixtures include the toilet, sink, and shower/bathtub.
Follow these steps to disconnect the plumbing fixtures:
- Shut off the water supply: Locate the shut-off valves for each plumbing fixture (toilet, sink, and shower/bathtub). Turn the valves clockwise to shut off the water supply. Flush the toilet and turn on the sink and shower/bathtub faucets to release any remaining water pressure.
- Disconnect the toilet: Start by removing the toilet tank lid and flushing the toilet to drain the water from the tank. Use an adjustable wrench to disconnect the water supply line from the bottom of the tank. Next, remove the bolts securing the toilet to the floor. Gently rock the toilet back and forth to break the wax seal, then lift it off and set it aside in a safe place.
- Disconnect the sink: Underneath the sink, locate the water supply lines and disconnect them from the faucet handles using an adjustable wrench. Next, remove the drain pipe connected to the sink by loosening the slip nuts with a pair of pliers or a pipe wrench. Carefully lift the sink off the vanity or countertop and set it aside.
- Disconnect the shower/bathtub: The process of disconnecting the shower or bathtub may vary depending on the type of fixture. Generally, you will need to remove any faucet handles, escutcheon plates, and showerhead connections. Follow the manufacturer’s instructions or consult a professional if you’re unsure about the disconnection process.
Remember to turn off the water supply and drain any remaining water before disconnecting the plumbing fixtures. This will help prevent water leaks and ensure a smoother removal process. Take extra care when handling the fixtures to avoid damaging them.
With the plumbing fixtures disconnected, you’re now ready to move on to the next step: removing the toilet, sink, and shower/bathtub.
Read more: How To Remove Shower Floor Tile
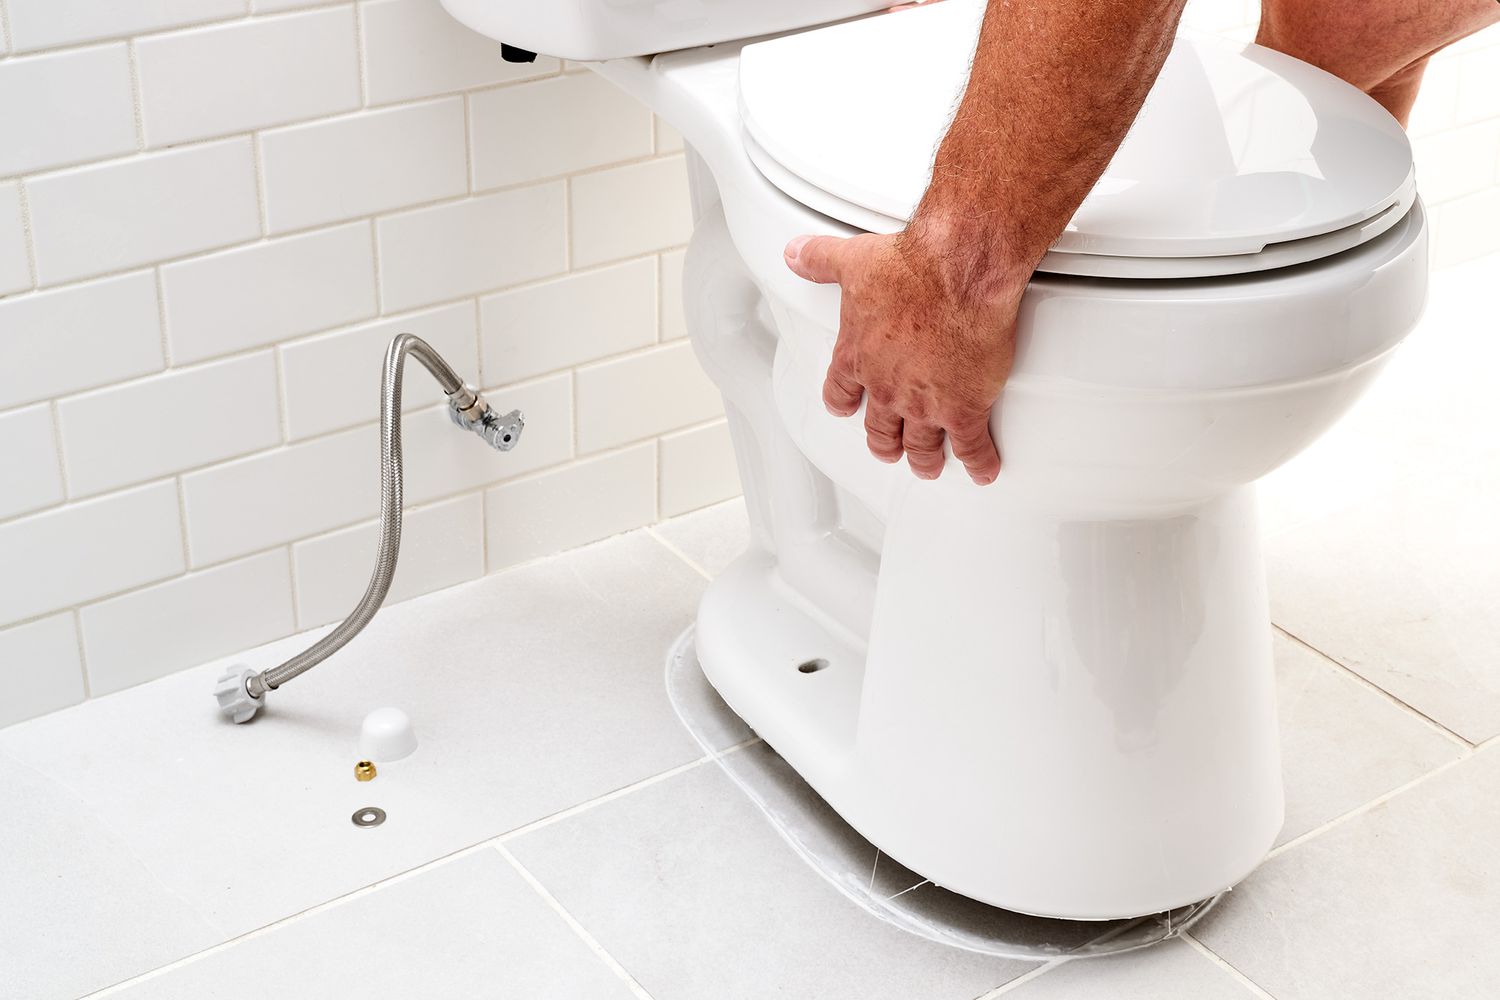
Step 4: Remove Toilet
Removing the toilet is an essential step when removing a bathroom floor. It allows you to have better access to the flooring and ensures that you can remove it without damaging the toilet. Follow these steps to remove the toilet:
- Prepare the area: Lay down old towels or newspapers around the toilet base to catch any water or debris that may spill during the removal process. This will help keep your bathroom clean and prevent any water damage.
- Disconnect the water supply: Locate the water supply line at the bottom of the toilet tank. Use an adjustable wrench to loosen the nut connecting the supply line to the toilet’s fill valve. Once loosened, carefully pull the supply line away from the fill valve.
- Remove the tank lid: Lift off the toilet tank lid and set it aside in a safe place. Be careful as the lid may be heavy or slippery. Set it on a towel or soft surface to prevent any damage.
- Drain the toilet: To minimize spills and mess, use a small cup or a sponge to remove as much water as possible from the toilet bowl and tank. You can also use a wet-dry vacuum to suction out the remaining water. It’s important to have an empty toilet bowl and tank before removing the toilet to prevent any leaks or spills.
- Remove the bolts: Locate the bolts or nuts securing the toilet to the floor. Depending on the toilet model, these may be hidden under caps or plastic covers. Use a wrench to loosen and remove the nuts or bolts. Keep in mind that toilets are heavy, so it’s best to have someone assist you in lifting it off the flange.
- Remove the toilet: With the nuts or bolts removed, carefully lift the toilet straight up and off the flange. It’s important to lift it evenly to prevent any damage to the flange or the toilet itself. Place the toilet on a towel or old newspapers to prevent any dripping.
Once you have removed the toilet, cover the exposed flange with a rag or plastic bag to prevent any noxious gases or sewer odors from entering your bathroom. You can now move on to the next steps of removing the sink and vanity.
Remember to take caution and ensure proper lifting techniques when removing the toilet, as it can be heavy and awkward to handle. If you’re unsure about any step or are uncomfortable with the process, it’s best to consult a professional plumber for assistance.
Step 5: Remove Sink and Vanity
Once the toilet is removed, it’s time to move on to removing the sink and vanity. Removing the sink and vanity will provide you with more space to work and allow for easier removal of the bathroom floor. Follow these steps to remove the sink and vanity:
- Turn off the water supply: Locate the shut-off valves under the sink and turn them clockwise to shut off the water supply. Turn on the faucet to release any remaining water pressure.
- Disconnect the water supply lines: Using an adjustable wrench, loosen and remove the nuts connecting the water supply lines to the faucet. Have a bucket or towels ready to catch any water that may still be in the lines.
- Disconnect the drain pipe: Loosen the slip nut or compression nut that connects the drain pipe to the sink trap using pliers or a pipe wrench. Carefully remove the drain pipe and set it aside. You may want to place a bucket or towels underneath to catch any water that may spill out.
- Disconnect the sink from the vanity: The sink may be secured to the vanity with caulk or clips. Use a utility knife to carefully cut through the caulk around the edges of the sink. If there are clips, loosen and remove them using a screwdriver or a wrench. Once the sink is no longer attached, lift it from the vanity and set it aside.
- Remove the vanity: If the sink is mounted to a vanity, you will need to remove the vanity as well. Look for any screws or nails securing the vanity to the wall or the floor. Use a screwdriver or a hammer to remove these fasteners. Once the vanity is free, lift it off the wall and carefully maneuver it out of the bathroom.
With the sink and vanity removed, you now have a clear workspace to continue with the bathroom floor removal process. Properly dispose of any old sink components and vanity or consider repurposing or donating them if they’re still in good condition.
Next, we will move on to removing the shower or bathtub, depending on your bathroom setup.
Please note that if you’re unsure about any step or are uncomfortable with the process, it’s always best to consult a professional plumber or contractor for assistance to avoid any damage or potential issues.
Before starting to remove the bathroom floor, make sure to turn off the water supply and disconnect any plumbing fixtures to avoid any potential water damage or accidents.
Step 6: Remove Shower or Bathtub
If your bathroom includes a shower or bathtub unit, it’s important to remove it before proceeding with the rest of the floor removal process. Removing the shower or bathtub will give you full access to the flooring and ensure a smooth transition to the next steps. Follow these steps to remove the shower or bathtub:
- Turn off the water supply: Locate the shut-off valves for the shower or bathtub and turn them clockwise to shut off the water supply. Turn on the faucet to release any remaining water pressure.
- Remove the fixtures: Begin by removing any fixtures attached to the shower or bathtub, such as the showerhead, faucets, and drain cover. Use wrenches or screwdrivers as necessary to loosen and remove these components.
- Inspect the installation: Carefully inspect the shower or bathtub unit for any visible screws, nails, or clips that may be securing it to the wall or the floor. Check for any caulking or adhesive as well.
- Disconnect plumbing connections: If there are any plumbing connections behind or underneath the shower or bathtub unit, use wrenches or pliers to disconnect the water supply lines and drain pipe.
- Break the seal: In some cases, the shower or bathtub unit may be secured to the floor or wall with a sealant or adhesive. Use a utility knife or a grout removal tool to carefully cut through the sealant and loosen any adhesive.
- Remove the unit: With all the connections and seals loosened, it’s time to remove the shower or bathtub unit. Enlist the help of a friend or family member to assist in lifting and maneuvering the unit out of the bathroom. Be cautious of its weight and size to prevent injury or damage.
Remember that the removal process may vary depending on the specific shower or bathtub unit and its installation. If you encounter any difficulties or are unsure about any step, consult a professional contractor or plumber for assistance.
Once the shower or bathtub unit is removed, you can continue with the next steps of removing the tile or flooring and the subflooring.
Keep in mind that removing a shower or bathtub can be a more complex task, and it may be necessary to seek professional help if you’re uncertain or uncomfortable with the process.
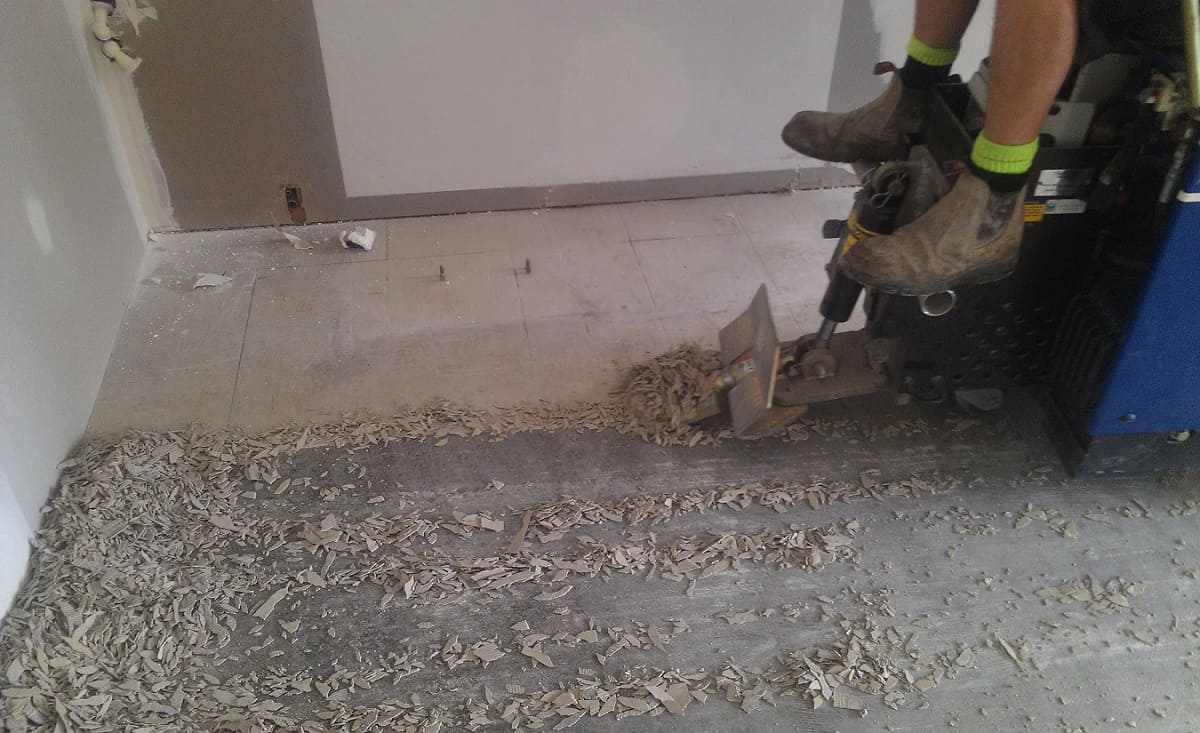
Step 7: Remove Tile or Flooring
Now that you have prepared the bathroom and removed the fixtures, it’s time to tackle the task of removing the tile or flooring. The method for removal will depend on the type of flooring material used. Follow these steps to remove the tile or flooring:
- Assess the flooring material: Determine the type of flooring you have in your bathroom, whether it’s tile, vinyl, laminate, or another material. This will help you decide on the best approach for removal.
- Prepare the necessary tools: Gather the tools needed for the specific type of flooring removal. For tile, you may need a grout removal tool, a hammer, and a chisel. For vinyl or laminate, a utility knife, pry bar, and mallet may be necessary. If you’re unsure about the tools needed, consult a professional or a knowledgeable expert.
- Start removing the flooring: Begin by removing any loose tiles or damaged sections of flooring, taking care not to damage the subflooring beneath. Using the appropriate tools, carefully work your way across the floor, removing the flooring material in small sections.
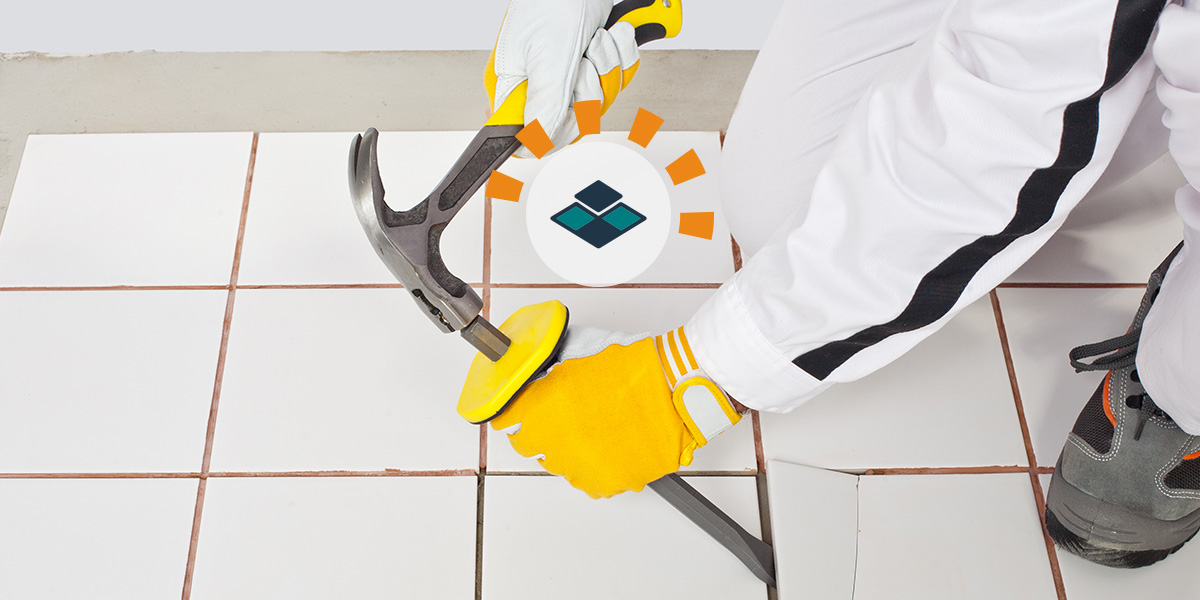
- For tile removal: If you’re removing tile, start by using a grout removal tool to break up the grout between the tiles. Once the grout is cleared, use a hammer and chisel to carefully break the tiles. Work slowly and methodically to avoid unnecessary damage.
- For vinyl or laminate removal: If you’re removing vinyl or laminate flooring, start by cutting the flooring into smaller sections with a utility knife. Use a pry bar or a putty knife to gently lift and remove the sections. Be cautious not to damage the subflooring beneath.
- Clean as you go: As you remove the flooring, collect the debris and dispose of it properly. Keep the work area clean and free of any loose material to ensure a safe and efficient removal process.
It’s important to note that removing flooring can be a time-consuming and labor-intensive task, especially if it’s a large area or if the flooring is heavily attached. Take breaks as needed and pace yourself to avoid exhaustion or strain.
Remember to wear appropriate safety gear, including gloves and safety goggles, during the removal process to protect yourself from debris and potential hazards.
Once the tile or flooring is removed, you can continue to the next step of removing the subflooring.
If you’re uncertain about any step or encounter difficulties during the process, consider seeking the assistance of a professional contractor or flooring specialist.
Read more: How To Remove Grout From Floor
Step 8: Remove Subflooring
Once you have removed the tile or flooring, it’s time to address the subflooring. The subflooring provides structural support and a level surface for your new flooring. If the subflooring is damaged or needs to be replaced, follow these steps to remove it:
- Inspect the subflooring: Carefully examine the subflooring to assess its condition. Look for signs of water damage, rot, or sagging. Determine if any sections need to be completely replaced or if minor repairs can be made.
- Prepare the necessary tools: Depending on the type of subflooring and its attachment method, gather the appropriate tools. You may need a circular saw, reciprocating saw, pry bar, hammer, nails, screws, or a combination of these tools.
- Identify the fasteners: Determine how the subflooring is attached to the floor joists. It may be secured with nails or screws. Identify the location of these fasteners to guide your removal process.
- Begin removing the subflooring: Starting at one edge of the bathroom, use a circular saw or a reciprocating saw to cut the subflooring into manageable sections. Take caution to avoid cutting into the floor joists beneath. Work your way across the floor, cutting and removing sections of subflooring as you go.
- Remove any fasteners: As you remove each section of subflooring, take note of any nails or screws that may remain in the floor joists. Use a pry bar or a hammer to remove these fasteners carefully.
- Make necessary repairs: If you encounter any areas of damaged subflooring, such as rot or water damage, cut away the affected sections and replace them with new plywood or oriented strand board (OSB). Secure the new subflooring to the floor joists with nails or screws.
- Clean the area: Once the subflooring is removed, take the time to clean up any remaining debris or dust. Ensure that the floor is free of any loose nails or screws to prevent any accidents or injuries during the installation of the new flooring.
Removing and replacing subflooring can be a complex task, especially if extensive repairs are needed. If you’re unsure about tackling this step or if you encounter significant issues, it’s recommended to consult a professional contractor or a flooring specialist for guidance and assistance.
With the subflooring removed and any necessary repairs made, you’re ready to move on to the next step of cleaning the area before installing the new flooring.
Remember to take breaks as needed and prioritize personal safety throughout the subflooring removal process. Wear appropriate safety gear, such as gloves and safety goggles, to protect yourself from debris and potential hazards.
Step 9: Clean the Area
After removing the old flooring and subflooring, it’s important to thoroughly clean the area before proceeding with the installation of the new flooring. Cleaning the area ensures a smooth surface for the new flooring and removes any debris or dust that may interfere with its installation. Follow these steps to clean the area:
- Remove all debris: Sweep or vacuum the entire bathroom to remove any loose debris, dust, or remnants of the old flooring. Pay attention to corners, edges, and hard-to-reach areas.
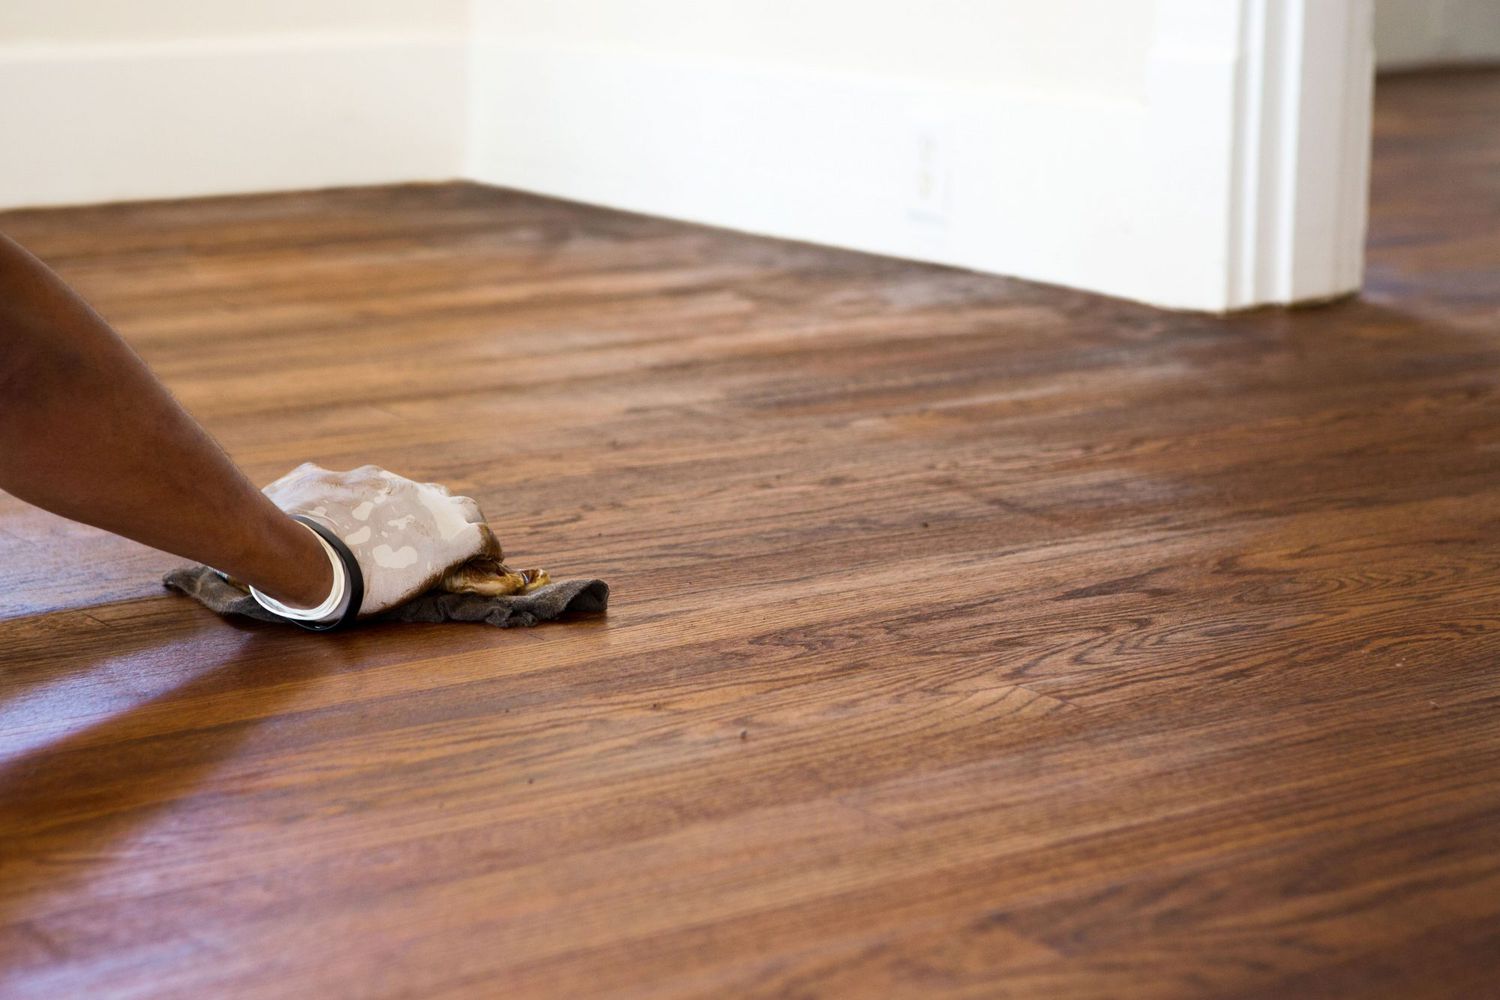
- Use a damp cloth or mop: Dampen a cloth or mop with warm water and gently wipe down the floor to remove any remaining dirt or grime. Be cautious if the subflooring is exposed, as excessive moisture can cause damage.
- Clean the walls and baseboards: Take the opportunity to clean the walls and baseboards adjacent to the flooring area. Use a mild cleaning solution and a sponge or cloth to remove any dirt, stains, or residue.
- Inspect for mold or mildew: Carefully inspect the walls and subflooring for any signs of mold or mildew. If any are found, thoroughly clean and disinfect the affected areas using an appropriate mold and mildew remover.
- Allow the area to dry: Ensure that the cleaned area is allowed to dry completely before proceeding with the installation of the new flooring. This may require a few hours or even a full day depending on the ventilation and humidity levels in your bathroom.
- Check for smoothness and levelness: Before installing the new flooring, inspect the subflooring for any unevenness or imperfections. Use a level or straight edge to check for flatness. Address any issues by sanding down high spots or using a self-leveling compound to fill in low spots.
Keeping the area clean and free of debris is essential for ensuring a successful and long-lasting flooring installation. By taking the time to clean and inspect the area, you’ll create an optimal foundation for the new flooring and ensure a professional finish.
With the area thoroughly cleaned and prepped, you’re now ready to move on to the final step: installing the new flooring in your bathroom.
Remember to prioritize safety throughout the cleaning process and use any necessary protective equipment, such as gloves and goggles, to avoid injury.
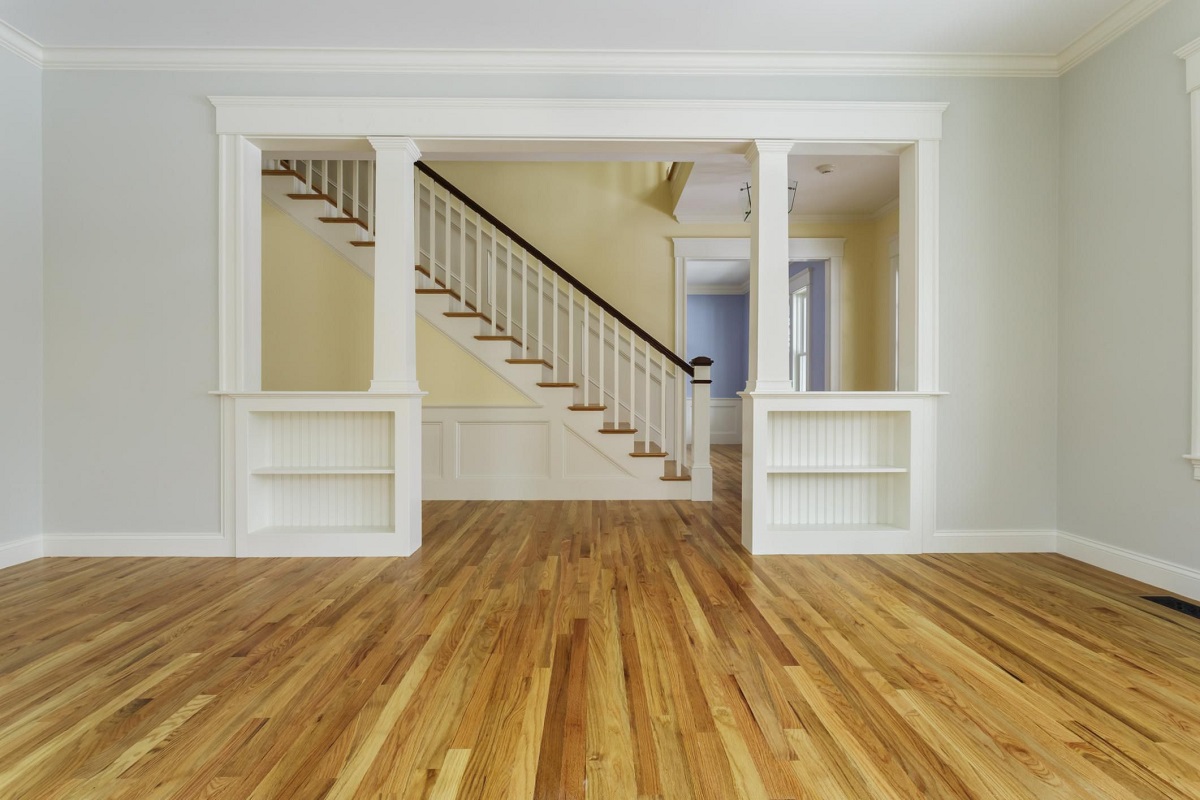
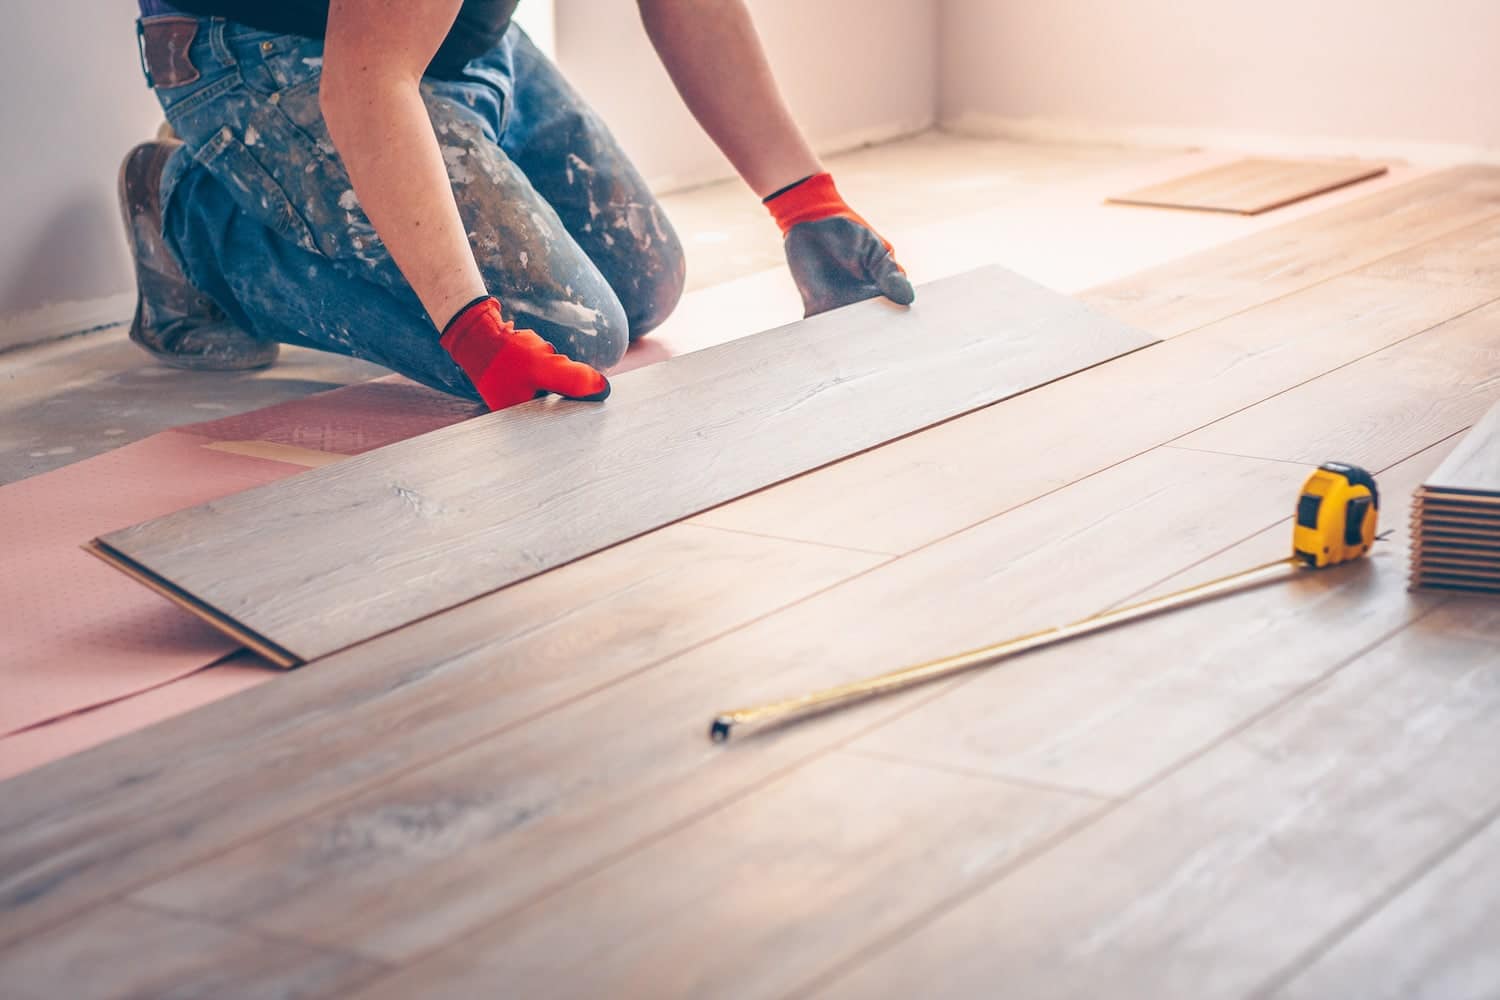
Step 10: Install New Flooring
Now that the area is clean and prepped, it’s time to install the new flooring in your bathroom. This step is the exciting final stage of the project where you get to see your vision come to life. Follow these steps to install the new flooring:
- Choose the right flooring material: Select the appropriate flooring material for your bathroom, considering factors such as durability, moisture resistance, and aesthetics. Popular options include ceramic or porcelain tile, vinyl, laminate, or natural stone.
- Measure and cut the flooring: Carefully measure your bathroom floor, taking into account any obstructions such as toilets or built-ins. Use these measurements to cut the flooring material to the appropriate size using a utility knife, straight edge, or a specific cutting tool depending on the material selected.
- Prepare the adhesive or underlayment: Depending on the type of flooring chosen, prepare the appropriate adhesive or underlayment as per the manufacturer’s instructions. Follow the recommended mixing ratios, drying times, and application techniques to ensure a proper installation.
- Apply the adhesive or underlayment: Spread the adhesive or underlayment evenly on the subfloor using a trowel or appropriate tool. Ensure proper coverage and follow the recommended thickness to ensure a strong bond or reliable surface for the new flooring.
- Lay the flooring: Begin laying the flooring material, starting at one corner of the bathroom. Carefully place each piece or tile in the desired pattern or configuration, ensuring a snug and secure fit. Use spacers if necessary to maintain consistent spacing between tiles or planks.
- Secure the flooring: Depending on the type of flooring, secure it to the subfloor using the recommended method. This may involve pressing tiles into the adhesive, clicking interlocking planks together, or using adhesive or nails depending on the material. Follow the manufacturer’s instructions for the optimal installation technique.
- Continue the installation: Work your way across the bathroom, laying the flooring material and securing it in place. Take your time to ensure a precise and accurate installation, paying attention to alignment, spacing, and any necessary cuts around obstacles.
- Fill gaps and clean: Once the flooring is installed, fill any gaps or joints with the recommended grout, caulk, or sealing material. Follow the instructions for application and removal of excess material. Clean the surface of the flooring, removing any adhesive or grout residue to achieve a clean and finished look.
- Allow for proper curing time: Depending on the type of flooring material and adhesive used, allow for the recommended curing time before walking or placing any furniture on the new flooring. This will ensure that the flooring sets properly and provides long-lasting durability.
- Reinstall fixtures and accessories: Once the new flooring is dry and cured, reinstall the fixtures, such as the toilet, sink, shower, and baseboard. Take care to follow the manufacturer’s instructions or consult a professional if needed to ensure proper installation.
Installing new flooring can be a rewarding and transformative step in your bathroom renovation. Follow these steps and the manufacturer’s instructions closely to achieve a beautiful and functional end result.
Remember to take your time, measure accurately, and use proper safety precautions throughout the installation process. With the new flooring in place, you can now enjoy your refreshed bathroom and the satisfaction of a job well done!
Conclusion
Congratulations! You have successfully completed the process of removing and replacing the bathroom floor. By following the step-by-step guide, you have transformed your bathroom and laid the foundation for a fresh and updated space. Whether you were looking to update the aesthetic of your bathroom or resolve issues with your old flooring, this project has allowed you to achieve your goals.
Throughout this journey, you learned how to prepare the bathroom, remove the baseboard, disconnect plumbing fixtures, remove the toilet, sink, and shower/bathtub, remove the tile or flooring, remove the subflooring, clean the area, and finally, install the new flooring. Each step required careful planning, attention to detail, and a commitment to ensuring a safe and efficient process.
By using the appropriate tools and materials, following the recommended techniques, and prioritizing safety, you have successfully completed this home maintenance project. Your bathroom now has a fresh new look and a sturdy foundation for years to come.
Remember, it’s always important to consult professionals or experts if you have any uncertainties or if you encounter difficulties during the process. They can provide guidance and assistance to ensure a successful project.
We hope this comprehensive and engaging guide has been helpful to you. Enjoy your newly renovated bathroom and take pride in the work you have accomplished. Whether you tackled this project on your own or with the help of professionals, your dedication has made a difference in your home.
Thank you for joining us on this journey, and we wish you all the best with your future home repair and improvement endeavors!
Frequently Asked Questions about How To Remove A Bathroom Floor (Step-By-Step) - By Home Repair Tutor
Was this page helpful?
At Storables.com, we guarantee accurate and reliable information. Our content, validated by Expert Board Contributors, is crafted following stringent Editorial Policies. We're committed to providing you with well-researched, expert-backed insights for all your informational needs.