Furniture
How To Rewire A Floor Lamp
Modified: October 20, 2024
Learn how to rewire a floor lamp and bring new life to your furniture. Find step-by-step instructions and helpful tips for a successful DIY project.
(Many of the links in this article redirect to a specific reviewed product. Your purchase of these products through affiliate links helps to generate commission for Storables.com, at no extra cost. Learn more)
Introduction
Welcome to our comprehensive guide on how to rewire a floor lamp. Floor lamps are not only functional lighting fixtures but also beautiful decorative pieces that can enhance the ambiance of any room. However, over time, the wiring in a floor lamp can become frayed or damaged, posing a safety hazard. By rewiring the floor lamp, you can ensure proper functionality and peace of mind.
In this article, we will take you through a step-by-step process to safely and effectively rewire a floor lamp. Whether you are a DIY enthusiast or a beginner, you will find this guide useful in tackling this project. We will cover everything from the tools and materials you will need to the actual rewiring process. So, let’s get started!
Key Takeaways:
- Safely and effectively rewire a floor lamp by following step-by-step instructions, ensuring proper functionality, and preserving its aesthetic appeal. Prioritize safety and enjoy the renewed illumination in your space.
- Gather necessary tools and materials, prioritize safety, and follow each step to successfully rewire your floor lamp. Enjoy the restored functionality and ambiance it brings to your home.
Read more: How To Rewire A Lamp
Overview of Floor Lamps
Before we dive into the rewiring process, let’s briefly go over the components of a typical floor lamp. Understanding the different parts will help you navigate the rewiring process more efficiently.
A floor lamp generally consists of the following components:
- Lamp base: The base provides stability and support for the lamp.
- Body: The body is the vertical portion of the lamp that extends from the base and often features decorative elements.
- Socket: The socket is the part that holds the light bulb in place.
- Harp: The harp is a bracket-like structure that supports the lampshade.
- Lampshade: The lampshade is the decorative cover that diffuses and directs the light.
- Power cord: The power cord is the electrical cable that connects the lamp to an electrical outlet.
- Plug: The plug is the end of the power cord that goes into the electrical outlet.
Now that you have a basic understanding of the different parts of a floor lamp, let’s move on to the tools and materials you will need for the rewiring process.
Key Takeaways:
- Safely and effectively rewire a floor lamp by following step-by-step instructions, ensuring proper functionality, and preserving its aesthetic appeal. Prioritize safety and enjoy the renewed illumination in your space.
- Gather necessary tools and materials, prioritize safety, and follow each step to successfully rewire your floor lamp. Enjoy the restored functionality and ambiance it brings to your home.
Read more: How To Rewire A Lamp
Overview of Floor Lamps
Before we dive into the rewiring process, let’s briefly go over the components of a typical floor lamp. Understanding the different parts will help you navigate the rewiring process more efficiently.
A floor lamp is a versatile and popular lighting fixture known for its functionality and decorative appeal. It typically consists of several key components that work together to provide lighting and enhance the aesthetics of a room.
Lamp Base: The lamp base sits on the floor and provides stability and support for the lamp. It can be made of various materials, such as metal, wood, or ceramic, and comes in different shapes and sizes to match different decor styles.
Body: The body of a floor lamp is the vertical portion that extends from the lamp base. It often features decorative elements like curves, twists, or intricate designs, adding an artistic touch to the lamp. The body is where the electrical wiring is housed, connecting the components of the lamp.
Socket: The socket is the part of the lamp where the light bulb is inserted and held in place. It is typically made of metal and has a threaded collar that allows for easy installation and removal of light bulbs.
Harp: The harp is a bracket-like structure that sits atop the socket and holds the lampshade in place. It consists of two arms that extend upward, creating a secure support system for the lampshade. The harp’s height can be adjusted to accommodate different sizes of lampshades.
Lampshade: The lampshade is the decorative cover that surrounds the light bulb and directs and diffuses the light. It can be made of various materials, such as fabric, paper, glass, or metal, and comes in a wide range of designs and styles to suit different preferences and interior decor.
Power Cord: The power cord is an essential component that connects the lamp to an electrical outlet. It is a flexible cable that carries the electricity from the outlet to the lamp, allowing it to illuminate. The power cord may have a switch located along its length for convenient on/off control.
Plug: The plug is the end of the power cord that is inserted into an electrical outlet. It contains prongs that fit into the outlet’s slots, securing the connection and allowing the lamp to draw power.
Now that you have a basic understanding of the different parts of a floor lamp, let’s move on to the tools and materials you will need for the rewiring process.
Tools and Materials Needed
Before you begin the process of rewiring your floor lamp, it is essential to gather all the necessary tools and materials. Having everything prepared beforehand will help ensure a smooth and efficient rewiring process. Here’s a list of what you’ll need:
Tools:
- Screwdriver set: A set of screwdrivers with various sizes and types will be handy for disassembling the lamp.
- Wire cutters/strippers: These tools are needed to cut and strip the wires during the rewiring process.
- Pliers: Pliers will be useful for bending and securing wires, as well as making adjustments to lamp components.
- Multimeter: A multimeter is essential for testing the continuity and voltage of the wires and components.
- Tape measure: A tape measure helps ensure accurate wire cutting and positioning.
- Wire nuts: Wire nuts are used to securely connect wires together.
- Electrical tape: Electrical tape provides insulation and protection for exposed wires.
Read more: How To Rewire A Thermostat
Materials:
- Replacement lamp cord: You will need a new lamp cord of the appropriate length to replace the old one.
- Lamp socket: If your current socket is damaged or faulty, you may need to replace it with a new one.
- Lamp plug: Similarly, if your plug is damaged or incompatible with your electrical outlets, a new plug may be needed.
- Wire connectors: Wire connectors are used to secure the connection between wires and components.
- Lampshade: If you plan on replacing the lampshade, make sure to choose one that fits the style and size of your floor lamp.
Make sure to check the specifications of the lamp cord, socket, and plug to ensure they are compatible with each other and meet safety standards. Also, consider any additional materials specific to your floor lamp’s design or any additional components you may need to replace during the rewiring process.
With all the necessary tools and materials at hand, you’re now ready to safely start the process of rewiring your floor lamp. Remember to follow proper safety precautions and take your time to ensure a successful and long-lasting rewiring job.
Step 1: Safety Precautions
Prior to starting any electrical work, it is crucial to prioritize safety. Electricity can be dangerous if not handled properly, so taking the necessary precautions is essential. Here are some important safety precautions to follow before rewiring your floor lamp:
1. Ensure the Power is Turned Off
Before you begin any work on your floor lamp, make sure it is completely unplugged from the electrical outlet. This ensures that there is no power running through the lamp and minimizes the risk of electric shock.
2. Create a Safe Work Area
Set up your work area in a well-lit space with plenty of room to move around and spread out your tools and materials. Keep the area dry and free from any potential hazards, such as water or flammable substances.
Read more: How To Make A Floor Lamp
3. Use Personal Protective Equipment (PPE)
Wearing appropriate personal protective equipment can help protect you from potential injuries. Consider wearing safety goggles to shield your eyes from any debris, as well as gloves to protect your hands.
4. Work on a Stable Surface
Place your floor lamp on a stable and flat surface to avoid any accidental tipping or tripping hazards. This will provide a secure workspace and prevent damage to the lamp or injury to yourself.
5. Inspect the Lamp for Damages
Before starting the rewiring process, thoroughly inspect the lamp for any signs of damage or wear. Look for frayed wires, cracked sockets, or loose connections. If you notice any issues, consider replacing the damaged parts before proceeding.
6. Read and Follow Instructions
It is important to closely follow the manufacturer’s instructions for your specific floor lamp model. This will help ensure that you are performing the rewiring correctly and safely. If there are no specific instructions available, consult a reputable online resource or seek guidance from a professional electrician.
Read more: How To Choose A Floor Lamp
7. Consult a Professional if Unsure
If you are uncertain about any aspect of the rewiring process or feel uncomfortable working with electricity, it is best to seek the assistance of a qualified electrician. They have the knowledge and expertise to handle electrical tasks safely and efficiently.
By taking these safety precautions, you are significantly reducing the risk of accidents or injuries during the rewiring process. Now that you are aware of the necessary safety measures, you can proceed with confidence to the next step of the rewiring process.
Step 2: Unplug the Floor Lamp
Now that you have taken the necessary safety precautions, it’s time to begin the rewiring process. The first step is to unplug the floor lamp from the electrical outlet. This ensures that there is no power running through the lamp and eliminates the risk of electric shock.
1. Locate the Power Cord
Identify the power cord of your floor lamp. Trace it from the base of the lamp to the plug, which is usually located towards the end of the cord.
2. Remove the Plug from the Outlet
Gently pull the plug out of the electrical outlet. Be sure to grip the plug itself and not the cord to avoid any damage to the cord.
Read more: How To Stabilize A Floor Lamp On Carpet
3. Inspect the Plug
While you have the plug in your hand, take a moment to inspect it for any signs of damage. Look for frayed wires, bent prongs, or any other visible issues. If the plug appears damaged, it may need to be replaced along with the rest of the wiring.
4. Wrap the Plug
Once the plug is disconnected, you can wrap it with electrical tape as an additional safety measure. This will help insulate the plug and prevent any exposed wires. Start by wrapping a few layers of electrical tape around the base of the plug, where the wire enters the plug body. Continue wrapping the tape around the entire plug, extending a few inches beyond the base.
5. Secure the Plug
Secure the wrapped plug to the lamp body or set it aside in a safe place. This will prevent it from accidentally falling or getting lost during the rewiring process.
By following these steps, you have successfully unplugged the floor lamp and ensured that there is no power running through it. Now you can proceed with the disassembly of the lamp in the next step.
Step 3: Disassemble the Floor Lamp
Now that you have safely unplugged the floor lamp, it’s time to disassemble it in order to access the wiring components. Disassembling the lamp will allow you to remove the old wiring and prepare for the rewiring process. Here’s how to disassemble the floor lamp:
Read more: How To Hide Lamp Cords On The Floor
1. Remove the Lampshade
If your floor lamp has a lampshade, carefully remove it by unscrewing or unclipping it from the harp. Set it aside in a safe place to avoid any damage during the disassembly process.
2. Unscrew the Light Bulb
Ensure that the lamp is switched off and the light bulb is cool to the touch. Gently unscrew the light bulb counterclockwise to remove it from the socket. Place it aside in a secure location to prevent any breakage.
3. Disassemble the Lamp Base
Examine the lamp base to determine how it is assembled. Some lamp bases have a threaded rod or a screw that holds the different parts together. Use a screwdriver or a wrench, if needed, to loosen and remove any screws or bolts that are keeping the lamp base intact. Take note of the order in which the pieces are assembled, as you will need to reassemble them later.
4. Remove the Socket and Harp
Once you have disassembled the lamp base, locate the socket and the harp. The socket is typically attached to the lamp body with a nut or a screw. Unscrew or unclip the socket and carefully separate it from the lamp body. Similarly, remove the harp from the socket by squeezing the arms inward and sliding it out.
Read more: How To Rewire A Chandelier
5. Set Aside the Lamp Components
As you remove each component, set them aside in a safe and organized manner. It’s a good idea to keep small parts in a container or bag to prevent them from getting lost. Remember to label or take pictures of the components if you think it will help you during the reassembly process.
By following these steps, you have successfully disassembled the floor lamp, allowing you to access the wiring components for the rewiring process. In the next step, we will guide you through removing the old wiring from the lamp.
Step 4: Remove the Old Wiring
With the floor lamp disassembled, it’s time to remove the old wiring. Removing the old wiring is an essential step in the rewiring process to ensure a safe and efficient electrical connection. Follow these steps to remove the old wiring from the lamp:
1. Identify the Old Wiring
Locate the old wiring within the lamp body. It typically runs from the socket through the lamp body and connects to the power cord. Take note of how the wiring is routed and connected before proceeding further.
2. Inspect the Old Wiring
Examine the old wiring carefully for any signs of damage, such as frayed or worn-out insulation. If you notice any issues, it is important to replace the wiring entirely for safety purposes. Even if the old wiring appears to be in good condition, it is still recommended to replace it to ensure reliability and longevity.
Read more: What Floor Lamp Is The Brightest
3. Disconnect the Socket Wiring
The wiring is connected to the socket, which holds the light bulb. Depending on the type of socket, you may need to unscrew or unclip the wiring terminals. Gently pull the wiring away from the socket, ensuring not to damage any of the other lamp components.
4. Disconnect the Power Cord Wiring
The power cord is connected to the wiring within the lamp body. Locate the point where the power cord connects to the lamp wiring. Depending on the lamp design, there may be a connection point or wire nuts securing the two wires together. Unscrew or unclip the connection and separate the old wiring from the power cord.
5. Remove and Discard the Old Wiring
Once the old wiring is disconnected from both the socket and power cord, carefully remove it from the lamp body. Ensure that all remnants of the old wiring are completely removed to make way for the installation of the new wiring. Properly dispose of the old wiring in accordance with local regulations.
By following these steps, you have successfully removed the old wiring from your floor lamp. In the next step, we will guide you through measuring and cutting the new wire for the rewiring process.
Step 5: Measure and Cut the New Wire
Now that you have removed the old wiring, it’s time to measure and cut the new wire for the rewiring process. The new wire will replace the old, worn-out wiring and ensure a safe and reliable electrical connection. Follow these steps to measure and cut the new wire:
Read more: What Is A Torchiere Floor Lamp
1. Gather the Necessary Tools
Before you begin measuring and cutting the new wire, make sure you have the necessary tools handy. This includes a tape measure and wire cutters/strippers. These tools will help you accurately measure and cut the wire to the required length.
2. Determine the Length of the New Wire
Measure the distance from the lamp socket to the point where the power cord will connect to the lamp wiring. This will give you the length of the new wire needed. Be sure to add a few extra inches to the measured length to allow for flexibility and ease of installation.
3. Select the Appropriate Wire Gauge
Consider the electrical requirements of your floor lamp when selecting the wire gauge. The gauge refers to the thickness of the wire. Consult the manufacturer’s instructions or a reputable online resource to determine the recommended wire gauge for your specific lamp model. It’s important to use the correct wire gauge to ensure proper electrical conductivity and avoid overheating.
4. Cut the New Wire
Using the wire cutters/strippers, carefully cut the new wire to the measured length. Make sure to make a clean and precise cut to ensure a proper connection later on.
Read more: What Is The Mass Of A Floor Lamp?
5. Strip the Ends of the New Wire
With the wire cut to the desired length, remove approximately 1/2 inch of insulation from each end of the wire using the wire cutters/strippers. This will expose the copper conductors for proper connection.
By following these steps, you have successfully measured and cut the new wire for your floor lamp. In the next step, we will guide you through attaching the new wire to the floor lamp components for the rewiring process.
Step 6: Attach the New Wire to the Floor Lamp
Now that you have measured and cut the new wire, it’s time to attach it to the various components of the floor lamp. Properly connecting the new wire will ensure a safe and reliable electrical connection. Follow these steps to attach the new wire to the floor lamp:
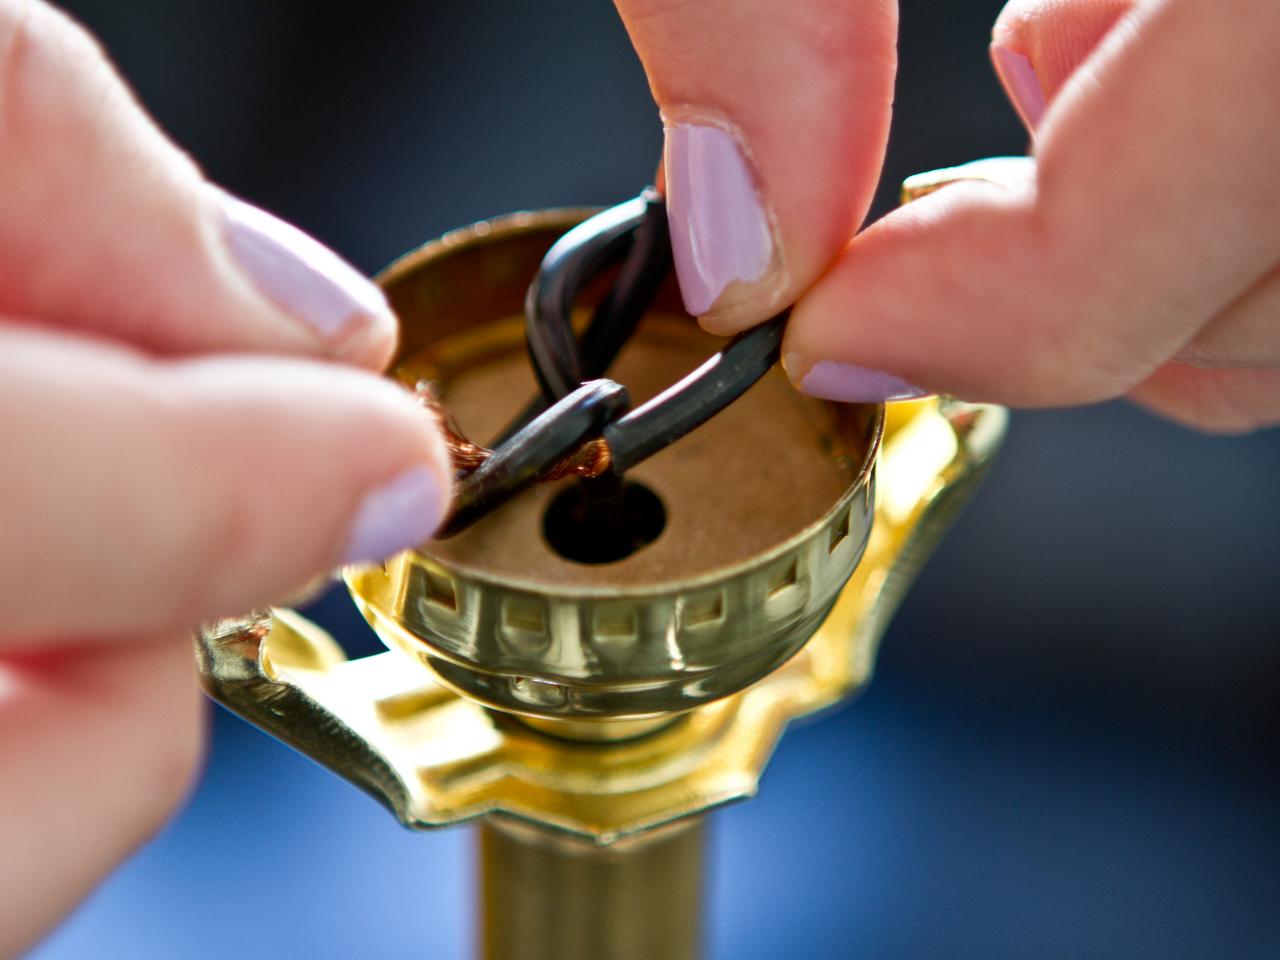
1. Connect the New Wire to the Socket
Begin by connecting one end of the new wire to the socket. Identify the two terminals on the socket where the wiring will be connected. If necessary, consult the manufacturer’s instructions or a wiring diagram for your specific lamp model. Twist the stripped ends of the new wire with the corresponding socket wires and secure them tightly using wire nuts. Make sure the connection is secure and there are no exposed wires.
2. Connect the New Wire to the Power Cord
Next, connect the other end of the new wire to the power cord. Determine the point where the power cord will connect to the lamp wiring within the lamp body. Twist the stripped end of the new wire with the corresponding power cord wires and secure them tightly using wire nuts. Ensure that the connection is secure and there is no exposed wiring.
Read more: Where To Place A Floor Lamp
3. Insulate the Connections
After making the connections, wrap each wire nut with electrical tape to provide further insulation and protection. Start at the base of the wire nut and wrap the tape firmly around the connection, extending it a few inches along the wire to ensure full coverage. This will help prevent any accidental contact and ensure a safe electrical connection.
4. Reassemble the Lamp Components
With the new wire securely attached to the socket and power cord, it’s time to reassemble the lamp components. Follow the reverse order of the disassembly process, ensuring that all the components are properly aligned and securely fastened. Pay attention to any specific instructions or guidelines provided by the manufacturer.
5. Double-Check the Connections
Before proceeding, double-check all the connections to ensure they are secure and properly insulated with electrical tape. Inspect the wiring for any signs of damage or exposed wires. If any issues are detected, make the necessary adjustments or replace the wiring as needed.
By following these steps, you have successfully attached the new wire to the various components of your floor lamp. In the next step, we will guide you through reassembling the floor lamp in its entirety.
Step 7: Reassemble the Floor Lamp
With the new wire securely attached to the necessary components, it’s time to reassemble the floor lamp. Reassembling the lamp will allow you to put all the pieces back together and restore its functionality and aesthetic appeal. Follow these steps to reassemble the floor lamp:
Read more: Where To Buy Floor Lamp
1. Align and Secure the Lamp Body
Start by aligning the lamp body with the lamp base. Carefully insert the threaded rod or screw through the designated hole or slot and tighten it securely. Use a screwdriver or wrench, if needed, to ensure a snug and stable fit. Make sure the lamp body is positioned straight and centered on the lamp base.
2. Attach the Harp and Socket
Next, slide the harp back onto the socket by inserting the arms into the designated slots. Ensure that the harp is securely attached to the socket and that the lampshade will sit properly on it. Screw or clip the socket back onto the lamp body, ensuring a tight connection.
3. Install the Light Bulb
Gently screw the appropriate light bulb into the socket. Be cautious not to overtighten, as it may cause damage to the socket or the bulb itself. Ensure that the bulb is securely in place and aligned properly.
4. Attach the Lampshade
If you had removed the lampshade earlier, it’s now time to reattach it. Align the lampshade with the harp and carefully secure it in place. Ensure that the lampshade is level and sits evenly on the harp. If necessary, adjust the harp’s height to achieve the desired positioning of the lampshade.
5. Plug in the Floor Lamp
With the lamp fully reassembled, you can now plug it back into the electrical outlet. Ensure that the plug is securely inserted and that the electrical connection is stable. Avoid placing any strain on the wires or bending them sharply.
By following these steps, you have successfully reassembled your floor lamp. In the final step, we will guide you through testing the rewired floor lamp to ensure proper functionality.
Step 8: Test the Rewired Floor Lamp
After successfully reassembling the floor lamp, it’s important to test the rewired connections to ensure proper functionality and safety. Testing the lamp will help identify any potential issues and give you peace of mind knowing that the rewiring was successful. Follow these steps to test the rewired floor lamp:
1. Position the Floor Lamp
Place the floor lamp in its desired location, ensuring that it is on a stable surface and positioned away from any flammable objects or materials. Make sure the lampshade is properly aligned and secure.
2. Turn on the Power
Switch on the power to the floor lamp by plugging it back into the electrical outlet. Ensure that the outlet is functioning properly and providing power to the lamp.
Read also: 10 Incredible Floor Lamp For 2025
3. Test the Light Bulb
Screw in a light bulb of the appropriate wattage and type into the socket of the floor lamp. Ensure that the bulb is securely in place and properly aligned. Turn on the lamp using the switch or pull chain, if applicable.
4. Check for Proper Illumination
Observe the lamp to ensure that the light bulb illuminates as expected. Check for any flickering or dimming of the light, which may indicate an issue with the wiring connection. The light should be stable and consistent in brightness. If you notice any abnormalities, switch off the lamp and double-check the wiring connections for any loose or faulty connections.
5. Test the Switch or Pull Chain
If your floor lamp has a built-in switch or pull chain, toggle it on and off to ensure that it functions properly. The switch or pull chain should turn the lamp on and off smoothly without any difficulties or interruptions.
6. Inspect for Safety
Carefully inspect the floor lamp and its wiring for any signs of overheating, sparking, or unusual smells. Ensure that all connections are secure, and there are no exposed wires or loose components. If you detect any safety concerns, switch off the lamp immediately and consult a professional electrician.
By following these steps, you have successfully tested the rewired floor lamp. If everything is functioning properly and safely, you can now enjoy the renewed illumination and beauty that your floor lamp brings to your space.
Remember, if at any point during the testing process you notice any issues or have concerns about the safety of the rewired floor lamp, it’s best to consult a professional electrician for further guidance and assistance.
Read more: How To Set Up An Arc Floor Lamp
Conclusion
Congratulations! You have successfully completed the rewiring process for your floor lamp. By following the step-by-step instructions in this guide, you have ensured the safety and functionality of your lamp while preserving its aesthetic appeal. Rewiring a floor lamp may seem like a daunting task, but with the right tools, materials, and precautions, it can be accomplished by DIY enthusiasts of all levels.
Remember, safety should always be the top priority when working with electrical components. Before starting any electrical project, make sure to unplug the lamp and take the necessary safety precautions, such as wearing personal protective equipment and working in a well-lit and stable area.
Throughout the rewiring process, we covered several essential steps. You learned how to safely unplug the lamp, disassemble the different components, remove the old wiring, measure and cut the new wire, attach the new wire to the floor lamp, reassemble the lamp, and test the rewired connections. By carefully following each step, you have successfully restored your floor lamp to its former glory.
It’s important to note that if you encounter any difficulties or have concerns about your electrical abilities, it is always recommended to consult a professional electrician. They can provide expert guidance and ensure that the rewiring is done correctly and safely.
Now that your floor lamp is rewired and fully functional, it’s time to enjoy the beautiful lighting and ambiance it adds to your space. Whether it’s illuminating a cozy reading nook or standing as a statement piece in your living room, your newly rewired floor lamp is ready to brighten up your home.
Remember to periodically inspect your floor lamp to ensure that the wiring and components remain in good condition. This will help prevent any potential hazards and extend the lifespan of your lamp.
Thank you for following this comprehensive guide on how to rewire a floor lamp. We hope it has been informative and helpful. Happy lighting!
Frequently Asked Questions about How To Rewire A Floor Lamp
Was this page helpful?
At Storables.com, we guarantee accurate and reliable information. Our content, validated by Expert Board Contributors, is crafted following stringent Editorial Policies. We're committed to providing you with well-researched, expert-backed insights for all your informational needs.