
Furniture
How To Set Up A Tripod Table Lamp
Modified: February 29, 2024
Learn how to easily set up and use a stylish and functional tripod table lamp for your furniture needs. Perfect for adding ambiance and lighting options to any room.
(Many of the links in this article redirect to a specific reviewed product. Your purchase of these products through affiliate links helps to generate commission for Storables.com, at no extra cost. Learn more)
Introduction
Setting up a tripod table lamp can be a simple and rewarding task. Whether you are a DIY enthusiast or just looking to add a touch of elegance to your space, a tripod table lamp can provide both functional lighting and stylish decor. In this article, we will guide you through the step-by-step process of setting up a tripod table lamp, from unboxing to positioning the lamp head. So, gather your materials and let’s get started!
Key Takeaways:
- Elevate your space with a DIY tripod table lamp, combining functional lighting and elegant decor. Follow the step-by-step guide for a rewarding setup experience.
- Ensure safety and satisfaction by testing the lamp’s functionality and adjusting the lamp head for optimal illumination. Add a lampshade for a softer, diffused lighting effect.
Read more: How To Set Up Dinnerware
Materials Needed
Before you begin assembling your tripod table lamp, make sure you have the following materials handy:
- A tripod table lamp kit
- A lampshade (optional, depending on the kit)
- A light bulb (check the lamp kit for the recommended bulb type)
- A power source (outlet or extension cord)
Once you have gathered these materials, you are ready to proceed with the assembly of your tripod table lamp.
Step 1: Unbox and Lay Out the Components
The first step in setting up your tripod table lamp is to carefully unbox and lay out all the components. This will allow you to familiarize yourself with the various parts and ensure that nothing is missing or damaged.
Begin by opening the lamp kit packaging and removing all the contents. Lay them out on a clean and spacious surface, organizing them in a logical manner.
Typically, a tripod table lamp kit will consist of the following components:
- Base: This is the sturdy foundation of the lamp that provides stability.
- Lamp Arm: This is the connecting piece between the base and the lamp head.
- Lamp Head: This is the part of the lamp that houses the light bulb.
- Power Cord: This is the cord that connects the lamp to the power source.
- Switch: This is the on/off switch that controls the lamp’s operation.
- Additional Hardware: Depending on the kit, there may be screws, bolts, or other hardware components that are necessary for assembly.
Take a few moments to inspect each component for any signs of damage or defects. If you notice any issues, contact the manufacturer or retailer for assistance or replacement parts.
Now that you have familiarized yourself with the components, you are ready to move on to the next step: assembling the base.
Step 2: Assemble the Base
With all the components laid out, it’s time to assemble the base of your tripod table lamp. The base provides stability and support for the lamp, ensuring it stands upright and secure.
Begin by locating the base component of your lamp kit. It is usually a solid, flat piece that may have pre-drilled holes or slots for attaching other parts.
If your base requires assembly, follow the instructions provided by the manufacturer. This may involve attaching legs or other support components to the base using screws or bolts. Use a screwdriver or wrench, as needed, to secure the pieces together tightly.
Once the base is fully assembled, double-check that all the connections are secure and that the base sits level on a flat surface. Adjust the legs if necessary to ensure stability.
Now that you have successfully assembled the base, you are ready to move on to the next step: attaching the lamp arm to the base.
Step 3: Attach the Lamp Arm to the Base
Now that you have assembled the base, it’s time to attach the lamp arm to it. The lamp arm serves as the connecting piece between the base and the lamp head, allowing for adjustable height and positioning.
Locate the lamp arm component in your tripod table lamp kit. It is typically a long, slender piece with mounting brackets or slots on each end.
Align the mounting brackets or slots of the lamp arm with the corresponding connectors on the base. Ensure that they fit together snugly.
Depending on the design of your lamp kit, you may need to secure the lamp arm to the base using screws, bolts, or other provided hardware. Consult the manufacturer’s instructions for the specific assembly method.
Using a screwdriver or wrench, if necessary, tighten the screws or bolts to securely attach the lamp arm to the base. Avoid overtightening, as it may damage the components.
Once the lamp arm is attached to the base, give it a gentle shake to ensure stability. It should not wobble or feel loose.
Congratulations! You have successfully attached the lamp arm to the base. Now, it’s time to move on to the next step: installing the light bulb.
Read also: 11 Incredible Tripod Floor Lamp for 2024
Step 4: Install the Light Bulb
With the lamp arm securely attached to the base, it’s time to install the light bulb in the lamp head. The light bulb is the essential component that will provide illumination to your space.
Start by locating the lamp head component in your tripod table lamp kit. It is usually a detachable part that fits onto the top end of the lamp arm.
Check the specifications or instructions provided with the lamp kit to determine the type and wattage of the recommended light bulb. It’s important to use a bulb that is compatible with your lamp for optimal performance and safety.
Before installing the light bulb, make sure the lamp is unplugged or the power is switched off to avoid any accidents.
Depending on the design of your lamp kit, you may need to unscrew or twist off the top cap or cover of the lamp head to access the bulb socket.
Insert the light bulb into the socket, ensuring that it is inserted firmly and securely. Be gentle to avoid damaging the bulb.
If the lamp head has a cap or cover, carefully screw it back on or twist it into place to secure the bulb.
Once the light bulb is installed, take a moment to wipe the bulb and lamp head clean using a soft, lint-free cloth to remove any fingerprints or smudges.
Now that the light bulb is installed, you are one step closer to enjoying the warm glow of your tripod table lamp. The next step is to adjust the lamp height according to your preference.
When setting up a tripod table lamp, ensure that the legs are evenly spaced and stable to prevent any wobbling or tipping over. Adjust the height and angle of the lamp to suit your lighting needs.
Step 5: Adjust the Lamp Height
One of the advantages of a tripod table lamp is its adjustable height, allowing you to customize the lighting to suit your needs and preferences. In this step, we will guide you through adjusting the lamp height to achieve the desired lighting position.
Start by locating the adjustable mechanism on your tripod table lamp. This can vary depending on the design of your lamp, but it is typically found near the junction between the lamp arm and the lamp head.
Some lamps may have a twist-lock mechanism, while others may use a telescopic or sliding mechanism. Refer to the instructions provided with your lamp kit to understand the specific adjustment method.
To lower the lamp height, gently loosen the adjustable mechanism by twisting, sliding, or unlocking it, depending on the mechanism type. Gradually lower the lamp arm or extend the telescopic component to the desired height. Once in position, tighten the mechanism to secure the lamp in place.
To raise the lamp height, follow the same process but in the opposite direction. Loosen the adjustable mechanism, raise the lamp arm, and secure it by tightening the mechanism.
Experiment with different heights to find the perfect balance between functionality and aesthetics. Consider the intended purpose of the lamp and the surrounding space when selecting the height.
Remember to take safety into account when adjusting the lamp height. Ensure that the lamp remains stable and balanced at the chosen height to prevent it from accidentally tipping over.
Now that you have adjusted the lamp height to your desired position, the next step is to connect the lamp to a power source.
Step 6: Connect the Power Source
With the lamp height adjusted to perfection, it’s time to connect the tripod table lamp to a power source. This will enable the lamp to illuminate your space and create a warm and inviting ambiance.
Begin by locating the power cord that is included in your lamp kit. The power cord is typically attached to the lamp base and has a plug at the other end.
Identify the nearest power outlet in your vicinity. Ensure that the outlet is easily accessible and in good working condition.
If the power cord is not long enough to reach the desired outlet, you may need to use an extension cord. Choose a quality extension cord that is suitable for indoor use and has the appropriate length to reach the outlet without causing any tripping hazards.
Insert the plug of the power cord into the power outlet or the extension cord, if necessary. Ensure that the connection is firm and secure.
Before switching on the lamp, take a moment to double-check that the light bulb is properly installed and the lamp head is securely attached. Inspect the power cord for any signs of damage, such as fraying or exposed wires. If any issues are detected, do not proceed and seek professional assistance or a replacement.
Once you have confirmed that everything is in order, switch on the lamp using the designated on/off switch. The lamp should light up, filling your space with a soft and warm glow.
Finally, position the lamp in the desired location and adjust the direction of the light to your preference. You can swivel or rotate the lamp head, if applicable, to direct the light where you need it the most.
Now that your tripod table lamp is connected to a power source and illuminating your space, it’s time to move on to the next step: testing the lamp to ensure proper functionality.
Step 7: Test the Lamp
After connecting the tripod table lamp to a power source, it is crucial to test its functionality to ensure that everything is in working order. This step will help you verify that the lamp is providing the desired illumination and that all components are functioning correctly.
To begin, switch on the lamp using the designated on/off switch. Observe the lamp to ensure that it lights up without any flickering or dimness. A steady and bright glow indicates that the bulb and electrical connections are functioning properly.
If you encounter any issues, such as a flickering light or no light at all, there may be a problem with the bulb, the power source, or the wiring of the lamp. In such cases, double-check the bulb installation, ensuring it is securely screwed in. Verify that the power source is working by testing another device on the same outlet or using a different outlet for the lamp. If the problem persists, it may be necessary to seek professional assistance or contact the manufacturer for troubleshooting guidance.
Additionally, you can test the lamp’s adjustability and stability by gently adjusting the lamp height or positioning the lamp head in different directions. Ensure that the lamp remains stable and balanced without any wobbling or tilting.
Take a moment to evaluate the overall lighting effect and consider if it meets your expectations. Adjust the lamp’s position and direction as needed to achieve your desired lighting ambiance.
Lastly, periodically check the lamp while in use to ensure that it operates safely. Make sure that the lamp does not overheat and that the power cord remains cool to the touch. Pay attention to any unusual smells or sounds, as they may indicate a malfunction or potential hazard.
By performing a thorough lamp test, you can ensure that your tripod table lamp is functioning properly and providing the desired lighting effect to enhance your space.
Now that you have successfully tested the lamp’s functionality, we can move on to the next step: positioning and angling the lamp head.
Read more: What Kind Of Table Lamps Are In Style?
Step 8: Position and Angle the Lamp Head
Now that your tripod table lamp is lighting up your space, it’s time to focus on positioning and angling the lamp head. By adjusting the direction of the light, you can optimize the illumination and create the desired ambiance in your room.
Start by loosening any mechanism or knob that allows you to rotate or swivel the lamp head. This will enable you to easily adjust the lamp head’s position.
Consider the purpose of the lamp and the area you want to illuminate. If you are using the lamp for reading or focused tasks, angle the lamp head towards the specific area you need to light up.
You can also experiment with different angles and positions to achieve the desired brightness and shadows. Tilt the lamp head up or down, or rotate it from side to side to find the optimal lighting effect for your space.
Take into account the surrounding decor and furnishings. If you have artwork or other decorative elements you want to highlight, adjust the lamp head to highlight those features.
Remember to tighten the mechanism or knob once you have positioned the lamp head to ensure that it stays in place securely.
Keep in mind that the position and angle of the lamp head can be changed anytime to suit your changing needs or preferences. Feel free to experiment and adjust the lamp head as often as you like to achieve the perfect lighting arrangement.
Now that you have positioned and angled the lamp head to your liking, you can move on to the optional step of adding a lampshade.
Step 9: Add Lampshade (Optional)
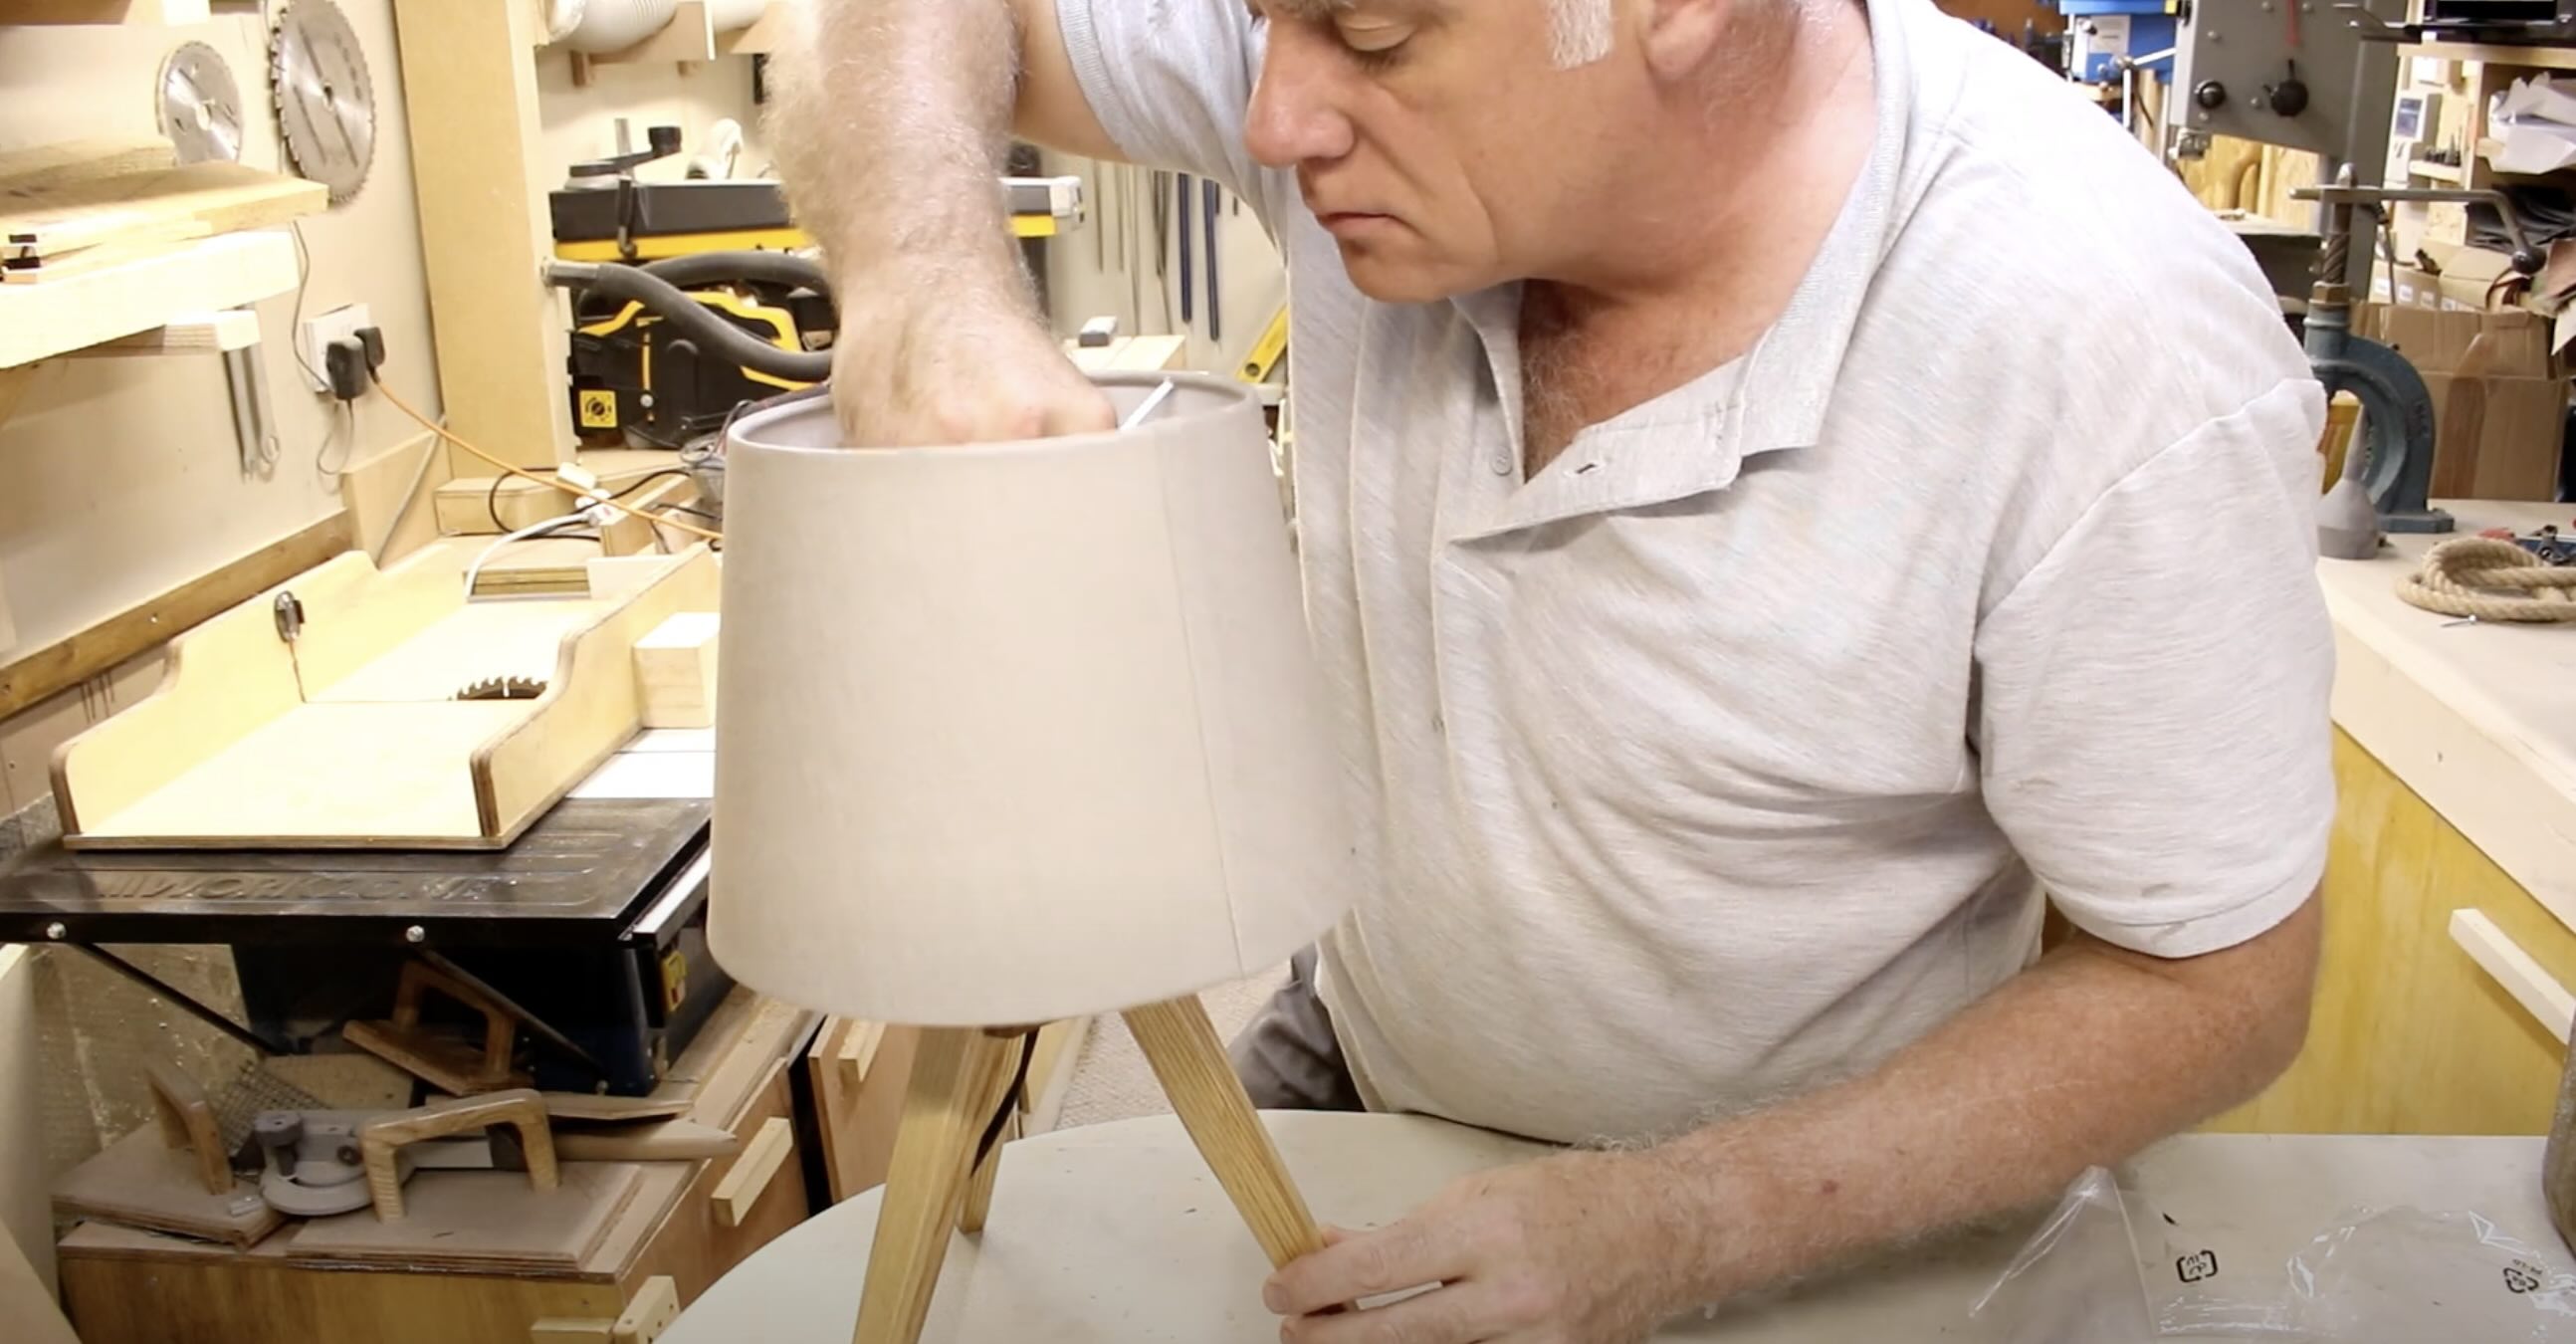
If you prefer a softer and more diffused lighting, adding a lampshade to your tripod table lamp is a great option. A lampshade not only helps to direct the light and reduce glare but also adds a decorative element to your lamp.
Before adding a lampshade, ensure that your tripod table lamp kit includes a lampshade attachment or bracket. This attachment will hold the lampshade in place securely.
Start by selecting a lampshade that complements the style and aesthetic of your room. Consider the size and shape of the lampshade in relation to the lamp head to ensure a proper fit.
Place the lampshade over the lamp head, aligning the attachment or bracket with the corresponding fittings on the lamp head.
Depending on the design of your lamp kit, you may need to secure the lampshade using screws, clips, or other provided hardware. Follow the manufacturer’s instructions to attach the lampshade securely.
Ensure that the lampshade is centered and sits straight on the lamp head. Adjust the position if necessary to achieve a balanced and symmetrical look.
Test the lamp with the lampshade on to ensure that the light is diffused to your liking. If the lampshade is too opaque and reduces the desired brightness, consider using a lighter or translucent shade. Conversely, if the lampshade doesn’t provide enough diffusion, opt for a thicker or textured shade.
Additionally, periodically inspect the lampshade for any signs of wear or damage. Clean the lampshade regularly following the manufacturer’s recommendations to maintain its appearance and functionality.
By adding a lampshade, you can enhance the overall aesthetic appeal and lighting effect of your tripod table lamp. However, do keep in mind that this step is optional, and you can still enjoy the elegance and functionality of your lamp without a lampshade.
With the lampshade added or without it, you have completed the setup process of your tripod table lamp. Take a step back and admire the beautiful lighting fixture you have assembled!
Conclusion
Setting up a tripod table lamp is a satisfying and rewarding process that allows you to combine functionality with style in your living space. By following these step-by-step instructions, you have successfully assembled and positioned your tripod table lamp, creating an inviting ambiance and adding a decorative touch to your room.
Throughout the setup process, you have learned how to unbox and lay out the components, assemble the base, attach the lamp arm, install the light bulb, adjust the lamp height, connect the power source, test the lamp’s functionality, and position and angle the lamp head. These steps have guided you in creating the perfect lighting arrangement to suit your needs and preferences.
Remember, always prioritize safety when handling electrical components. If you encounter any issues or problems during the setup process, don’t hesitate to seek professional assistance or contact the manufacturer for guidance.
Now that your tripod table lamp is ready to shine, take a moment to bask in the warm glow it provides. Whether you’re using it for reading, working, or simply creating a cozy atmosphere, your new tripod table lamp will surely make a wonderful addition to your home.
Enjoy the beautiful lighting and the ambiance it adds to your living space. And don’t forget to periodically clean and maintain your lamp to ensure optimal performance and longevity.
Thank you for joining us on this journey of setting up a tripod table lamp. We hope this article has been informative and helpful. May your lamp bring light and beauty to your home for years to come!
Frequently Asked Questions about How To Set Up A Tripod Table Lamp
Was this page helpful?
At Storables.com, we guarantee accurate and reliable information. Our content, validated by Expert Board Contributors, is crafted following stringent Editorial Policies. We're committed to providing you with well-researched, expert-backed insights for all your informational needs.





0 thoughts on “How To Set Up A Tripod Table Lamp”