Home>Furniture>Outdoor Furniture>How To Fix A Patio Umbrella String
Outdoor Furniture
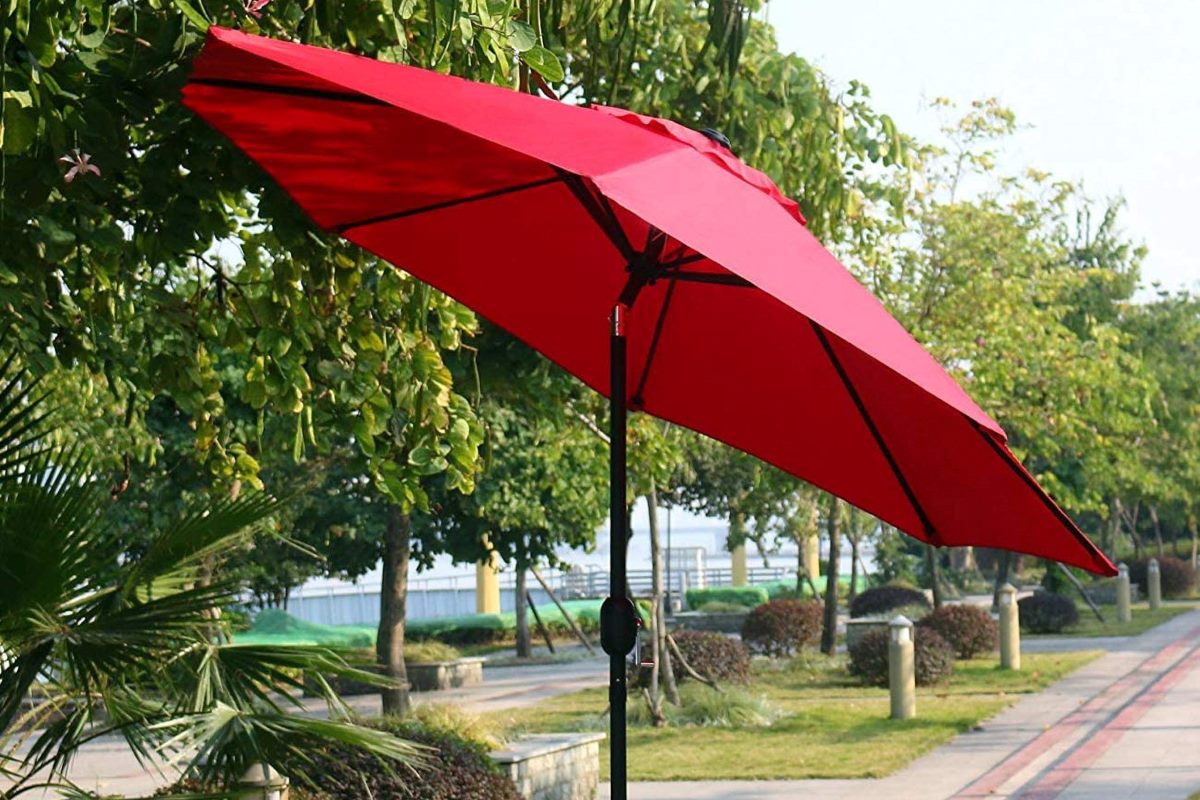
How To Fix A Patio Umbrella String
Modified: May 6, 2024
Learn how to fix a patio umbrella string with our step-by-step guide. Ensure the durability of your outdoor furniture with our easy DIY solution.
(Many of the links in this article redirect to a specific reviewed product. Your purchase of these products through affiliate links helps to generate commission for Storables.com, at no extra cost. Learn more)
Introduction
A patio umbrella is a great addition to any outdoor space, providing shade and protection from the sun’s harsh rays. However, one common issue that can occur with patio umbrellas is a broken or frayed string. When the string that holds the umbrella canopy in place becomes damaged, it can lead to the umbrella not being able to open or close properly.
If you find yourself with a patio umbrella that has a broken string, fear not! In this article, we will guide you through the process of fixing a patio umbrella string, so you can get your umbrella back in working order and enjoy your outdoor space to the fullest.
It’s important to note that the method for fixing a patio umbrella string may vary depending on the design of your umbrella. However, the general steps outlined in this article should provide you with a good starting point for repairing your umbrella.
So, gather your tools and materials, and let’s get started on fixing your patio umbrella string!
Key Takeaways:
- Fixing a patio umbrella string is a manageable DIY project that involves assessing the damage, preparing the new string, and threading it through the mechanism. Attention to detail and patience are key for a successful repair.
- Properly tying secure knots and thorough testing ensure the umbrella operates smoothly. By following the steps outlined, you can save money and extend the lifespan of your patio umbrella.
Read more: How To Fix Patio Umbrella Crank
Common Problems with Patio Umbrella Strings
Patio umbrella strings may encounter several issues over time, leading to their malfunction. Identifying these common problems will help you better understand what might be causing your umbrella string to break or become damaged. Here are some of the most frequent issues you may encounter:
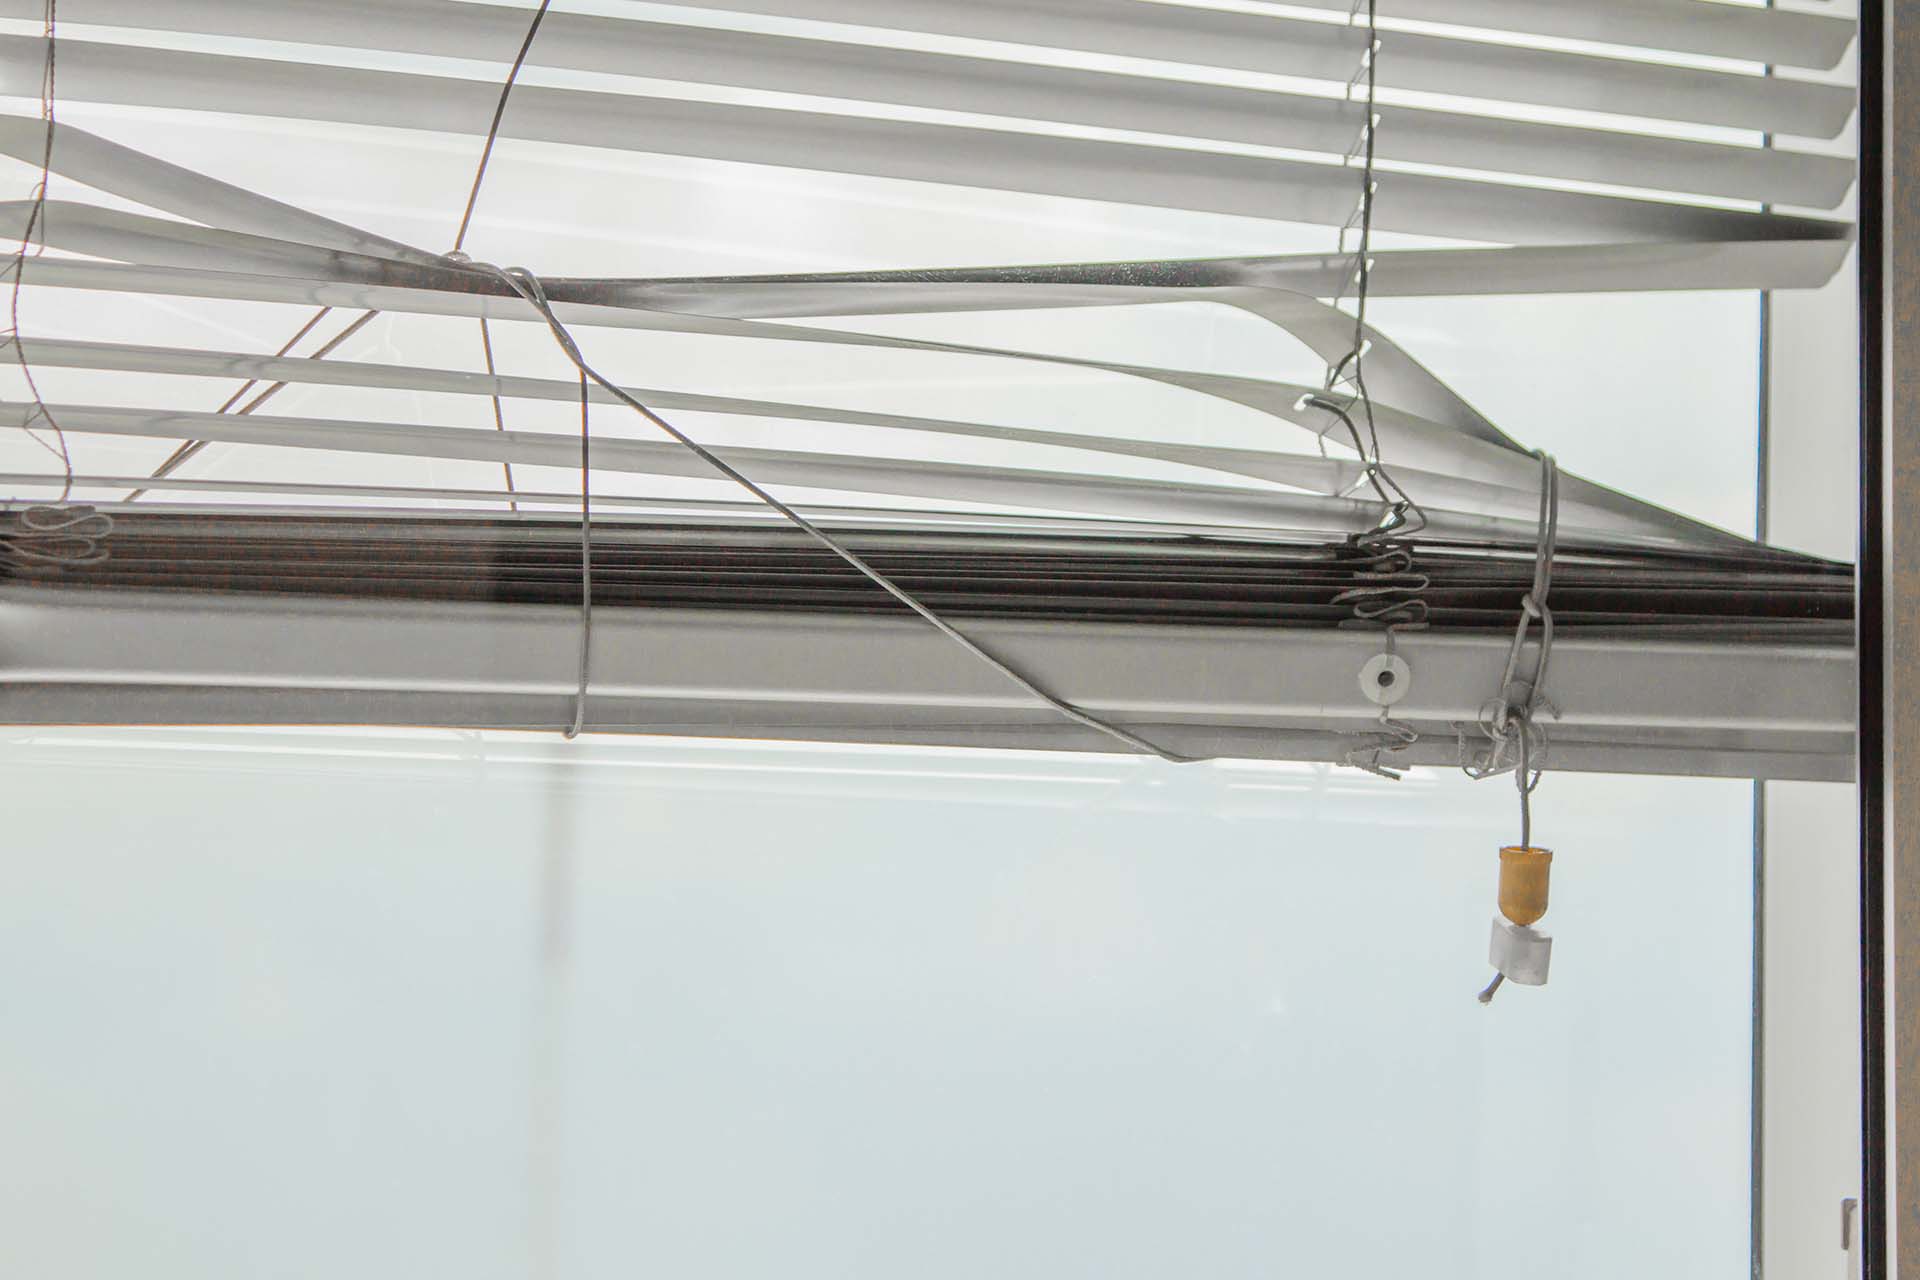
1. Frayed or Broken String:
The most common problem with patio umbrella strings is fraying or breaking. These strings bear the weight of the umbrella canopy and are subjected to constant stress from wind, rain, and regular use. Over time, they can wear down and become weak, resulting in fraying or snapping.
2. Knot Coming Loose:
Umbrella strings are often attached to the canopy and frame using knots. If the knots are not properly secured, they can come loose over time. This can cause the umbrella to be unstable or prevent it from opening and closing smoothly.
3. Incorrect String Length:
Incorrect string length is another issue that can arise. If the string is too short, it may not allow the umbrella to fully open or close. On the other hand, if the string is too long, it can become tangled or excessive and affect the overall functionality of the umbrella.
4. Tangled String:
Occasionally, the umbrella string can become tangled, making it difficult to open or close the umbrella smoothly. Tangled strings not only impede the functionality of the umbrella but can also lead to knots coming loose or even breaking the string entirely.
These common problems can be frustrating, especially when you’re looking forward to enjoying some time outdoors under the shade of your umbrella. However, with proper troubleshooting and the right tools, most patio umbrella string issues can be resolved with a bit of patience and care. In the following sections, we will guide you through the process of fixing your patio umbrella string, step by step.
Just remember, before attempting any repairs on your umbrella string, it’s essential to ensure your safety. Make sure to work in a well-lit area, use sturdy tools, and take precautions against any potential hazards. Now that you have a better understanding of the common problems with patio umbrella strings, let’s move on to the necessary tools and materials you’ll need for the repair process.
Tools and Materials Needed
Before you begin repairing your patio umbrella string, it’s important to gather all the necessary tools and materials. Having everything prepared beforehand will help you streamline the process and ensure you have everything you need within reach. Here are the tools and materials you’ll need:
1. Replacement String:
The first and most important item you’ll need is a replacement string. Make sure to measure the length of the old string before purchasing a new one to ensure an accurate fit. It’s recommended to choose a durable and weather-resistant material, such as nylon or polyester, that can withstand the outdoor elements.
2. Scissors:
You’ll need a pair of sharp scissors to cut the old string and trim the new string to the desired length. Make sure the scissors are clean and able to cut through the string smoothly.
3. Tweezers or Needle-Nose Pliers:
These tools will come in handy when removing any remaining bits of the old string or untangling any knots. Tweezers work well for small bits, while needle-nose pliers provide more grip for larger or stubborn pieces.
4. Lighter or Matches:
You’ll need a lighter or matches to melt and seal the ends of the replacement string. This will prevent it from fraying and unraveling over time. Exercise caution when using an open flame and make sure to have proper ventilation while melting the string.
5. Tape or Clothespins:
Having some tape or clothespins on hand can be helpful for temporarily securing the new string in place while you work on threading it through the umbrella’s mechanism. This will prevent the string from slipping back through the holes or getting lost in the process.
6. Step Stool or Ladder:
Depending on the height of your patio umbrella, you may need a step stool or ladder to reach the top part where the string is threaded. Ensure that the step stool or ladder is stable and placed on a flat surface to prevent accidents while working.
7. Safety Glasses:
It’s always a good idea to wear safety glasses when working with tools and materials to protect your eyes from any flying debris or accidental splintering.
By gathering all of these tools and materials before you begin, you’ll be well-prepared to tackle the task of fixing your patio umbrella string. With everything in place, let’s move on to the step-by-step process of assessing the damage and getting your umbrella back in working order.
Step 1: Assess the Damage
Before you proceed with repairing your patio umbrella string, it’s important to assess the extent of the damage. By understanding the condition of the string and identifying any additional issues, you’ll be better equipped to plan your repair strategy. Follow these steps to assess the damage:
1. Open the Umbrella:
Start by fully opening your patio umbrella. This will allow you to examine the string and its attachment points more closely. Take note of any visible signs of damage, such as fraying, breaking, or knots coming loose.
2. Inspect the String:
Carefully inspect the entire length of the string. Look for any areas where the string is frayed, worn, or broken. Pay attention to the attachment points where the string connects to the umbrella canopy and frame, as these are common areas for damage to occur.
3. Check the Knots:
Verify the condition of the knots securing the string. Ensure that they are tight and secure, and there are no signs of them coming loose. If you notice any issues with the knots, consider retying them or using a different knotting technique during the repair process.
4. Examine the Umbrella Mechanism:
Take a closer look at the mechanism that operates the umbrella, such as the pulleys, rods, or cranks. Check for any signs of wear and tear or any obstructions that may be affecting the smooth operation of the umbrella. Cleaning any debris or lubricating the mechanism may be necessary to ensure proper functioning.
5. Take Measurements:
Carefully measure the length of the old string to determine the required length for the replacement string. This will ensure that you purchase a replacement string of the appropriate size and prevent any issues with the umbrella’s operation once the repair is complete.
By thoroughly assessing the damage, you’ll have a clear understanding of what needs to be repaired and how to proceed. This step will also help you determine if any additional parts or components of the umbrella need attention. Once you have evaluated the condition of the string and umbrella mechanism, you can move on to the next step of removing the old string.
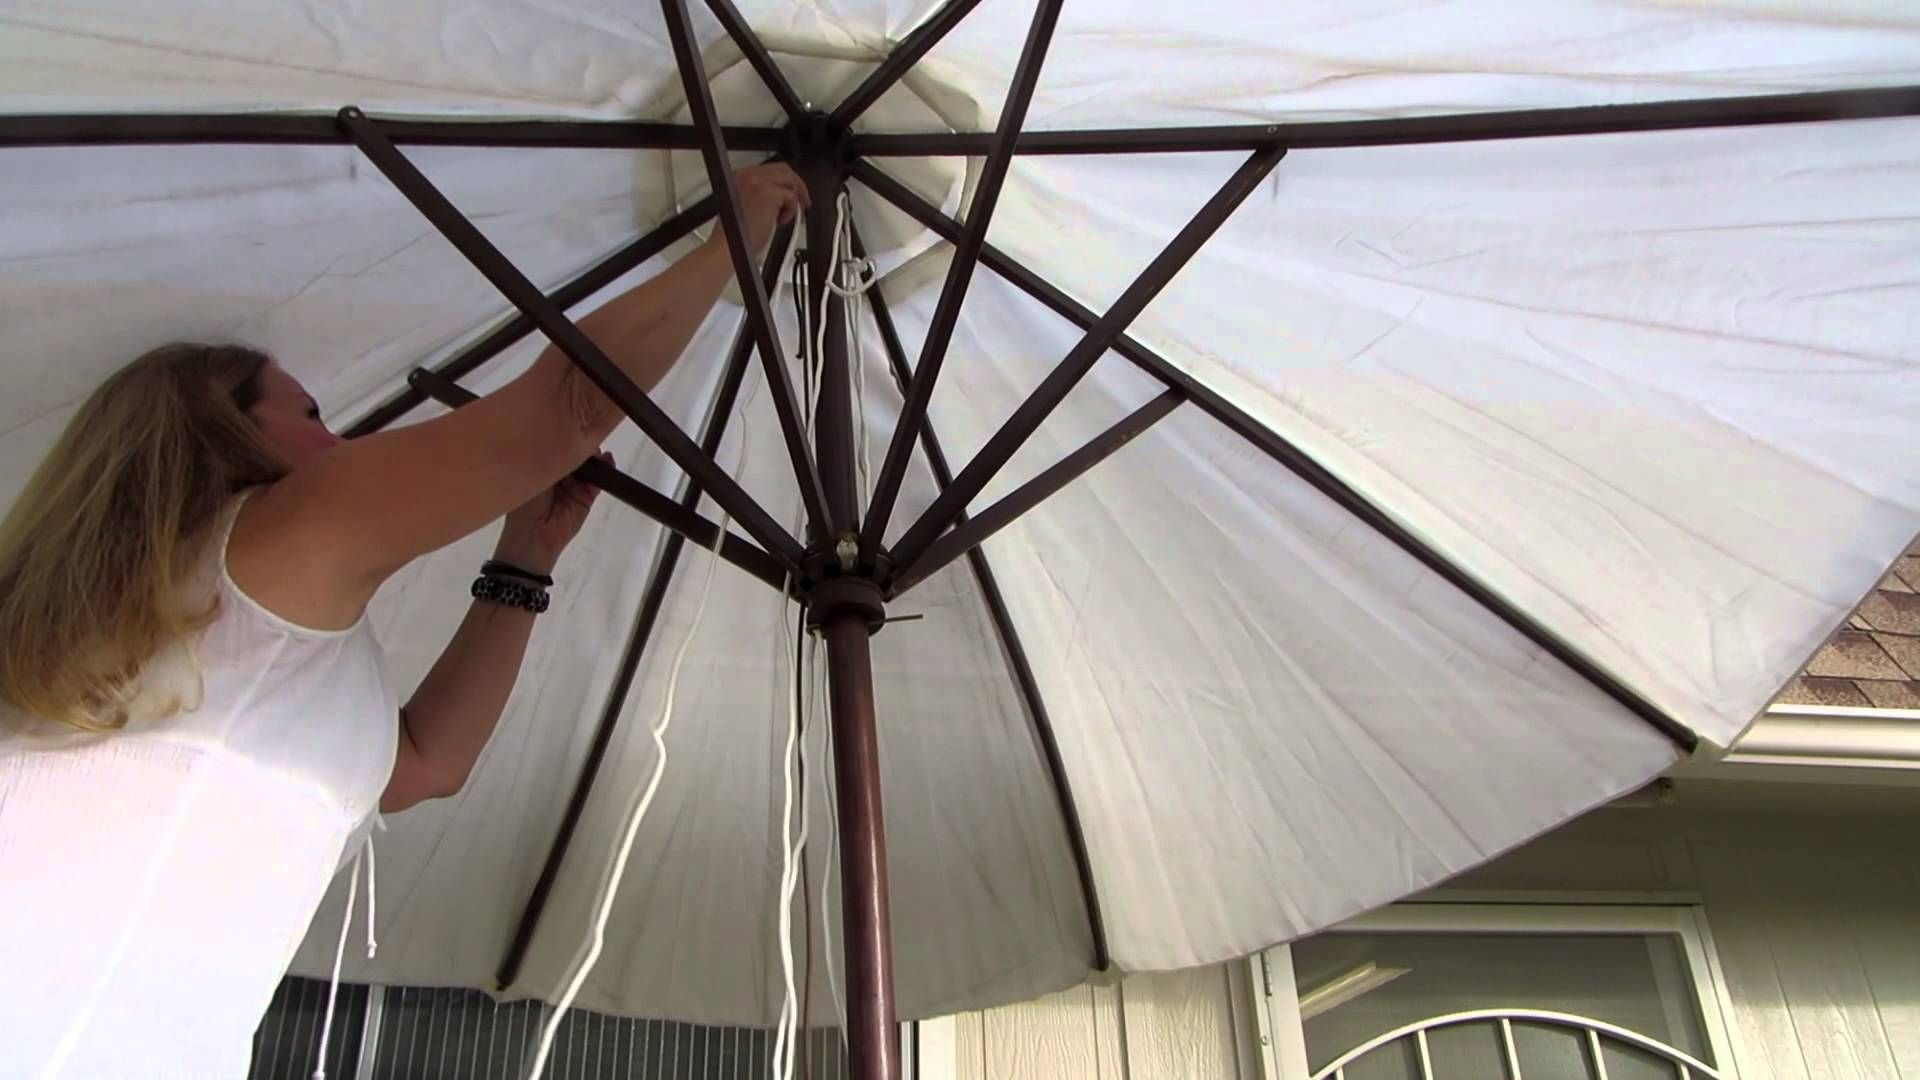
Step 2: Remove the Old String
With a clear assessment of the damage to your patio umbrella string, it’s time to remove the old string. This step is essential to make way for the replacement string and ensure a smooth repair process. Follow these steps to safely and effectively remove the old string from your umbrella:
1. Secure the Umbrella:
Before you begin, make sure to secure the umbrella in a stable position. This will prevent any unintended movement or accidents while working on the string. You can use a clamp, tape, or ask someone to hold the umbrella steady for you.
2. Locate the Attachment Points:
Identify the attachment points where the string is connected to the umbrella canopy and frame. These points are typically located at the top center and near the lower ends of the umbrella ribs. Pay close attention to how the string is threaded through these points as it will help you when inserting the replacement string later.
3. Loosen or Disconnect the Old String:
Start by loosening or disconnecting the old string from each attachment point. Depending on the type of umbrella, you may need to untie knots, remove clips, or detach hooks. Take care not to damage any parts of the umbrella while doing so.
4. Carefully Pull the Old String:
Once the old string is detached from the attachment points, gently pull it out of the umbrella. Try to keep the old string intact while removing it, as it can serve as a reference for threading the replacement string.
5. Inspect for Remaining Pieces:
After removing the old string, inspect the umbrella for any remaining pieces or loose ends. Use tweezers or needle-nose pliers to carefully remove any stubborn bits of string or untangle any knots that may have been left behind.
Removing the old string may require some patience and attention to detail, especially if there are knots or tangled sections. Take your time to ensure that the old string is completely removed before moving on to the next step. Once the old string has been successfully removed, you’re ready to prepare the new string for installation.
To fix a patio umbrella string, start by removing the old string and measuring the length needed. Then, thread the new string through the umbrella’s pulley system and tie a secure knot at the end. Finally, test the umbrella to ensure the string is working properly.
Read more: How To Fix A Broken Patio Umbrella
Step 3: Prepare the New String
Now that the old string has been removed from your patio umbrella, it’s time to prepare the new string for installation. Proper preparation is crucial to ensure the string fits correctly and functions smoothly once it’s threaded through the umbrella. Follow these steps to prepare the new string:
1. Measure and Cut the New String:
Start by measuring the length of the old string that you removed in step 2. Use a measuring tape or ruler to get an accurate measurement. Add a few extra inches to the measured length to account for any necessary adjustments or knots.
2. Choose the Right Replacement String:
Select a replacement string that is suitable for outdoor use and can handle the weight and stress of the umbrella canopy. Look for durable materials like nylon or polyester, which are resistant to weather and UV rays.
3. Thread One End of the String:
Take one end of the new string and thread it through an attachment point, following the same path as the old string. This will serve as the starting point for threading the rest of the string through the umbrella mechanism.
4. Prepare the End of the String:
To prevent the newly installed string from fraying, melt the cut end of the string using a lighter or a match. Hold the flame close to the end of the string for a few seconds until it begins to melt and create a clean, sealed edge. Be sure to exercise caution while handling an open flame and provide proper ventilation.
5. Secure the String:
Use a piece of tape or a clothespin to temporarily secure the end of the string to the umbrella. This will prevent the string from slipping back through the attachment point as you work on threading it through the rest of the mechanism.
6. Straighten the String:
Before proceeding, make sure the new string is straight and doesn’t have any twists or kinks. Straightening the string will help it pass smoothly through the umbrella and prevent any unnecessary tangles during installation.
By following these steps, you’ll have a properly measured and prepared new string ready to be threaded through your patio umbrella. With the new string in hand, you can move on to the next step: threading it through the umbrella mechanism.
Step 4: Thread the New String
With the new string prepared, it’s time to thread it through the various components of your patio umbrella. This step requires patience and attention to detail, as you navigate the string through the intricate mechanism. Follow these steps to correctly thread the new string:
1. Start at the Attachment Point:
Begin by threading the end of the new string through the same attachment point where the old string was previously connected. Follow the same path and direction, ensuring that the string is secured in place.
2. Follow the Path:
While holding onto the threaded end of the string, carefully guide it through the pulleys, rods, or cranks that control the opening and closing of the umbrella. Follow the original path of the old string as closely as possible to ensure proper functioning.
3. Use Tape/Clothespin to Secure:
As you thread the string through the mechanism, use a small piece of tape or a clothespin to keep the string in place temporarily. This will prevent it from slipping back through the attachment point while you work on threading the remainder of the string.
4. Be Patient and Gentle:
Take your time and be patient as you thread the new string through the intricate parts of the umbrella. Avoid using excessive force or pulling too tightly, as this may cause the string to tangle or become stuck. Gently guide the string through the mechanism, ensuring it moves smoothly.
5. Check for Proper Alignment:
Periodically check the alignment of the string as you thread it through the mechanism. Ensure that it moves in a straight line and doesn’t twist or cross over itself. Correct any misalignment or tangles as you go along to ensure a smooth operation.
6. Continue Threading to the Attachment Point:
Keep threading the string through the various components until you reach the final attachment point. Take care to maintain the same path and alignment throughout the process. Once you reach the attachment point, make sure the string is securely in place.
By following these steps, you’ll successfully thread the new string through the umbrella mechanism, replacing the old string and setting the stage for the final step: tying the knots to secure it in place. Take your time and exercise patience as you navigate through each part of the mechanism, ensuring a smooth and hassle-free repair process.
Step 5: Tie the Knots
Now that the new string is threaded through the umbrella mechanism, it’s time to securely tie the knots and ensure that it stays in place. Properly tied knots will prevent the string from coming loose and ensure the umbrella functions correctly. Follow these steps to tie the knots:
1. Double-Check the String Alignment:
Before tying the knots, double-check the alignment and tension of the string. Ensure that it moves smoothly and doesn’t twist or cross over itself. Adjust the string if necessary to ensure a straight and even path.
2. Tie a Double Knot:
Start by tying a double knot at the attachment point on one end of the string. Make a loop with the string and pass the loose end through the loop twice. Pull the ends of the string tightly to secure the knot. Double knots provide extra stability and prevent the string from coming loose over time.
3. Test the Knot:
Give the knot a gentle tug to ensure it’s secure. The knot should hold firmly without slipping or unraveling. If it feels loose, untie the knot and retie it, making sure to pull the string tightly for a secure hold.
4. Repeat for Other Attachment Points:
Move along the string and tie double knots at each attachment point, both on the umbrella canopy and frame. Follow the same process of creating a loop and passing the loose end through twice. Tighten each knot securely to ensure a strong connection.
5. Trim Excess String:
Once all the knots are tied and checked for security, trim any excess string using a pair of sharp scissors. Leave a small tail of about an inch to prevent the knots from coming undone. Take care not to cut the string too close to the knot, as this may cause it to unravel.
6. Test the Umbrella Operation:
With the knots tied and excess string trimmed, it’s time to test the umbrella’s operation. Open and close the umbrella to ensure it moves smoothly and that the string holds securely. If everything functions properly, congratulations! You have successfully repaired your patio umbrella string.
By following these steps and securely tying the knots, you can ensure that the new string remains in place and maintains the umbrella’s functionality. Taking the time to properly tie the knots will provide a durable and long-lasting repair, allowing you to enjoy your patio umbrella for many future sunny days.
Step 6: Test the Umbrella
After successfully tying the knots and completing the repair process for your patio umbrella string, it’s important to thoroughly test the umbrella to ensure it operates smoothly and functions as intended. Follow these steps to properly test your umbrella:
1. Open the Umbrella:
Begin by gently opening the umbrella to its full extent. Pay close attention to how the new string moves through the mechanism and the overall stability of the umbrella as it expands. Ensure that the canopy opens evenly and fully without any obstructions or binding.
2. Close the Umbrella:
Once the umbrella is fully open, carefully close it back down. Watch for any signs of resistance, uneven movement, or entanglement of the string. The canopy should close smoothly and securely without any difficulty.
3. Check the Tension:
While the umbrella is both open and closed, observe the tension of the string. It should be tight enough to hold the canopy in place, but not so tight that it causes strain on the umbrella frame or compromises its operation. Adjust as necessary to achieve the ideal tension.
4. Test in Breezy Conditions:
If possible, test the umbrella in gentle breezy conditions. This will help you assess how well the repaired string holds up to wind resistance. Ensure that the canopy remains stable, doesn’t twist or turn excessively, and remains firmly attached to the frame.
5. Verify Stability:
Shake the umbrella lightly and observe its stability. The canopy should stay securely in place, without any wobbling or shifting. If you notice any instability, recheck the knots, and adjust the tension of the string to ensure a secure connection.
6. Repeat the Testing:
Perform these testing steps multiple times to ensure consistent results. Sometimes, certain issues may only become apparent after repeated use or under specific conditions. By conducting thorough testing, you can have confidence in the repair and the functionality of your patio umbrella.
By carefully testing your patio umbrella after the repair process, you can identify any lingering issues or fine-tune the tension and alignment of the string. This step ensures that your umbrella is fully functional, stable, and ready for use in providing shade and comfort in your outdoor space.
With the umbrella successfully tested and proven to be in good working order, you can now enjoy the benefits of your repaired patio umbrella and comfortably relax in the shade it provides.
Read more: How To Dye A Patio Umbrella
Conclusion
Repairing a patio umbrella string may seem like a daunting task, but with the right knowledge and tools, it is a manageable DIY project. By following the steps outlined in this article, you can fix a broken or damaged string and restore the functionality of your umbrella.
We started by assessing the damage and identifying common problems with patio umbrella strings. Understanding the issues allowed us to prepare for the repairs effectively. We then gathered the necessary tools and materials needed for the task at hand.
Step by step, we guided you through removing the old string, preparing the new string, threading it through the umbrella mechanism, tying secure knots, and testing the umbrella’s functionality. Through each step, attention to detail and precision were emphasized to ensure a successful repair.
By completing these steps, you can not only save money by avoiding the need for a professional repair or replacement but also extend the lifespan of your patio umbrella, allowing you to continue enjoying your outdoor space for years to come.
It’s important to note that while this article provides a general guide to repairing a patio umbrella string, the specific method may vary depending on the design and structure of your umbrella. Always refer to the manufacturer’s instructions or seek professional assistance if you encounter any challenges or difficulties during the repair process.
Remember to prioritize safety throughout the repair process, working in well-lit areas, using proper tools, and taking precautions to prevent accidents or injuries.
With your patio umbrella now repaired, you can once again enjoy the shade, comfort, and relaxation it provides on those warm, sunny days. Take pride in your accomplishment and bask in the satisfaction of a job well done!
So go ahead, gather your tools, inspect your umbrella, and let the repair process begin. With a little patience and effort, your patio umbrella will be back in top-notch condition, ready to enhance your outdoor experience.
Once you've mastered fixing a patio umbrella string, why not tackle more ambitious projects around your house? Our guide on DIY home improvement offers practical tips and tricks to transform spaces without breaking the bank. From updating fixtures to creating custom furniture, you'll find plenty of inspiration to make your living environment both unique and inviting. Ready to put your skills to the test and give your home a personal touch? Dive into our comprehensive DIY guide and start turning your vision into reality today!
Frequently Asked Questions about How To Fix A Patio Umbrella String
Was this page helpful?
At Storables.com, we guarantee accurate and reliable information. Our content, validated by Expert Board Contributors, is crafted following stringent Editorial Policies. We're committed to providing you with well-researched, expert-backed insights for all your informational needs.


0 thoughts on “How To Fix A Patio Umbrella String”