Home>Furniture>Outdoor Furniture>How To Stop Water From Flooding The Patio

Outdoor Furniture
How To Stop Water From Flooding The Patio
Modified: March 7, 2024
Prevent water from flooding your patio and damaging your outdoor furniture with these helpful tips and tricks. Keep your outdoor space dry and protected.
(Many of the links in this article redirect to a specific reviewed product. Your purchase of these products through affiliate links helps to generate commission for Storables.com, at no extra cost. Learn more)
Introduction
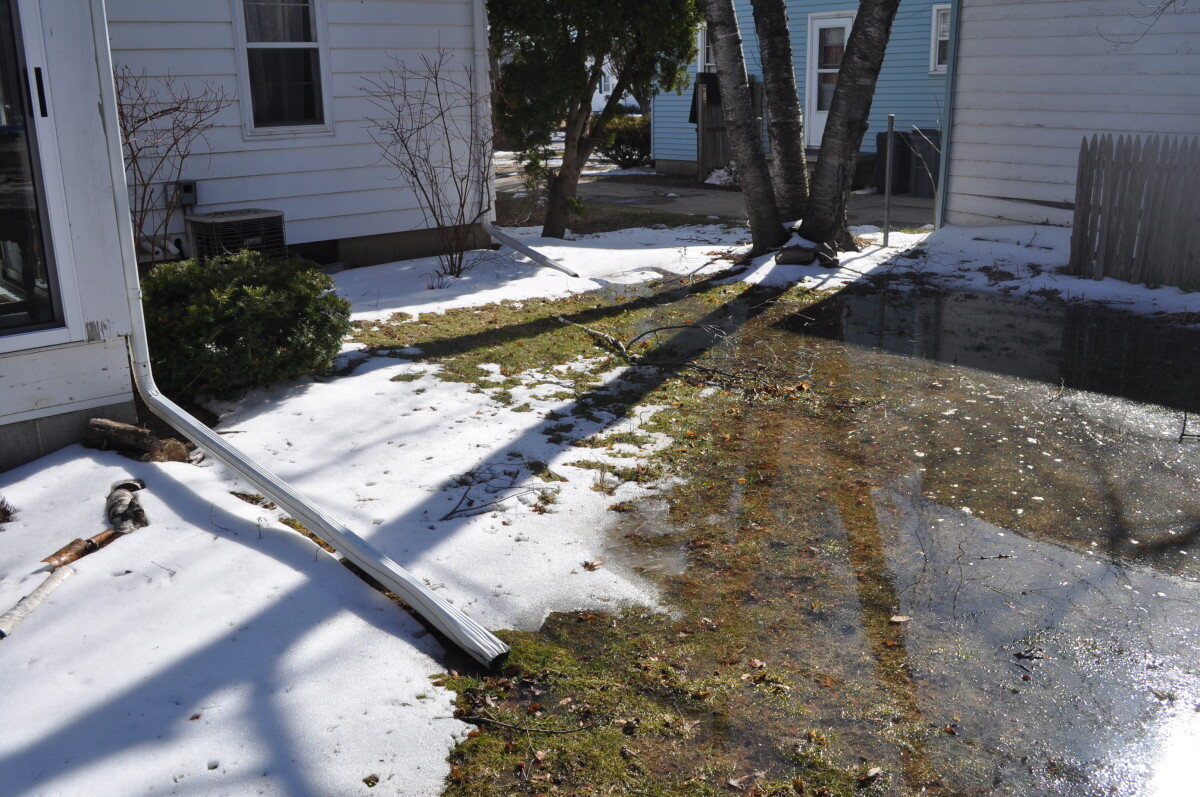
Welcome to our comprehensive guide on how to stop water from flooding your patio. There’s nothing quite as frustrating as stepping onto your patio after a heavy rainstorm only to find it submerged under a pool of water. Not only does this make your outdoor space unusable, but it can also cause damage to your furniture and flooring.
Fortunately, there are several effective methods to mitigate patio flooding and ensure that your outdoor area remains dry and functional. In this article, we will explore various solutions, ranging from assessing patio drainage to installing a French drain and utilizing rain barrels.
Whether you are dealing with an existing issue or looking to prevent future water damage, the tips and techniques discussed here will help you create a patio that is resistant to flooding.
So let’s dive in and learn how to safeguard your patio from the notorious water woes!
Key Takeaways:
- Keep Your Patio Dry
Prevent flooding by clearing drainage pathways, installing a French drain, and using rain barrels. Create a slope away from the patio and consider a retaining wall for effective water management. - Protect Your Patio with a Sealant
Apply a waterproof sealant to safeguard your patio from water damage. Regular maintenance and reapplication will prolong its effectiveness and prevent future flooding.
Read more: How To Stop Your Basement From Flooding
Understanding the Problem
Before we dive into the methods for preventing patio flooding, it’s important to understand the root causes of the problem. By identifying the factors contributing to water accumulation, you can better implement the appropriate solutions.
Patio flooding can occur due to various reasons, including:
- Poor drainage: Insufficient or clogged drainage pathways can prevent water from properly flowing away from your patio, leading to pooling and flooding.
- Landscaping issues: If your yard is not properly graded or lacks proper landscaping features, like slopes or retaining walls, water can easily accumulate and compromise your patio.
- Roof runoff: During heavy rainstorms, the water runoff from your roof can overwhelm your patio, causing pooling and flooding.
- Groundwater: If your property is situated in an area with a high water table, excess groundwater can seep into your patio area and create flooding issues.
By identifying the specific factors contributing to your patio flooding, you will be able to implement targeted solutions that address the root causes.
Next, let’s move on to assessing the current state of your patio drainage system.
Assessing Patio Drainage
Before implementing any solutions, it’s important to assess the current state of your patio drainage system. This will help you identify any existing issues and determine the best course of action.
Here are a few steps to follow when assessing your patio drainage:
- Observe after rainfall: After a rainstorm, take a close look at your patio to see how the water is flowing. Is there any pooling or standing water? Note the areas where water tends to accumulate.
- Inspect the drainage pathways: Examine the gutters, downspouts, and any existing drainage systems around your patio. Make sure they are clear of any debris or obstructions that could impede water flow.
- Check for soil erosion: Look for signs of soil erosion around your patio area. If you notice any areas where the soil is washed away or uneven, this could indicate poor drainage.
- Consider the slope: Evaluate the slope of your patio and the surrounding landscape. Ideally, the patio should have a slight slope away from your home, directing water towards a designated drainage area.
By performing a thorough assessment, you’ll have a better understanding of the existing drainage issues that need to be addressed. This will allow you to choose the most appropriate solutions for your specific situation.
Next, let’s explore some effective methods for clearing patio drainage pathways.
Clearing Patio Drainage Pathways
One of the most common causes of patio flooding is blocked or inadequate drainage pathways. Over time, leaves, dirt, and other debris can accumulate, obstructing water flow and leading to pooling on your patio. Clearing these pathways is an essential step in preventing flooding.
Here are a few steps to help you clear your patio drainage pathways:
- Remove debris: Start by clearing any visible debris from your gutters, downspouts, and drainage channels. This includes leaves, twigs, and any other obstructions that may be impeding water flow.
- Flush with water: Once the visible debris is removed, flush the pathways with a garden hose. This will help dislodge any smaller debris or sediment that may be blocking the flow of water.
- Use a plumbing snake: If you encounter stubborn blockages, a plumbing snake can be useful in breaking them up and clearing the pathway. Insert the snake into the drain and rotate it to dislodge any stubborn debris.
- Consider gutter guards: To prevent future blockages, consider installing gutter guards. These are mesh or screen-like covers that fit over your gutters and prevent debris from entering. They allow water to flow through while keeping leaves and other debris out.
By clearing your patio drainage pathways, you’ll ensure that water can flow freely away from your patio, reducing the risk of flooding. However, if you’re still experiencing issues, it may be necessary to explore more advanced solutions such as installing a French drain.
Let’s move on to the next section to learn more about installing a French drain for effective patio drainage.
Installing a French Drain
A French drain is a highly effective drainage solution that helps redirect water away from your patio. It consists of a perforated pipe surrounded by gravel or rock, which allows water to seep in and be diverted to a designated drainage area.
Here’s a step-by-step guide to installing a French drain:
- Determine the drainage path: Identify the optimal route for your French drain. This should be a downward slope away from your patio, towards an area that can handle the excess water, such as a garden or a municipal storm drain.
- Dig the trench: Dig a trench along the determined drainage path. The trench should be about 18 inches deep and wide enough to accommodate the perforated pipe and the surrounding gravel or rock.
- Add the geotextile fabric: Place a layer of geotextile fabric at the bottom of the trench. This will help prevent soil and sediment from clogging the drain over time.
- Install the perforated pipe: Place the perforated pipe on top of the fabric, making sure it runs the entire length of the trench. Connect multiple sections, if necessary, using pipe connectors.
- Add gravel or rock: Fill the trench around the pipe with gravel or rock, ensuring that there is enough space for water to flow through. The gravel or rock acts as a filter, allowing water to enter the pipe while keeping soil and sediment out.
- Cover with geotextile fabric: Place another layer of geotextile fabric over the gravel or rock to prevent soil from entering the drainage system.
- Backfill the trench: Carefully backfill the trench with soil, making sure to compact it as you go to prevent settling.
When installed correctly, a French drain can significantly improve your patio drainage, preventing water from flooding and causing damage. However, if you’re looking for a more sustainable solution, consider utilizing rain barrels.
Move on to the next section to learn how rain barrels can help mitigate patio flooding.
Make sure the patio slopes away from your house to direct water away. Use a waterproof sealant on the patio surface to prevent water from seeping in.
Read more: How To Stop Birds From Pooping On A Patio
Using Rain Barrels
Rain barrels are a sustainable and cost-effective method to manage water runoff from your roof and prevent excessive water from flooding your patio. By capturing rainwater and storing it for later use, you can reduce the amount of water that ends up pooling around your patio.
Here’s how to effectively use rain barrels to mitigate patio flooding:
- Select the right location: Place your rain barrel near a downspout that collects water from your roof. Ensure that it is stable and securely positioned on a level surface.
- Install a diverter: Attach a diverter kit to your downspout to redirect rainwater into the rain barrel. This helps prevent overflow and allows you to control the flow of water.
- Ensure proper drainage: Connect an overflow hose or pipe to the rain barrel to direct excess water away from your patio. This will prevent any overflow that may result in flooding.
- Use the collected water: Make use of the stored rainwater for various purposes, such as watering your plants, cleaning outdoor equipment, or even washing your car. This will help reduce the amount of water that flows towards your patio.
- Maintain your rain barrel: Regularly inspect your rain barrel for debris and clean it as necessary. Ensure that the lid is tightly sealed to prevent mosquito breeding and to maintain water quality.
By incorporating rain barrels into your patio drainage system, you can effectively manage rainwater, reduce the risk of flooding, and conserve water for future use.
However, if you’re still experiencing patio flooding issues, consider creating a slope away from your patio to redirect water flow.
Next, we’ll discuss how to create a slope that channels water away from your patio.
Creating a Slope Away from the Patio
Creating a slope away from your patio is another effective method to prevent water from accumulating and flooding your outdoor space. By ensuring that the ground slopes away from your patio, you can redirect water flow towards appropriate drainage areas.
Follow these steps to create a slope away from your patio:
- Identify the drainage direction: Determine the direction in which you want the water to flow away from your patio. This should be towards a designated drainage area, such as a garden or a storm drain.
- Measure the slope: Use a level and a measuring tape to determine the current slope of your patio. Ideally, you should aim for a slope of at least 1/4 inch per foot away from your home.
- Remove excess soil: If the existing slope is not sufficient, you may need to remove some soil from the higher end of your patio and redistribute it to create a more pronounced slope.
- Compact the soil: After adjusting the slope, use a compactor or a tamper to compact the soil. This will help prevent future settling and maintain the integrity of the created slope.
- Add landscaping features: Enhance the effectiveness of the slope by incorporating landscaping features such as swales or berms. These can help further direct the flow of water away from your patio.
- Add vegetation: Consider planting grass or other ground coverings on the slope to help stabilize the soil and absorb excess water.
Creating a proper slope away from your patio ensures that water flows in the intended direction, reducing the risk of flooding. However, if you’re dealing with uneven ground or the slope is not sufficient, installing a retaining wall can be a viable solution.
Proceed to the next section to learn about the benefits of installing a retaining wall for patio drainage.
Installing a Retaining Wall
If you’re facing significant patio flooding due to uneven ground or inadequate slopes, installing a retaining wall can be an effective solution to redirect water flow and prevent water accumulation.
Here’s a step-by-step guide to installing a retaining wall:
- Plan and design: Determine the location and height of the retaining wall based on the needs of your patio and the surrounding landscape. Consider factors such as soil stability and aesthetic appeal.
- Prepare the area: Clear the area where the retaining wall will be installed. Remove any vegetation, rocks, or debris to ensure a stable and level foundation.
- Excavate the trench: Dig a trench for the footing of the retaining wall. The depth and width of the trench will depend on the height and design of the wall. Follow local building codes and guidelines.
- Install the base material: Fill the trench with a layer of crushed gravel or compacted aggregate base material. This will provide a stable foundation for the retaining wall.
- Set the first course: Lay the first row of retaining wall blocks or stones on the prepared base material, following the manufacturer’s instructions for alignment and interlocking.
- Continue building the wall: Stack the subsequent rows of blocks or stones, ensuring that each layer is level and securely placed. Use a level and a rubber mallet to adjust and align the blocks as necessary.
- Backfill and compact: As you build the wall, backfill the area behind it with soil or drain rock. Compact the backfill material in layers to provide stability and proper drainage.
An effectively installed retaining wall can not only prevent patio flooding but also add visual appeal to your outdoor space. It helps divert water away from your patio and maintains a stable landscape.
However, if you’re still experiencing patio flooding issues, applying a waterproof sealant can provide an additional layer of protection.
In the next section, we’ll explore the benefits of applying waterproof sealant to your patio.
Applying Waterproof Sealant
Applying a waterproof sealant to your patio is a proactive measure to protect it from water damage and prevent future flooding. The sealant creates a barrier that repels water, keeping your patio dry and resilient.
Follow these steps to properly apply a waterproof sealant to your patio:
- Clean the surface: Thoroughly clean your patio surface, removing any dirt, debris, or stains. Use a pressure washer or a stiff brush to scrub away tough stains and ensure a clean surface for the sealant.
- Repair any cracks: Inspect your patio for any cracks or damage. Fill in small cracks with a concrete crack filler and smooth it out with a putty knife. For larger cracks or damaged areas, consult a professional for proper repair.
- Choose the right sealant: Select a high-quality waterproof sealant specifically designed for outdoor applications. Consider factors such as your patio material and climate conditions to choose the appropriate product.
- Apply the sealant: Follow the manufacturer’s instructions for applying the sealant. Typically, you’ll use a brush, roller, or sprayer to evenly coat the entire surface of your patio. Pay special attention to seams, joints, and porous areas.
- Allow for curing and drying: Give the sealant sufficient time to cure and dry as per the manufacturer’s recommendations. Avoid walking on or using the patio during this period to ensure proper bond formation.
- Maintain and reapply: Regularly inspect your patio for signs of wear and reapply the sealant as needed. This will help maintain its waterproofing properties and protect it from future water damage.
Applying a waterproof sealant to your patio adds an extra layer of protection against water infiltration, reducing the risk of flooding and prolonging its lifespan. It is an effective preventive measure that can save you from costly repairs and replacements in the future.
Now that we’ve explored various methods to prevent patio flooding, let’s conclude our comprehensive guide.
Read more: How To Stop Dogs From Peeing On A Patio
Conclusion
Dealing with patio flooding can be a frustrating and inconvenient problem. However, by implementing the solutions discussed in this guide, you can effectively mitigate water accumulation and keep your outdoor space dry and functional.
Assessing your patio drainage, clearing any obstructions, and creating a slope away from the patio are crucial initial steps. These measures ensure effective water flow and prevent pooling that can lead to flooding.
If basic solutions are not sufficient, installing a French drain or utilizing rain barrels can provide additional drainage capacity and help manage excess water. Consider which approach aligns best with your patio’s needs and your environmental goals.
Furthermore, installing a retaining wall can help you address significant patio flooding due to uneven ground or inadequate slopes. It serves as a structural barrier that redirects water flow and prevents soil erosion.
Lastly, applying a waterproof sealant adds an extra layer of protection to your patio, making it resistant to water damage and preventing future flooding. Regular maintenance and reapplication of the sealant will ensure prolonged effectiveness.
By understanding the problem, assessing your patio’s drainage, and implementing targeted solutions, you can enjoy a dry and functional outdoor space, free from the frustrations of patio flooding.
Remember, each patio is unique, so choose the solutions that best suit your specific needs and consult professionals when necessary. With proper care and preventive measures, you can create a patio that withstands the challenges of water and enhances your outdoor living experience.
Enjoy your newfound knowledge and get ready to transform your patio into an oasis, no longer plagued by the issues of water flooding!
Frequently Asked Questions about How To Stop Water From Flooding The Patio
Was this page helpful?
At Storables.com, we guarantee accurate and reliable information. Our content, validated by Expert Board Contributors, is crafted following stringent Editorial Policies. We're committed to providing you with well-researched, expert-backed insights for all your informational needs.




0 thoughts on “How To Stop Water From Flooding The Patio”