Home>Furniture>Outdoor Furniture>How To Build A Patio Pergola
Outdoor Furniture
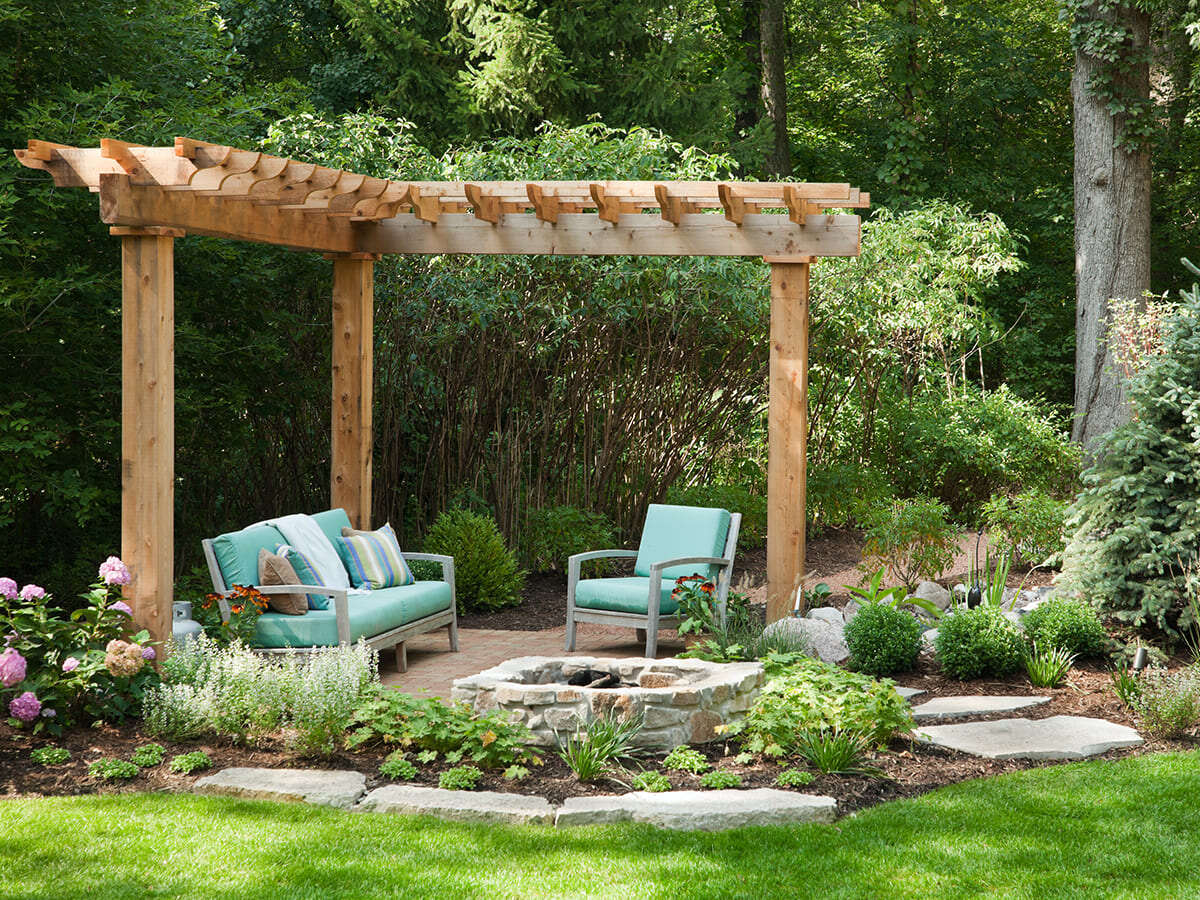
How To Build A Patio Pergola
Modified: March 7, 2024
Discover how to build a stunning patio pergola to elevate your outdoor space with our step-by-step guide. Create an inviting oasis with stylish and functional outdoor furniture.
(Many of the links in this article redirect to a specific reviewed product. Your purchase of these products through affiliate links helps to generate commission for Storables.com, at no extra cost. Learn more)
Introduction
Welcome to the ultimate guide on how to build a patio pergola – the perfect addition to your outdoor space. A pergola is not only a functional and versatile structure; it also adds beauty and ambiance to any patio or garden. Whether you want a cozy spot for relaxing, a shaded area for entertaining, or a place to grow climbing plants, a pergola is the answer.
In this comprehensive guide, we will take you through each step of the process, from planning and design to the finishing touches. By the end, you will have all the knowledge and confidence to create your own stunning patio pergola.
Before we dive into the details, it’s important to highlight that building a patio pergola requires some basic construction skills and knowledge. If you are not comfortable with DIY projects or if you lack experience in handling tools, it is advisable to consult a professional or seek assistance.
Now, let’s get started with step one: Planning and Design.
Key Takeaways:
- Planning and design are crucial for building a patio pergola. Consider the purpose, size, location, and materials to create a personalized and functional outdoor structure.
- Adding shade elements, finishing touches, and regular maintenance enhance the beauty and functionality of your pergola. Create a welcoming outdoor oasis for relaxation and entertainment.
Read more: How To Build A Pergola On A Patio
Step 1: Planning and Design
The first step in building a patio pergola is careful planning and design. This stage is crucial as it lays the foundation for the entire project and ensures that you create a pergola that meets your specific needs and compliments your outdoor space.
Start by determining the purpose of your pergola. Do you want it to provide shade, act as a focal point, or simply enhance your outdoor aesthetics? Understanding the purpose will help you make informed decisions during the design and material selection process.
Next, consider the size and location of your pergola. Measure your patio or outdoor area to determine the ideal dimensions for your structure. This will depend on the available space and the intended use of the pergola. Keep in mind that you will need enough room for furniture and movement underneath the pergola.
When it comes to choosing materials, consider both aesthetic appeal and durability. Common materials for pergolas include wood, metal, and vinyl. Wood offers a natural and rustic look, while metal provides a modern and industrial feel. Vinyl, on the other hand, offers low maintenance and longevity. Select a material that aligns with your preferred style and suits your climate.
Take into account any local building regulations or homeowner association guidelines that may affect the design and construction of your pergola. Some areas may require permits for certain pergola sizes or building materials. Research these requirements and obtain any necessary permissions before proceeding with your project.
Once you have a clear vision of your pergola’s purpose, size, location, and materials, it’s time to bring your ideas to life. Consider creating a detailed sketch or using a design software to visualize your pergola. This will help you refine your design, make modifications if needed, and ensure that you have a clear plan to follow during the construction phase.
Remember, the planning and design phase is your opportunity to get creative and personalize your pergola. Experiment with different styles, add decorative elements, and choose a color scheme that complements your existing outdoor decor. The more thought and detail you put into this step, the more satisfying the end result will be.
With your plan in hand, you are now ready to move on to step two: obtaining permission or permits.
Step 2: Obtaining Permission or Permits
Before you begin construction on your patio pergola, it is essential to check if you need any permissions or permits from your local authorities. The regulations regarding pergola construction can vary based on your location, so it is crucial to do thorough research to ensure you are in compliance with the law.
Start by contacting your local building department or planning authority to inquire about the specific requirements for constructing a pergola. They will provide you with information on any permits that may be necessary, as well as guidelines on the size, height, and location of the structure.
When you reach out to the authorities, be prepared to provide details about your pergola, such as its dimensions, materials, and intended use. This will help them determine the level of permission you require and any additional specifications you need to adhere to.
It is important to note that obtaining permits may come with associated fees and a waiting period. Factor these considerations into your project timeline and budget. While the process may seem cumbersome, it is important to follow regulations to ensure the safety and compliance of your pergola.
If you live in a neighborhood with a homeowners association (HOA), check the governing documents to see if there are any restrictions or guidelines for building structures like pergolas. Some HOAs may have specific rules regarding materials, colors, and placement. Ensure that your proposed design aligns with these guidelines to avoid any conflicts or fines down the line.
Once you have received the necessary permissions or permits, it’s time to move on to the next step: gathering materials and tools.
Before we proceed, it is important to note that the information provided in this step may vary depending on your local building regulations. Always consult with your local authorities for accurate and up-to-date information on permits and permissions.
Step 3: Gathering Materials and Tools
Now that you have your plans and necessary permissions in place, it’s time to gather the materials and tools needed for building your patio pergola. Having everything you need at the outset will save time and ensure a smooth construction process.
The materials required will depend on the design and style of your pergola. Here are some common materials you may need:
- Wood: Choose pressure-treated lumber or cedar for a natural and durable option.
- Metal: Opt for steel or aluminum for a modern and sleek look.
- Vinyl: If you prefer a low-maintenance option, vinyl is a great choice.
- Concrete: You may need concrete for anchoring your pergola posts.
- Hardware: Gather screws, nails, brackets, and other necessary hardware for assembly.
- Shade elements: If you plan to add a fabric or roof covering, gather the appropriate materials.
In addition to materials, you will need a set of tools to complete the construction process. Here are some essential tools you may require:
- Tape measure: For accurate measurements.
- Level: To ensure your structure is straight and level.
- Saw: A circular saw or miter saw for cutting lumber.
- Drill: To create holes for screws and attach hardware.
- Hammer: For driving nails and securing components.
- Post hole digger: If you need to dig holes for your pergola posts.
- Wrenches: For tightening bolts and nuts.
- Safety equipment: Don’t forget gloves, safety glasses, and ear protection.
It’s important to have the necessary tools in good working condition. Check that all your tools are functioning properly and replace any worn-out or damaged equipment.
While gathering materials and tools, consider the quantity and quality required for your specific project. Take accurate measurements based on your plans and ensure that you have accounted for any additional supplies needed for the construction process.
Once you have all the materials and tools gathered and ready, you can move on to the next step: preparing the site for construction.
Step 4: Preparing the Site
Before you start building your patio pergola, it’s essential to prepare the site where the structure will be located. Proper site preparation will ensure a sturdy and long-lasting pergola, so you can enjoy it for years to come.
Start by clearing the area of any obstacles, such as rocks, plants, or debris. Ensure that the ground is level and free from any obstructions that may interfere with the construction process.
Next, mark the perimeter of your pergola using stakes and string. This will give you a clear outline of where the structure will be situated. Double-check the measurements to ensure they align with your design plans.
If your pergola will be attached to an existing structure, such as your house or a deck, make sure to inspect and prepare those surfaces too. Repair any damage or deterioration, and ensure that they are structurally sound to support the weight of the pergola.
Consider the foundation of your pergola. Depending on your design and local building codes, you may need to dig post holes or install footings to provide stability. Follow your design plans and any applicable regulations to determine the appropriate foundation method for your pergola.
Prior to digging or installing footings, it is essential to locate any underground utility lines. Contact your local utility companies to have them mark the locations of underground cables, pipes, and wires. This will prevent any accidental damage during the construction process.
Once the site is cleared, marked, and any necessary groundwork is completed, you are now ready to move on to the construction phase of your pergola. The next step, step 5, will guide you on how to build the foundation for your patio pergola.
Read more: How To Build A Patio Pergola
Step 5: Building the Foundation
With the site prepared, it’s time to start building the foundation of your patio pergola. The foundation is crucial for providing stability and support to your structure, ensuring that it remains sturdy and safe in various weather conditions.
The type of foundation you will need depends on your specific design plans and local building codes. Here are some common foundation options for patio pergolas:
- Concrete footings: This method involves digging holes at each corner of the pergola and pouring concrete to create sturdy footings. The size and depth of the footings will depend on the size and weight of your pergola.
- Concrete slab: If you prefer a solid surface for your pergola, you can pour a concrete slab as the foundation. This option works well for attaching your pergola to an existing concrete patio.
- Deck attachment: If you have a deck and want to attach the pergola to it, ensure that the deck structure is strong enough to support the additional weight. Consult with a professional if you are unsure.
When building the foundation, it’s crucial to follow the design plans and any local building codes or regulations. The stability and safety of your pergola depend on a solid foundation, so take the time to do it properly.
Start by marking the locations where the footings or slab will be placed. Use stakes and string to create a guide for digging or pouring the concrete. Double-check the measurements and ensure that everything is level.
If you are digging footings, use a post hole digger or an auger to create holes at the specified locations. The depth of the holes will depend on your local building codes and the design plans for your pergola.
Once the holes are ready, you can begin pouring the concrete to create the footings. Follow the instructions on the concrete mix and use a level to ensure that they are level and plumb. Allow the concrete to dry and cure according to the manufacturer’s recommendations before proceeding to the next step.
If you are pouring a concrete slab as the foundation, prepare the area by providing a solid and leveled base. Use formwork to create the edges of the slab and pour the concrete, following the recommended thickness. Smooth the surface with a trowel and allow the concrete to cure properly before continuing with the construction.
Having a solid foundation is an essential step in building a patio pergola. Once the foundation is complete, you can move on to Step 6: Installing Posts and Beams, where the structure of your pergola will start to take shape.
When building a patio pergola, make sure to use pressure-treated wood to prevent rot and decay. This will ensure that your pergola lasts for many years to come.
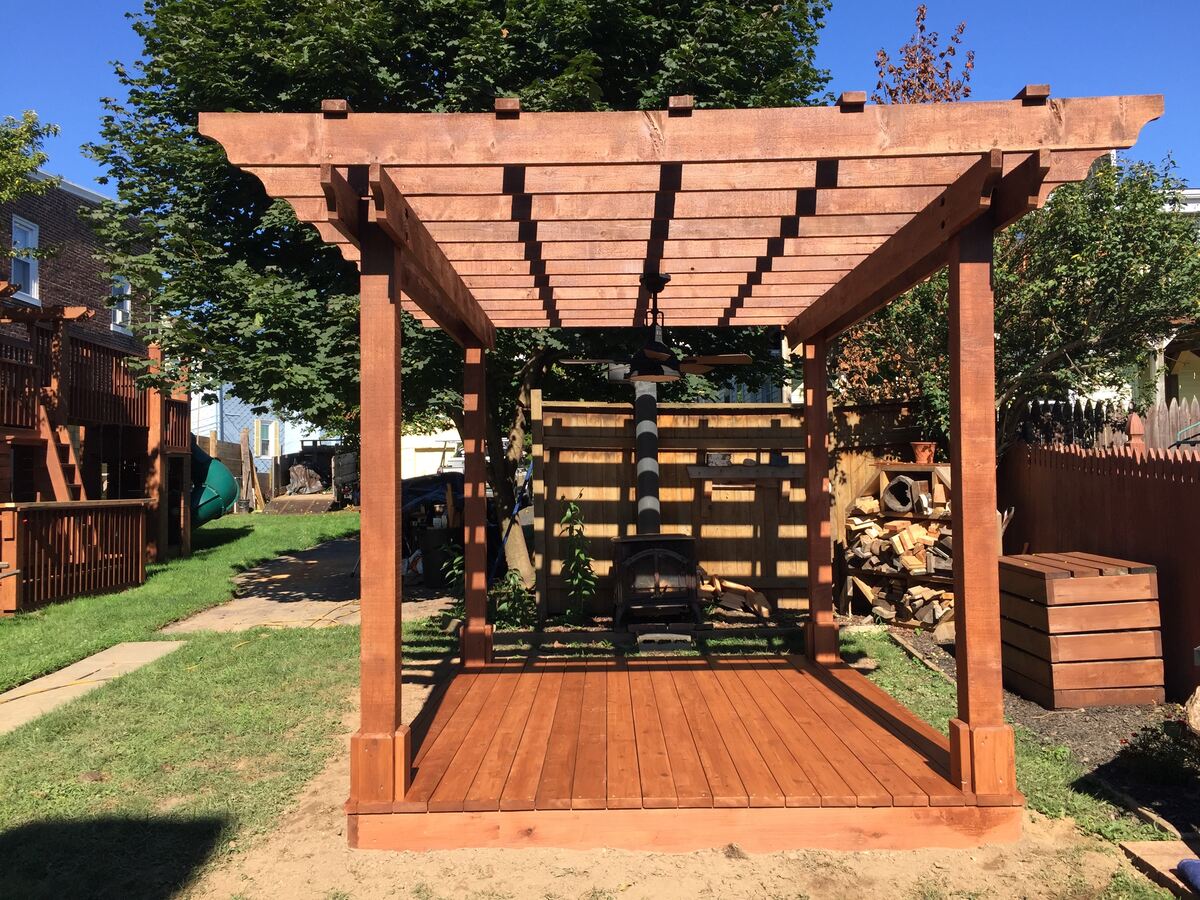
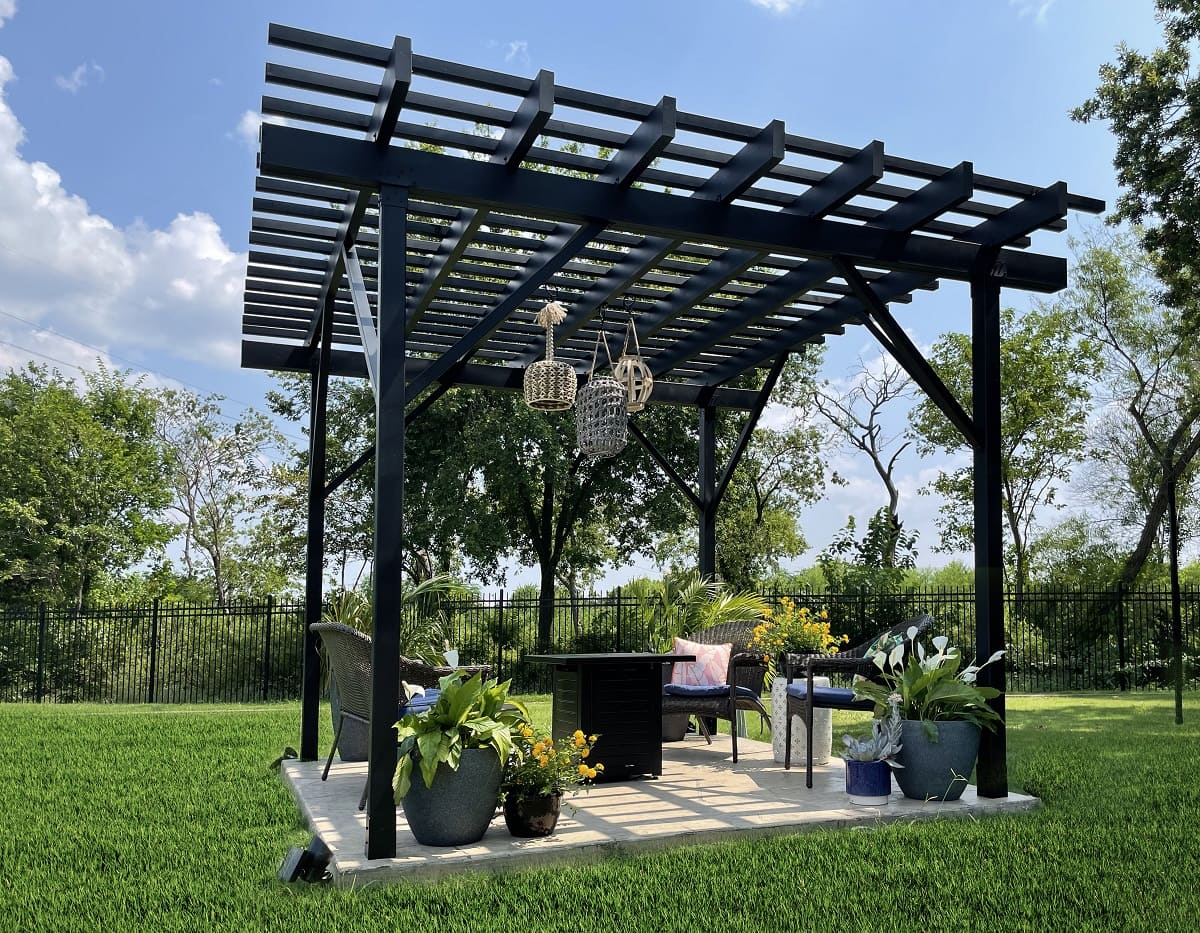
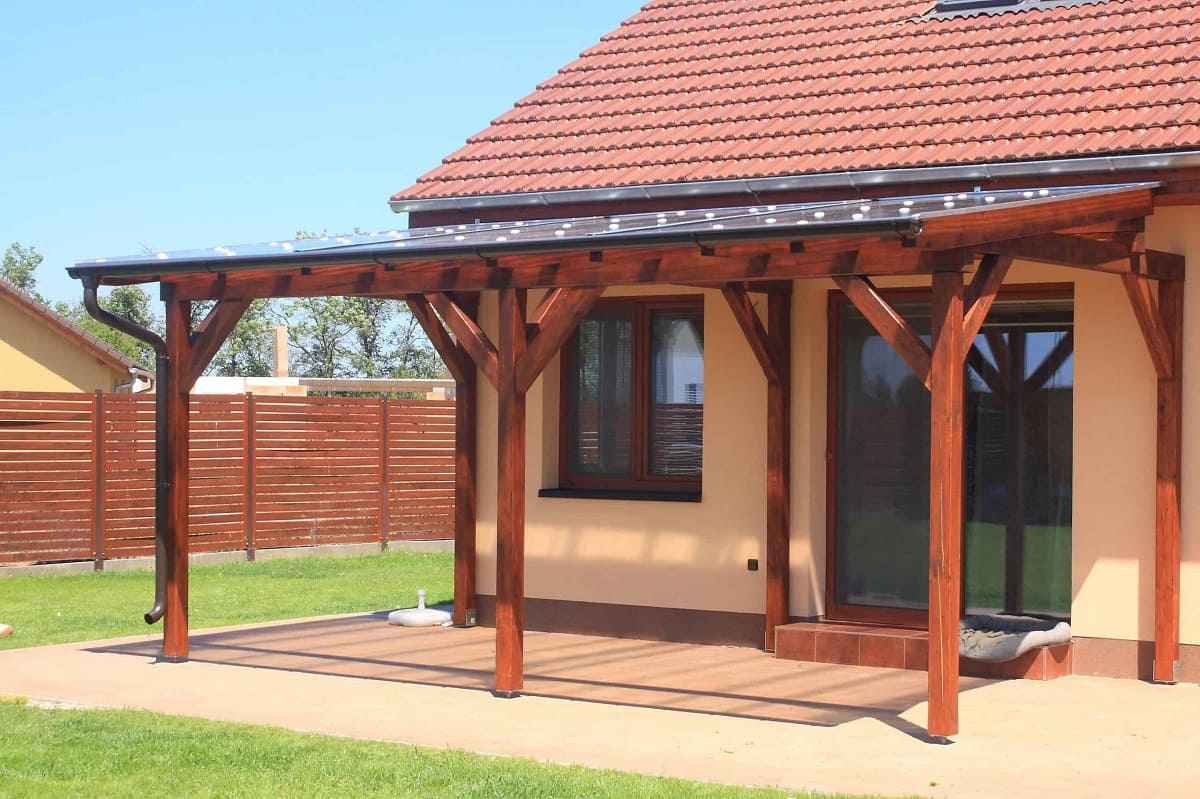
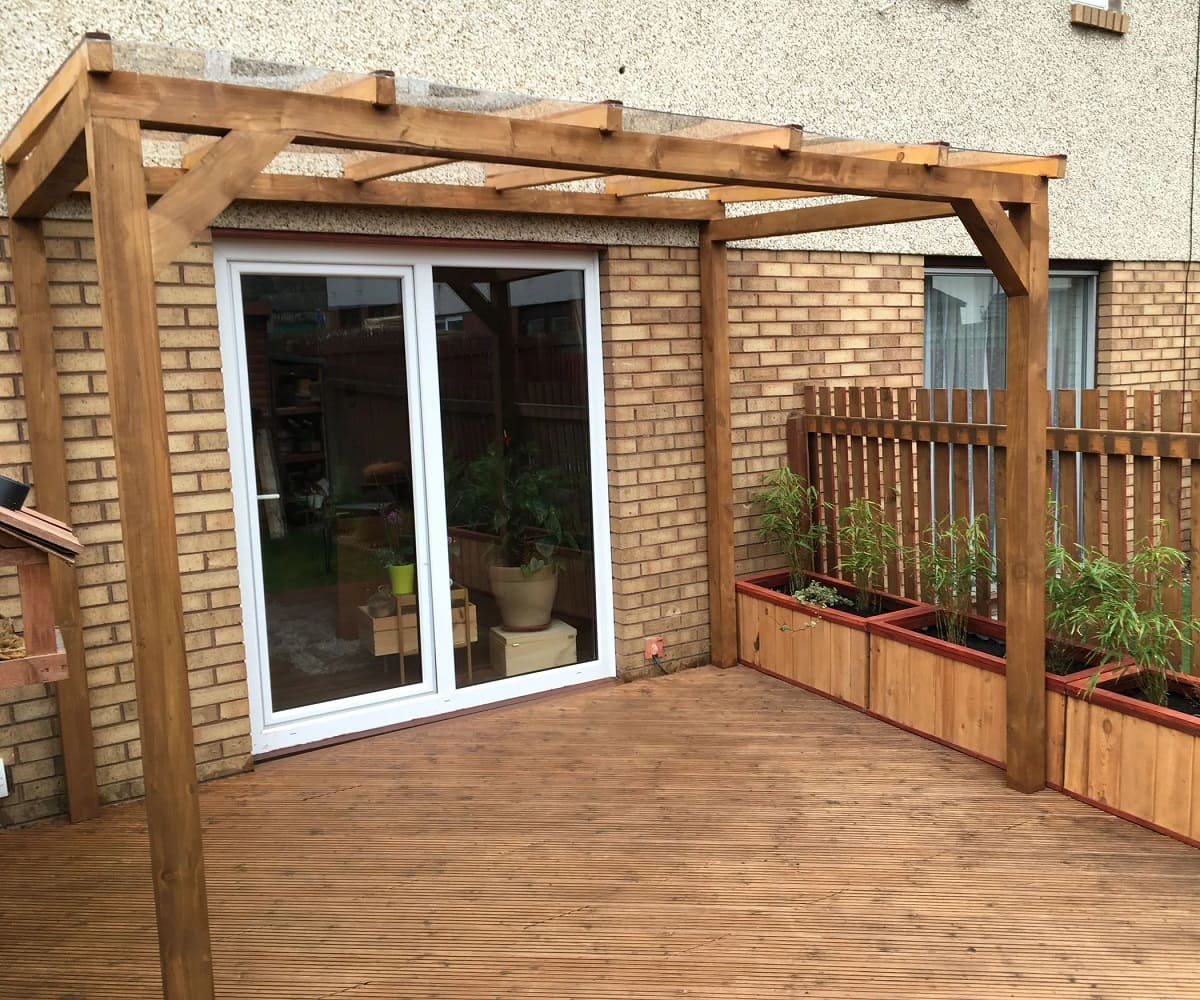
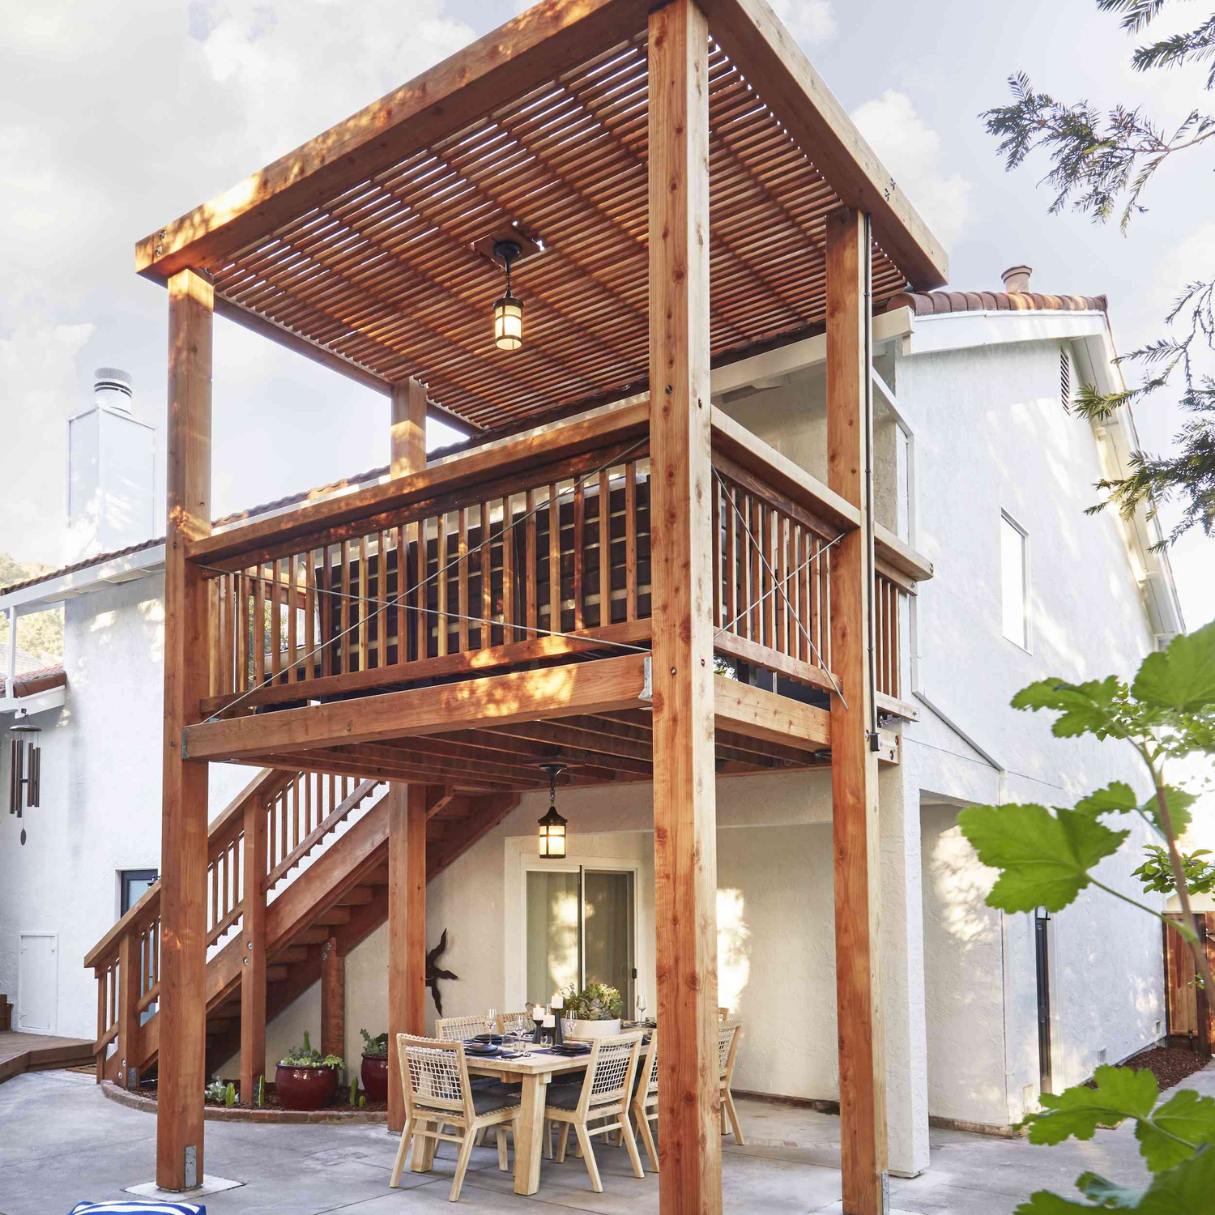
Step 6: Installing Posts and Beams
Now that the foundation is in place, it’s time to start building the structure of your patio pergola. Step 6 focuses on installing the posts and beams, which provide the framework and support for the overall structure.
Start by measuring and marking the locations for the posts. Depending on your design, you may have corner posts, as well as intermediate posts if your pergola is large. Use a level to ensure that the posts are plumb and straight.
If you are using pre-treated or cedar lumber, it’s important to protect the portion of the posts that will be in contact with the ground. Apply a waterproofing sealant or wrap the bottom portion of the post with a water-resistant material before installation.
Once the posts are marked and prepped, dig holes at the designated locations. The depth of the holes will depend on the required stability for your pergola. Use a post hole digger or an auger to ensure that the holes are deep enough and have a consistent diameter.
Place the posts into the holes and fill them with concrete. Ensure that the posts are level and plumb before the concrete sets. Use temporary bracing to hold the posts in position until the concrete cures. Allow the concrete to dry and cure completely according to the manufacturer’s instructions.
When the posts are securely set, it’s time to install the beams. The beams run across the top of the posts and provide support for the rafters and the overall structure of the pergola.
Cut the beams to the appropriate length based on your design plans. Place the beams on top of the posts, ensuring they are evenly spaced and level. Use galvanized brackets or joist hangers to secure the beams to the posts. Secure the brackets or hangers with appropriate screws or nails.
Double-check the alignment and levelness of the beams before proceeding to the next step. This will ensure that the rafters and crossbeams will fit properly and create a stable and visually appealing structure.
By completing Step 6, you have established the basic framework of your patio pergola. The posts and beams provide the foundation for the remaining components, and your pergola is starting to take shape. In the next step, Step 7: Attaching Rafters and Crossbeams, the structure will become more defined as additional elements are added.
Step 7: Attaching Rafters and Crossbeams
With the posts and beams in place, it’s time to move on to Step 7: Attaching rafters and crossbeams. This step brings the structure of your patio pergola to life, adding depth and visual interest to the overall design.
Start by preparing the rafters, which are the angled components that run from the top of one beam to the top of the opposite beam. Measure and mark the spacing for the rafters along the length of the beams. The spacing will depend on your design plans and personal preference.
Cut the rafters to the appropriate length and angle to fit securely between the beams. Use a saw or a miter saw to make precise cuts. Make sure that each rafter is aligned and flush with the outer edge of the beams.
Secure the rafters to the beams using metal brackets or by toenailing. Metal brackets provide extra stability and easy installation. Follow the manufacturer’s instructions for positioning and attaching the brackets. If you choose to toenail, use galvanized nails or screws to secure the rafters in place.
Once the rafters are securely attached, it’s time to add the crossbeams. Crossbeams run perpendicular to the rafters and provide additional support and stability to the structure.
Measure and mark the desired spacing for the crossbeams along the length of the rafters. Like the rafters, the spacing will depend on your design plans and personal preference. Cut the crossbeams to the appropriate length and angle.
Attach the crossbeams to the rafters, positioning them at the marked locations. Use metal brackets or toenails to secure the crossbeams into place. Ensure that each crossbeam is level and flush with the outer edges of the rafters.
Double-check the alignment and overall stability of the rafters and crossbeams. Make any necessary adjustments to ensure that the structure is level and visually appealing.
By completing Step 7, you have added the key elements that define the structure of your patio pergola. The rafters and crossbeams create a stunning framework that will support the final components of your pergola. In the next step, Step 8: Adding Shade Elements, you will have the opportunity to enhance the functionality and aesthetics of your pergola.
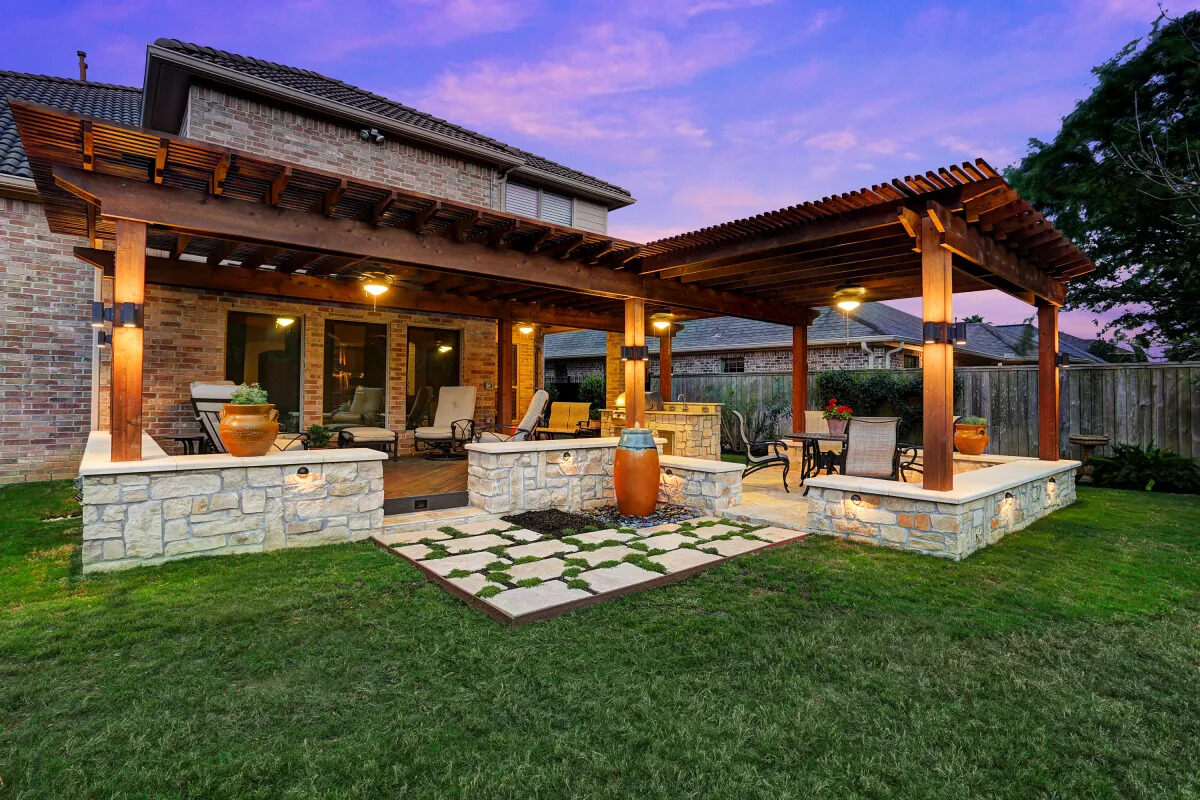
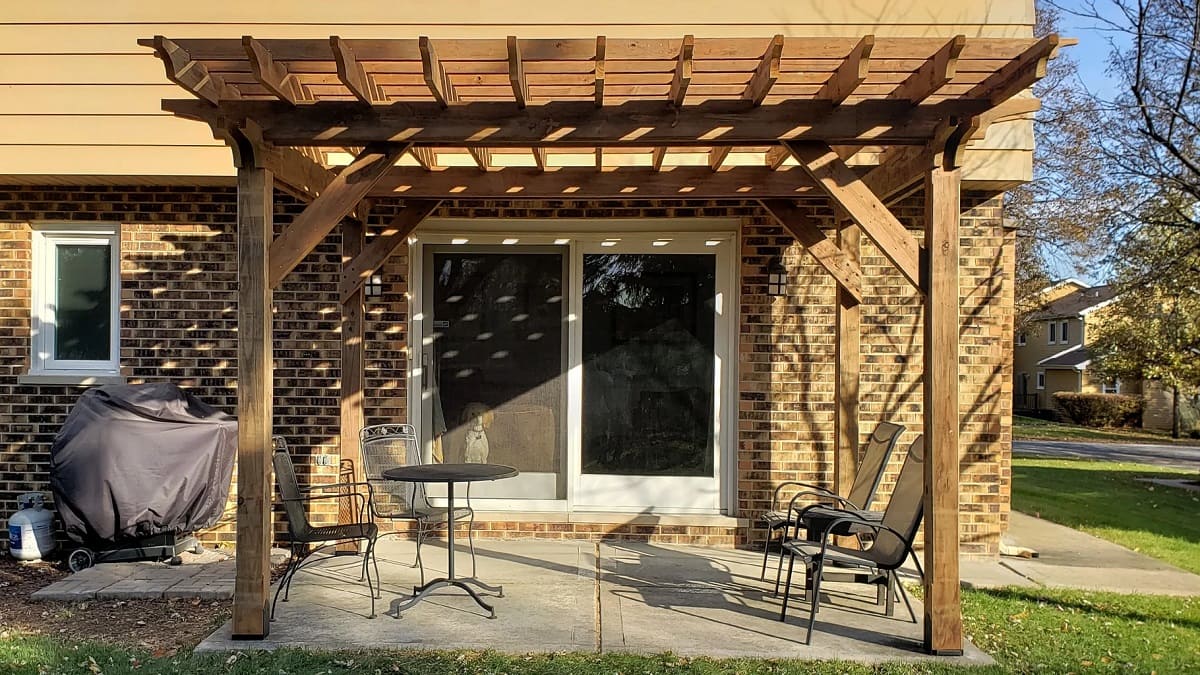
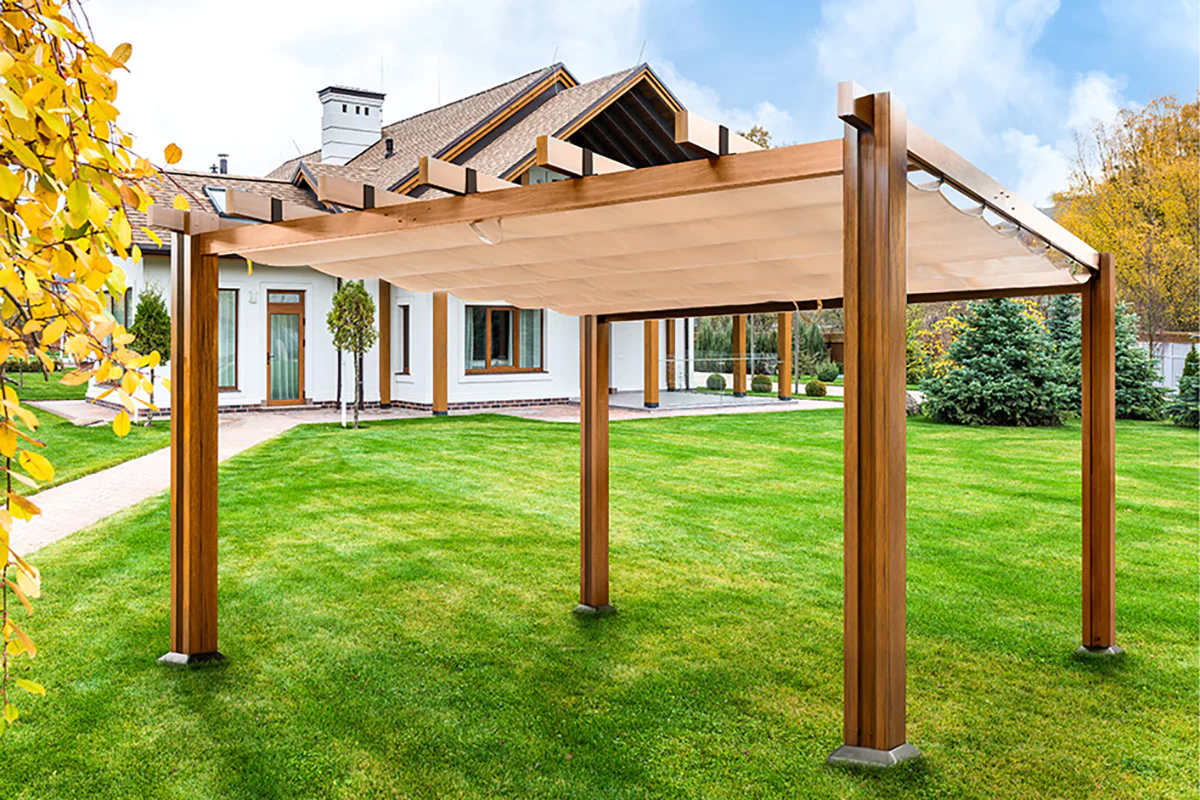
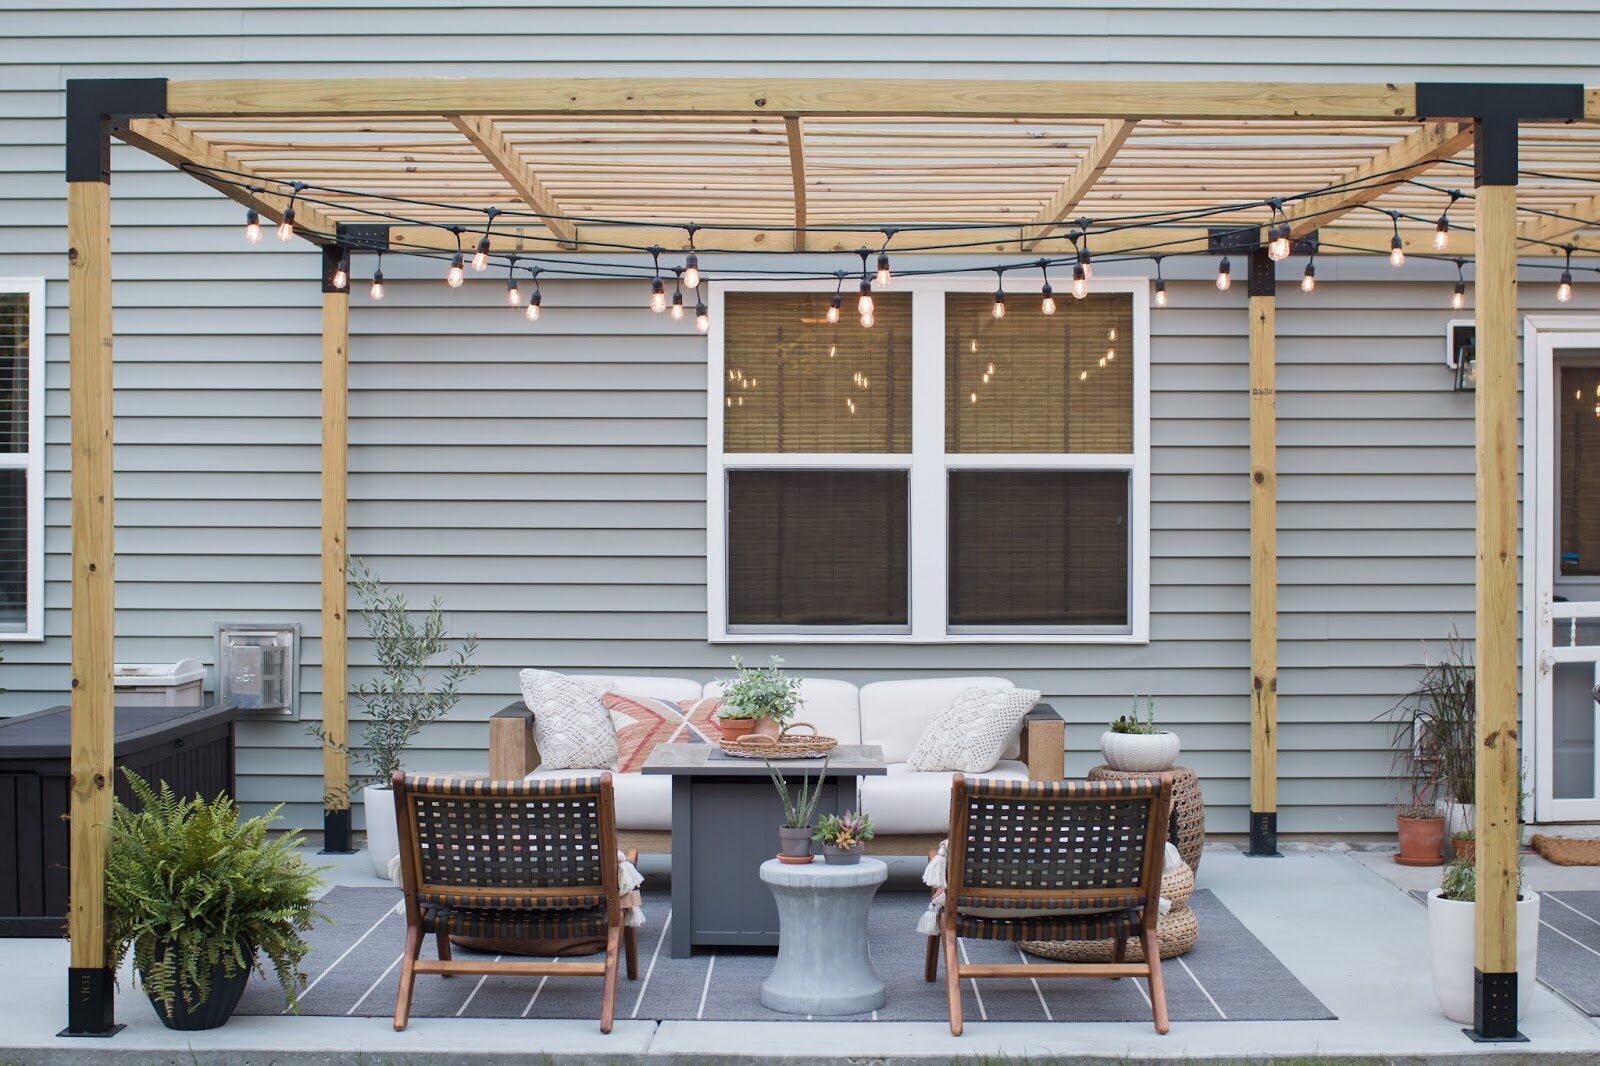
Step 8: Adding Shade Elements
In Step 8, we will focus on adding shade elements to your patio pergola. These elements not only provide much-needed shade during hot summer days but also add to the overall beauty and functionality of your outdoor space.
There are several options to consider when it comes to adding shade to your pergola:
- Fabric Canopies: Choose a high-quality outdoor fabric that is weather-resistant and UV-protected. Install the fabric canopy by threading it through the rafters and crossbeams, creating a layered effect or draping it to cover the desired area. Secure the fabric using hooks or ties for a clean and snug fit.
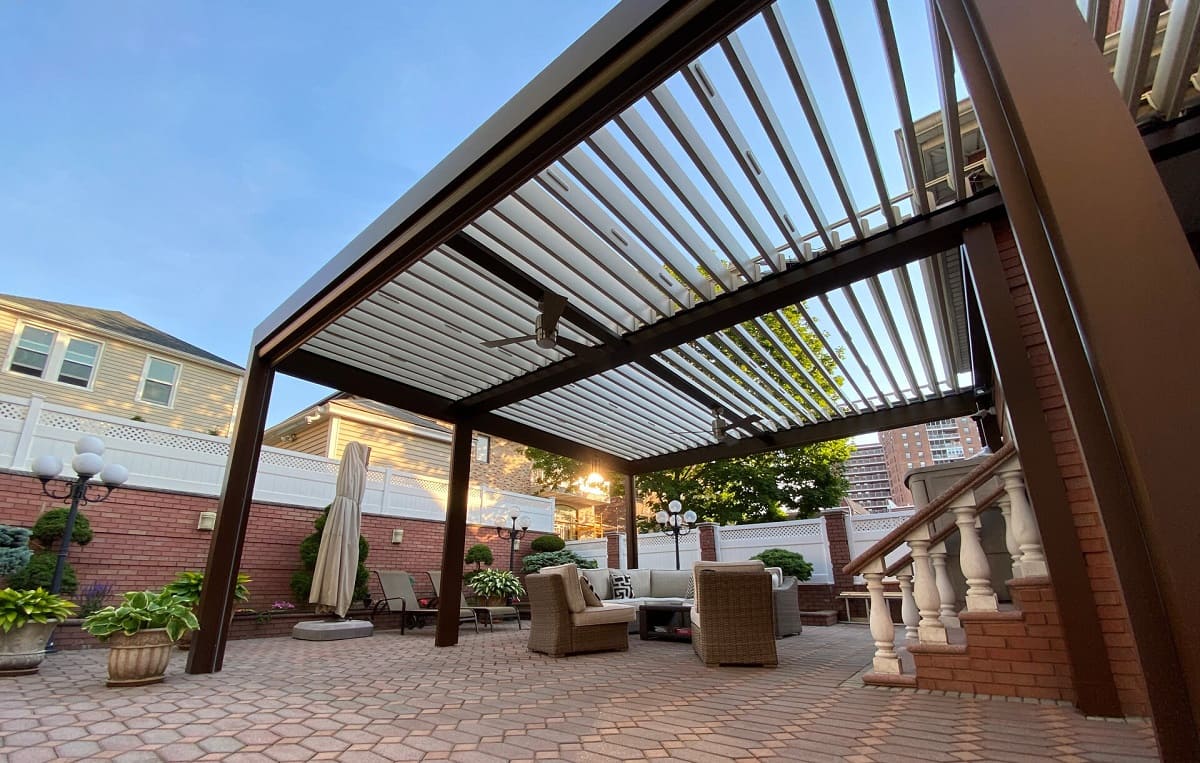
- Retractable Awnings: If you prefer the flexibility of adjustable shade, consider installing retractable awnings. These can be manually or electronically operated, allowing you to extend or retract the awnings based on your preference.
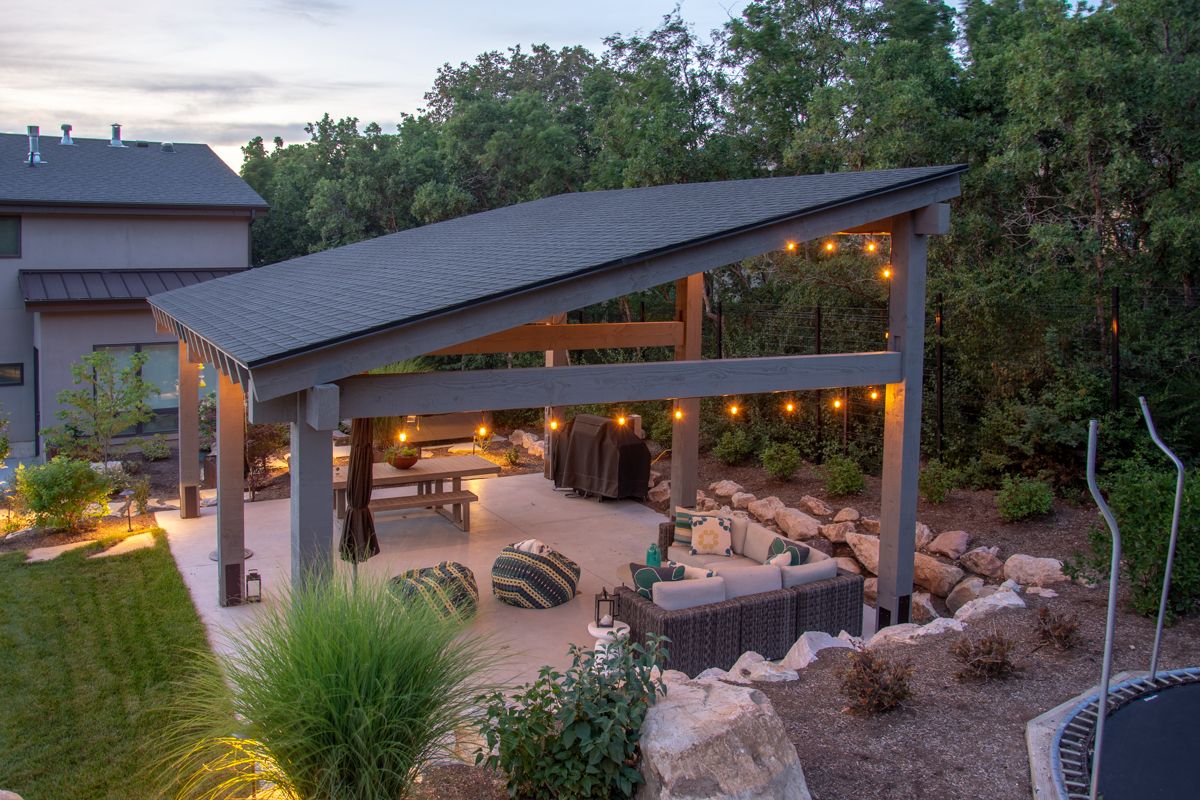
- Pergola Roofing: For a more substantial shading solution, you can install a solid roof on your pergola. Options include metal roofing, polycarbonate panels, or even wooden slats. Choose a material that complements your overall design while providing the desired level of shade and protection.
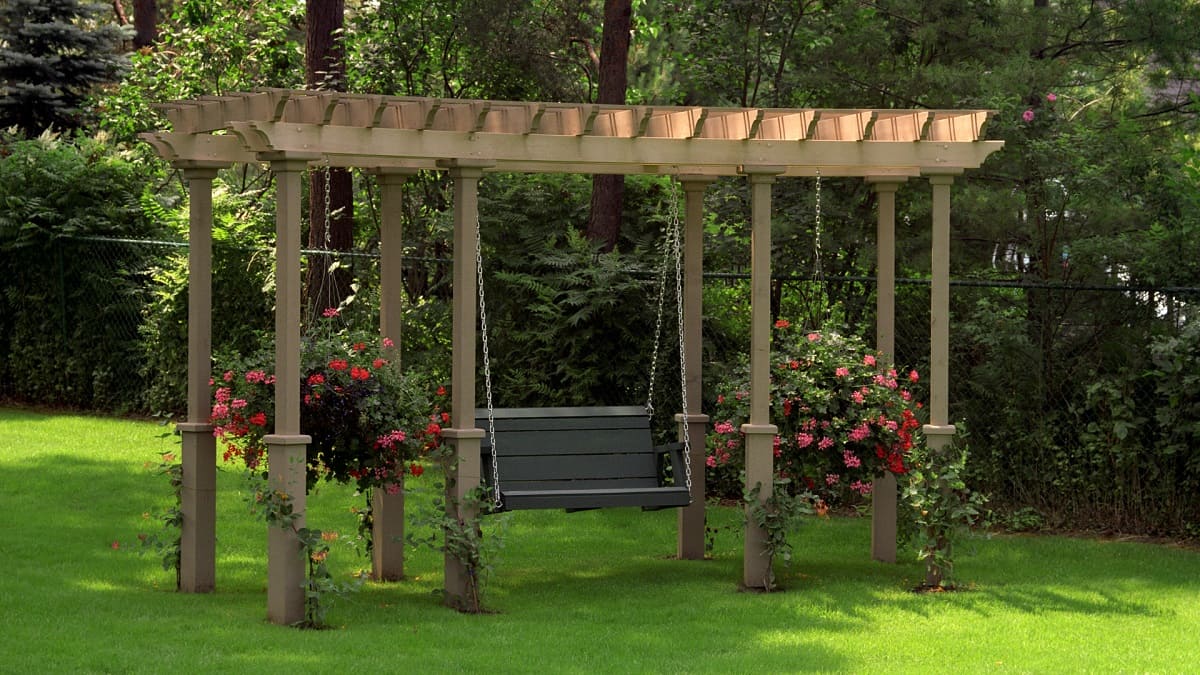
- Greenery and Vines: Create a natural shade by incorporating climbing plants or vines into your pergola design. Train them to grow around the structure, allowing the foliage to provide shade and create a beautiful green canopy overhead.
Consider the climate and specific needs of your outdoor space when choosing your shade elements. Some areas may require more sun protection, while others may benefit from the versatility of retractable options. Take into account your personal style preferences, maintenance requirements, and overall budget when making your decision.
Once you have chosen your shade element, carefully install it according to the manufacturer’s instructions. Ensure that the shade element is securely attached and properly tensioned to withstand wind and other weather conditions. Regularly inspect and maintain your shade element to ensure its longevity and performance.
By adding shade elements to your patio pergola, you are creating a comfortable and inviting space that can be enjoyed even on the hottest days. The next step, Step 9: Finishing Touches, will cover the final details to complete your pergola construction.
Read more: How To Build A Pergola Roof
Step 9: Finishing Touches
In the final step of building your patio pergola, we will focus on the finishing touches that will complete the construction and add those additional details that make your pergola truly unique.
Here are some finishing touches you can consider:
- Stain or Paint: Apply a stain or paint to protect and enhance the appearance of your pergola. Choose a color that complements your outdoor space and matches your personal style. Ensure that the chosen product is suitable for exterior use and can withstand the elements.
- Decorative Elements: Add decorative elements such as finials, brackets, or trim pieces to enhance the aesthetics of your pergola. These details can elevate the overall look and make your pergola stand out.
- Lighting: Install outdoor lighting to create a warm and inviting atmosphere in the evenings. Consider string lights, solar-powered fixtures, or even hanging lanterns to add both functionality and charm to your pergola.
- Furniture and Accessories: Select outdoor furniture and accessories that complement the style and purpose of your pergola. Comfortable seating, cushions, pillows, and maybe even a small table can make your pergola a cozy retreat for relaxation and entertainment.
- Planters and Greenery: Incorporate planters or containers with flowers, shrubs, or herbs around your pergola to add a touch of nature and color. Consider climbing plants to further beautify and integrate your pergola with the surrounding landscape.
Take the time to carefully consider each finishing touch and ensure that it aligns with your vision for your outdoor space. These details will help personalize your pergola and create a welcoming and enjoyable environment.
Once you have completed the finishing touches, take a step back and admire your newly built patio pergola. You have successfully transformed your outdoor space into a stunning sanctuary that serves both functional and aesthetic purposes.
Remember to maintain your pergola regularly by cleaning and inspecting it for any damage or wear. Treat any issues promptly to ensure the longevity and durability of your structure.
Congratulations on successfully building your patio pergola! Enjoy the countless hours of relaxation and entertainment that this beautiful addition will provide in your outdoor living space.
If you’re ever in need of further assistance or inspiration, feel free to refer back to this guide or consult with professionals in the field. Happy pergola building!
Conclusion
Building a patio pergola is a rewarding project that adds both functionality and beauty to your outdoor space. Throughout this comprehensive guide, we have taken you through each step of the process, from planning and design to the finishing touches. By following these steps and incorporating your own personal style, you can create a stunning pergola that enhances your outdoor living experience.
Remember, proper planning and design are key to a successful pergola project. Consider the purpose, size, and location of your pergola, and choose materials that suit your style and climate. Obtaining necessary permissions or permits as well as gathering the right materials and tools are crucial steps in ensuring a smooth construction process.
Preparing the site and building a solid foundation provide the stability and support needed for your pergola. Installing posts and beams, followed by attaching rafters and crossbeams, give shape and structure to your pergola. Adding shade elements, such as fabric canopies, retractable awnings, or natural vines, provides relief from the sun and adds to the overall ambiance.
The finishing touches, such as staining or painting, decorative elements, lighting, and furniture, truly make your pergola unique and inviting. Incorporating planters and greenery adds a touch of nature and a vibrant atmosphere to your outdoor oasis.
Throughout the construction process, it’s important to adhere to local building codes and regulations, as well as consult professionals when needed. Safety should always be a top priority.
Once your patio pergola is complete, take the time to step back and appreciate your accomplishment. It’s a space where you can relax, entertain guests, and enjoy the beauty of the outdoors. Regular maintenance will ensure that your pergola remains in top condition for years to come.
We hope this guide has provided you with the necessary knowledge and inspiration to embark on your patio pergola journey. By following these steps and infusing your own creativity, you can create a remarkable outdoor oasis that perfectly suits your style and needs.
Now, go forth and begin building your dream patio pergola – an inviting retreat that will bring joy and relaxation for years to come.
Frequently Asked Questions about How To Build A Patio Pergola
Was this page helpful?
At Storables.com, we guarantee accurate and reliable information. Our content, validated by Expert Board Contributors, is crafted following stringent Editorial Policies. We're committed to providing you with well-researched, expert-backed insights for all your informational needs.

0 thoughts on “How To Build A Patio Pergola”