Home>Garden Essentials>How Long Do You Bake Pumpkin Seeds At 350
Garden Essentials
How Long Do You Bake Pumpkin Seeds At 350
Modified: March 24, 2024
Discover the perfect time and temperature for baking pumpkin seeds in your garden. Learn how long to bake pumpkin seeds at 350 degrees for a delicious and crunchy snack.
(Many of the links in this article redirect to a specific reviewed product. Your purchase of these products through affiliate links helps to generate commission for Storables.com, at no extra cost. Learn more)
Introduction
Welcome to the wonderful world of pumpkin seeds! If you’re a fan of fall festivities and delicious snacks, then you’re in for a treat. Pumpkin seeds are not only a nutritious and tasty snack, but they also offer a great way to reduce waste in your kitchen. Instead of throwing away the seeds from your pumpkin, why not give them new life by baking them into crispy, flavorful treats?
In this article, we will explore the process of preparing and baking pumpkin seeds to perfection. Whether you want a simple salted version or prefer to experiment with different seasonings, we’ve got you covered. So, put on your apron, gather your pumpkin seeds, and let’s dive in!
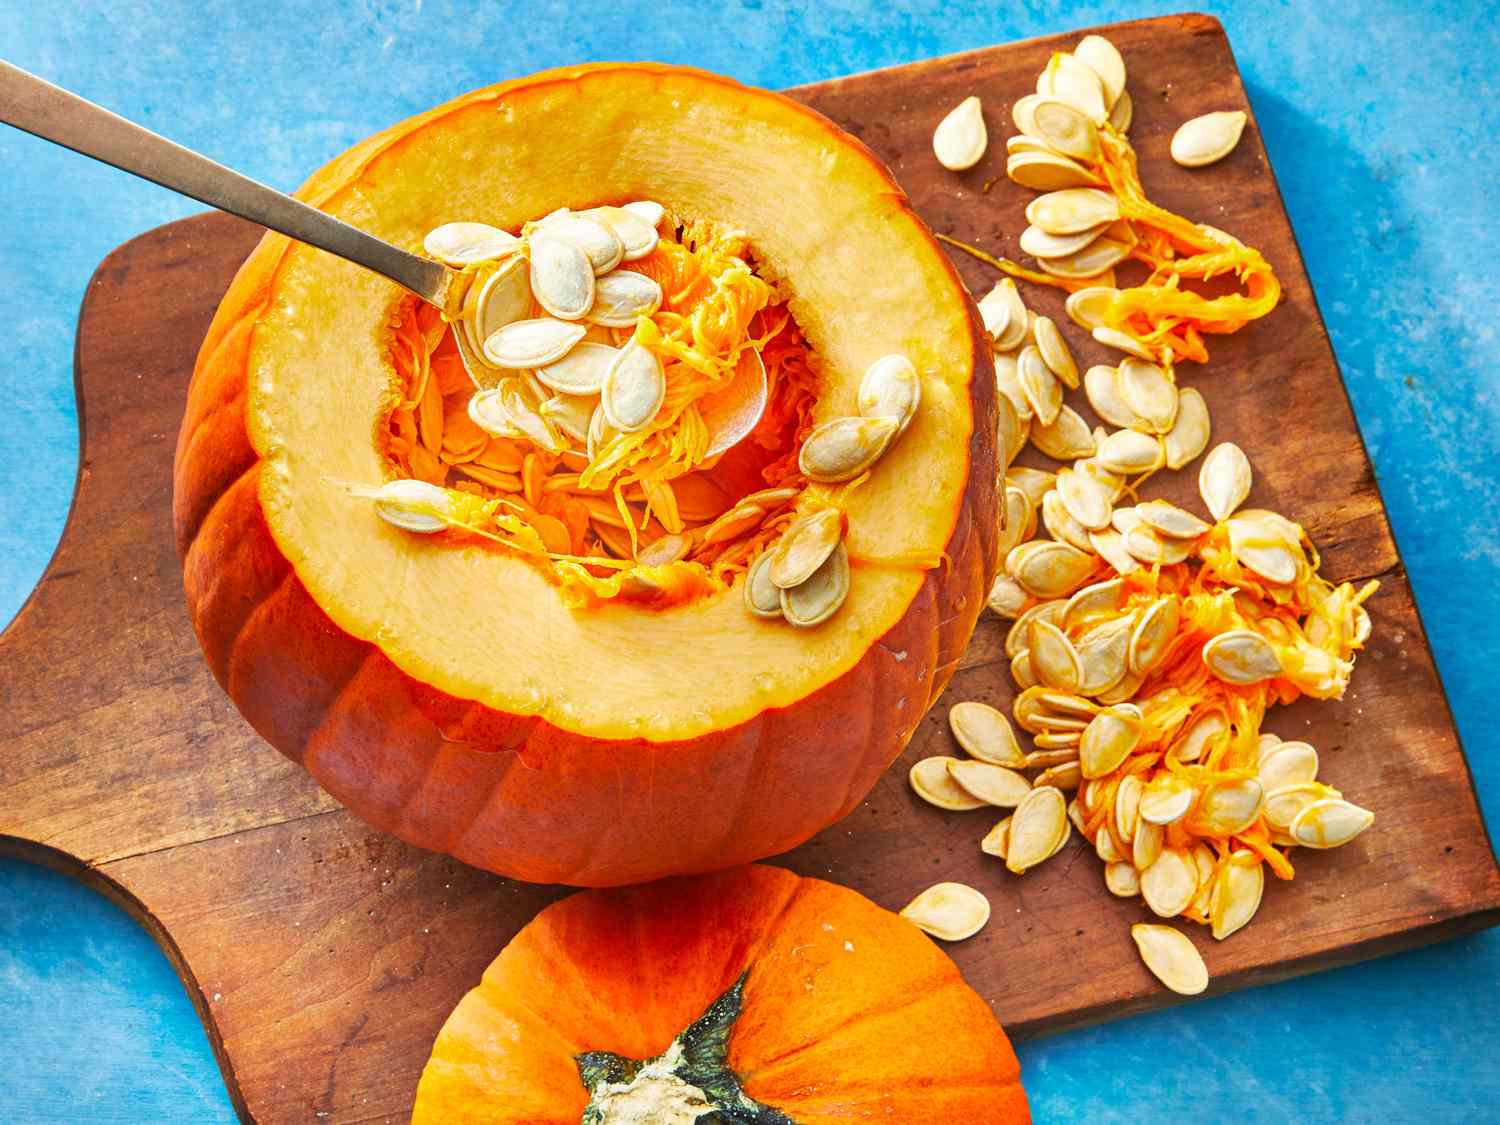
Before we jump into the baking process, it’s important to start with properly prepared pumpkin seeds. So, let’s begin with how to extract and clean the seeds.
Key Takeaways:
- Don’t toss those pumpkin seeds! Instead, bake them into delicious snacks with endless seasoning options like salted, garlic parmesan, or spicy Cajun. Experiment, enjoy, and reduce food waste in a fun, tasty way!
- Baking pumpkin seeds is a breeze! Just clean, season, and bake at 350°F for 20-25 minutes. Check for golden brown color, perfect crispness, and balanced flavors. Cool, store, and enjoy the delightful crunchiness!
Read more: How Long To Bake Pumpkin Seeds At 350
Preparing the Pumpkin Seeds
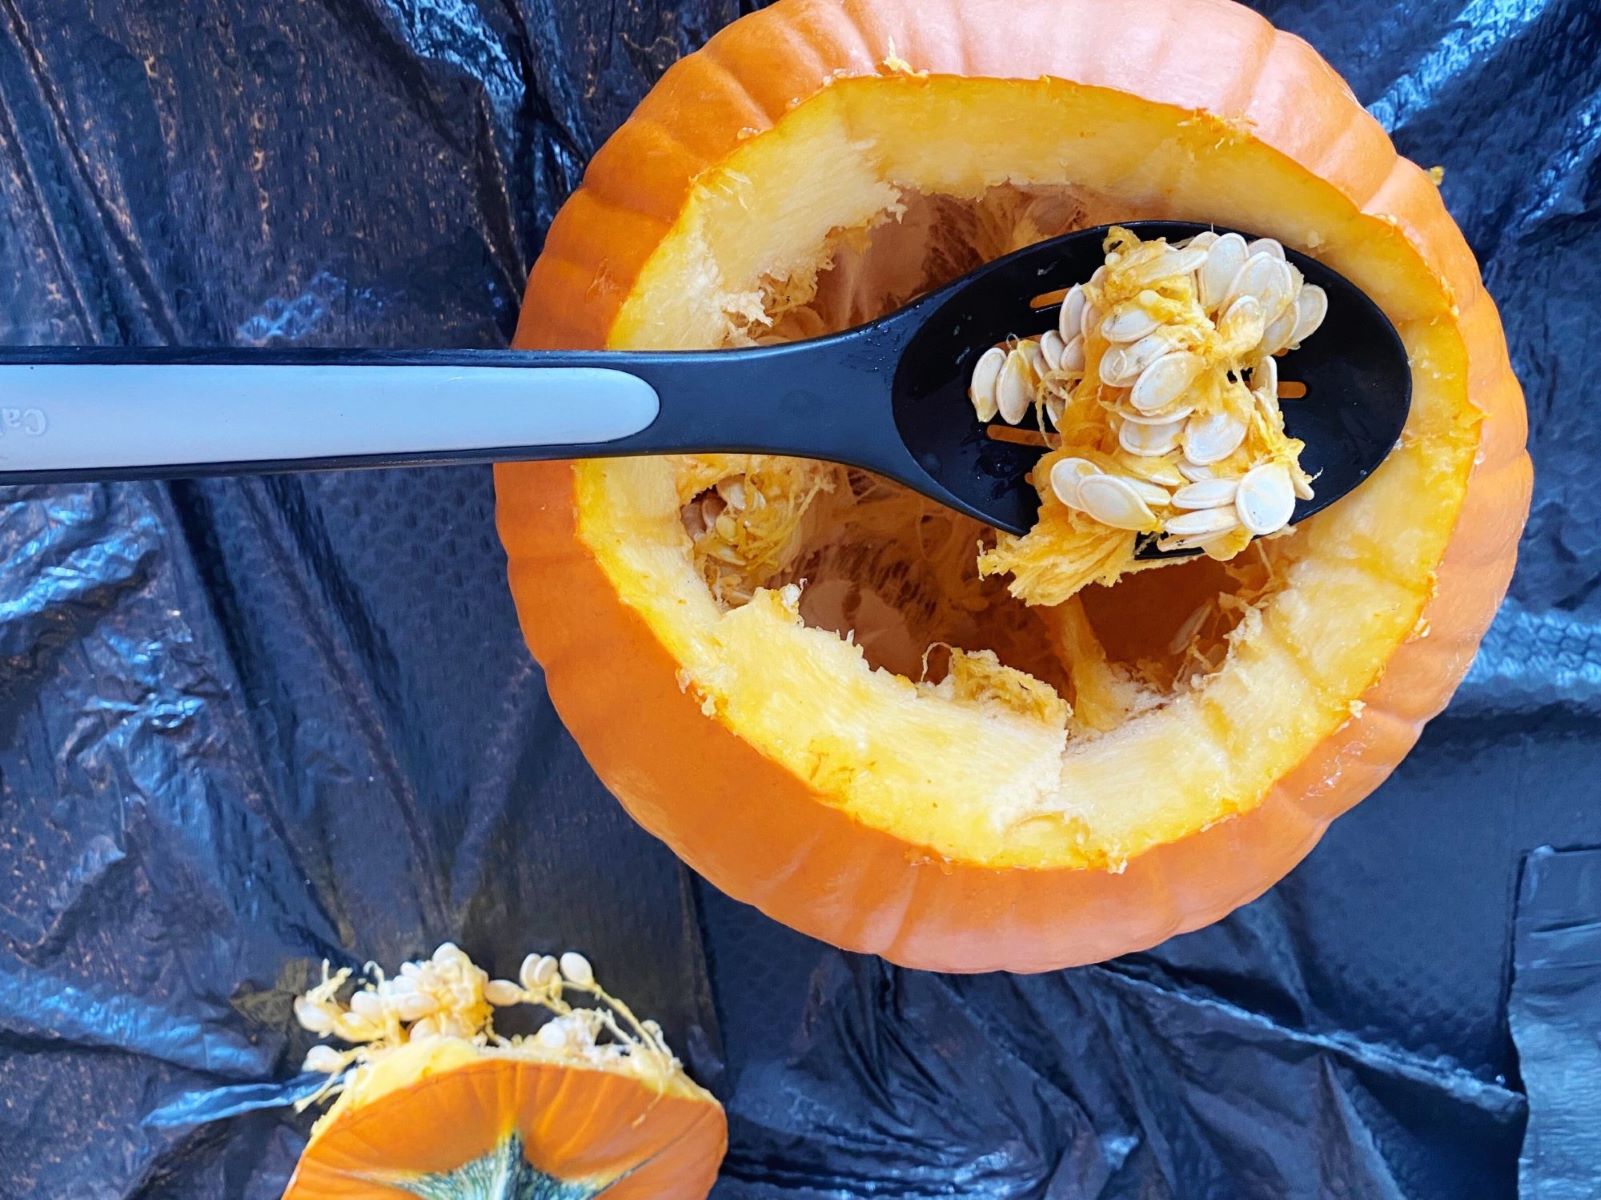
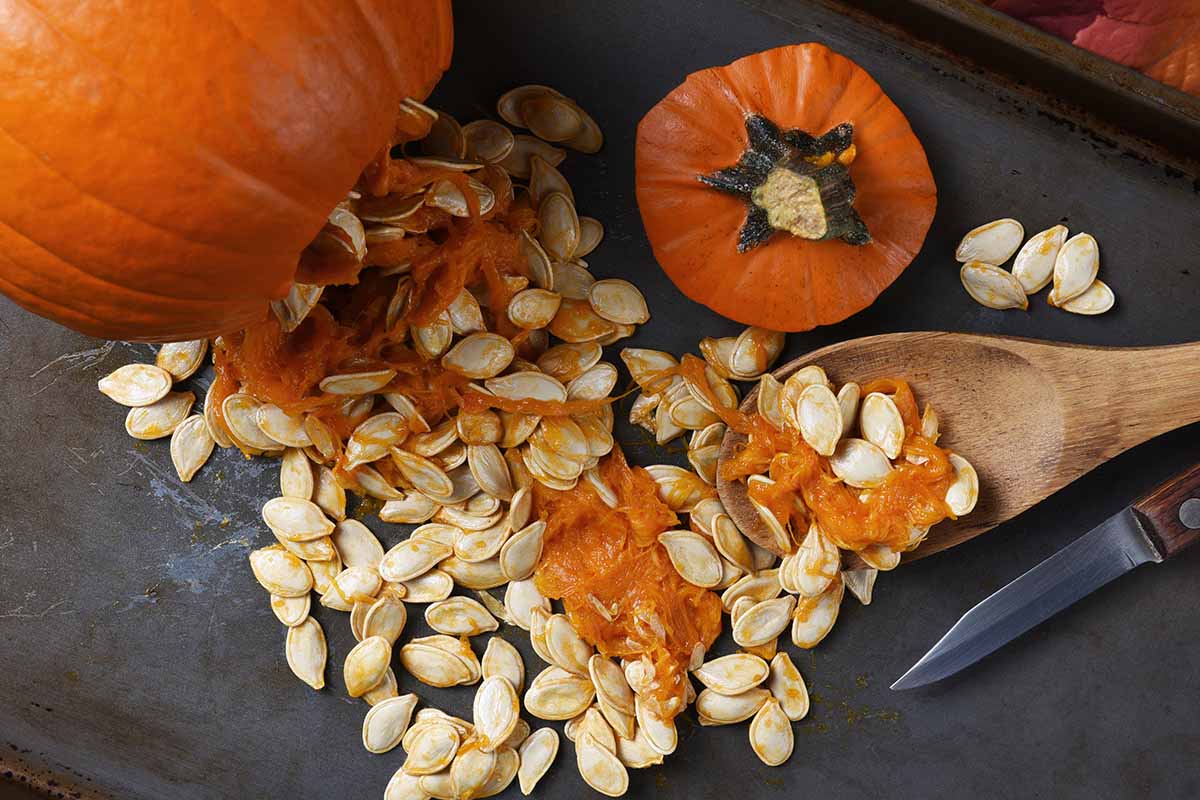
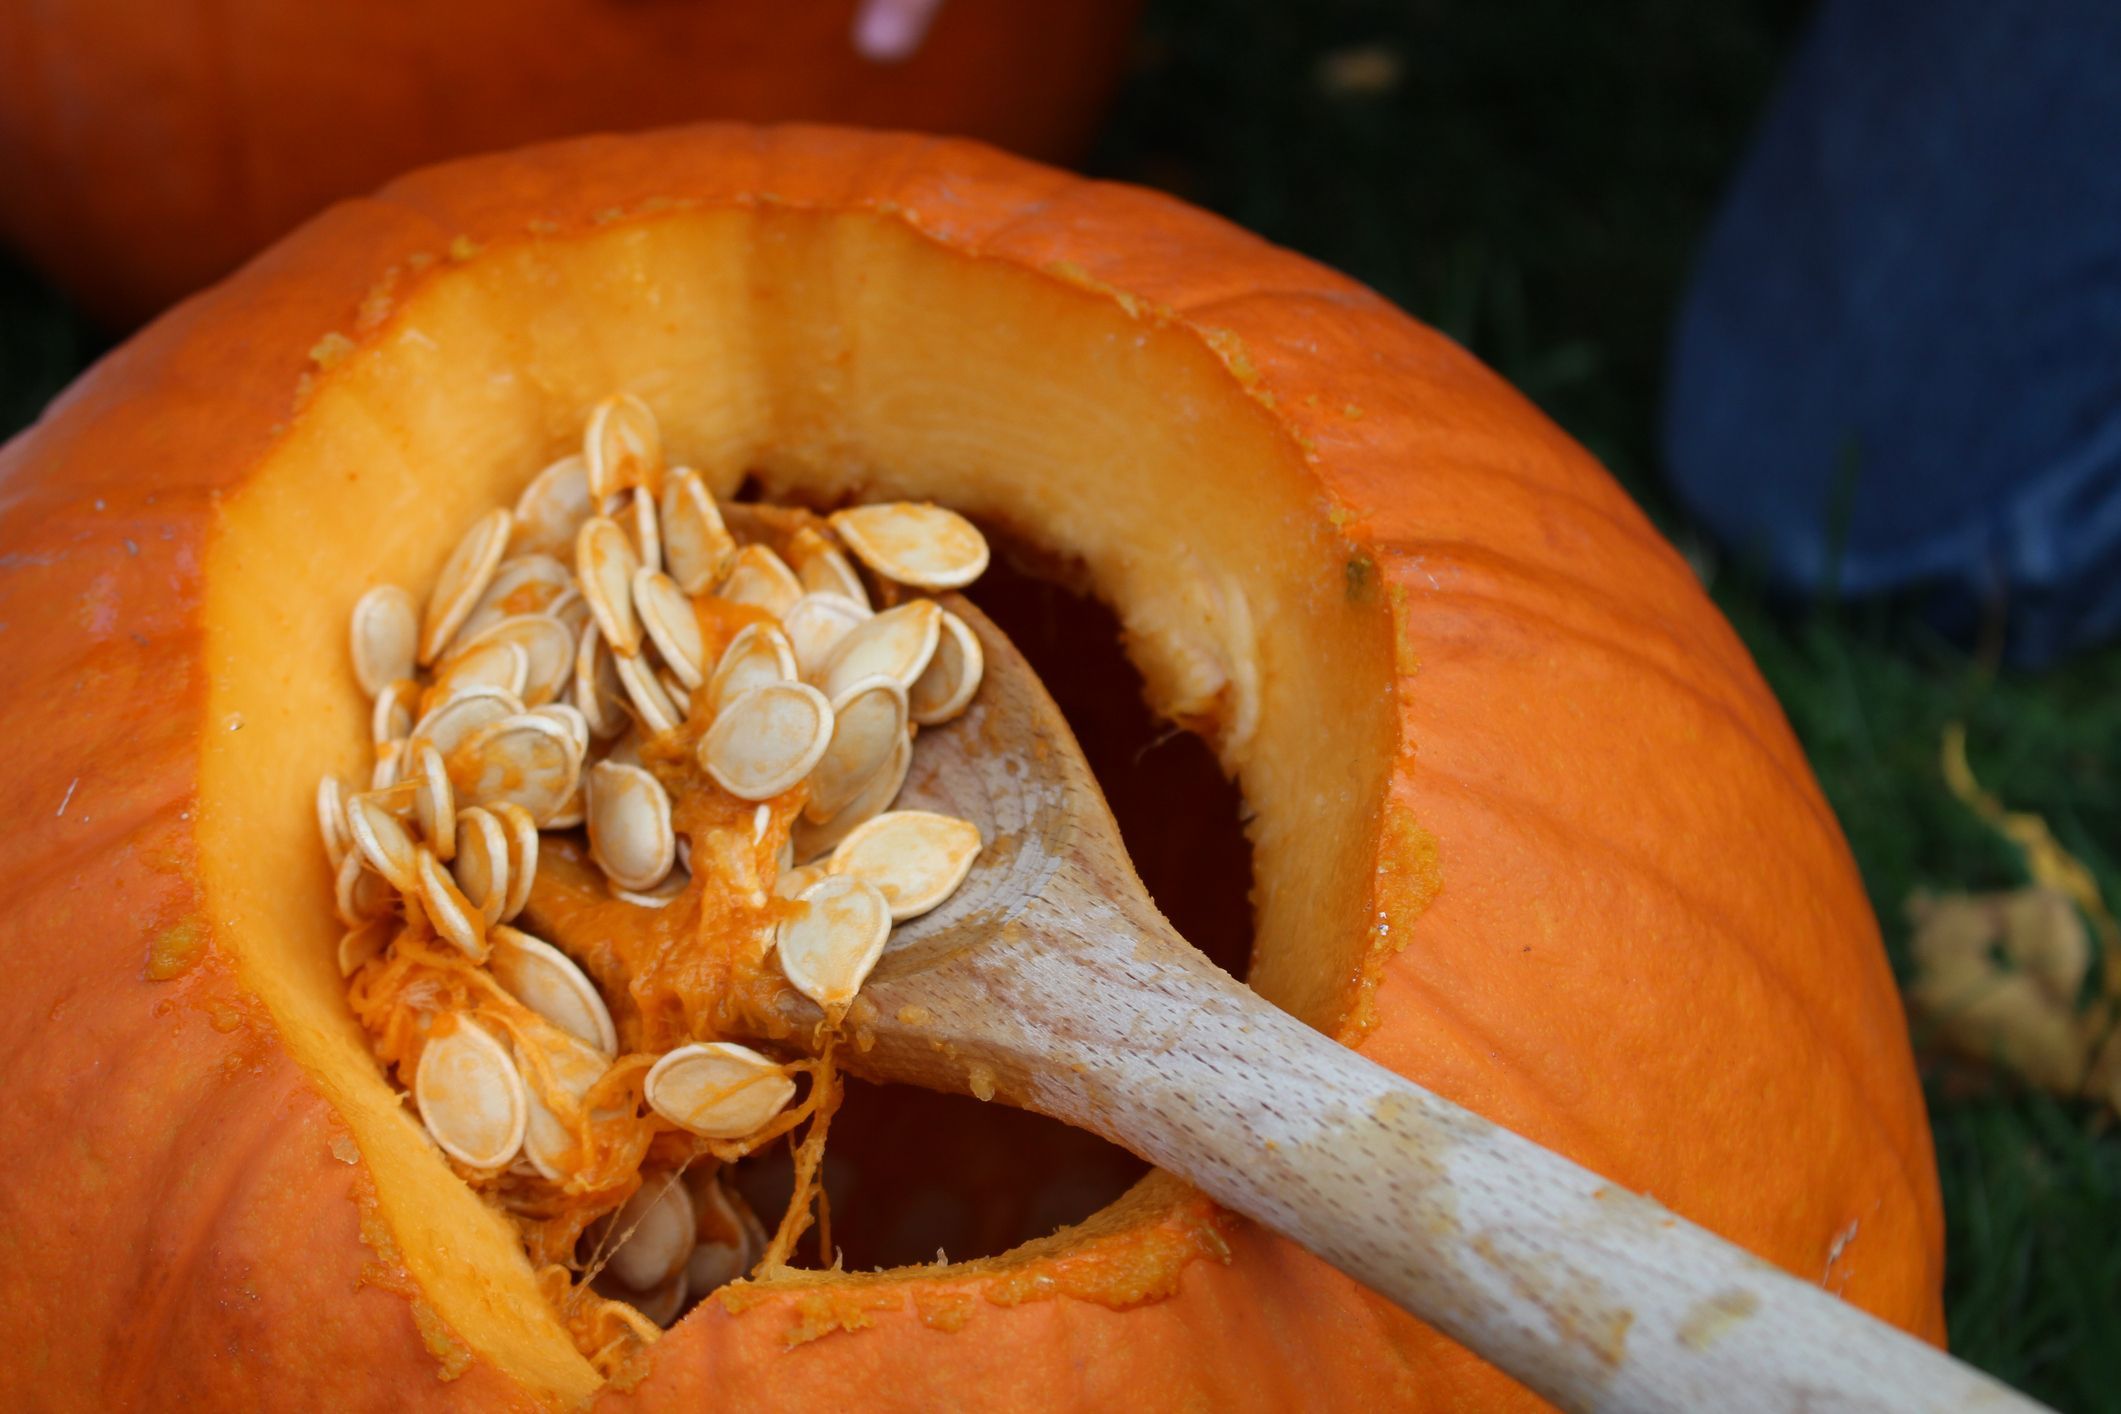
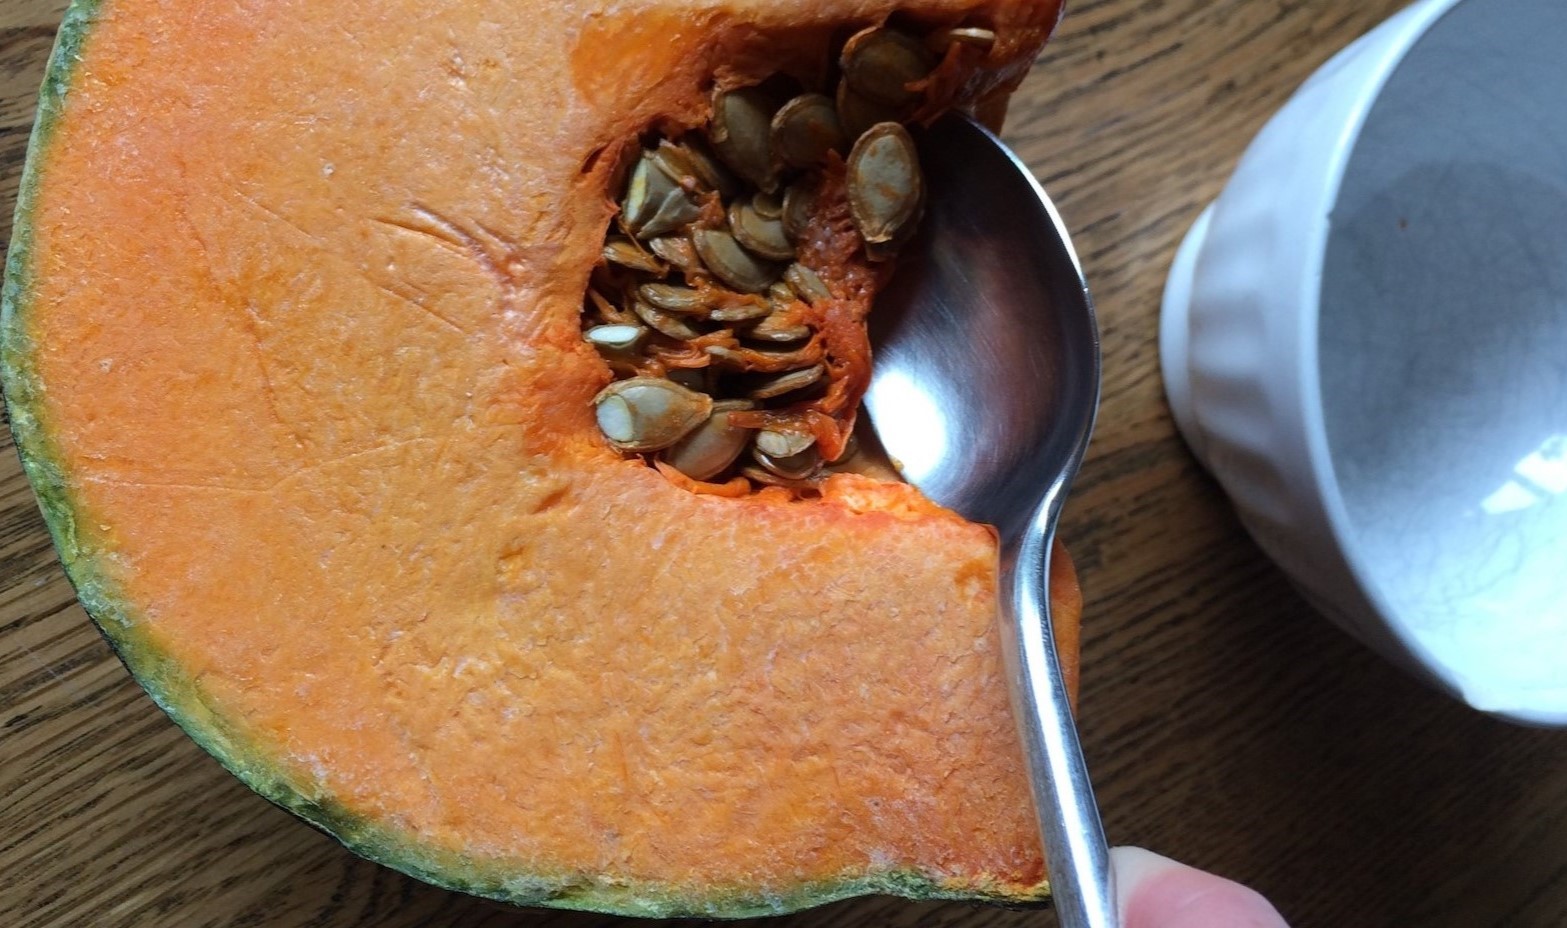
After you have carved your pumpkin or dismantled it for cooking purposes, the first step is to extract the seeds. Using a large spoon or your hands, scoop out the inner contents of the pumpkin and place them in a bowl. Separate the seeds from the pulp and fibrous threads, rinsing them under cold water to remove any remaining debris.
Once the seeds are cleaned, it’s time to remove any excess moisture. Pat them dry with a paper towel or spread them out on a clean kitchen towel and let them air dry for about 15-20 minutes. This step is crucial in achieving the perfect crunchiness when baking the seeds.
Now that the seeds are clean and dry, you can move on to seasoning them to your liking.
Seasoning Options
The beauty of baking pumpkin seeds is the endless variety of seasonings you can use to flavor them. Whether you prefer sweet or savory, there are options to satisfy every palate. Here are some seasoning ideas to get you started:
- Salted: For a classic and simple flavor, sprinkle the pumpkin seeds with salt. You can use regular table salt or try sea salt for a more pronounced taste.
- Garlic Parmesan: Toss the pumpkin seeds with melted butter, minced garlic, grated Parmesan cheese, and a pinch of salt. This combination results in a savory and cheesy treat that will have you coming back for more.
- Cinnamon Sugar: If you have a sweet tooth, this seasoning is for you. Mix the pumpkin seeds with melted butter, cinnamon, and sugar. The result is a delightfully sweet and crunchy snack that is perfect for satisfying your dessert cravings.
- Spicy Cajun: Add a little heat to your pumpkin seeds by tossing them in a blend of Cajun spices. Combine chili powder, paprika, cayenne pepper, garlic powder, and a touch of salt for a bold and zesty flavor.
- Herb-infused: Create a fragrant and herbaceous snack by coating the pumpkin seeds with olive oil and a mixture of dried herbs such as rosemary, thyme, and oregano. This seasoning option is perfect for those who enjoy a more earthy and aromatic taste.
Feel free to experiment and get creative with your seasonings. Mix and match flavors or come up with your own unique combinations. The key is to have fun and discover what tantalizes your taste buds the most.
Baking the Pumpkin Seeds
Now that the pumpkin seeds are cleaned and seasoned, it’s time to bake them to crispy perfection. Here’s how:
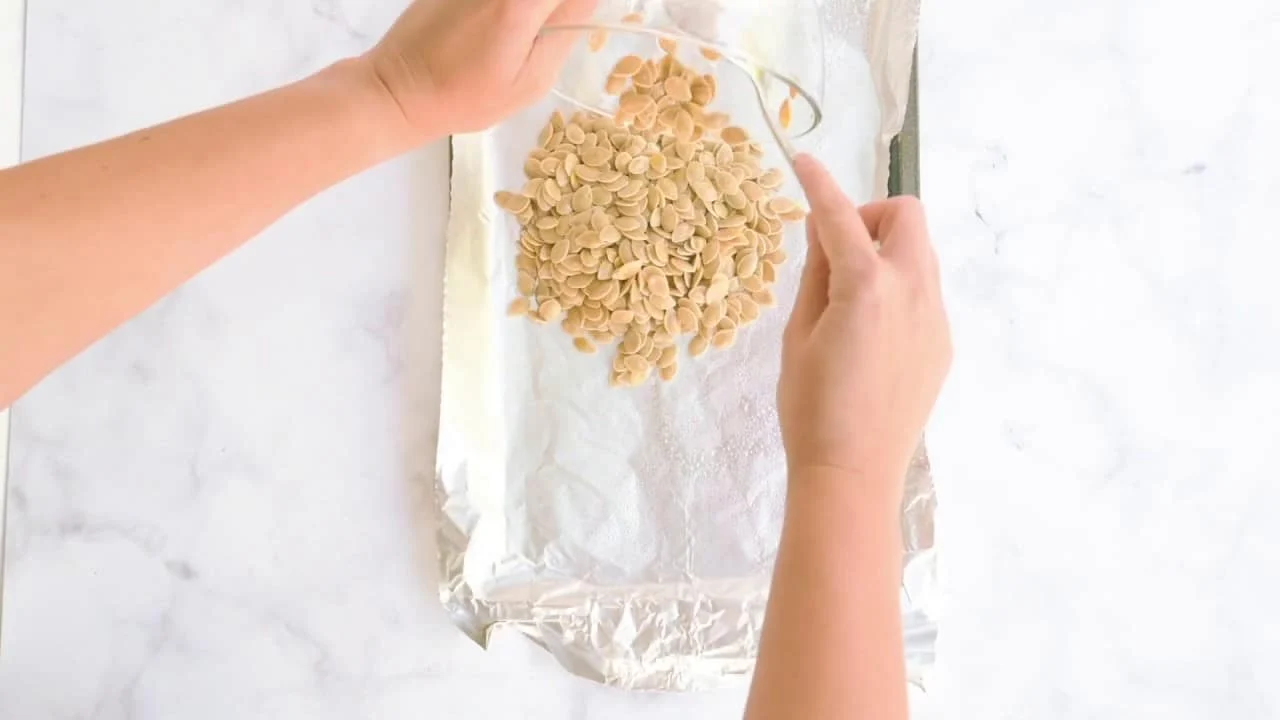
- Preheat the oven: Set your oven to 350°F (175°C) to ensure even baking.
- Spread the seeds: Line a baking sheet with parchment paper or aluminum foil for easy cleanup. Spread the seasoned pumpkin seeds in a single layer on the prepared baking sheet.
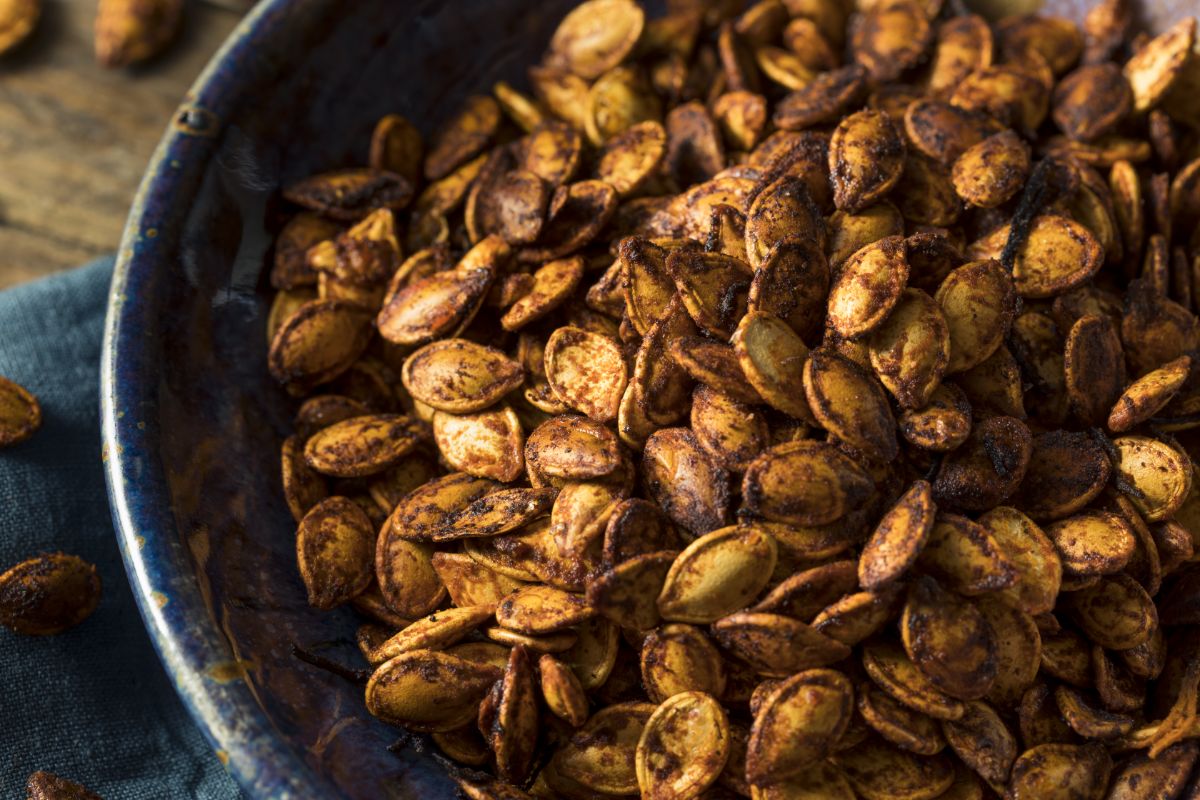
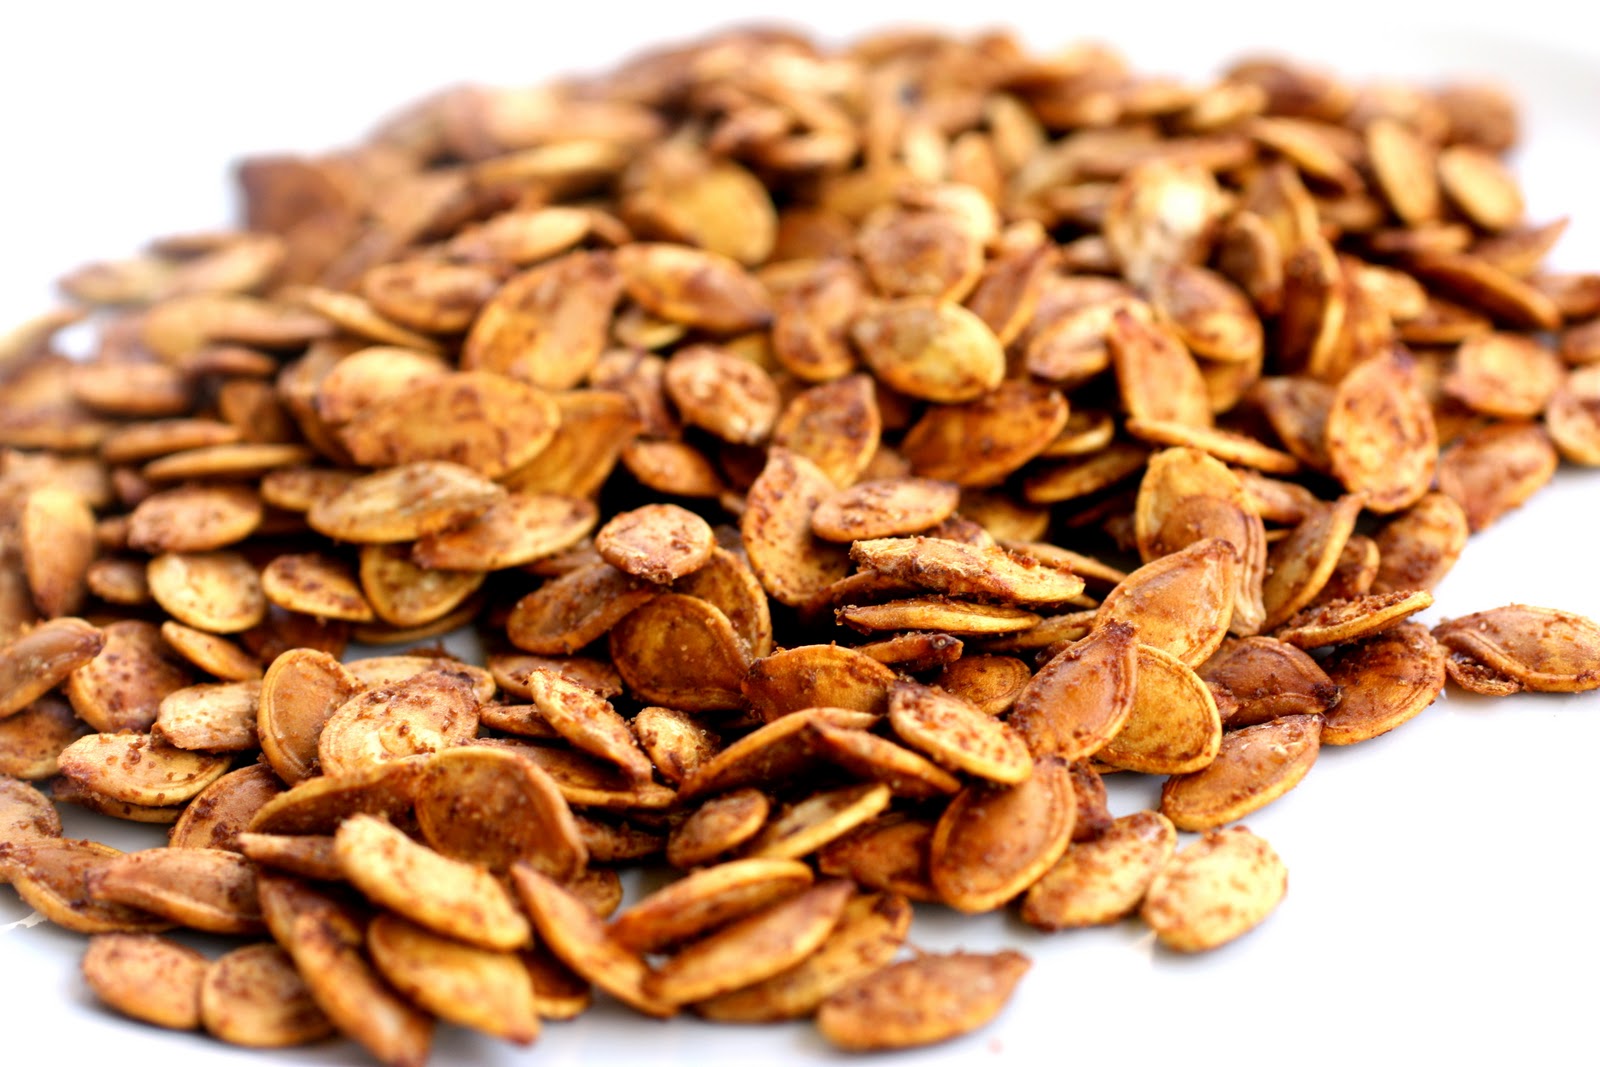
- Baking time: Place the baking sheet in the preheated oven and bake for about 20-25 minutes, or until the seeds turn golden brown. To ensure even cooking, stir the seeds every 10 minutes.
- Watch out for burning: Keep a close eye on the seeds as they bake, as they can go from perfectly toasted to burnt in a matter of minutes. Adjust the baking time accordingly and remove them from the oven once they are golden and crisp.
Remember, the baking time may vary depending on the size and moisture content of the pumpkin seeds. It’s always a good idea to start with the lower end of the baking time and gradually increase it if needed.
Once the seeds are beautifully golden and crispy, it’s time to check for doneness.
After cleaning and drying the pumpkin seeds, toss them with oil and seasoning, then spread them on a baking sheet. Bake at 350°F for 20-30 minutes, stirring occasionally, until golden brown and crispy. Enjoy!
Checking for Doneness
Checking for doneness is an important step to ensure that your baked pumpkin seeds are perfectly cooked. Here are a few indicators to look out for:
- Color: The seeds should be evenly golden brown throughout. If you notice any seeds that are still pale or have a greenish tint, they may need a bit more time in the oven.
- Crispness: Gently bite into a seed to test its crispness. It should have a satisfying crunch without being overly hard or chewy.
- Taste: Take a small sample and taste it. The flavors should be well-developed and balanced, whether you’ve opted for a sweet or savory seasoning.
If the seeds need a bit more baking, simply return them to the oven for a few more minutes, keeping an eye on them to prevent burning.
Once the pumpkin seeds are done to your liking, it’s time to remove them from the oven and let them cool.
Read more: How Long Do Baked Pumpkin Seeds Last
Cooling and Storing the Pumpkin Seeds
After removing the pumpkin seeds from the oven, allow them to cool completely before enjoying or storing them. Here’s what you need to know:
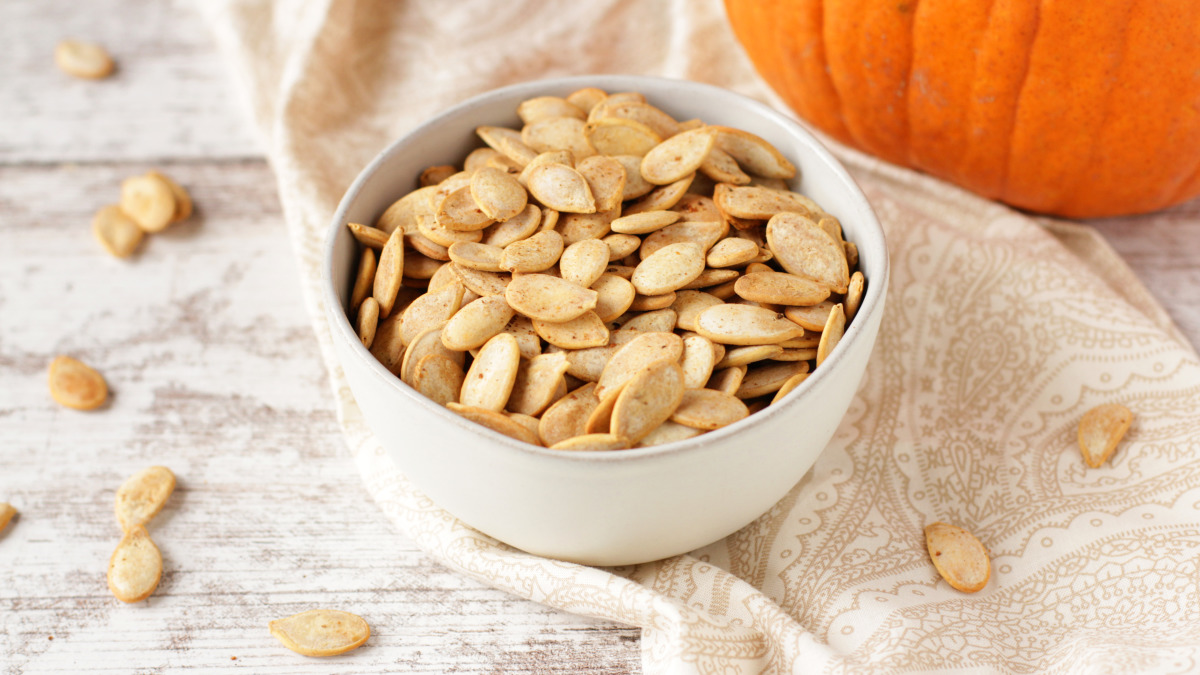
- Cooling: Transfer the baked pumpkin seeds to a cooling rack or a clean, dry surface. Let them cool for at least 15-20 minutes. This will help them achieve maximum crunchiness.
- Storage: If you have any leftover pumpkin seeds (which is rare because they’re so delicious), you can store them to enjoy later. Place them in an airtight container or a resealable plastic bag. Properly stored, they can stay fresh for up to two weeks.
- Refrigeration or Freezing: For even longer storage, you can keep the pumpkin seeds in the refrigerator for up to a month or freeze them for up to six months. Before storing them in the fridge or freezer, make sure they are completely cooled and dry to prevent any moisture-related issues.
When you’re ready to enjoy the pumpkin seeds, simply take them out of storage and indulge in their deliciousness. They make for great snacks on their own, but you can also add them to salads, trail mixes, granola bars, or use them as a garnish on soups and roasted vegetables.
With their crunchy texture and versatile flavors, baked pumpkin seeds are a delightful treat that can be enjoyed year-round.
Conclusion
Baking pumpkin seeds is not only a great way to reduce food waste but also a delicious and nutritious snack option. With a few simple steps, you can transform the seeds from your pumpkin into crispy and flavorful treats that will delight your taste buds.
From the basic salted version to the more adventurous garlic parmesan or cinnamon sugar options, the seasoning possibilities for pumpkin seeds are endless. Feel free to experiment and create your own unique combinations, allowing you to cater to your personal preferences.
Once seasoned, baking the pumpkin seeds is a breeze. Just make sure to keep an eye on them as they can quickly go from perfectly toasted to burnt. Checking for doneness by assessing the color, crispness, and taste will ensure that your pumpkin seeds are just right.
After they are baked to perfection, allow the pumpkin seeds to cool completely before enjoying or storing them. If there are any leftovers (which is unlikely), store them in an airtight container for future snacking or incorporate them into other dishes for added crunch and flavor.
Whether you’re enjoying them as a snack or adding them to your favorite recipes, baked pumpkin seeds offer a delightful experience with their satisfying crunch and delicious flavors.
So, the next time you carve a pumpkin or use it for cooking, don’t forget to save those seeds and give them a new life by baking them into tasty treats. Get creative with your seasonings, perfect your baking technique, and savor the goodness of homemade pumpkin seeds.
Frequently Asked Questions about How Long Do You Bake Pumpkin Seeds At 350
Was this page helpful?
At Storables.com, we guarantee accurate and reliable information. Our content, validated by Expert Board Contributors, is crafted following stringent Editorial Policies. We're committed to providing you with well-researched, expert-backed insights for all your informational needs.


0 thoughts on “How Long Do You Bake Pumpkin Seeds At 350”