Home>Garden Essentials>How To Remove Pumpkin Seeds
Garden Essentials
How To Remove Pumpkin Seeds
Modified: August 20, 2024
Learn how to remove pumpkin seeds from your garden and enjoy the fresh taste of homegrown produce. Find step-by-step instructions and helpful tips.
(Many of the links in this article redirect to a specific reviewed product. Your purchase of these products through affiliate links helps to generate commission for Storables.com, at no extra cost. Learn more)
Introduction
Welcome to this comprehensive guide on how to remove pumpkin seeds. If you’ve ever carved a pumpkin for Halloween or cooked with fresh pumpkin, you know how important it is to properly remove the seeds. Pumpkin seeds are not only edible but also packed with nutrients, making them a delicious and healthy snack. In this article, we’ll take you through the step-by-step process of cleaning and preparing pumpkin seeds for roasting or storing.
Before we begin, it’s worth noting that pumpkins come in various sizes, so adjust the steps accordingly. Whether you’re using a small sugar pumpkin for baking or a large carving pumpkin for decoration, the process remains the same. So, let’s grab our aprons and get started!
But first, here’s a list of materials you’ll need for the process:
Key Takeaways:
- Don’t toss those pumpkin seeds! Follow these easy steps to clean, roast, or store them for a tasty and nutritious snack. Enjoy the delicious benefits of pumpkin seeds while reducing food waste.
- By mastering the art of removing pumpkin seeds, you can enjoy a crunchy and healthy treat packed with nutrients. Whether you roast them for a snack or save them for later, pumpkin seeds are a versatile and delicious addition to your culinary adventures.
Read more: How To Remove Pumpkin Seed Shell
Materials Needed
Before you dive into removing pumpkin seeds, make sure you have the following materials handy:
1. Pumpkin: Choose a fresh and ripe pumpkin of your choice. The size is up to you, depending on your intended use for the pumpkin.
2. Knife: A sharp and sturdy kitchen knife will be needed to cut the pumpkin and remove the top.
3. Spoon: A large spoon, such as a metal or sturdy plastic spoon, will be used to scoop out the seeds and separate them from the pulp.
4. Bowl: Have a large bowl ready to collect the seeds as you scoop them out of the pumpkin.
5. Colander: A colander or strainer will come in handy for washing the seeds thoroughly.
6. Paper towels or kitchen towels: These will be used for drying the seeds after washing them.
7. Baking sheet or storage container: Depending on your plans for the seeds, you’ll need a baking sheet for roasting or a storage container for keeping them fresh.
8. Optional: Flavorings and seasonings: If you want to add some extra flavor to your roasted seeds, have seasonings like salt, pepper, garlic powder, or cinnamon ready to sprinkle on them.
Remember, having all the necessary materials ready before you start will make the process much smoother and enjoyable!
Step 1: Cleaning the Pumpkin
The first step in removing pumpkin seeds is to clean the pumpkin. Start by rinsing the pumpkin under cool running water to remove any dirt or debris on the surface. Use your hands or a vegetable brush to gently scrub away any stubborn dirt.
Once the pumpkin is clean, pat it dry with a clean towel. This will make it easier to handle and prevent any slippage when cutting into it.
It’s important to note that if you’re using a pumpkin for carving, make sure to remove any stickers, markers, or wax that may have been applied to the pumpkin’s surface. These can contaminate the seeds and affect their taste.
Once the pumpkin is cleaned and dried, it’s time to move on to the next step: removing the top.
Step 2: Removing the Top
With the cleaned pumpkin ready, it’s time to remove the top. This step is necessary to gain access to the seeds inside. Take a sharp knife and carefully cut a circle around the stem of the pumpkin, angling the knife slightly towards the center. Make sure to cut all the way through the pumpkin.
Once you’ve cut all the way around, gently lift the top off. Set it aside as you’ll need it later if you plan on using the pumpkin for other purposes like making pumpkin puree or a decorative jack-o’-lantern.
As you remove the top, you might notice some stray fibers or seeds attached to it. Use a spoon or your hands to remove any remaining seeds or pulp from the top. Shake it gently over a bowl to collect any loose seeds that may have fallen out.
Now that the top is removed, you’ll be able to see the hollow interior of the pumpkin. It’s time to move on to the next step: scooping out the seeds!
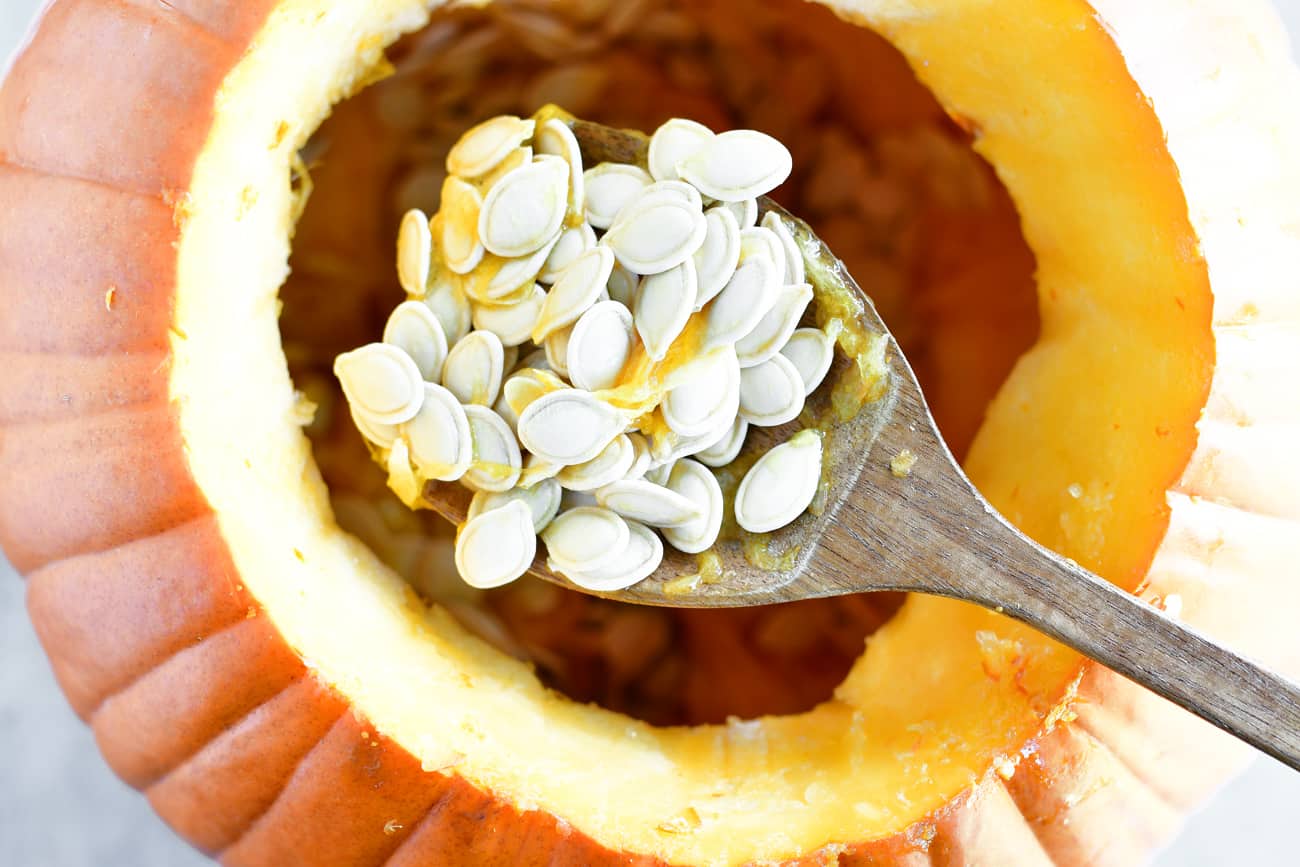
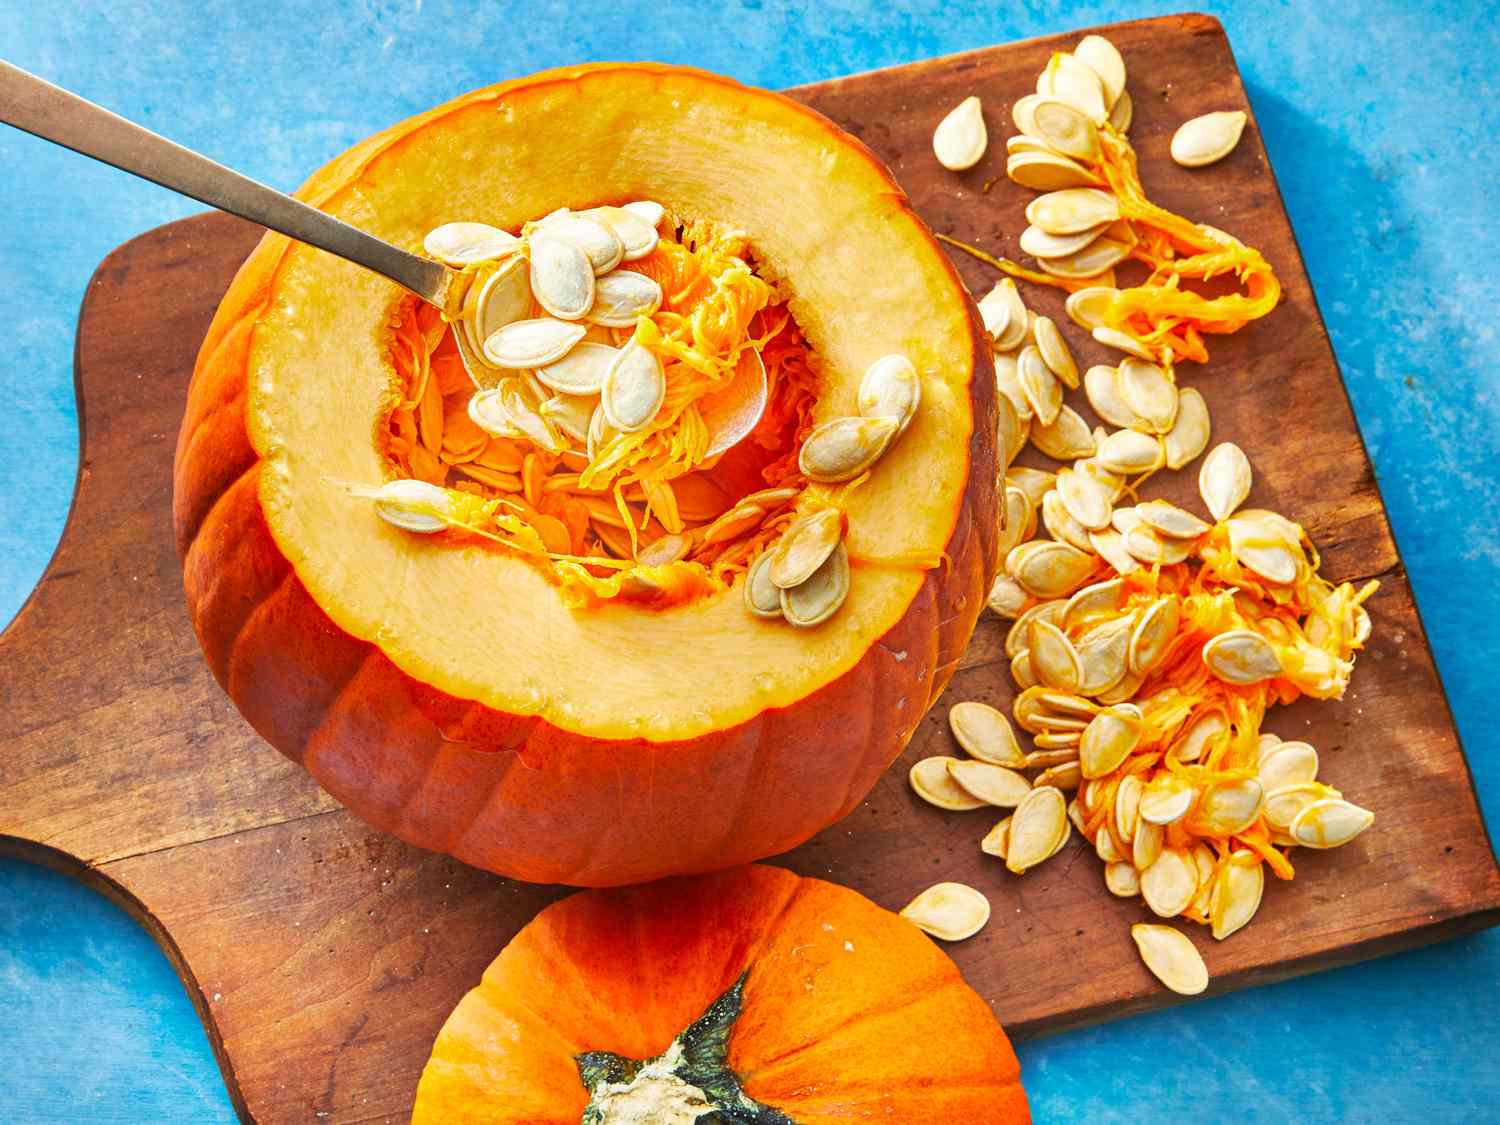
Step 3: Scooping out the Seeds
Now that the top of the pumpkin is removed, it’s time to start scooping out the seeds. Grab a large spoon and begin to gently scrape the inner walls of the pumpkin, loosening the seeds and pulp as you go.
Be careful not to apply too much force or dig too deep as you scoop. You want to remove the seeds without damaging the flesh of the pumpkin. Work your way around the interior of the pumpkin, making sure to cover all the areas where the seeds are located.
As you scoop, you’ll notice that the seeds are attached to stringy fibers, known as pumpkin pulp. Don’t worry too much about removing every bit of pulp at this stage; it can be sorted out in the next step.
Continue scooping until you’ve removed the majority of the seeds and pulp from the pumpkin. Be patient and thorough, as you want to collect as many seeds as possible.
As you scoop, you can place the seeds and pulp directly into a bowl. This will make it easier to separate the seeds from the pulp in the next step.
Once you’ve finished scooping out the pumpkin seeds, it’s time to move on to step 4: separating the seeds from the pulp.
After removing the seeds from the pumpkin, rinse them in a colander to remove any pulp. Then spread them out on a baking sheet, drizzle with oil and sprinkle with salt. Roast in the oven at 300°F for 20-30 minutes, stirring occasionally, until golden brown and crispy. Enjoy as a snack or add to salads and soups!
Read more: How Many Seeds Are In A Pumpkin
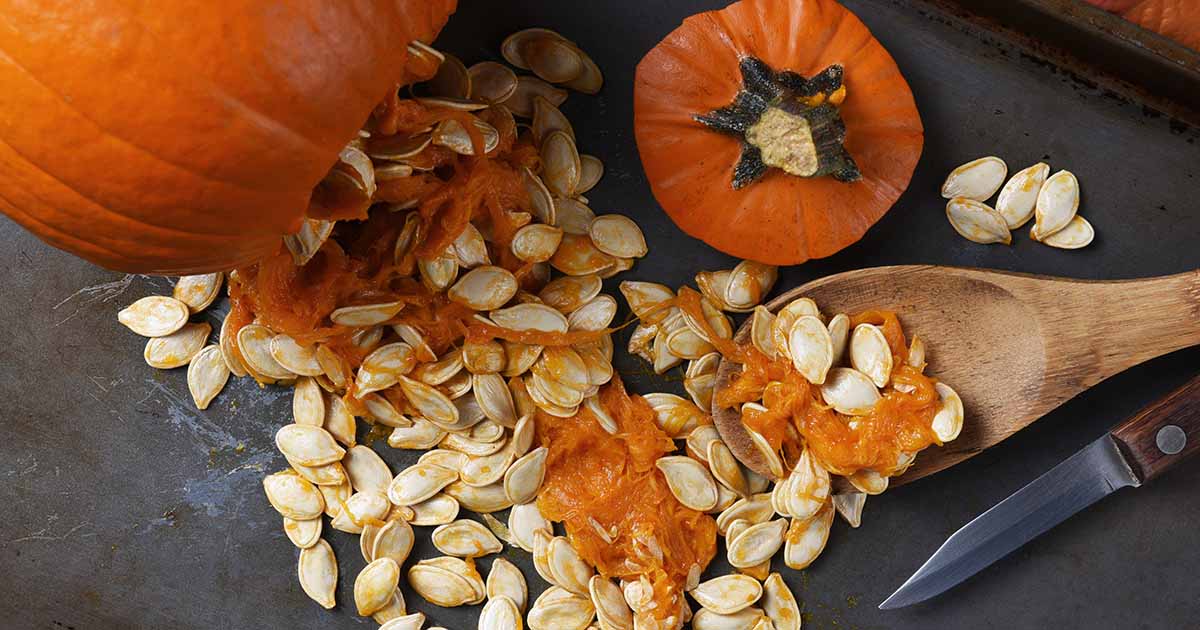
Step 4: Separating Seeds from Pulp
Now that you’ve scooped out the pumpkin seeds along with the pulp, it’s time to separate the seeds from the fibrous pulp. This step ensures that the seeds are clean and ready for the next stages of the process.
Begin by transferring the contents of the bowl into a colander or strainer. Hold it under running water and use your hands or a spoon to gently rinse away any remaining pumpkin pulp.
As you rinse the seeds, you’ll notice that the pulpy fibers will separate and wash away, leaving the seeds behind. Continue to rinse and agitate the seeds until the majority of the pulp has been removed.
Once the seeds are free from most of the pulp, give them a final rinse, ensuring that they’re clean and debris-free. This step is crucial to obtain high-quality pumpkin seeds.
After rinsing, examine the seeds to check for any remaining pulp or debris. If you come across any, simply pick or scrape it off with your fingers or a spoon.
Now that the seeds are free from the majority of the pulp, it’s time to proceed to the next step: washing the seeds to remove any remaining residue.
Step 5: Washing the Seeds
With the pumpkin seeds separated from the pulp, it’s important to give them a thorough wash to remove any remaining residue and ensure their cleanliness.
Start by placing the seeds in a colander or strainer and run them under cool running water. Gently swish the seeds around with your hands or a spoon to help dislodge any lingering pulp or debris.
As you wash the seeds, you may notice that the water turns cloudy. This is a sign that the washing process is working, as it is removing any remaining impurities.
Continue washing the seeds for a couple of minutes, being sure to agitate them gently to ensure all surfaces are cleaned. You can even use your fingers to rub any stubborn residue off the seeds.
Once you’re satisfied with the cleanliness of the seeds, give them a final rinse under running water to remove any remaining soap or dirt particles.
After the final rinse, carefully drain the water from the colander or strainer, ensuring that all excess water is removed.
Now that the seeds are thoroughly cleaned, it’s time to move on to the next step: drying them before roasting or storing.
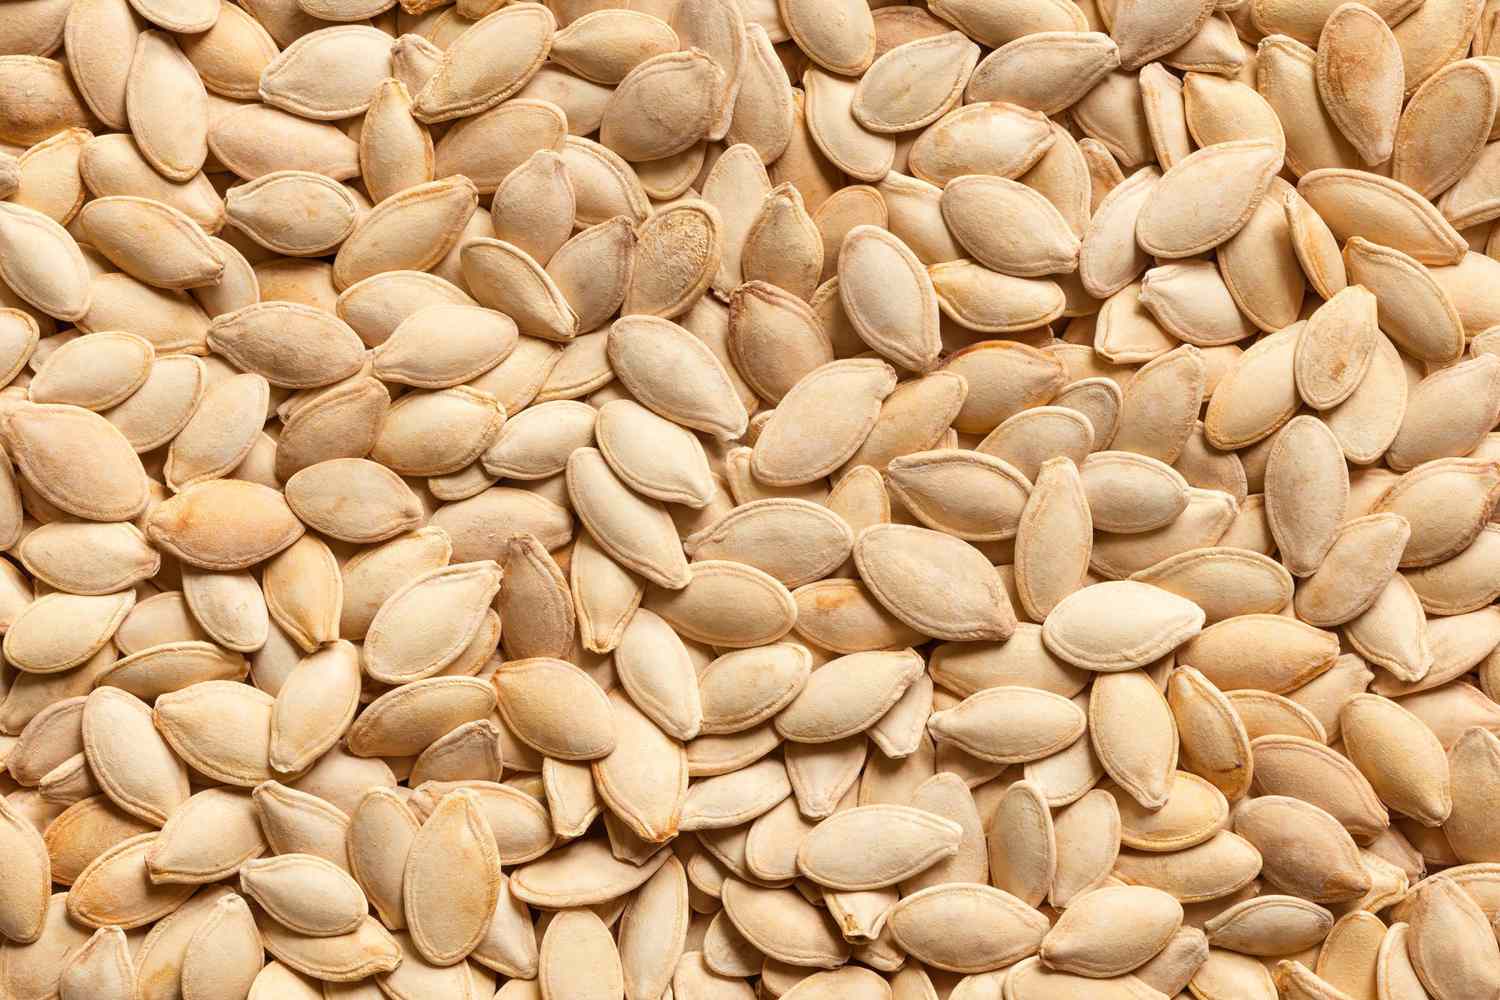
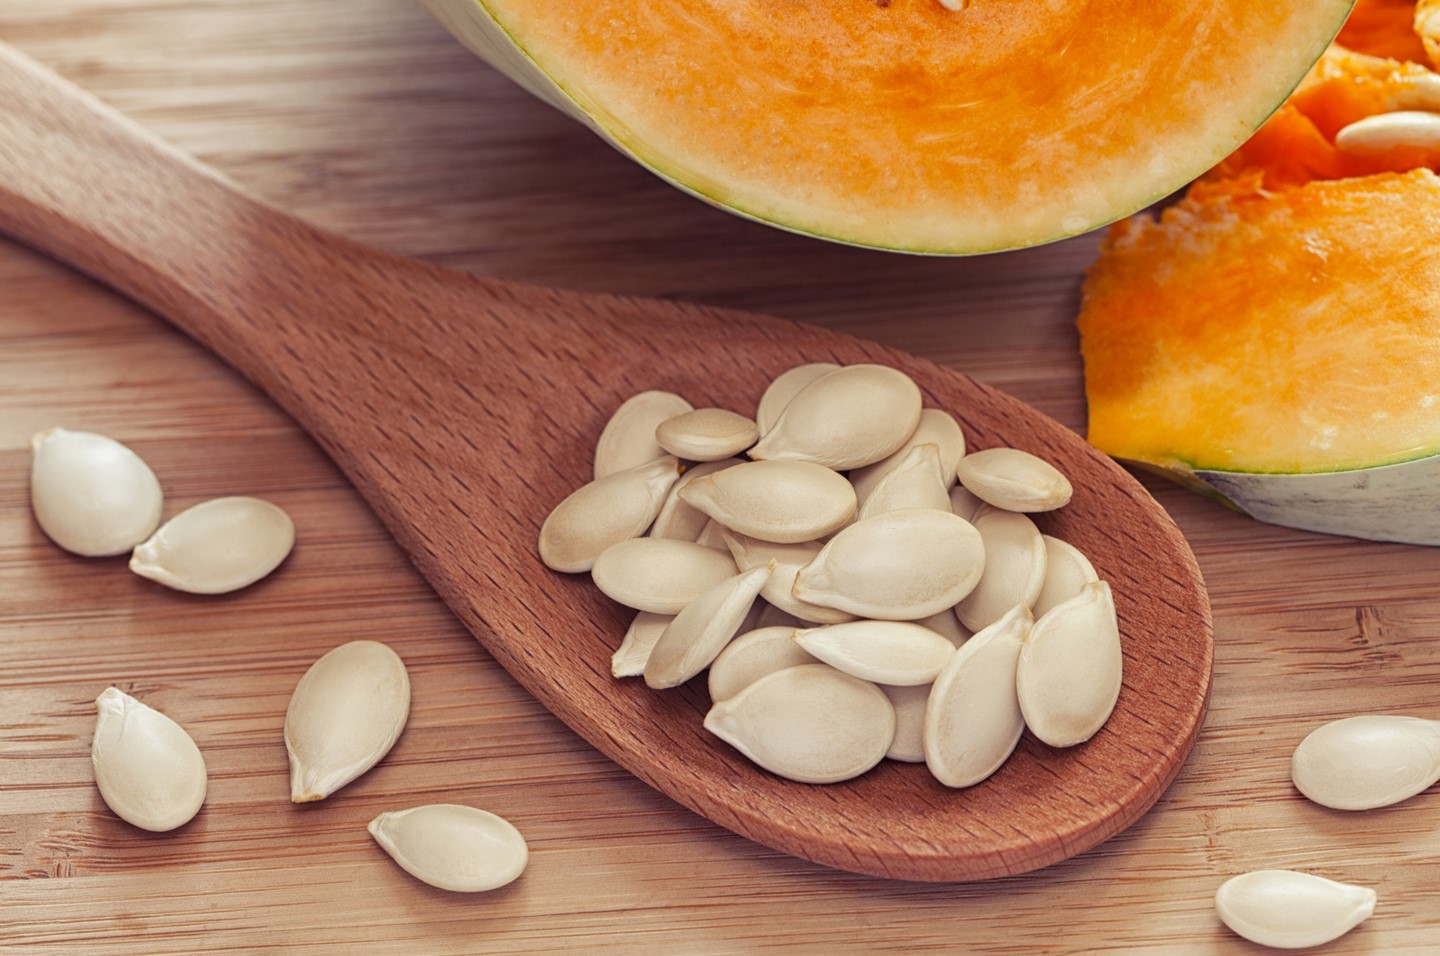
Step 6: Drying the Seeds
After washing the pumpkin seeds, it’s crucial to properly dry them before moving on to the next stage of cooking or storing. Drying the seeds will help them roast evenly and prevent them from becoming soggy.
Begin by gently patting the seeds dry with a clean kitchen towel or paper towels. Make sure to remove any excess water on the surface of the seeds.
Spread the seeds out in a single layer on a clean baking sheet or a tray lined with parchment paper. This will allow air to circulate evenly and speed up the drying process.
Leave the seeds to air-dry completely for at least 24 hours. Find a dry and cool location with good airflow to facilitate the drying process.
During the drying period, it’s important to stir or flip the seeds occasionally to ensure even drying. This will prevent any moisture from becoming trapped and promote uniform drying throughout.
As the seeds dry, you’ll notice that they become lighter in weight and firmer to the touch. This indicates that they are ready for the next step: roasting or storing.
Once the seeds are completely dry, it’s time for the final step: roasting them for a delectable snack or storing them for future use.
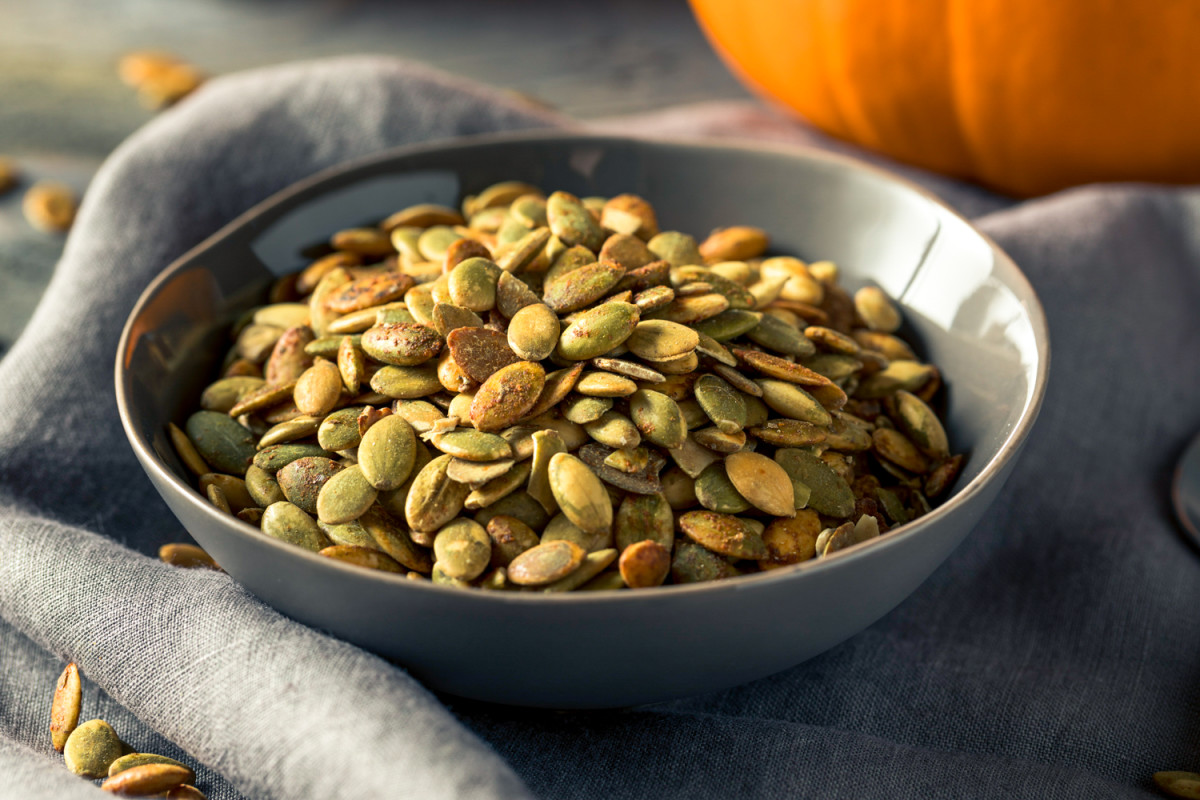
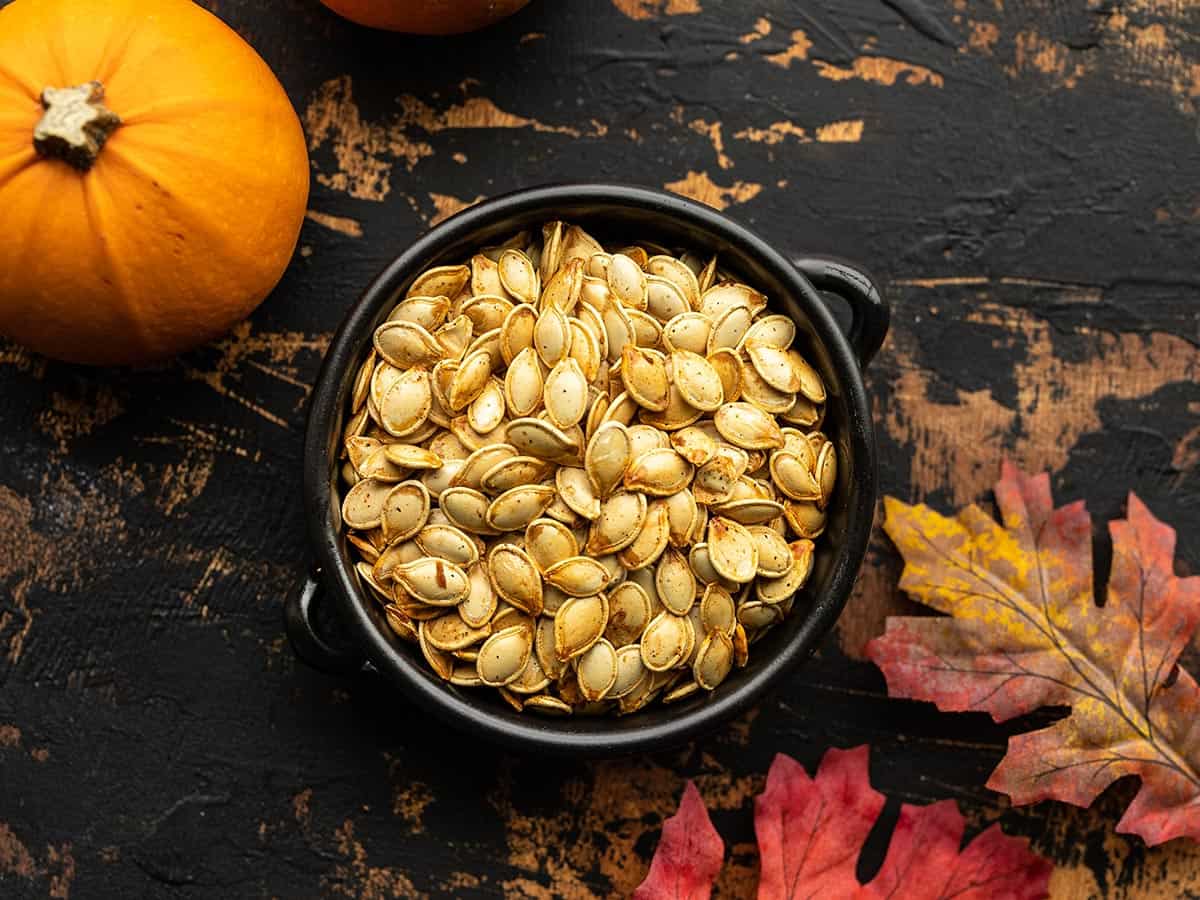
Step 7: Roasting or Storing the Seeds
Now that your pumpkin seeds are dried and ready, you have two options: roasting them for a delicious snack or storing them for later use. Let’s explore both options.
Roasting the seeds:
Roasting pumpkin seeds is a popular method to bring out their natural flavor and create a satisfyingly crunchy snack. Here’s how to do it:
- Preheat your oven to 350°F (175°C).
- In a bowl, toss the dried pumpkin seeds with a little bit of oil (olive oil or melted butter work well). Add any desired seasonings like salt, pepper, garlic powder, or even sweet options like cinnamon or sugar. Mix well to evenly coat the seeds.
- Spread the seasoned seeds in a single layer on a baking sheet.
- Place the baking sheet in the preheated oven and roast the seeds for about 15-20 minutes, or until they turn golden brown. Be sure to stir the seeds halfway through to ensure even roasting.
- Once roasted, remove the baking sheet from the oven and let the seeds cool completely before enjoying. They will become even crispier as they cool.
Now, if you’re planning to store the pumpkin seeds rather than roasting them, follow these steps:
- After drying the seeds, transfer them to an airtight container or a sealable plastic bag.
- Store the seeds in a cool, dry place away from direct sunlight, like a pantry or cupboard.
- Pumpkin seeds can stay fresh for several months if properly stored. However, for the best quality and flavor, try to consume them within a few weeks.
Whether you choose to roast or store the seeds, remember to label the container with the date to keep track of their freshness.
Now that you’ve successfully removed, cleaned, and prepared the pumpkin seeds, it’s time to enjoy the fruits of your labor. Crunch on the roasted seeds as a healthy snack, incorporate them into your meals, or save them for a future recipe. Happy snacking!
Read more: How To Plant Pumpkin Seeds
Conclusion
Congratulations! You have now mastered the art of removing pumpkin seeds and are ready to enjoy the nutritious and delicious benefits they offer. By following the step-by-step process outlined in this guide, you have learned how to clean the pumpkin, remove the top, scoop out the seeds, separate them from the pulp, wash them thoroughly, and dry them properly. Whether you choose to roast the seeds for a crispy snack or store them for later use, you can now confidently handle pumpkins and make the most of their tasty seeds.
Pumpkin seeds are not only a treat for your taste buds, but they also come with a host of health benefits. They are rich in nutrients such as protein, fiber, healthy fats, and a wide array of vitamins and minerals. Incorporating pumpkin seeds into your diet can help boost your immune system, support heart health, improve digestion, and promote better sleep among many other benefits.
So, the next time you carve a pumpkin or prepare fresh pumpkin for cooking, don’t discard those seeds. Instead, take the time to remove them, clean them meticulously, and either roast them for a tasty snack or store them for future use. Regardless of your choice, you can enjoy the satisfaction of knowing you have capitalized on every part of the pumpkin.
Remember, practice makes perfect when it comes to removing pumpkin seeds, so don’t be discouraged if you encounter some challenges along the way. With time and experience, you will become more proficient in this process and develop your preferred techniques.
Thank you for joining us on this pumpkin seed journey. We hope you found this guide helpful and that you feel inspired to make pumpkin seeds a regular part of your culinary adventures. Happy seed removal and enjoy your delicious pumpkin seed creations!
Frequently Asked Questions about How To Remove Pumpkin Seeds
Was this page helpful?
At Storables.com, we guarantee accurate and reliable information. Our content, validated by Expert Board Contributors, is crafted following stringent Editorial Policies. We're committed to providing you with well-researched, expert-backed insights for all your informational needs.


0 thoughts on “How To Remove Pumpkin Seeds”