Home>Garden Essentials>How To Germinate Grains For Whiskey
Garden Essentials
How To Germinate Grains For Whiskey
Modified: October 28, 2024
Learn the simple steps to germinate grains in your garden and create your own whiskey. Discover the secrets of successful grain germination for a homemade spirit.
(Many of the links in this article redirect to a specific reviewed product. Your purchase of these products through affiliate links helps to generate commission for Storables.com, at no extra cost. Learn more)
Introduction
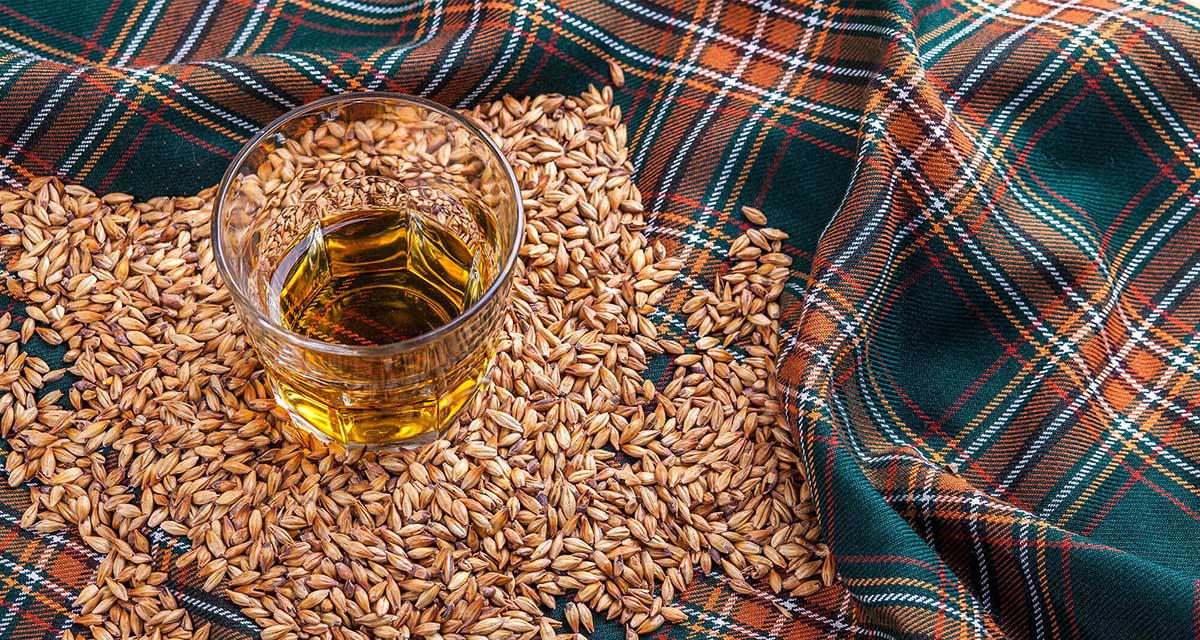
Welcome to the world of whiskey production, where every drop of this golden elixir is crafted with passion and purpose. If you have an appreciation for fine spirits and a love for gardening, why not combine these interests and learn how to germinate grains for whiskey? By understanding the germination process and following some simple techniques, you can grow your own whiskey grains, adding a personal touch to your favorite spirit.
Germination is a crucial step in the whiskey production process. It involves soaking and sprouting grains, which activates enzymes and converts starches into fermentable sugars. These sugars are then used by yeast during fermentation to create alcohol. By germinating your own grains, you have greater control over the flavor profile of your whiskey, allowing you to experiment and create unique blends.
Before we dive into the details of germinating grains for whiskey, it’s important to choose the right type of grains. While barley is the most commonly used grain in whiskey production, other grains like corn, rye, and wheat can also be used. Each grain brings its own distinct qualities to the final product, so selecting the grains that align with your taste preferences is essential.
Once you’ve chosen your grains, it’s time to prepare them for germination. This involves a process known as malting, where the grains are soaked, allowed to sprout, and then dried. Malting triggers enzymes in the grains that convert starches into fermentable sugars, which are later fermented into alcohol by yeast.
There are several techniques for germinating whiskey grains, and each has its own advantages and challenges. The traditional floor malting method involves spreading the grains on a malting floor and manually turning them regularly. This method requires careful temperature and moisture control to ensure even germination.
Another method is drum malting, which involves using a rotating drum to create ideal conditions for germination. The drum continuously tumbles the grains, providing even moisture and temperature distribution. This method is more practical for small-scale whiskey production.
Monitoring the germination progress is crucial to ensure optimal results. Regularly check the moisture content, temperature, and the length of the sprout. Too much moisture can lead to mold or rot, while too little can inhibit germination. Maintaining the ideal temperature range allows for consistent enzymatic activity.
Once the grains have reached the desired level of germination, it’s time to stop the process. This is done by drying the grains to stop further enzymatic activity. The dried germinated grains, known as malt, can then be stored and used in the whiskey production process.
With a firm understanding of the germination process and the right techniques, you can now embark on your journey to grow and germinate grains for whiskey. By experimenting with different grains and germination methods, you can develop your own unique flavor profiles and bottle your very own handcrafted whiskey.
So let’s raise our glasses and toast to the exploration of germinating grains for whiskey – a truly rewarding endeavor that allows you to savor the fruits of your labor in every sip.
Key Takeaways:
- Grow your own whiskey grains by understanding the germination process and choosing the right grains. Experiment with different techniques to create unique flavor profiles for your homemade whiskey.
- Monitor and stop the germination process at the right time to achieve optimal results. Properly dry and store the germinated grains to preserve their flavors for whiskey production.
Read more: How To Store Whiskey
Understanding the Germination Process
In order to successfully germinate grains for whiskey production, it’s important to understand the science behind the process. Germination is a natural phenomenon that occurs when a seed, in this case, a grain, is provided with the right environmental conditions to sprout and grow into a plant. During germination, the starches within the grain are broken down into fermentable sugars, which are essential for the fermentation process in whiskey production.
The germination process begins when the grains are soaked in water, triggering the seed to rehydrate and activate enzymes. As the grains absorb water, enzymes within the grain get to work, breaking down complex starches into simpler sugars. This enzymatic activity is what produces the sugars needed for fermentation.
Temperature and moisture play a crucial role in the germination process. Temperature affects the speed at which enzymes work, with an optimal range between 55°F (13°C) to 65°F (18°C) for most whiskey grains. Moisture, on the other hand, helps create an environment conducive to enzymatic activity. During germination, the grains need to be kept evenly moist, but not waterlogged.
As the grains continue to absorb moisture, they undergo cellular changes, leading to the sprouting of a tiny rootlet called the “radicle” and the emergence of a small shoot known as the “plumule.” This sprouting signals that germination is taking place successfully.
During germination, enzymes called amylases break down the starches in the grain into fermentable sugars. These sugars, sucrose, glucose, and maltose, are essential for yeast fermentation, converting them into alcohol and creating the distinctive flavors in whiskey.
It’s important to note that the length of the germination process depends on the desired level of modification. For example, in traditional floor malting, the grains are allowed to germinate for around four to six days, whereas in drum malting, the process can be shortened to two to three days. The level of enzymatic activity and the development of rootlets and shoots determine the ideal time to stop the germination process.
Understanding the germination process is crucial in order to ensure optimal results in whiskey production. By providing the grains with the right conditions, monitoring the progress of germination, and halting the process at the desired stage, you can deliver quality germinated grains that will contribute to the unique flavors and characteristics of your homemade whiskey.
Choosing the Right Grains for Whiskey Production
When it comes to producing whiskey, selecting the right grains is a key decision that will significantly impact the flavor, aroma, and overall character of the final product. While barley is the most common grain used in whiskey production, there are other grains that can be used to create unique and distinct whiskey blends.
Barley is favored for its high enzyme content, which aids in the conversion of starches into fermentable sugars during the malting process. This is essential for yeast fermentation and alcohol production. Barley also contributes to the smooth and rich mouthfeel often associated with whiskey.
Corn is another popular grain used in whiskey production, particularly in American and bourbon whiskey. Corn adds a sweeter, mellow flavor profile to the whiskey and contributes to its distinct caramel and vanilla notes. It’s important to note that a majority of corn-based whiskeys must adhere to specific legal requirements, such as containing a minimum of 51% corn in the grain bill.
Rye is known for adding a spicy and bold flavor profile to whiskey. It is commonly used in American rye whiskey and plays a prominent role in its spiciness and complexity. Rye provides a distinct flavor profile with hints of pepper and spice that sets it apart from other grains.
Wheat, although less common as a primary grain in whiskey production, is often used in combination with other grains to create a smoother and softer whiskey profile. It contributes to a lighter and more delicate mouthfeel and is frequently found in bourbon whiskeys.
When selecting grains for whiskey production, it’s important to consider the flavor profile and characteristics you desire in your final product. Experimenting with different grain combinations can help you create a unique blend that reflects your preferences and creative vision.
In addition to the main grains mentioned above, there are also specialty grains that can be added to the grain bill to further enhance the complexity and depth of flavor. These may include malted rye, malted wheat, or specialty malts like chocolate or smoked malt, each adding its own distinct flavor and aroma notes to the whiskey.
Understanding the different characteristics and flavor profiles of various grains empowers you to create a whiskey that is truly your own. So, whether you opt for a traditional barley-based whiskey or choose to experiment with different grain combinations, selecting the right grains is a fundamental step in producing a whiskey that will captivate the senses and leave a lasting impression.
Preparing the Grains for Germination
Before grains can be germinated for whiskey production, they need to go through a process known as malting. Malting prepares the grains for optimal enzymatic activity, which is crucial for converting starches into fermentable sugars during germination.
The first step in preparing the grains for malting is cleaning. Grains can contain impurities such as dirt, stones, or other debris that need to be removed. This can be done by sifting the grains or using a grain cleaning machine to ensure they are free from any foreign particles.
Next, the grains need to be soaked in water to initiate the malting process. This soaking, also known as steeping, helps to hydrate the grain and kick-start enzymatic activity. The grains are placed in large containers or tanks and submerged in water for a specific period of time, typically around 24 to 48 hours. During this time, the grains absorb moisture, which triggers the process of germination.
Once the steeping is complete, the grains are drained and spread out on a malting floor or a specialized germination vessel. The aim here is to create a uniform and shallow layer of grains to allow for even germination. It’s important to monitor the moisture content of the grains closely at this stage to ensure they remain evenly moist, without becoming waterlogged.
During the germination process, it’s beneficial to turn the grains regularly. This helps to prevent clumping and ensures even airflow, promoting optimal germination. Continuous turning also helps to prevent the grains from heating up, which can lead to fungal growth or spoilage.
Temperature plays a crucial role in the malting process. The grains need to be kept within a specific temperature range to maximize enzymatic activity. Typically, the temperature range for germinating grains is between 55°F (13°C) to 65°F (18°C). This can be achieved by controlling the ambient temperature in the germination area or by using temperature-controlled vessels or rooms.
Depending on the type of grain and the desired level of modification, the germination process can take anywhere from a few days to a week. During this time, you can monitor the progress by observing the length of the sprout, also known as the acrospire, which develops from the rootlet of the grain.
Once the grains have reached the desired level of germination, the next step is to stop the process by drying them. Drying involves reducing the moisture content to halt enzymatic activity. This can be done by spreading the germinated grains in a thin layer and gently applying heated air or using specialized drying equipment. The goal is to carefully dry the grains without compromising the integrity of the enzymes.
Once the grains are dried, they are known as malt and can be stored for future use in whiskey production. Proper storage is essential to maintain the quality of the malt. It’s recommended to store malt in a cool, dry place, away from direct sunlight, and in airtight containers to prevent moisture absorption and maintain freshness.
By carefully preparing the grains for germination through the malting process, you set the stage for successful enzymatic activity and create a solid foundation for producing high-quality germinated grains for whiskey production.
Germination Techniques for Whiskey Grains
Germinating whiskey grains is a crucial step in the whiskey production process. There are several techniques you can employ to ensure successful germination and achieve the desired flavors and characteristics in your homemade whiskey.
1. Floor Malting: This traditional method involves spreading the grains on a malting floor. The grains are regularly turned and mixed to ensure even germination and prevent clumping. The malting floor provides ample space for the grains to spread out and allows for natural airflow, necessary for successful germination. Temperature and humidity control is crucial in this technique, as the grains need to be kept within an optimal temperature range of 55°F (13°C) to 65°F (18°C) with a humidity level of around 45 to 50%. Floor malting requires careful monitoring and manual intervention throughout the germination process.
2. Drum Malting: This method is more suitable for small-scale whiskey production. Drum malting involves using a rotating drum that allows for easy and controlled germination. The drum continuously tumbles the grains, ensuring even moisture distribution and preventing clumping. This technique saves space and requires less manual labor compared to floor malting. Temperature and moisture control can be easily regulated within the drum, providing ideal conditions for germination.
3. Steep-Aerate-Germinate (SAG): This technique combines soaking, aerating, and germinating the grains in a specialized vessel. The grains are soaked in water, then aerated by introducing oxygen, and finally allowed to germinate. The SAG technique optimizes enzymatic activity and promotes even germination. It provides greater control over moisture levels and allows for easy monitoring of the germination progress.
4. Sprouting Trays: Sprouting trays or racks can be used for germinating whiskey grains in a controlled environment. These trays offer a compact and organized setup, making it easier to manage smaller batches of grains. The trays provide a consistent moisture and airflow environment, promoting even sprouting and germination. Temperature and humidity should be monitored and adjusted accordingly for optimal results.
5. Greenhouse Germination: Greenhouses offer a controlled environment for germinating whiskey grains. The greenhouse provides consistent temperature, humidity, and natural light, creating an ideal setting for germination. This technique allows for larger-scale germination and is suitable for regions with a more temperate climate. However, it requires proper monitoring of temperature and ventilation to prevent overheating or excess humidity.
It’s important to note that each germination technique has its own set of advantages and challenges. Factors such as scale of production, available space, and climate conditions should be taken into consideration when choosing the appropriate technique for germinating whiskey grains.
Regardless of the technique you choose, regular monitoring of temperature, moisture levels, and the length of sprouts is essential to ensure successful germination. Through careful management and selection of the right germination technique, you can produce high-quality germinated grains that contribute to the unique flavors and characteristics of your homemade whiskey.
Soak the grains in water for 8-12 hours to kickstart the germination process. Then spread them out on a tray and keep them moist for 2-4 days, until small roots start to appear.
Read more: How To Store Unopened Whiskey
Monitoring the Germination Progress
Monitoring the germination progress of whiskey grains is a critical step to ensure optimal results in the whiskey production process. Regular observation and assessment of various factors will help guide you in determining the ideal timing to stop the germination process and proceed to the next stage of whiskey production.
One key aspect to monitor is the moisture content of the germinating grains. The grains should be kept evenly moist throughout the germination period. Excess moisture can lead to the growth of mold or other undesirable microorganisms, while insufficient moisture can hinder germination. Regularly check the moisture levels by gently pressing a small sample of grains between your fingers. They should feel slightly damp but not excessively wet.
Temperature control is crucial during germination, as it affects enzymatic activity and overall progress. It’s recommended to maintain a temperature range of 55°F (13°C) to 65°F (18°C) for most whiskey grains. Fluctuations outside this range can impact the enzymes’ ability to break down starches into fermentable sugars. Use a thermometer to regularly check the temperature in the germination area or vessel and make any necessary adjustments to maintain the optimal range.
Observing the length and color of the sprout, known as the acrospire, is another important monitoring factor. The acrospire should exhibit steady growth during the germination process. A length of around 1/3 to 2/3 of the total grain length is generally considered optimal. You can periodically sample the germinating grains to assess the development of the acrospire. Depending on your desired level of modification, you can adjust the timing to halt germination accordingly.
Regular turning or mixing of the grains is essential to prevent clumping, ensure even germination, and promote proper airflow. This is particularly important in floor malting, where manual intervention is required. Gently turn or mix the grains at regular intervals to distribute moisture and prevent overheating or stagnant spots. This will help maintain consistent enzymatic activity and minimize the risk of mold or other issues.
While monitoring the progress of germination, be mindful of any unusual odors that may indicate problems such as mold or spoilage. Whiskey grains should have a fresh and slightly sweet aroma during germination. Any foul or musty smells could be a sign of contamination and would require immediate attention.
Keep detailed records of your monitoring observations, including temperature readings, moisture levels, and any notable developments. This will help you track the progress of germination and make informed decisions regarding when to stop the process based on your desired flavor profile and modification level.
By diligently monitoring the germination progress of whiskey grains, you can ensure that they reach an optimal stage for further processing in whiskey production. This attention to detail will contribute to the overall quality and characteristics of your homemade whiskey, allowing you to create a truly unique and satisfying spirit.
Stopping the Germination Process
The germination process is a delicate balance, and knowing when to stop it is crucial to achieve the desired flavors and characteristics in your whiskey. There are several indicators you can look for to determine the ideal timing to halt germination and move on to the next stage of whiskey production.
One of the key factors to consider is the length of the acrospire, or sprout, which is the tiny rootlet that emerges during germination. As the germination progresses, the acrospire grows within the grain. Depending on the desired level of modification, you can stop the germination process when the acrospire has reached a certain length. For most whiskey production, a length of approximately 1/3 to 2/3 of the total grain length is considered optimal.
Color is another indicator to assess when stopping germination. The acrospire should display a pale, creamy, or slightly purple color, indicating that enzymatic activity has occurred and starches have begun to convert into fermentable sugars. Once the acrospire has reached the desired length and the desired color has developed, it may be time to halt the germination process.
Taste testing can provide further insights into the progression of germination. Take a small sample of the germinating grains and chew them to assess the flavor profile. You should notice a slight sweetness along with a pleasant malt flavor. This indicates that the enzymes have effectively converted starches into sugars and that germination is at an appropriate stage.
Monitoring the moisture level of the germinating grains is important when deciding to stop germination. If the moisture content is too high, it can lead to mold growth or spoilage. Conversely, if the grains become too dry, enzymatic activity will cease. Aim for a moisture level that feels slightly damp but not overly wet when you press a sample of grains between your fingers.
It’s essential to stop the germination process before the shoots grow too long or become too prominent, as this can result in excess vegetal flavors or bitterness in the final whiskey. Additionally, if germination is allowed to continue for too long, the enzymes will exhaust their supply of starches, leading to a reduced yield of fermentable sugars.
Stopping the germination process can be achieved by drying the germinated grains. This is done to halt enzymatic activity and preserve the flavor development achieved during germination. Spread the germinated grains in a thin layer and gently apply heated air or use specialized drying equipment to carefully reduce the moisture content. Monitor the drying process closely to ensure the grains are dried to the desired level without compromising the integrity of the enzymes.
Once the germinated grains have been dried, they are referred to as malt and are ready to be used in the whiskey production process. Proper storage in a cool, dry place is essential to maintain the quality of the malt and to prevent moisture absorption or deterioration.
By observing the indicators of acrospire length, color, flavor, and moisture content, you can determine the optimal timing to stop the germination process. This careful decision-making will contribute to the creation of high-quality germinated grains that will ultimately shape the unique flavors and characteristics of your homemade whiskey.
Drying and Storing Germinated Grains
After germination is complete, the next crucial step is to dry the germinated grains, also known as malt, in order to preserve their flavors and prepare them for use in the whiskey production process. Proper drying and storage techniques are essential to maintain the quality and integrity of the malt until it is ready to be utilized.
1. Drying the Germinated Grains:
To stop the germination process, the germinated grains need to be dried. Drying halts enzymatic activity, preserving the flavor development achieved during germination. Here are some steps to effectively dry germinated grains:
- Spread the germinated grains in a thin, even layer on drying racks, screens, or trays. This ensures proper airflow and even drying.
- Place the drying racks or trays in a well-ventilated area, away from direct sunlight and extreme heat or cold.
- Use fans or gentle air circulation to facilitate drying, ensuring that the grains dry evenly.
- Maintain a controlled temperature, ideally around 120°F (49°C), to speed up the drying process while preventing the grains from overheating.
- Regularly monitor the moisture content of the grains by testing a small sample. The grains should be dried until they feel hard and have a moisture content of around 5-7%.
2. Storing the Germinated Grains (Malt):
Once the germinated grains have been properly dried, they are referred to as malt and are ready for storage. Proper storage conditions are crucial to maintain the quality and freshness of the malt. Here are some guidelines to follow:
- Store the malt in cool, dry, and well-ventilated conditions, away from direct sunlight.
- Choose airtight containers or packaging to prevent moisture, pests, and unwanted odors from reaching the malt.
- Avoid storing the malt near strong-smelling substances, as it can absorb odors easily.
- Temperature control is important. Aim for a storage temperature between 40°F (4°C) and 60°F (15°C).
- Regularly check the stored malt for any signs of moisture or pests. Remove any spoiled or damaged grains to prevent contamination.
Properly dried and stored malt can be kept for months or even years without significant loss of quality. However, it’s best to use the malt within a reasonable timeframe to ensure the flavors and enzymatic activity remain at their best.
When using the malt in the whiskey production process, it’s recommended to mill or grind it into a coarse powder or grist just before use. This helps expose the starches for enzymatic conversion during mashing.
By carefully drying and storing the germinated grains, you maintain the integrity of the flavors developed during germination and ensure the quality of the malt for whiskey production. Proper storage conditions allow you to create exceptional whiskies that showcase the unique characteristics of your homemade malt.
Conclusion
Congratulations on embarking on the journey of germinating grains for whiskey production! By understanding the germination process, choosing the right grains, and employing the proper techniques, you can add a personal touch to your favorite spirit and create unique and flavorful whiskies.
Throughout this article, we have explored various aspects of germinating grains for whiskey, from understanding the science behind the process to selecting the optimal grains for your desired flavor profile. We’ve also discussed the steps involved in preparing the grains for germination, the different germination techniques you can use, and how to monitor and stop the germination process at the right time.
Remember, the key to successful grain germination lies in maintaining the optimal temperature, moisture levels, and ensuring even sprouting. Regular monitoring, careful assessment of indicators such as acrospire length and color, and taste testing will guide you in determining when to stop the germination process.
After germination, drying the grains and storing them properly as malt is critical to preserve the flavors and enzymatic activity. Maintain a cool, dry, and well-ventilated storage area to ensure the quality of your malt until it’s ready to be used in whiskey production.
Germinating grains for whiskey production is a labor of love that allows you to express your creativity and passion for both gardening and fine spirits. By experimenting with different grains, germination techniques, and flavor profiles, you can craft your own unique whiskies that reflect your personal taste and style.
So, embark on this exciting journey and raise a glass to the art of germinating grains for whiskey. With knowledge, patience, and a touch of creativity, you can create whiskies that bring joy and satisfaction to your palate and those who have the pleasure of savoring your handcrafted spirits. Cheers!
Frequently Asked Questions about How To Germinate Grains For Whiskey
Was this page helpful?
At Storables.com, we guarantee accurate and reliable information. Our content, validated by Expert Board Contributors, is crafted following stringent Editorial Policies. We're committed to providing you with well-researched, expert-backed insights for all your informational needs.


0 thoughts on “How To Germinate Grains For Whiskey”