Home>Garden Essentials>How To Germinate Rice

Garden Essentials
How To Germinate Rice
Modified: October 28, 2024
Learn the step-by-step process of germinating rice in your garden with our comprehensive guide. Boost your garden's productivity with these expert tips!
(Many of the links in this article redirect to a specific reviewed product. Your purchase of these products through affiliate links helps to generate commission for Storables.com, at no extra cost. Learn more)
Introduction
Welcome to the wonderful world of gardening! If you have ever wondered how to germinate rice, you have come to the right place. Whether you are a seasoned gardener looking to expand your repertoire or a beginner eager to dip your toes into the world of plant cultivation, learning how to germinate rice is a fascinating and rewarding endeavor.
Rice, the staple food for millions of people around the world, is not only a versatile and delicious grain. It is also a plant that holds deep cultural and historical significance. Understanding the process of germinating rice allows you to connect with this ancient crop on a more intimate level and gain a deeper appreciation for the food that sustains us.
In this article, we will guide you through a step-by-step process of how to successfully germinate rice. From selecting the right seeds to transplanting the seedlings, we will provide you with all the necessary information and tips to ensure a bountiful harvest. So, let’s get started on this exciting gardening adventure!
Key Takeaways:
- Growing rice from seeds requires patience, proper water management, and a suitable germination environment. Start small, learn from experience, and enjoy the journey of nurturing your own homegrown rice.
- Selecting the right rice seeds, preparing the germination container, and creating the optimal environment are crucial for successful rice germination. With care and attention, you can witness the transformation from seeds to healthy seedlings.
Read more: How To Germinate A Bean
Step 1: Selecting the Rice Seeds
The first step in germinating rice is to select the right seeds. There are thousands of rice varieties available, each with different characteristics and growth requirements. When choosing rice seeds, consider factors such as the climate in your region, the desired yield, and the culinary characteristics of the rice.
You can purchase rice seeds from local garden centers, online seed suppliers, or even from fellow gardeners. Look for reputable sources that offer high-quality seeds that are suited to your specific growing conditions.
It’s important to note that there are two main types of rice: upland rice and paddy rice. Upland rice thrives in dry conditions, while paddy rice requires a submerged environment. Choose the type of rice that is best suited to your climate and gardening capabilities.
When selecting rice seeds, it’s also crucial to ensure that they are fresh and viable. Look for seeds that are plump and firm, without any signs of damage or mold. If possible, soak a small batch of seeds in water overnight to check for any floating or non-germinating seeds. Discard any seeds that do not sink, as they are likely not viable.
Moreover, consider the desired characteristics of the rice you want to grow. Think about factors such as grain size, color, and taste. Some popular rice varieties include Basmati, Jasmine, Arborio, and Calrose. Research the specific traits and growth requirements of the variety you choose to ensure a successful germination process.
Once you have selected the right rice seeds, move on to the next step: preparing the germination container.
Step 2: Preparing the Germination Container
Now that you have selected your rice seeds, it’s time to prepare a suitable germination container. The container you choose should provide a controlled environment for the seeds to sprout and grow.
An ideal germination container for rice seeds is a shallow tray or dish that is at least 2 inches deep. This will allow for ample space for the roots to grow while keeping the seeds evenly moist. You can use a seedling tray, a shallow plastic container, or even a recycled food container with drainage holes added.
Before filling the germination container, ensure that it is clean and sanitized. Wash it thoroughly with warm soapy water and rinse it well. This will help prevent the growth of mold or bacteria that could harm the germinating seeds.
Next, fill the germination container with a suitable planting medium. A recommended option is a mixture of equal parts high-quality potting soil and vermiculite or perlite. This combination provides good drainage while retaining moisture, creating an ideal environment for the rice seeds to germinate.
Spread the soil mixture evenly in the germination container, ensuring it is uniformly moistened but not soggy. Gently tap the container on a hard surface to settle the soil and remove any air pockets.
Now that your germination container is ready, it’s time to move on to pre-soaking the rice seeds in the next step.
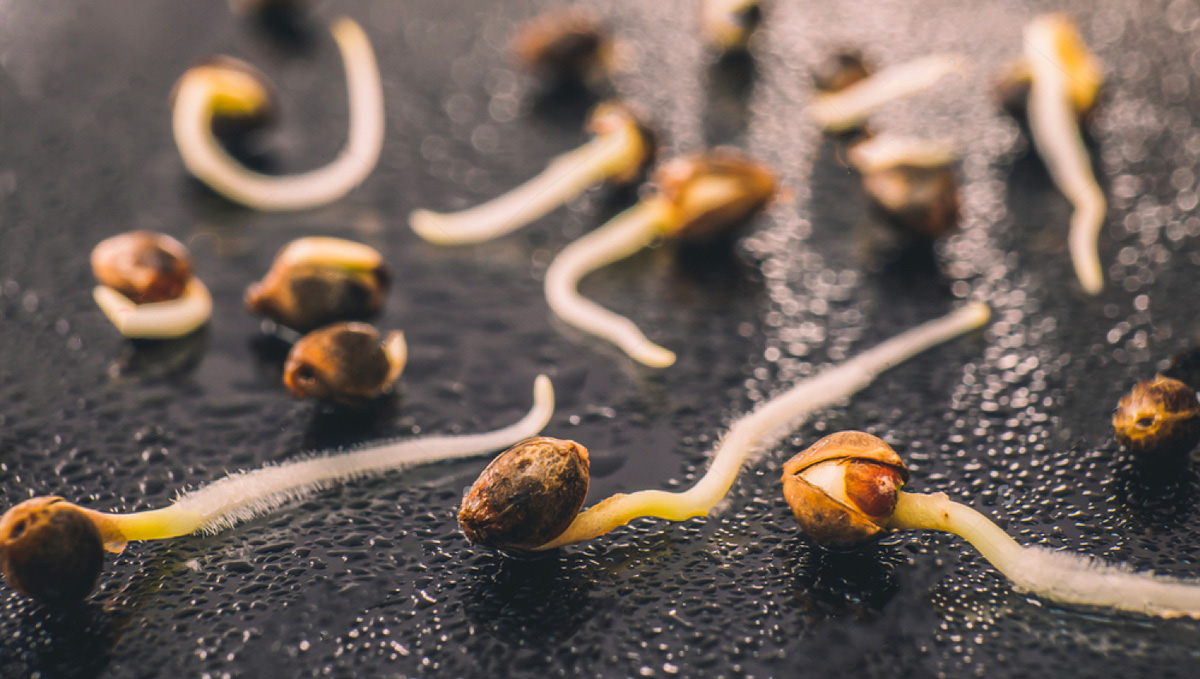
Step 3: Pre-soaking the Rice Seeds
Pre-soaking the rice seeds is an essential step in the germination process. Soaking the seeds before planting helps to speed up the germination and ensures a higher success rate.
To pre-soak the rice seeds, place them in a bowl or container and cover them with room temperature water. Use approximately twice as much water as the volume of the seeds, as they will absorb water and swell in size. Allow the seeds to soak for 24 to 48 hours, changing the water every 8 to 12 hours to prevent the growth of mold or bacteria.
This pre-soaking process helps to remove any chemicals or inhibitors present on the seed coat and softens it, making it easier for the seed to germinate. Additionally, it triggers the activation of enzymes within the seed, which initiates the germination process.
It’s important to note that different rice varieties may require different soaking times. Some varieties may only need a few hours of soaking, while others may benefit from a longer duration. Refer to the specific instructions for the rice variety you have selected to determine the optimal soaking time.
After the pre-soaking period is complete, drain the excess water from the seeds and gently rinse them with fresh water. The seeds are now ready to be planted in the germination container.
Move on to the next step to learn how to create the optimal germination environment for your rice seeds.
Step 4: Creating the Germination Environment
Creating the right germination environment is crucial for the successful growth of your rice seeds. By controlling factors such as temperature, humidity, and light, you can provide the ideal conditions for germination.
First, find a suitable location for your germination container. Rice seeds require warmth to germinate, so choose a spot that has a consistent temperature range of 75°F to 85°F (24°C to 29°C). You can place the container on a heat mat or near a warm area in your home, such as on top of the refrigerator.
In addition to temperature, humidity is also important. Rice seeds prefer a humid environment for germination. To create this, cover the germination container with a clear plastic lid or plastic wrap to retain moisture. This helps to maintain a high humidity level around the seeds.
It’s important to monitor the moisture level in the germination container regularly. Check the soil’s moisture every day and mist it with water if it begins to dry out. Avoid overwatering, as it can lead to fungal growth or rotting of the seeds. The soil should be consistently moist but not waterlogged.
Lastly, consider the lighting conditions for your germination environment. Rice seeds do not require direct sunlight to germinate, but they do need some light. Place the germination container in a well-lit area, such as near a window with indirect sunlight. If natural light is not available, you can use fluorescent lights or grow lights to provide the necessary illumination.
By creating the right germination environment, you are setting the stage for successful seed germination. Now it’s time to move on to the next step: planting the pre-soaked rice seeds.
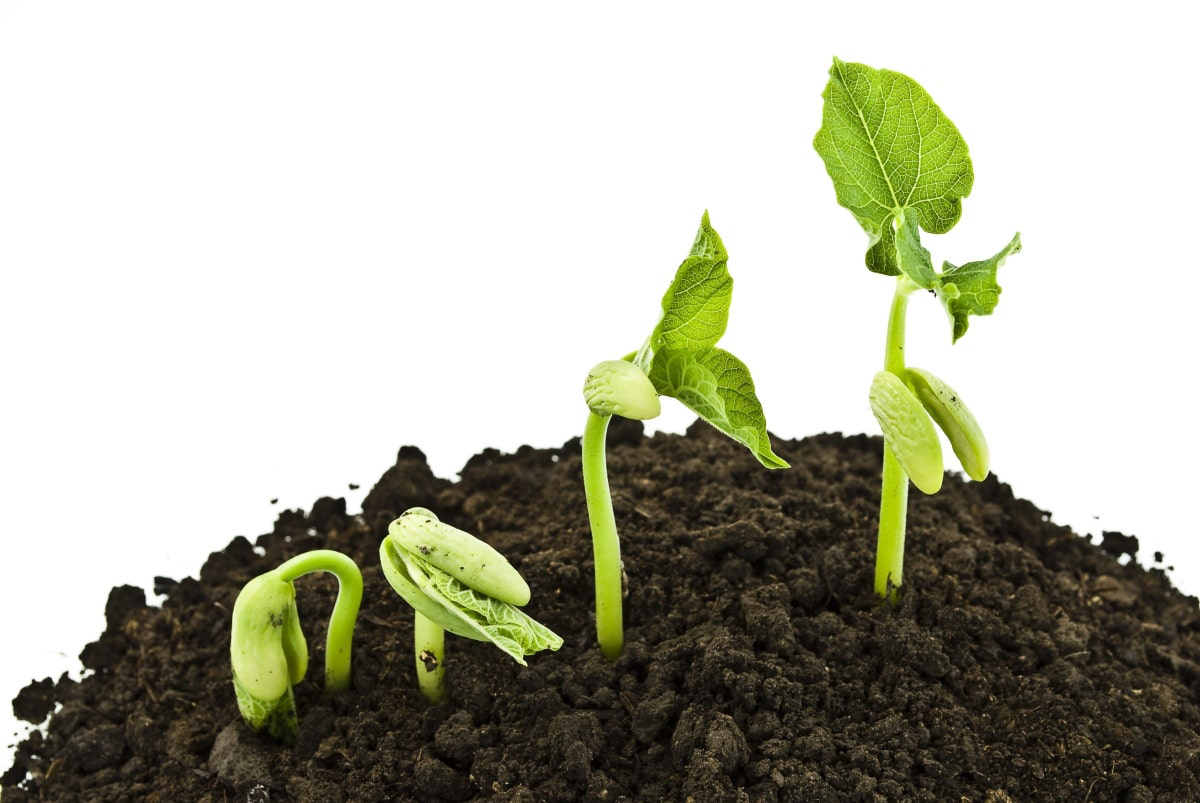
Soak the rice seeds in water for 24 hours, then transfer them to a damp cloth for another 24 hours. Plant the germinated seeds in a warm, moist environment to encourage growth.
Read more: How To Germinate Pecans
Step 5: Planting the Pre-soaked Seeds
Now that you have prepared the germination container and created the optimal environment, it’s time to plant the pre-soaked rice seeds. Follow these steps to ensure a successful planting process:
- Gently make small holes in the moist soil mixture of the germination container. Make the holes approximately half an inch deep and space them about an inch apart.
- Take a pre-soaked rice seed and place it in each hole. Ensure that the pointy end of the seed is facing downwards, as this is where the root will emerge.
- Cover the seeds with a thin layer of soil mixture, just enough to lightly bury them. Be careful not to press down too firmly, as this may inhibit the growth of the emerging seedlings.
- Once all the seeds are planted, mist the soil lightly with water to settle it and provide additional moisture.
It’s important to note that rice seeds should not be planted too deep. Planting them too deep can hinder their ability to emerge and may lead to poor germination rates. The shallow planting depth allows the emerging seedlings to access oxygen and light more easily.
After planting the seeds, cover the germination container with the plastic lid or plastic wrap to maintain a humid environment. Keep the container in the warm and well-lit location as mentioned in the previous step.
Now that the seeds are planted, it’s time to move on to the next step: maintaining the germination conditions and caring for the germinated rice seeds.
Step 6: Maintaining the Germination Conditions
After planting the pre-soaked rice seeds, it is essential to maintain the proper germination conditions to ensure successful growth. Here are some key factors to consider:
Temperature: Ensure that the germination environment remains within the temperature range of 75°F to 85°F (24°C to 29°C). This warmth promotes the germination process and encourages healthy seedling development. Use a thermometer to monitor the temperature regularly and make adjustments if necessary.
Humidity: Rice seeds require a humid environment for successful germination. Continue to cover the germination container with a plastic lid or plastic wrap to retain moisture. Check the humidity level inside the container regularly and mist the soil if it becomes dry. Avoid overwatering, as it can lead to fungal issues.
Lighting: Rice seeds need some light to germinate, but they do not require direct sunlight. Ensure the germination container is placed in a well-lit area, with indirect sunlight if possible. If natural light is insufficient, use fluorescent lights or grow lights to provide supplemental lighting for around 12-14 hours a day.
Moisture: It is crucial to monitor and maintain an appropriate moisture level in the germination container. Check the soil’s moisture daily by gently pressing your finger into the soil. If it feels dry, mist the soil lightly with water to keep it consistently moist. Avoid waterlogging or letting the soil dry out completely.
Air Circulation: While a humid environment is important, good air circulation is also necessary to prevent mold and disease issues. Ensure there is enough ventilation in the germination area to allow fresh air to circulate around the growing plants. However, avoid placing the container in a drafty area that could overly dry the soil.
Monitoring and maintaining these germination conditions will give your rice seeds the best chance of successful growth. As your seeds begin to germinate and seedlings emerge, it’s time to move on to the next step: monitoring and caring for the germinated rice seeds.
Step 7: Monitoring and Caring for the Germinated Rice Seeds
As your rice seeds germinate and transform into seedlings, it’s important to closely monitor their progress and provide proper care to ensure their healthy growth. Here are some important aspects to consider:
Growth Observation: Keep a close eye on the germinated rice seeds as they sprout. Within a few days of planting, you should start to see small shoots emerging from the soil. As the seedlings grow, you’ll notice the emergence of the first leaves, called cotyledons. Pay attention to the overall growth rate and appearance of the seedlings.
Watering: Continue to maintain a moist but not waterlogged environment in the germination container. Water the seedlings gently and carefully, making sure not to overwater. Regularly check the soil’s moisture level and adjust your watering routine accordingly. Remember, too much water can lead to root rot and other problems.
Lighting: Provide your germinated rice seeds with adequate light exposure. They require at least 12-14 hours of light per day. If natural light is limited, use grow lights or fluorescent lights to supplement the lighting. Position the lights close enough to provide sufficient intensity for the seedlings without causing heat stress.
Thinning: If multiple seedlings emerge from a single planting hole, it’s important to thin them out to allow each seedling enough space to grow. Gently remove the weaker or extra seedlings, leaving the strongest and healthiest ones. Thinning helps avoid overcrowding and competition for resources.
Fertilization: As the seedlings grow, they will benefit from a gentle feeding of a balanced liquid fertilizer diluted to half strength. Apply the fertilizer once or twice a month, following the manufacturer’s instructions. Avoid over-fertilizing, as it can lead to excessive leaf growth at the expense of root development.
Pest and Disease Management: Keep a watchful eye for any signs of pests or diseases that may affect the germinated rice seedlings. Common issues include fungal diseases, such as damping-off, and pests like aphids or snails. Employ preventive measures such as good sanitation practices and regular inspection to catch any problems early.
By closely monitoring and caring for your germinated rice seeds, you will be able to nurture them into healthy seedlings. Continue to provide the necessary care, and soon you’ll be ready to transplant the germinated rice seedlings into their permanent growing area, as discussed in the next step.
Step 8: Transplanting the Germinated Rice Seedlings
Once your germinated rice seedlings have reached a suitable size, it’s time to transplant them into their permanent growing location. Transplanting is a crucial step in the growth process and requires careful handling to ensure the seedlings’ successful establishment. Follow these steps for proper transplanting:
- Choose the planting site: Select a location that provides ample sunlight and is well-drained. Rice plants require at least 6-8 hours of direct sunlight daily to grow optimally.
- Preparing the soil: Prior to transplanting, prepare the soil by removing any debris, weeds, or rocks. Ensure the soil is moist, loose, and crumbly, as this will provide a favorable growing environment for the seedlings.
- Transplanting method: The most common method for transplanting rice seedlings is the flooded method, which mimics the paddy rice growing conditions. Create small individual holes or shallow furrows in the soil, spaced approximately 6-8 inches apart.
- Transplanting process: Gently remove the seedlings from the germination container, taking care not to damage the delicate roots. Place each seedling into a hole or furrow, ensuring that the roots are fully covered with soil. Space the seedlings evenly, allowing them ample room to grow and develop.
- Watering: After transplanting, water the seedlings thoroughly to ensure good soil contact and root establishment. Gradually introduce water to the planting area, gradually filling it with several inches of water. Maintain a consistent water level, keeping the soil always moist but not waterlogged.
- Weed control: Regularly monitor the planting area for weeds and promptly remove them to minimize competition for nutrients, water, and sunlight. Hand-weeding is recommended, especially in the early stages when the rice seedlings are still small and vulnerable.
- Fertilization: Rice plants benefit from appropriate nutrition. Apply a balanced, slow-release fertilizer or organic matter around the base of the plants following the recommended application rates. This will encourage healthy growth and optimize yield.
Remember to monitor the progressing rice plants and continue necessary care, such as proper irrigation and pest management. With time and proper cultivation, you will eventually harvest your own homegrown rice!
Now that your germinated rice seedlings are transplanted and growing in their new location, continue to care for them diligently until it’s time for harvest.
Read more: How To Germinate A Pinecone
Step 9: Final Thoughts and Tips
Congratulations! You have successfully learned how to germinate rice and nurture it from seeds to seedlings. As you continue on this exciting gardening journey, here are some final thoughts and tips to ensure a rewarding experience:
Patience: Growing rice from seed requires patience. The germination process can take anywhere from a few days to a couple of weeks. Be patient and maintain the optimal conditions, and soon you’ll see the seeds sprout and transform into healthy seedlings.
Start small: If you’re a beginner, it’s advisable to start with a small batch of rice seeds. This will allow you to focus your attention and understand the growth process before scaling up to larger plantings. Once you gain experience and confidence, you can expand your rice cultivation.
Water management: Rice is a water-loving plant, but it’s crucial to strike a balance in water management. Ensure the soil remains moist throughout the germination and growth stages, but avoid overwatering or letting the soil become waterlogged. A well-draining soil mix and regular watering will help prevent root rot and other water-related issues.
Cultivate in containers: If you don’t have space for a larger rice field, you can still experience the joy of growing rice by cultivating it in containers. Use deep pots or large containers with proper drainage and create a mini paddy-like environment for the rice plants. This can be a fun and manageable project that allows you to grow rice on a smaller scale.
Learn from experience: Each growing season presents an opportunity to learn and improve. Take note of any challenges faced, such as pest issues or environmental factors, and make adjustments for future plantings. Engaging in active observation and learning will ultimately enhance your gardening skills.
Enjoy the journey: Gardening is meant to be an enjoyable and fulfilling experience. Embrace the process of growing rice, from planting the seeds to nurturing the seedlings. Take the time to connect with nature, witness the growth and development of the plants, and savor the joy of harvesting your own homegrown rice.
With these final thoughts and tips in mind, you are now equipped with the knowledge and guidance to successfully germinate rice and embark on a rewarding gardening adventure. Now, it’s time to roll up your sleeves, get your hands dirty, and experience the satisfaction of growing your own rice!
Curious about how long seeds take to sprout? Our next guide covers everything you need to know about seed germination times. Understanding these timelines can help optimize your planting strategy for a more bountiful harvest. Don't miss out on these valuable insights to enhance your gardening skills!
Frequently Asked Questions about How To Germinate Rice
Was this page helpful?
At Storables.com, we guarantee accurate and reliable information. Our content, validated by Expert Board Contributors, is crafted following stringent Editorial Policies. We're committed to providing you with well-researched, expert-backed insights for all your informational needs.


0 thoughts on “How To Germinate Rice”