Home>Garden Essentials>How To Germinate Seeds

Garden Essentials
How To Germinate Seeds
Modified: March 16, 2024
Learn how to successfully germinate seeds in your garden with our step-by-step guide, ensuring a bountiful and vibrant garden all year round.
(Many of the links in this article redirect to a specific reviewed product. Your purchase of these products through affiliate links helps to generate commission for Storables.com, at no extra cost. Learn more)
Introduction
Welcome to the wonderful world of gardening! One of the most exciting and rewarding aspects of gardening is starting from scratch – growing plants from seeds. The process of germinating seeds is not only fascinating, but it also allows you to have a hands-on experience in nurturing and watching new life emerge from the ground.
In this article, we will take a deep dive into the art of seed germination. We will explore the science behind this magical process, discuss the importance of selecting the right seeds, provide detailed steps on preparing the germination environment, and offer tips on troubleshooting common germination issues. So whether you are a gardening enthusiast looking to expand your knowledge or a beginner eager to embark on your first seed-growing adventure, this article is here to guide you every step of the way.
Before we embark on this journey, let’s quickly understand what germination entails. Germination is the process in which a seed sprouts and develops into a seedling. It is the crucial first stage of a plant’s life and sets the foundation for its growth and development. During germination, the seed absorbs water, activates enzymes, and begins to break down stored nutrients, ultimately leading to the emergence of a tiny plant.
Now that we have a basic understanding of germination, let’s move on to selecting the right seeds. Understanding the different types of seeds available and their individual requirements is key to a successful germination process.
Key Takeaways:
- Germinating seeds is like witnessing a magical transformation – from tiny seeds to vibrant seedlings. Understanding the needs of each plant and providing the right conditions are key to successful germination.
- Whether you’re a seasoned gardener or a beginner, the joy of nurturing and growing plants from seeds is unmatched. Embrace the process, be patient, and marvel at the wonders of nature in your garden.
Read more: How To Germinate Grape
Understanding the Germination Process
The process of seed germination is truly a marvel of nature. It is a complex series of events that ensures the successful growth of a new plant. Understanding the germination process is essential for providing the optimal conditions needed for seeds to sprout and thrive.
For germination to occur, seeds require a combination of moisture, oxygen, and the right temperature. When these conditions are met, the seed’s dormancy is broken, and it begins to activate the biological processes necessary for growth.
The first step in the germination process is the absorption of water. Water acts as a trigger, signaling the seed to start growing. As the seed takes in water, it swells and softens, allowing for the movement of stored nutrients.
Once the seed has absorbed enough water, enzymes within the seed are activated. These enzymes, known as proteases and amylases, break down stored proteins and carbohydrates into smaller molecules, which are then used as nutrients to support the growth of the emerging plant.
As the seed metabolizes these nutrients, it produces energy in the form of adenosine triphosphate (ATP). This energy is vital for the development of the seedling and helps drive processes such as root and shoot growth.
Another critical factor in the germination process is oxygen. Oxygen is required for aerobic respiration, which is the process by which the seed uses stored carbohydrates and converts them into ATP. Adequate oxygen levels are crucial to ensure that the seed’s metabolic processes can run efficiently.
The final component for successful germination is the right temperature. Different plants have different temperature requirements for germination. Some plants thrive in cooler temperatures, while others require warmer conditions. Understanding the preferred temperature range for your specific seeds is essential to providing the optimal environment for germination.
By understanding these key factors in the germination process – water, enzymes, oxygen, and temperature – you can create the ideal conditions for your seeds to sprout. In the next section, we will explore the importance of selecting the right seeds for successful germination.
Selecting the Right Seeds
Choosing the right seeds is crucial for a successful germination process. Each plant has its own unique set of requirements and preferences, so it’s important to select seeds that are well-suited to your climate, growing conditions, and gardening goals. Here are some tips to help you select the right seeds:
1. Consider Your Climate
The climate in your region plays a significant role in determining which seeds will thrive. Some plants prefer cooler temperatures, while others require warmer or more temperate climates. Research the hardiness zones and average temperatures in your area to identify seeds that are best suited to your climate.
2. Evaluate Growing Conditions
Take a close look at the conditions in your garden or the area where you plan to grow your plants. Consider factors such as available sunlight, soil type, and drainage. Some plants prefer full sun, while others can tolerate partial shade. Similarly, certain plants thrive in well-draining soil, while others prefer soil that retains moisture. Choose seeds that are compatible with the growing conditions you can provide.
Read more: How To Germinate Wheat
3. Consider Time and Space Constraints
Depending on the size of your garden and the time you can dedicate to gardening, you may need to select seeds accordingly. Some plants, like leafy greens and herbs, have a relatively short growth cycle and can be harvested within a few weeks. Other plants, such as fruit trees, require more space and time to mature. Assess your available space and the time you can commit to gardening to choose seeds that align with your constraints.
4. Gardening Goals
Consider your goals and preferences as a gardener. Are you interested in growing edible plants, beautiful flowers, or a mix of both? Are you looking to attract pollinators or create a specific aesthetic in your garden? Identifying your gardening goals will help you select seeds that align with your vision and interests.
5. Seed Quality
Lastly, pay attention to seed quality. Choose reputable seed suppliers or sources to ensure that you are receiving high-quality seeds that have been stored and handled properly. Look for seeds that are labeled as “organic” or non-GMO if that is important to you.
By considering these factors and doing some research, you can select the right seeds that are best suited for your specific growing conditions and gardening goals. Once you have chosen the ideal seeds, it’s time to prepare the germination environment, which we will explore in the next section.
Preparing the Germination Environment
Creating a suitable germination environment is essential to provide the optimal conditions for seeds to sprout and grow into healthy seedlings. Here are some steps to prepare the germination environment:
Read more: How To Germinate Mitraria
1. Selecting Containers
Choose containers that are appropriate for the type of seeds you are germinating. Options include seed trays, peat pots, egg cartons, or even recycled containers with drainage holes. Ensure that the containers are clean and sterilized to minimize the risk of diseases or pests.
2. Choosing a Growing Medium
Select a suitable growing medium for your seeds. Options include seed-starting mix, coconut coir, or a mixture of compost and vermiculite. Avoid using garden soil, as it may contain weed seeds or pathogens that can hinder germination.
3. Moistening the Growing Medium
Before sowing the seeds, moisten the growing medium to the appropriate level of moisture. It should be damp but not overly wet, as excessive moisture can lead to rot and fungal diseases.
4. Sowing the Seeds
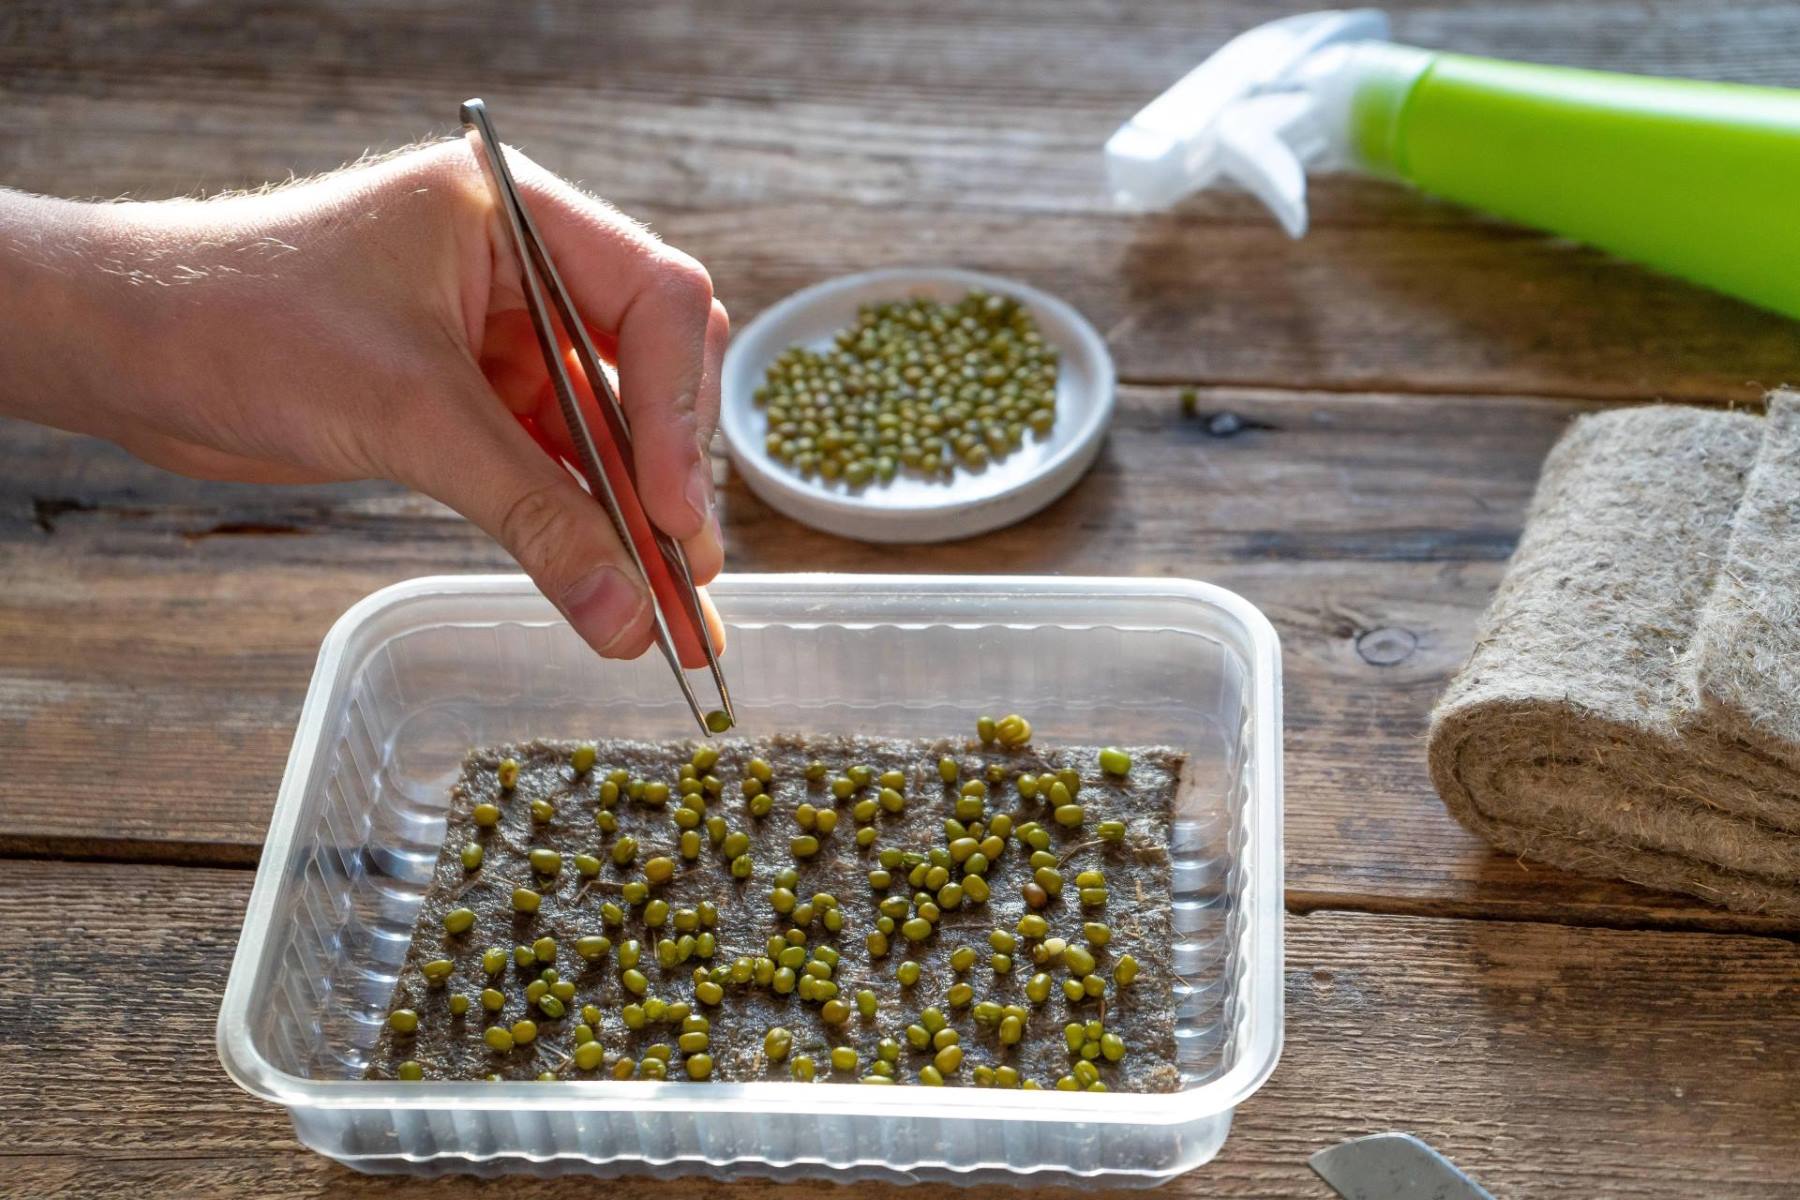
Follow the instructions on the seed packet regarding the proper depth and spacing for sowing the seeds. Gently press the seeds into the growing medium, ensuring good seed-to-soil contact.
Read more: How To Germinate Banana
5. Providing Adequate Lighting
Most seeds require sufficient light for germination to occur. Place the containers in a bright location or provide supplemental light with fluorescent or LED grow lights. Keep the lights on for 12-16 hours a day to mimic natural daylight.
6. Maintaining Optimal Temperature and Humidity
Temperature plays a crucial role in seed germination. Check the ideal temperature range for your seeds and provide a consistent and appropriate temperature. Using a seedling heat mat or placing the containers near a warm, draft-free area can help maintain the desired temperature. Additionally, cover the containers with a plastic dome or plastic wrap to create a humid environment and retain moisture.
7. Watering Wisely
Water the containers gently to keep the growing medium consistently moist. Avoid overwatering, as it can lead to seed rot or fungal growth. Use a spray bottle or a gentle watering can to avoid dislodging or damaging the germinating seeds.
By following these steps, you can ensure that the germination environment provides the perfect conditions for your seeds to sprout and develop into healthy seedlings. In the next sections, we will discuss how to germinate seeds in soil and water, along with tips for troubleshooting common germination issues.
Germinating Seeds in Soil
Germinating seeds in soil is a traditional and reliable method that has been used by gardeners for centuries. Here are the steps to successfully germinate seeds in soil:
Read more: How To Germinate Lychee
1. Prepare the Soil
Choose a well-draining soil mix specifically designed for seed starting or create your own by combining equal parts of compost, peat moss, and vermiculite. Fill your chosen containers with the soil mix, leaving a small gap at the top for watering.
2. Sow the Seeds
Follow the instructions on the seed packet for the recommended planting depth and spacing. Make small holes in the soil with your finger or a pencil, place the seeds in the holes, and cover them with a thin layer of soil. Gently press the soil down around the seeds to ensure good seed-to-soil contact.
3. Water the Soil
After sowing the seeds, water the soil gently using a spray bottle or a watering can with a fine rose attachment. Make sure the soil is evenly moist but not saturated. Continue to water as needed to keep the soil consistently moist throughout the germination process.
4. Provide Adequate Light
Place the containers in a bright location where the seeds can receive at least 6-8 hours of sunlight daily. If natural light is not sufficient or consistent, supplement with fluorescent or LED grow lights placed 2-4 inches above the seedlings. Adjust the height of the lights as the seedlings grow to prevent them from becoming leggy.
Read more: How To Germinate Rice
5. Maintain Optimal Temperature
Most seeds require a temperature range of 65-75°F (18-24°C) for germination. Place the containers in a warm spot or use a seedling heat mat to maintain the desired temperature. Avoid exposing the seeds to extreme temperature fluctuations, as they can impact germination success.
6. Patience and Observation
Germination can take anywhere from a few days to a few weeks, depending on the type of seed. Be patient and continue to provide the right conditions while monitoring the progress. As the seeds germinate and seedlings emerge, adjust watering and lighting as needed to support their growth.
7. Transplanting Seedlings
Once the seedlings have developed a few sets of true leaves, they are ready to be transplanted into larger containers or directly into the garden if the weather permits. Handle the seedlings carefully to avoid damaging the delicate roots. Plant them at the appropriate depth and provide proper care to ensure their ongoing growth and development.
By following these steps, you can successfully germinate seeds in soil and set the stage for healthy seedlings. However, if you prefer an alternative method, such as germinating seeds in water, continue reading the next section.
Germinating Seeds in Water
Germinating seeds in water is an alternative method that can be used for certain types of seeds. This method, also known as “water germination,” offers several benefits, including faster germination, easier observation of seed viability, and increased success rates. Here is a step-by-step guide to germinating seeds in water:
Read more: How To Germinate Okra
1. Gather Your Supplies
You will need a shallow container, such as a plate or a plastic tray, and clean, room temperature water. Make sure the container is large enough to hold the seeds without crowding them.
2. Select the Seeds
Not all seeds are suitable for water germination. Ideal candidates for this method include larger seeds with hard seed coats, such as beans, peas, and lettuce. Avoid using tiny or delicate seeds, as they can become too fragile in water.
3. Soak the Seeds
Place the seeds in the container and cover them with water. Make sure all the seeds are fully immersed. Add enough water to ensure that there is sufficient hydration but avoid completely submerging the seeds. Soak the seeds for a designated period as specified on the seed packet.
4. Monitor and Change the Water
Check the seeds daily and replace the water regularly to prevent stagnation and the growth of harmful microorganisms. Rinse the seeds with fresh, room temperature water each time you change the water. This helps to keep the germination environment clean and ensures a fresh supply of oxygen for the seeds.
Read more: How To Germinate A Bean
5. Observe Germination
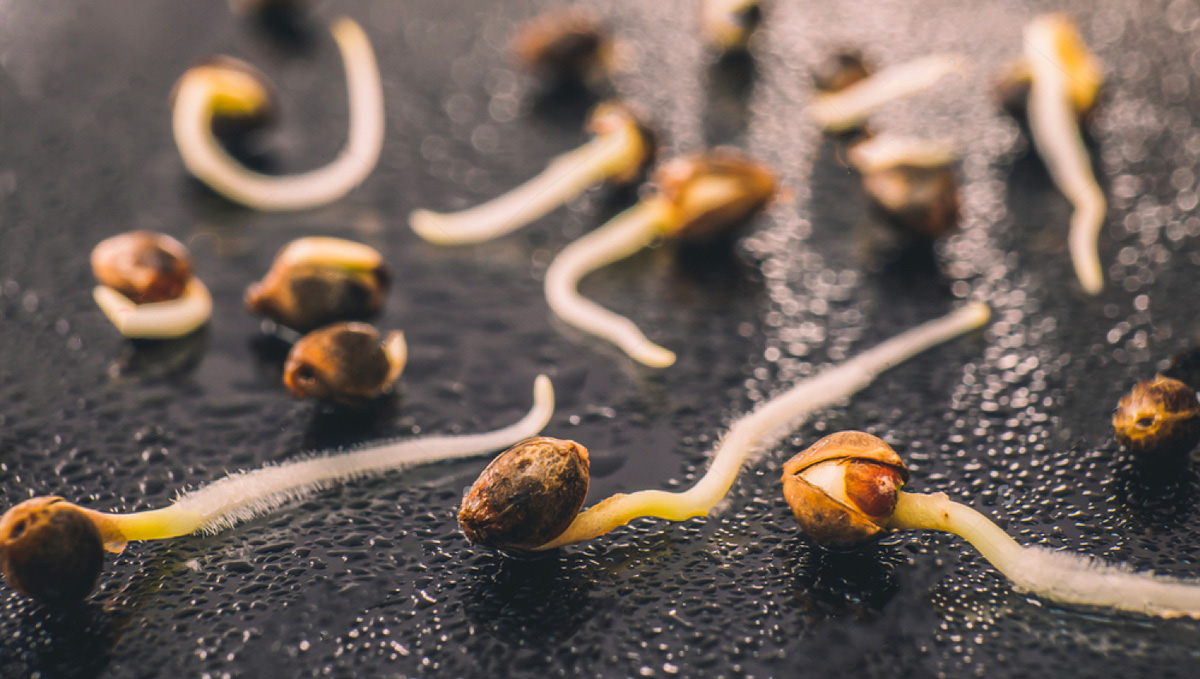
As the seeds absorb water, they will swell and eventually sprout. The germination process can vary depending on the seed type and environmental conditions. Observe the seeds closely and look for signs of germination, such as root emergence.
6. Transfer Germinated Seeds
Once the seeds have sprouted and developed a small root, it’s time to transfer them to a growing medium, such as a seed tray or individual pots with a suitable soil mix. Gently handle the germinated seeds to avoid damaging the delicate roots, and place them at the appropriate depth in the growing medium.
7. Provide Proper Care
After transplanting, ensure that the seedlings receive adequate light, temperature, and moisture according to their specific requirements. Continue to observe and care for the seedlings as they grow, providing the necessary nutrients and protection from pests and diseases.
Germinating seeds in water offers a unique and engaging way to witness the early stages of plant growth. By following these steps, you can successfully germinate seeds in water and nurture them into healthy seedlings. In the next section, we will explore some common germination issues and provide troubleshooting tips.
Troubleshooting Germination Issues
While germinating seeds can be an exciting process, it is not without its challenges. Sometimes, despite our best efforts, germination issues may arise. But fear not! Here are some common germination issues and troubleshooting tips to help you overcome them:
Read more: How To Germinate Pecans
1. Slow or No Germination
If your seeds are taking longer than expected to germinate or haven’t germinated at all, there may be several reasons:
- Insufficient moisture: Ensure that the growing medium is consistently moist, but avoid overwatering, which can lead to rot.
- Incorrect temperature: Check if the temperature is within the recommended range for the specific seeds you are germinating. Adjust the environment if necessary.
- Old or poor-quality seeds: Seeds that are past their prime or of low quality may have reduced viability. Consider using fresh, high-quality seeds from reputable sources.
2. Weak or Leggy Seedlings
If your seedlings appear weak, with thin, elongated stems and pale leaves, they may be suffering from insufficient light:
- Increase light intensity: Ensure that seedlings receive adequate amounts of direct or artificial light. Adjust the distance between light source and seedlings accordingly.
- Provide a light breeze: Gentle air movement can help strengthen seedling stems by simulating outdoor conditions.
3. Damping-Off Disease
Damping-off is a fungal disease that affects seedlings, causing them to wilt and die. To prevent damping-off:
- Use sterile soil: Start with clean, sterile soil mix to minimize the risk of fungal pathogens.
- Avoid overwatering: Ensure proper drainage and provide appropriate moisture levels, avoiding excess water that can create a favorable environment for fungal growth.
- Improve air circulation: Use a small fan or keep the growing area well-ventilated to reduce humidity and prevent the buildup of fungal spores.
4. Nutrient Deficiencies
If your seedlings exhibit stunted growth, yellowing leaves, or other signs of nutrient deficiencies:
- Use a balanced fertilizer: Provide seedlings with a diluted, balanced fertilizer to ensure they receive necessary nutrients.
- Adjust pH levels: Check the pH of the soil or growing medium and adjust it to the appropriate range for the specific plants you are growing.
- Consider seedling-specific formulas: Some fertilizers are specially formulated for the needs of young seedlings, so consider using these if available.
Read more: How To Germinate A Pinecone
5. Pests and Diseases
Seedlings can be susceptible to pests and diseases. To prevent or address these issues:
- Keep the growing area clean: Remove any fallen leaves or debris that can harbor pests or diseases.
- Inspect seedlings regularly: Check for signs of pests, such as holes in leaves or the presence of insects. If pests are detected, use appropriate organic pest control methods.
- Treat diseases promptly: If you notice signs of disease, such as wilting or discolored leaves, identify the issue and treat it with suitable organic fungicides or disease control methods.
By troubleshooting these common germination issues, you can take proactive steps to ensure the success of your seedlings. Remember that each plant species may have specific requirements, so it’s essential to research specific care guidelines for the seeds you are germinating. With patience and proper care, you’ll be rewarded with healthy seedlings ready for transplanting and the joy of watching your garden flourish.
Now that we’ve covered troubleshooting, let’s move on to the next step: transferring germinated seeds to containers.
Transferring Germinated Seeds to Containers
Once your seeds have germinated and developed into healthy seedlings, it’s time to transfer them to individual containers. This step is crucial for providing the seedlings with enough space, nutrients, and optimal growing conditions to continue their growth. Here’s a guide to transferring germinated seeds to containers:
1. Choose the Right Containers
Select containers that are appropriate for the size and growth habit of your seedlings. Individual pots or seedling trays with drainage holes are ideal. Ensure that the containers are clean and sterilized to prevent the spread of diseases.
2. Prepare the Growing Medium
Fill the containers with a suitable growing medium, such as a seed-starting mix or a combination of compost and vermiculite. The medium should be well-draining, fluffy, and rich in nutrients to support the seedlings’ growth.
Read more: What Is Germinate
3. Replanting Seedlings
Gently remove each seedling from the germination container. Handle the seedlings carefully by their leaves or root ball to prevent damage. Make a small hole in the center of each new container and carefully place the seedling into the hole. Firmly press the soil around the base of the seedling to secure it.
4. Watering the Transplanted Seedlings
After transplanting, water the seedlings thoroughly to settle the soil around their roots. Use a gentle stream of water to ensure even moisture distribution. Avoid overwatering, as it can lead to root rot. Maintain adequate moisture levels in the growing medium as the seedlings establish themselves.
5. Provide Proper Lighting and Temperature
Place the containers in a well-lit area, preferably near a south-facing window where the seedlings can receive sufficient sunlight. If natural light is limited, supplement with fluorescent or LED grow lights placed 2-4 inches above the seedlings. Maintain a suitable temperature range for the specific seedlings you are growing.
6. Gradual Acclimation
If transplanting seedlings outdoors, acclimate them gradually to the outdoor environment. Start by exposing them to outdoor conditions for a few hours every day, gradually increasing the duration over the course of a week. This helps the seedlings adjust to the changes in temperature, wind, and sunlight, reducing the risk of transplant shock.
Read more: How To Germinate A Plant
7. Continued Care and Maintenance
As the transplanted seedlings grow, continue to provide them with proper care. Regularly monitor moisture levels, provide adequate nutrients through fertilization, and ensure proper airflow around the containers. Pinch back or trim any excessive growth to encourage bushier and more robust plants.
By following these steps, you can successfully transfer your germinated seeds to individual containers, setting them on the path to becoming mature plants. Remember to provide ongoing care and attention to ensure the health and vigor of your seedlings. In the concluding section, we will wrap up the article and summarize the key points we’ve discussed.
Conclusion
Congratulations on completing this comprehensive guide to seed germination! By understanding the germination process, selecting the right seeds, preparing the germination environment, and troubleshooting common issues, you are well-equipped to embark on a successful seed-growing journey.
The process of germinating seeds is not only a fascinating endeavor but also a rewarding one. Watching tiny seeds sprout and transform into vibrant seedlings is a testament to the incredible cycle of life. Whether you’re an experienced gardener or a beginner, the joy and sense of accomplishment that comes with nurturing and growing your own plants from seeds is unmatched.
Remember, each plant has its own unique requirements, so take the time to research and understand the specific needs of the seeds you are germinating. Pay attention to factors such as temperature, moisture, light, and nutrient levels to create the optimum conditions for healthy seedling growth.
Through the process of trial and error, you will gain valuable experience and become more adept at successfully germinating seeds. Don’t be discouraged by setbacks or challenges along the way; view them as opportunities to learn and grow as a gardener.
As you continue on your gardening journey, remember to enjoy the process. Gardening is not just about the end result but also about the journey itself. Take pleasure in the simple tasks of sowing seeds, nurturing them, and witnessing their growth. Be patient, observe, and marvel at the wonders of nature and the incredible transformation that occurs in your garden.
So go ahead and sow those seeds, whether it’s in the soil or in water. Embrace the anticipation, the nurturing, and the joy of watching life emerge from a tiny seed. Happy gardening!
Frequently Asked Questions about How To Germinate Seeds
Was this page helpful?
At Storables.com, we guarantee accurate and reliable information. Our content, validated by Expert Board Contributors, is crafted following stringent Editorial Policies. We're committed to providing you with well-researched, expert-backed insights for all your informational needs.

0 thoughts on “How To Germinate Seeds”