Home>Garden Essentials>How To Grow Chives From Seed
Garden Essentials
How To Grow Chives From Seed
Modified: August 17, 2024
Learn how to grow chives from seed and create a beautiful and productive garden with our easy step-by-step guide.
(Many of the links in this article redirect to a specific reviewed product. Your purchase of these products through affiliate links helps to generate commission for Storables.com, at no extra cost. Learn more)
Introduction
Welcome to the wonderful world of gardening! If you’re looking to add some freshness and flavor to your culinary creations, growing chives from seed is a great place to start. Chives are a versatile herb that not only add a delightful onion-like taste to dishes but also provide a touch of visual appeal to any garden. Plus, they are incredibly easy to grow, making them an ideal choice for both beginners and experienced gardeners.
In this article, we will walk you through the step-by-step process of growing chives from seed. We’ll cover everything from gathering the necessary supplies to harvesting your homegrown chives. So let’s dive in and get our hands dirty!
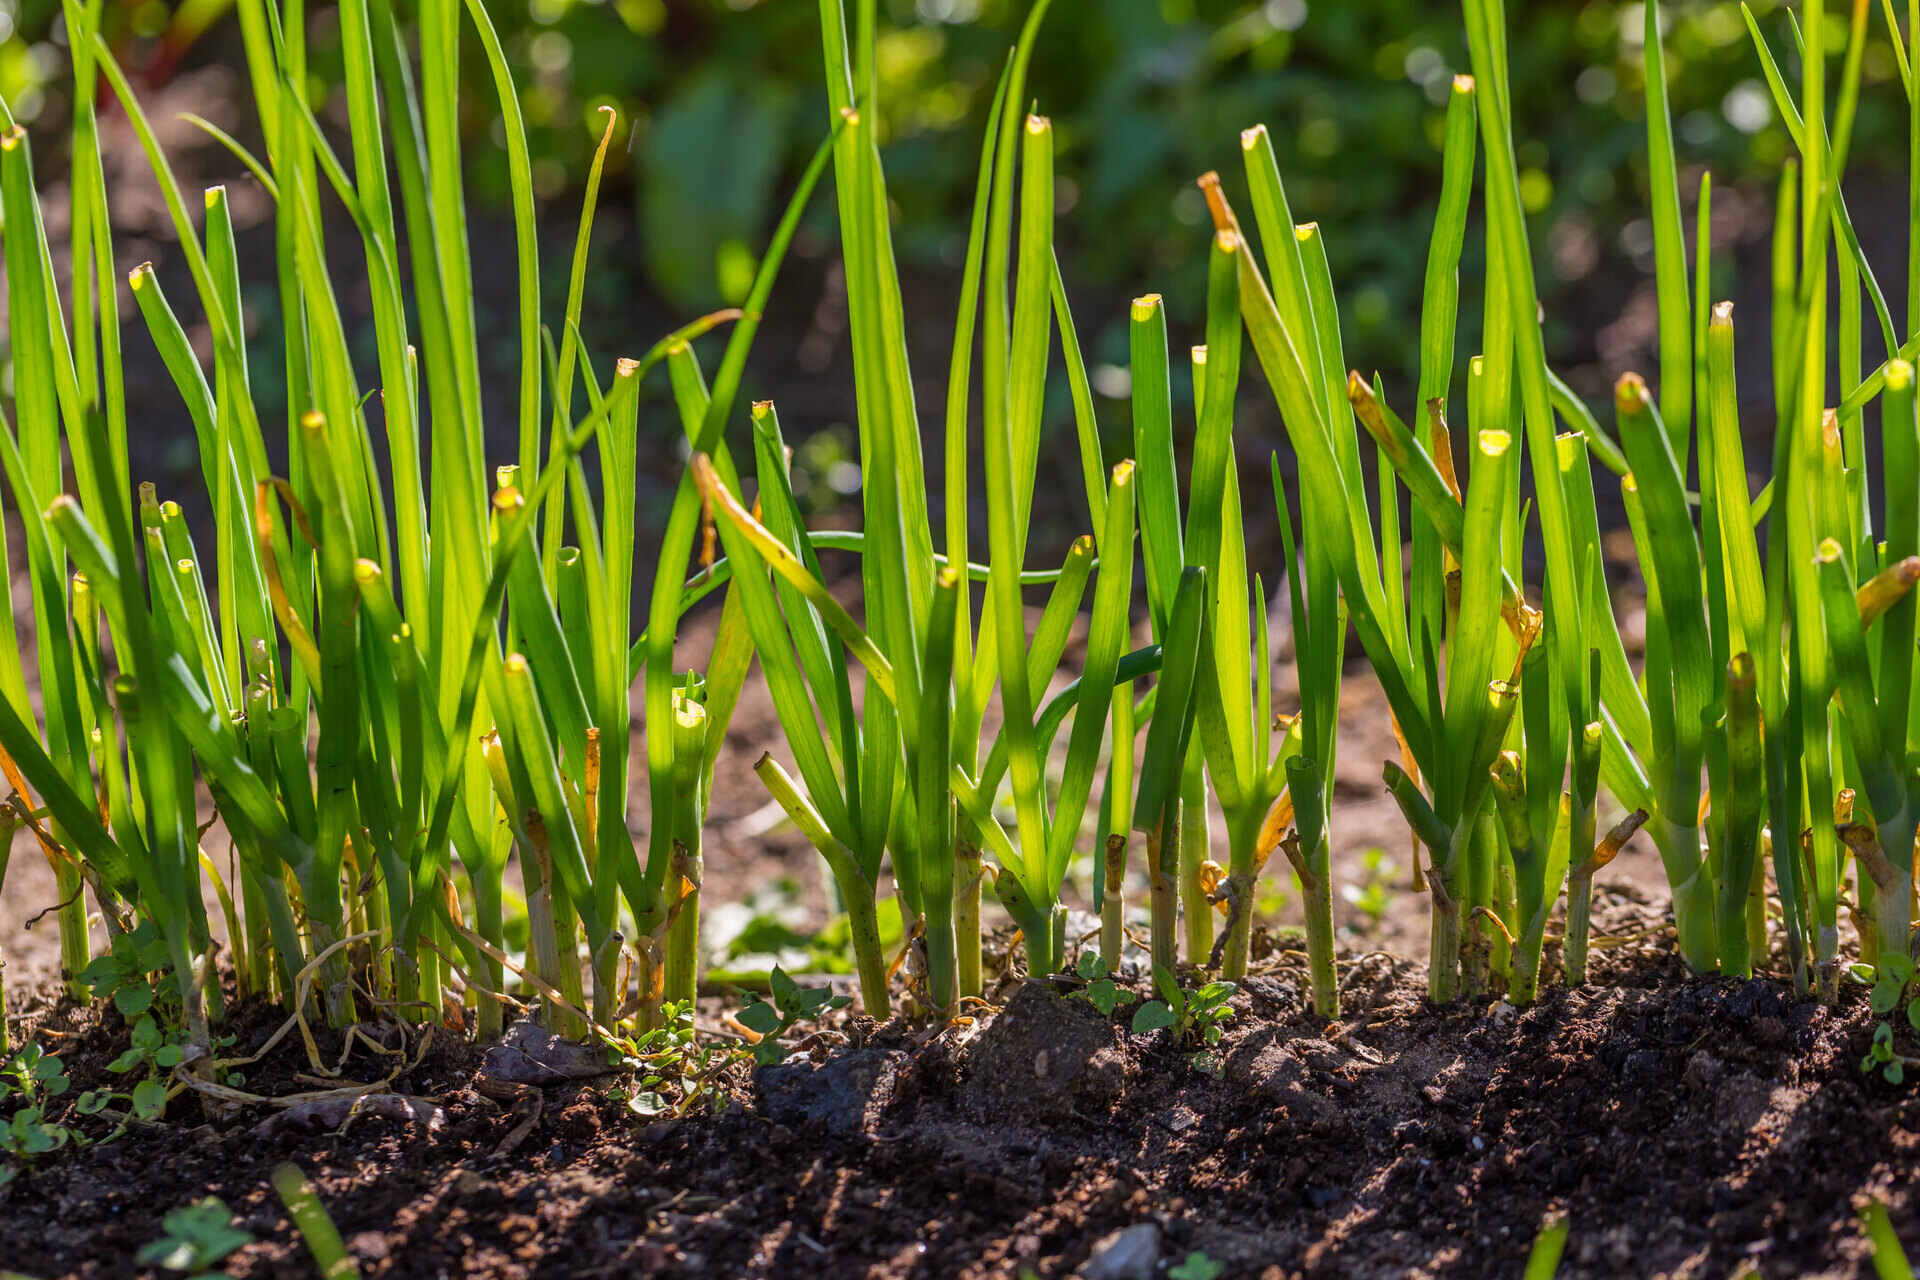
Before we begin, it’s important to understand that chives (Allium schoenoprasum) are a member of the onion family. They are a perennial herb that is well-loved for its delicate, grass-like leaves and purple globe-shaped flowers. Chives not only provide a burst of flavor to a wide variety of dishes, including soups, salads, and omelets, but they are also a great companion plant in the garden, helping to repel pests and attract beneficial insects.
Now, without further ado, let’s get started on our chive-growing journey!
Key Takeaways:
- Growing chives from seed is easy and rewarding, providing flavorful herbs for cooking and visual appeal in the garden. Follow the steps to prepare soil, sow seeds, and care for seedlings for a successful harvest.
- Troubleshoot common issues like poor germination, pests, and watering to ensure healthy chive plants. Enjoy the process of nurturing and harvesting your own homegrown chives for culinary delights!
Read more: How To Grow Okra From Seed
Step 1: Gather Supplies
Before you begin sowing chive seeds, it’s important to gather all the necessary supplies. Here’s a list of items you’ll need:
- Chive seeds: You can purchase chive seeds from your local nursery or garden center. Make sure to choose high-quality seeds from a reputable source.
- Seed-starting trays: These shallow trays are specifically designed for starting seeds. They usually come with a clear plastic lid to create a mini greenhouse effect.
- Seed-starting mix: Use a sterile seed-starting mix, which provides the right balance of nutrients and drainage for young seedlings.
- Watering can or spray bottle: You’ll need a gentle watering method to keep the soil moist without disturbing the seeds.
- Labels or markers: It’s essential to label your trays or pots to keep track of the different varieties you’re growing.
- Grow lights or sunny window: Chive seedlings need bright light to grow properly. If you don’t have a sunny window, consider using artificial grow lights.
- Planting containers: Once your chive seedlings are ready for transplantation, you’ll need pots with good drainage to accommodate their growth.
- Organic fertilizer: Chives benefit from occasional fertilization. Look for a balanced, organic fertilizer suitable for herbs.
- Gardening gloves and hand tools: It’s always a good idea to have gloves and basic gardening tools, such as a trowel, on hand for any necessary maintenance.
By gathering these supplies ahead of time, you’ll have everything you need to start your chive-growing journey smoothly and efficiently. Now, let’s move on to the next step: preparing the soil.
Step 2: Prepare the Soil
Creating the right environment for your chive seeds is crucial for their successful germination and growth. Here are some steps to prepare the soil:
- Select a well-draining location: Chives thrive in soil that drains well and doesn’t retain too much moisture. Choose a spot in your garden that receives at least 6 hours of sunlight each day.
- Clear the area: Remove any weeds, rocks, or debris from the planting area. This will ensure that the chive plants have ample space and nutrients to grow.
- Loosen the soil: Use a garden fork or a tiller to loosen the soil to a depth of about 8-10 inches. This will help promote healthy root development and allow for proper drainage.
- Amend the soil: If your soil is heavy and clayey, you can improve its drainage by adding organic matter, such as compost or well-rotted manure. Spread a 2-3 inch layer of organic matter over the soil and work it in with a garden fork or tiller.
- Level and smooth the soil: Use a rake to level and smooth the soil surface. This will provide a consistent planting bed for your chive seeds.
By properly preparing the soil, you create an optimal growing environment for your chive seeds. The loosened soil allows for easy root penetration and good drainage, while the addition of organic matter enriches the soil with nutrients. Now, let’s move on to the exciting part: sowing the chive seeds!
Step 3: Sow the Seeds
Now that you’ve prepared the soil, it’s time to sow your chive seeds. Follow these steps to ensure successful germination:
- Moisten the seed-starting mix: Before filling your seed trays or pots with the seed-starting mix, lightly moisten it with water. This will create a suitable environment for the seeds to germinate.
- Fill the trays: Fill the seed-starting trays or pots with the moistened seed-starting mix, leaving about 1/4 inch of space at the top.
- Sow the seeds: Sprinkle the chive seeds evenly over the surface of the seed-starting mix. Aim for a spacing of approximately 1 inch between each seed.
- Cover the seeds: Gently press the seeds into the soil using the back of a spoon. Then, lightly cover them with a thin layer of the seed-starting mix.
- Mist the trays: Using a watering can or spray bottle, mist the trays with water. Be careful not to overwater, as the seeds may rot. The goal is to provide enough moisture for germination without saturating the soil.
- Label the trays: Place labels or markers in the trays to identify the chive variety or planting date. This will help you keep track of your plants as they grow.
- Create a mini greenhouse: If your seed-starting trays have a clear plastic lid, place it on top to create a mini greenhouse effect. This helps to retain moisture and provide a warm environment, promoting faster germination.
Now that you’ve sown your chive seeds, it’s time to move on to the next step: watering and care. Stay tuned!
Step 4: Watering and Care
Proper watering and care are essential for the healthy development of your chive seedlings. Follow these guidelines to ensure their growth:
- Monitor soil moisture: Check the moisture level of the soil regularly. Chive seeds require consistent moisture for germination, so make sure the soil remains slightly moist but not waterlogged.
- Water gently: Use a watering can or spray bottle to water your seedlings. Be careful not to drown them with heavy watering. A gentle misting or a light watering is sufficient to keep the soil moist.
- Provide adequate light: Chive seedlings need bright, indirect light to thrive. If you’re growing them indoors, place them near a sunny window or use artificial grow lights to ensure they receive at least 12-16 hours of light daily.
- Monitor temperature: Chive seeds germinate best at temperatures between 60-70°F (15-21°C). Once the seedlings have emerged, maintain a slightly cooler temperature of around 55-65°F (13-18°C) to promote healthy growth.
- Thin the seedlings: Once the seedlings have grown to about 2-3 inches tall, thin them out to provide adequate space for each plant to flourish. Use scissors or your fingertips to carefully remove the weakest seedlings, leaving the strongest ones spaced about 4-6 inches apart.
- Apply organic fertilizer: After thinning the seedlings, you can start applying a balanced, organic fertilizer to provide additional nutrients. Follow the instructions on the fertilizer package, and be careful not to over-fertilize.
- Protect from pests: Keep an eye out for garden pests like aphids, slugs, and snails. Remove any visible pests by hand and consider using organic pest control methods such as neem oil or insecticidal soap if necessary.
- Keep weeds at bay: Regularly inspect your chive bed for weeds and remove them promptly to prevent competition for nutrients and space.
By following these watering and care guidelines, you’ll provide your chive seedlings with the ideal conditions for healthy growth. Now, let’s move on to the next step: thinning and transplanting.
Plant chive seeds in well-draining soil, keep them moist, and place them in a sunny spot. Once they sprout, thin them to 6 inches apart to promote healthy growth.
Read more: How To Grow A Tree From A Seed
Step 5: Thin and Transplant
As your chive seedlings continue to grow, it’s important to thin them out and eventually transplant them to individual pots or your garden bed. Follow these steps for successful thinning and transplanting:
- Wait for the seedlings to mature: Give your chive seedlings enough time to grow and develop before thinning them out. Ideally, the seedlings should be around 4-6 inches tall and have a few sets of true leaves.
- Identify the weakest seedlings: Observe your seedlings and identify the weaker ones in each cluster. These are the seedlings that need to be thinned out to provide more space and nutrients for the remaining plants.
- Prepare individual pots or garden bed: If you’re transplanting chives to pots, fill them with a well-draining potting mix. If you’re transplanting them to your garden bed, ensure the soil is prepared and amended as mentioned in Step 2.
- Carefully remove the seedlings: Using your fingertips or a small garden trowel, carefully lift the unwanted seedlings from the soil, taking care not to disturb the root system of the remaining plants.
- Plant the seedlings: Dig a small hole in the prepared pot or garden bed and gently place the transplanted seedlings into the hole, ensuring the roots are well-covered with soil. Space each plant about 6-8 inches apart to allow for proper growth.
- Water the transplanted seedlings: After transplanting, give the seedlings a thorough watering to help settle the soil and provide hydration to their newly disturbed roots.
- Continue care: Once the chive seedlings are transplanted, continue caring for them by watering regularly, providing adequate light, and monitoring for pests or diseases.
Thinning and transplanting your chive seedlings will give them the space they need to thrive and reach their full potential. Now, let’s move on to the next step: harvesting chives!
Step 6: Harvesting Chives
Congratulations on reaching the stage where you can start harvesting your chives! Here are some tips to ensure a bountiful harvest:
- Wait for maturity: Chives usually take about 60-90 days from sowing to reach maturity. The plants should have multiple leaves and be approximately 6-8 inches tall before you start harvesting.
- Choose the right time: It’s best to harvest chives in the morning when the leaves are at their peak flavor. Select the outer leaves of each plant, leaving the inner ones to continue growing.
- Use sharp scissors or shears: To harvest the chives, use a pair of sharp scissors or garden shears to make clean cuts. Avoid pulling or tearing the leaves, as this can damage the plant.
- Harvest from the base: Cut the chive leaves from the base of the plant, leaving about an inch above the soil level. This will encourage new growth and keep your chive plants productive.
- Enjoy fresh or preserve: Freshly harvested chives can be used immediately in various dishes like salads, soups, stews, and omelets. You can also preserve them by drying or freezing to enjoy their flavor throughout the year.
- Regular harvesting: Continue to harvest chives regularly to encourage new growth and increase your harvest. Avoid cutting more than one-third of the plant at a time to maintain its vigor and health.
Remember, harvesting chives is an ongoing process, and with proper care, your plants will continue to produce flavorful leaves for many seasons to come.
Now that you know how to harvest chives, let’s move on to the final step: troubleshooting common issues.
Step 7: Troubleshooting
While growing chives is generally trouble-free, there are a few common issues that you may encounter. Here are some troubleshooting tips to help you overcome these challenges:
- Poor germination: If you’re experiencing low germination rates, it could be due to improper seed depth, inconsistent moisture, or low-quality seeds. Ensure that you’re following the correct seed-sowing techniques mentioned in Step 3 and maintain consistent soil moisture throughout the germination process.
- Pests: Chives are generally resistant to pests and diseases, but occasional pest infestations may occur. Aphids, thrips, or onion maggots can affect chives. Use organic pest control methods such as insecticidal soap or neem oil to manage these pests. Regularly inspect your plants for any signs of damage or infestations.
- Overwatering or underwatering: Chives prefer slightly moist soil, but they don’t tolerate waterlogged conditions. Avoid overwatering, as it can lead to root rot. Conversely, underwatering can cause stunted growth. Monitor the soil moisture regularly and adjust your watering schedule accordingly.
- Yellowing leaves: If the leaves of your chive plants turn yellow, it could indicate nutrient deficiencies or excessive sunlight. Ensure that your plants are receiving adequate nutrients through organic fertilization and that they are not exposed to intense, direct sunlight. Consider providing some shade during the hottest part of the day.
- Winter dormancy: Chives are perennial herbs, but they may enter a period of dormancy during winter. The leaves may die back, but the plant will regrow in spring. Cut back the foliage to about an inch above the soil surface and provide a layer of mulch for winter protection.
By troubleshooting these common issues promptly, you can ensure the health and vitality of your chive plants throughout the growing season. Remember to observe your plants closely and take necessary actions to address any problems that may arise.
Congratulations! You now have all the knowledge and steps needed to successfully grow chives from seed. Get ready to enjoy the vibrant taste and appearance of freshly harvested chives in your culinary creations!
Happy gardening!
Conclusion
Congratulations on completing this comprehensive guide to growing chives from seed! By following the step-by-step instructions provided, you now have the knowledge and confidence to embark on your chive-growing journey. Whether you’re a beginner or an experienced gardener, chives are a versatile and rewarding herb to cultivate.
From gathering the necessary supplies to harvesting your homegrown chives, each step is crucial for the success of your garden. By preparing the soil, sowing the seeds, providing proper care, and troubleshooting any issues that may arise, you can ensure healthy and abundant chive plants.
Not only do chives add a delightful onion-like flavor to a wide variety of dishes, but they also bring visual appeal to your garden with their delicate leaves and vibrant purple flowers. Their versatility doesn’t end there – chives are also beneficial as companion plants, attracting beneficial insects and deterring pests.
As you continue your chive-growing journey, remember to enjoy the process. Gardening is not only about the end result but also about the joy of nurturing and watching your plants thrive. Take time to appreciate the fresh fragrance of chive leaves, the touch of green in your garden, and the satisfaction of harvesting your own homegrown herbs.
Now that you have all the tools and knowledge needed, it’s time to get your hands dirty and start growing your chives from seed. Experiment with different recipes and enjoy the vibrant, fresh taste that chives bring to your culinary creations. Share your harvest with family and friends, and perhaps even inspire others to embark on their own gardening adventures.
Remember, gardening is a continuous learning experience, and each year will bring new lessons and opportunities for growth. Embrace the journey, adapt to challenges, and enjoy the rewards of nurturing your own thriving chive garden.
Here’s to the joy and satisfaction of growing delicious chives from seed!
Frequently Asked Questions about How To Grow Chives From Seed
Was this page helpful?
At Storables.com, we guarantee accurate and reliable information. Our content, validated by Expert Board Contributors, is crafted following stringent Editorial Policies. We're committed to providing you with well-researched, expert-backed insights for all your informational needs.


0 thoughts on “How To Grow Chives From Seed”